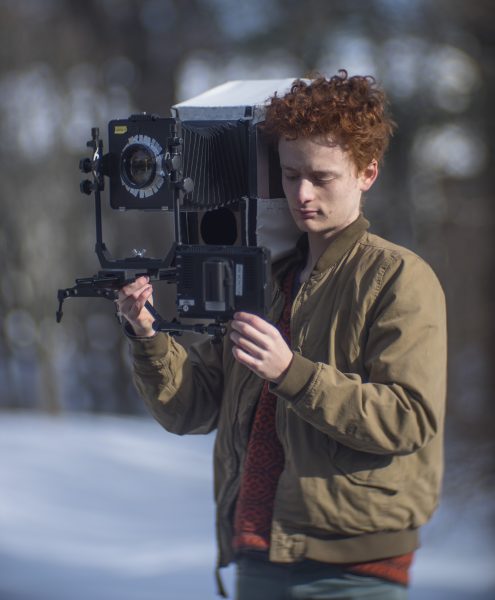
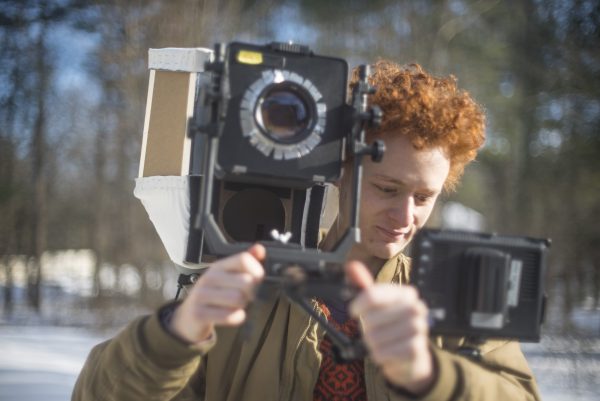
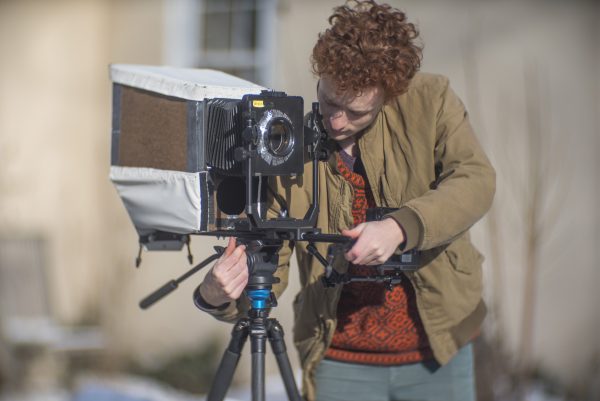
Zev Hoover is an 18-year-old photographer who has managed to build his own 8×10 large format video camera. Zev believes his creation is the only camera of its kind in the world. Not only is it astonishing that he has been able to build this camera, but that it’s also made out of relatively affordable components.
I sat down with Zev and asked him about his background, how the camera works, and why he decided to embark on such an ambitious project.
Tell me a little bit about your background?
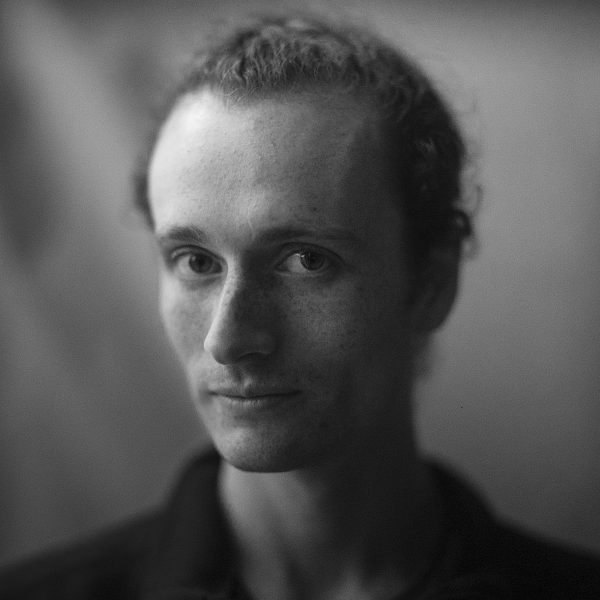
I am an 18-year-old photographer getting more and more into videography based in Natick, MA. I actually just completed my college applications a few days ago, simultaneous to finishing up building this camera! I love everything imaging and possibly like the tinkering part more than the actual shooting.
What was the inspiration behind building this camera?
Just a love of the large format look. I had been shooting extensions (aka ‘Bokehrama’ or the Brenizer method) in my photography for years to simulate the look of a larger sensor, but those methods are rather tedious and of course, don’t transfer well over to video. After fiddling around with some DIY scanning camera builds, I already had most of the parts needed to make the camera. I think I got the idea from looking at the ground glass on my brother’s medium format camera and thinking ‘why not just capture that?’.
How does the camera work?
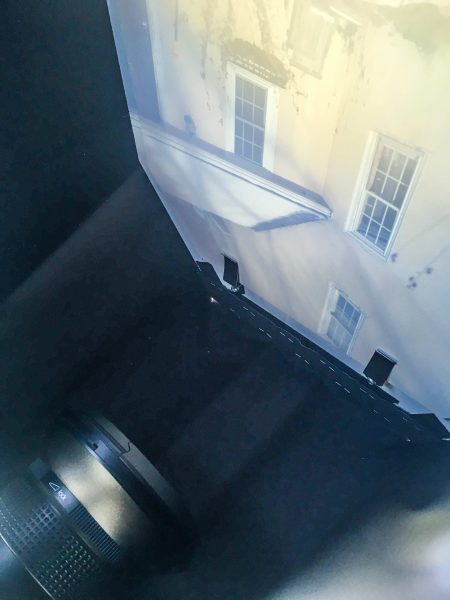
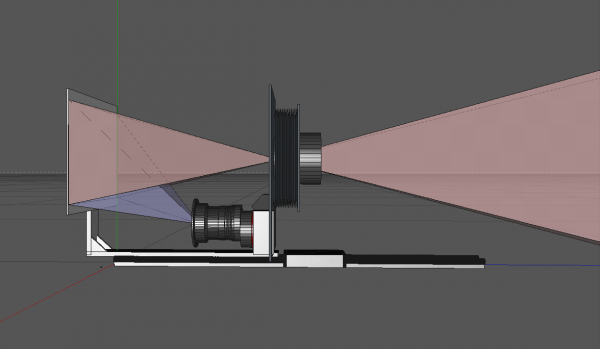
The camera works by projecting an image from a large format lens onto an 8×10 matte white screen. The projected image on the screen is then captured with an off-axis camera (the ‘taking camera’) with a wide-angle lens. To get around perspective and distortion issues, and not have the recording camera in the way of the optical path from the main lens to the screen, the taking camera is in APS-C crop mode and its lens is shifted up (using a tilt-shift adapter). This allows it to record a centered image of the screen while being well out of the way of the light path.
Large format ‘reimaging’ rigs have been made before (quite successfully by Gonzalo Ezcurra), but with a key difference: they project onto a ground glass and record the image from behind, instead of reflecting the image off a diffuse surface. This method works, but it has some flaws; a ground glass is never a truly perfect diffusing filter, so there will always be a hotspot at the center of the image and usually, some grain pattern introduced as well. This can be reduced by putting a longer lens on the taking camera, but then your already huge setup just gets longer, and less practical.
My version has the advantage of a folded optical path: Since the image is bounced off a screen instead of going through a ground glass, my rig is about half the size of other’s designs. It is still huge, but this size difference is enough to allow shoulder mounting and really improve usability. Another advantage is the ‘hotspot’ issue: there are materials easily available much more perfectly matte (meaning perfectly diffuse reflection) and grainless than the best ground glasses or diffusing gels I have seen. Also, because the taking camera is shifted and not centered on the screen, any hotspot that remains is moved up almost to the top of the image instead of being smack dab in the center.
For people who may not know, how big is an 8×10 large format image compared to full frame or S35 sized sensors?
8×10 format—area wise—is approximately 120x larger than S35, and 60x larger than full frame. Making sensors that huge is impossible/prohibitively expensive for mere mortals, but a reimaging rig like mine gives access to many of the lovely image qualities at a minute fraction of the cost. It has a lot of creative possibilities that I am really interested to explore.
How long did it take to build?
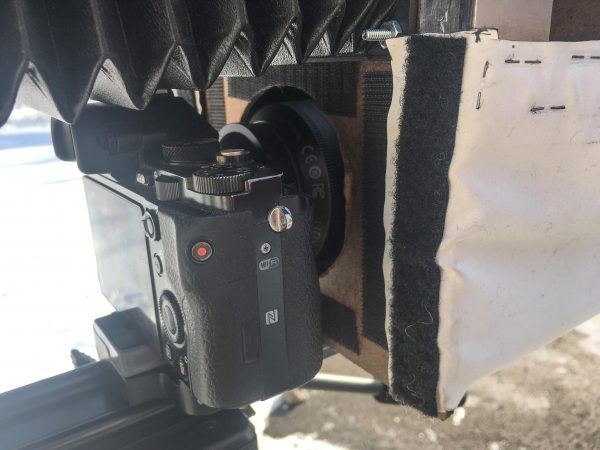
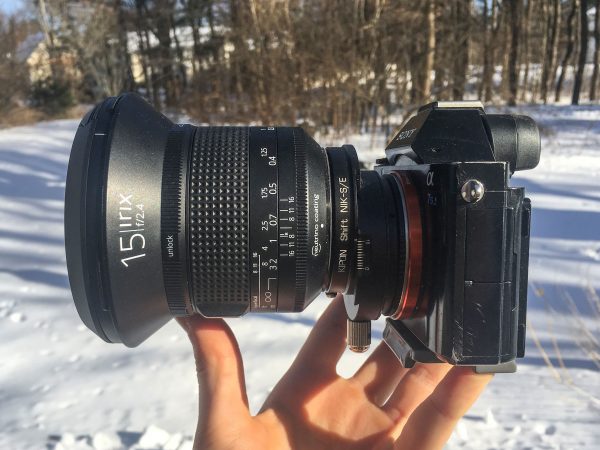
I started building it in the summer of 2017 and pretty much finished it then too, but since that time I have made a series of incremental improvements—like changing the wide angle lens from the craptastic Opteka 15mm f/4 to an Irix 15mm f2.4, and swapping the projection screen from an Ampersand Artist Panel to the much more matte Ampersand Clayboard. That changed the camera from a novelty to a genuinely useful artistic tool.
How much do you think it cost to build?
Here is a rundown on the parts list, prices include shipping:
$399 Irix 15mm f2.4 Firefly
It really is a fantastic lens, worth every penny and up there with the brand name glass in terms of image quality. I tried it first with an
Opteka 15mm f/4 ($149) but the sharpness and moustache distortions were shocking.
$127 Kipon Nikon-Sony Shift Adapter
For the price it has quite disappointing build and usability, but it does the job just fine.
$80 Feelworld Fw759 monitor
Any monitor would do, and this one did fine.
$62 Industar-37 300mm f4.5
This was just one of the cheapest fast lenses I could find that would about cover 8×10. No complaints, image quality is lovely and the pretty flares are definitely a bonus!
$60 used Cambo 4×5 front standard, bellows, and lens board
This piece was really a lifesaver. The front standard includes shift and tilt adjustments, which even if you don’t plan on using much are very helpful for fine tuning the positioning of the main lens. I attempted making my own bellows, but nothing I made was smooth and resistance free enough. For the price, definitely worth it.
$33 unbranded slider
Just the cheapest one I could find. There are tones of them that all look the same if you search ’32in slider’ on ebay or amazon.
$50 Ampersand Clayboard (projection screen) + blackout curtain + miscellaneous hardware
Adding everything up, that is about $800, but I didn’t spend that much since I swapped around some parts (sold my Voigtlander 15mm for the Irix) and already had others. If you want to build the camera and already have a large format lens, wide angle lens, and monitor, you are looking at about $270 USD in parts.
Was there a lot of trial and error involved to get the right result?
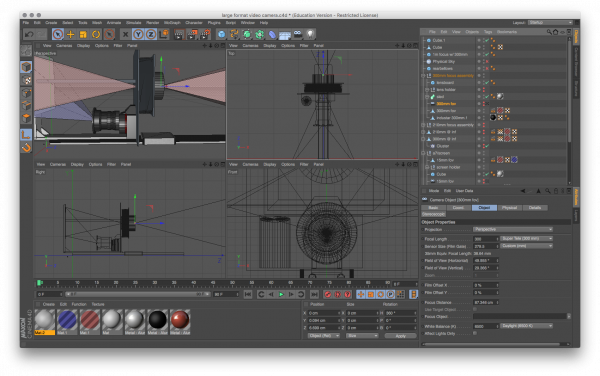
Not really. I modeled the FOV of the lenses (with shifting and everything) and most of the camera in Cinema 4D to make sure it would actually work and there wouldn’t be any shadows cast on the imaging plane or the front of the slider in the foreground. That took care of most things before I even had any of the parts. Finding the right material for the imaging screen (eventually found Ampersand Clayboard worked fantastic) and a bunch of other little optimizations did take a bit to figure out, but overall it was a pretty straight forward project.
Have you attempted to build other cameras in the past?
I have built multiple scanning cameras out of cheap repurposed CIS scanners, with various degrees of success. They can be a lot of fun, and it is pretty amazing to make a 150mp camera out of a $20 scanner, but the use case for me is rather limited. I love shooting color, and video, and people; the scanning camera doesn’t exactly excel in those areas. I would love to revisit scanning cameras, but the first step to really improve image quality would be to reverse engineering the scanner’s IC to gain manual control, and that is quite a project.
What is the image quality like?
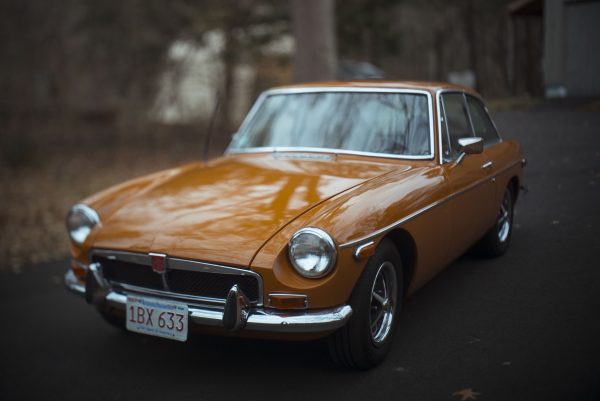
The image quality speaks for itself, really. If there is enough light, the images are fantastic. The large format lens produces incredible bokeh and flares, and is way overqualified for measly 1080p or 4k, so sharpness is only limited by the wide angle lens. The 15mm Irix I am using just about resolves 4k but not much more. Dynamic range and pretty much all other image attributes are the same as they are on the taking camera; my a7s does admirably, but I would love to see what the images would look like with RED or a Alexa Mini instead.
What are the biggest drawbacks of using this camera?
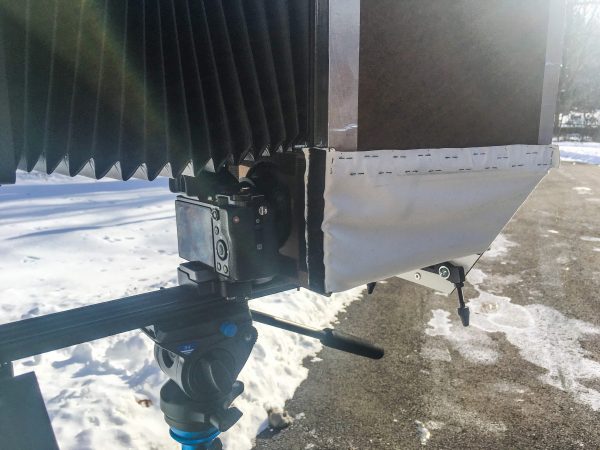
The main drawback is light sensitivity; it is about 6 stops darker than shooting with the Irix 15mm alone on my a7s. It works fine for outdoor shots, but as you can see in the video, poorly lit interiors are a struggle. To be fair to the camera, I do not have any video lights; with the right lighting equipment indoor shooting would be perfectly doable. The other downside is size, but it is just about as small as an 8×10 camera could be thanks to the folded optical path.
Are you proud of what you have accomplished?
Yeah I guess I am. I am really excited to improve the idea and see what others make with it. I have gotten an overwhelming amount of interest from people wanting to build their own versions, and am really looking forward to see what they create. This camera design really produces a unique type of image and I think it could have a lot of applications.
Are you going to try and improve on your concept by building another one?
Certainly! I have a 365mm f3.65 lens on the way from Belarus, that hopefully will give me an extra stop as well as a larger image circle (less vignetting at infinite focus). It would be very fun to try an anamorphic adapter on the front (thanks to John Paul Summers for the awesome suggestion!) and see what large format anamorphic looks like. Next, I really want to build a 4×5 sized version with an Aero Ektar 7″ F/2.5, but it is out of my budget at the moment. At that size, the camera would be just about hand-holdable and the image quality would be very stunning. If anyone reading this has an Aero Ektar (of any focal length), please get in touch and we should make it happen!
I love individuals like Zev who aren’t afraid to think outside of the box and try something that hasn’t been done before. It’s great to see someone who is passionate about what he does and doesn’t want to just follow the crowd. Zev is currently waiting to hear back about his college applications and here at Newsshooter we wish him the best of luck. Any college or university would be lucky to have someone of his calibre.
You can follow Zev Hoover on Instagram and/or Facebook.


