By technical editor Matt Allard:
There seem to be quite a few people out there who are not quite sure why, when and how you should use a Look, Picture Profile, LUT or LOG when your filming. I’m going to explain the basic differences between them and run you through how to use them in the real world.
There are so many LUTs, film stock emulation and scene files available today that it can be hard to know what will work best for you. I am also going to look at some of these available options and provide some tutorials on how to use them.
First of all let’s break down the difference between a LUT and a Look, scene file or Picture Profile.
Looks, Picture Profiles and Scene Files:
The majority of cameras available today are designed to be able to record a rec.709 video-compliant signal. The reason cameras do this is that rec.709 is the current television broadcast standard. Rec.709 produces video that could air on television without any post-production color grading. Rec.709, sometimes known as BT.709 was implemented in 1990 with the introduction of 16:9 broadcasts. Rec.709 compliant signals are broadcast in an 8bit colour space and squeeze all the camera information into around 5 stops of dynamic range.
Back in 1984 RCA introduced the first CCD imager in a television camera, the CCD-1 and it wasn’t long before CCD cameras would eventually have dynamic range capabilities that would exceed both the display dynamic range and the Rec.709 gamma function. Today’s professional cameras allow you to go way beyond the limits of standard HD (rec.709) to get more dynamic range, without straying too far from the HD standards. These new cameras allow the user to make adjustments to the image that alter the cameras response to things such as colour, contrast, black levels, and knee. You can also make adjustments to the sharpness and detail of the image. These in-camera adjustments are usually referred to as Picture Profiles, Scene Files or Looks. Usually a camera manufacturer will include a variety of these in their cameras, and most of them can be adjusted by the user. Some manufacturers have introduced cameras with “hyper-gamma” or gamma modes with a film-like response, which stretch the gamma curve even further to get more dynamic range. The trouble is, all cameras interpret Rec.709 differently. Monitors are usually the only items that conform to the rec.709 gamma standards, but the majority of cameras generally do not. And although the rec.709 standard provides a consistent image, the irony is, most consumers don’t have their TV’s set up to replicate a perfect rec.709 image.
The downside of Picture Profiles or scene files is that they are usually very specific to a particular camera model. On many cameras you can save these files to the media and export them to copy or share between identical cameras. This is commonly done on multi-camera ENG productions where it is important to have a consistent ‘baked in’ look for all cameras.
It’s very important to remember that any of these Looks, Scene Files or Picture Profiles you use will be ‘baked in’ to the recorded image. This is common practice among broadcast and documentary shooters who are often required to provide footage that will not be adjusted in post due to time and budget constraints. These files are made for a specific camera and their look ends up part of the recorded image. Fundamentally this is what makes a Look, Scene File or Picture Profile different from the concept of a LUT.
LUTs:
LUT stands for Look Up Table, but what is a lookup table? A lookup table should be viewed as a sort of electronic business card and your computer, camera or monitor is the rolodex that stores all those business cards. Just like business cards, LUTs contain information that can be organised or filed in whatever way you like. In the video world when a LUT is applied to an image, the information from that LUT is read and the camera, computer or monitor changes the look of the image based on the information it reads. If your material is going to be broadcast,you use a LUT to normalise or correct a Log image to see what it will look like when it is broadcast as a standard HD Rec. 709 image. A LUT is a shortcut for applying this offset to a image. You could manually adjust the image in post, but this is a time consuming process. A LUT allows you to do this step quickly and more accurately.
LUTs are not just used to normalise or correct a LOG image to rec.709. LUTs can be created to achieve any type of look that you are after, but unlike picture profiles, looks and scene files, they aren’t baked into the image. You can still bake the look into the recording if you would like, but that is not their primary purpose. I will talk about when or why you would bake a LUT into a recording later in the article.
A LUT is used so that you can see what the image will look like later in post,while still allowing you to record your camera’s clean Log image. Recording in Log allows your camera to capture its maximum amount of dynamic range. A LUT is applied to your camera’s viewfinder or monitor, but not generally to the recording. The benefit of this is that you can see an image on location that is closer to what the final image will look like after colour grading. By not baking in the LUT to your recording you get the added flexibility of being able to change the look entirely in post.
The other big benefit of using a LUT is that you can have a LUT loaded into your camera or monitor and then have the same LUT in your edit or colour correction program. This gives you complete confidence that what you are seeing when your recording can be recreated precisely later on.
LUTs come in various forms and there’s a lot of confusion as to the difference between 1D and 3D LUTs. A 1D LUT can be very useful in many situations and does a fairly good job at modifying a Log image. Their Achilles heel is that they offer very limited adjustability and colour correction options. They map the colours red, green and blue separately so any adjustment you do only effects that individual colour. 3D LUTs are more complex and you may have seen a file before that ends in .cube. Thats because 3D LUTs are based on a three-dimensional cube. The main benefit of a 3D LUT over a 1D LUT is that it maps all colors together and not individually. This allows for a far greater level of adjustment to the image.
Now that I’ve described the differences between LUTs, Looks, Picture Profiles and Scene Files, let’s look at when and how should you use them.
Looks, Picture Profiles and Scene Files:
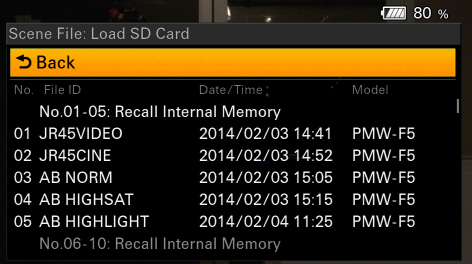
Anybody who is shooting with a camera that doesn’t feature a proper Log recording option will likely be using one of these to maximise their camera’s potential. I’ve used Picture Profiles on most of my cameras and I’ll give you a quick breakdown of why and when I use them. The primary reason for using a picture profile is to maximise the dynamic range of the camera, or to create a specific look. I’ve always been partial to the Scene Files that Andy Shipsides creates over at AbelCine. He has been doing it for a very long time and the Scene Files can be downloaded for free for a wide range of cameras.
Picture profiles or Scene Files can be great to use for material that needs to be recorded in 8bit and low-bitrate codecs. They allow you to fine tune your image without it needing to be heavily adjusted in the edit or post. You really do need to make sure that you get your exposure and white balance right when you are shooting though if you’re using a low bitrate codec such as AVCHD or certain flavours of MPEG recording. By using Picture Profiles you will find that because they are not recording a strict rec.709-compliant image, small adjustments may have to be done in the edit or post. Usually this may just involve bringing the black levels down or adding a little bit of contrast. If you’re handing your material straight off to an editor who does not have time to do anything to the image then using a Picture Profile or similar will usually be OK. For those shooting fast turnaround projects such as news, you really need to keep in mind that the pictures you are recording need to be as close to broadcast-ready as possible.
The other reason I use Picture Profiles or Scene Files is that if I am doing a multi camera project, it gives me the ability to load up the same look on all the cameras. Please note though, that this usually only works on cameras that are identical. There are a lot of Scene Files out there that have been designed to mimic the look of another camera to help you try and match them together. Some of them work better than others.
LOG:
Log recording is very different than RAW but they can be used in a similar way. Log isn’t RAW; it’s video, and is just a clever way of capturing an image that maximizes the tonal range of a sensor. Cameras from Canon, Sony, Panasonic and ARRI cameras offer a Log recording mode. While they are all named differently, V-log, S-Log, C-Log etc, they all have the same purpose. When using one of these forms of Log the image looks very flat and very desaturated.
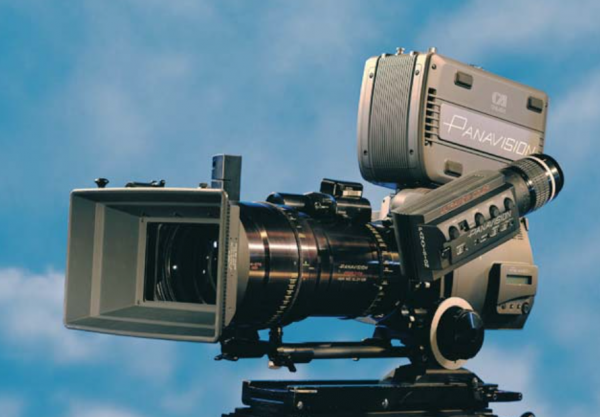
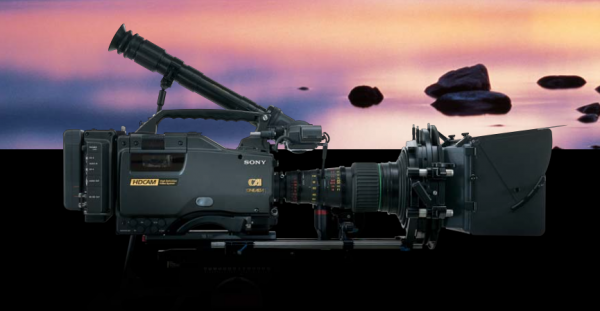
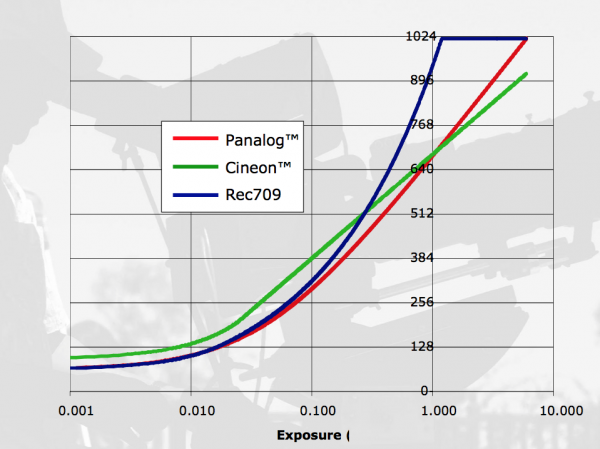
Log has been around for a long time, way before the introduction of digital cinema cameras. Kodak developed Cineon, a 10 bit quasi-log system that was used for scanning film into a Log format. This helped maximise the information from the film that could be stored in a video format. The Log information contained many shades of grey and had very low contrast. This Log material could then be corrected to be viewed on a monitor. In 2004 Panavision and Sony introduced the Genesis, a Super35 sized CCD imager camera with a dynamic range six times greater than that accommodated by the nominal Rec. 709 standard. The Genesis used what the company called PanaLog, which was based on the Log curve created for the Sony F900 back in 1999. Panalog eventually would become S-Log.
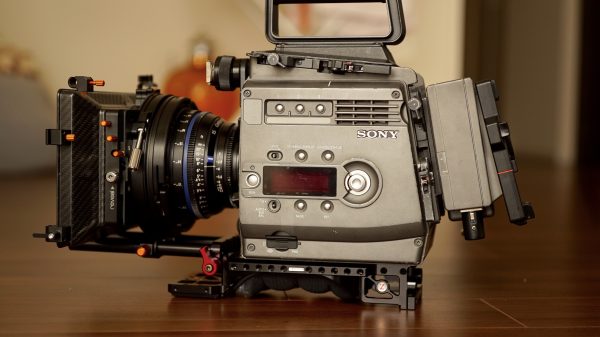
The trouble with recording Log on some cameras is that the white balance and ISO are often baked in and can’t be adjusted in camera. The Sony F3 which I still own today was the first commercially affordable camera to offer proper Log recording. You could change the ISO, but you could only select either 3200k or 5600k white balance presets. While the S-Log option greatly increased the camera’s dynamic range you really needed to be careful how you used it. I would only use S-log if I was recording ProRes 4444 10bit. If you tried to record to the camera’s internal 35Mb/s MPEG codec the image would completely fall apart when you tried to grade it. A lot of people make the mistake of trying to record Log to low colour space, low-bitrate codecs. Log images are designed to be recorded to a very robust codec and not to cameras recording AVCHD or MPEG. You are likely to see a lot of banding as a result of compression artefacts such as macro blocking when using these codecs. I often see people using cameras such as the Sony FS700 and a7S, recording S-log2 internally. These codecs, particularly AVCHD, are not designed to be recording Log images. As soon as you need to do any sort of heavy colour correction you’re going to see a lot of image artifacts and banding.
S-log was originally developed for use on high-end digital cinema cameras that could record up to 12bit images in 4:4:4 colour space. So what happens if you try and use S-log2 to record internally on a a7S in 8 bit 4:2:0? Well this is less than ideal, but it can still be done as long as you’re very careful how you expose your image. If you want to be a bit safer I would recommend recording a 10bit image to a Odyssey 7Q+ or Atomos Shogun. A 10bit recording can capture close to 1000 shades of grey from black to white. A 8 bit recording only has a maximum of 235 shades from black to white. This is where recording in 10bit gives you a lot more room to adjust exposure correctly in post.
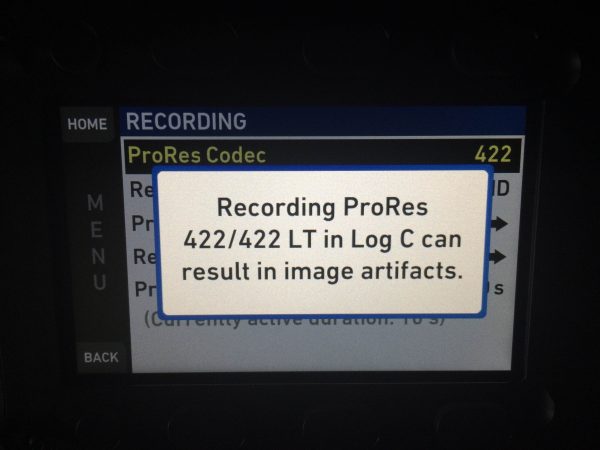
On my Arri Amira if you select to record in Log C and try to set the camera to record anything lower than ProRes 422HQ you get a warning that comes up on the screen that says “Recording ProRes 422/422LT in Log C can result in image artifacts.” Arri actually only recommends recording Log C in 4:4:4:4 12bit ProRes.
Canon developed Canon Log to work with their range of Cinema EOS cameras. It was designed to work effectively in combination with the XF codec. This codec is 4:2:2 8bit, so again you need to make sure you get your exposure right in-camera so you don’t run into problems if you need to adjust anything in post.

LUTs:
I use LUTs whenever I’m recording a Log image. LUTs let me monitor an image that is close to what the final result will look like, while still letting me record a Log image. I can switch between different LUTs to get an indication of what look might work the best when applied to the log image. On my Amira I can load up 3D LUTs that are the same as I use within FCPX or on external monitors such as the Odyssey 7Q+ or SmallHD 502. This enables a seamless workflow and gives me the confidence that what I’m seeing on my camera is what I will see in post.
By viewing a Log image using a LUT, I also have the confidence that I have a lot more headroom, particularly in the highlights, than what is being displayed on the monitor or camera’s viewfinder. Monitoring using a LUT gives you a security blanket of knowing if it looks good in the VF or monitor it will look good later on in post.
There are some instances where I will choose to ‘bake’ the LUT into the recording. I will do this if I need to turn around material instantly without having to touch the image at all. In this case I’m using the LUT more as a Picture Profile than a traditional LUT. This is not the prefered method for using a LUT, but it can yield good results. I often used the S-Log2/3 to rec.709A LUT to bake in the look when I had a Sony F55. I did this because I prefered the look this gave over the camera’s Picture Profiles. Just remember if you choose to bake in a LUT to your recording you need to make sure that the image you’re recording is exposed correctly: you won’t have the headroom in highlights that a LOG recording offers.
Finally I’m going to run through some of the LUTs, Picture Profiles and Film Emulation stocks that are available and that I personally use.
LUTs and LUT integration:
LUT Utility
LUT Utility allows you to apply LUTs to LOG exposed images from: Arri Log C, Blackmagic Camera Film, Canon C-Log, RED Filmlog, Sony S-Log, Technicolor Cinestyle and any other “flat” Log picture profile from cameras including Nikon and Panasonic. It integrates straight inside FCPX and you can either use any of the 11 included LUTs or load up any 3D LUT into the application. I use LUT Utility all the time in FCPX and I love the ability to create looks or load up LUTs in my camera or monitor and then use the same ones inside LUT Utility. LUT Utility is a real bargain for $29 US.
Captain Hook Blackmagic Cinema Camera LUTs:
Captain Hook has made some great LUTs for the Blackmagic Cinema Camera and the BMPCC. There’s two versions of each of the LUTs you can download. I find these work really well with the Blackmagic cameras. You can download them for free, but Captain Hook asks for a donation of $10 US. They are well worth the $10, so please donate.
Deluts by James Miller:
Deluts from cinematographer James Miller give you a package that is compromised of nearly 30 custom LUT profiles to use on set or in the edit/grade. They are available in both .3DL and .cube Deluts and are compatible with most NLE systems and LUT-compatible cameras and monitors. They work with a variety of footage from different cameras but are very popular for use with the Sony a7S and Canon EOS Cinema cameras.
Picture Profiles and Scene Files:
AbelCine:
I have used Scene Files from AbelCine for many years. I have always found them to create a more pleasing image than those that are come included in many cameras. Andy Shipsides does a good job of making Scene Files for a variety of shooting conditions, as well as providing looks that enable you to match your camera to those from different manufacturers. These Scene Files are available for a multitude of cameras and can be downloaded for free.
XDCAM USER:
Alister Chapman is one of the most knowledgable people out there when it comes to post workflow and camera operation. Over on XDCAM User you can find a variety of Picture Profiles for cameras such as the Sony FS7, Sony F3, and Sony FS700 as well as cameras like the PXW-X200.
Film Emulation:
KOJI Advance:
KOJI Advance is a full-featured film emulation plugin for Adobe Premiere (Mac and Windows), Adobe After Effects (Mac and Windows), Final Cut Pro X (Mac only). It includes LUT files in .cube format for loading into LUT-capable cameras and field monitors. KOJI Advance is designed to work with a wide variety of video formats, including DSLR, REDlogFilm, Arri Log C, BMDFilm, BMPC4KFilm, Sony SLog3, Canon C-Log, and Cineon.
KOJI Advance has many advantages over simple LUT files as it features a number of powerful color correction tools including an advanced auto white balance, temp control, lift/gamma/gain, density, printer points, and advanced film grain taken from real 35mm negative stocks.
I find KOJI very easy to use inside FCPX and it allows you to make key adjustments to the Film Emulation look you choose. The auto white balance tool is also very impressive even when used on its own. I like the fact I can load up the KOJI film stock LUTs into my camera or monitor, so I can get an idea of what the image will look like out in the field. KOJI is a little expensive at $199, but it does offer a lot of functionality and features.
FilmConvert:
FilmConvert is probably the most popular film emulation product on the market. Using a scientific approach FilmConvert looked at scanned film that was graded digitally. FilmConvert then looks at the characteristics of digital sensors, and provides a complex algorithm to transform digital footage to match film stocks. It is available across multiple platforms such as After Effects, Premiere, Final Cut, Motion, Vegas and Photoshop. FilmConvert is available for individual applications for $199 US or $299 US for use across all the platforms.

