Apple has released Final Cut Pro version 10.6.6. This isn’t a huge update, but it does add several new features such as Automatic Color Management, Dynamic Content, a Scene Removal Mask, and the ability to import Final Cut Pro projects from iPad.
Final Cut Pro 10.6.6 NEW features
- Import your project from Final Cut Pro for iPad to take advantage of blazing performance, advanced color correction tools, and more on your Mac.
- Use automatic color management to easily edit HDR and SDR clips in the same project, with intelligent tone mapping of video to match your color space.
- Choose from a new collection of professionally designed titles, effects, transitions, and generators to enhance the look of your videos.
- Improve your color correction workflow with the Color Adjustments effect, and apply new color presets to give your clips a particular look.
- Use Scene Removal Mask to remove and replace the background behind a subject, without using a green screen.
FINAL CUT PRO 10.6.6 FIXES & Enhancements
- Use the new ProRes RAW Settings window for easy access to ProRes RAW ISO, color temperature, and exposure offset.
- Install an Apple ProRes RAW plug-in from a camera manufacturer to view and adjust settings optimized for that camera’s sensor.
- Export to HEVC at up to 8K resolution with hardware acceleration on Mac computers with Apple silicon.
- Fixes an issue where multicam clips would sometimes turn black.
- Export to EXR now includes an alpha channel.
- Fixes an issue where adding video clips from the Photos browser would result in lower-resolution files being placed in the timeline.
- Fixes an issue where Final Cut Pro could not read Sony FX9 clips with embedded LUTs.
- Fixes an issue where Final Cut Pro would fail to open while an exFAT-formatted SD card with Canon clips was mounted.
- Fixes an issue where the progress bar would not update when opening or updating a large library.
Final Cut Pro manages color space settings automatically, so you can easily edit HDR and SDR clips in the same project, or mix different types of HDR clips in a project. To manage color space settings, Final Cut Pro applies a built-in Color Conform effect to each imported clip.
By default, Color Conform is set to Automatic, so that if you add a clip to a project that has a different color space setting, the clip’s color space is automatically converted to the project’s color space. If you don’t want clips to be automatically converted to another color space when you add them to a project, you can turn off automatic color management in Final Cut Pro settings.
You can also use the Color Conform effect to manually adjust how individual clips are conformed to the project’s color space. For example, you can set the Color Conform effect on a selected clip to None (off), or to a specific conversion, such as HDR (HLG) to SDR (for HLG clips that you add to an SDR project).
You can also convert a clip’s color space using the HDR Tools effect, which is a legacy effect included for backward compatibility with older projects. (In projects created in Final Cut Pro 10.6.3 or earlier, the Color Conform effect is set to None.)
Important: The Color Conform effect and the HDR Tools effect are additive, so you should use only one or the other on a clip.
HOW TO USE IT
In Final Cut Pro, select one or more clips in the timeline.

To open the Video inspector, choose Window > Show in Workspace > Inspector (or press Command-4), then click the Video button at the top of the inspector.

In the Color Conform section of the Video inspector, click the Type pop-up menu and choose Manual, then click the Conversion Type pop-up menu and choose an option:
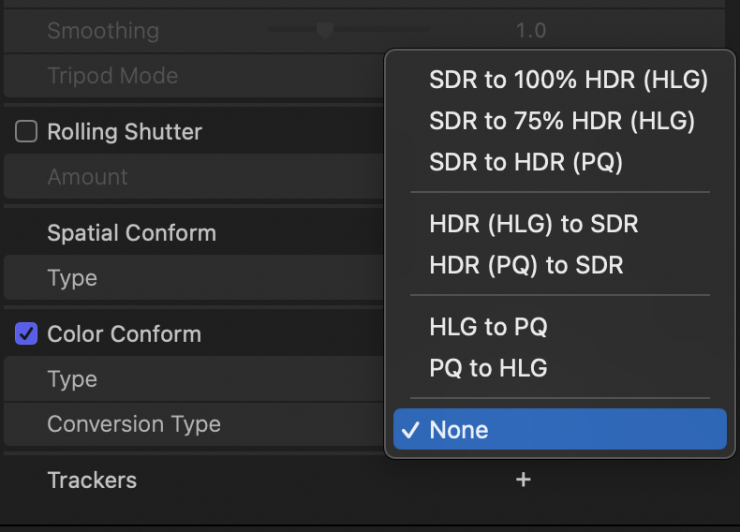
SDR to 100% HDR (HLG): Apply this setting to SDR (Rec. 709) clips in HDR (HLG) projects to inverse tone map a 100% SDR white level up to a 100% HLG signal level.
SDR to 75% HDR (HLG): Apply this setting to SDR (Rec. 709) clips in HDR (HLG) projects to map a 100% SDR white level to a 75% HLG signal level.
SDR to HDR (PQ): Apply this setting to SDR (Rec. 709) clips in HDR (PQ) projects to map a 100% SDR white level to a 58% (203 nits) PQ signal level. To change the target PQ signal level, adjust the Peak Brightness slider.
HDR (HLG) to SDR: Apply this setting to HDR (HLG) clips in SDR (Rec. 709) projects to convert the clips to SDR luminance levels.
HDR (PQ) to SDR: Apply this setting to HDR (PQ) clips in SDR (Rec. 709) projects to convert the clips to SDR luminance levels.
HLG to PQ: Apply this setting to HDR (HLG) clips in HDR (PQ) projects to convert the clips from HLG to PQ. This setting results in PQ clips that appear on PQ displays the way HLG clips would appear on an HLG reference display, assuming all displays have the same peak luminance. This conversion uses the HLG reference OOTF in accordance with Rep. ITU-R BT.2408, with peak luminance corresponding to the level you set in the Peak Brightness slider. A value of 1000 nits is most commonly used for this conversion.
PQ to HLG: Apply this setting to HDR (PQ) clips in HDR (HLG) projects to convert the clips from PQ to HLG. This setting results in HLG clips that appear on HLG displays the way PQ clips would appear on a PQ reference display, assuming all displays have the same peak luminance. This conversion uses the HLG inverse OOTF in accordance with Rep. ITU-R BT.2408, with peak luminance corresponding to the level you set in the Peak Brightness slider. A value of 1000 nits is most commonly used for this conversion.
None: Turn off color conversion for the selected clips (the clips retain their native color space).
You can turn off automatic color management in Final Cut Pro settings. After you turn off automatic color management, clips that you import and add to the timeline are no longer converted to the project’s color space.
In Final Cut Pro, choose Final Cut Pro > Settings, then click General.
Deselect the Automatic Color Conform checkbox.
When you import a clip and add it to the timeline, Conversion Type is set to None in the Color Conform section of the Video inspector, and no conversion is applied.

You can use AirDrop or iCloud Drive to import a project created in Final Cut Pro for iPad.
Below are the steps to do this.
Open Final Cut Pro on the iPad you want to transfer from, then do one of the following:
In the Projects screen, select a project in the list on the left, tap the Share button above the video preview, then tap Final Cut Pro for iPad Project.
With a project open, tap the Share button in the toolbar, then tap Final Cut Pro for iPad Project.
If you want to include all the video clips, audio clips, and photos you imported into your project (even if you haven’t added some of them to the timeline), make sure Include All Media is turned on; to export an offline project, turn off Include All Media.
Tap Export.
Tap one of the following options:
AirDrop: Share wirelessly to a nearby Mac using AirDrop.
Save to Files: Save the project to your iPad or iCloud Drive, and retrieve it with your Mac.
For more information, see the Final Cut Pro User Guide for iPad.
After the project file has finished copying, open Final Cut Pro on your Mac and choose File > Import > Final Cut Pro for iPad Project.
Note: This is the only way to import projects created in Final Cut Pro for iPad. You can’t open a Final Cut Pro for iPad project in Final Cut Pro on your Mac by double-clicking the project icon or dragging it to Final Cut Pro on your Mac.
In the window that appears, navigate to the location where you stored the project file you transferred from your iPad.
By default, AirDrop transfers appear in your Downloads folder.
Select the project file and click Import.
In the Save as Library window that appears, enter a name, then click Save.
The project is converted to a Final Cut Pro library and appears in the Libraries sidebar.
Note: If you import a project that contains a soundtrack included with your Final Cut Pro for iPad subscription, the soundtrack retains its clip name, role, duration, and position in the timeline. However, the soundtrack is imported as a simple AAC audio file that no longer dynamically adjusts to fit the length of your project.
Scene Removal Mask
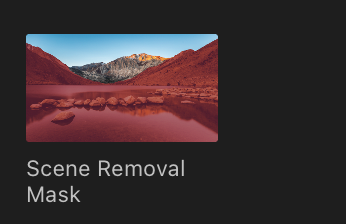
This can be found in the Effects tab. You simply drag and drop it onto a clip.

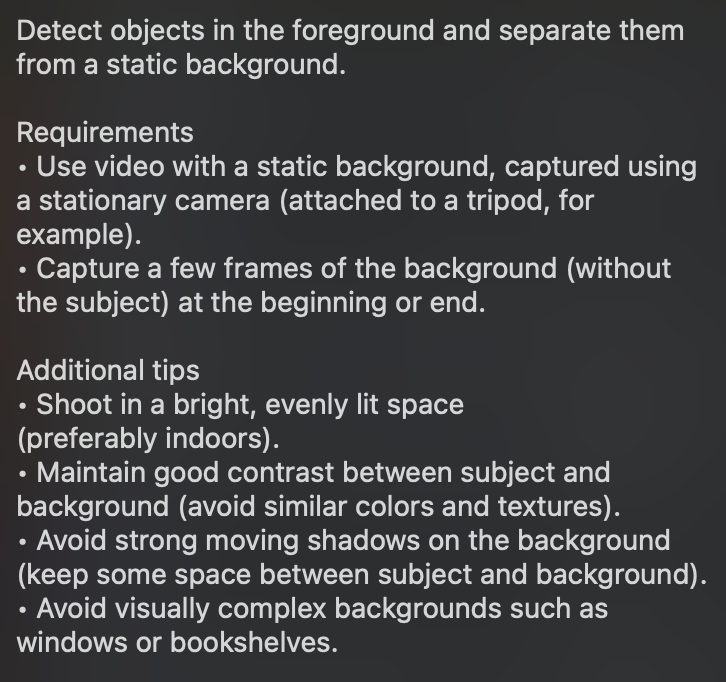
Now, while this sounds exciting, it is very limited as to what you can do. Apple states that it will only work with a static background, and the camera also needs to be static.

Dynamic Content lets you choose from a new collection of professionally designed titles, effects, transitions, and generators to enhance the look of your videos.
None of these options are very exciting and they all seem to be targeted at Vloggers and YouTubers.


