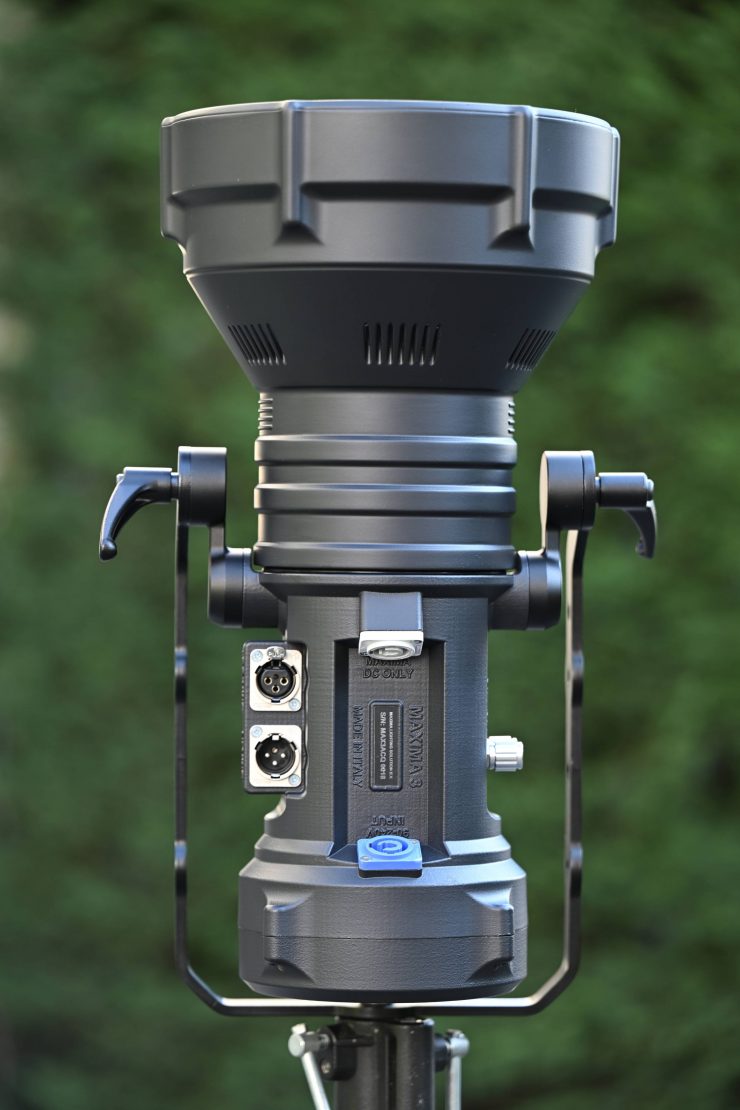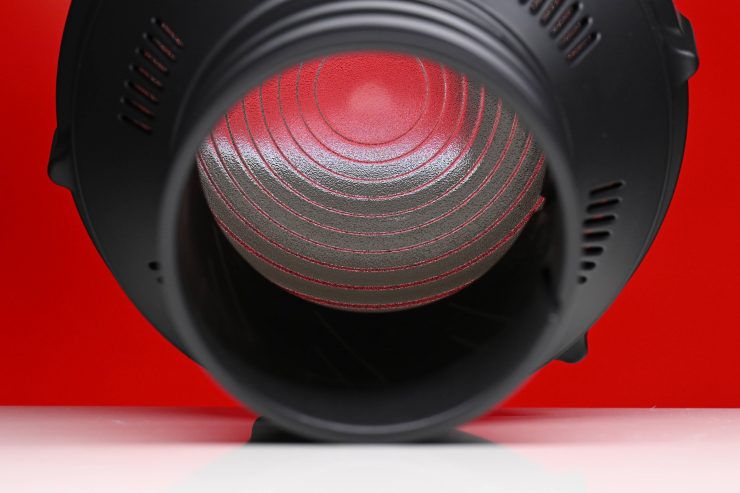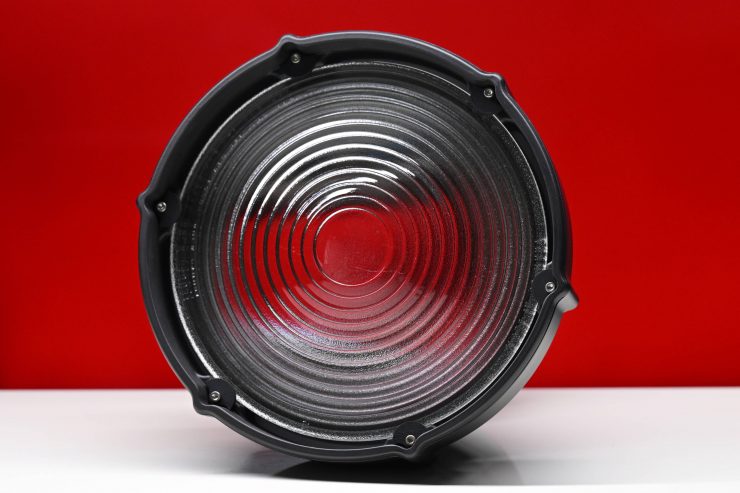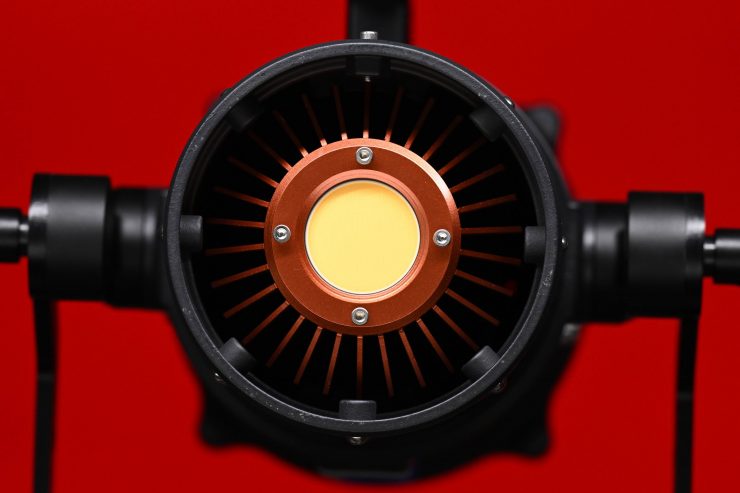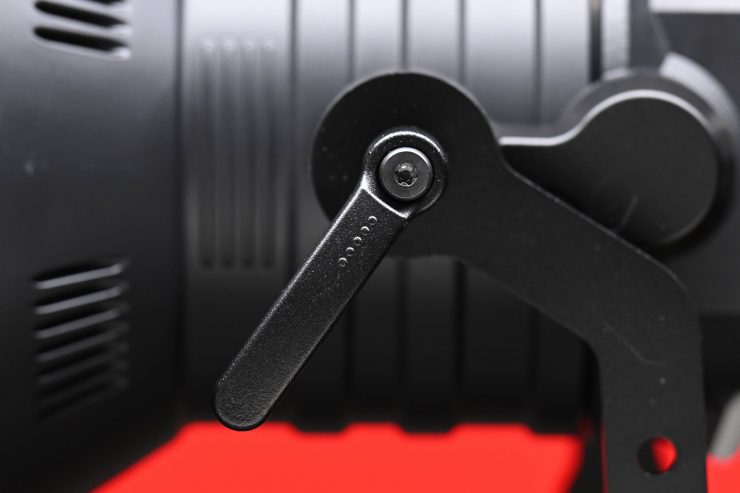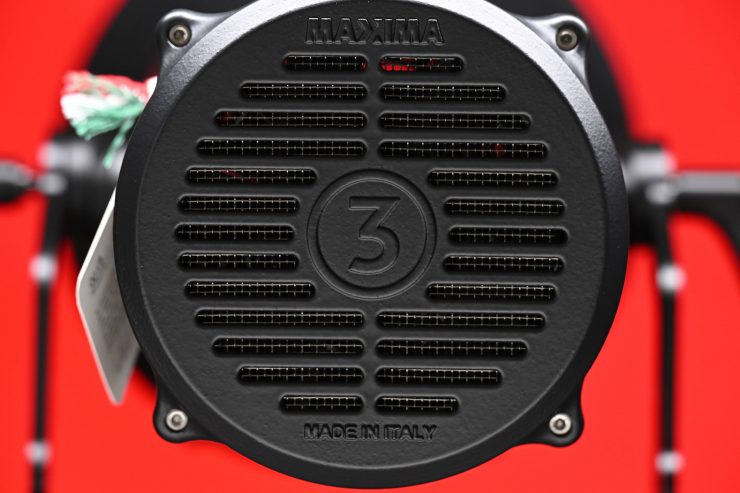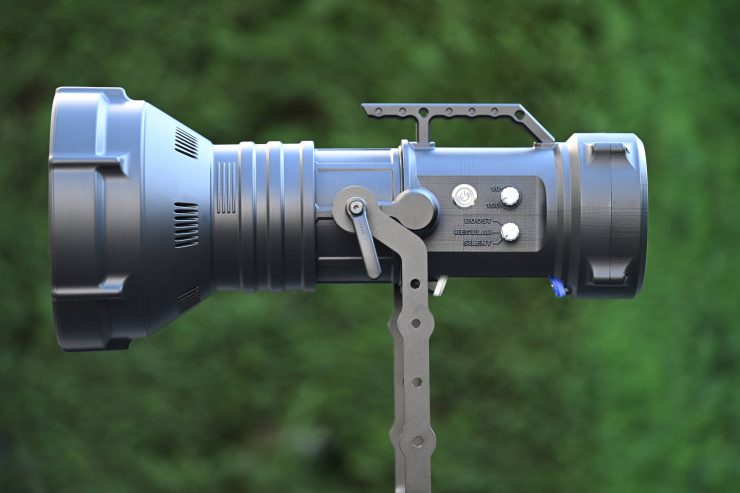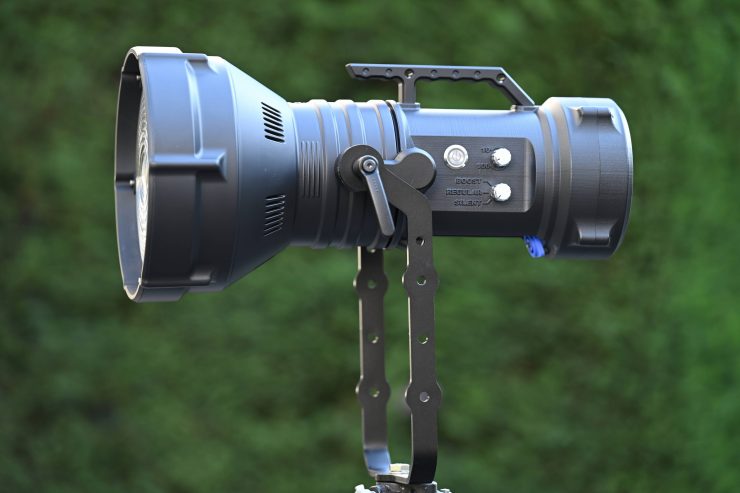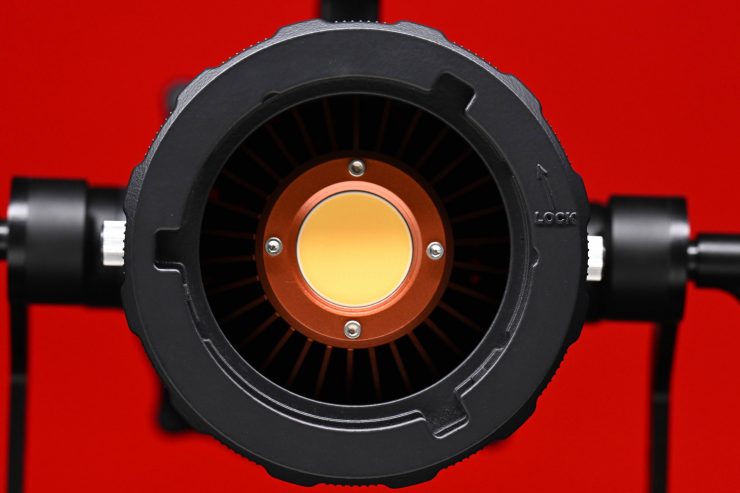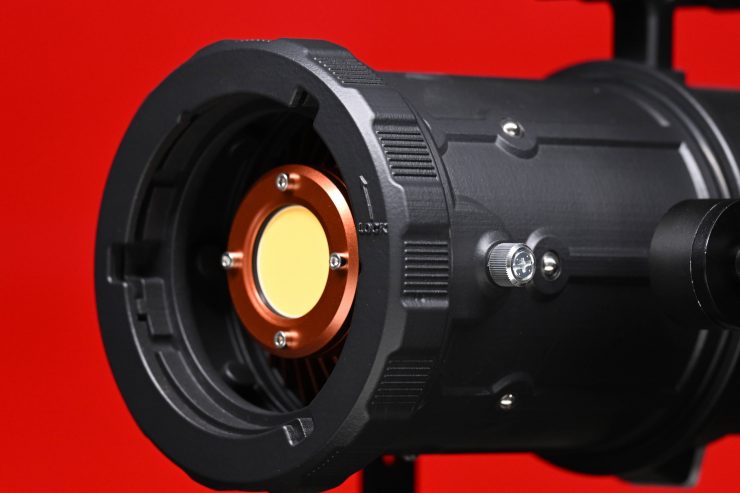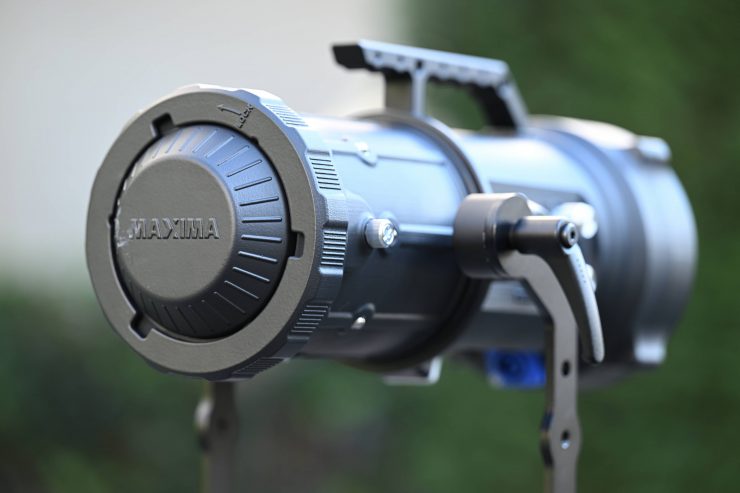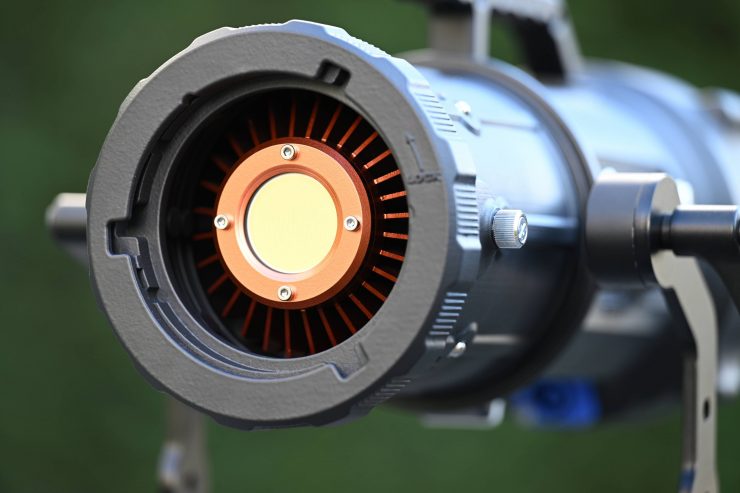
The Maxima 3 which I first reported on back in April 2021 is a light I have been wanting to try out for some time.
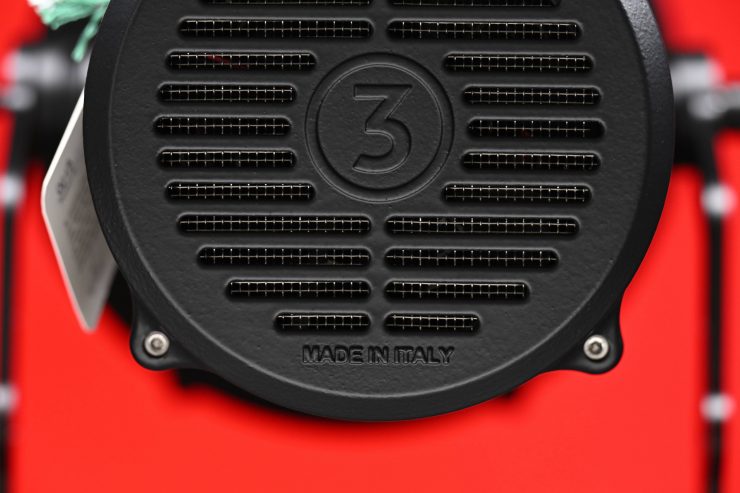
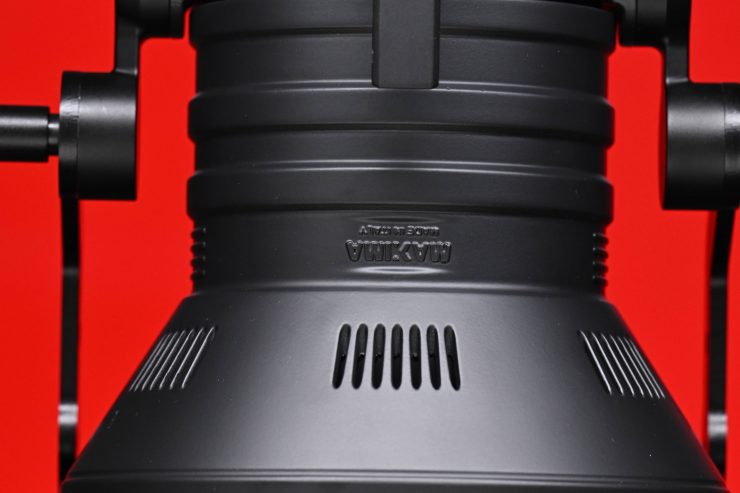
The Maxima 3 lights are made and manufactured in Italy. The Maxima 3 is a 300W high output, compact, single-point daylight or tungsten LED lighting source.
The Maxima 3 is being touted as the ultimate all-in-one fixture. It draws 300W, and weighs 4.3kg (9.47 lb) without the Fresnel lens, and 5.4 kg (11.9 lb) with the Fresnel lens. It has no external power supply or control unit, all you do is plug it in and it is ready to go.
Concept
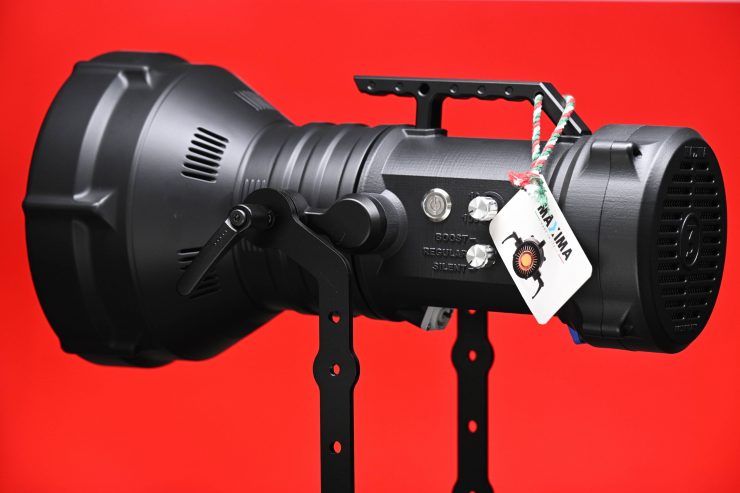
The whole concept behind the Maxima 3 was to build a rock-solid, reliable, all-in-one workhorse fixture for industry professionals. The Maxima 3 was envisaged and brought to market by working professionals in the industry. Maxima is the brainchild of Enrico and Claudio who both work at cinestudio in central Italy. They originally made the Maxima for themselves, but then it became so popular that customers started requesting to buy them, and from there a new company was born. The company is based in the Netherlands, but the manufacturing is entirely done in Italy.
When they were envisioning the Maxima 3 they wanted to make something that was different from what was currently available in the market. There are hundreds of lights available and there is little point in making a light that is exactly the same as something that already exists. While there are always going to be some similarities with other point source lights, nobody wants to see a blatant copy of something that already exists.
The Maxima 3 had to meet certain goals such as high build quality, high performance, and good usability because it is being targeted at high-end professionals.
If you are going to make a big investment in a lighting fixture, you want that lighting fixture to have a long shelf life. This is especially true for rental houses.
Build Quality
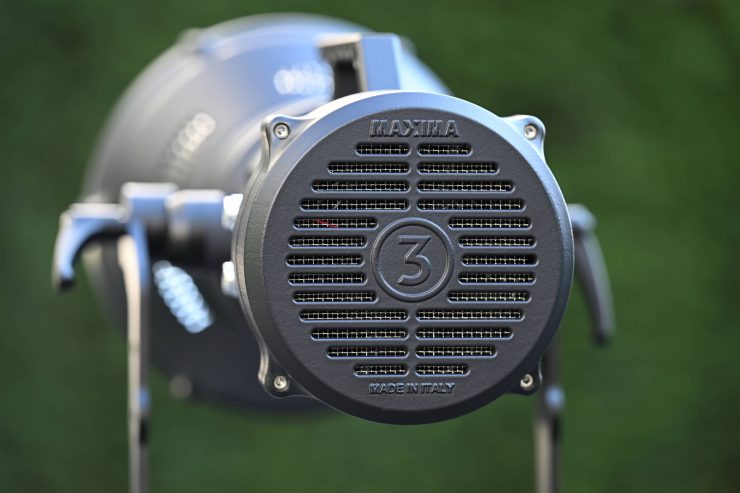
The build quality of the Maxima 3 is extremely good. It has a very industrial feel to it and the entire light is manufactured in Acqualagna PU, Italy. The only components that don’t come from Italy are the LEDs which come from Japan, and the borosilicate Fresnel lens which is made by SCHOTT in Germany.
The benefit of making almost everything in-house is that you aren’t relying on other companies and supply chains. This gives you greater control over your product when it comes to quality control, and you aren’t waiting on stock to come out of some other country.
Every Maxima 3 fixture is hand built from start to finish by one single engineer. The person who built the fixtures has his or her name placed on the tag that is attached to the light. Every Maxima 3 is hand-tested for 80 hours before it can be signed off to be sent out to a customer. I don’t know of too many lighting companies, if any, that do this.
As part of the 80 hours of testing, the lights also get subjected to a weather test.
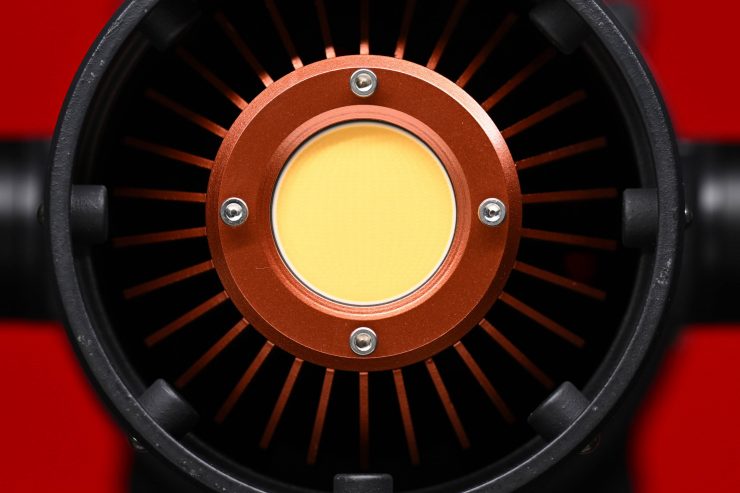
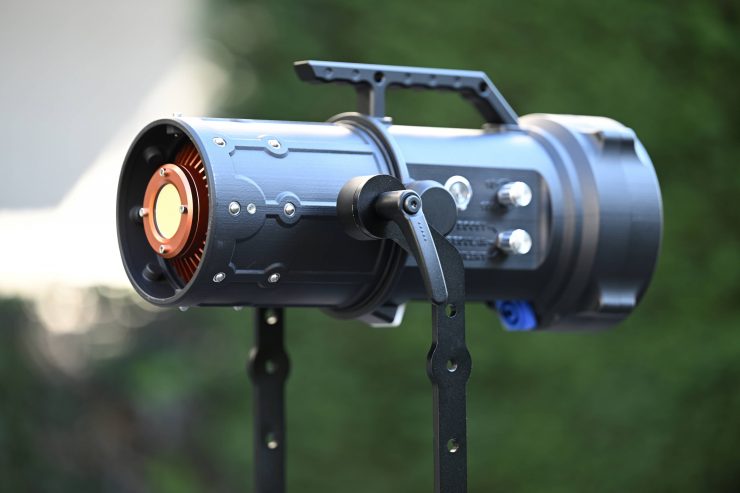
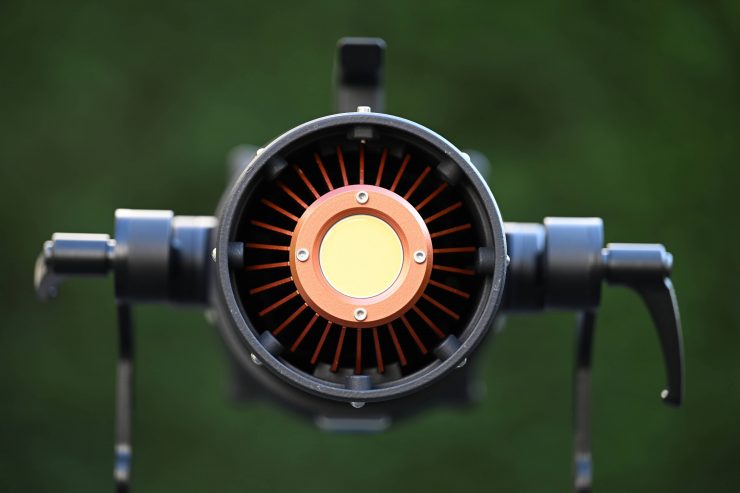
The Maxima 3 utilizes a proprietary copper heatsink which was designed and manufactured by Maxima in Italy. The copper heatsink is claimed to provide a 40% more efficient luminous performance compared to aluminum heatsinks that are used by standard LED lamps.
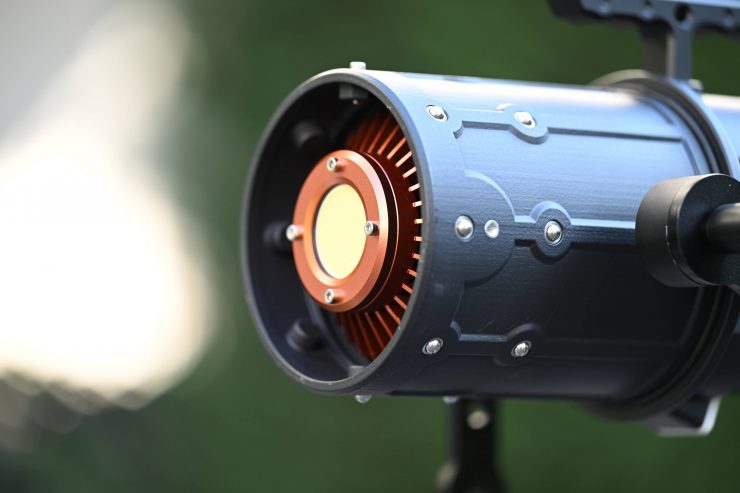
The other benefit of utilizing a full copper heatsink is that Maxima can run in a silent mode up to a certain wattage and then even when the fan is activated at higher power draws it is very quiet. COB LEDs run extremely hot and you need to cool them in an efficient way without creating a lot of noise.
ARRI fixtures are extremely popular in rental houses across the globe, and some of the primary reasons for that are long-term reliability and durability and I think Maxima is utilizing some of those same principles.
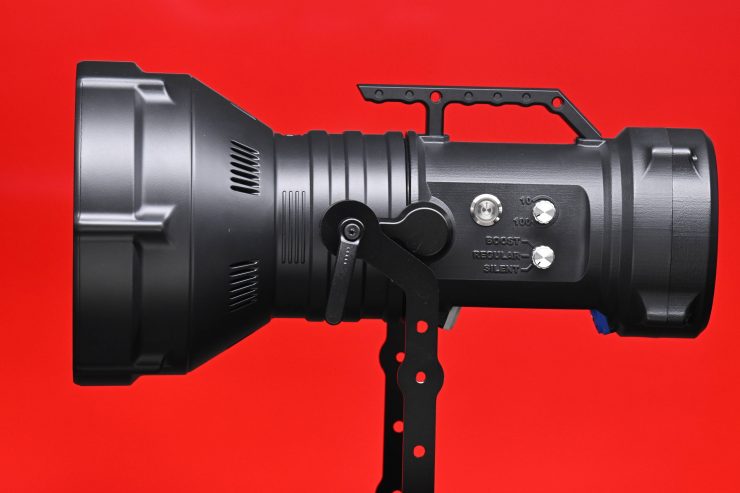
The nice aspect of the Maxima 3, is that it is a self-contained unit. There is no separate controller or power supply that you have to tangle with. As the fixture isn’t super heavy, you can use it on a lot of different lighting stands, which is a big help, especially if you are traveling.
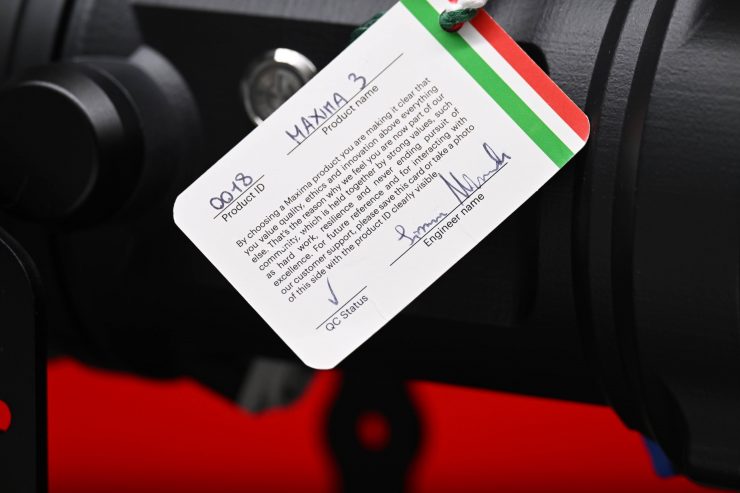
Every Maxima also comes with a nice card that details the company’s philosophy and it includes a sticker on the back with the direct email address for the person who will help you out if you have any questions or issues with the fixture. These little touches and the attention to detail tell you that the company cares about its product and the end user.
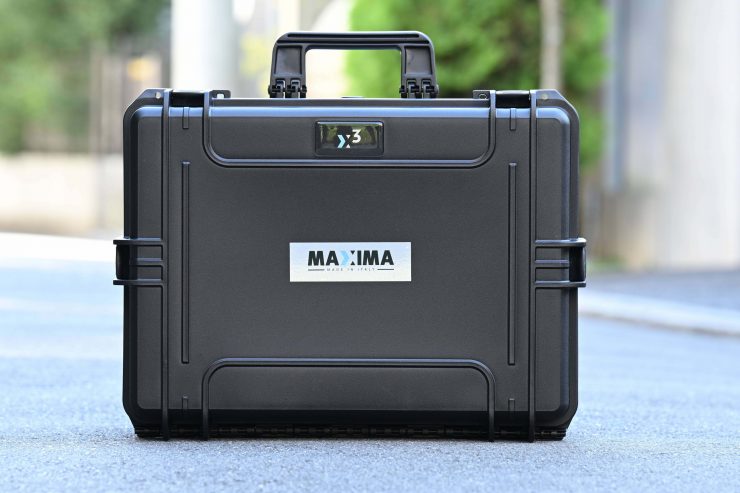
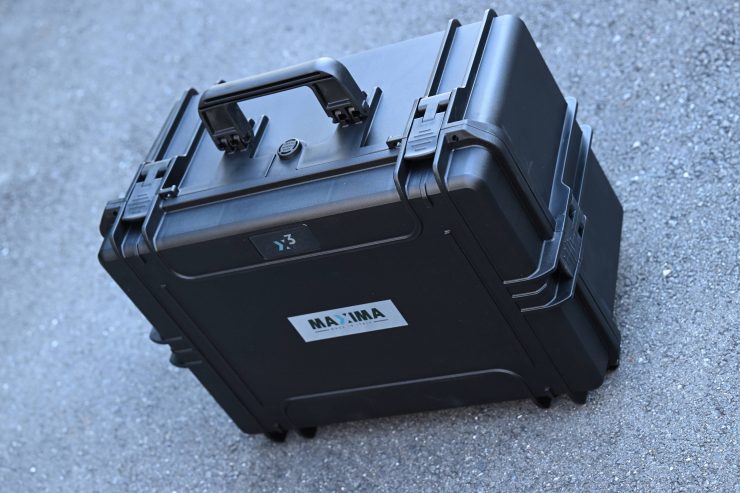
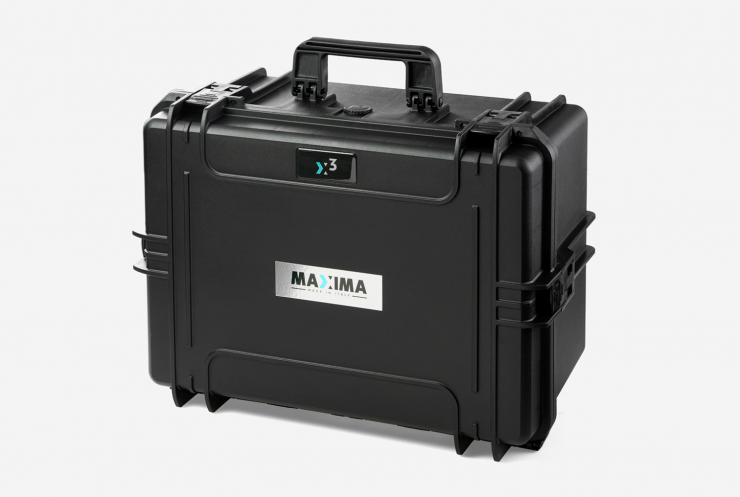
The included hard case is very well made and it is nice to see a company giving you a proper hard case instead of some cloth bag where the straps and zippers can break.
Design
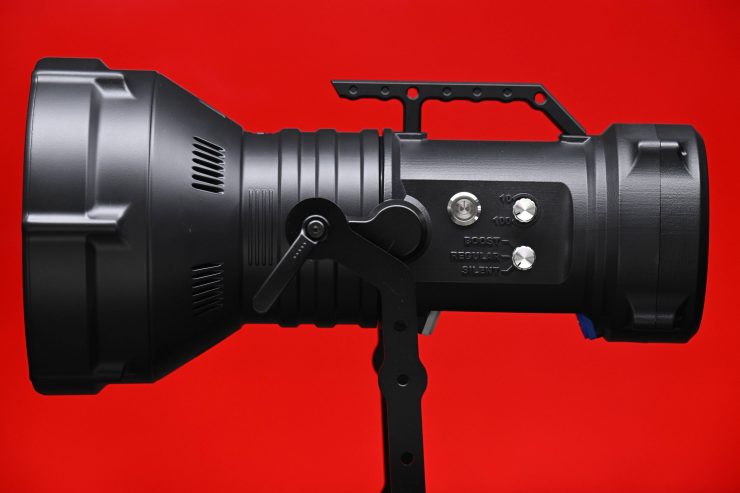
As far as the design goes, the Maxima 3 doesn’t particularly look like anything else on the market. Its form factor is a little bit different from most other point source fixtures.
It is very clear, at least to me, that the Maxima 3 was made and designed by people working in the industry. Everything has been well thought out from a user perspective and that shows in the product. Often you can tell when an engineer has had too much say in the design of a product because they don’t factor in a user’s end experience. Design and usability need to work hand in hand to create a good product.
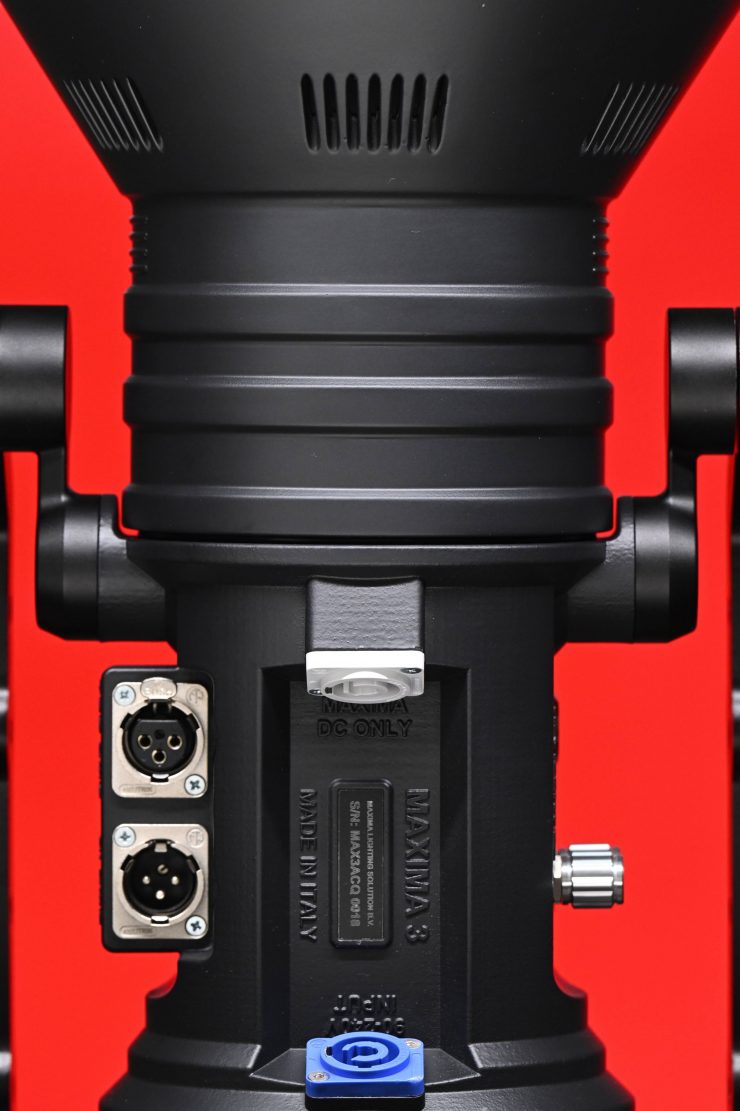
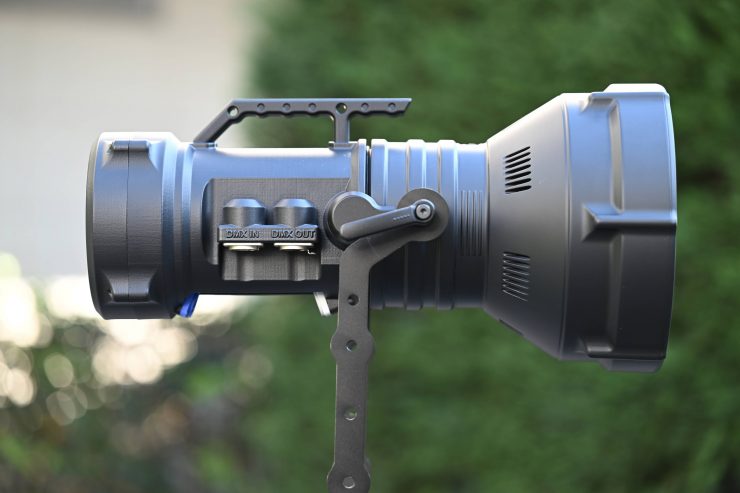
I like how they have placed both the power input on the Maxima 3 at an angle underneath the fixture. This prevents any moisture or water from getting inside and it helps with creating a good balance when the light is mounted on the yoke frame.
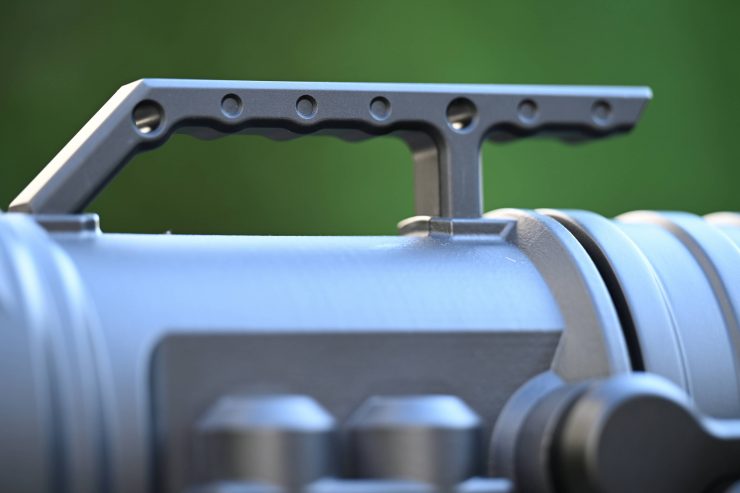
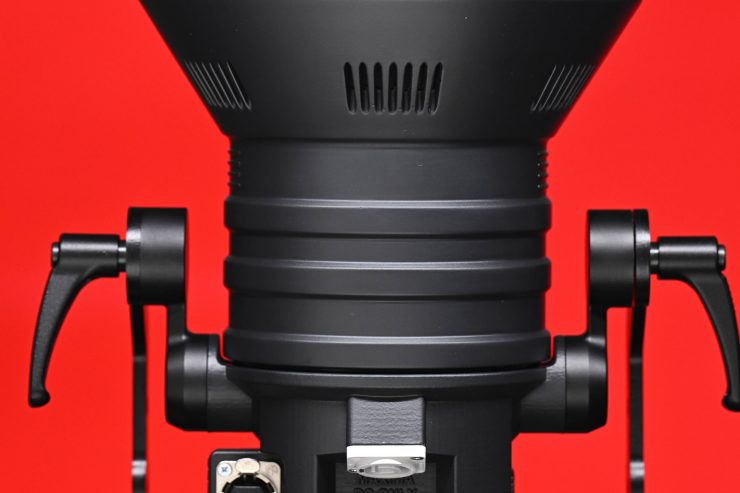
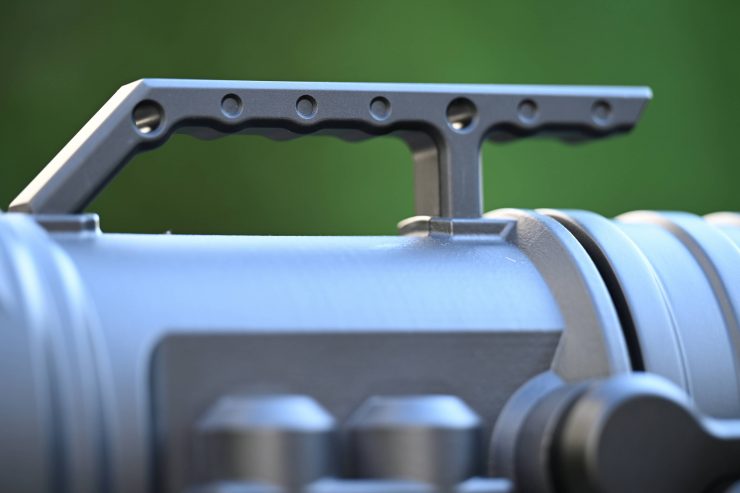
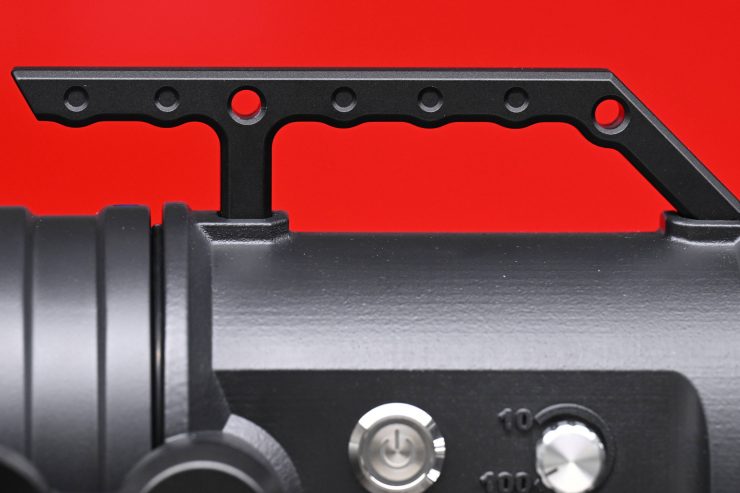
I also like the top handle on the fixture. It is beautifully made and it has been positioned so that the weight balance is even when you pick it up. Again, and I am going to keep stressing this in the review, the attention to detail is extremely impressive.
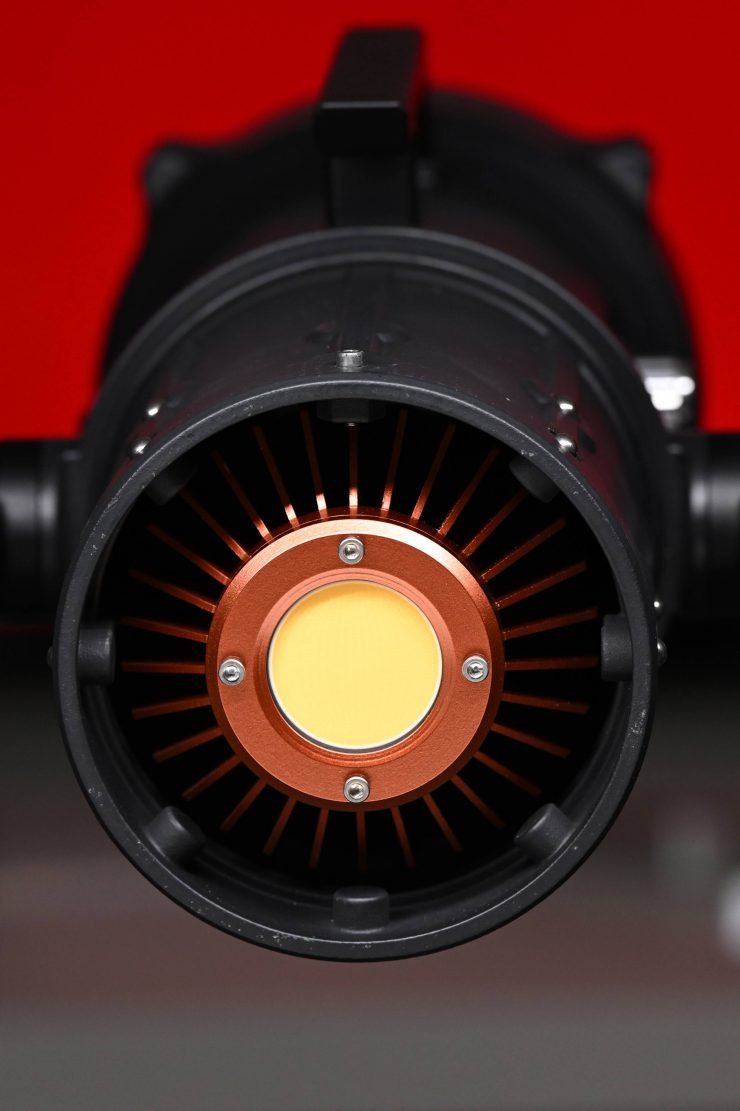
Quite a few LED spotlights on the market, including the Maxima 3, are using COB technology. COB stands for “Chip On Board” where multiple LED chips are packaged together as one lighting module. The advantage of COB LEDs being multi-chip packaged is that the light-emitting area of a COB LED can contain many times more light sources in the same area that standard LEDs could occupy. This results in a greatly increased lumen output per square inch.
The biggest problem with COB LED lights is that unless you diffuse them they are very bright to look at and unsuitable for directly lighting talent.
Weight & Size
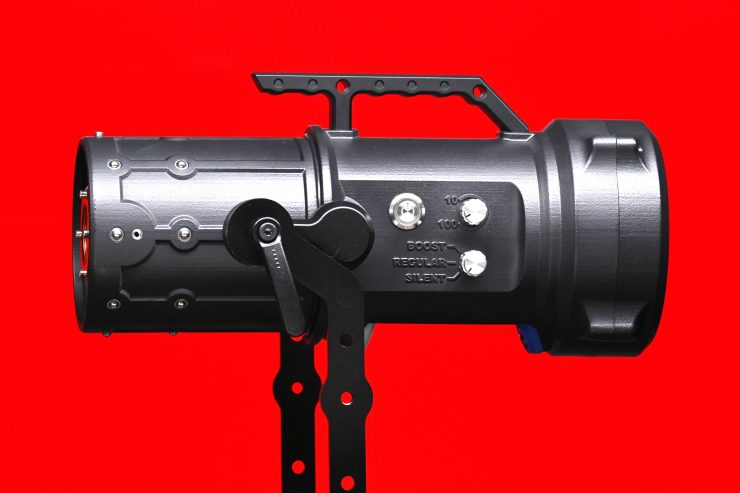
The Maxima 3 weighs in at 3.5kg / 7.71 lb. With the Fresnel, it weighs 4.8kg / 10.58 lb. With the light head, Fresnel, and yoke frame it weighs in at just 5.4kg / 11.9 lb.
It is also pretty compact in size because there is no additional power supply/controller. This all-in-one design makes it an appealing prospect for anyone who travels a lot.
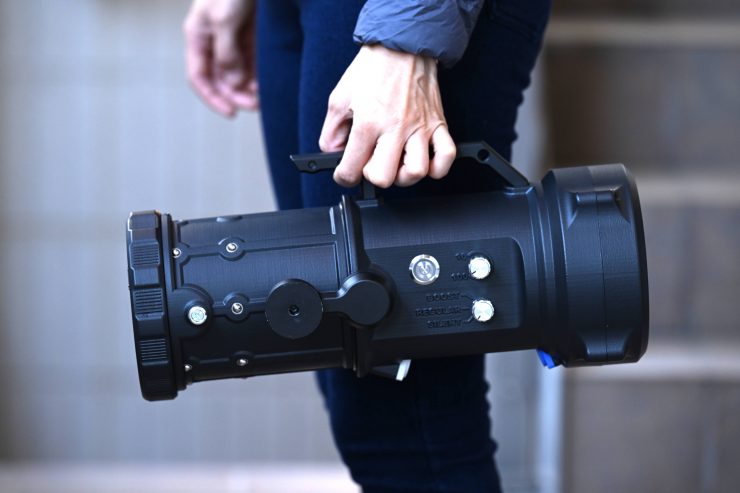
What is also nice is that the light is very well balanced and you can hold the handle with one finger.
So how does the weight compare to some other daylight spotlight fixtures?
| LIGHT HEAD | POWER SUPPLY | |
| Maxima 3 | 3.5kg | |
| ARRI Orbiter | 11.7kg | |
| Prolycht Orion 300 FS | 3.7kg | 3.2kg |
| Aputure Light Storm 300d Mark II | NA | NA |
| Godox Knowled M300D | 3.03kg | 2.74kg |
| Nanlite Forza 300 LED Monolight | NOT LISTED | 5.04kg including lamp head |
| K 5600 Lighting Joker2 400W | 2.49kg | 4.08kg |
It is puzzling that some companies don’t list the weight of their fixtures. I could not find any listing anywhere for how much the Aputure Light Storm 300d Mark II weighs.
I found the size and lack of weight of the Maxima 3 to my liking. It’s nice to have an all-in-one fixture that doesn’t weigh too much and doesn’t need an additional power supply/controller box.
If you are interested, the total weight of the whole kit in its flight case is 12.2kg / 26.89 lb.
What I really like is that the whole kit with the Fresnel fits in one case so there are no additional cases required. With all of the direct competition, you need to carry additional bags or cases to fit the Fresnel in.
Mounting
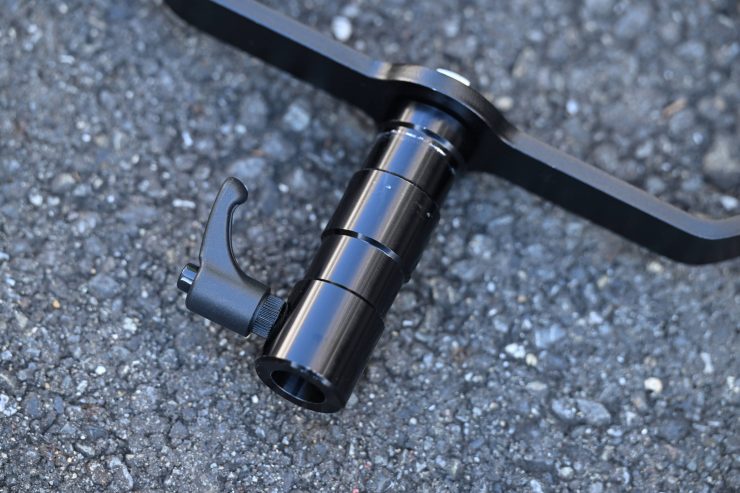
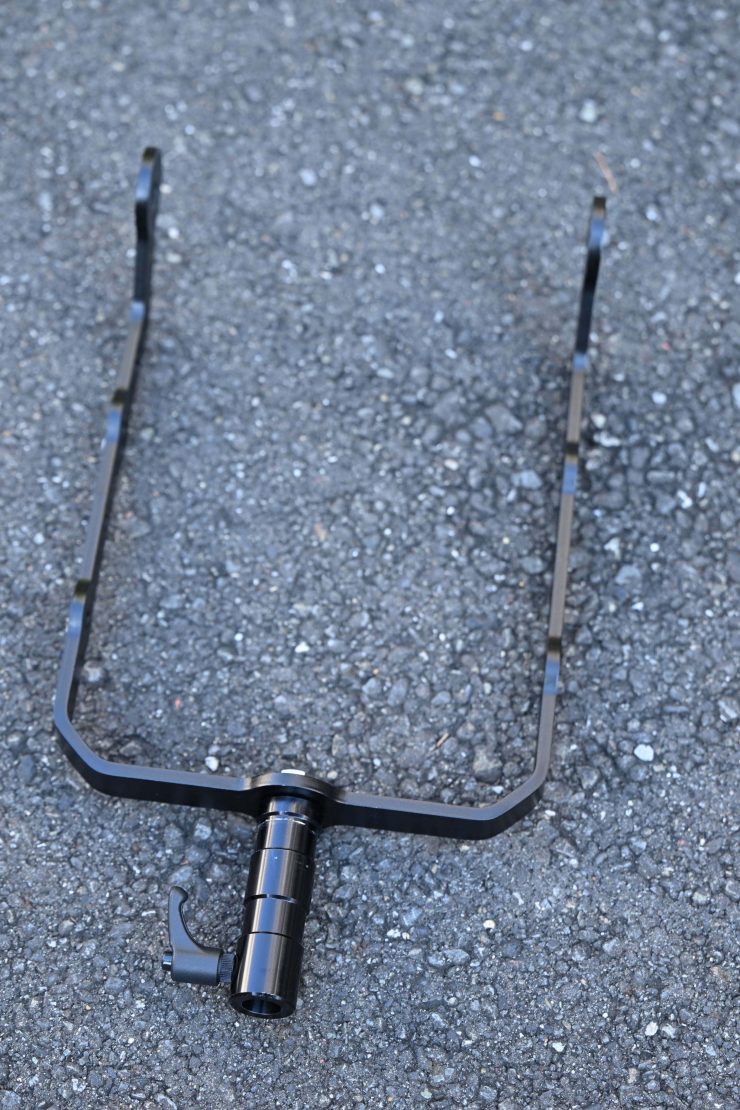
The yoke features a combination 1 1/8″ Junior pin that you can also use on a regular spigot. This allows for a multitude of different ways to mount the light to various lighting stands depending on your requirements.
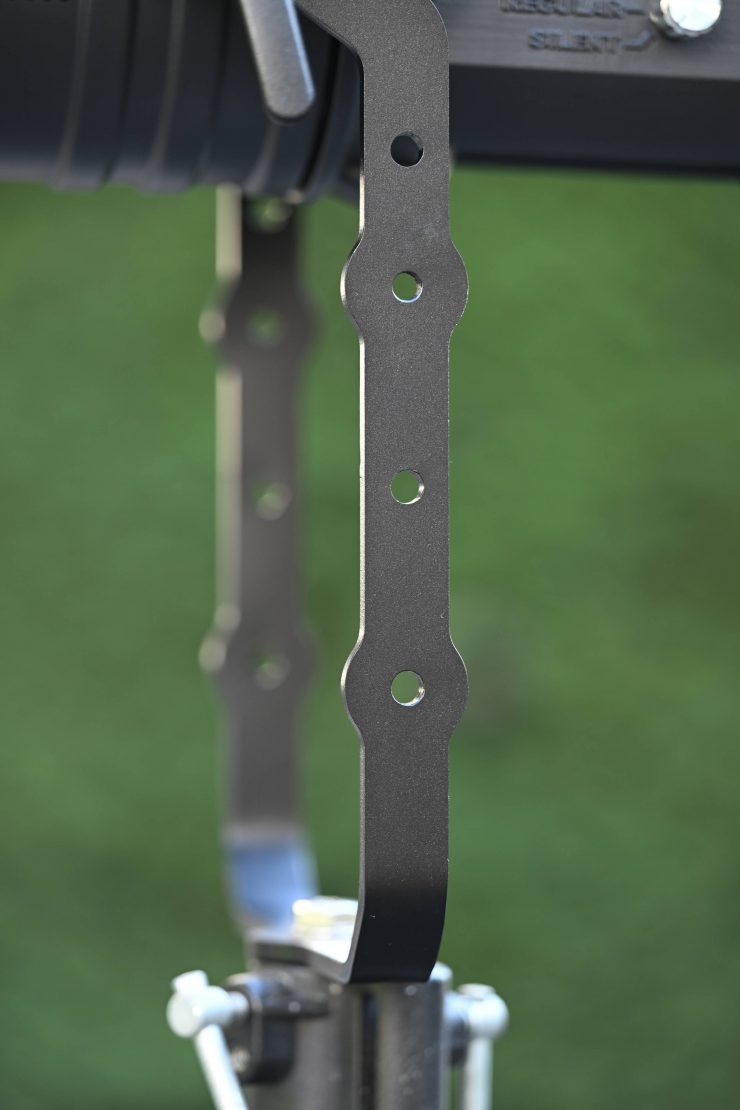
The yoke frame is not only very lightweight but incredibly sturdy. My only small issue with the yoke frame is that you need to remove it from the fixture every time you want to pack it away. To be honest, this doesn’t take very long to do. You can actually fit the Maxima 3 in its case with the yoke attached, provided you remove the spigot. Although I found this to be more difficult than just removing the yoke. If you really wanted to, you could simply remove the foam and fit the Maxima 3 with the yoke and the spigot inside the bare case, plus cables and miscellaneous accessories, however, this is not something I would recommend.
The way the Maxima 3 has been designed, is that the yoke frame sits almost in the middle of the fixture so this provides a very good weight balance. You have to love the Italians, it is almost the same concept as building a sportscar where you try to get a 50/50 weight balance.
Even if the tightening knobs aren’t locked down the Maxima 3 won’t suddenly fall down. It is this sort of attention to detail that I like.
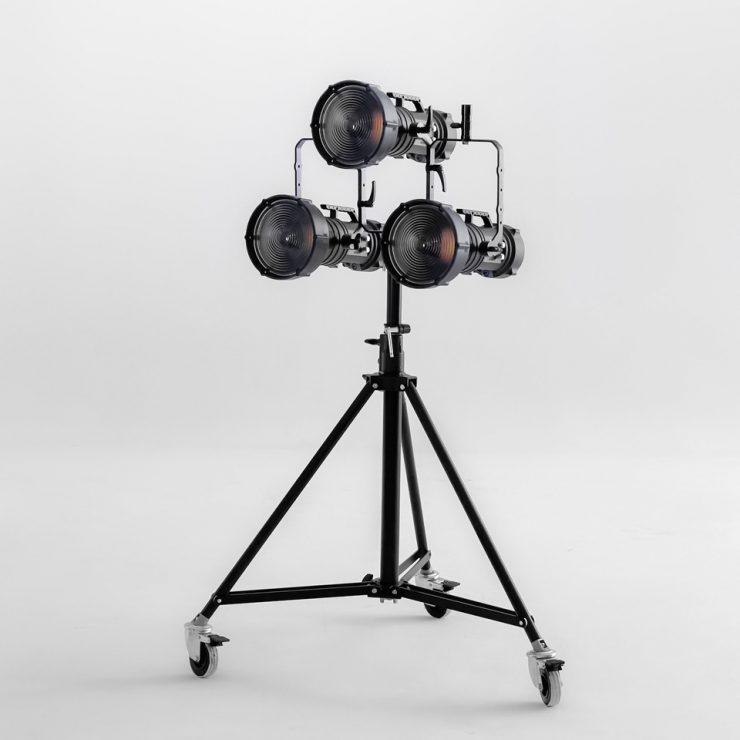
You will also notice that the yoke frame has a lot of holes in it. The reason for this is that you can attach other Maxima units so you can create larger arrays.
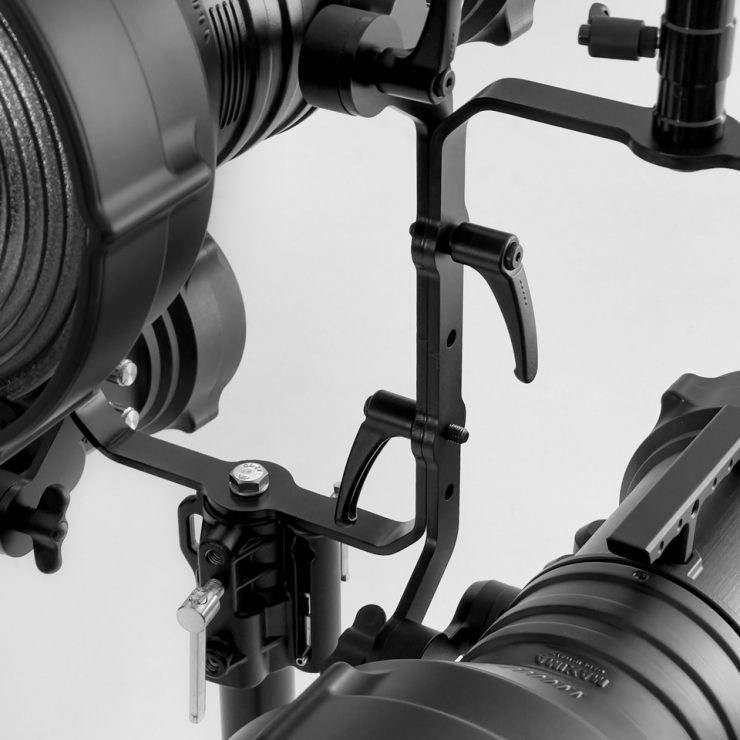
The way it works is that you can use the standard yoke frame that comes with the Maxima 3 and attach another yoke frame directly to it. You simply turn another yoke frame upside down and then screw in the two locking mechanisms from the yoke mount to connect the frames. You then take two small M8 screws and insert another Maxima 3 into the frame.
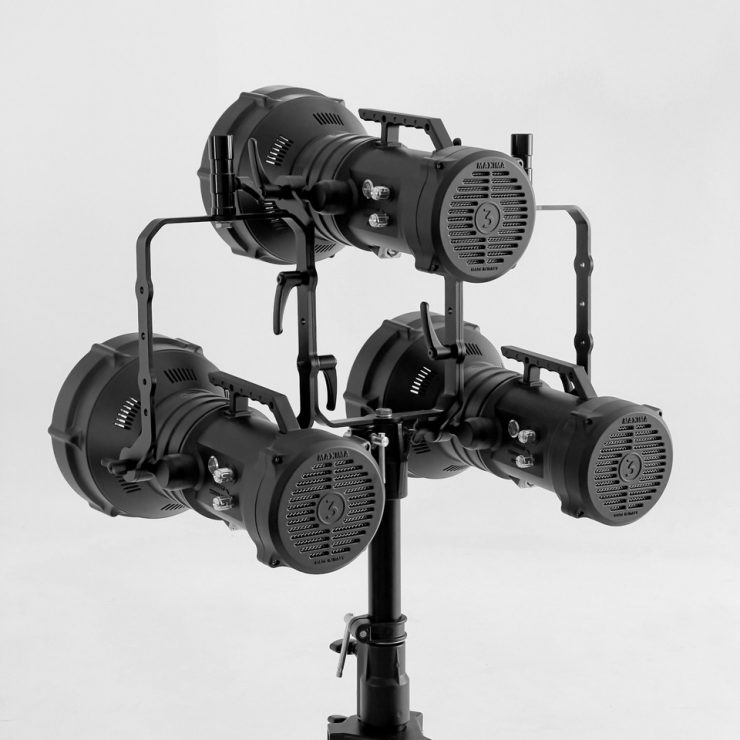
Maxima also has a nice 3 light splitter box so that you can connect up three fixtures and power them via one outlet.
I like this design and the simplicity of what they have done here. Instead of having to buy additional array mounts, you simply use what you already have to create arrays. Everything has been well thought out.
Power Draw
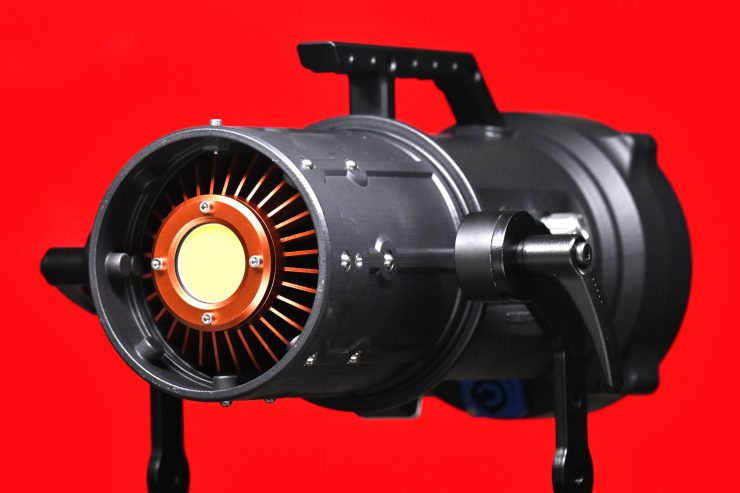
The Maxima 3 draws a maximum of 310W which in an age of high power draw LED spotlights may not sound like much. It is almost strange that we keep talking about lights based on their power draw because all it essentially means is how much power is being drawn by that particular fixture. The power draw is never a direct correlation with how much output or how efficient a fixture is.
According to Maxima, the light has an output of 128lx per watt, which makes it one of the most efficient lights on the market.

The Maxima has two power inputs located on the underside of the fixture.
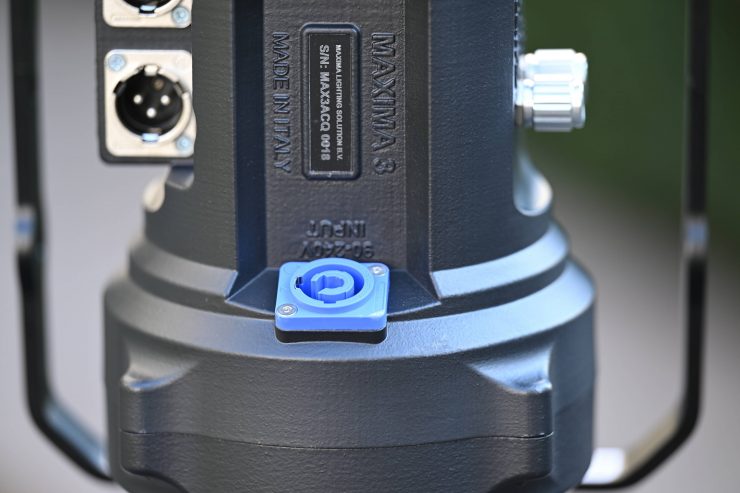
The blue one is for mains power and the white one is for the optional battery which I will talk about more in a minute. The Maxima 3 utilizes PowerCon connectors.
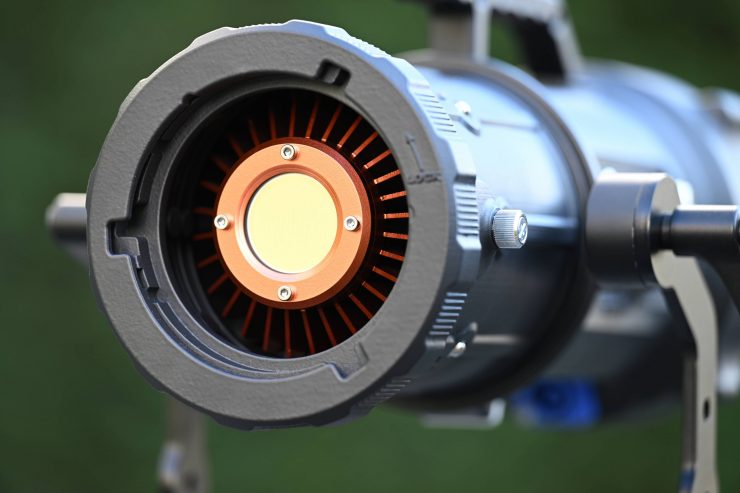
So how does the power draw compare to some other daylight spotlight fixtures?
| MAX. POWER DRAW | |
| Maxima 3 | 310W |
| Aputure Light Storm C300d Mark II | 350W |
| Godox Knowled M300D | 330W |
| Nanlite Forza 300 LED Monolight | 300W |
| K 5600 Lighting Joker2 400W | 400W |
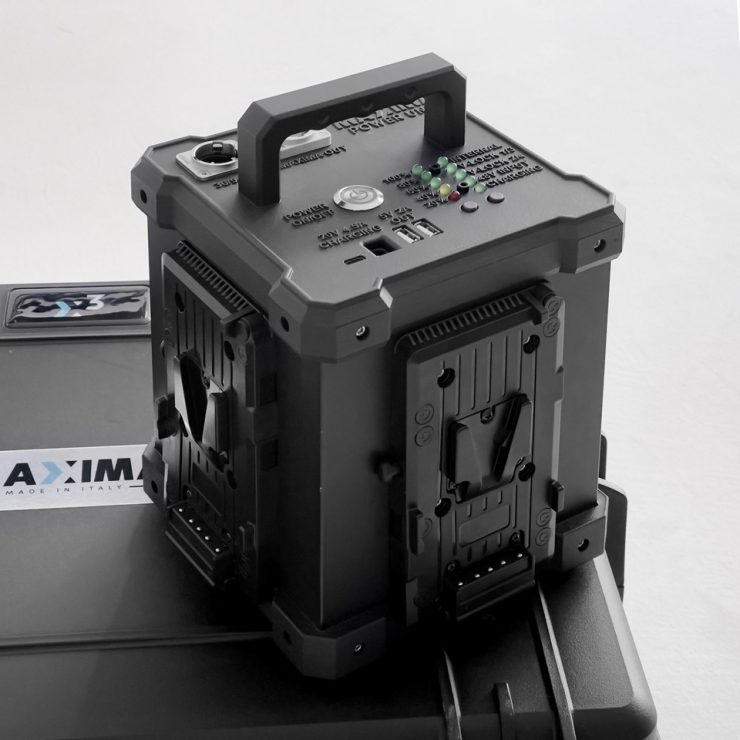
Maxima also makes an optional battery-powered solution that not only has a built-in 400Wh battery, but you can also attach up to 4 V-lock batteries. This solution lets you power the Maxima 3 at 100% output remotely.
I really like this concept as it gives you a lot of versatility, however, it isn’t a solution you can fly with.
You can utilize the internal battery or you can switch to running it via V-lock batteries. It also features a 36-54V DC input so you can also attach a big block battery. There is also a 5V out USB if you need to charge your phone, etc.
You can charge the internal battery by using a regular Apple MacBook Pro charger that has USB-C. It takes around 4 hours to charge the internal battery according to maxima.
I wasn’t able to test this power unit out at the time of doing this review.
Pump Action Fresnel
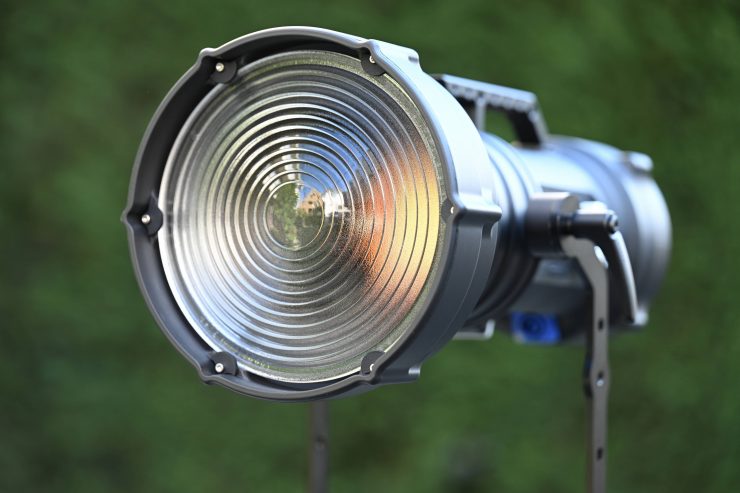
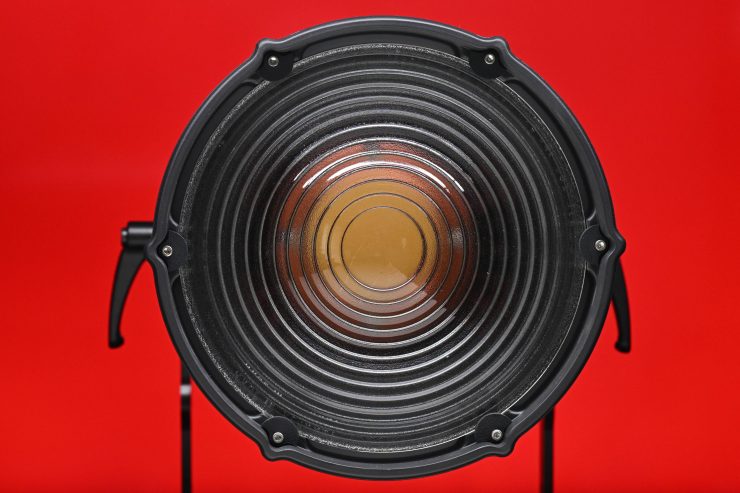
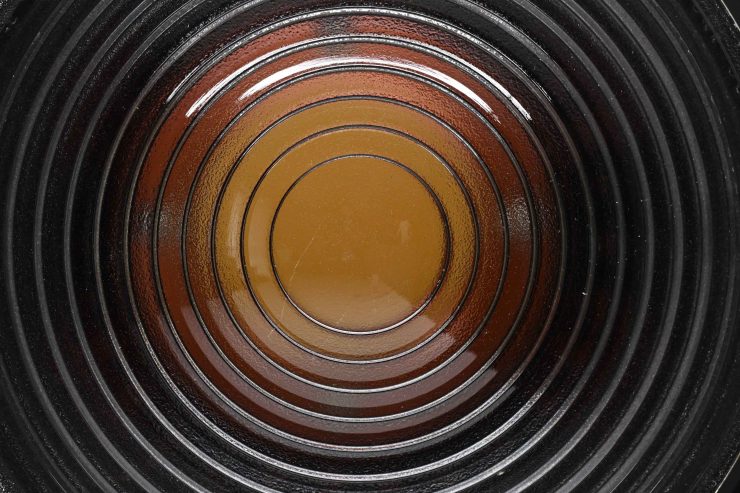
The Maxima 3 comes with a pump action Fresnel that has a range of 15-60 degrees. The borosilicate Fresnel lens is made by SCHOTT in Germany.
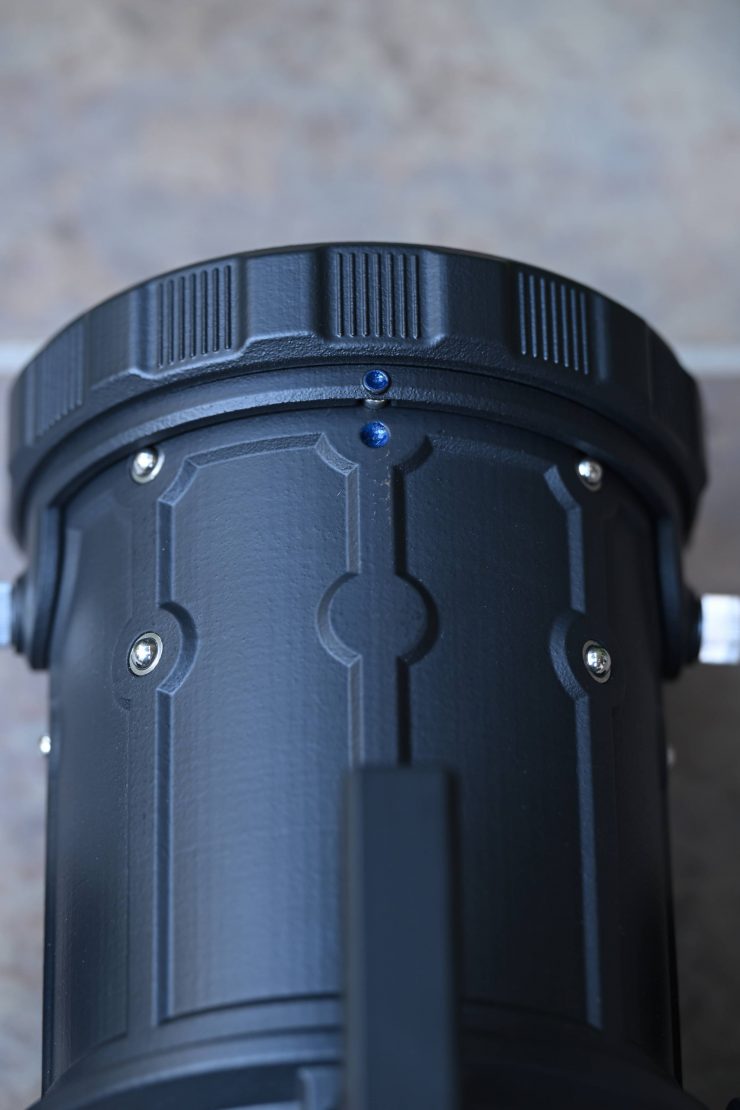
To put the Fresnel onto the Maxima 3 you simply line up the dot on the Fresnel with the dot on the fixture and slide it in and then turn it clockwise. This locks it into place. To take it off the Maxima 3 you just twist it anti-clockwise when it is in the full spot position.
The Fresnel is easy to operate. All you need to do is to push it in or out while turning it clockwise.
The Fresnel is beautifully made and it is incredibly lightweight.
S-Mount locking ring
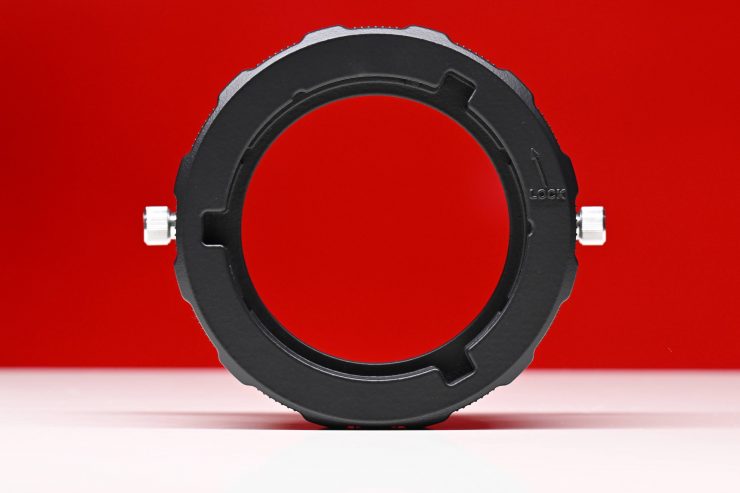
The Maxima 3 comes with an S-Mount locking ring that allows you to attach Bowens mount lighting modifiers.
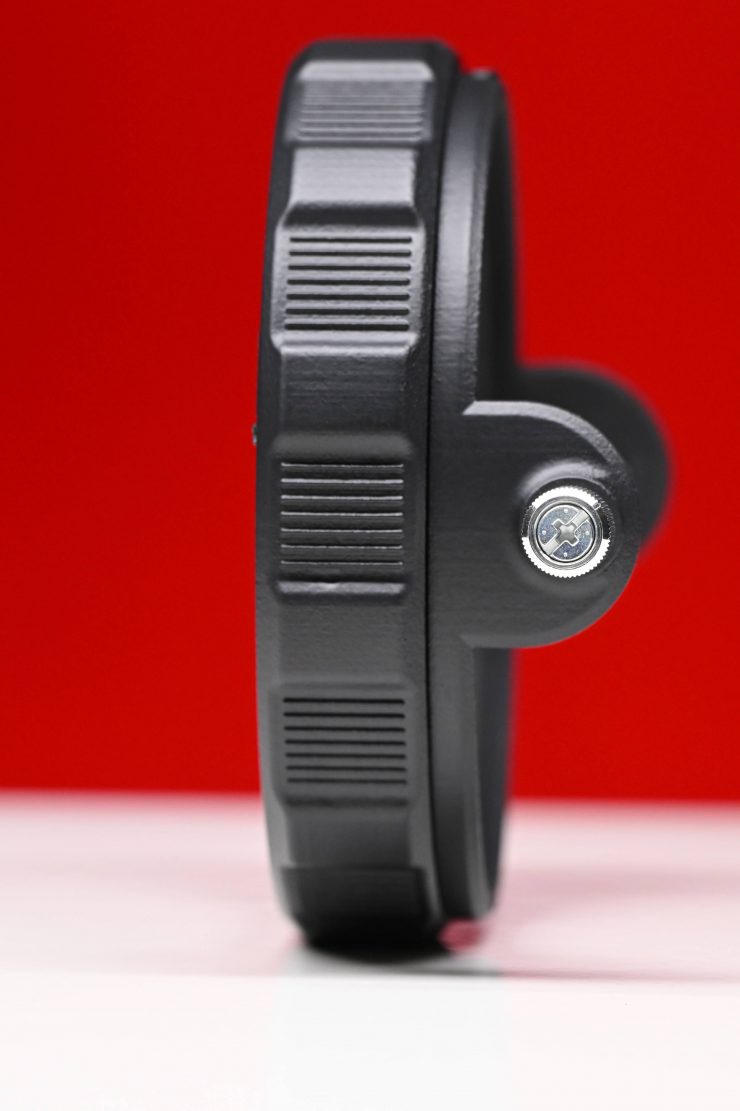
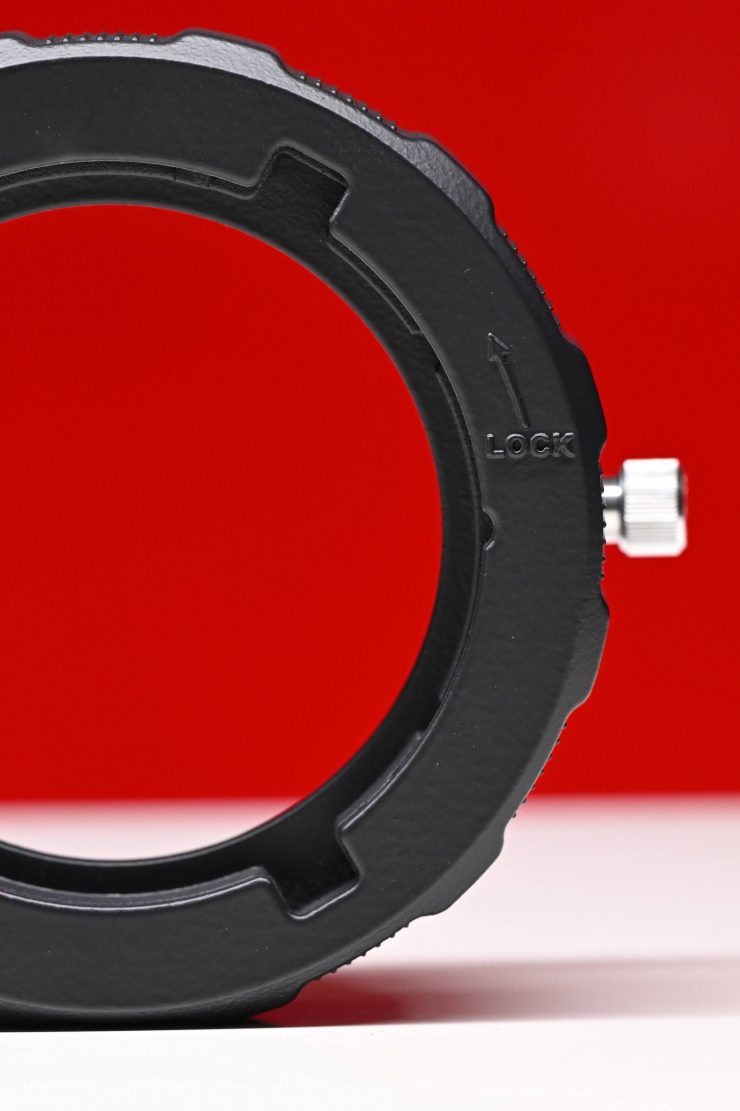
This is no ordinary Bowens mount. The interface was designed and built by Maxima because they didn’t think that any of the off-the-shelf adapters were good enough. The Maxima 3’s S-Mount locking ring features a bayonet mechanism which provides a lot stronger and secure mounting platform than a standard Bowens mount.
The mount is so strong that you can pick up the entire light via an attached reflector without any fear of it breaking or falling off.
The other nice aspect about having a Bowens mount adapter is that you can just leave it attached to your softbox or lighting modifier.
Again, the attention to detail of this fixture is impressive.
To put it on the Maxima 3 you line up the dot with the dot on the fixture and slide it in. You then tighten the thumb screws.
Above you can see how the locking mechanism works. Essentially it is like a PL mount for your light.
Connectivity
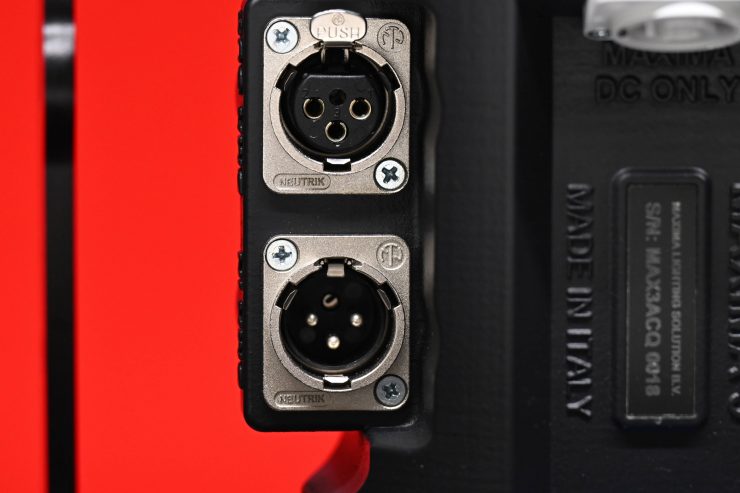
The Maxima 3 has both DMX In and DMX Out.
Controls & Operating Modes
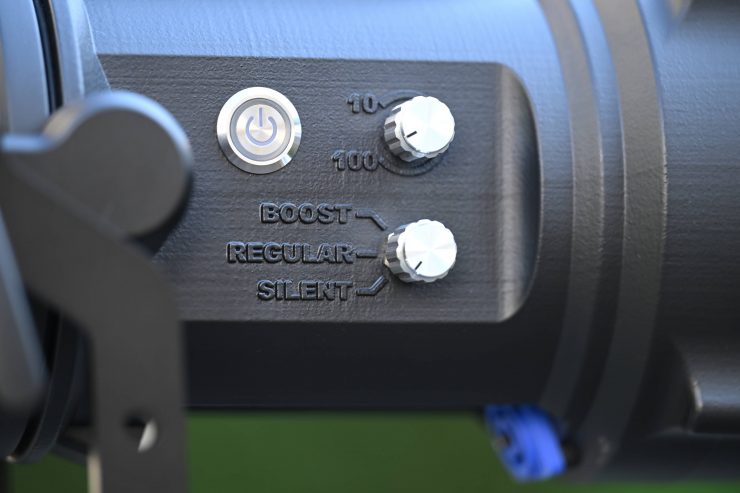
The Maxima 3 has been designed to be simplistic and easy to use. Because the versions are either daylight or tungsten you don’t need to have a lot of complicated menus or operating modes like you would with an RGBWW fixture.
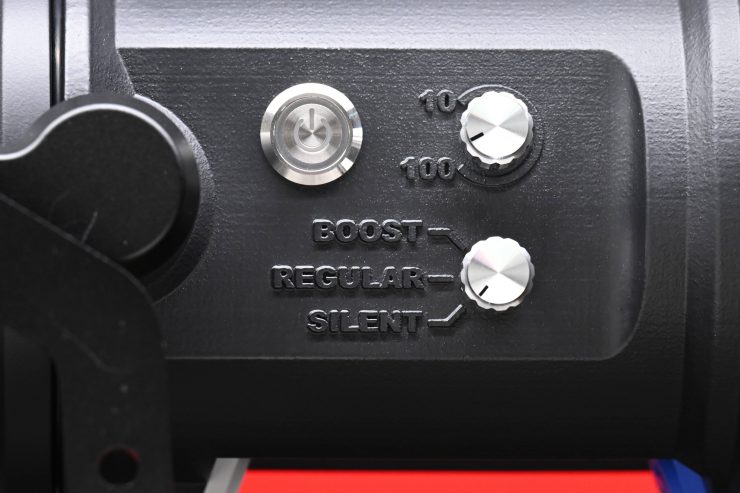
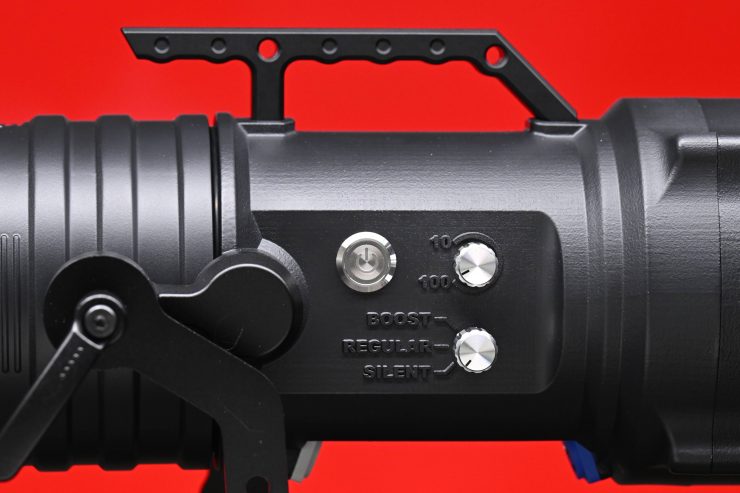
I like that when the fixture is connected to a power source, the power On/Off button is illuminated.
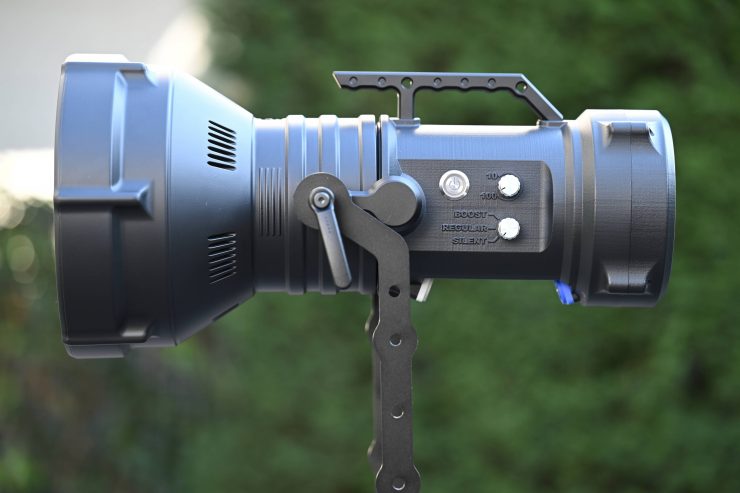
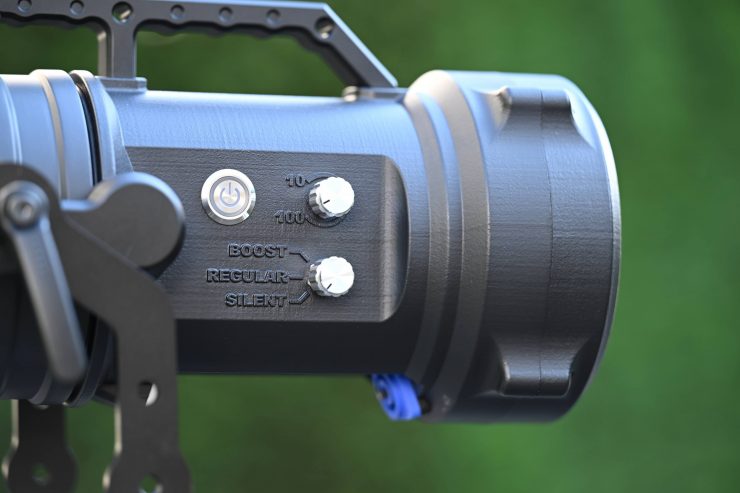
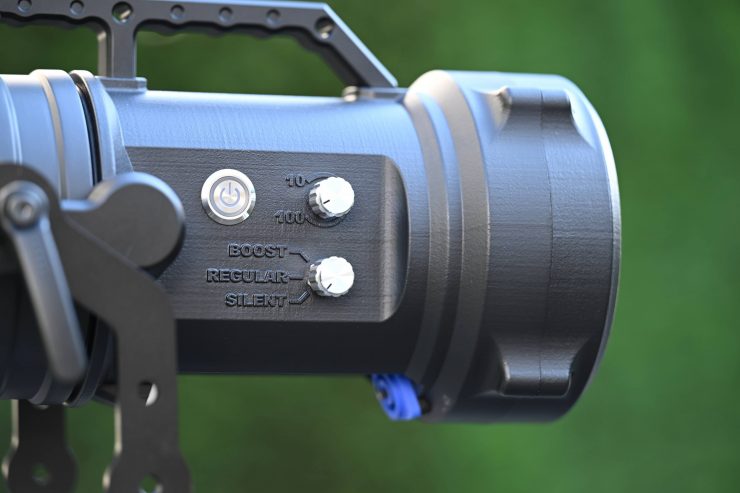
There is a simple on/off button, a Mode switch, and a Dimming dial. It is Italian simplicity. Sometimes there is no need to make anything more complicated than it needs to be. The only issue I have with the controls is that the Mode switch and Dimming dial are very difficult to see in dark conditions. You also have no way of seeing what the output level is unless you use the app.
Now, there are 3 operating modes available on the Maxima 3:
SILENT MODE
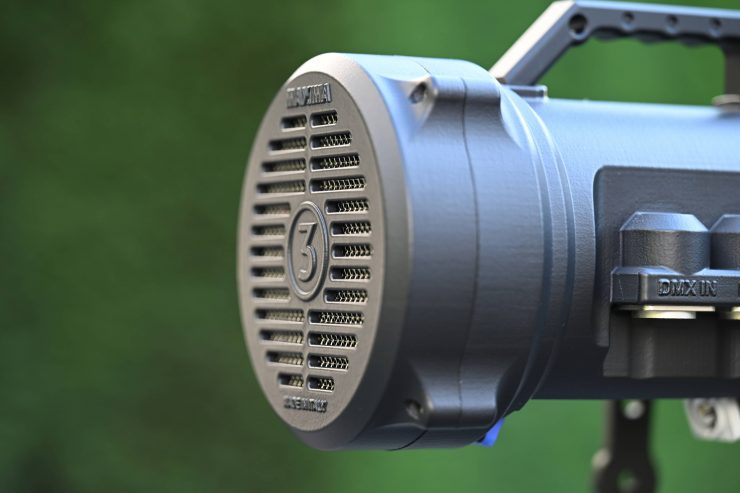
In silent mode, Maxima 3 operates in the 10-160W range and emits only 19dBa of noise. This is the best mode when silent operation is of paramount importance. Just to be clear, the fan does still work in this mode, but it is barely audible and you need to put your ear right up against the back of the fixture to hear it. In this mode, the LEDs are also working at their best efficiency.
REGULAR MODE
In regular mode, the Maxima 3 operates in the 20-240W range and emits only 26dBa of noise. This is the most balanced ratio between luminous output and noise. Now, I did find that the fan noise when in this mode can be an issue if you have the fixture too close to where audio is being recorded. I found that as long as you have the light at least 2-3 meters away it won’t be any real issue.
BOOST MODE
In boost mode, the Maxima 3 operates at its full power between 200-310W for those scenarios where audio is not being recorded or Maxima is placed far from the scene. This mode is exceptionally noisy and you couldn’t use it even remotely close to where audio is being recorded.
I like the Silent Mode because a lot of times when you are doing interviews you don’t want to run a light in an Auto fan mode where it is silent and then it suddenly kicks in 10 minutes into the interview. The output in Silent Mode is also high enough for a lot of indoor interview scenarios. It’s actually quite ironic that you see so many people running high-powered fixtures at 5% or less. You really don’t need a 600W fixture for an indoor interview, despite what marketing departments want you to believe. There are also quite a few fixtures on the market where the CCT accuracy drops when you start dimming a fixture down. People assume that nothing changes when you dim the light down and that is why I always test the light’s CCT performance at various dimming levels.
The caveat when designing a COB spotlight without a separate power supply/controller is that you are in a constant tug of war with the heat it produces. Having all of the components in an all-in-one design does mean that you are going to have to run fans and pretty high speeds if you want to power the light at higher outputs. While I love the Silent mode, I found the Regular mode was borderline as far as the amount of noise it created if you wanted to use the fixture in a quiet room for an interview. The Boost mode is very, very noisy, and you simply can’t use this if you are recording audio within 5-7 meters of where the fixture is positioned.
How loud is it?
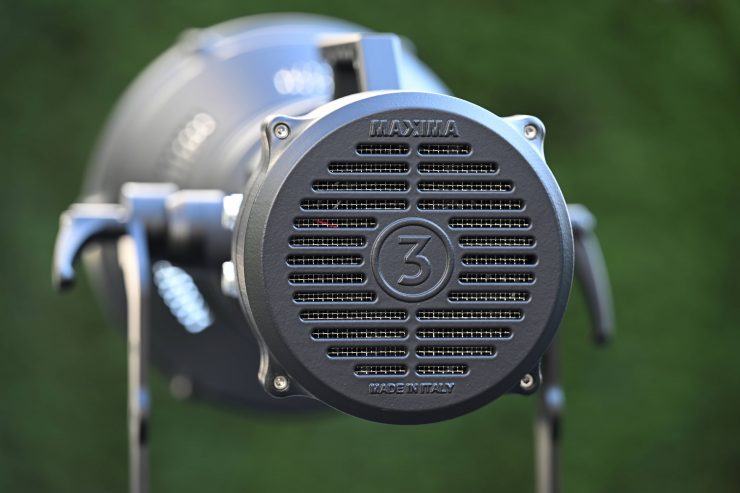
I did a few tests to see how much noise the Maxima 3 generated at a distance of 3m / 9.84′.
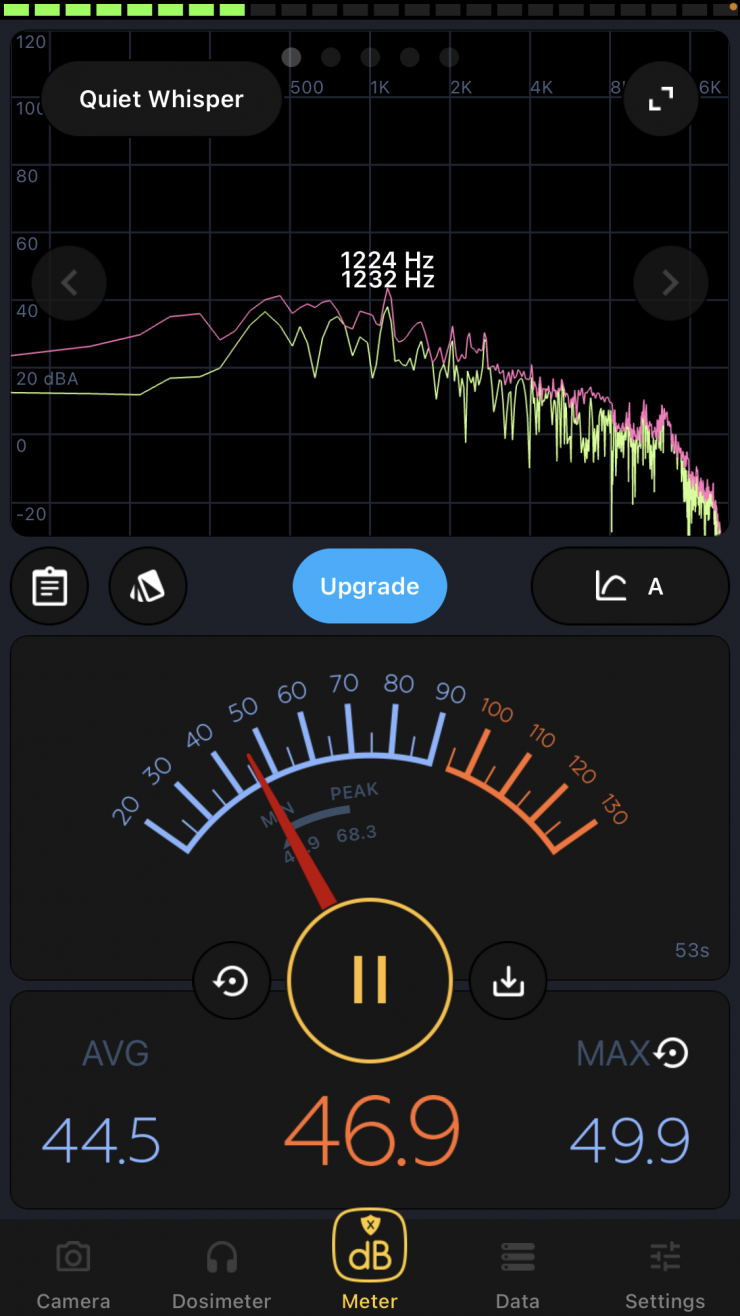
Regular mode 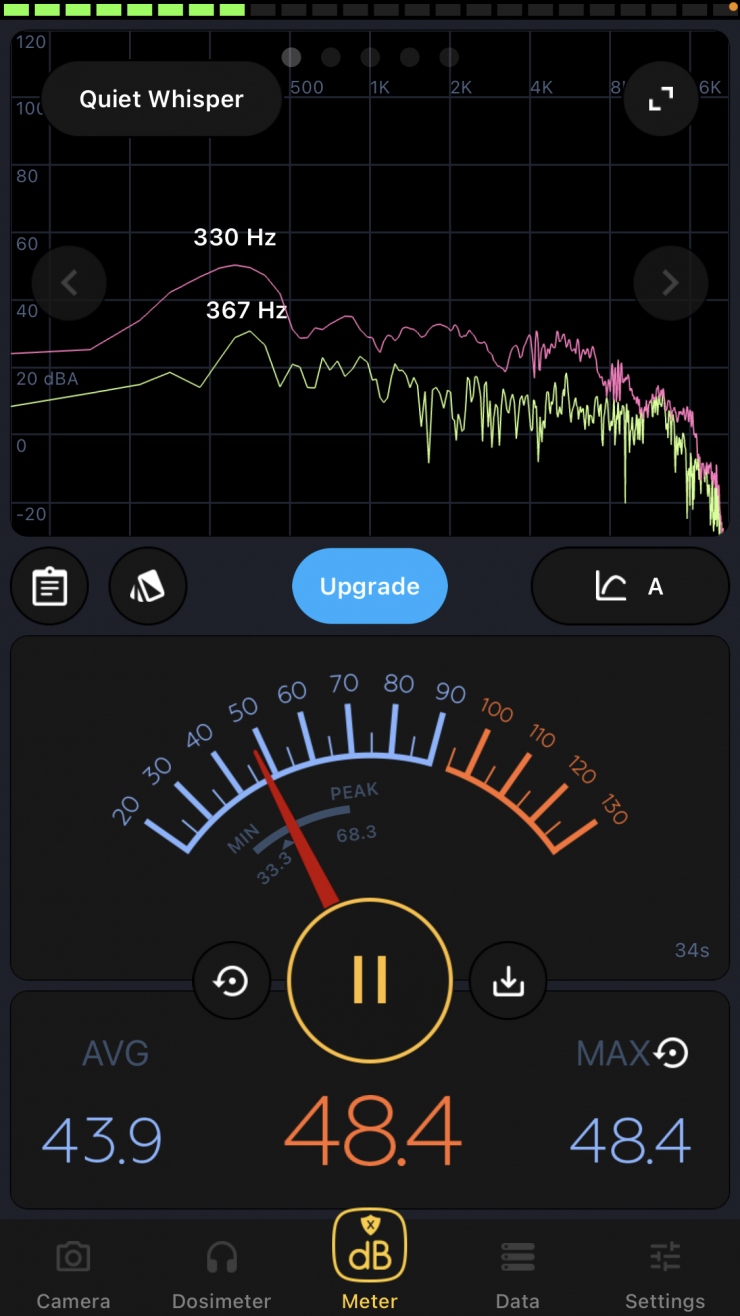
Boost Mode
Above you can see some measurements I took at the various settings. Now, these measurements don’t really tell the whole story about the noise, so below you can hear what the various settings sound like when I recorded audio directly behind the fixture in the Silent, Regular, and Boost modes.
The Silent mode is extremely quiet. In the Regular mode, you probably want to have the fixture around 2-3m away from where any audio is being recorded. In the Boost mode, you don’t want to have any audio being recorded within at least 5-7 meters. I personally wouldn’t use the Boost mode in any situation where critical audio is being recorded.
Maxima Control iOS & Android App
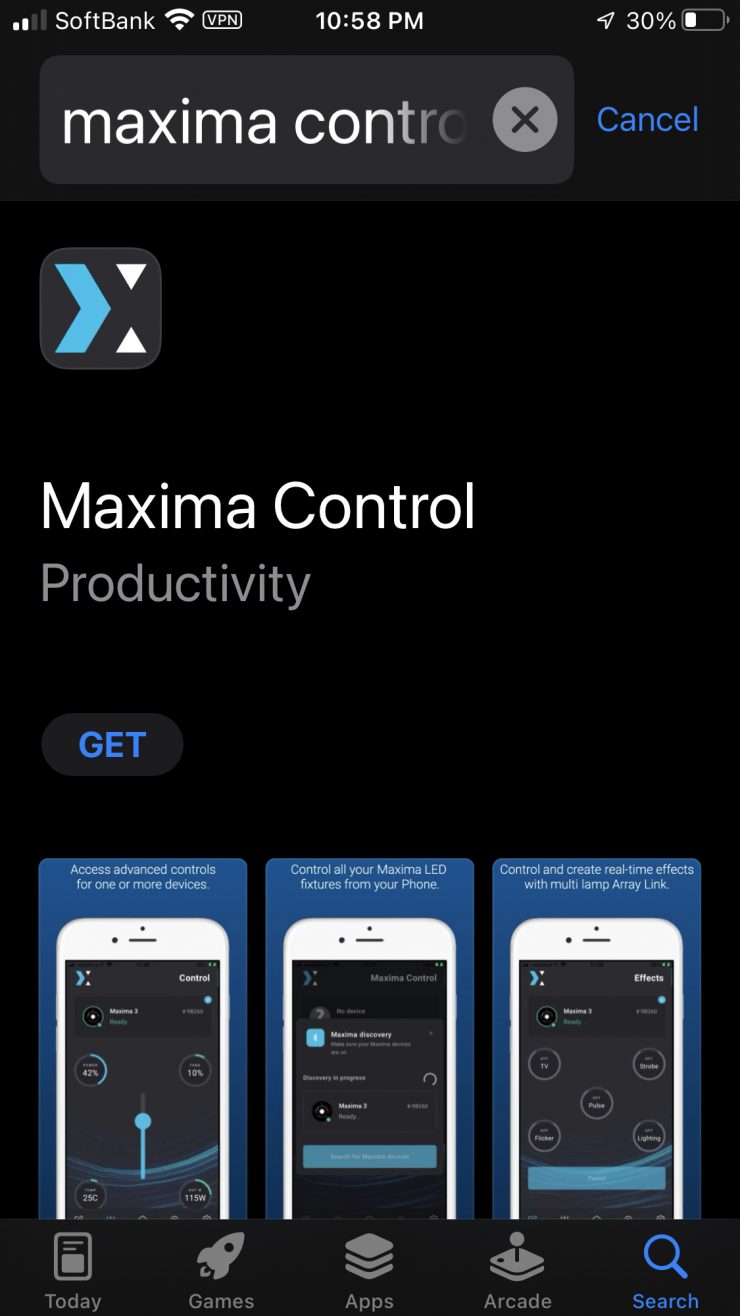
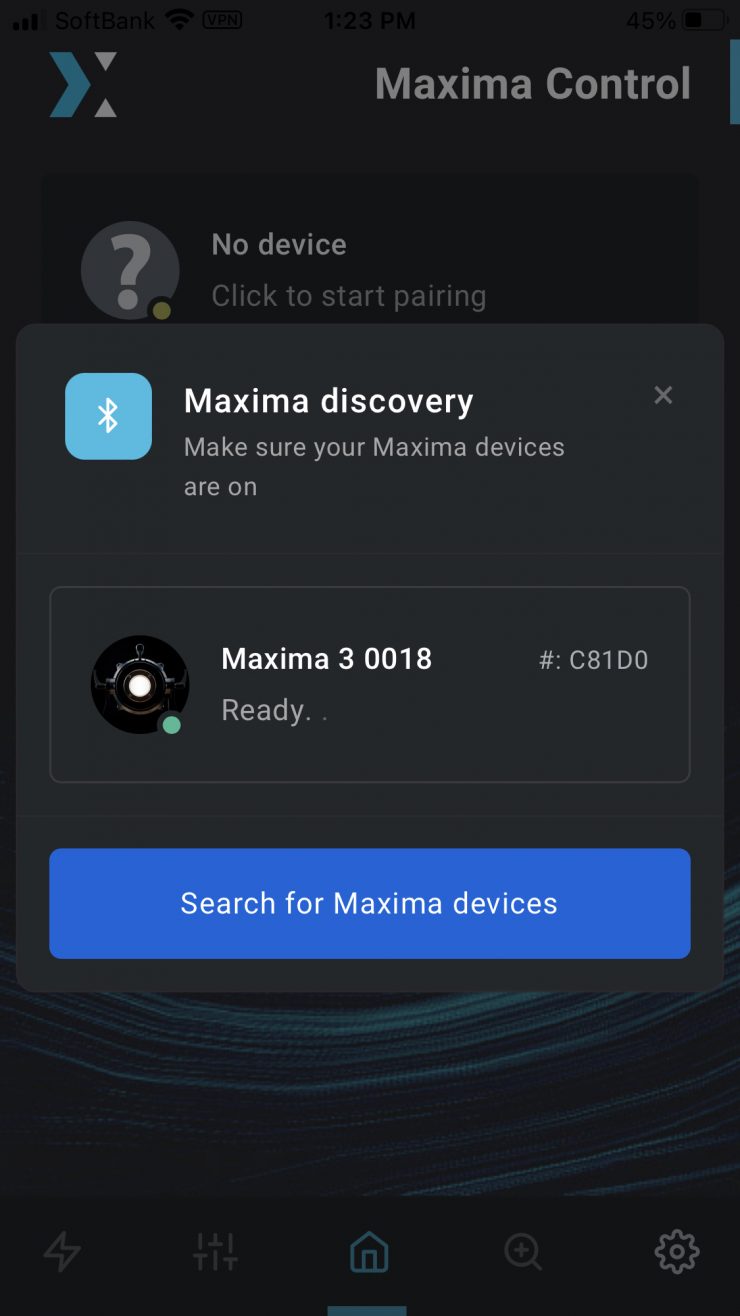
If you want you can use the free Maxima Control app that is available for iOS and Android devices. This app gives you full wireless control over the fixture.
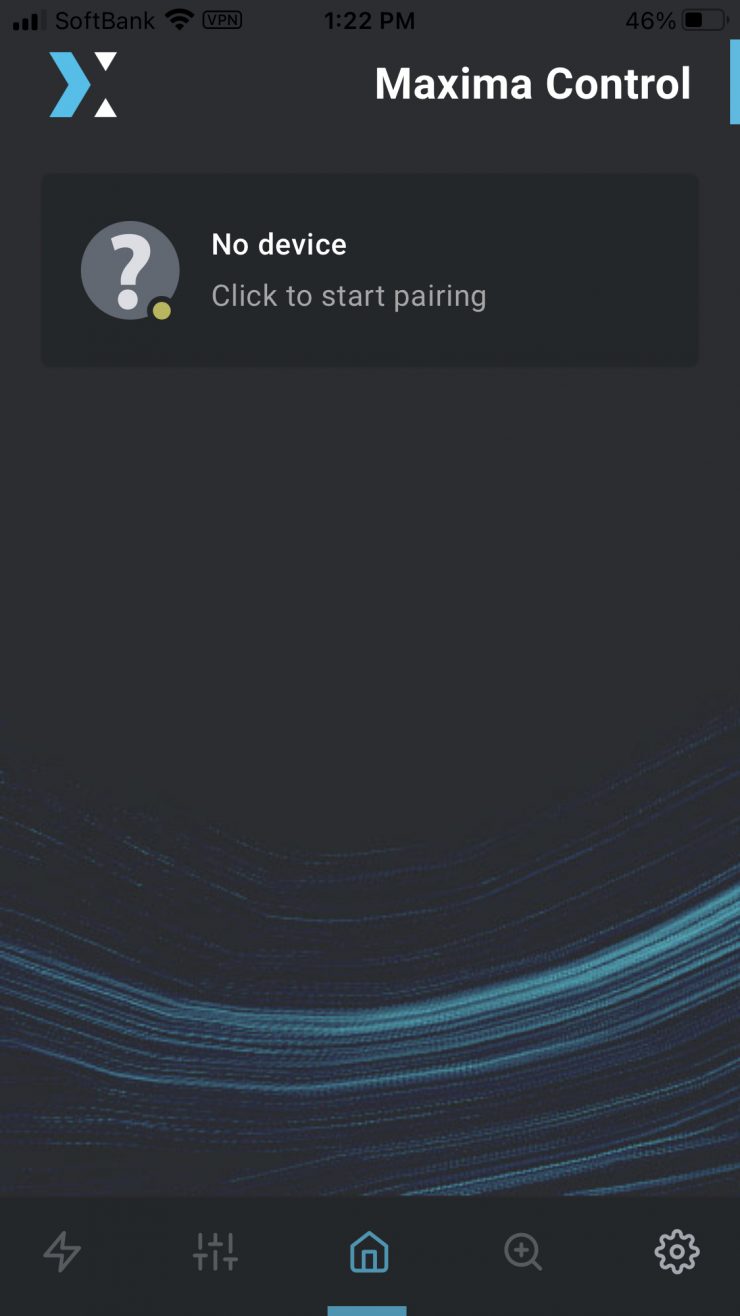
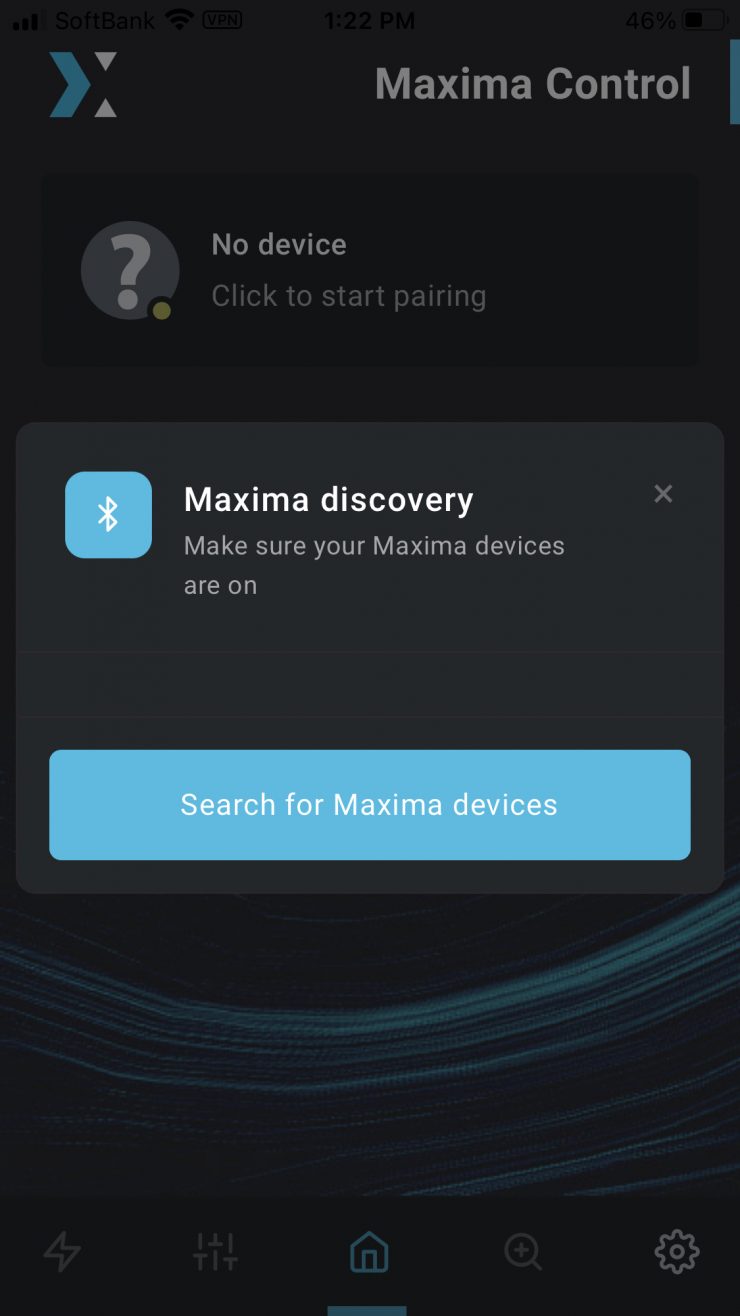
The app is very straightforward to use and operate. Set up and pairing are extremely quick. All you need to do is turn the light on, open the app, select the fixture and that’s it.
There are several different pages that you can access in the app.
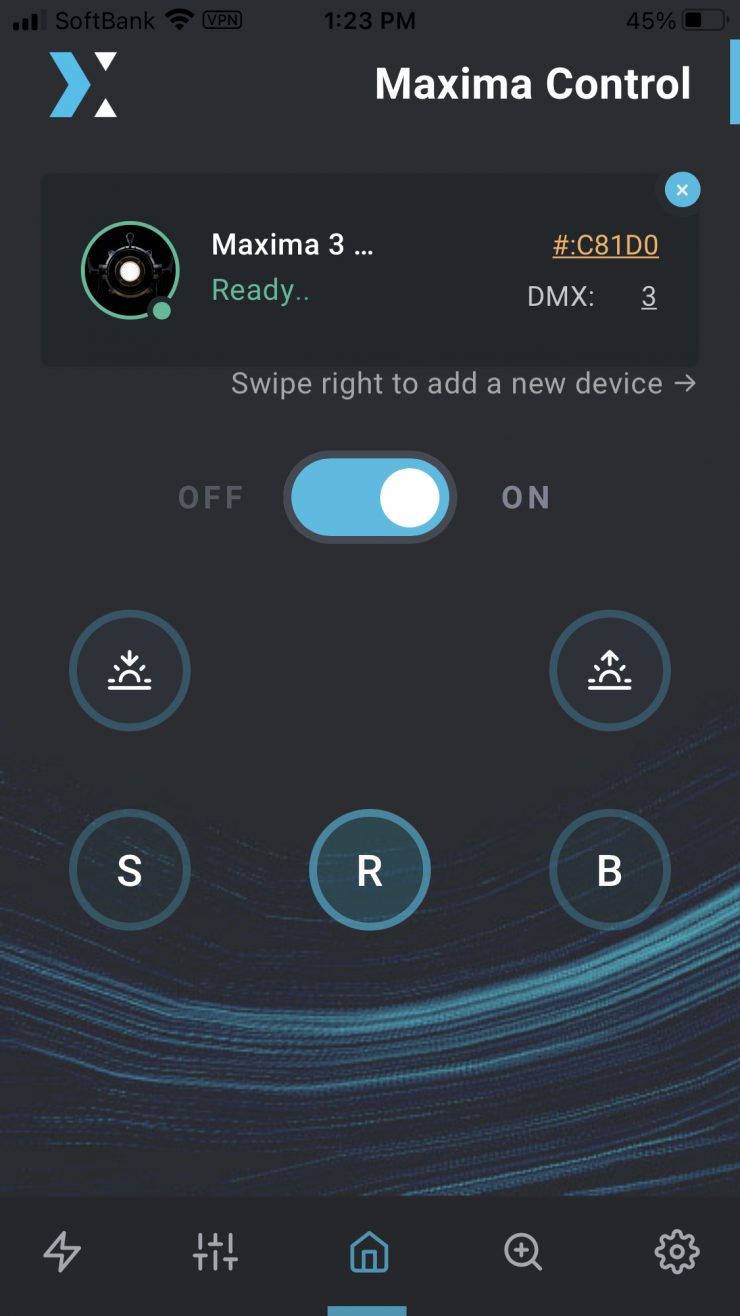
The Maxima Control Home page lets you turn the fixture On/Off and you can switch between the three different operating modes.
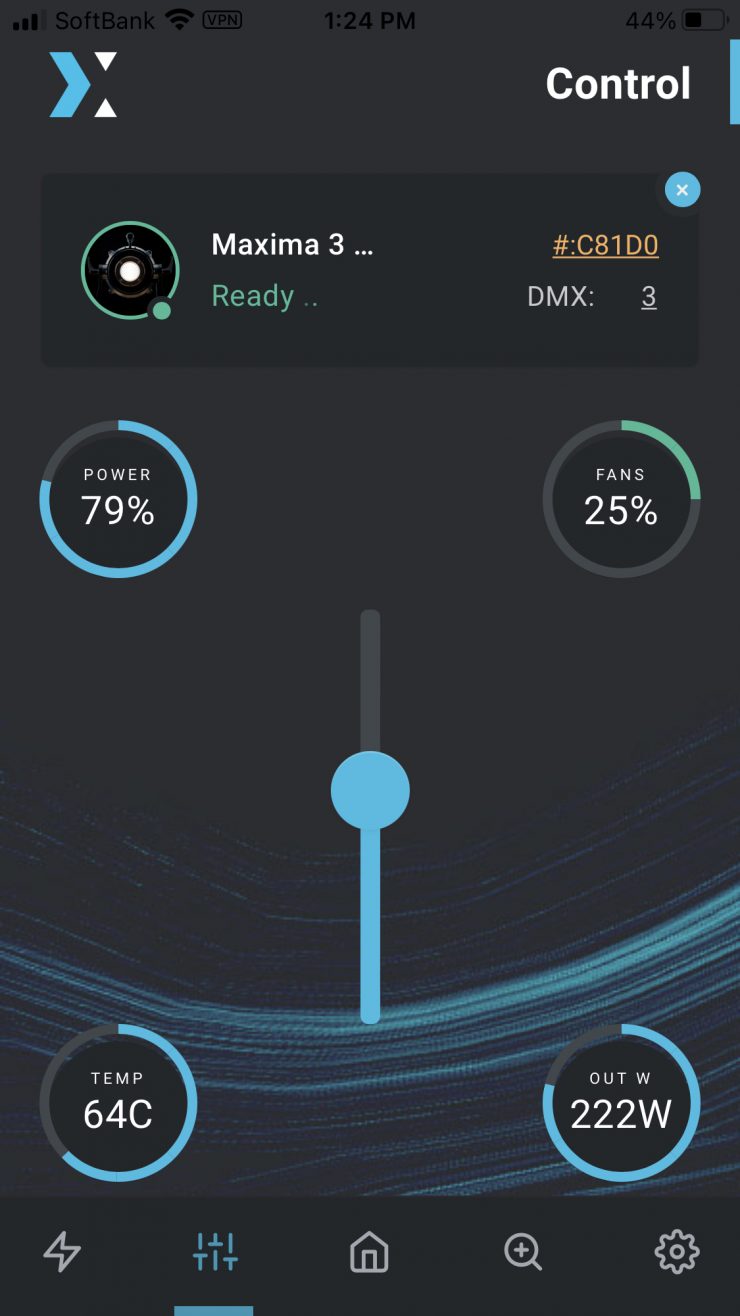
On the Control page, you will see a simple slider for adjusting the intensity, the status of the fans, and the temperature and output draw of the fixture.
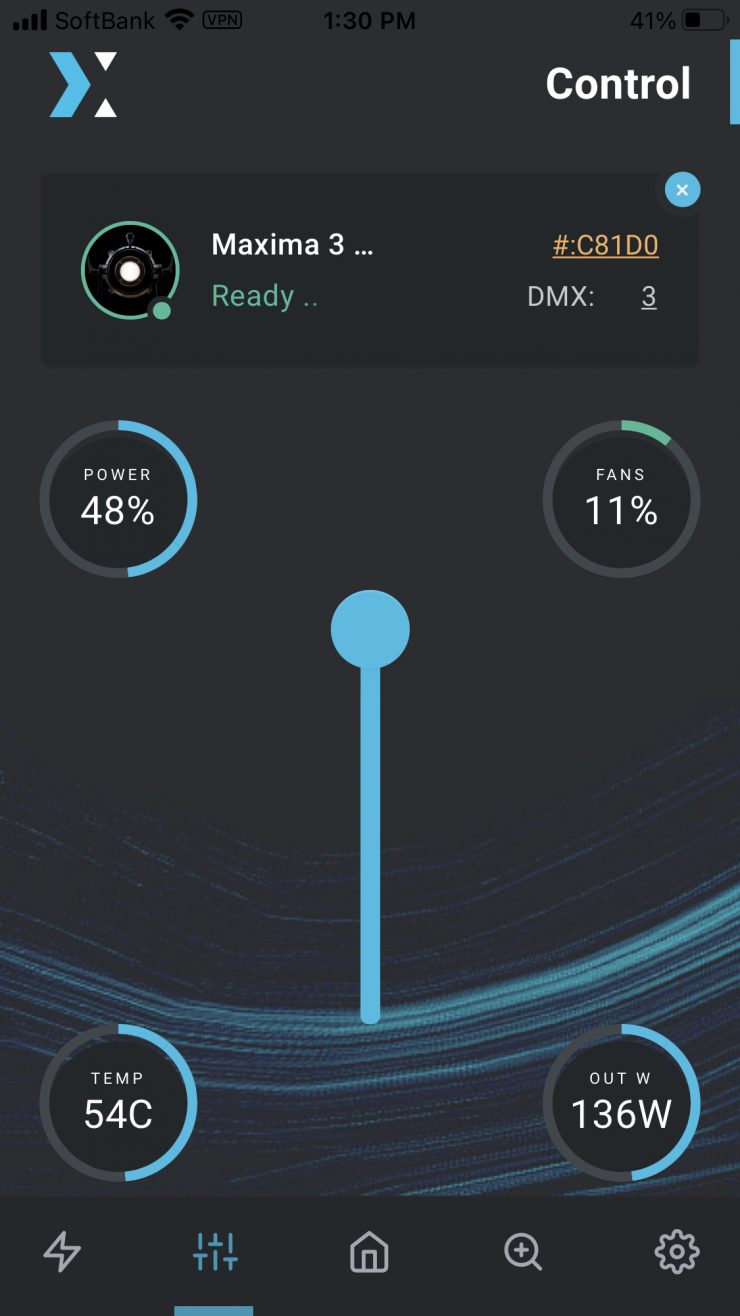
Boost mode 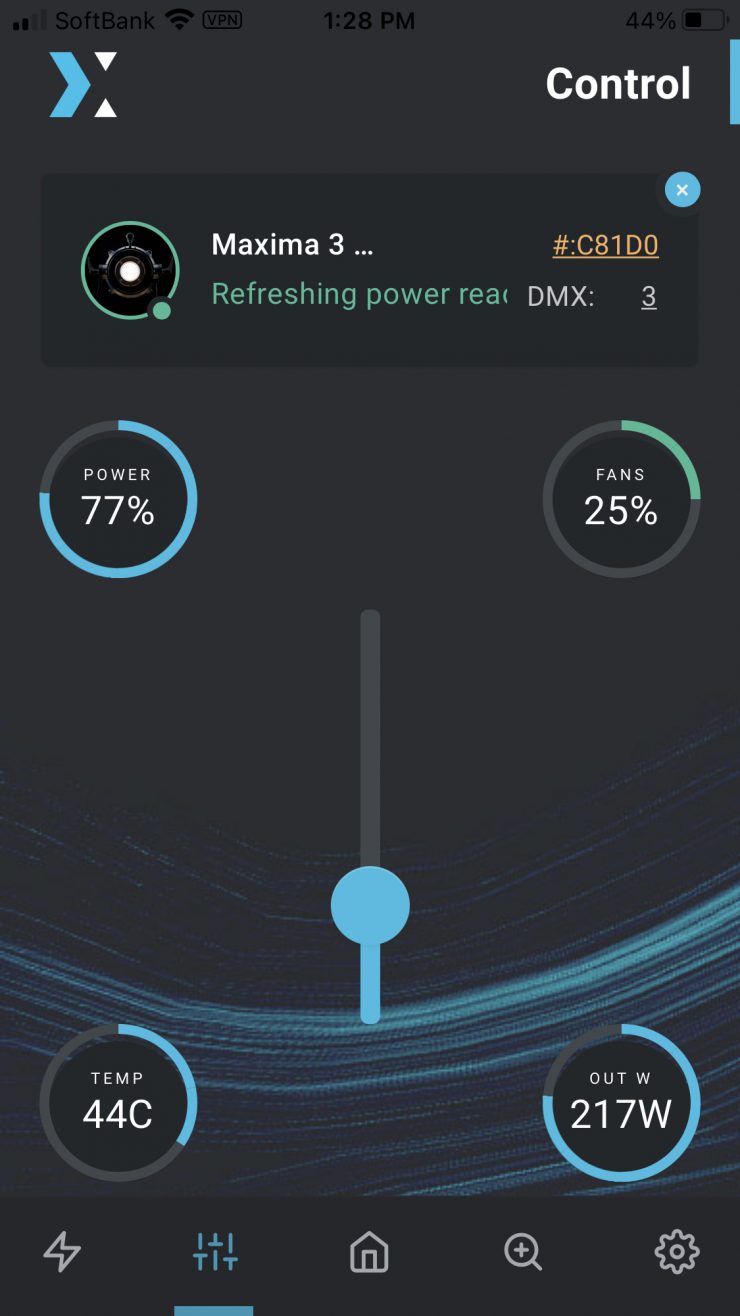
Regular mode 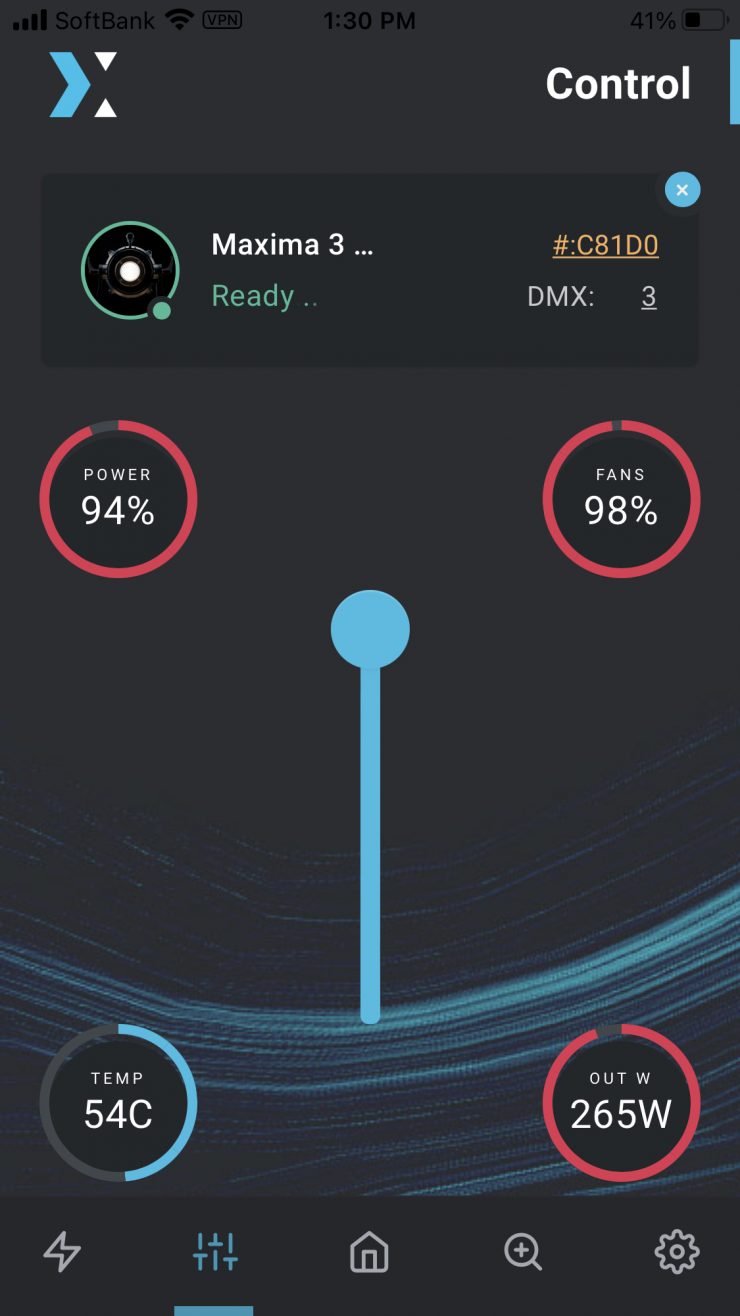
Silent mode
The intensity slider is a little laggy when you use it and the Power display can be a little confusing because if you are not in the Boost mode it won’t show 100%. I would have liked to have seen some preset intensity buttons so you could quickly move the light between various settings such as 25%/50%/75% etc. I would have also liked to have seen an indicator on this page that tells you what operating mode you are in.
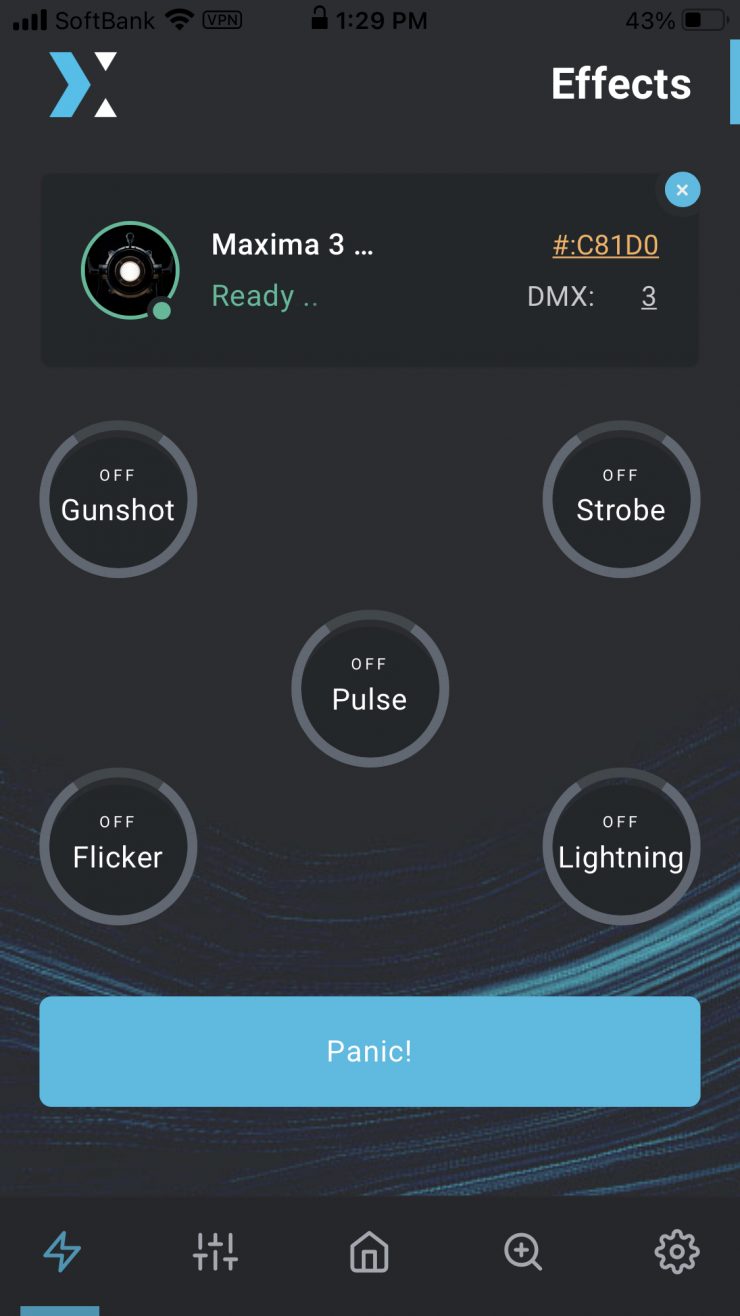
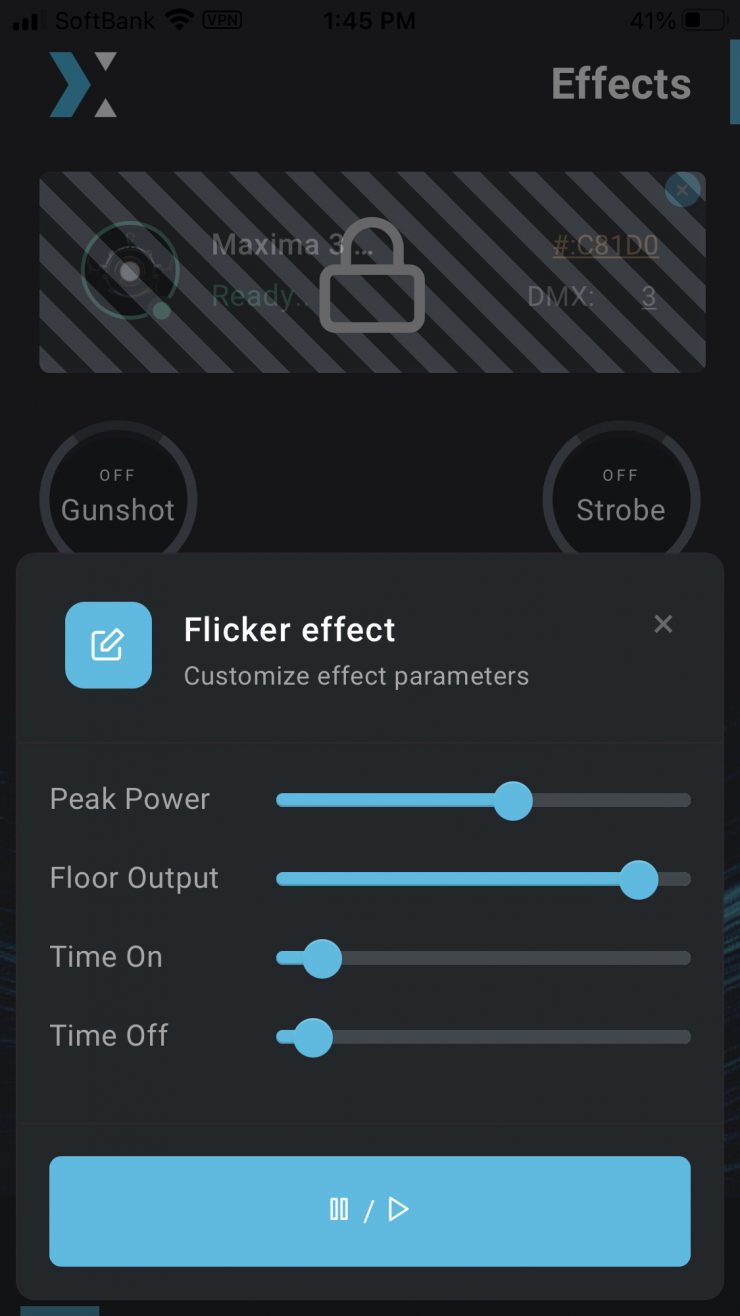
On the Effects page, you can choose from several different effects, which can all be individually adjusted.
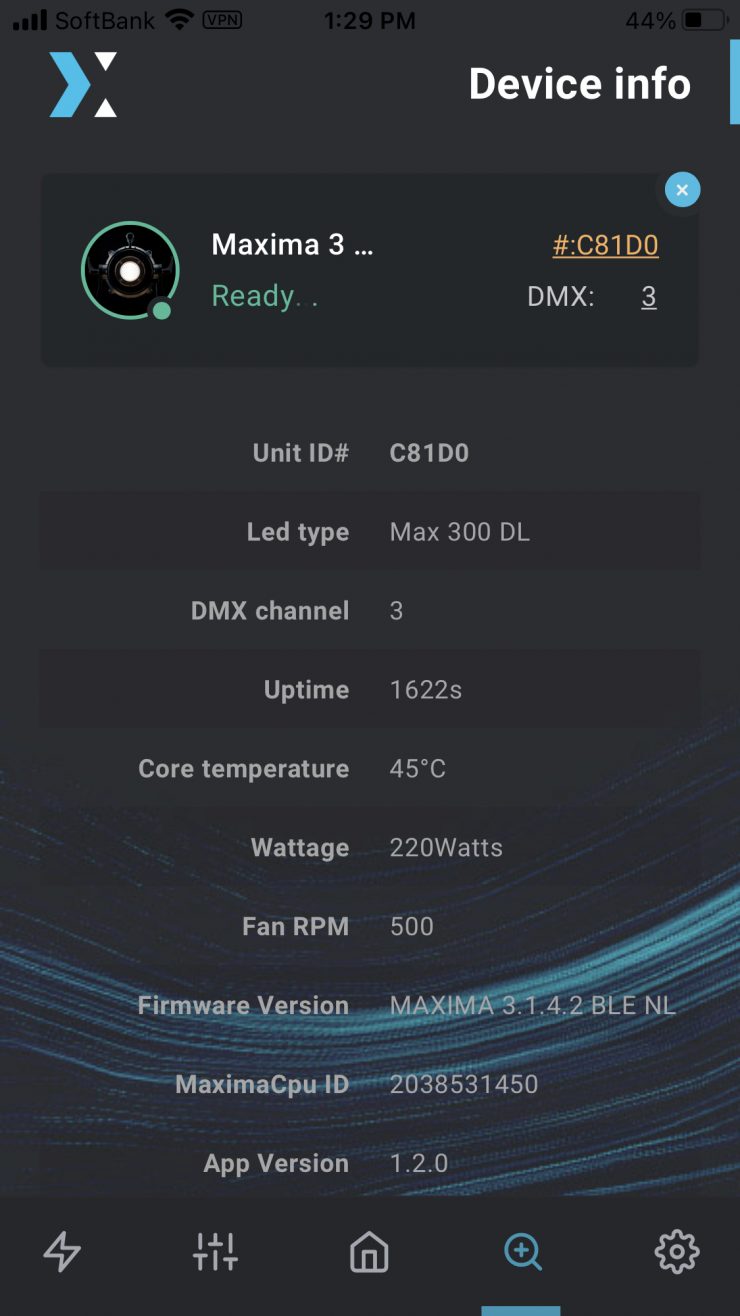
On the Device Info page you can the status of the light and what firmware version it is running, etc.
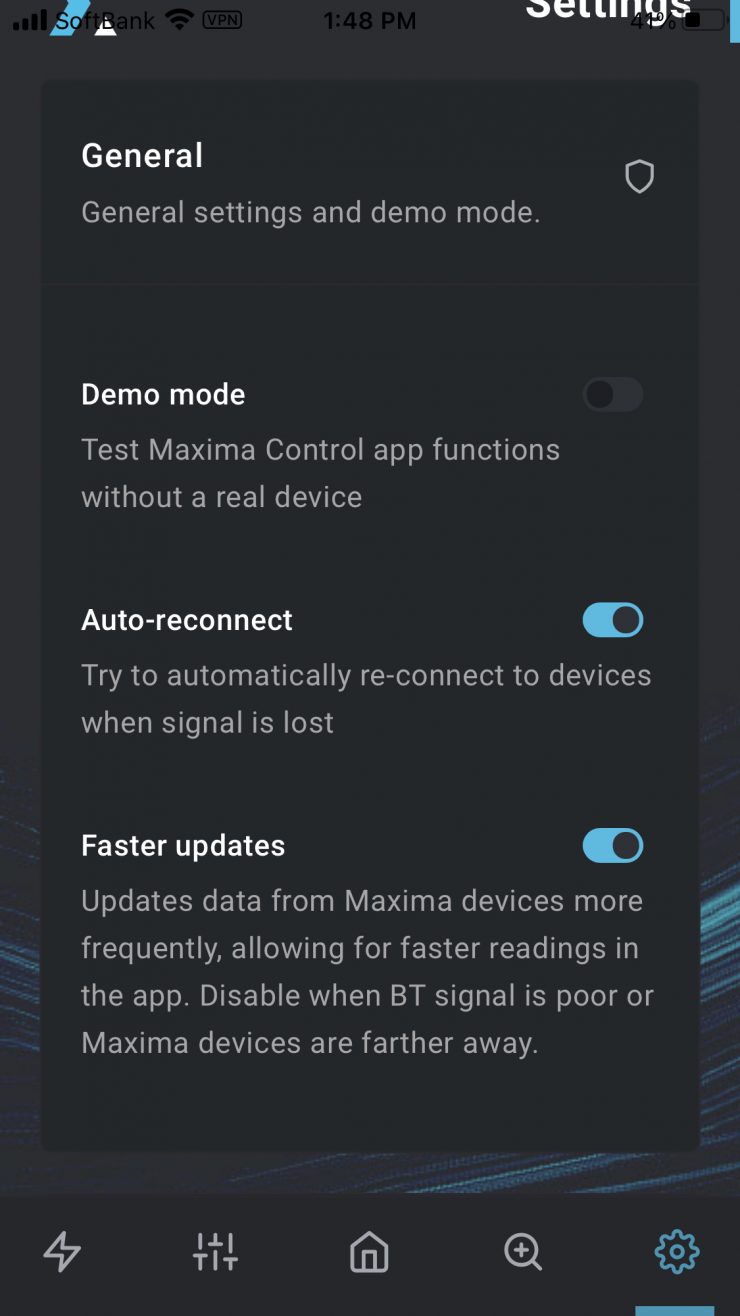
On the Settings page, you can choose to turn On/Off Auto-reconnect, put the light in Demo mode, and even open a Support ticket if you have an issue with the light.
The app works reasonably well, but there is certainly room for improvement.
But it is only 5600K
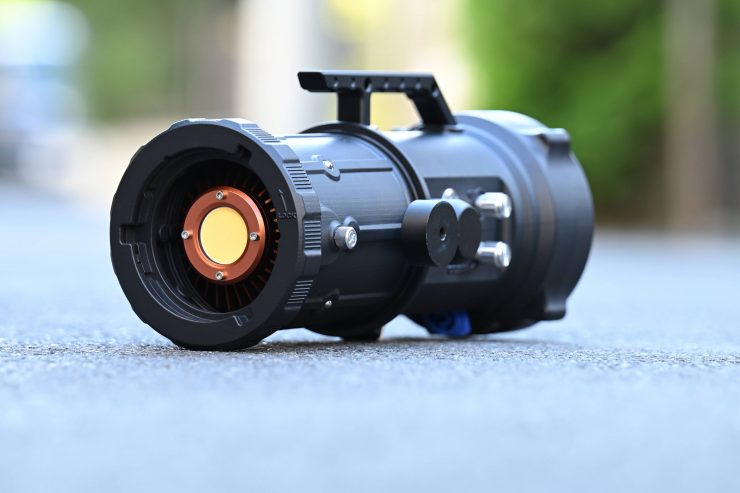
In an age where RGBWW fixtures have become increasingly popular, some readers may well question the validity of owning a 5600K fixture. That is certainly a legitimate concern, however, we used tungsten and daylight-only fixtures for decades and that never held us back. Sure, a daylight-only fixture is not going to be as versatile as an RGBWW one, but it really depends on your use case requirements as to whether or not you need RGBWW.
Photometrics
So now let’s get to the photometric results. I always test lights in this way so that I get a reference to how they compare to other fixtures. Results only tell part of the story and should never be used alone to judge a light. I have found from extensive testing over the years that certain lights that have good photometric results don’t always look good, and lights that have worse photometric scores can sometimes look better than their results indicate.
You need to look at a whole series of photometric tests to come to a conclusion. You can’t make any accurate assessment by looking at one individual test. You wouldn’t just read one chapter in a book and know the entire story, so don’t do it with light results either!
Output & CCT Accuracy
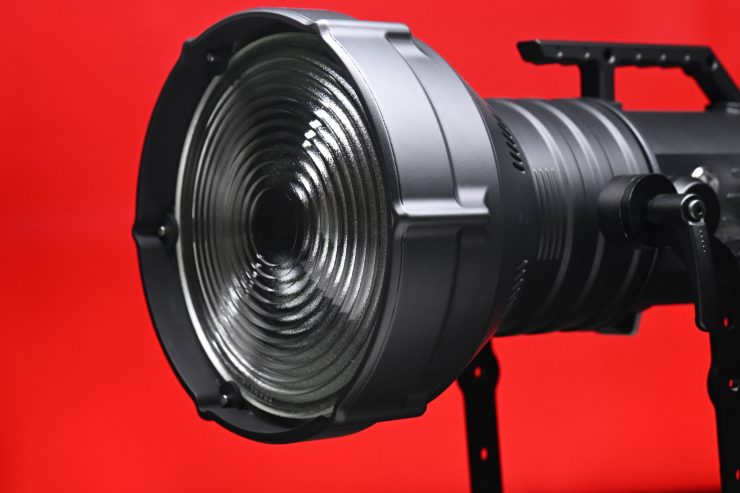
I tested the Maxima 3 using a Sekonic C-800 Spectrometer to find out how much output the light had and how accurate the CCT reproduction was. All readings are taken at a distance of 1m (3.28ft) in a controlled environment.
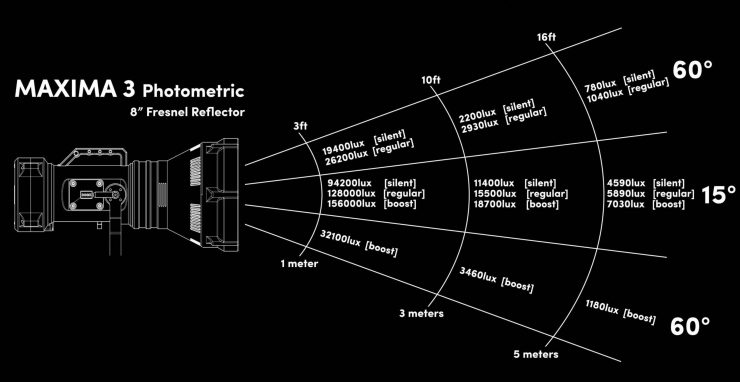
Above is what the manufacturer states as the output for the Maxima 3 when using the 8″ Fresnel. These readings were taken from the COB and not from the end of the Fresnel.
The Maxima 3 has a decent amount of output, but it isn’t going to have the same amount of output as something like a K 5600 Lighting Joker2 800W. The output is arguably going to be closer to a K 5600 Lighting Joker2 400W. The trouble is comparing HMI fixtures to a COB spotlight is a slippery slope. They are totally different types of fixtures.
So let’s see my independent testing results. All my readings were taken 1m / 3.3′ from the end of the Fresnel. I do all my testing using the same parameters so I can directly compare other lights. My figures are not going to replicate the manufacturer’s quoted figures because of the difference in testing methods. Also, because I am in Japan and the voltage is 100V, the figures I am getting, in theory, should be about 10% less because the light isn’t running on 230V power like it was when it was tested by the manufacturer.
15° Silent Mode
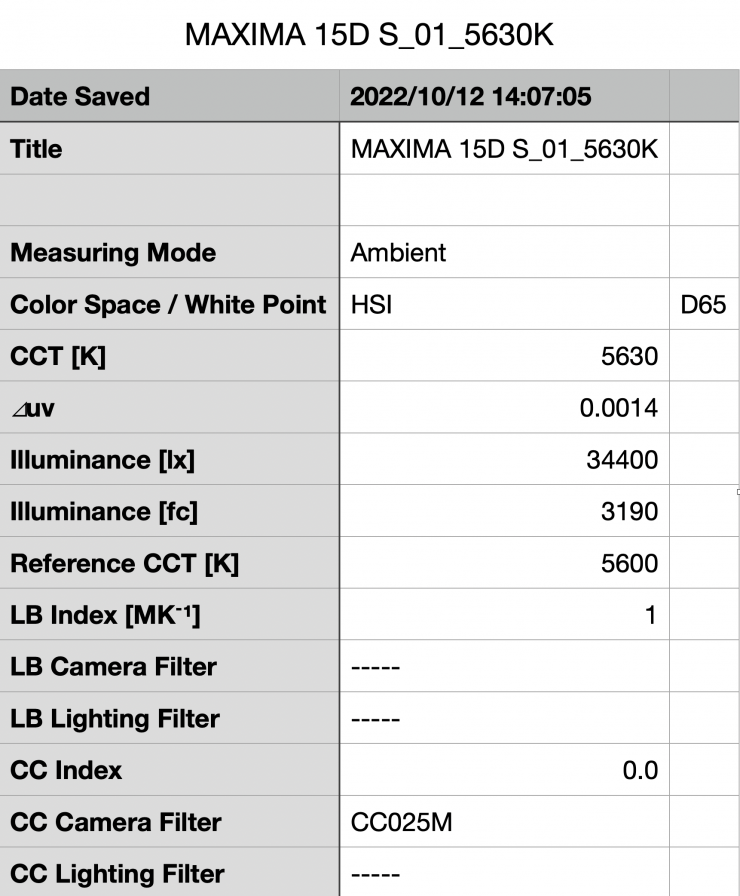
Above you can see the Maxima 3 recorded an output of 34,400 lx (3190 fc) when set at 15° and running in Silent mode at a distance of 1m /3.3′. The figure of 34,400 lx was way less than the 94,200 lx quoted by Maxima. Again, this discrepancy is because the manufacturer measured the output distance from the COB element and not from the end of the fresnel.
If I took a measurement 1m from the COB element like the manufacturer I got a figure of 68,300 lx. This was still well below the claimed figure of 94,200 lx.
As another test, I measured the light at a distance of 3m from the COB element and I got a figure of 9,580 lx, which was lower than the claimed figure of 11,400 lx, but only by around 16%.
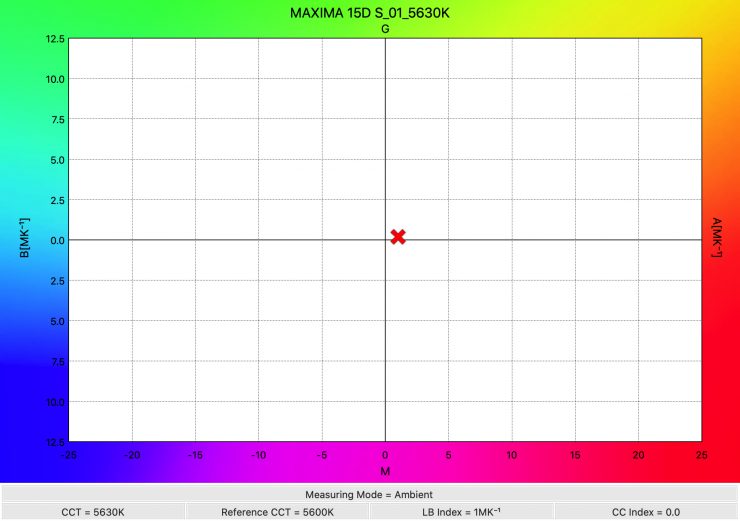
The light recorded a CCT reading of 5630K which was excellent.
60° Silent Mode
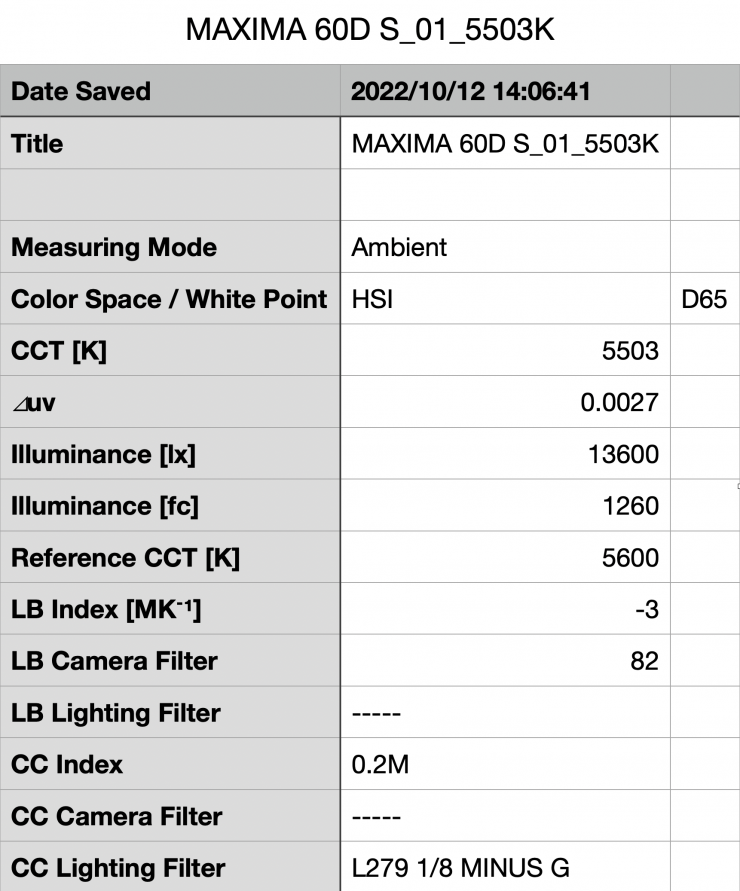
Above you can see the light’s output when it was set at 60° and used in its Silent mode. It produced 13,600 lx (1260 fc), which was 60.4% less than the 34,400 lx it produced when used at 15°.
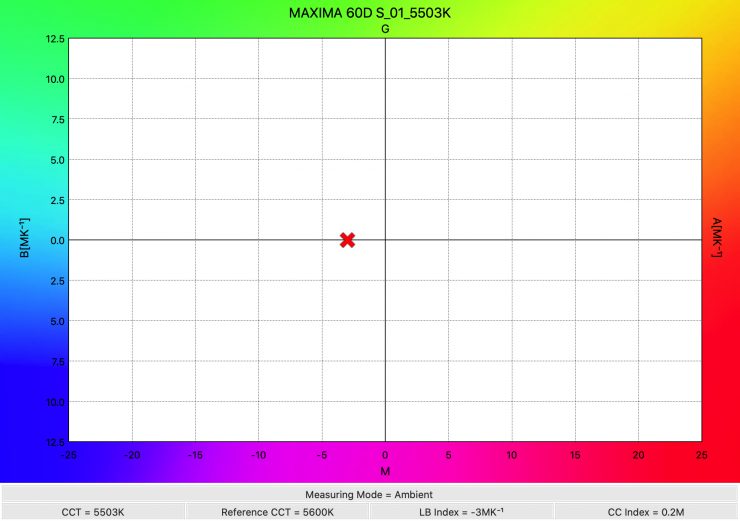
As far as CCT accuracy goes, it recorded a reading of 5503K.
15° Regular Mode
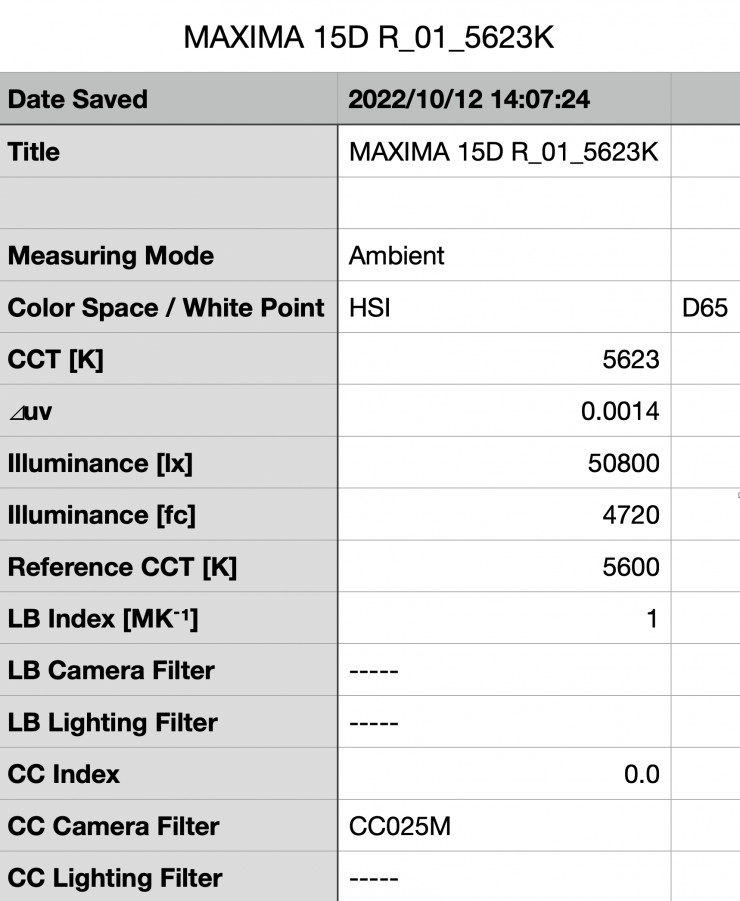
Above you can see the light’s output when it was set at 15° and set in its Regular mode. It produced 50,800 lx (4720 fc), which was 47.75% more than its output when in the Silent mode.
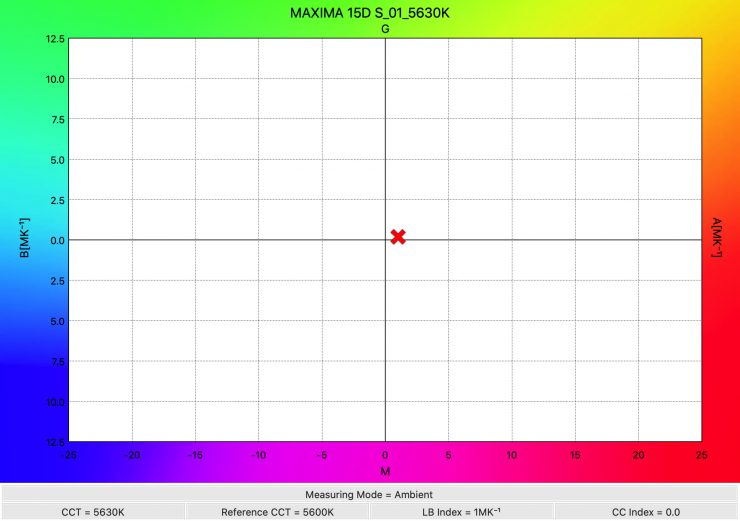
As far as CCT color temperature accuracy goes, it recorded a very accurate reading of 5623K. This tells me that the Regular mode doesn’t alter the CCT in any way.
60° Regular Mode
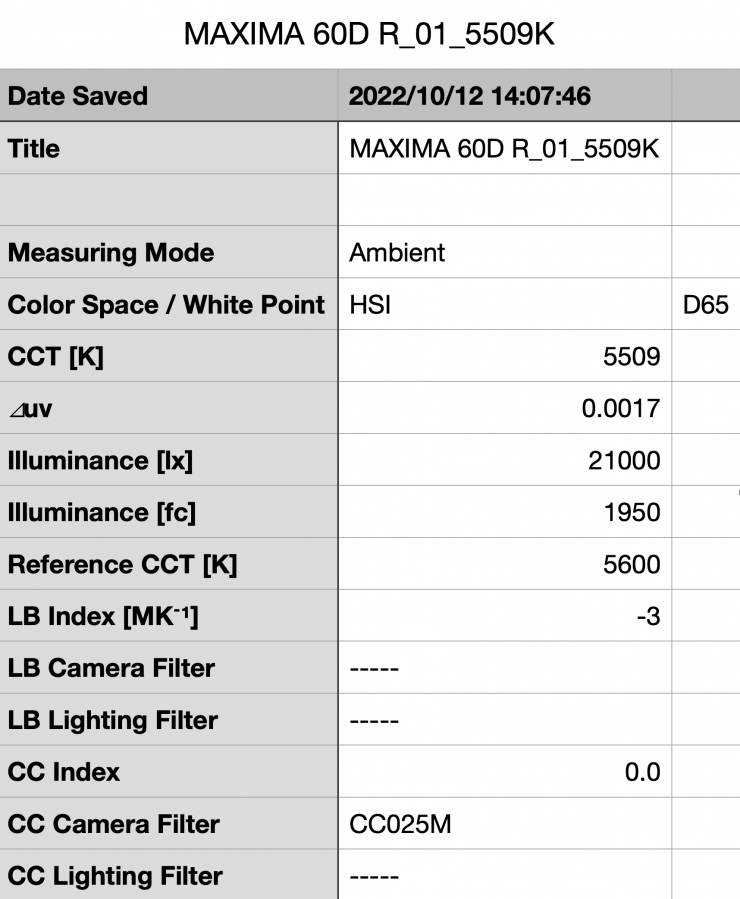
Above you can see that when the fixture was set at 60° and used in its Regular mode it recorded an output of 21,000lx (1950fc). This was 54.4% more than its output in Silent mode.
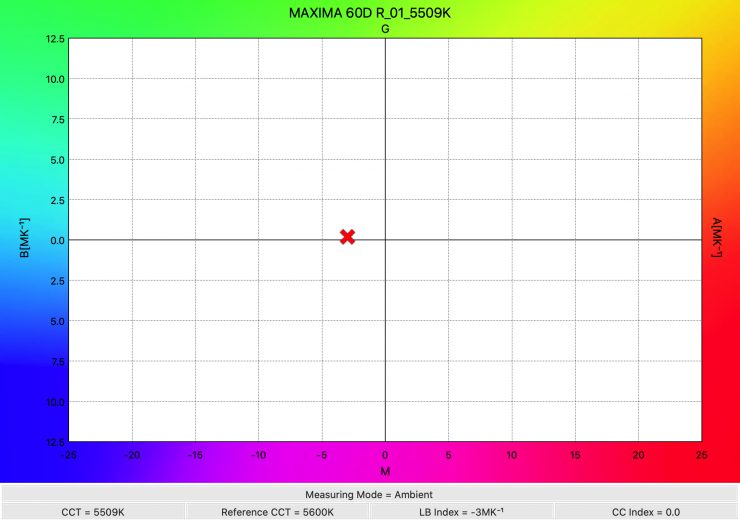
As far as its CCT reading was concerned, it recorded 5509K which was basically identical to what it recorded in Silent mode.
15° Boost Mode
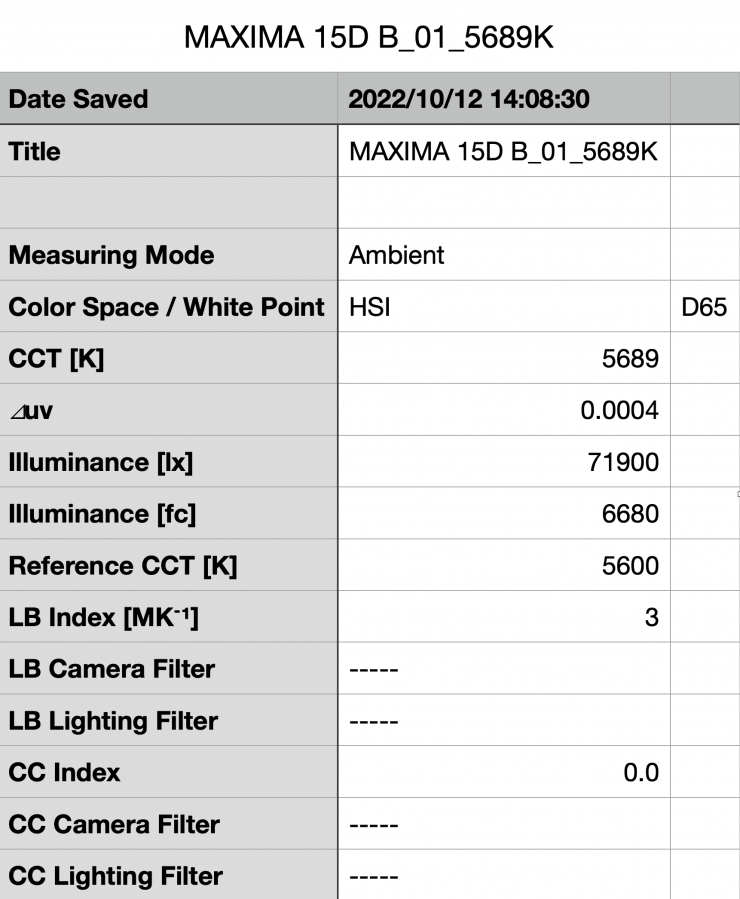
Above you can see the light’s output when it was set at 15° and used in its Boost mode. It produced 71,900 lx (6680 fc), which was 41.5% more than it output in Regular mode.
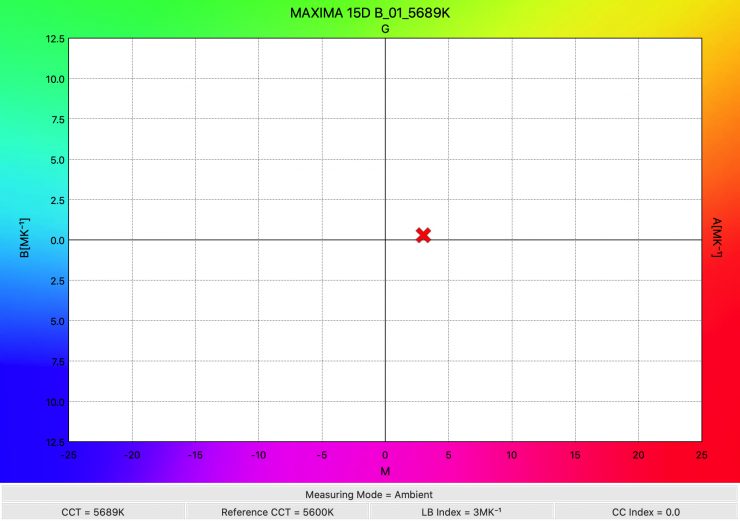
As far as CCT color temperature accuracy goes, it recorded a pretty accurate reading of 5689K. This tells me that the Boost mode does slightly alter the CCT reading, but not by much.
60° Boost Mode
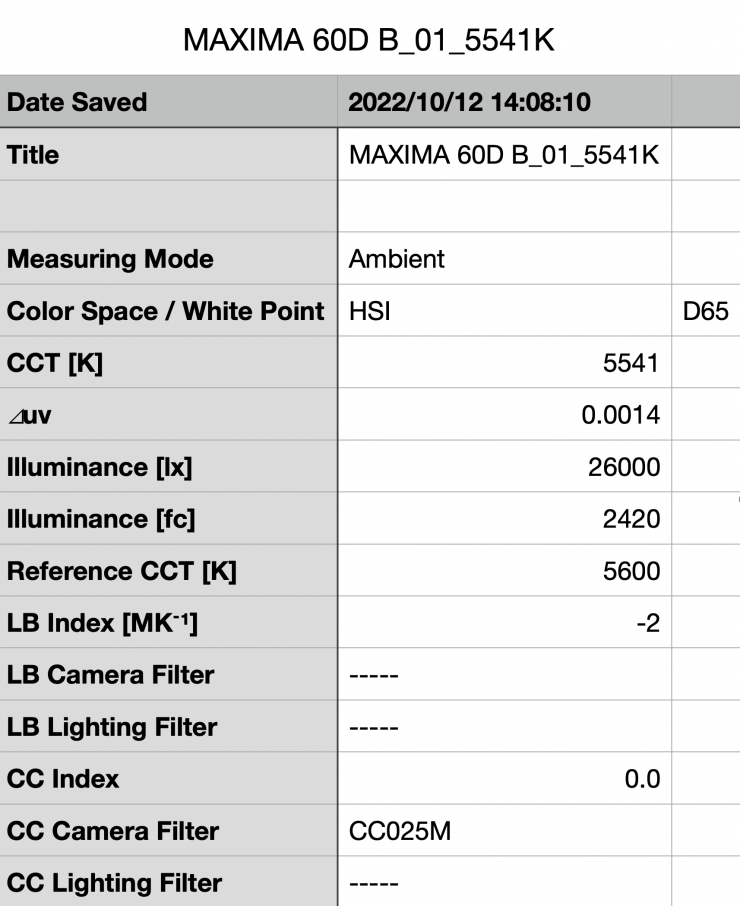
Above you can see the light’s output when it was set at 60° and used in its Boost mode. It produced 26,000 lx (2420 fc), which was 28.3% more than it output in Regular mode.
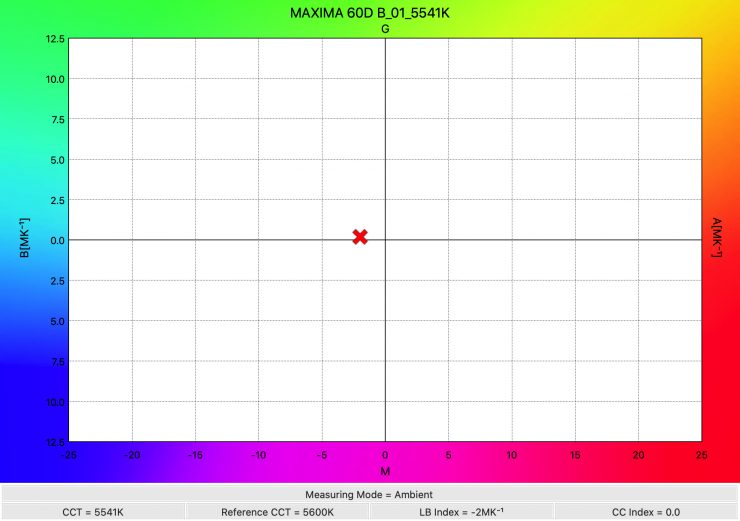
As far as CCT color temperature accuracy goes, it recorded a pretty accurate reading of 5541K.
Summary
So let’s table up those results so you can compare them all in one place.
| OUTPUT | CCT | |
| 15° Silent Mode | 34,400lx | 5630K |
| 60° Silent Mode | 13,600lx | 5503K |
| 15° Regular Mode | 50,800lx | 5623K |
| 60° Regular Mode | 21,000lx | 5509K |
| 15° Boost Mode | 71,900lx | 5689K |
| 60° Boost Mode | 26,000lx | 5541K |
How much output does it have when using a softbox?
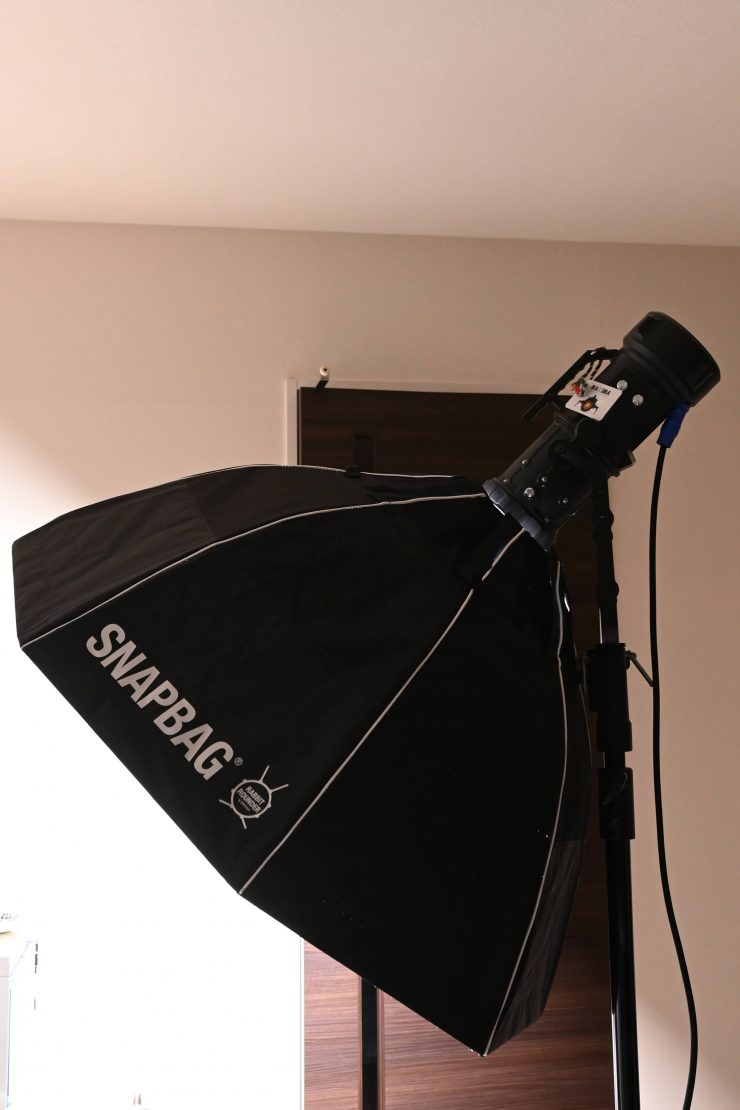
With versatile spotlights such as the Maxima 3, you are commonly going to be using the light with the Fresnel or with a softbox. I wanted to test the Maxima 3 out with a DoPchoice Rabbit Rounder Octa 2 softbox to see how much output the light had when set in Silent/Regular/Boost modes at 100% output. All measurements were taken 1m from the softbox.
Silent Mode
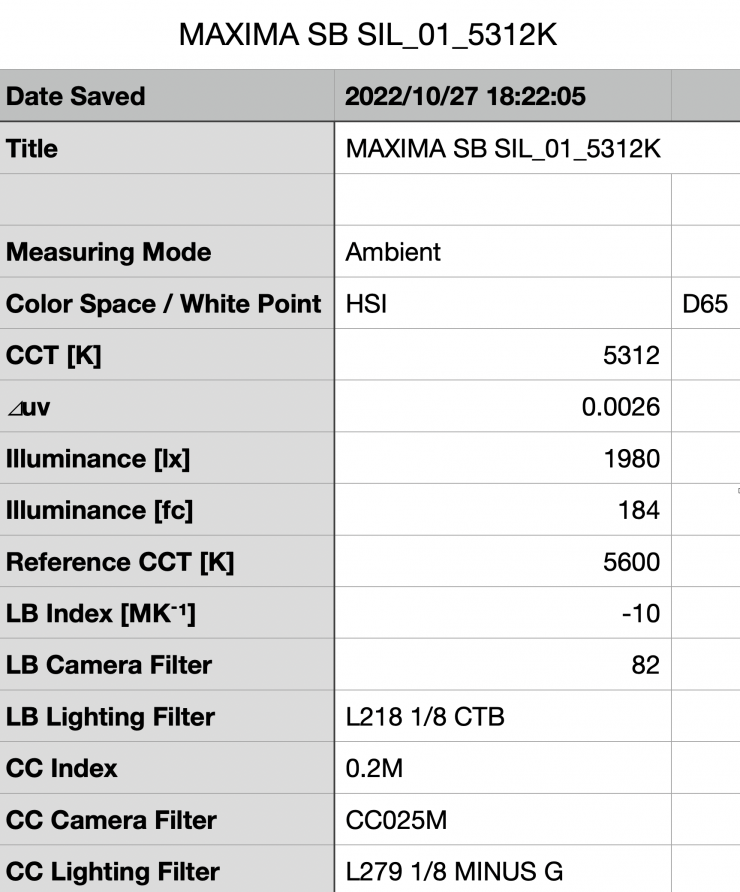
In Silent mode, the light recorded an output of 1980 lx (184 fc).
Regular mode
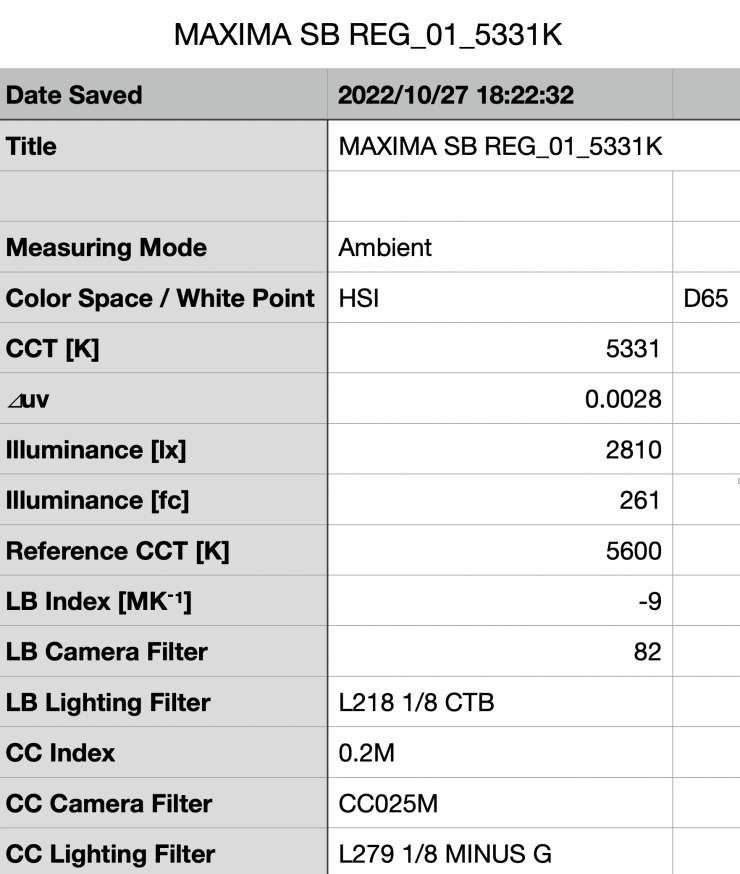
In Silent mode, the light recorded an output of 2810 lx (261 fc).
Boost mode
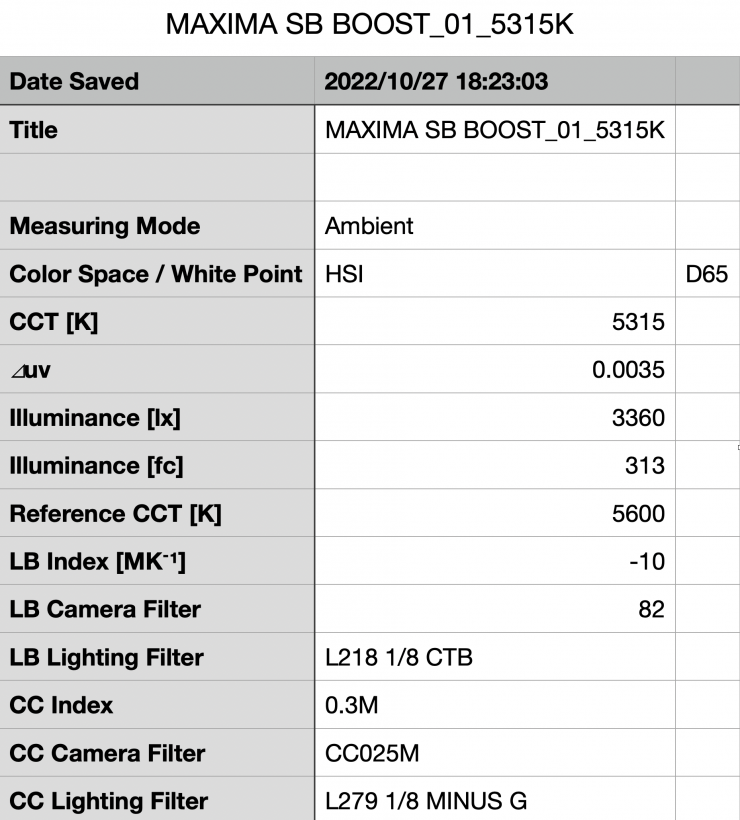
In Boost mode, the light recorded an output of 3360 lx (313 fc).
What about if you start dimming the light down?
Nobody uses a light at 100% output every time they turn it on. It is important to test the CCT accuracy of a light when it is used at reduced outputs. It was hard to do any sort of accurate testing with the Maxima 3 because I had no way of working out what output level I was setting. All I could do was to get a reading with the output turned all the way up and then another reading with it dialed way down. All I was looking at here was if the CCT value changed when dimming the light down.
| CCT | |
| 100% Output Regular Mode | 5509K |
| 10% Output Regular Mode | 5517K |
What this tells me is that the CCT reading does not change in any noticeable way. It is basically identical regardless of whether you use the light at 100% output or 1%.
How does this output compare to some other fixtures we have reviewed?
This is a hard one to judge because the Maxima 30 comes with a Fresnel. So what I did is I took the reflector that comes with the Prolycht Orion 300 FS and put it on the Maxima 3 to get a reading. All of the other fixtures were using their standard 55/60 degree reflectors.
| OUTPUT @1m | |
| Maxima 3 Boost mode | 40,400lx |
| Maxima Regular mode | 32,400lx |
| ARRI Orbiter | 21,000lx |
| Aputure LightStorm LS 300d II Pro | 45,600lx |
| Prolycht Orion 300 FS | 25,900lx |
What you need to remember is that the reflector that comes with the Aputure LightStorm LS 300d II Pro has a massive hotspot, so the figures are a bit deceiving.
Color Rendering
So now that we have seen how much output the Maxima 3 produces, how does it perform when it comes to replicating accurate color?
60° Silent Mode
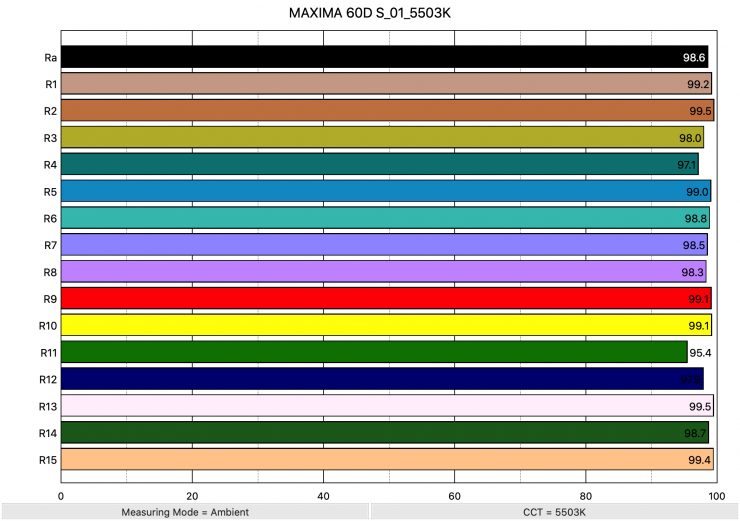
Above you can see that when the light was in its Silent Mode and set at 60° it recorded an average CRI (R1-R8) of 98.6 and an extended CRI (R1-R15) of 98.5. For replicating accurate skin tones it recorded 99.1 for R9 (red), 99.5 for R13 (closest to caucasian skin tones), and 99.4 for R15 (closest to Asian skin tones).
These are outstanding results and they are the best results I have ever seen from a LED spotlight period. Every Ra value was above 95 and the lowest score was 95.4. The extended CRI (R1-R15) of 98.5 was the highest score I have ever recorded from any light. This light is exceptionally accurate and the color rendering scores set a new benchmark.
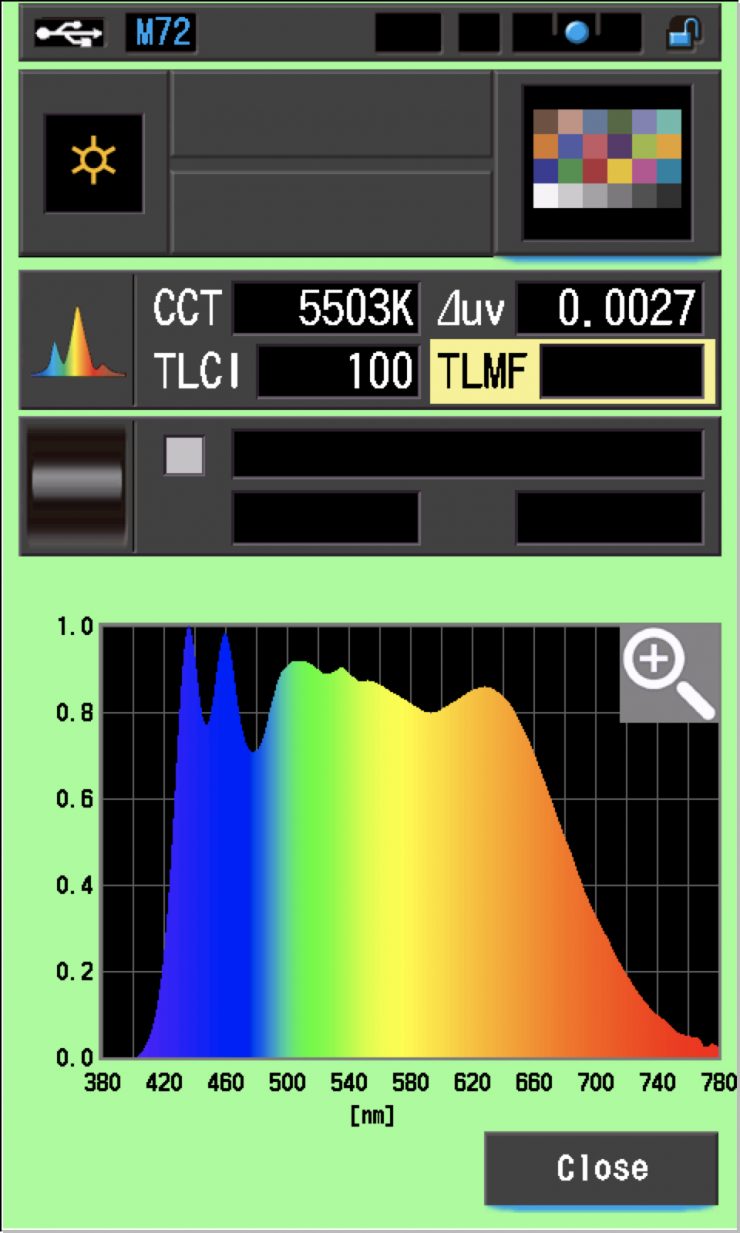
The light, when set at 5600K, recorded a perfect TLCI score of 100. This is the first light I have ever tested to receive a perfect score.
60° Boost Mode
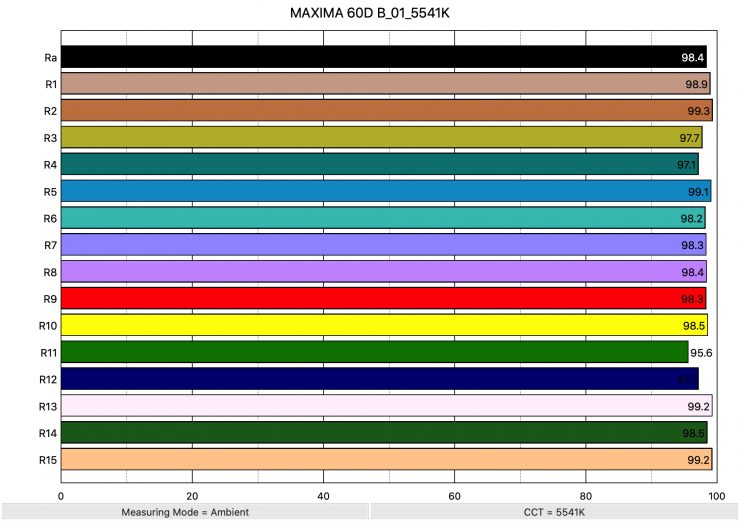
Ok, so we have seen how good the color rendering scores are when the light is run in its Silent mode, but how does it perform in the Boost mode? Above you can see that when the light was in its Boost Mode and set at 60° it recorded an average CRI (R1-R8) of 98.4 and an extended CRI (R1-R15) of 98.22. For replicating accurate skin tones it recorded 98.3 for R9 (red), 99.2 for R13 (closest to caucasian skin tones), and 99.2 for R15 (closest to Asian skin tones).
These results were pretty close to being identical to when the light is used in its Silent mode. This tells me that the light still remains exceptionally color accurate no matter what mode you are running it in.
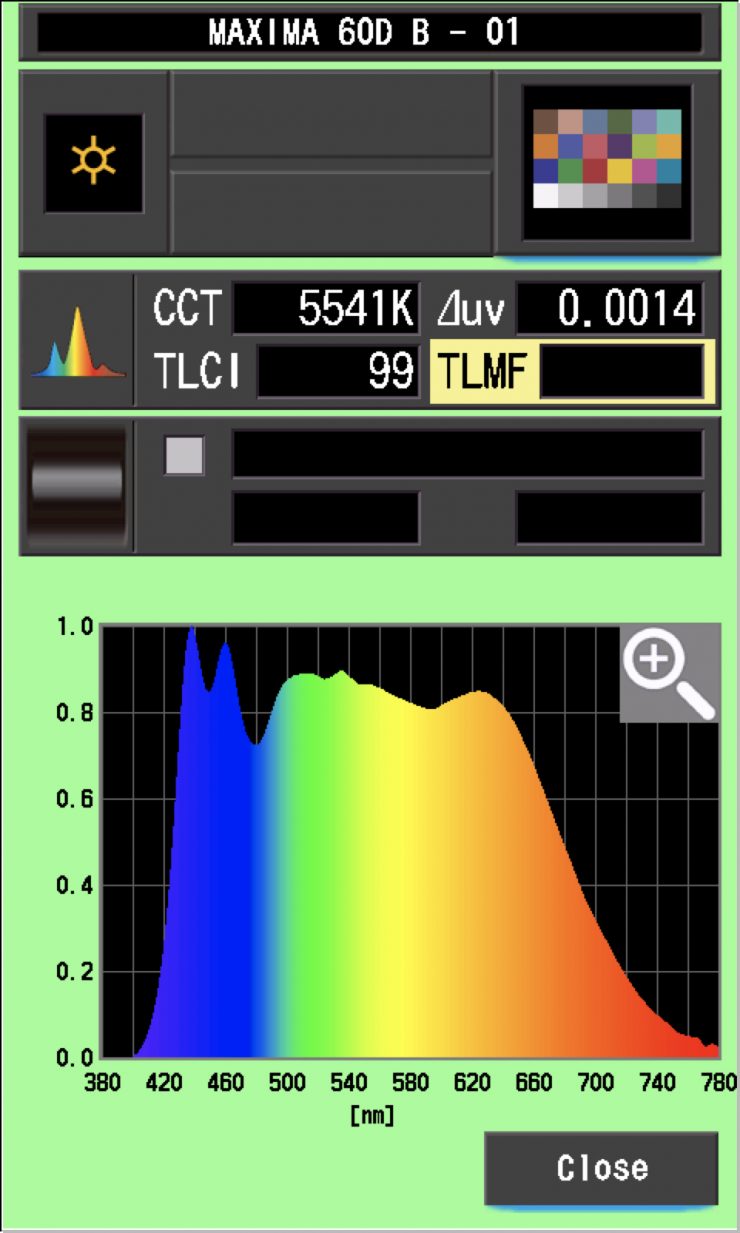
The light, when used in Boost mode, recorded a TLCI score of 99.
So how do these results compare to something like a Prolycht Orion 300 FS, Aputure LightStorm LS 300d Pro, and the ARRI Orbiter?
| EXTENDED CRI | R9 | R13 | R15 | |
| Maxima 3 | 98.5 | 99.1 | 99.5 | 99.4 |
| ARRI Orbiter | 98.1 | 86.3 | 98.9 | 97.4 |
| Aputure LightStorm LS 300d Pro | 95.64 | 72 | 92.8 | 87.7 |
| Prolycht Orion 300 FS | 96.06 | 93.2 | 98.7 | 99.5 |
Above you can see that the Maxima 3 outperforms all of these lights when it comes to color rendering, however, the scores from ARRI and Prolycht are also very good.
CC Index & ⊿uv
The CC Index displays the CC correction value and whether any magenta or green need to be added or subtracted. 1 CC corresponds to 035 Kodak CC values or 1/8 Rosco filter values. Any reading less than +1.00 or -1.00 and you’re probably not going to need to make any kind of adjustment. The ⊿uv is the value to show how much this light is away from being an ideal light source (black body radiation = incandescent lamp). As with the CC Index you want this number to theoretically be zero. Kelvin is not a linear value, so we need to convert from Kelvin to MK-1 to compare the values of color temperature. To calculate from Kelvin to Mired is MK-1= 1*1000000/Kelvin. While this may sound confusing, it is the only way of measuring if the Kelvin shift is significant enough to warrant having to use a filter for correction. Below are the results for the Maxima 3 when using the Regular Mode.
Kelvin Vs MK-1
| Kelvin | Difference in K | MK-1 | Difference in MK-1 | |
| SET VALUE | 5600K | 0 | 178.57 | 0 |
| ACTUAL READING | 5618K | 18 | 177.99 | -0.58 MK-1 |
These figures might look confusing, but what it tells me is that the light is extremely CCT accurate. Any MK-1 score that is under -9/9 means you wouldn’t have to use any color correction gels. The MK-1 scores for this light were exceptionally good.
CC INDEX & ⊿uv
| CC INDEX | ⊿uv | |
| 5600K | 0.0 | 0.0017 |
Again, these scores are exceptionally good. The consistency of the Maxima 3 is certainly what makes it stand out from a lot of other lights.
TM-30
TM-30 is a relatively new color rendering standard that was developed to deal with the limitations of CRI. TM-30 looks at 99 individual colors. These 99 colors are categorized into seven groups: nature, skin color, textiles, paints, plastics, printed material, and color systems.
TM-30 scores go from 0 – 100. The higher the score, the more accurate a light is at producing colors. Any TM-30 Rf score in the ’90s is considered to be good. What is interesting and something that you need to be very aware of is that two separate light sources with the exact same CRI scores can render colors very differently. A light with a high CRI rating could have a low TM-30 score. Conversely, a light with a good TM-30 score could have a bad CRI score.
Now, there are two measurements associated with TM-30, Rf and Rg.
Rf (Color Fidelity)
Rg (Color Gamut)
With Rf value, ideally, you want a score in the 90’s.
With Rg value, a score below 100 indicates that the light source renders colors with less saturation than the reference source. So ideally you want this score to be above 100.
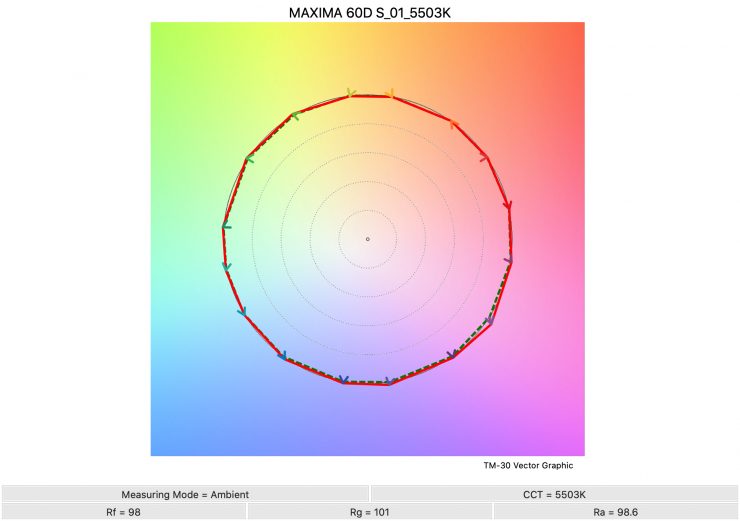
Silent Mode 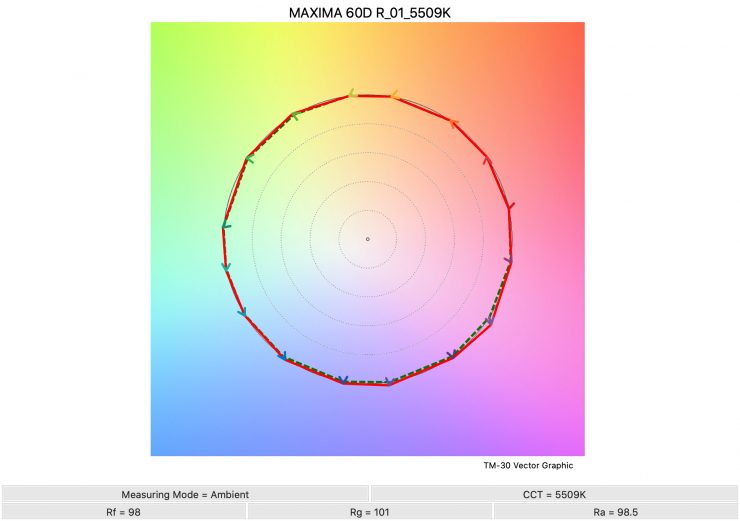
Regular Mode 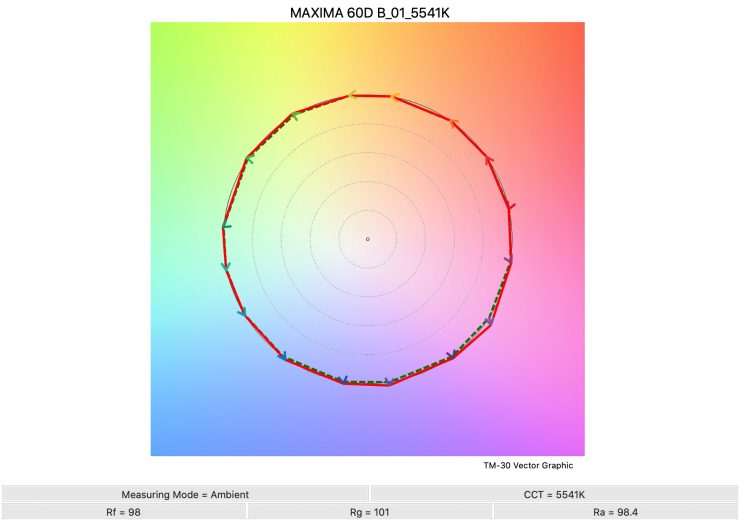
Boost Mode
Above you can see the scores for Maxima 3. Below I have listed the figures as well.
| Rf | Rg | |
| Suilent Mode | 98 | 101 |
| Regular Mode | 98 | 101 |
| Boost Mode | 98 | 101 |
The TM-30 scores are all good and it shows me that the light is very consistent at replicating accurate color with full saturation.
SSI
SSI (Spectral Similarity Index) was developed by the Sci-Tech Council of the Academy. SSI gives me the ability to set any light as a standard, or use predefined standards (such as CIE D55), and then give other lights an SSI score based on how well they will match standards such as CIE D55. This way I can measure spectral response and compare it directly against an ideal light source. This is actually a much better test than recording CRI scores.
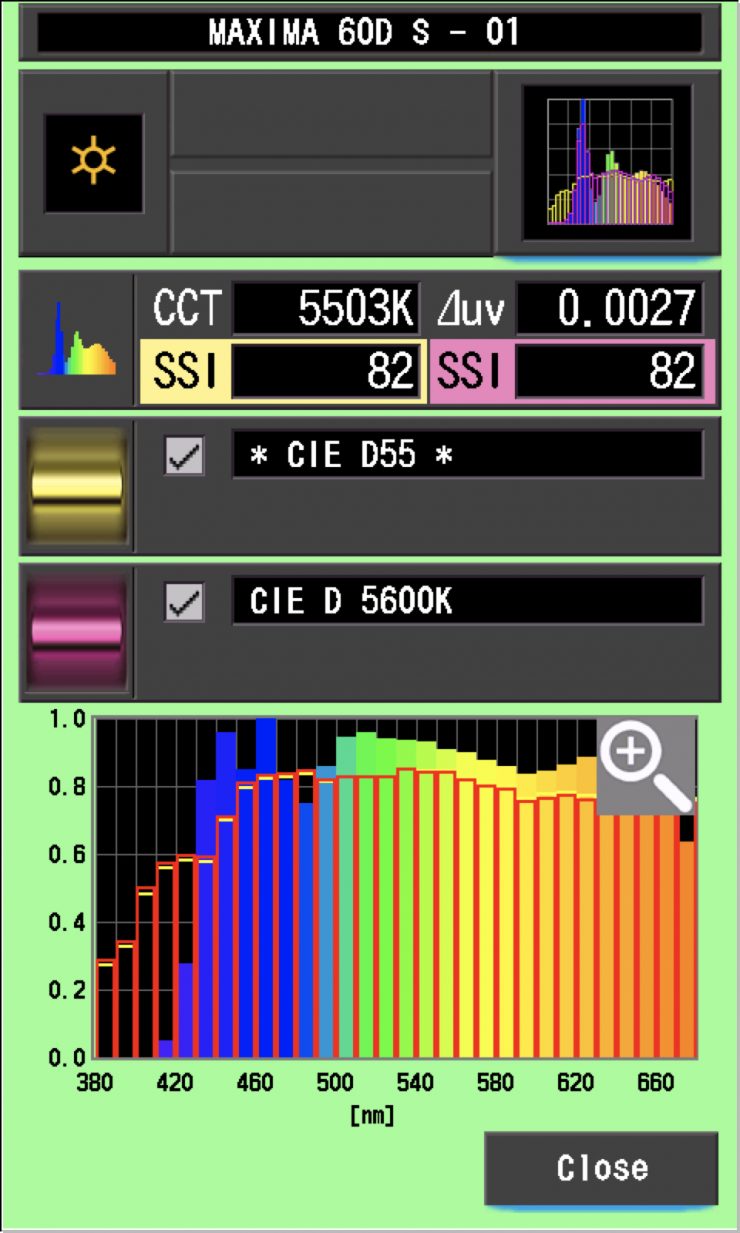
In the graph above the gold bars indicate a perfect CIE D55 source. The red bars indicate a perfect CIE D 5600K source. This lets us compare how close to a perfect 5600K lighting source the Maxima 3 is. A score in the low 70’s is typical for a 5600K LED source. A score in the 80s is outstanding. While 82 is a good score, the highest SSI scores I have ever recorded were with the ZOLAR 1×1 panels which recorded SSI scores of 90.
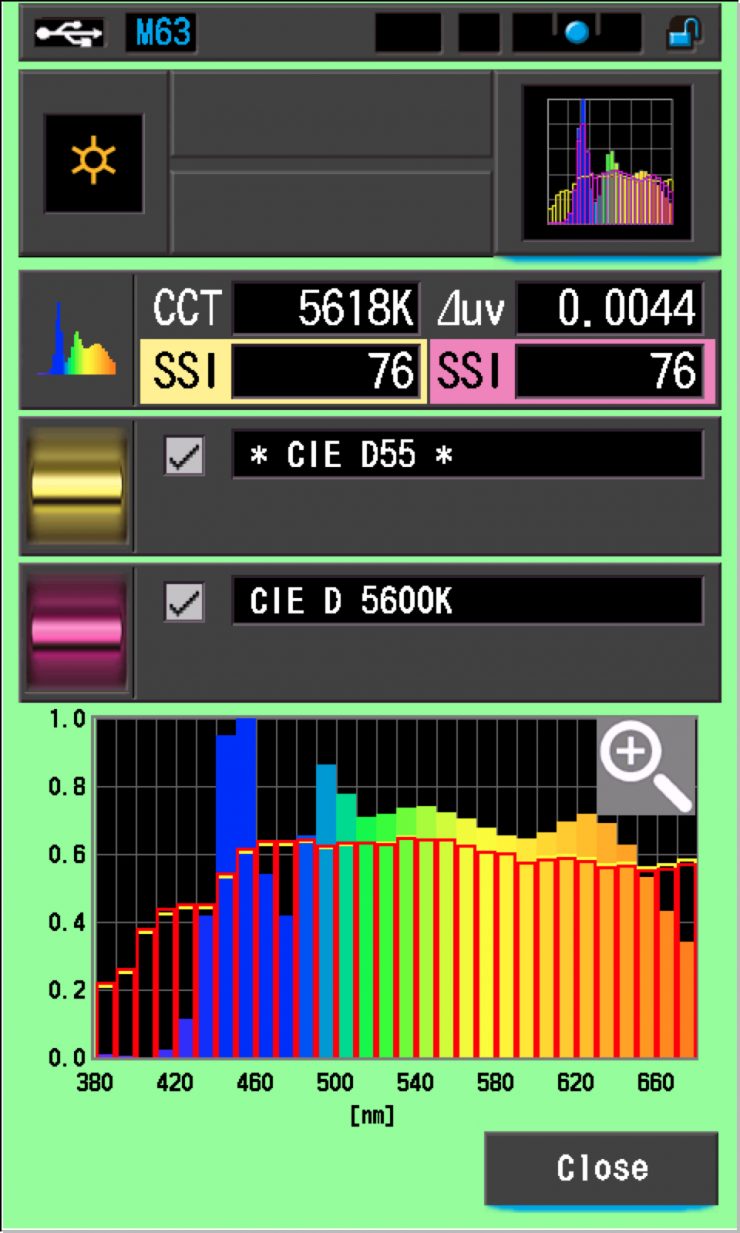
As a comparison, above is the SSI score for the ARRI Orbiter.
The main reason we want to record SSI scores is so we can see how well they match with other lights. As an example, I wanted to see how well the Maxima 3 matched the Z CAM Zolar V30-C and the ARRI Orbiter. Below you can see the results.
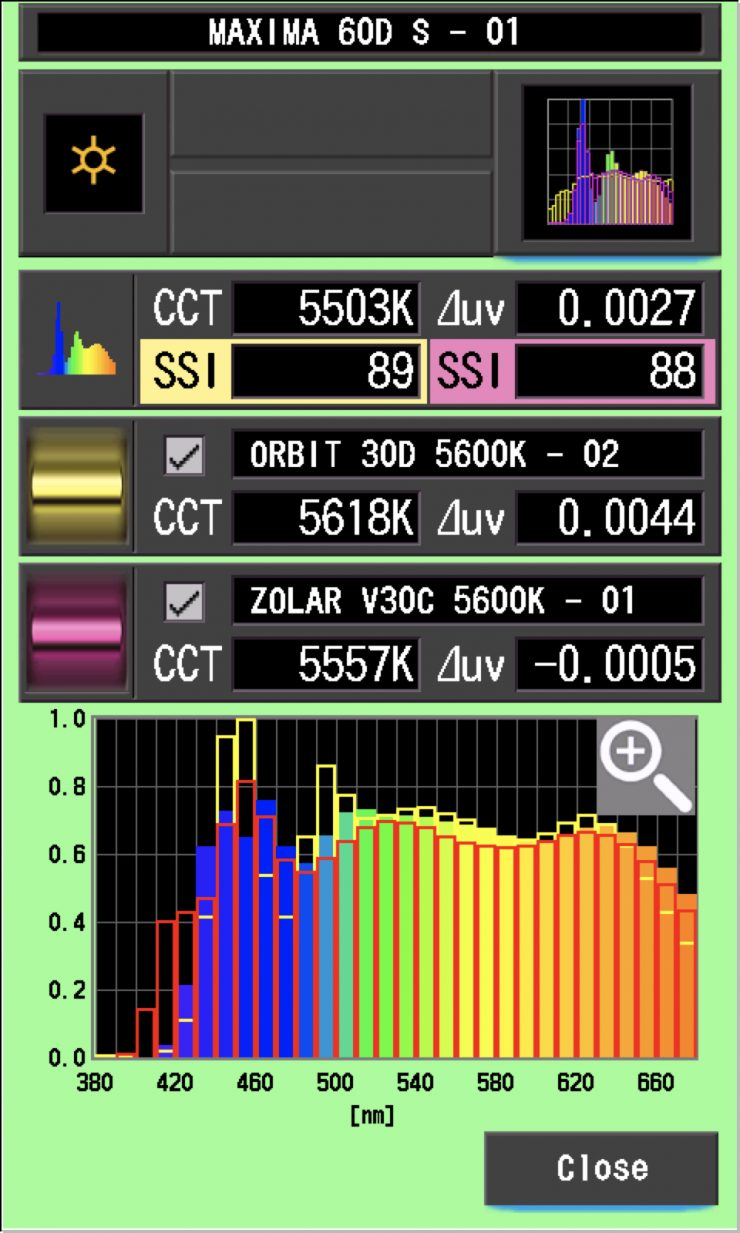
As you can see neither lights are a perfect match to the Maxima 3, but they are reasonably close.
As another test, I thought I would compare the Maxima 3 against the Nanlite Forza 720B and the Aputure LS 600c Pro.
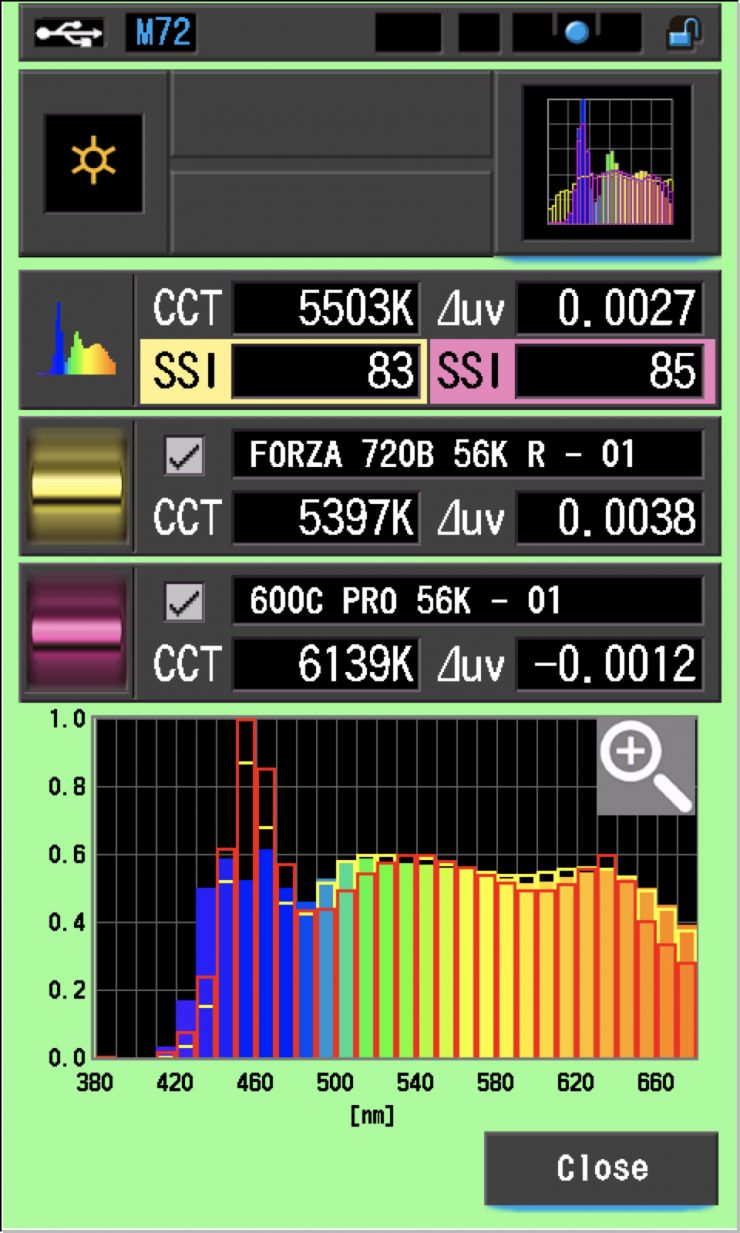
As you can see, neither the Aputure or the Forza were a good match. In saying that, very few lights from different manufacturers are ever going to be an exact match. The problem with having a light that has very good color rendering scores is that it isn’t going to match a lot of other lights.
SSI tests are a great way of telling you what lights you own or use will work well together.
Spectral Distribution
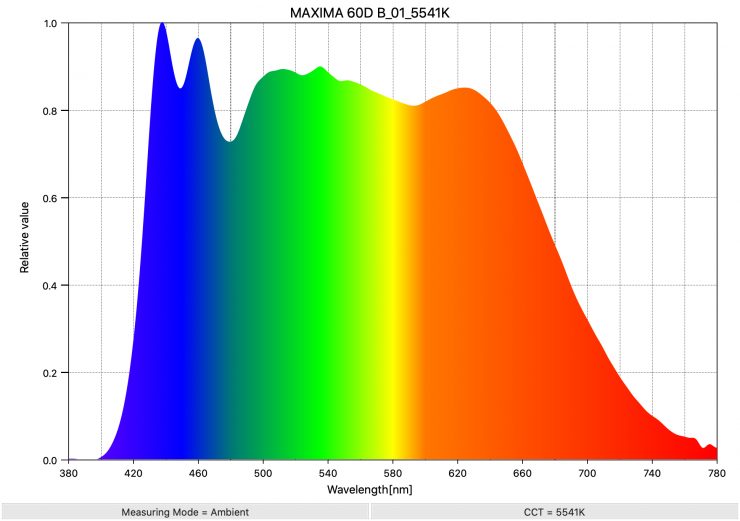
Above you can see the spectral distribution of the Maxima 3. The spectral distribution is extremely full, and there aren’t any large spikes.
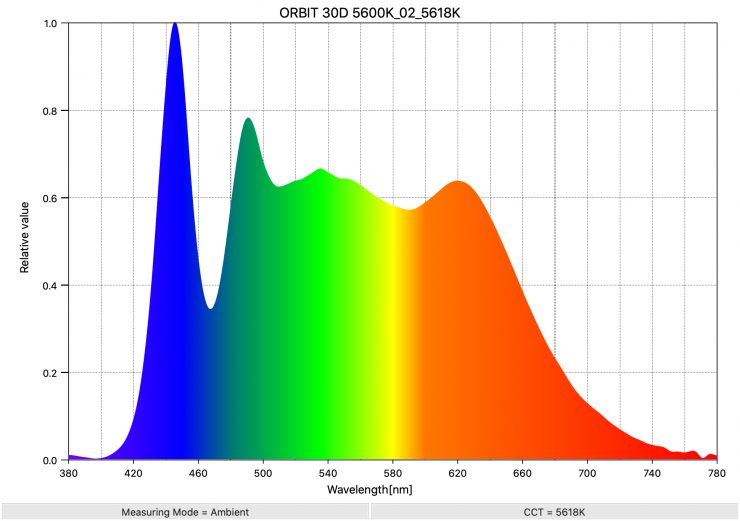
As a comparison, above you can see the spectral distribution of the ARRI Orbiter when it is set at 5600K. The spectral distribution is reasonably full, but you can see a green spike.
Real-World Performance, Usability & Quality of Light
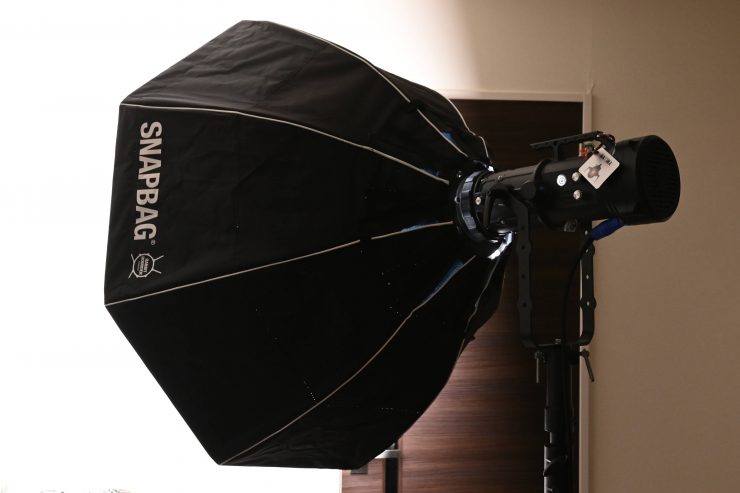
As I always say, photometric scores only tell you part of the story. So let’s find out if the scores from the Maxima 3 translate into good real-world performance.
The quality of the light that is coming from the Maxima 3 is really nice, but like any fixture, how you use it is more important than what it can do.
What I also love about the Maxima 3 is that almost every operation can be done with a single hand. The light has been well thought out and designed and it is super easy to use.
The ease of use that this fixture offers is impressive. Because it has been well thought out, nothing is overly complicated and it doesn’t take long to set up the light or put it away once you are done. Having everything fit into a single case is also a nice touch.
The light certainly has enough punch to work well for interviews, lighting up small to medium-sized rooms, etc., and creating a nice hard directional source when using the Fresnel. The versatility of being able to use the light as a hard or soft source is what makes spotlights such a popular option for owner/operators.
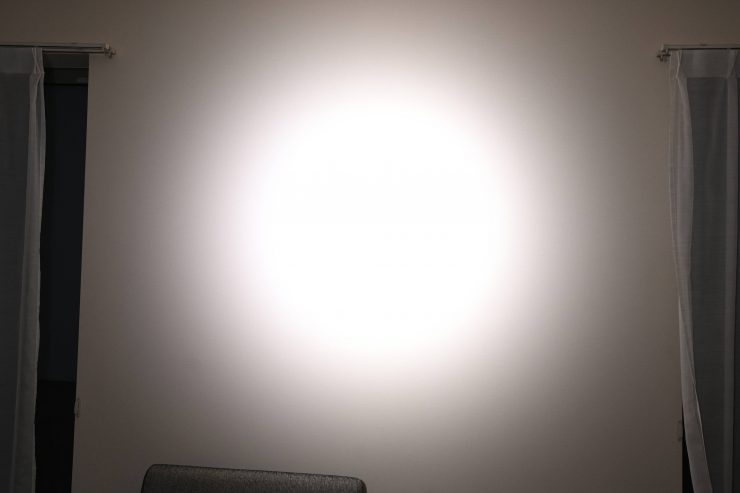
Above you can see that there is a small hotspot when you use the Maxima 3 with a DoPchoice Rabbit Rounder Octa 3, however, I found that it filled out the softbox relatively well.
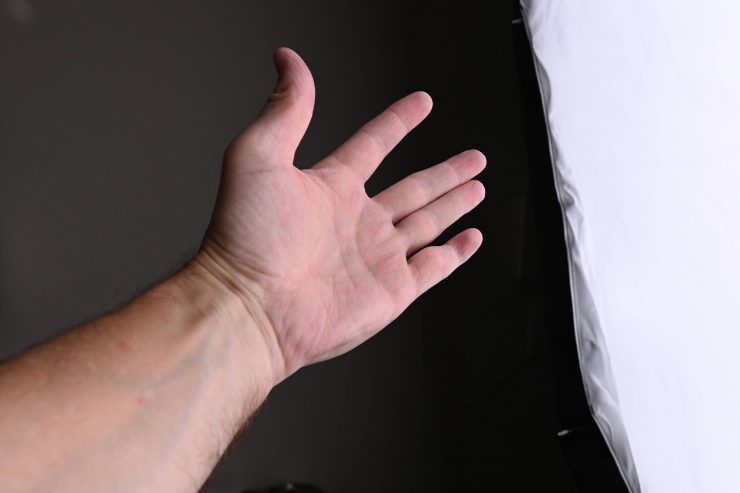
In combination with a large softbox, the Maxima 3 is very capable of creating a nice wrapping soft lighting source.
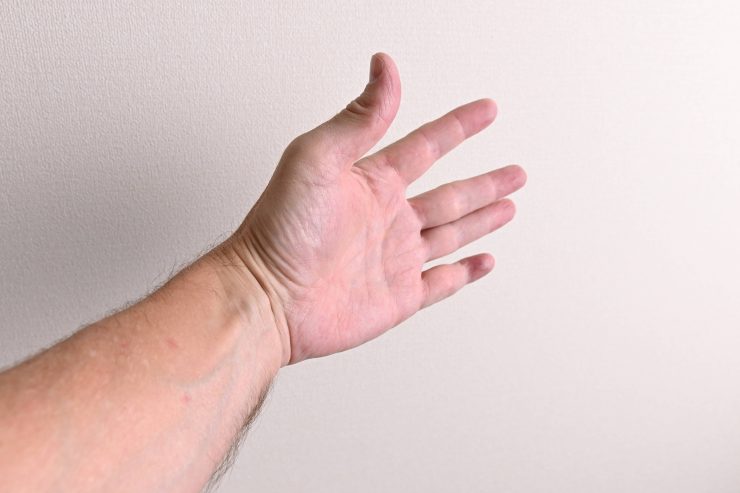
With a DoPchoice Octa 3 softbox, you can create nice soft light. Above you can see that even with my hand being within 10cm of the wall behind me there are very soft shadows being created.
I did find that with the Fresnel set at 15° you will get a slight hot spot. There is also some slight color fringing on the edges.
15° Regular Mode
| DISTANCE FROM CENTER | OUTPUT READING `@3m |
| Center | 16,500lx |
| 15cm | 14,700lx |
| 30cm | 8,410lx |
| 1m | 232lx |
Above you can see measurements I took at a distance of 3m with the Fresnel set at 15°.
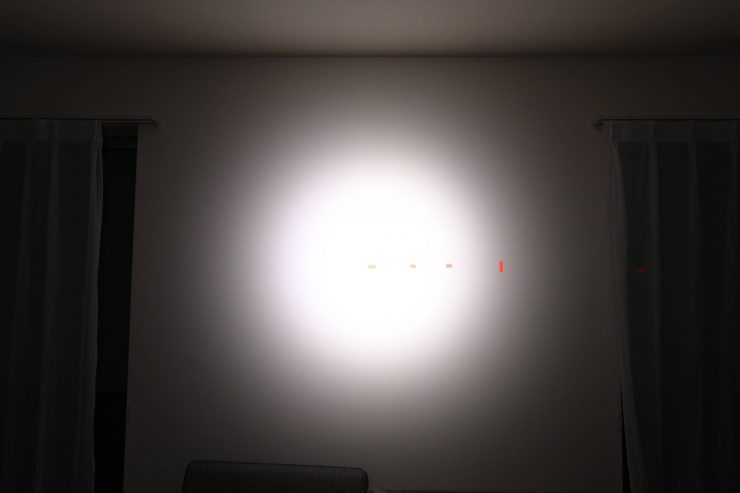
Here I wanted to see how linear the fall off was as you move out from the center of the beam. As you can see from the data, there is a definite hotspot in the middle. 30cm from the center, the output falls by 49%.
60° Regular Mode
| DISTANCE FROM CENTER | OUTPUT READING `@3m |
| Center | 3,650lx |
| 15cm | 3,580lx |
| 30cm | 3,450lx |
| 50cm | 3,200lx |
| 1m | 2200lx |
With the Fresnel set at 60°, there aren’t any hot spots and the fall-off is nice and gradual. At 1m from the center, the output was 39.7% less than at the center.
Who is the Maxima 3 aimed at and where does it fit in the market?
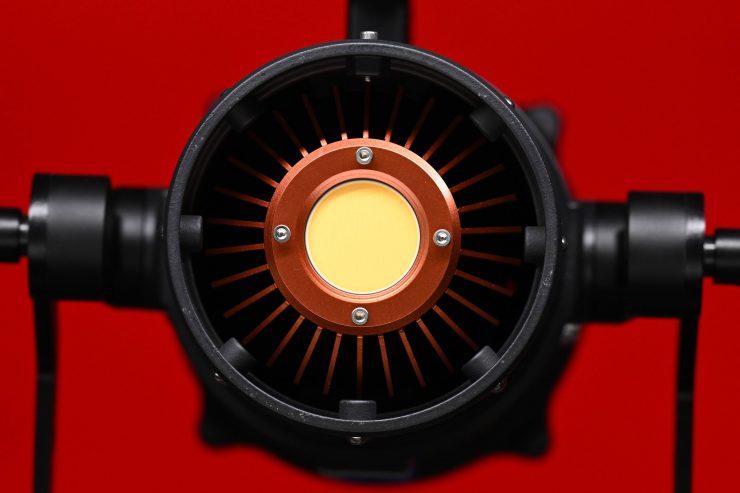
You could use the Maxima 3 for lots of different lighting applications, but the fixture is certainly being targeted as a versatile, high-output, high-quality lighting fixture for professional use in the TV and film industry.
If you are an owner-operator who is looking for a jack-of-all-trades lighting solution, would the Maxima 3 be something you should look at? The answer to that question really depends on your requirements. With its all-in-one design and compact size and weight, it does make for a good solution for owner/operators who don’t need an RGBWW or Bi-color solution.
While there is no doubt that it does a lot of things well, you could argue that similar power draw RGBWACL lights like the Prolycht 300 FS are more versatile and you can run them directly via 2 flight-safe camera batteries from the included power supply/controller. However, the Maxima 3 is better built, well thought out, and it features an all-in-one design. There really is no such thing as the perfect light.
Whenever something new comes out there are always going to be questions asked such as, “Why do I need that?” and “Does this do anything that can’t already be done with something that I already own?”
Any potential buyer of a Maxima 3 has to way up the cost, size, weight, and feature set against fixtures they may already own.
The great aspect of the Maxima 3, like most spotlights, is that it has the ability to be a hard light source, a soft source, or just about anything else you want it to be.
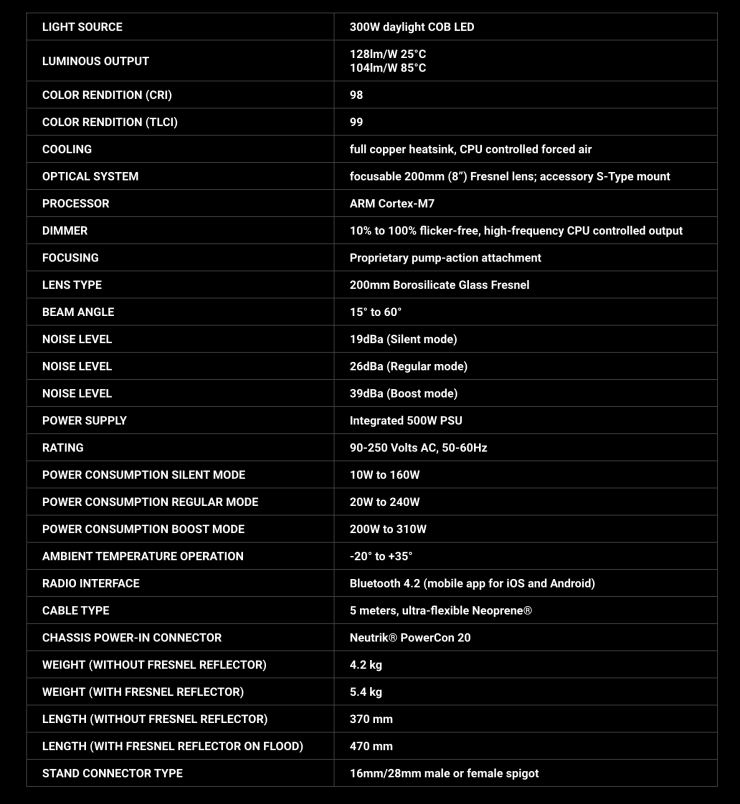
Full Specifications
Price & Availability
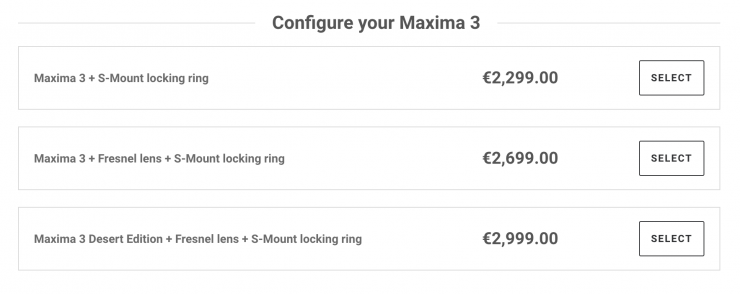
The Maxima 3 is now available for €2,299. You can also buy it with the Fresnel lens for €2,699.
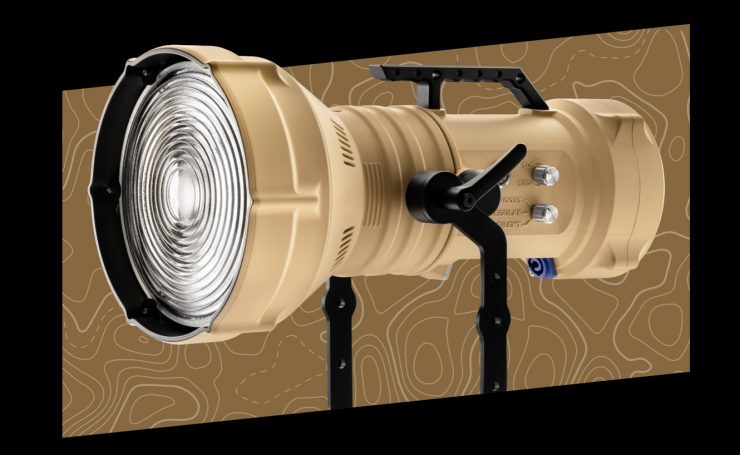
There is also a Maxima 3 Desert Edition + Fresnel lens available for €2,999.
Below you can see how the price compares to some of the competition:
| Price | |
| Maxima 3 | €2,699.00 |
| Aputure LS 300d II | $949 USD |
| ARRI Orbiter* | $6,300 USD |
| PROLYCHT Orion 300 FS | $2,150 USD |
| HIVE LIGHTING Super Hornet 575-C | $5,999 USD |
| Aputure Light Storm LS300X | $999 USD |
| Nanlite Forza 300 LED Monolight | $499 USD** |
Just to reiterate, the Maxima 3 doesn’t have a lot of the same features as the Orbiter and Orion 300 FS, LS300x, and Super Hornet 575-C.
*Please be aware that the base price doesn’t include a lot of the items you will need to get a working light.
**Currently on sale at B&H
The Maxima 3 is pretty expensive and a lot of that is due to the fact that the light is manufactured in Italy and not China. The labor costs and the materials used are not the same as what you will find in more affordable fixtures.
Conclusion
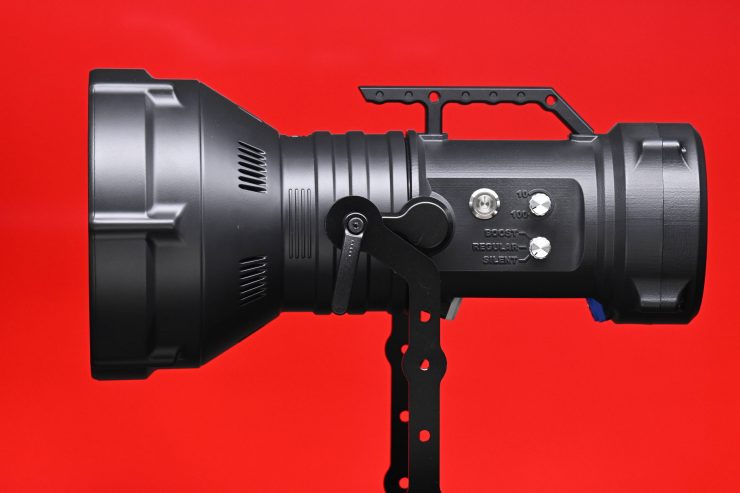
The Maxima 3, is a well-made, well-thought-out fixture with exceptionally good color accuracy, and a decent amount of output. I like the all-in-one design and the attention to detail.
The fixture produces a really nice quality of light and I like how quickly you can go from using the Fresnel to a softbox.
The interface and operating system are fairly straightforward and easy to use, and in that regard, it is a quick fixture to set up. The app is easy enough to use, but it could be improved upon.
The only real downside to the light is probably the noise it makes in Boost mode. This does limit the usability of the light and its output when working in environments where sound needs to be recorded. This is the caveat to having an all-in-one design and not using a separate power supply/controller.
Yes, the light is expensive, but it is going to be a fixture you could perceivably use for many, many years. It is built like a tank and it is going to stand up to the rigors of field use.
This is not a light for everyone and it is aimed at a specific audience. The same person looking at a Maxima 3 isn’t going to be the same person looking at a lower-cost COB spotlight. For those who value color accuracy, build quality, and attention to detail, and are looking for something that is unique, the Maxima 3 ticks a lot of boxes.
The Maxima 3 really impressed me and it does a lot of things really well. It is not perfect, but no light is.

