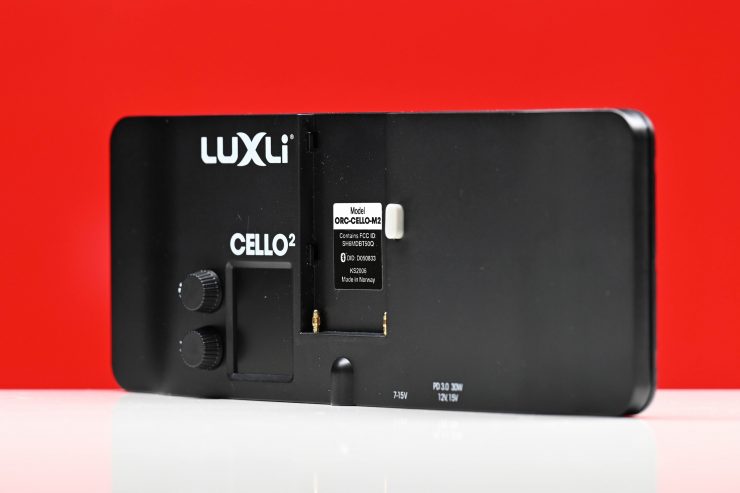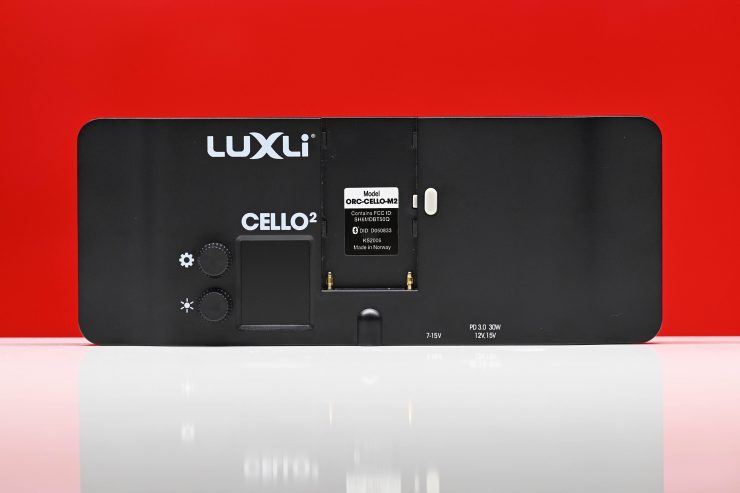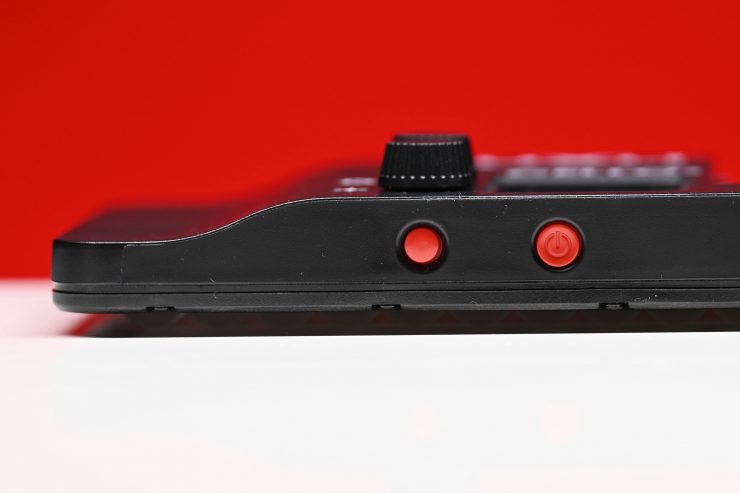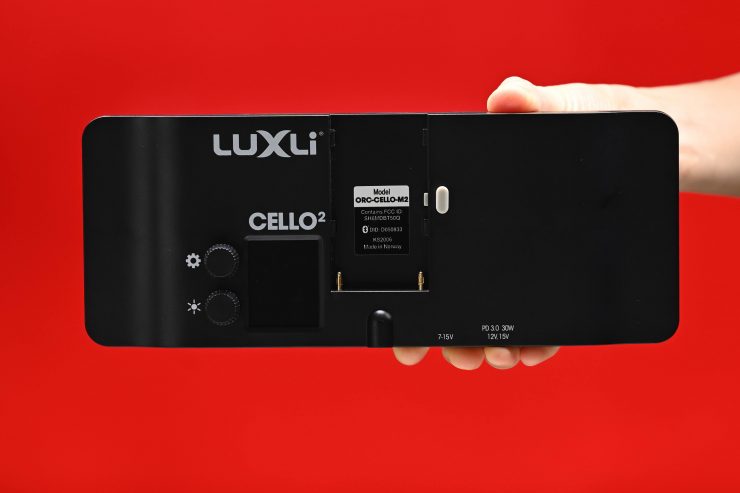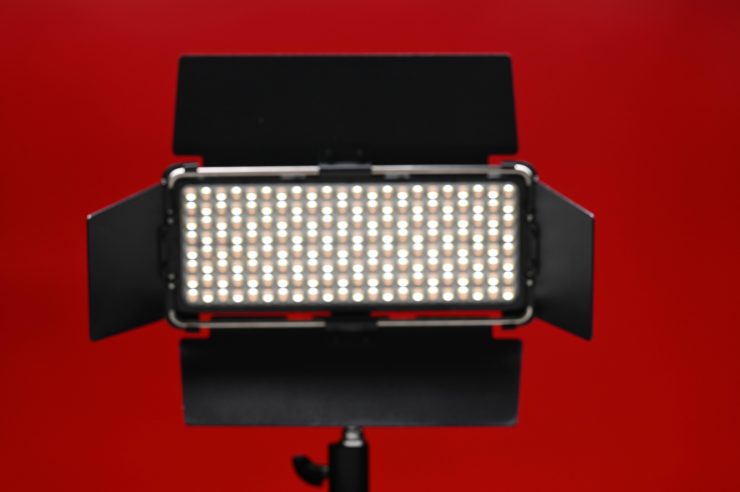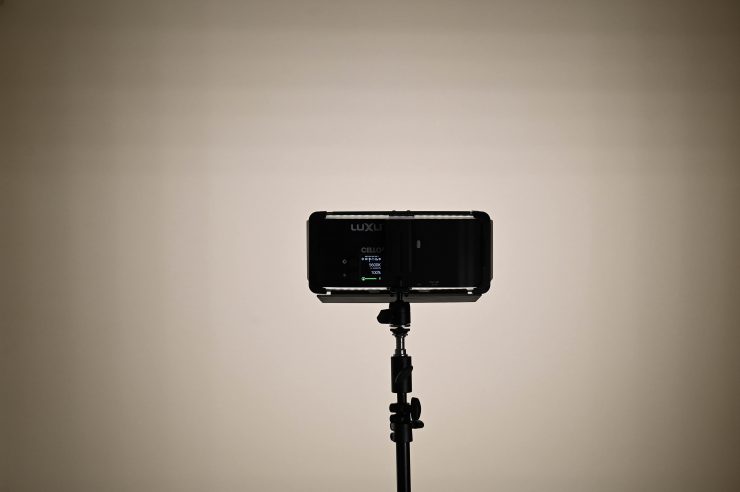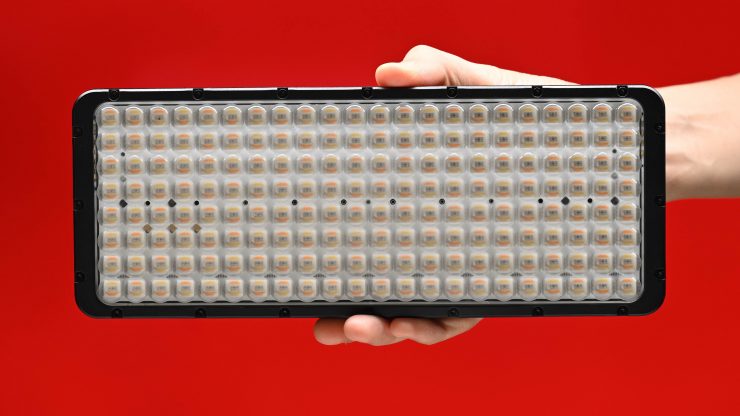
The Luxli Cello² is the follow-up to the original Cello 10″ RGBAW light that was announced back in 2018.
The original Cello was popular because of its functionality, and innovative feature set. Since that time, Luxli has introduced the Viola, Viola 2, Timpani, Taiko, and Fiddle fixtures. I have previously reviewed the Timpani, Taiko, and Fiddle lights. You can see links to those reviews below:
You can read our article from NAB 2018 about the Luxli Cello here.
Key features
- 10″ RGBAW LED panel
- Internal battery with 3-hour run time
- 2800 – 10,000K CCT range
- Bluetooth 5 equipped with 100 ft. range
- iOS and Android app control
- Extreme color accuracy
- USB Type-C charging
- Multiple operation modes
- LCD display
RGBAW
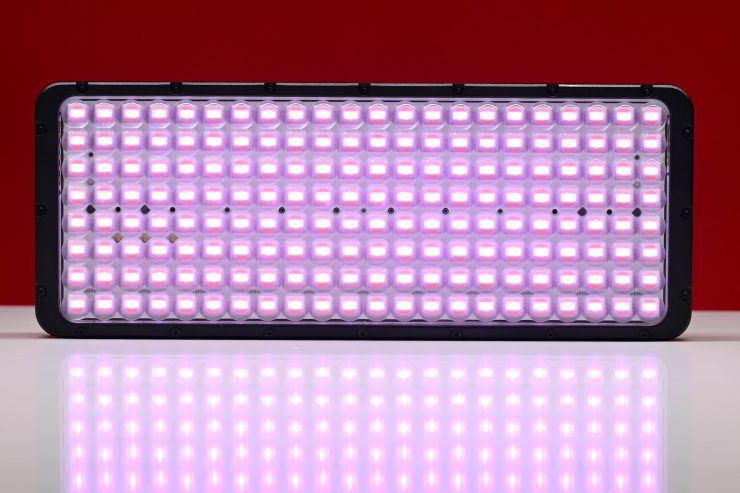
So what exactly is RGBAW? The “A” and “W” in RGBAW stand for amber and white, 2800K and 5600K color temperature LED’s, respectively. Luxli claims that the Cello² mixes the output of these two LEDs to ensure an exact color temperature in CCT mode and accurate color reproduction in Gel mode.
Whatever Luxli is doing, they are doing it right. The Timpani, Taiko, and Fiddle Pocket are some of the most color-accurate lights I have ever tested.
If it ain’t broke don’t fix it

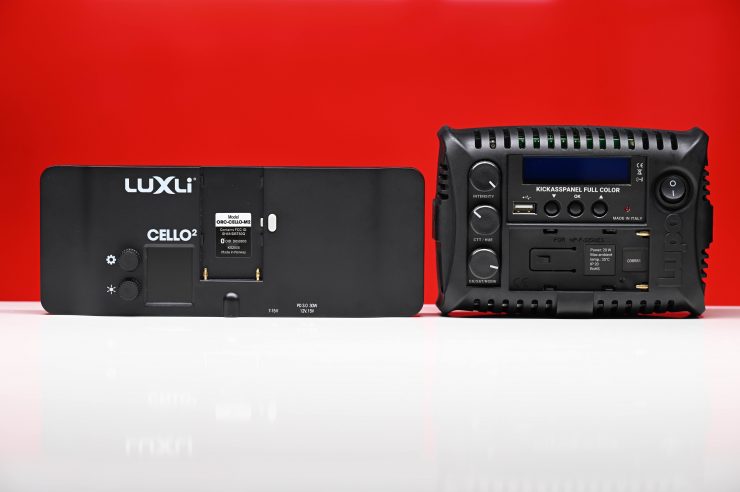
Cello Mark 2 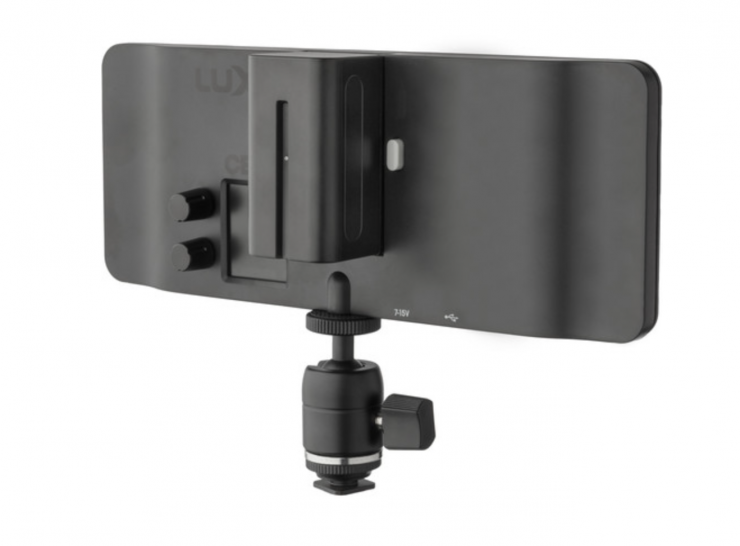
Cello
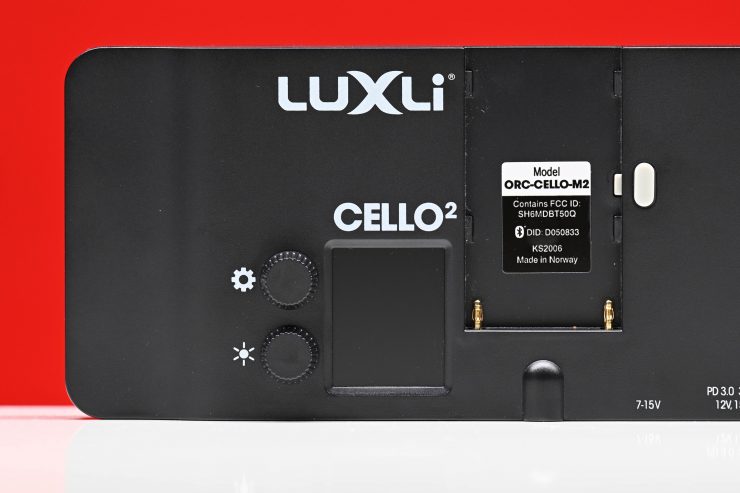
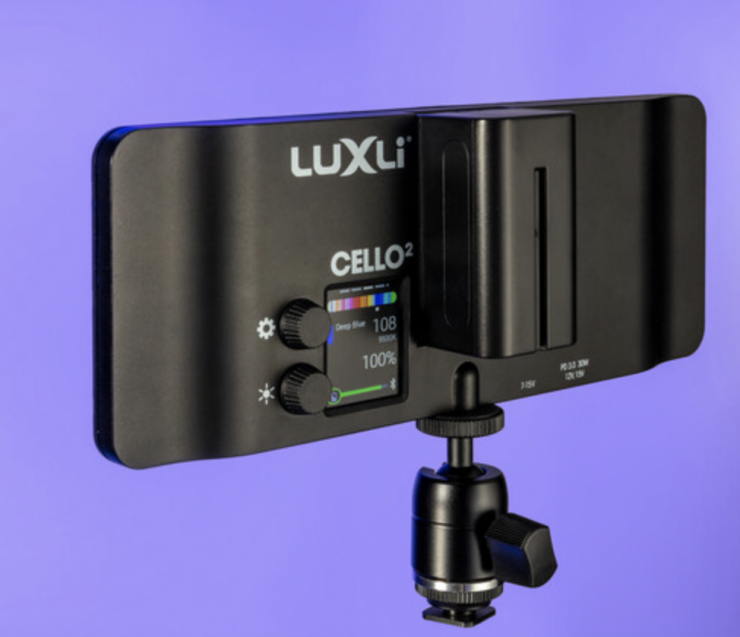
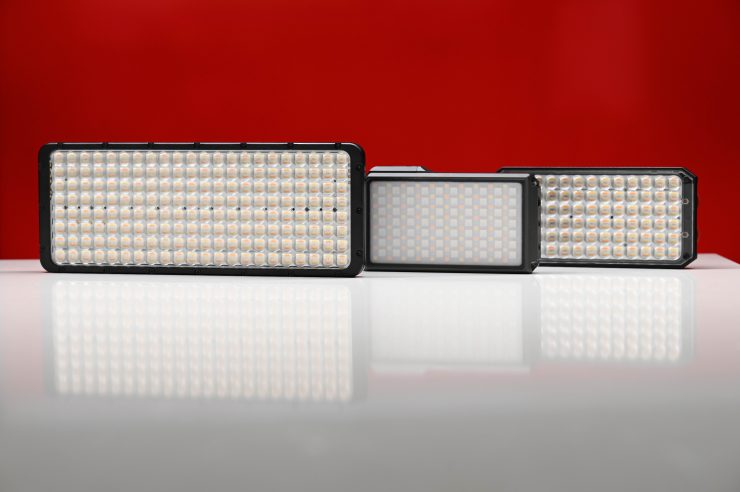
The Cello² looks almost identical to the original Cello. There wasn’t anything that really needed to be changed as far as the physical body size and layout of the controls were concerned.
Five-Die LED System
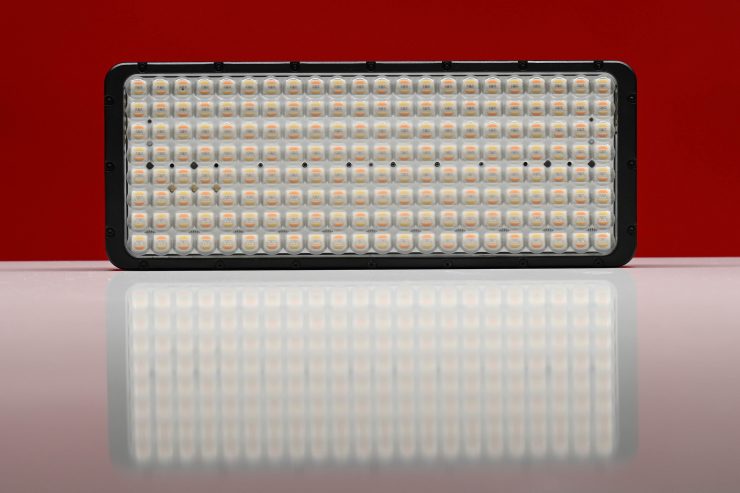
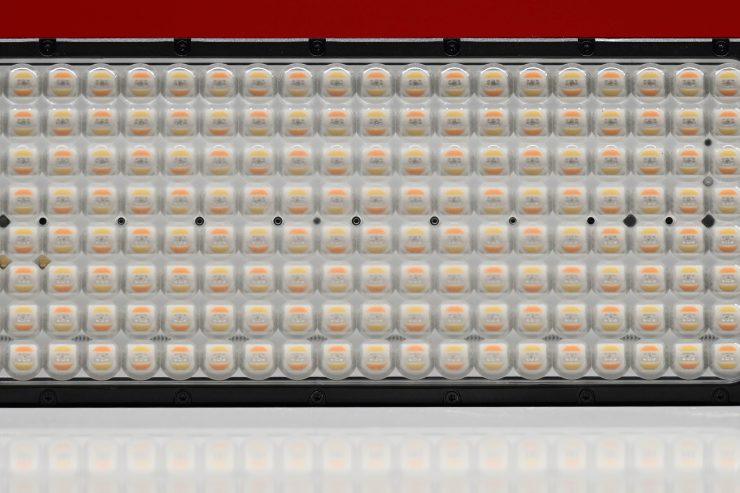
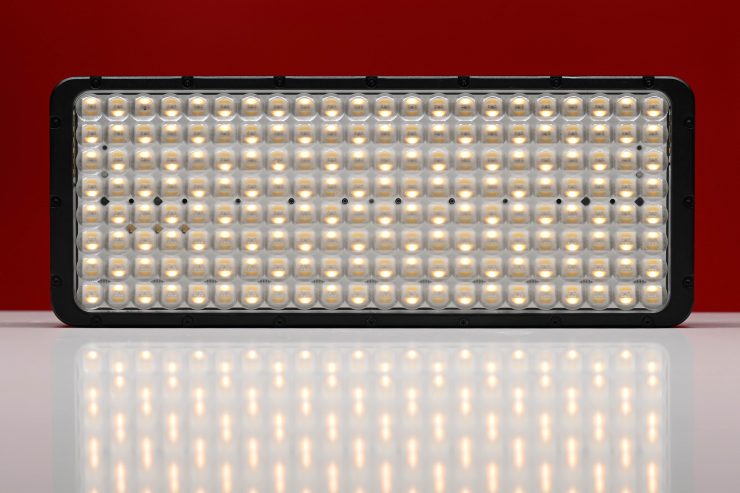
The light utilizes Luxli’s unique five-die RGBAW LEDs that are claimed to deliver exceptional accuracy, and rich saturated colors. To assure that the light exactly conforms to Luxli standards of quality, every Cello² is individually calibrated and tested before it leaves the factory. A serialized photometric calibration result sheet that lists the lux output, CRI, TLCI, and color gamut is included with every light.
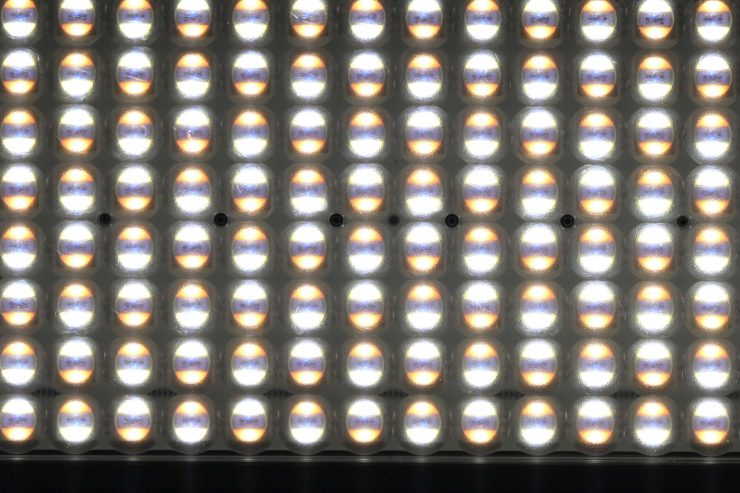
The Cello² is made up of 176 RGBAW LEDs. The beam angle is 72°.
Build Quality
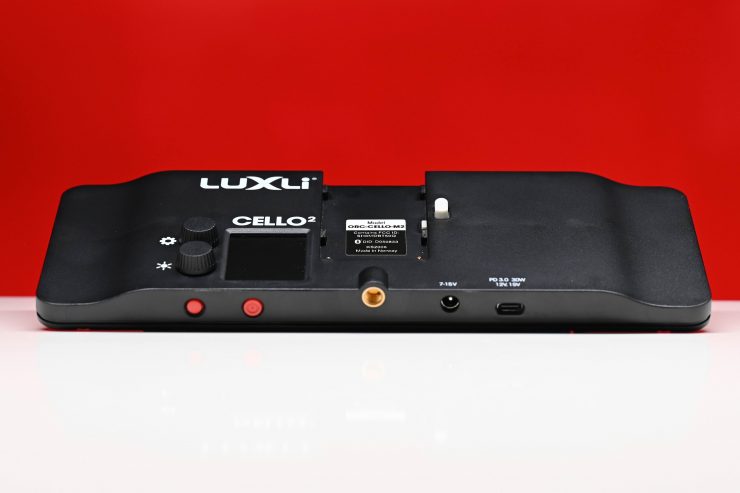
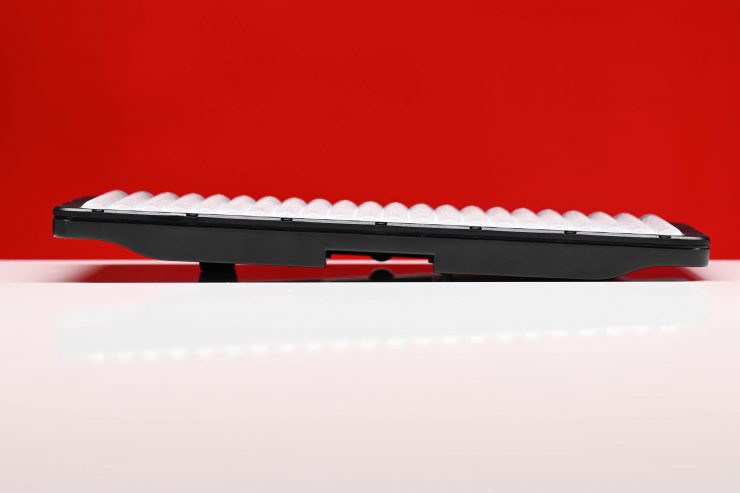
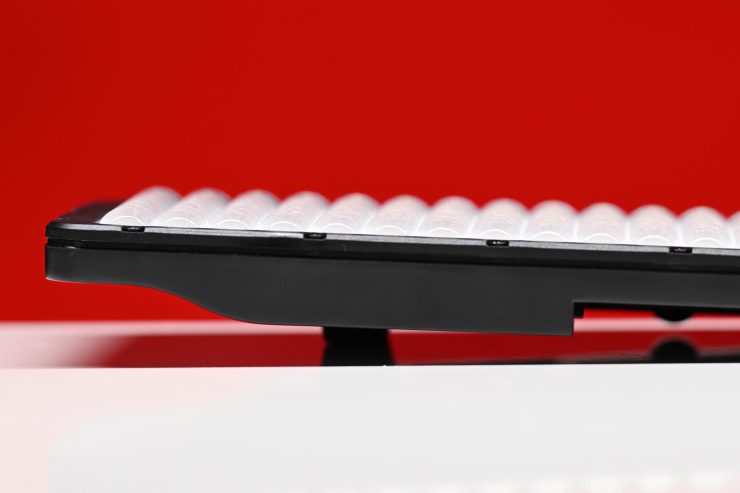
I have been very impressed with the build quality of all of the Luxli fixtures I have reviewed, and the Cello² follows in those footsteps. The light is beautifully made and the housing is all aluminum.
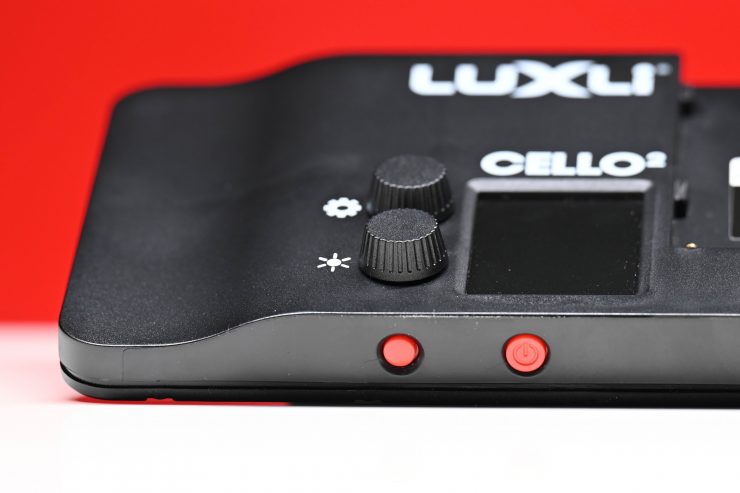
The scroll dials and buttons are nice and tactile, but they are made out of plastic.
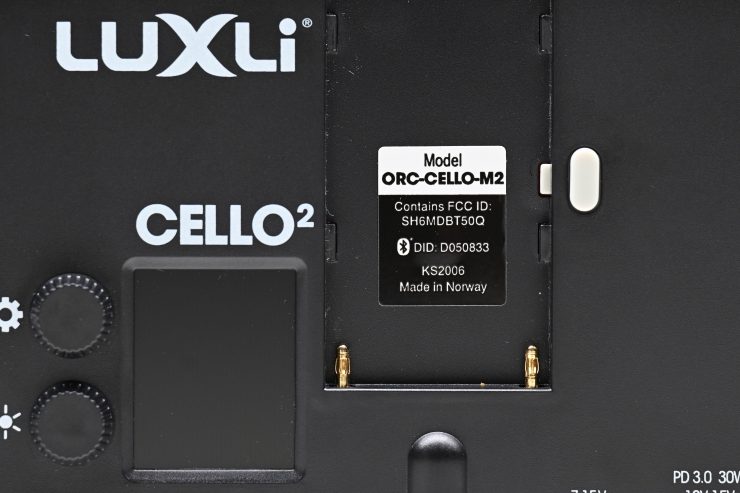
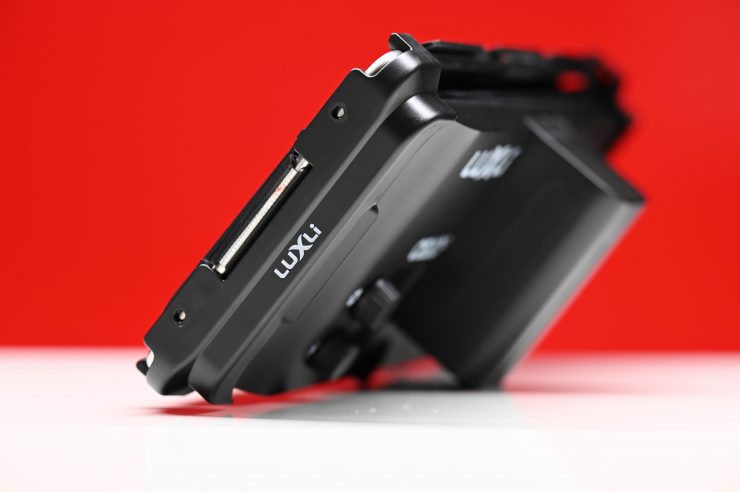
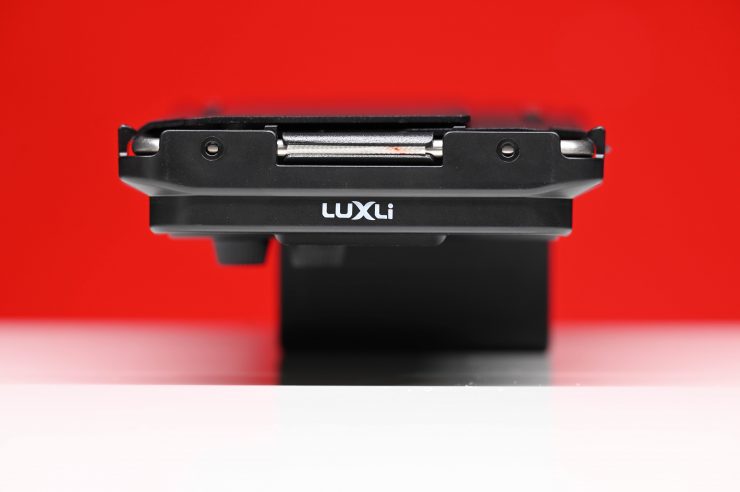
The battery plate is also well made and Sony NP-F style batteries click in securely and don’t wobble around.
Weight & Size
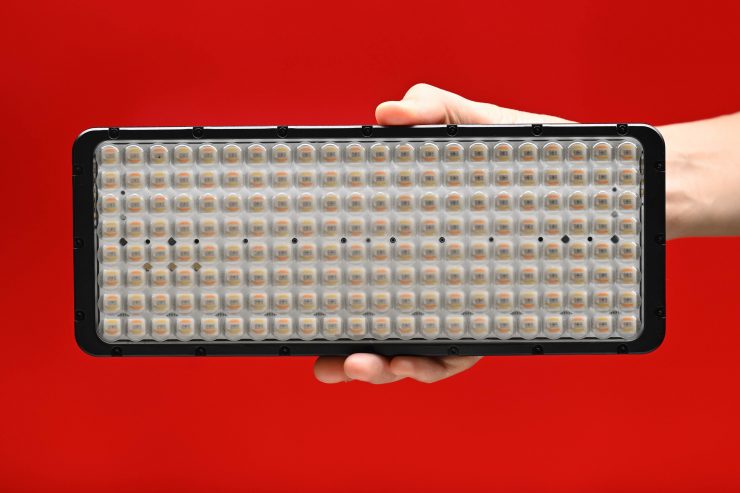
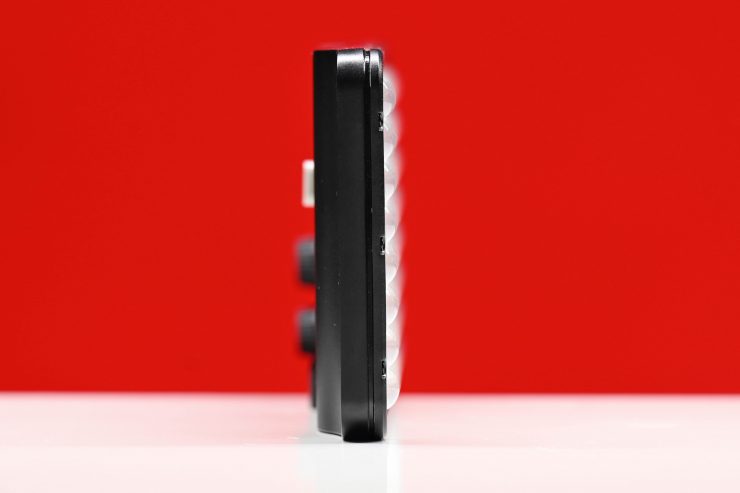
The Luxli Cello² weighs in at 354.8 g / 12.5 oz, which makes is slightly lighter than the original Cello which weighs 13.2 oz / 374g. Its physical size is 9.5 x 3.6 x 0.8″ / 24.1 x 9.1 x 2 cm. which is identical to that of the original Cello.
This weight perhaps makes it a little heavy and large to be used as an on-camera light, but that depends on what camera you are using it with.
So how does this weight compare to some other small-sized RGBW lights? Below you can see:
| Weight | |
| Luxli Cello² | 354.8g / 12.5 oz |
| Lupo Kickassapanel Full-Color RGBW | 530 g / 18.69 oz |
| Luxli Fiddle | 282g / 9.94 oz |
| PFY Matrix Pocket-Sized Portable Bi-Color RGB Light | 249g / 8.78 oz |
| Pilotfly AtomCUBE Rx1 RGBCW Pocket LED | 275g / 9.70 oz |
| YY-C150 RGB LED video light | 265g / 9.34 oz |
| BOLING Pocket LED RGB Video Light | 260g / 9.17 oz |
| Aputure MC RGBWW LED Light | 130g / 4.59 oz |
| Falcon Eyes PockeLite F7 RGBW On-Camera Light | 300g / 10.58 oz |
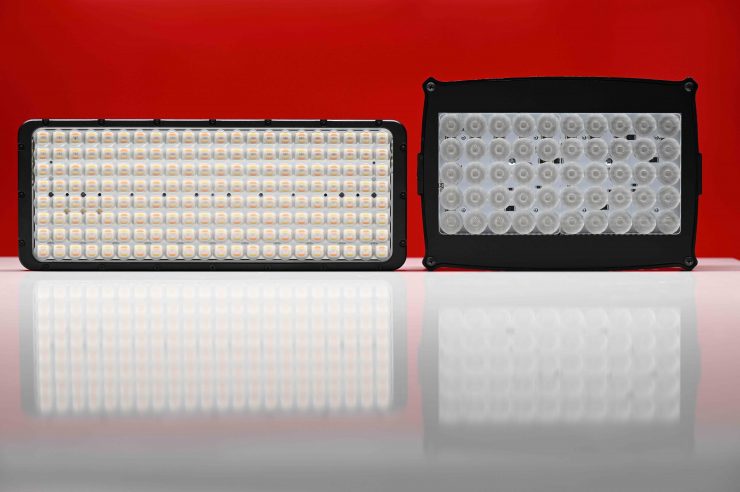
The Cello² is a little heavier than some of the other competing lights, but that is to be expected as it is also physically larger. It is, however, quite a bit lighter than the Lupo Kickassapanel Full-Color RGBW.
Mounting
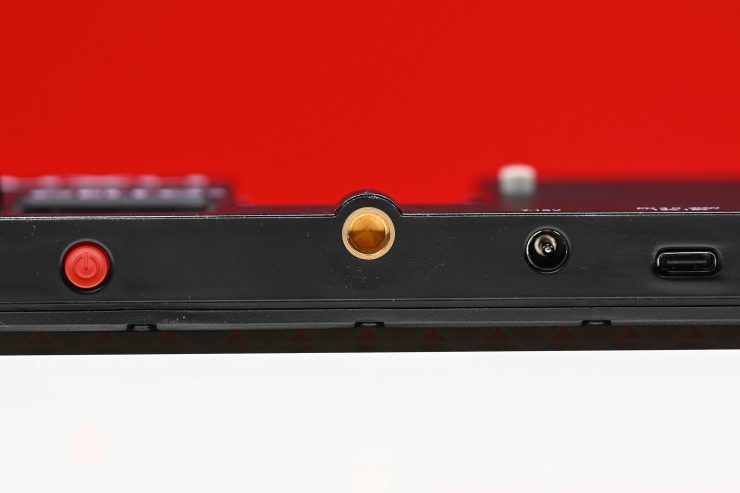
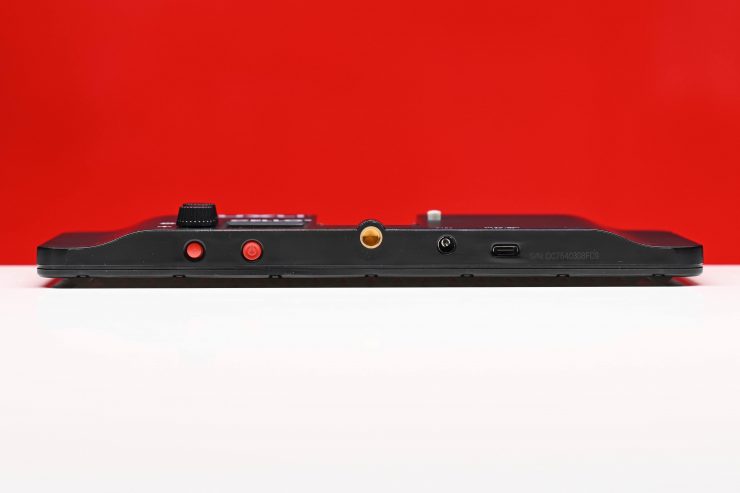
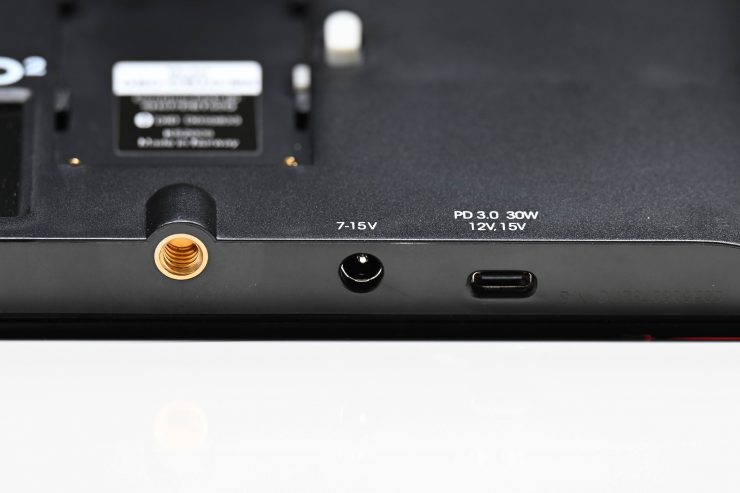
The Cello² has a single 1/4 20″ mounting point on the bottom of the light. I personally would have liked to have seen more mounting points on the fixture.
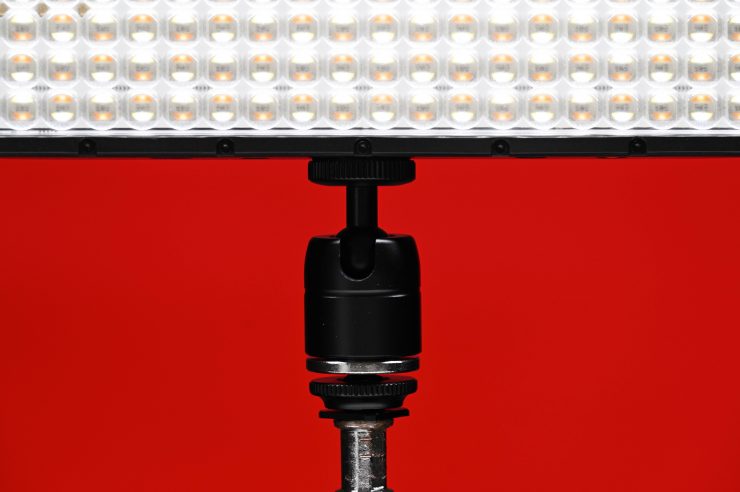
Luxli does give you a reasonably good ball head to 1/4-20″/cold shoe adapter that you can use with the Cello².
Power Draw
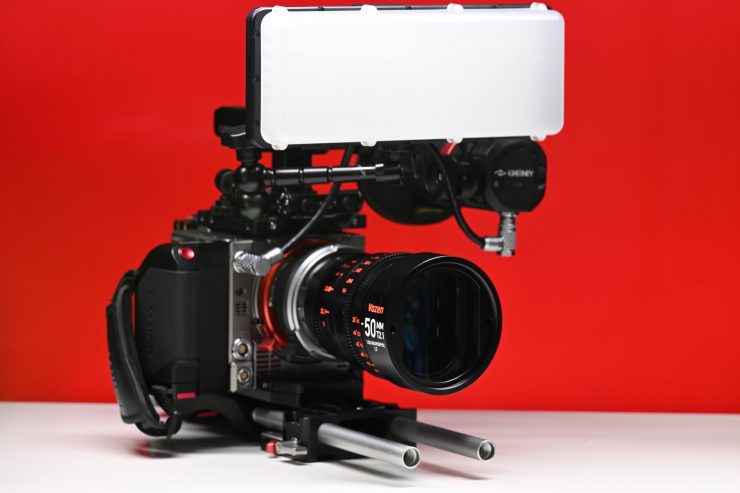
The light draws 30W which is a little higher than most other on-camera style RGBW lights. again, this is no surprise given its physical size and the fact that it uses far more LEDs.
So how does the power draw compares to other fixtures:
| Power Draw | |
| Luxli Cello² | 30W |
| Lupo Kickasspanel Full-Color RGBW | 20W |
| Luxli Fiddle Pocket | 18W |
| PFY Matrix Pocket-Sized Portable Bi-Color RGB Light | 14W |
| Pilotfly AtomCUBE Rx1 RGBCW Pocket LED | 15W |
| YY-C150 RGB LED video light | 12W |
| BOLING Pocket LED RGB Video Light | 12W |
| Aputure MC RGBWW LED Light | 5W |
| Falcon Eyes PockeLite F7 RGBW On-Camera Light | 12W |
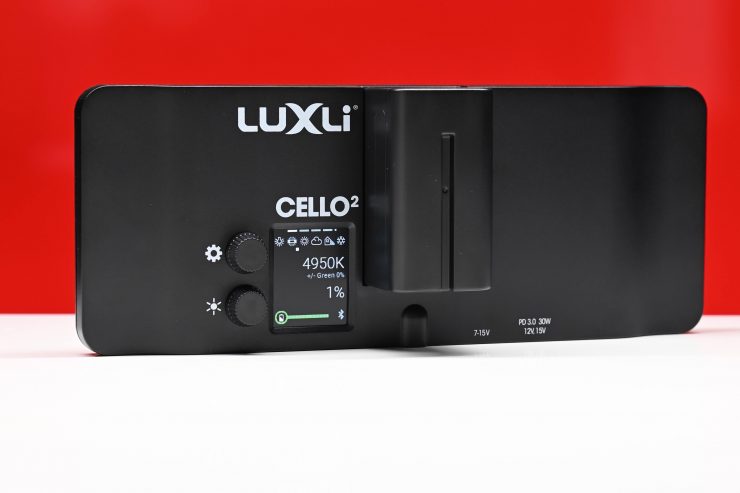
The Luxli Cello² needs to be powered via a single Sony L-Series (NP-F) battery or a 7 to 15V DC (2A) power input. You can also power it via any 12-15V USB-C PD source. A lot of small, compact on-camera style LED lights feature an in-built battery.
| RUN TIME | |
| Luxli Cello² | Depends on the battery being used |
| Lupo Kickasspanel Full-Color RGBW | Depends on the battery being used |
| Luxli Fiddle Pocket | 180min |
| PFY Matrix Pocket-Sized Portable Bi-Color RGB Light | 240min* |
| Pilotfly AtomCUBE Rx1 RGBCW Pocket LED | 180min |
| YY-C150 RGB LED video light | 180min* |
| BOLING Pocket LED RGB Video Light | 140min* |
| Aputure MC RGBWW LED Light | 120min |
| Falcon Eyes PockeLite F7 RGBW On-Camera Light | 110min* |
*Claimed run times (not tested)
Above you can see how long the internal battery run times are for some of the other lights.
Built-in batteries certainly have their pros and cons. Yes, it is nice to grab a light and not have to worry about finding a battery and putting it onto the back of a light, but the flip side is, once that internal battery dies you can’t use the light anymore. If you are going to put an internal battery in a light it needs to be able to power the light at full power for at least 2-3 hours to be useful. With the Cello², you can power it all day as long as you have enough batteries. It is also nice that it has a DC input because it allows you to power it from other sources such as a D-tap on a camera battery or camera.
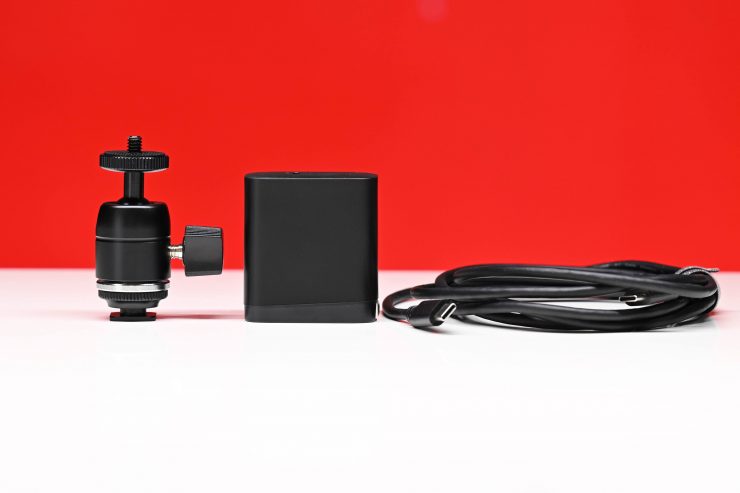
Luxli gives you a USB-C PD AC wall charger and a nice long USB-C to USB-C cable.
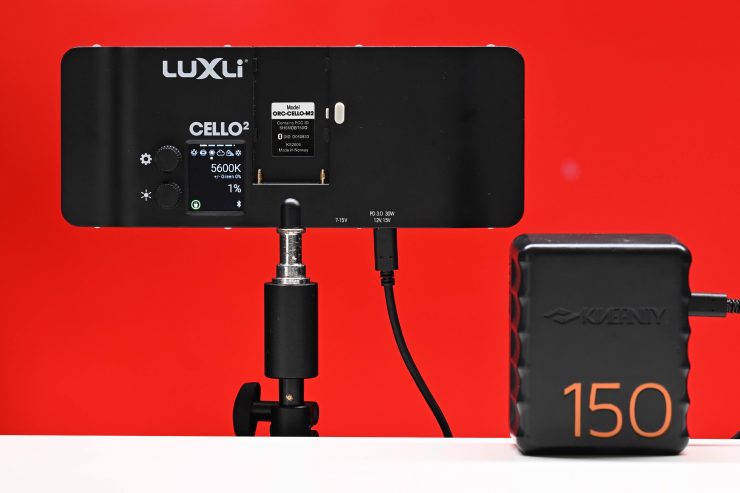
As I just mentioned, you can also power and charge the Cello² at the same time if you connect it to a USB-C power device. Above I am running the light off the USB-C output on the Kinefinity V-lock battery.
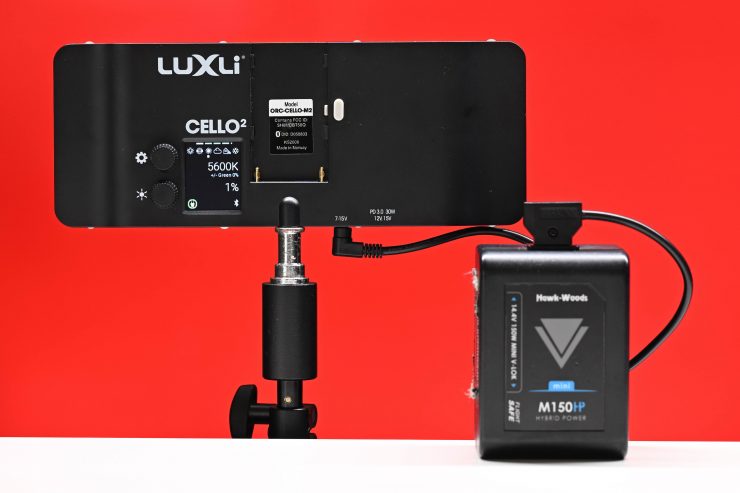
You could also run it from a camera battery or camera that has a D-tap power outlet with a DC to D-tap cable.
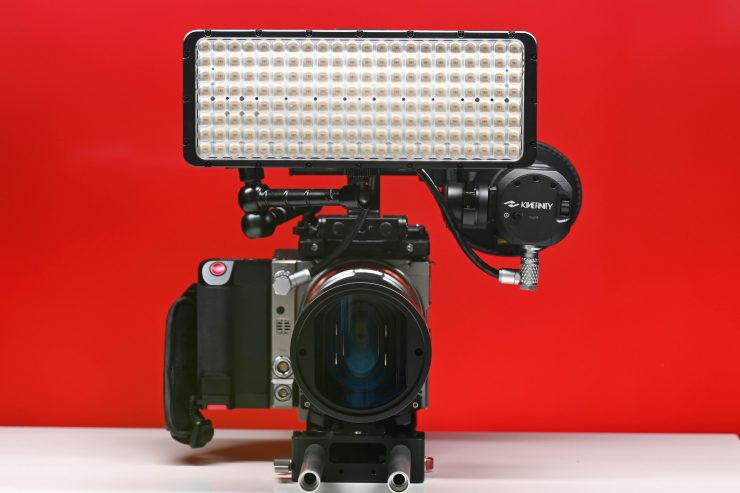
This is very handy if you were using the Lupo Kickassapanel Full-Color RGBW as an on-camera light because you could power it off your camera battery for continuous uninterrupted use.
More than just a light
Gone are the days where a light was just a light. A lot of today’s modern lights are now a seamless blend of hardware and firmware.
Having a light that is firmware updateable helps extend its life and adds extra functionality over time.
Controls & Menu System
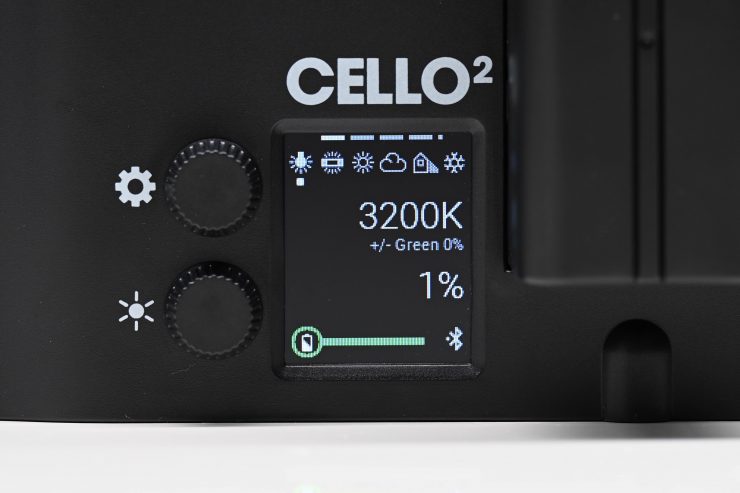
If there is one thing that Luxli does very well across the board, it is control interfaces. Despite how many features you have in a light, that light should be easy to use and operate. Nobody wants to get lost in endless menus or have to remember weird button combinations to make changes.
The rear LCD screen is easy to see and it gives you clear and concise information about the light.
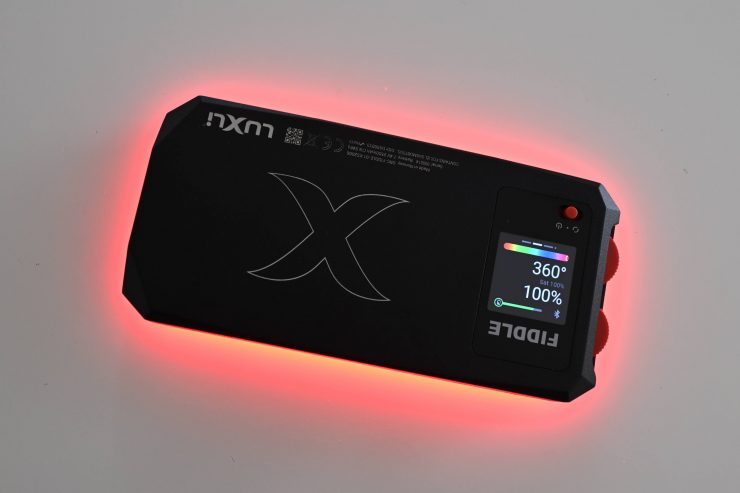
If you turn the fixture upside down the display doesn’t automatically flip. This is a feature that was on the Fiddle Pocket and I am not sure why it wasn’t included on the Cello². This may be a small thing, but it is incredibly useful during real-world use.
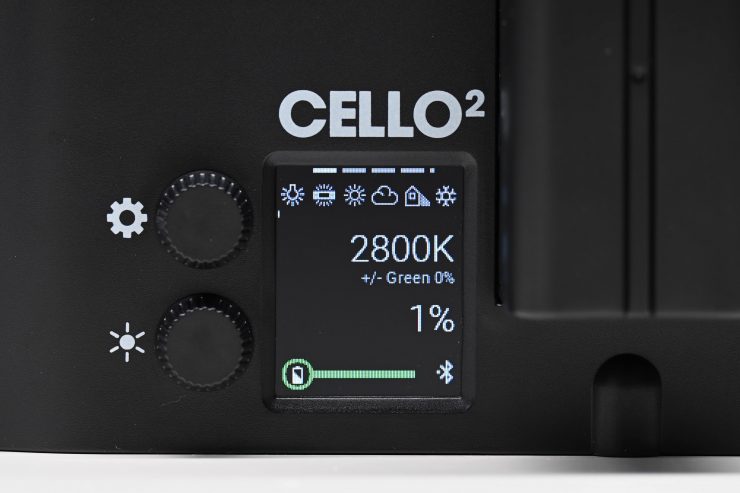
The Cello² uses a combination of dials and buttons. It is pretty easy to cycle through the various modes.
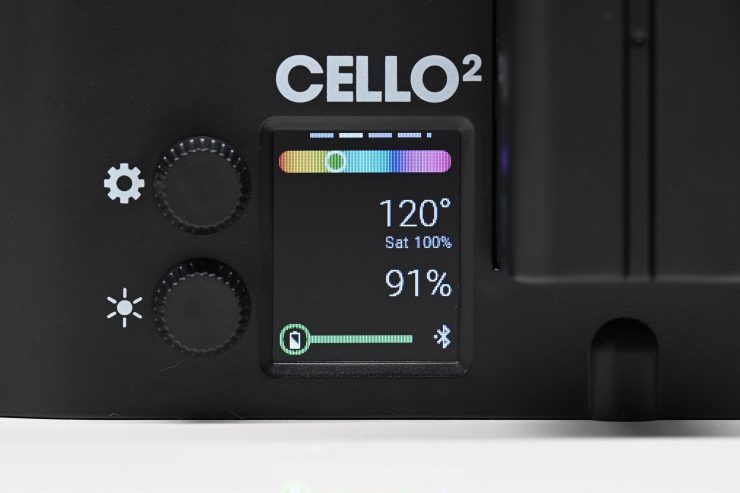
It is also easy to make adjustments and changes on the Cello². I like how there is a virtual color pallette displayed when you are in the HSI Mode. This makes selecting the color you are looking to create a whole lot easier.
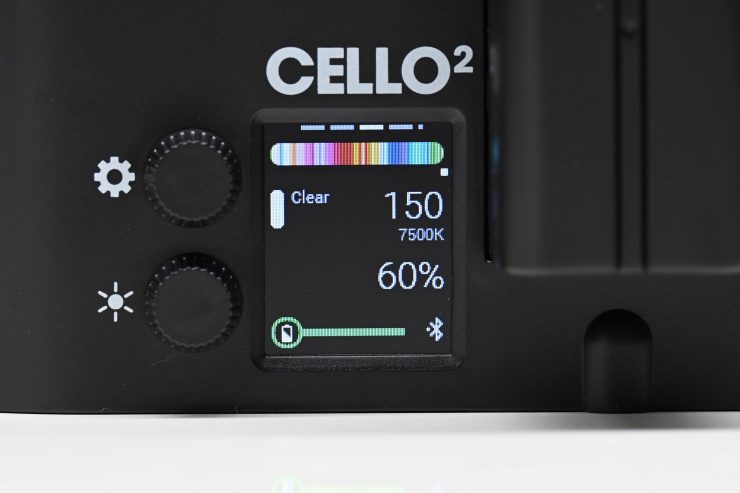
In the Gel Mode, you can also see visual color indicators of the gels you are selecting. This is way better than just having a gel name listed. It allows you to know what type of look that particular gel is going to create.
Control green & magenta color shifts
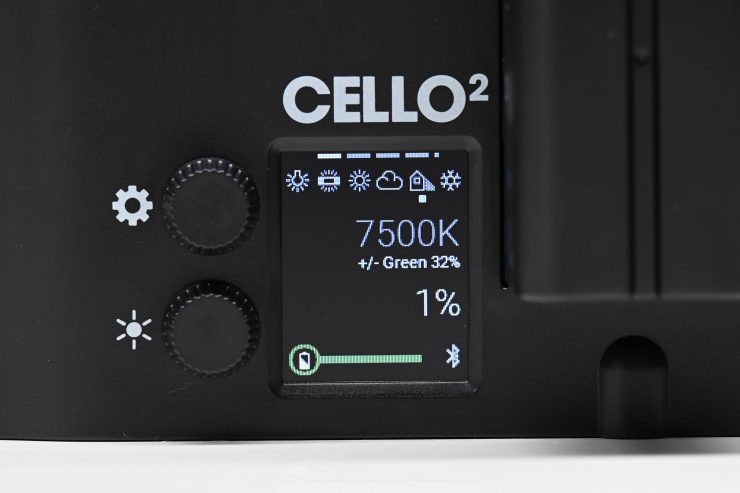
The Cello² lets you adjust +/-green values from 0-100%. This is an incredibly useful feature that lets you get rid of color casts and makes it easier to match other lights that you may be using. If you are using lights from different manufacturers they are all going to behave differently. By being able to offset green or magenta you can get the Cello² to closely match another source. For instance, if you happen to be shooting in an office building with overhead fluorescent lights, they may well have a color cast, if you can’t turn them off, you may want to replicate that same look with the Cello². By playing with the +/-green values you can.
Unlike some other lights that have +/- green adjustment, on the Cello², you aren’t limited to a certain amount of adjustment. The fixture lets you go from -100% to +100%.
The only negative aspect about the way Luxli has set up the +/-green values is that they have chosen to use values in a percentage form and not in the normal CC values you find in a lot of cameras and some other lights.
Operating Modes
CCT Mode
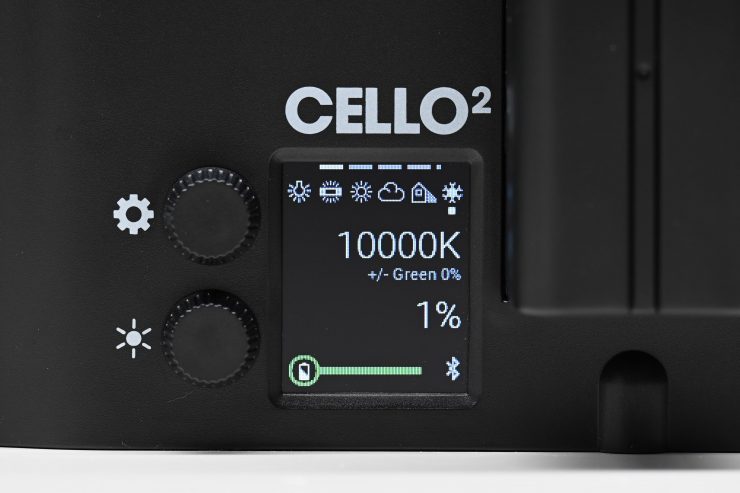
The traditional correlated color temperature (CCT) mode allows you to adjust your color temperature from 2800 to 10,000K in 50K increments. This lets you emulate any lighting condition, from the cool hues of bright sunlight to the warmth of a tungsten bulb. Dimming can be done in increments of 1%. Unlike some lights, the Cello² actually stays on all the way down to 1%.
CCT Mode is the one most users will find themselves using the most often.
HSI Mode
In the HSI Mode, you can independently adjust hue, saturation, and intensity.
Filter Mode
If you select the Filter Mode you can select from 150 different filters. Any color temperature available in the CCT mode can be modified by the filter samplings. Included in the filters are useful items such as Chromakey Green and Blue. This filter mode was originally introduced by Luxli in their original Cello, but it didn’t have anywhere near the number of filter options that are found in the Timpani, Taiko, Fiddle, and now the Cello² .
It is very impressive to see so many filters available in the Cello² . There is literally a filter for just about any need you may encounter.
Effects Mode
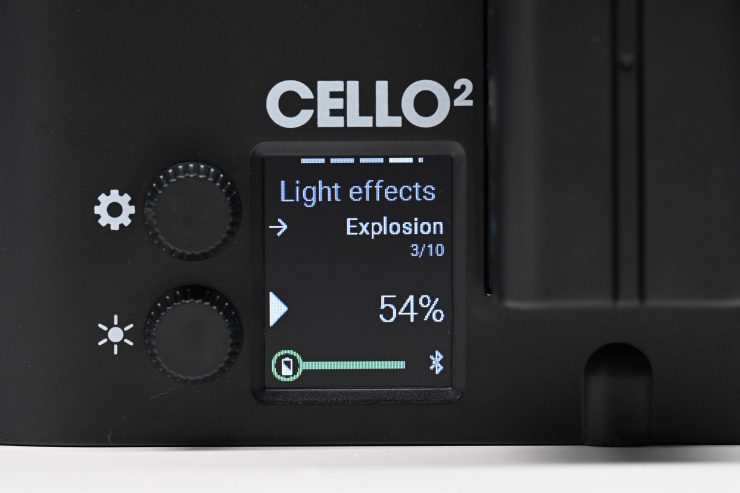
The Cello² also features a range of special effects, from strobing that imitates lightning strikes and explosions to orchestrated timed color shifts and warning lights. Each effect is adjustable in timing and color temperature. These special effects are nice to have, but realistically they are not something most shooters will use that often.
If you are interested, you can read what they all do below:
CCT Chase
A continuous loop that changes between two preset color temperatures. Good for simulating a sunrise, sunset, or a change from cloudy to sunny weather in real time. Since the sequence loops, you can shoot multiple takes without reprogramming the light.
CCT Start: Selects the color temperature at the beginning of the sequence (2400 to 10,000 K). CCT Stop: Selects the final color temperature of the sequence (2400 to 10,000 K).
+/- Green: Sets the green/magenta (tint) saturation level in 1% increments from +100% (green) to -100% (magenta).
Time Unit: Select between seconds and minutes for the time loop. Time/Loop: Select how many seconds or minutes the loop will last (1 to 160).
Color Chase
A continuous loop that moves through the color wheel between two selected colors. Since the sequence loops, you can shoot multiple takes without reprogramming the light.
Hue Start: Selects the color at the beginning of the sequence (0° to 360°).
Hue Stop: Selects the final color of the sequence (0° to 360°).
Saturation: Determines the color intensity from 100% (full color) to 0% (white light). Time Unit: Select between seconds and minutes for the time loop.
Time/Loop: Select the duration in seconds or minutes for each loop (1 to 160).
Explosion
Simulates the light from explosions. The Timpani generates random-length pulses and strobes within a range of the red to amber section of the color wheel.
Explosions/Minute: Sets how many separate explosions occur each minute (1 to 360). Duration (%): Set the percentage of time the light is illuminated for each pulse or strobe
(5% to 95%).
Fire
Simulates the light of a candle, campfire, or bonfire in various wind conditions. Fire Type: Select candle, campfire, or bonfire.
Wind Type: Select between no wind, breeze, windy, or storm.
Fireworks
Simulates the light from fireworks. Colors and timing of each flash are random. Explosions/Minute: Sets how many flashes will occur per minute (1 to 50).
Duration (%): Determines the percentage of time the light is illuminated in each cycle. Select from a range of 5% (shortest duration) to 95% (longest duration).
Lightning
Simulates lightning by creating random short and long bursts.
CCT: Selects the color temperature of the lightning flashes (3000 to 10,000 K) in 50 K increments. Interval(s): Sets the interval of seconds between lightning flashes (1 to 60).
Paparazzi
Simulates the random firing of multiple camera flashes.
Intensity: Higher intensity increases the number of random flashes per second (0 to 100).
Bulb Type: Determines the length of each flash. Slow is the longest duration. Modern is the shortest duration. Choose from Slow, Medium, Fast, and Modern.
CCT: Sets the color temperature of the flashes from 2800 to 10,000 K+/- Green: Sets the green/magenta (tint) saturation level in 1% increments from +100% (green)
to -100% (magenta).
Pulse
Offers a steady pulse at a programmable rate. Similar to the Strobe special effect (below), but the light fades on and off.
Hue: Selects the light color (0 to 360).
Saturation: Determines the color intensity from 100% (full color) to 0% (white light). Pulses/Minute: Sets how many times the light will pulse each minute (1 to 200).
Siren
Simulates the flashing lights of an emergency vehicle, like a police car or ambulance.
Colors: Select the color combination of flashing lights. Choose red, blue, and white; red and blue; red and white; blue and white; blue; red; or SAE Amber.
Flash/Cycle: Set the number of times each individual color will flash within the cycle. Choose from 1 to 4 times per cycle.
Cycles/Minute: Determines how many repetitions of the cycle will occur each minute. Choose from 10 to 360.
Duration (%): Determines the percentage of time the light is illuminated in each cycle. Select from a range of 10% (shortest duration) to 90% (longest duration).
Strobe
Offers a steady flashing light at a programmable rate.
Hue: Selects the light color (0 to 360).
Saturation: Determines the color intensity from 100% (full color) to 0% (white light).
Frequency: Changes the number of flashes per second (1 to 25).
Duration (%): Determines the percentage of time the light is illuminated in each cycle. Select from range of 10% (shortest duration) to 90% (longest duration).
Pick your color & conduct an orchestra
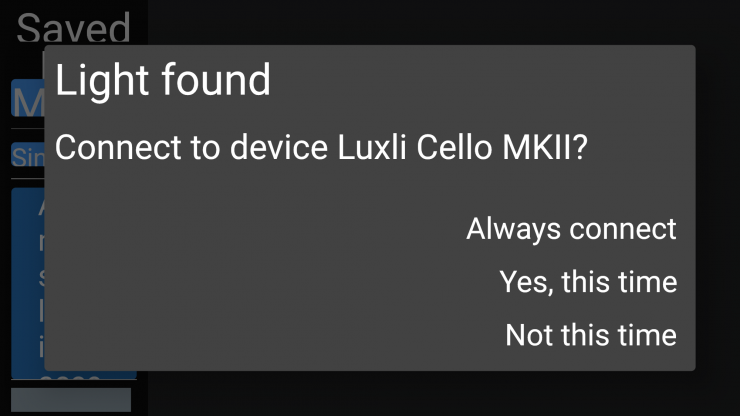
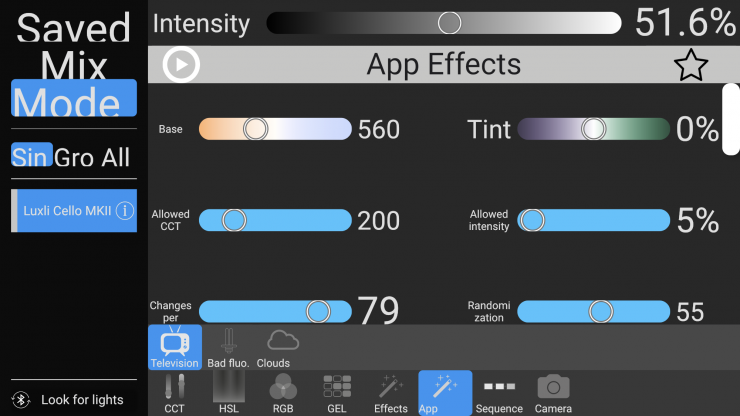
Luxli has a fantastic app that lets you control any of their lights. Any changes made on the app are sent to the Cello² via Bluetooth at a distance of up to 100′ (30m) away.
The Luxli Conductor app, is available on both iOS & Android devices.
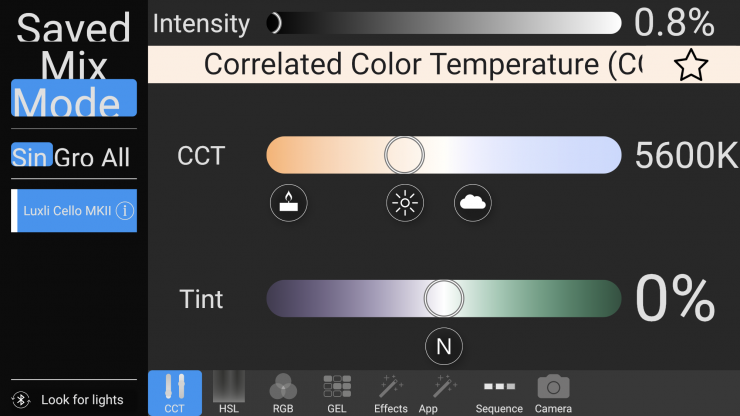
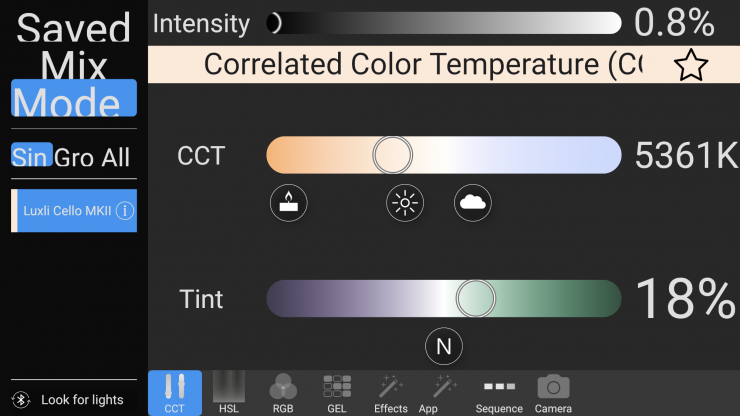
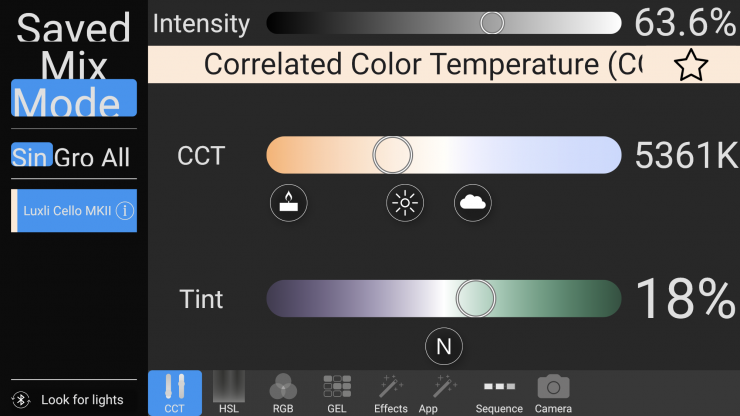
In CCT Mode, you have full control over your Kelvin color adjustment and output, as well as being able to make +/- Green adjustments.
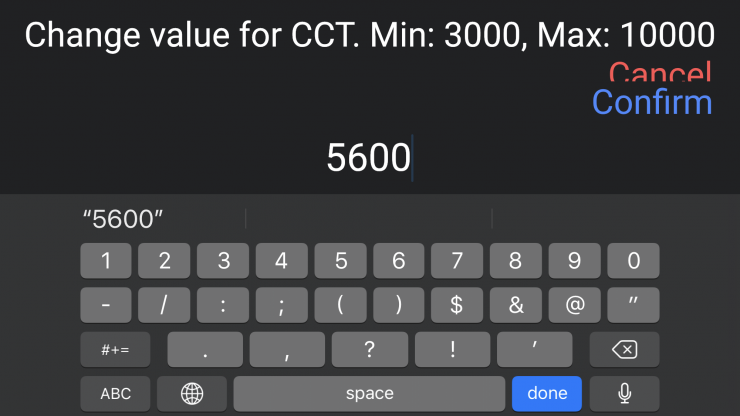
You can also dial in your exact Kelvin color temperature without having to use the slider.
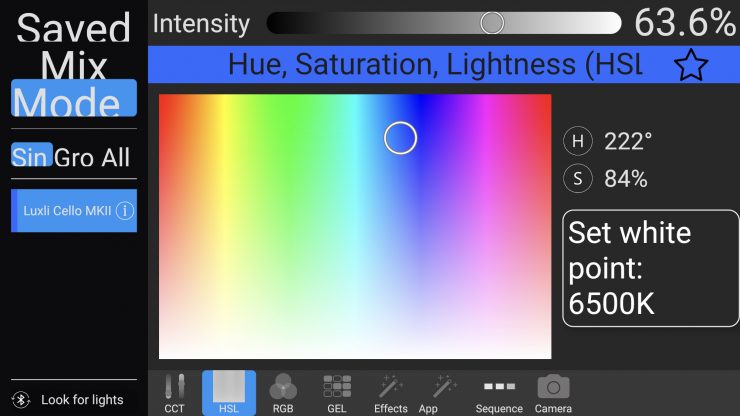
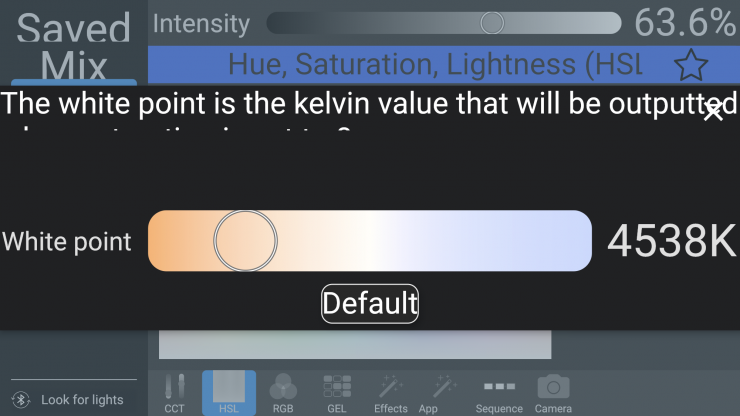
In the HSI Mode, any color on the color wheel can be selected with 1° increments. Saturation can also be controlled to mix the desired color with white light.
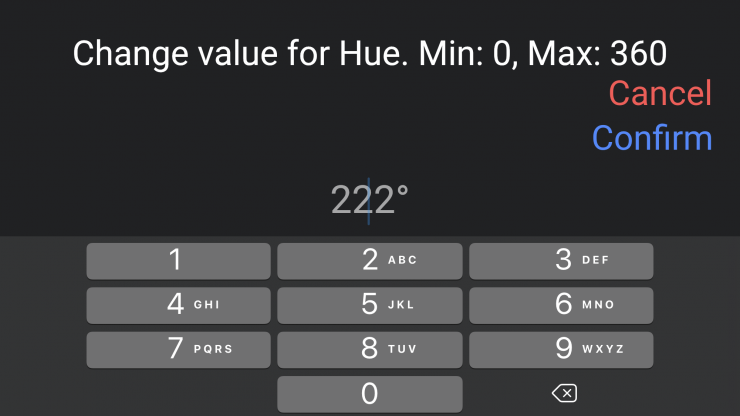
You can also dial in the exact hue you want without having to use the slider.
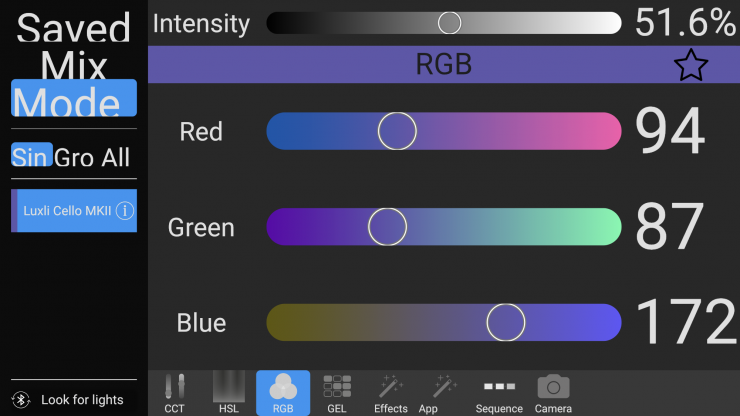
In the RGB Mode, you can individually select the RED, Green, and Blue channels and make adjustments.
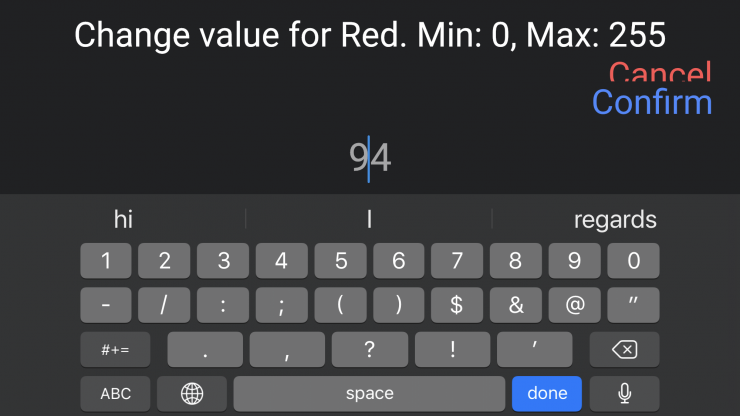
You can also dial in the exact amount of Red, Blue, and Green you want without having to use the slider.
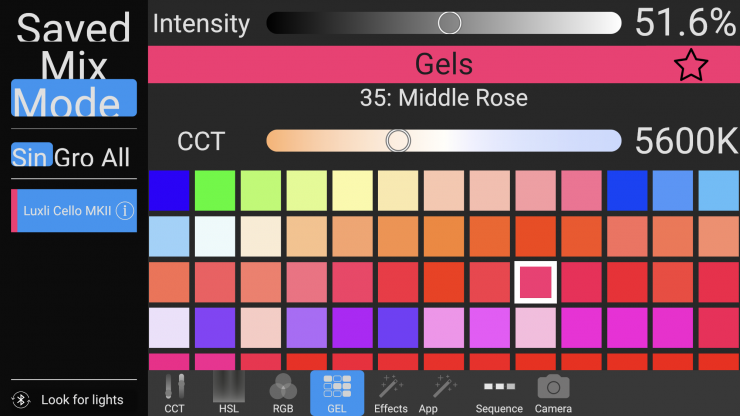
In the Gel Mode, you can select any of the available gels that are found in the light’s extensive catalog.
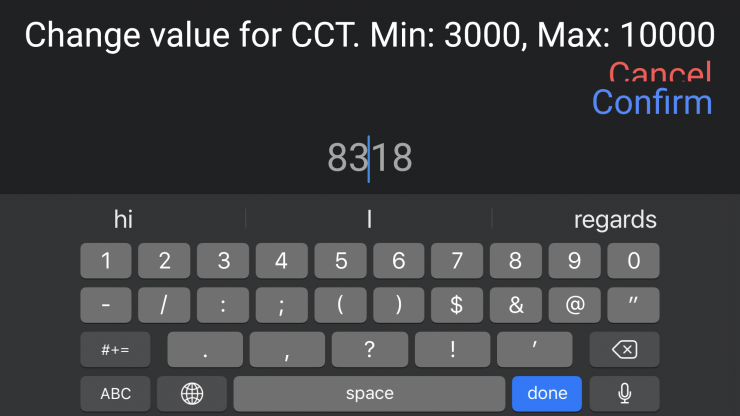
You can also dial in the exact CCT you want without having to use the slider.
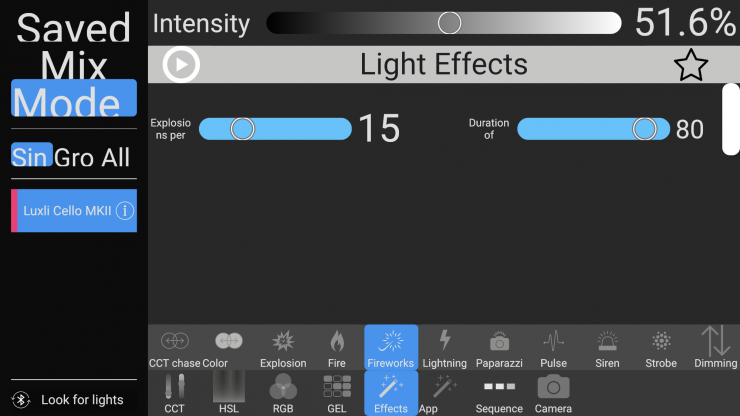
In Effects Mode, you can select and adjust a wide array of special effects.
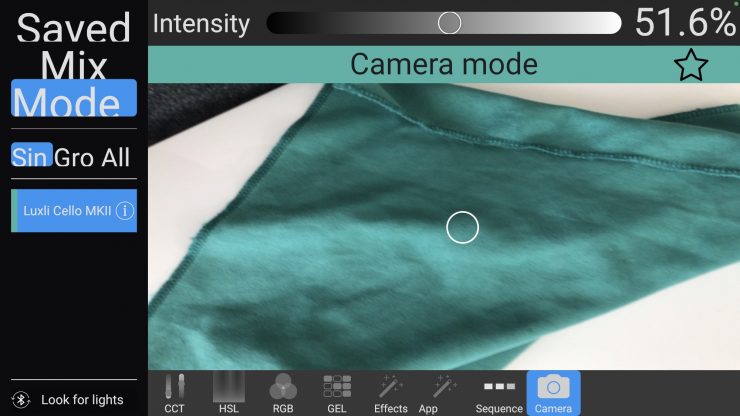
The Camera feature can be used to match any color that you frame up with your camera on a tablet or smartphone. This has been a feature on the Timpani since 2018. This is like a virtual eye dropper. You frame up a color with your camera and then touch the screen and then the light will attempt to replicate that color. It works better with some colors than others.
What I will say is that if you are using multiple Luxli lights you can get them to create identical colors.
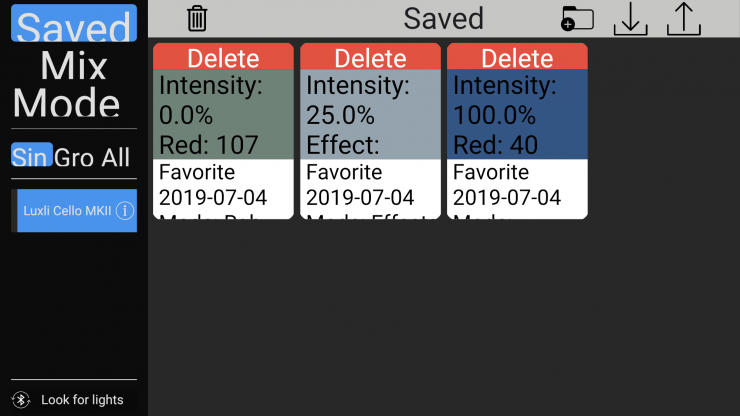
You can also go to a saved section and recall and store all of your favorite settings.
The app is nice because it uses Bluetooth and not Wi-fi, so you don’t need to join any networks. All you do is launch the app once the light is turned on and it automatically finds your light and gives you connection options.
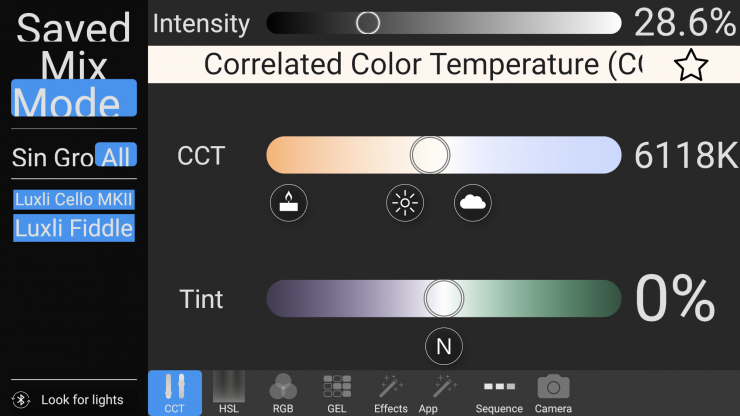
You can also combine multiple Luxli lights and synchronize them to operate all at once. You can make changes on one light, which will then be reflected on all of the other connected lights. You can also place lights in certain groups and well as individually control each fixture.
For me personally, the ability to be able to control all of these aspects of the light from a smartphone or a tablet is a big deal. It lets me make adjustments to the light while I’m still standing behind the camera so I don’t need to go over to the light, adjust it, and then walk back to the camera to see how it looks.
It also makes controlling RGB modes so much easier as it displays your color palette in a simple, clear interface. Some other RGB lights only show values for red, green, and blue and you have no idea what sort of color you are really creating without making an adjustment and then seeing how it looks. Luxli has taken the sometimes complicated and made it simple.
Beam Angle
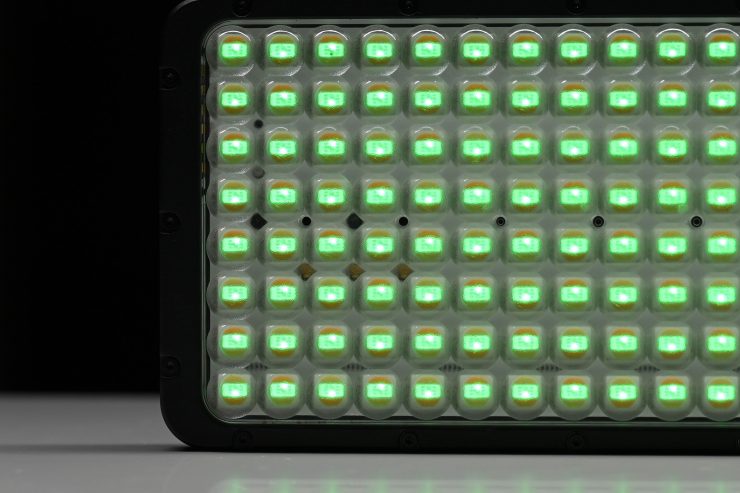
The Luxli Cello² has a beam angle of 72°. This beam angle provides a reasonably wide spread of light without it spilling out too much.
Photometrics
So now let’s get to the photometric results. I always test lights in this way so that I get a reference to how they compare to other fixtures. Results only tell part of the story and should never be used alone to judge a light. I have found from extensive testing over the years that certain lights that have good photometric results don’t always look good, and lights that have worse photometric scores can sometimes look better than their results indicate. It is important that you don’t judge a light from one individual result. You have to gather all the data to make a comprehensive conclusion.
Different lights can also look different depending on what camera you happen to be using.
In a nice touch, every Cello² light comes with its own individual photometric results. Not many companies do this and it is nice to see that Luxli does. It shows attention to detail and that lights are not just pushed off some assembly line and thrown in a box.
Output & Color Temperature Accuracy
I tested the Luxli Cello² at a variety of Kelvin color temperatures with a Sekonic C-800 Spectrometer to find out how much output the light had and how accurate the Kelvin color temperature reproduction was.
All readings are taken at a distance of 1m (3.28ft) in a controlled environment.
5600K
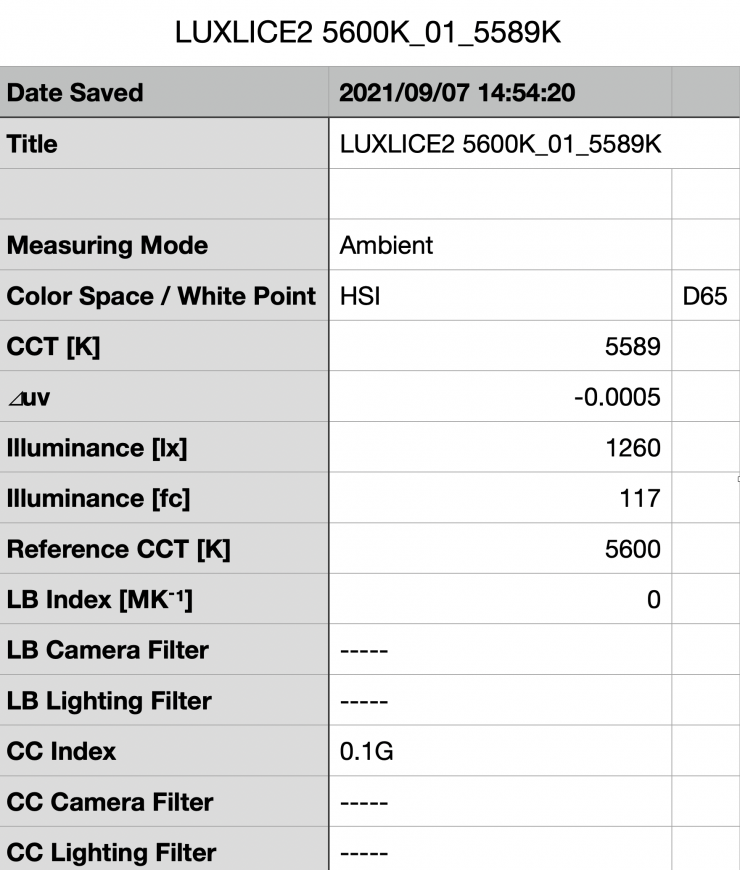
Above you can see the Cello² when set at 5600K recorded an output of 1260 lx (117 fc) when set at 5600K.
As a comparison, the smaller sized Luxli Fiddle Pocket recorded an output of 522 lx (48.5 fc) when set at 5600K.
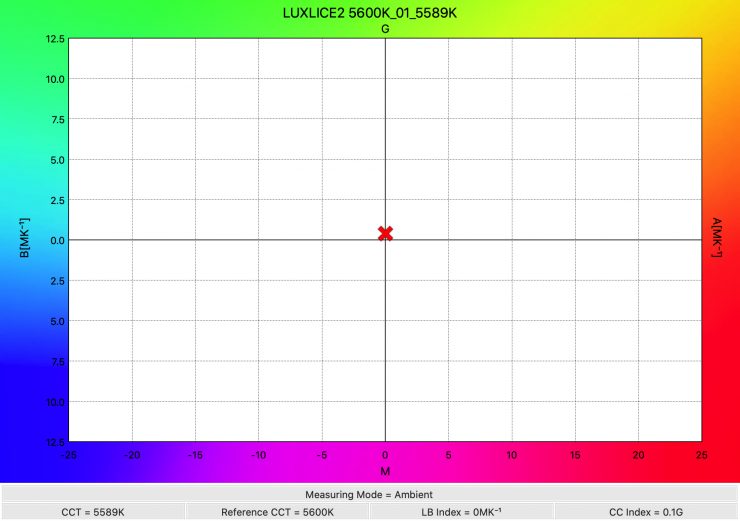
The light recorded a Kelvin color temperature reading of 5589K which was extremely accurate.
So, how does the output at 5600K compare to the Pilotfly AtomCUBE Rx1 RGBCW Pocket LED Video Light hat I previously reviewed? Well, let’s see.
| Output at 5600K | |
| Luxli Cello² | 1260 lx |
| Lupo Kickasspanel Full-Color RGBW | 2260 lx |
| Luxli Fiddle Pocket | 522 lx |
| Pilotfly AtomCUBE Rx1 RGBCW Pocket LED | 382 lx |
Again, this is no surprise as the Cello² has more output than the Luxli Fiddle Pocket and Pilotfly, but less than the Lupo.
As far as an accurate rendition of creating a 5600K source here is how it compares to those other lights:
| Kelvin Color Temperature (when set at 5600K) | |
| Luxli Celo² | 5589K |
| Lupo Kickasspanel Full-Color RGBW | 5921K |
| Luxli Fiddle Pocket | 5622K |
| Pilotfly AtomCUBE Rx1 RGBCW Pocket LED | 5330K |
As you can see, the Luxli Cello² not only has more output at 5600K, but it is also far more Kelvin color temperature accurate than the Pilotfly and Lupo.
5600K (Diffusion)
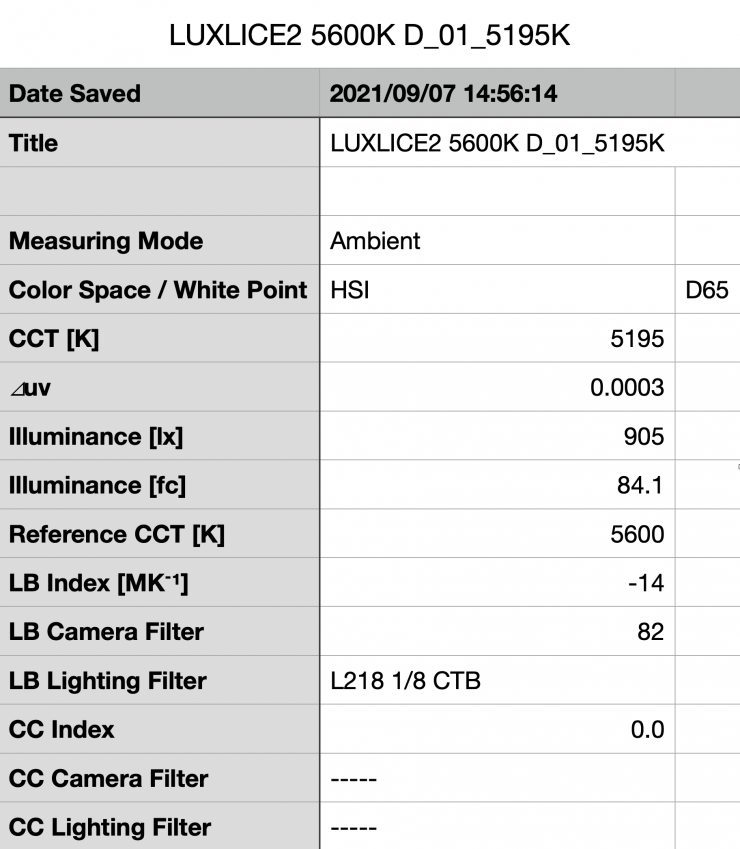
Above you can see the Cello² when set at 5600K with the diffusion filter attached recorded an output of 905 lx (84.1 fc).
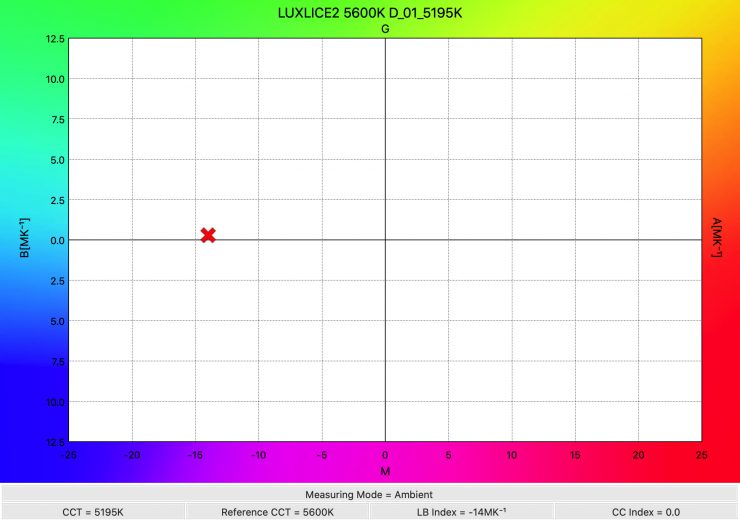
The light recorded a Kelvin color temperature reading of 5195K which was more than 300K from being accurate. This clearly shows me that the diffusion filter is altering the Kelvin color temperature by quite a considerable margin.
3200K
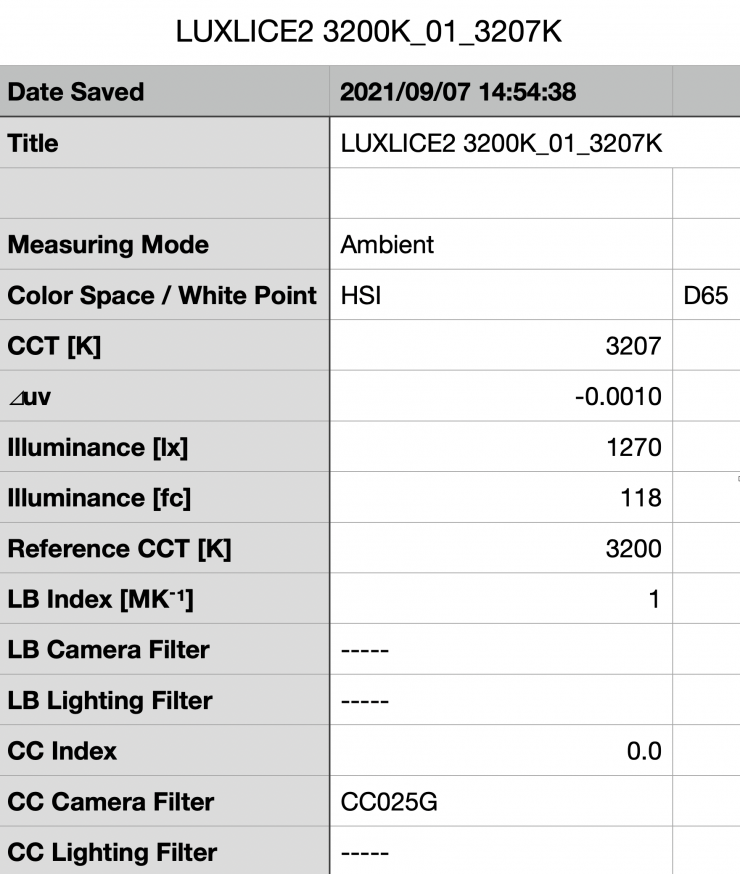
Above you can see the lights output when it was set at 3200K. It produced 1270 lx (118 fc), which was actually 0.78% more than the 1260 lx it produced at 5600K.
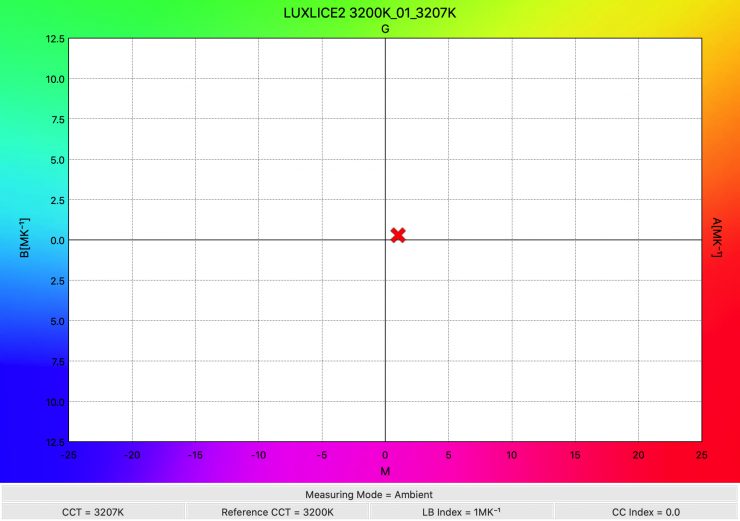
As far as Kelvin color temperature accuracy goes, it recorded a very accurate reading of 3207K.
So, how does this compare to the Pilotfly AtomCUBE Rx1 RGBCW
Pocket LED, Luxli Fiddle Pocket, and the Lupo Kickasspanel Full-Color RGBW? Below you can see:
| Output at 3200K | |
| Luxli Cello² | 1270 lx |
| Lupo Kickasspanel Full-Color RGBW | 1840 lx |
| Luxli Fiddle Pocket | 500 lx |
| Pilotfly AtomCUBE Rx1 RGBCW Pocket LED | 371 lx |
As far as an accurate rendition of creating a 3200K source here is how it compares against the Pilotfly AtomCUBE Rx1 RGBCW Pocket LED and Luxli Fiddle Pocket:
| Kelvin Color Temperature (when set at 3200K) | |
| Luxli Cello² | 3207K |
| Lupo Kickasspanel Full-Color RGBW | 3064K |
| Luxli Fiddle Pocket | 3232K |
| Pilotfly AtomCUBE Rx1 RGBCW Pocket LED | 3317K |
Just like at 5600K, the Luxli lights are exceptionally Kelvin color temperature accurate.
3200K (Diffusion)
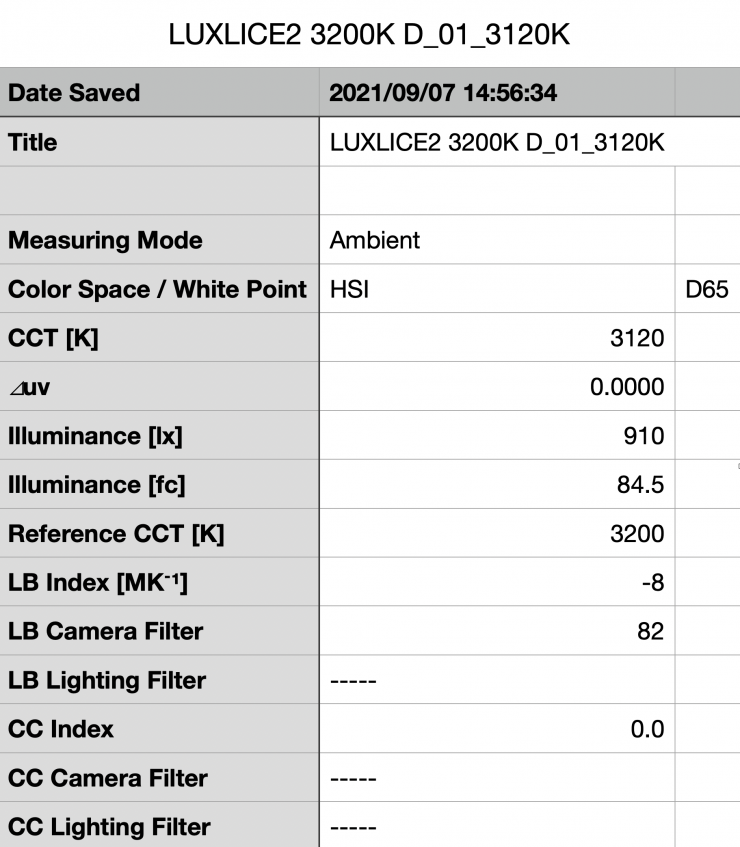
Above you can see the Cello² when set at 3200K with the diffusion filter attached recorded an output of 910 lx (84.1 fc).
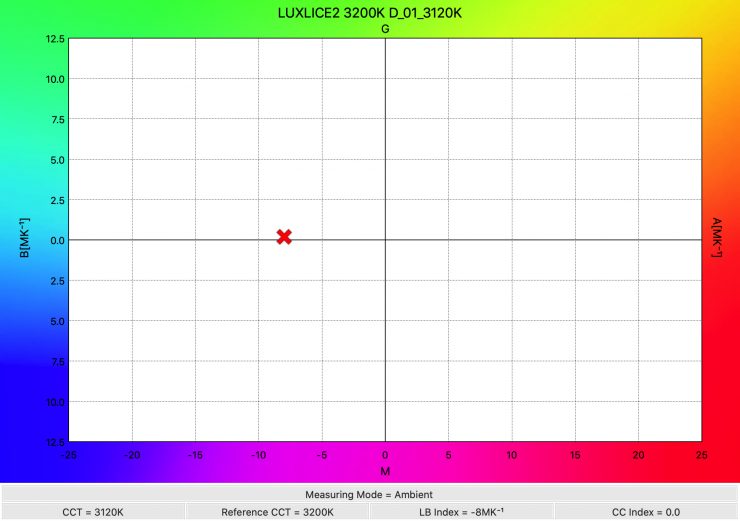
The light recorded a Kelvin color temperature reading of 3120K which was still very good. This shows me that the diffusion filter is altering the Kelvin color temperature but not by that much when you use the light at 3200K.
RGB Output
With most RGB lights if you use them to generate or create colors the output gets massively reduced. So how does the Cello² fare?
I decided to do a test to see how much output the light had when I created a super-saturated color.
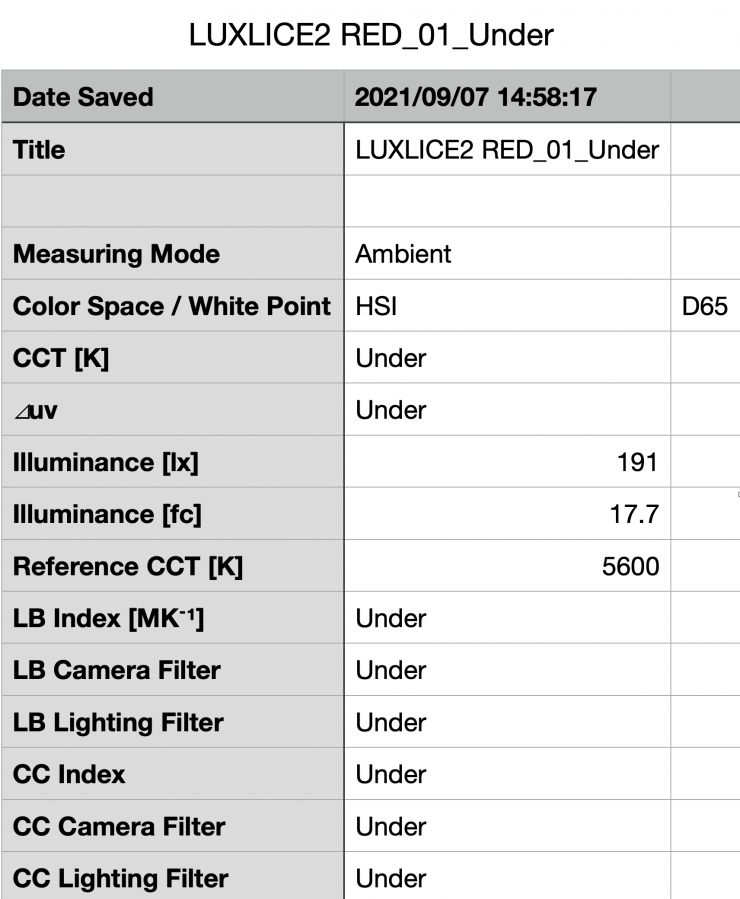
In the HSI mode, choosing a saturated red, and set to 100% output, the light recorded an output of 191 lx / 17.7 fc. This is something you need to be clearly aware of when using the HSI mode. The output is going to be significantly lower than when using the light in CCT mode.

What I did find is that the light was slightly off being able to create an accurate fully saturated RED. The light registered 2 degrees instead of 0 degrees.
How does it perform at various Kelvin color temperatures?
Summary of results (medium diffusion)
| SETTING | OUTPUT | CCT READING |
| 2800K | 1250 lx | 2798K |
| 3200K | 1270 lx | 3207K |
| 4500K | 1270 lx | 4510K |
| 5600K | 1260 lx | 5589K |
| 6500K | 1270 lx | 6557K |
| 8000K | 1270 lx | 8047K |
| 10000K | 1260 lx | 9824K |
These results show me that the lights output is exceptionally consistent at all Kelvin color temperatures.
The Cello²’s output only varies by 1.67% across the whole Kelvin spectrum. I am yet to come across a light that is able to maintain this type of consistent output across its whole Kelvin color temperature range. This is just the third light I have ever encountered where the output is almost dead on at every Kelvin color temperature across the range. The other two lights were the Luxli taiko and the Luxli Fiddle Pocket. This is extremely impressive. Whatever Luxli is doing, they are doing it right.
The Kelvin color temperature accuracy across the range is also exceptionally good,
If there is one word that sums up the Luxli Cello², it is consistency. The consistency and accuracy of the fixture are second to none.
Color Rendering
5600K
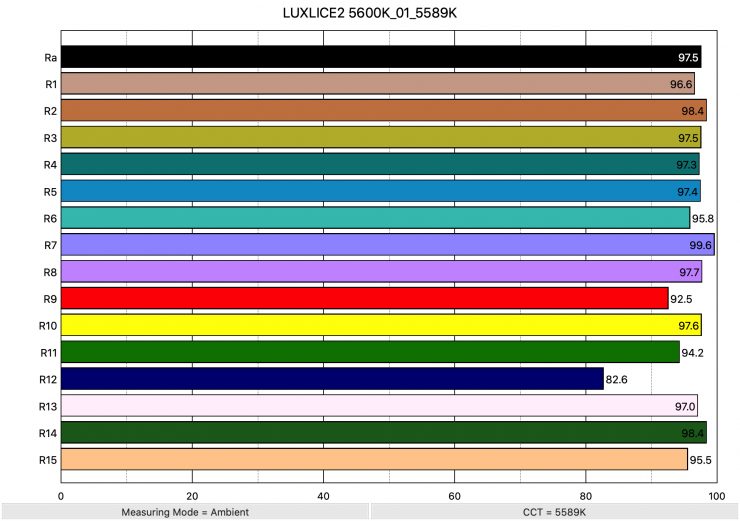
So now that we have seen how much output the Cello² produces, how does it perform when it comes to replicating accurate colors? Above you can see that when the light was set at 5600K it recorded an average CRI (R1-R8) of 97.5 and an extended CRI (R1-R15) of 95.8. For replicating accurate skin tones it recorded for R9 92.5 (red), 97.0 for R13 (closest to caucasian skin tones), and 95.6 for R15 (closest to Asian skin tones). These are very good results.
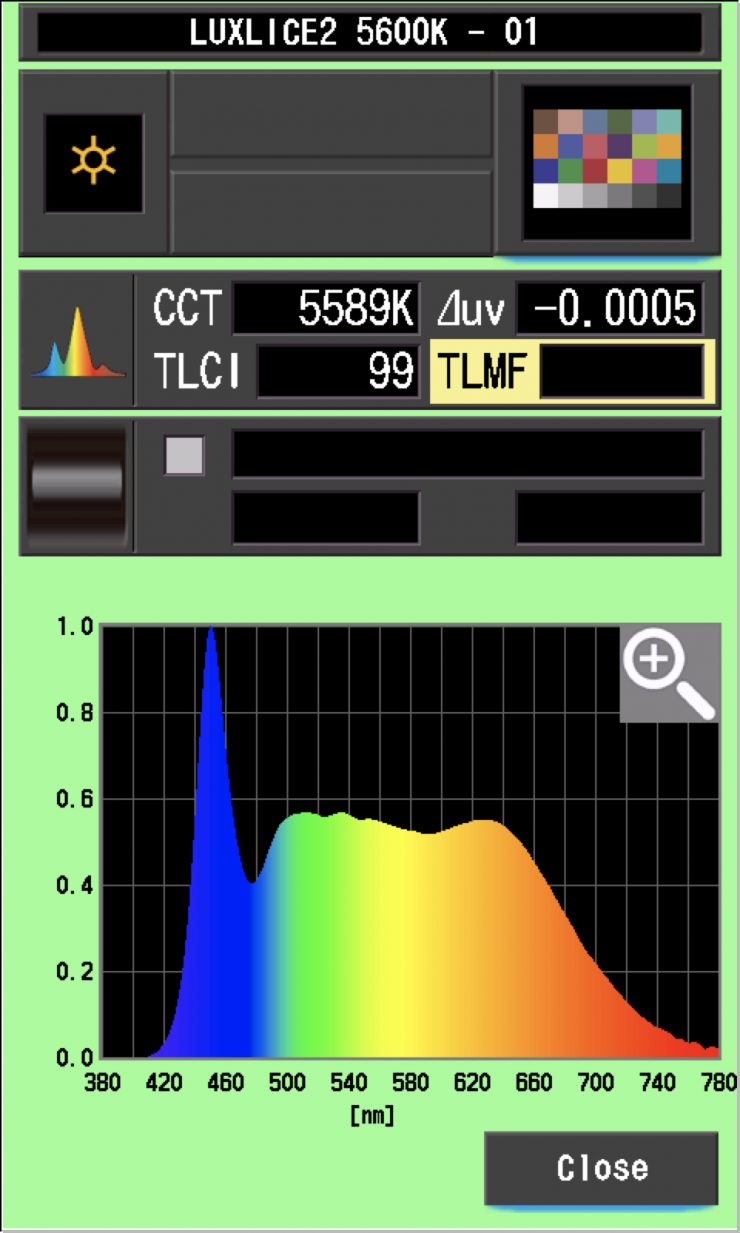
The light, when set at 5600K, recorded a TLCI score of 99. That is almost perfect.
How does this compare to the Pilotfly AtomCUBE Rx1 RGBCW
Pocket LED, Luxli Fiddle Pocket, and Lupo Kickassapanel Full-Color RGBW lights that we have previously reviewed when used at 5600K? Below you can see:
| Average CRI | Extended CRI | |
| Luxli Cello² | 97.5 | 95.87 |
| Lupo Kickassapanel Full-Color RGBW | 93.6 | 90.69 |
| Luxli Fiddle Pocket | 97.3 | 95.38 |
| Pilotfly AtomCUBE Rx1 RGBCW Pocket LED | 94.5 | 92.3 |
3200K
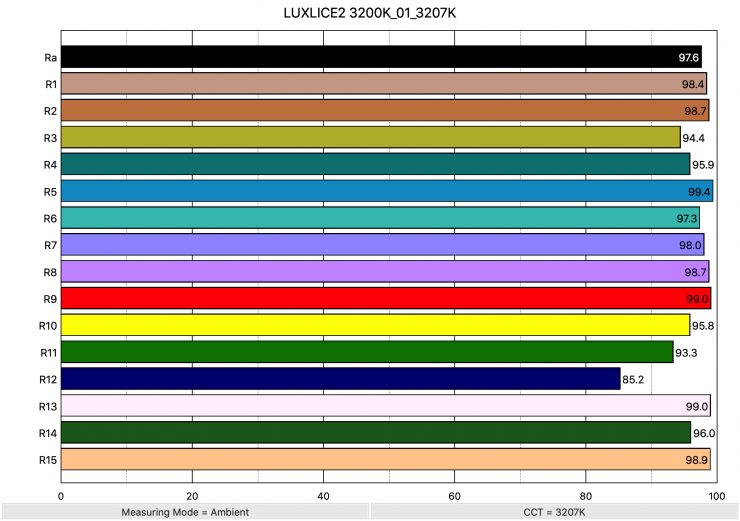
Above you can see the scores for when the light was used at 3200K. It recorded an average CRI (R1-R8) of 97.5 and an extended CRI (R1-R15) of 96.32. For replicating accurate skin tones it recorded 99.0 for R9 (red), 99.0 for R13 (closest to caucasian skin tones), and 98.9 for R15 (closest to Asian skin tones).
These results were some of the best from any light I have ever tested. The ARRI Orbiter still has the best extended CRI score of any light I have ever tested at 5600K.
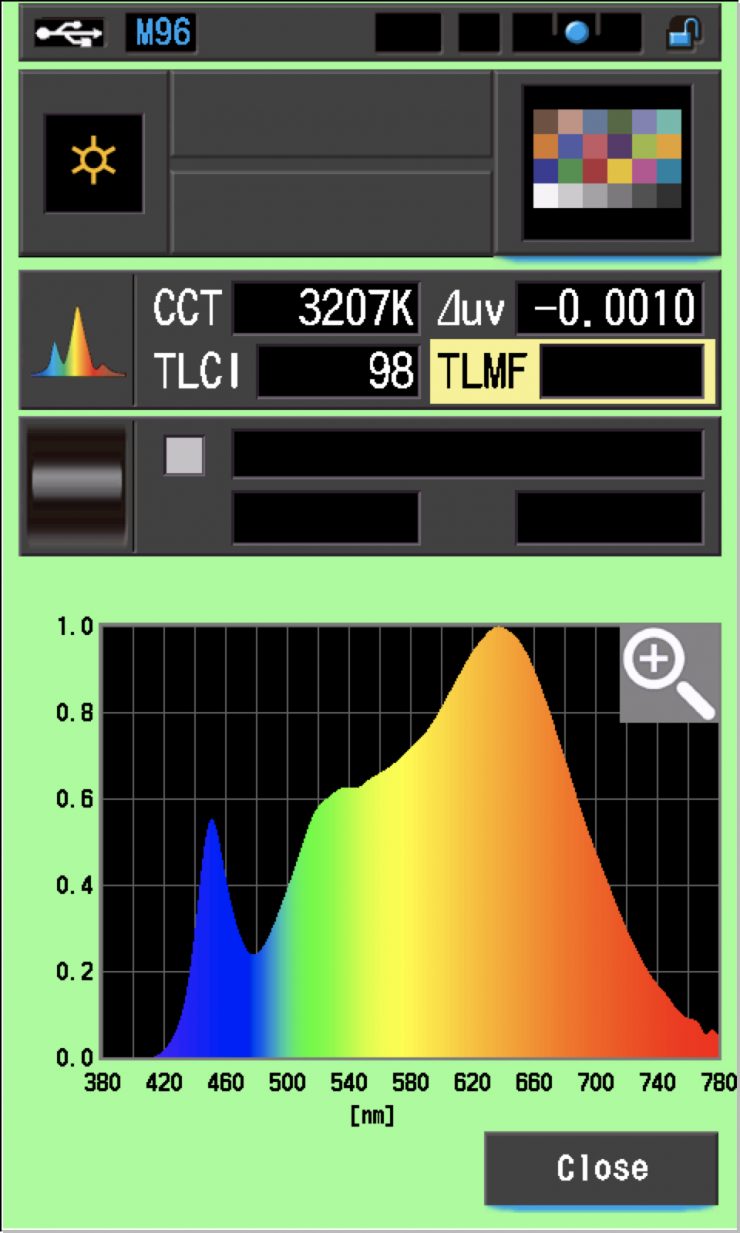
The light, when set at 3200K, recorded a TLCI score of 98.
How does this compare to Pilotfly AtomCUBE Rx1 RGBCW Pocket LED and Luxli’s own Fiddle Pocket when used at 3200K? Below you can see:
| Average CRI | Extended CRI | |
| Luxli Cello² | 97.6 | 96.53 |
| Lupo Kickasspanel Full-Color RGBW | 95.0 | 93.1 |
| Luxli Fiddle Pocket | 97.5 | 96.32 |
| Pilotfly AtomCUBE Rx1 RGBCW Pocket LED | 94.7 | 93.2 |
Once again the Luxli Cello² recorded higher scores than the Pilotfly. In fact, this is the second highest extended CRI score at 3200K that I have ever gotten from any light I have ever tested. The highest was the ARRI Orbiter.
Thoughts
The Luxli Cello² is a highly accurate fixture that replicated colors better than almost any other light I have tested. In fact, the only other light that beat it by a tiny, tiny margin, was the ARRI Orbiter. Its scores are exceptionally good across the whole Kelvin color temperature range.
CC Index & ⊿uv
The CC Index displays the CC correction value and whether any magenta or green need to be added or subtracted. 1 CC corresponds to 035 Kodak CC values or 1/8 Rosco filter values. Any reading less than +1.00 or -1.00 and you’re probably not going to need to make any kind of adjustment. The ⊿uv is the value to show how much this light is away from being an ideal light source (black body radiation = incandescent lamp). As with the CC Index you want this number to theoretically be zero. Kelvin is not a linear value, so we need to convert from Kelvin to MK-1 to compare the values of color temperature. To calculate from Kelvin to Mired is MK-1= 1*1000000/Kelvin. While this may sound confusing, it is the only way of measuring if the Kelvin shift is significant enough to warrant having to use a filter for correction. Below are the results for the Cello²:
Kelvin Vs MK-1
| Kelvin | Difference in K | MK-1 | Difference in MK-1 | |
| SET VALUE | 2800K | 0 | 357.14 | 0 |
| ACTUAL READING | 2798K | 2 | 357.39 | 0.25 MK-1 |
| SET VALUE | 3200K | 0 | 312.50 | 0 |
| ACTUAL READING | 3207K | 7 | 311.81 | -0.69 MK-1 |
| SET VALUE | 4500K | 0 | 222.22 | 0 |
| ACTUAL READING | 4510K | 10 | 221.72 | -0.50 MK-1 |
| SET VALUE | 5600K | 0 | 178.57 | 0 |
| ACTUAL READING | 5589K | 11 | 178.92 | -0.35 MK-1 |
| SET VALUE | 6500K | 0 | 153.85 | 0 |
| ACTUAL READING | 6557K | 57 | 152.50 | -1.35 MK-1 |
| SET VALUE | 8000K | 0 | 125 | 0 |
| ACTUAL READING | 8047K | 47 | 124.26 | -0.74 MK-1 |
| SET VALUE | 10000K | 0 | 100 | 0 |
| ACTUAL READING | 9824K | 191 | 101.79 | 1.79 MK-1 |
These figures might look confusing, but what it tells me is that the light is extremely Kelvin color accurate and you wouldn’t need to use any color correction gels at any of its settings. The MK-1 scores for the Cello² are exceptional. Any MK-1 score of -/+6 or under is considered to be very good.
CC INDEX & ⊿uv
| CC INDEX | ⊿uv | |
| 2800K | 0.1G | -0.0010 |
| 3200K | 0 | -0.0010 |
| 4500K | 0 | -0.0009 |
| 5600K | 0.1G | -0.0005 |
| 6500K | 0.3G | -0.0007 |
| 8000K | 0.6G | -0.0005 |
| 10000K | 0.9G | 0.0000 |
The ⊿uv scores were very good for this light and some of the best I have seen from any LED light. The Creamsource Vortex 8 has the best ⊿uv scores I have seen from an LED fixture. Only the Rotolight Titan X2, Luxli Fiddle Pocket, and Creamsource Vortex8 have ever recorded a perfect ⊿uv at any Kelvin color temperature.
TM-30
TM-30 is a relatively new color rendering standard that was developed to deal with the limitations of CRI. TM-30 looks at 99 individual colors. These 99 colors are categorized into seven groups: nature, skin color, textiles, paints, plastics, printed material, and color systems.
TM-30 scores go from 0 – 100. The higher the score, the more accurate a light is at producing colors. Any TM-30 Rf score in the ’90s is considered to be good. What is interesting and something that you need to be very aware of is that two separate light sources with the exact same CRI scores can render colors very differently. A light with a high CRI rating could have a low TM-30 score. Conversely, a light with a good TM-30 score could have a bad CRI score.
Now, there are two measurements associated with TM-30, Rf and Rg.
- Rf (Color Fidelity)
- Rg (Color Gamut)
With Rf value, ideally, you want a score in the 90’s.
With Rg value, a score below 100 indicates that the light source renders colors with less saturation than the reference source. So ideally you want this score to be above 100.
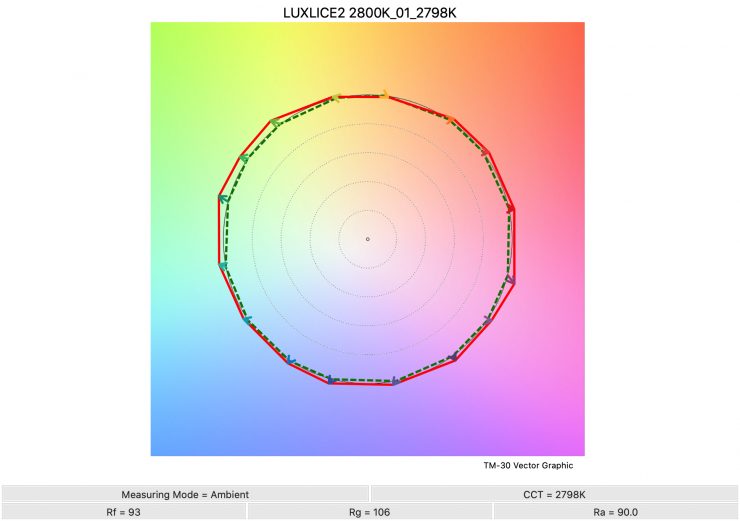

2800K 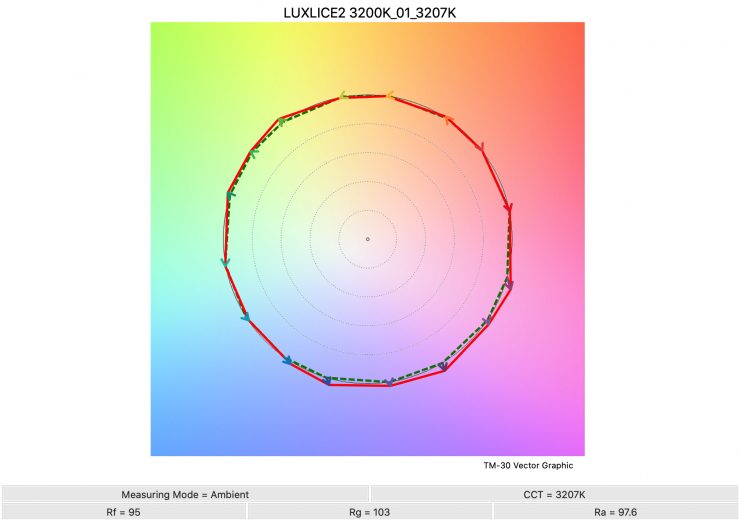
3200K 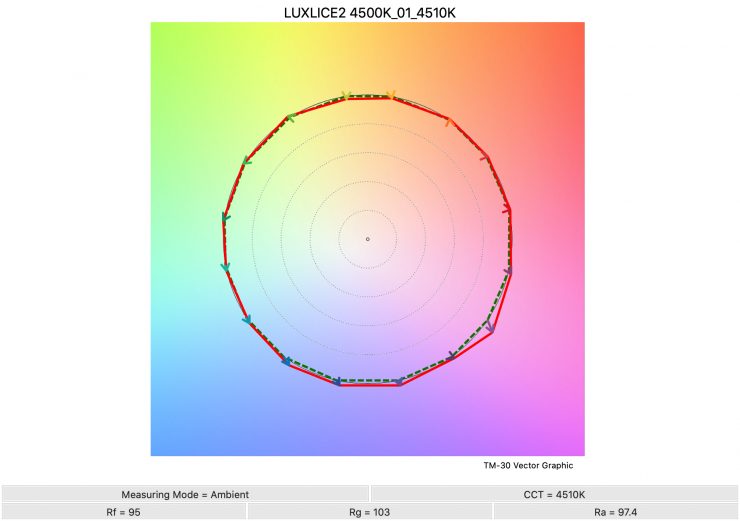
4500K 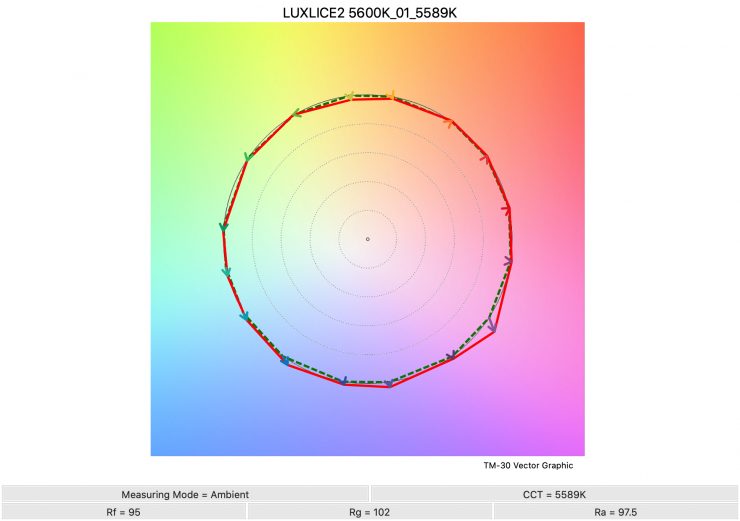
5600K 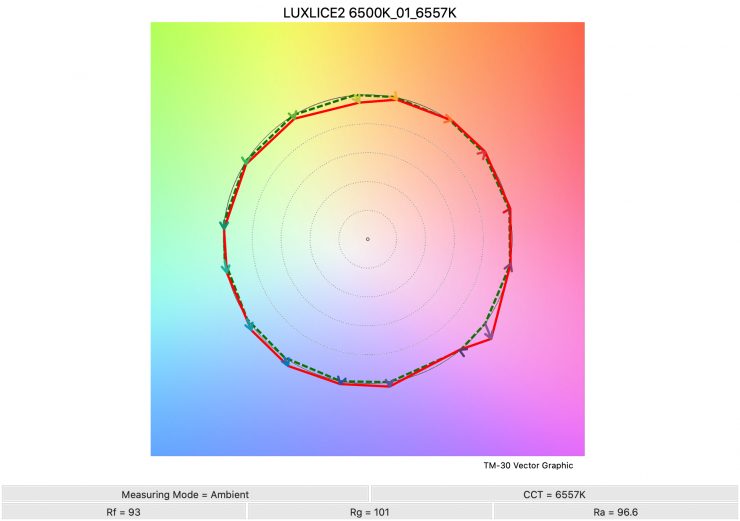
6500K 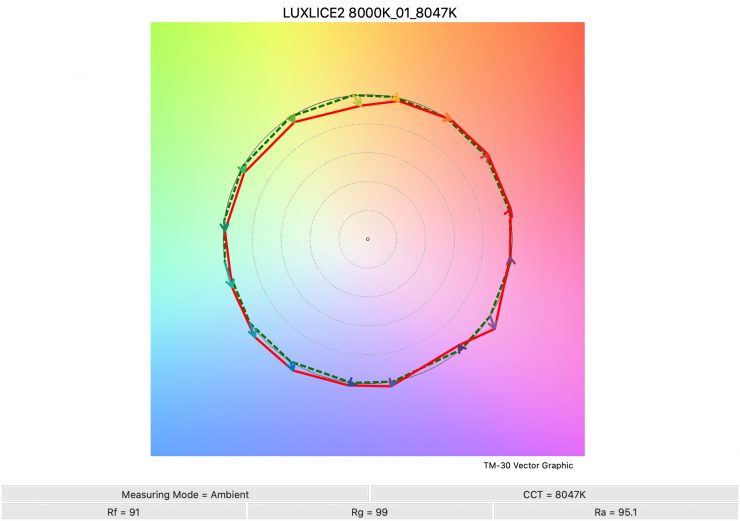
8000K 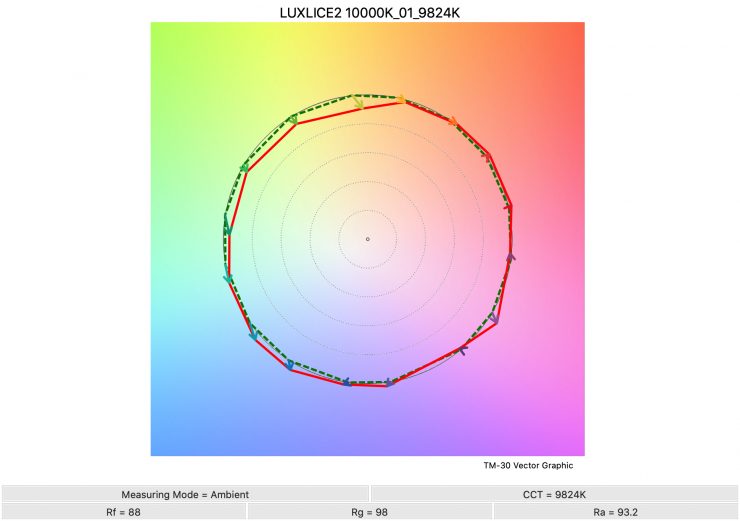
Above you can see the scores for the Cello² at various Kelvin color temperatures.
Here are the results:
| Rf | Rg | |
| 2800K | 93 | 106 |
| 3200K | 95 | 103 |
| 4500K | 95 | 103 |
| 5600K | 95 | 102 |
| 6500K | 93 | 101 |
| 8000K | 91 | 99 |
| 10000K | 88 | 98 |
These are pretty good results.
SSI
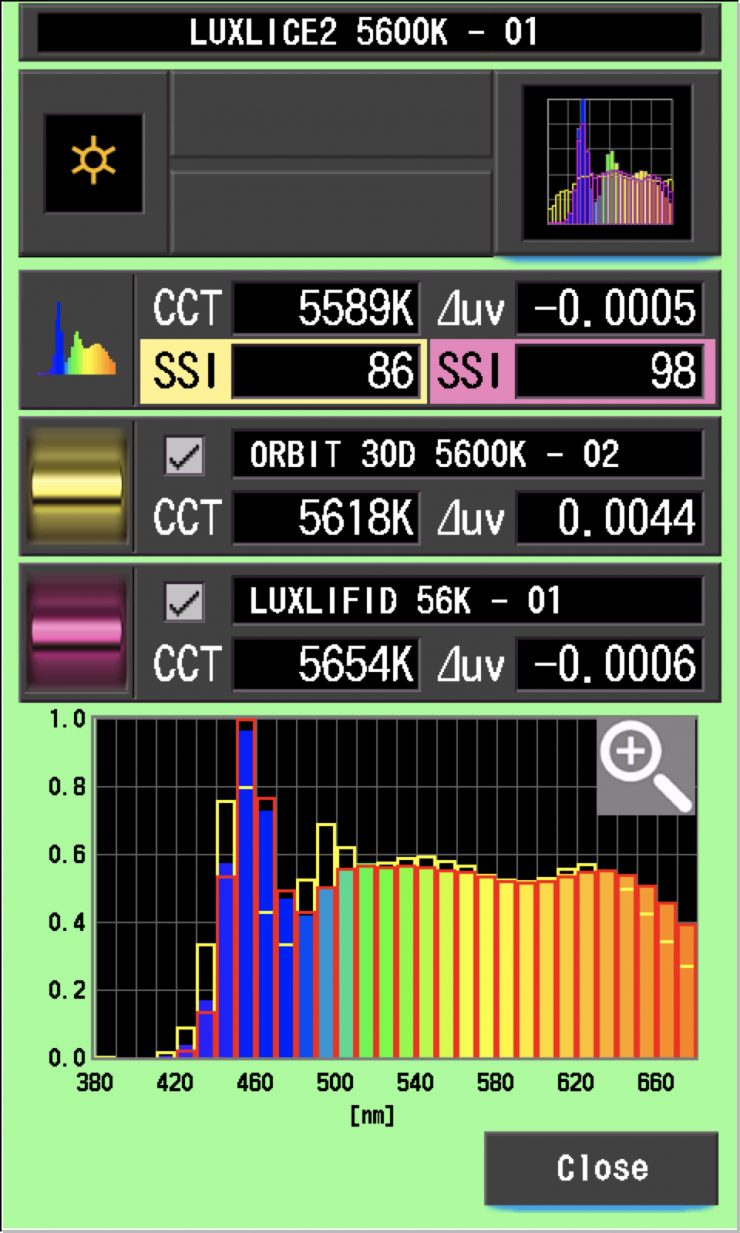
SSI (Spectral Similarity Index) was developed by the Sci-Tech Council of the Academy. SSI gives me the ability to set any light as a standard, or use predefined standards (such as CIE D55), and then give other lights an SSI score based upon how well they will match standards such as CIE D55. This way I can measure spectral response and compare it directly against an ideal light source. This is actually a much better test than recording CRI scores.
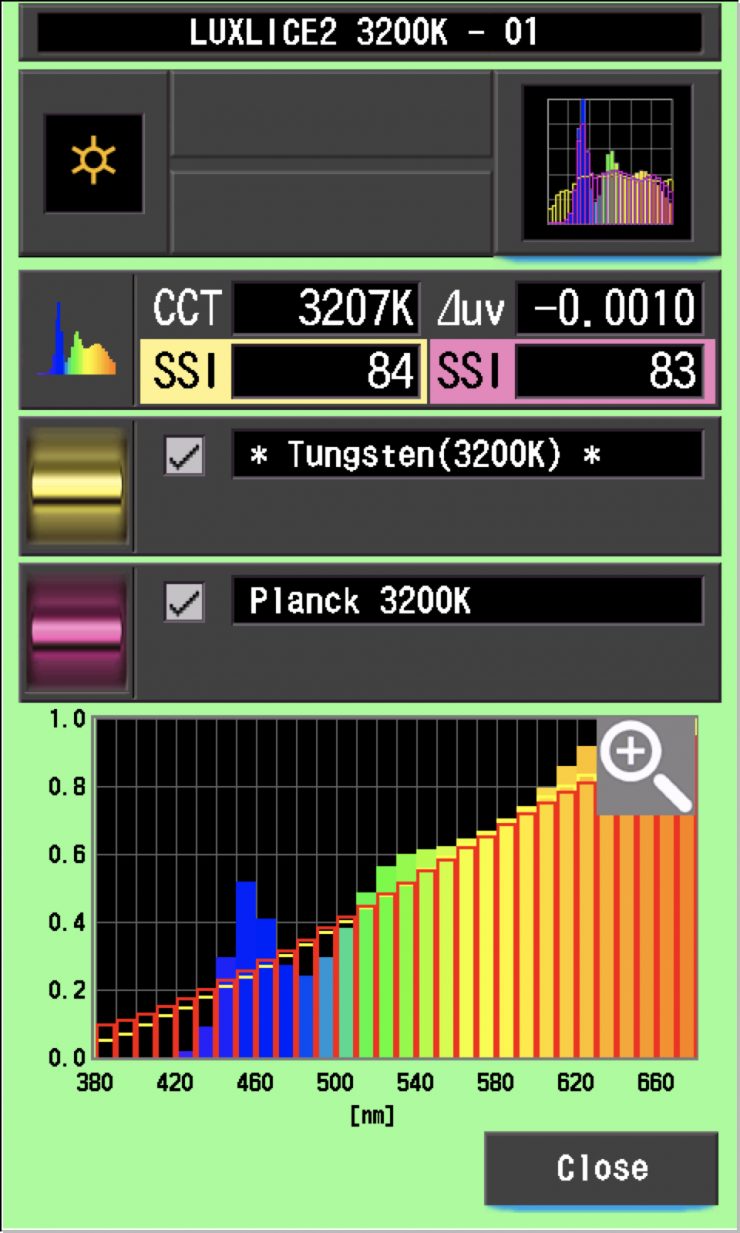
In this graph, the red bars indicate a perfect Planck 3200K source. The gold bars indicate a perfect 3200K Tungsten source. This lets us compare how close to a perfect 3200K lighting source the Cello² is. Any SSI score in the low ’80s is very good for a 3200K LED light. As you can see, LED lights have a hard time replicating colors below about 450nm.
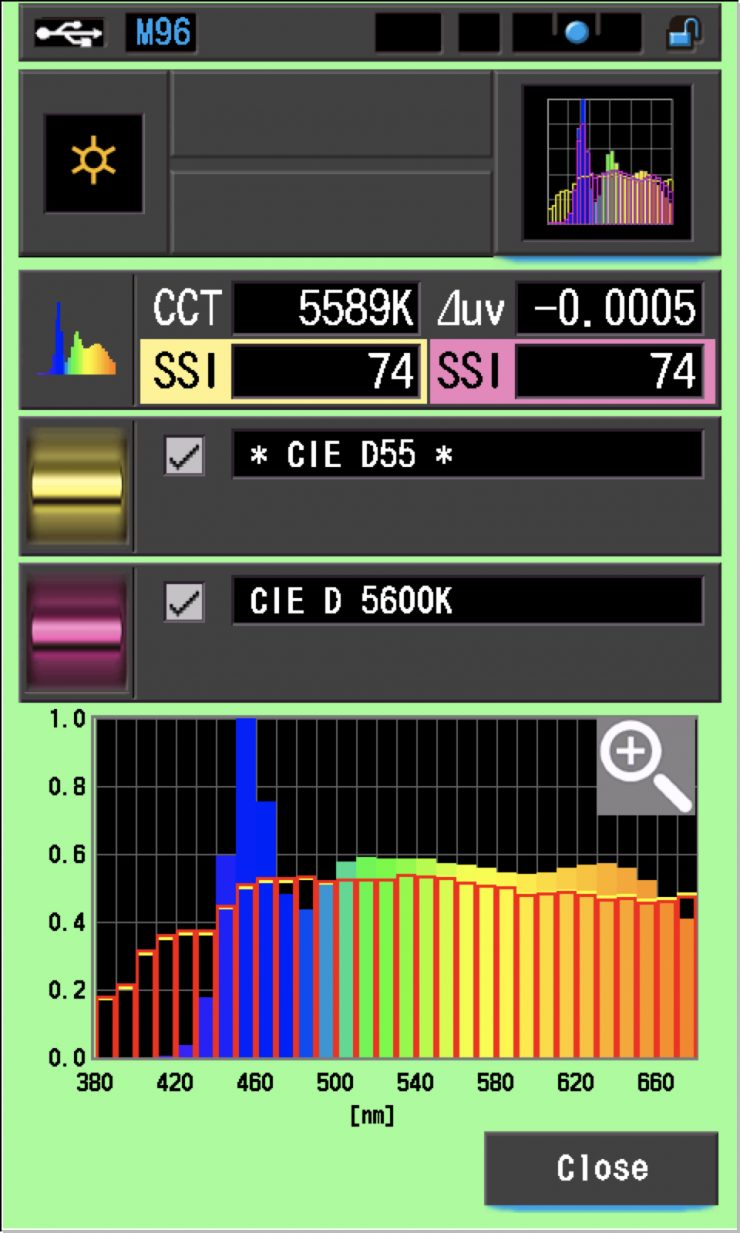
In the graph above the gold bars indicate a perfect CIE D55 source. The red bars indicate a perfect CIE D 5600K source. A score in the low 70’s is very good for a 5600K LED source. If you look at the⊿uv value it is -0.0005. The ⊿uv value shows how much this light is away from being an ideal light source (black body radiation = incandescent lamp). This light was almost perfect.
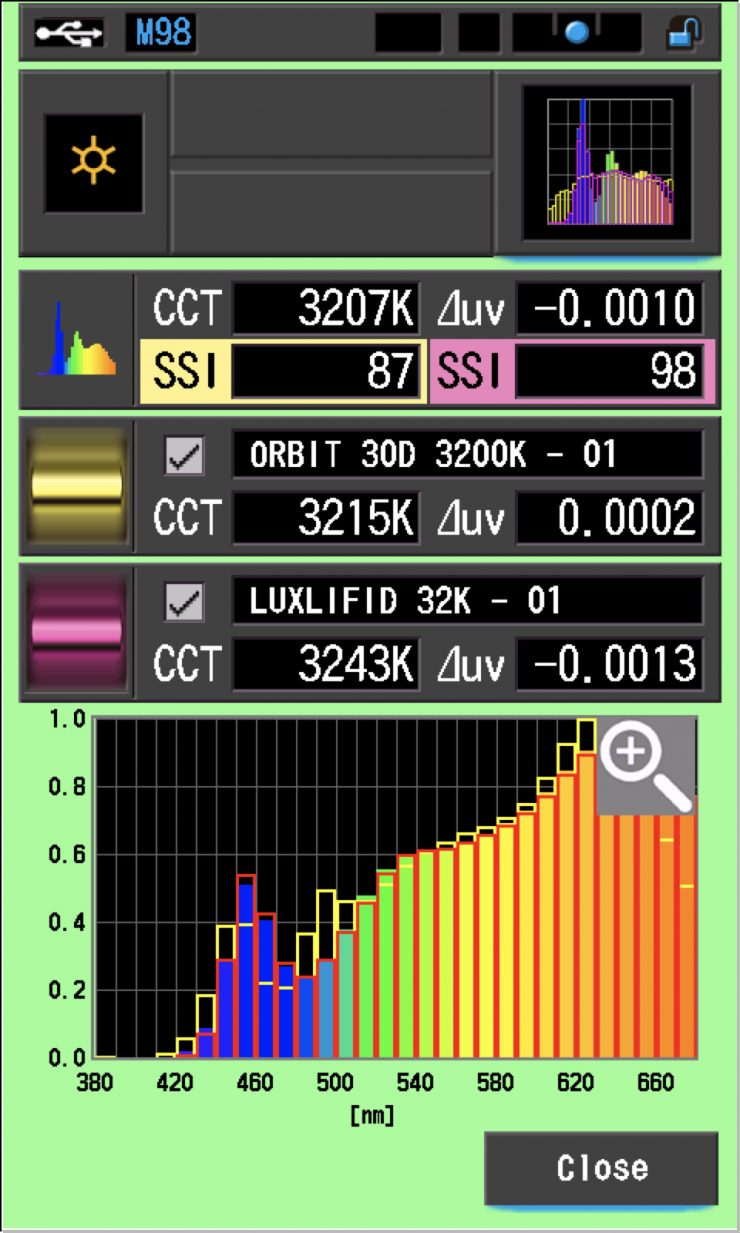
The main reason we want to record SSI scores is so we can see how well they match with other lights. As an example, let’s see how well it matches with an ARRI Orbiter and Luxli’s own Fiddle Pocket. Above you can see the results at 3200K and 5600K. As you can see, the Cello² matched pretty well with the ARRi Orbiter and it was almost a perfect match with Luxli’s own Fiddle Pocket.
I also tested out the Cello² and compared it to both the Luxli Taiko and Timpani fixtures and the light was a very close match to both of those lights. If you owned other Luxli lights, the Cello² is going to match pretty seamlessly.
SSI tests are a great way of telling you what lights you own or use will work well together.
Spectral Distribution
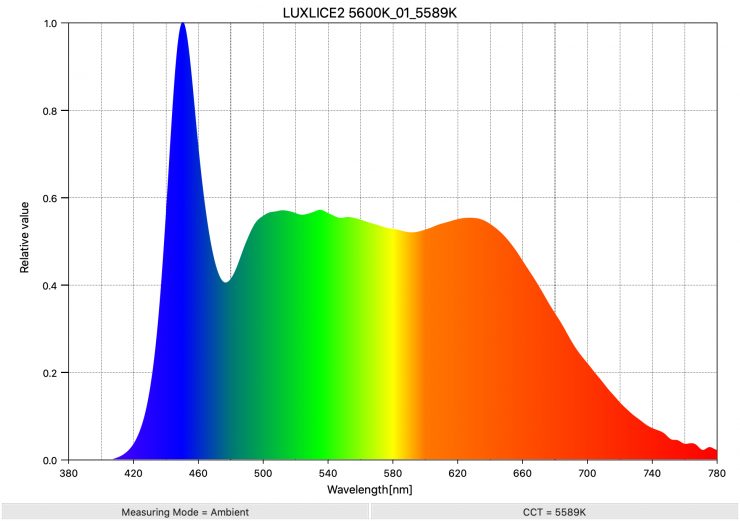
Above you can see the spectral distribution of the Cello² when it is set at 5600K. The spectral distribution is very full and even.
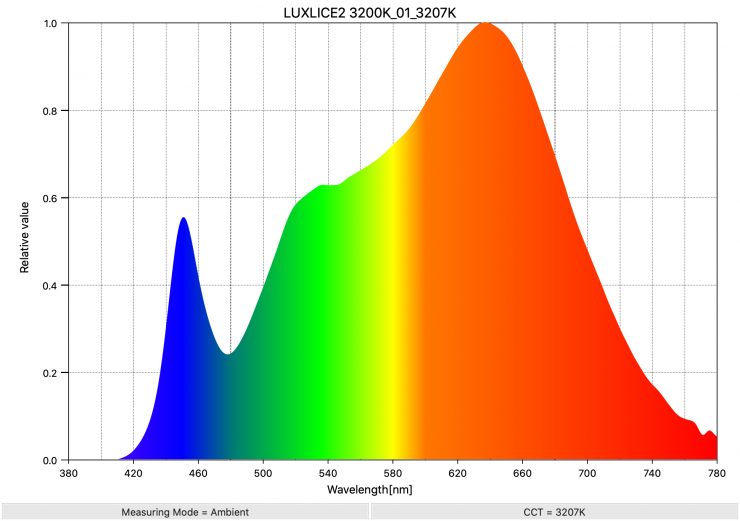
Above you can see the spectral distribution of the Cello² when it is set at 3200K. The spectral distribution is nice and full and there is only a light push towards green.
Real-World Performance & Quality of Light
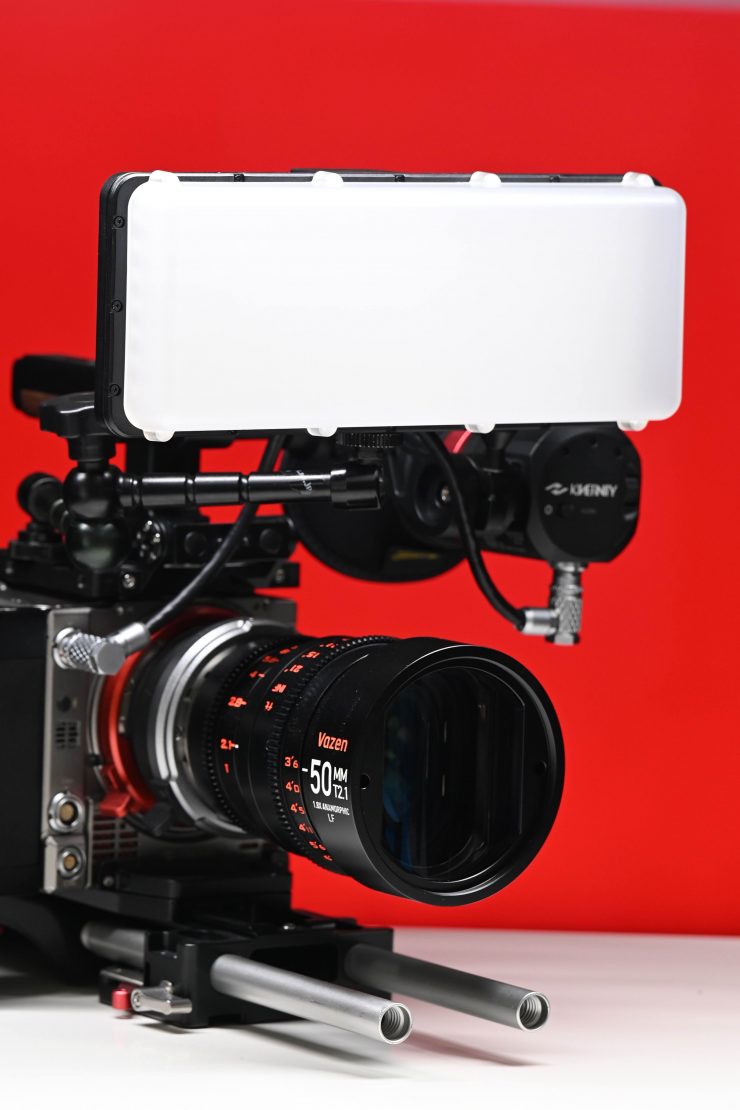
As I always say, photometric scores only tell you part of the story. So do the scores from the Cello² translate into real-world performance? The Cello² produces a nice, reasonably broad 72° spread of light. The photometric data can only give me scientific data and it is much more important for me to see how the light looks and performs with skin tones.
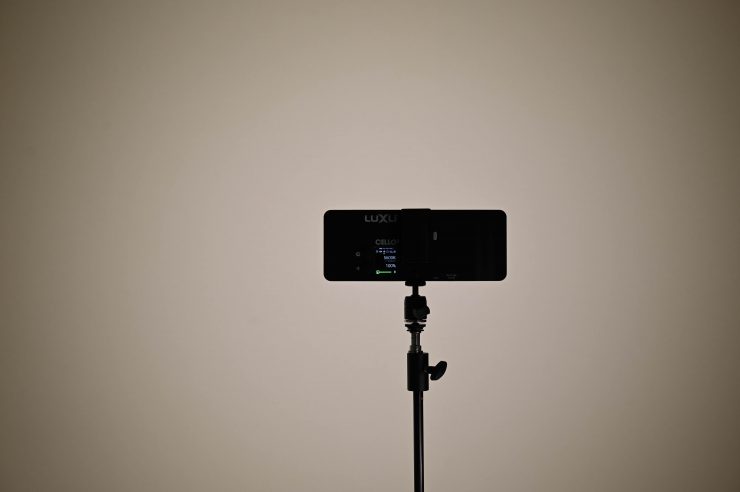

Luxli Cello² 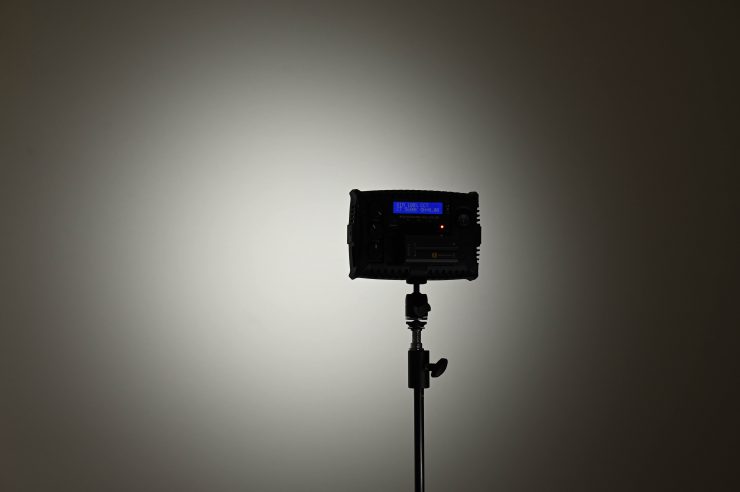
Lupo Kickasspanel Full-Color RGBW
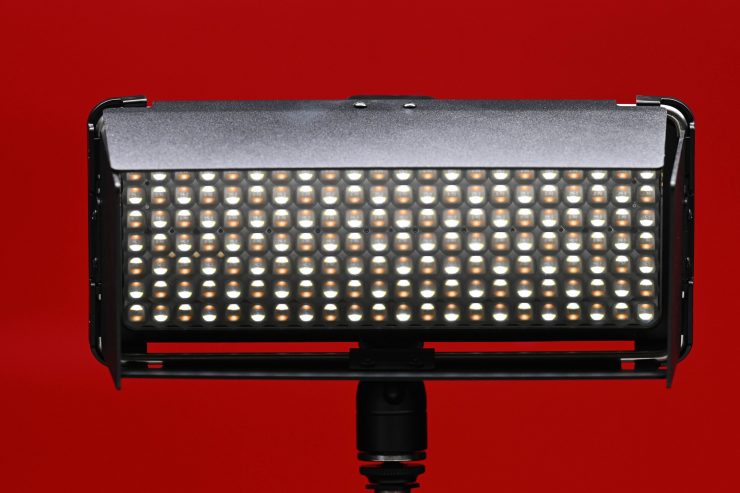
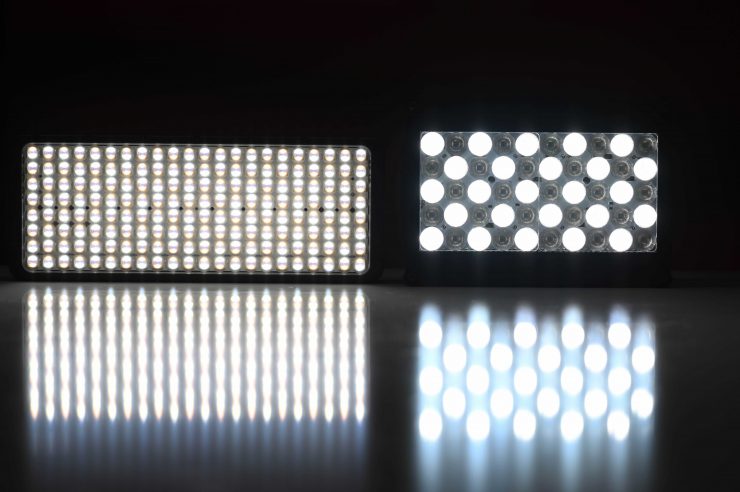
Above you can see how the intensity and beam spread of the Cello² compares to the Lupo Kickasspanel Full-Color RGBW. The Cello² has a much broader beam spread and softer fall-off. The Lupo is a very spotty and directional LED light and the fall-off is pretty harsh.
The light can be made to look quite soft, but again, anytime you diffuse a small source you are going to lose a lot of output. The Cello² probably just has enough output that you could get away with diffusing it and still maintain decent enough light levels.

If you don’t diffuse it you will get cross-hatched shadows if the object you are illuminating to too close to something else. In most instances, you probably won’t be doing this with a light, but it is important that you are aware of it.
The Cello² provides a decent amount of output, good usability, and it is really well made. This all comes with the added benefit of the light being extremely color accurate.
Having digital filters, and special effects are nice, but most users will just want to create really nice white light, and that is something the Cello² does really well.
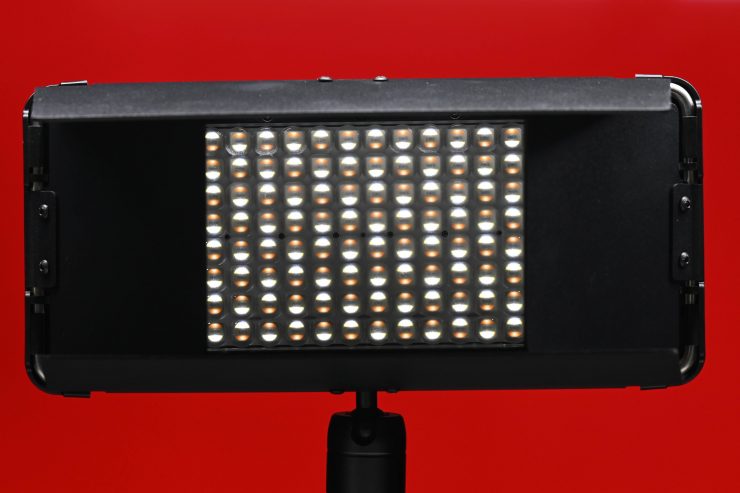
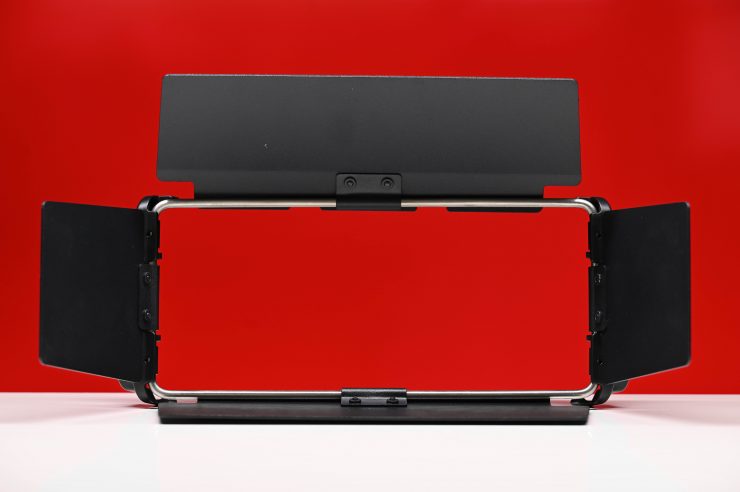
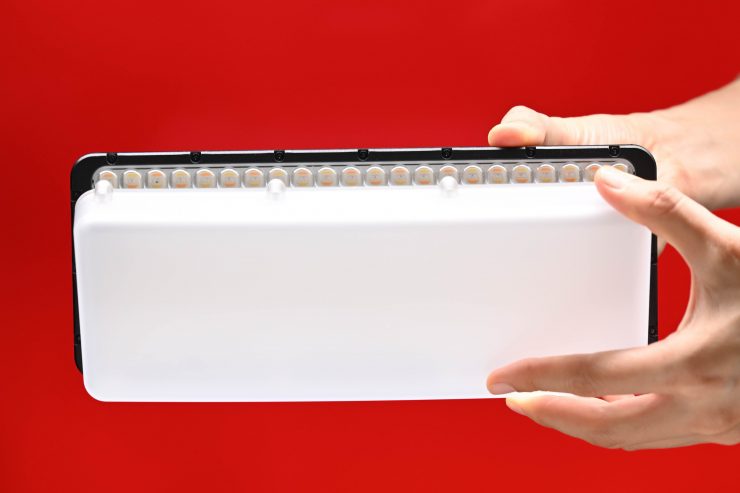
Two of the optional accessories I got to try out were the barn doors and the magnetic diffusion filter.
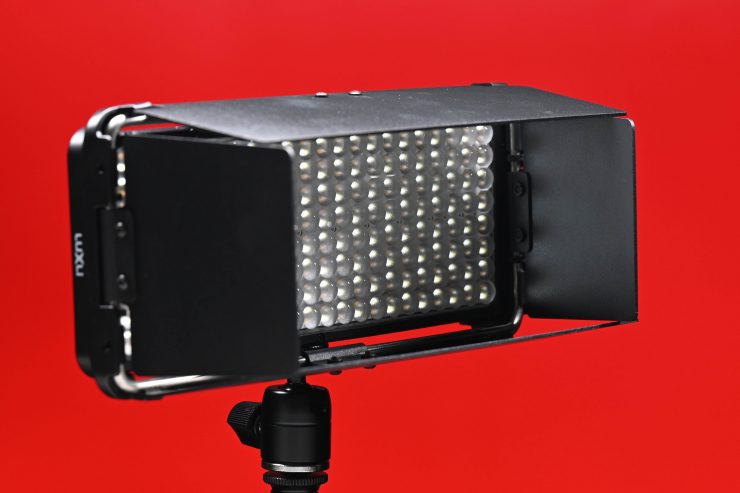
The barn doors are really well made for a light at this price point
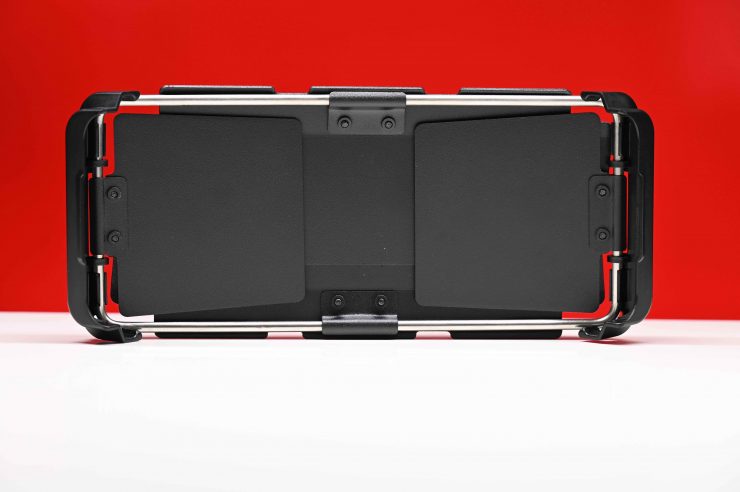
They clip onto the Cello². They don’t wobble around or rattle.
The only issue is that they don’t really work that well. It isn’t that they don’t cut the light, it is more to do with the cross-hatching you get when you use them.
Above you can see what I mean. The effect is amplified the more you close the barn doors down.
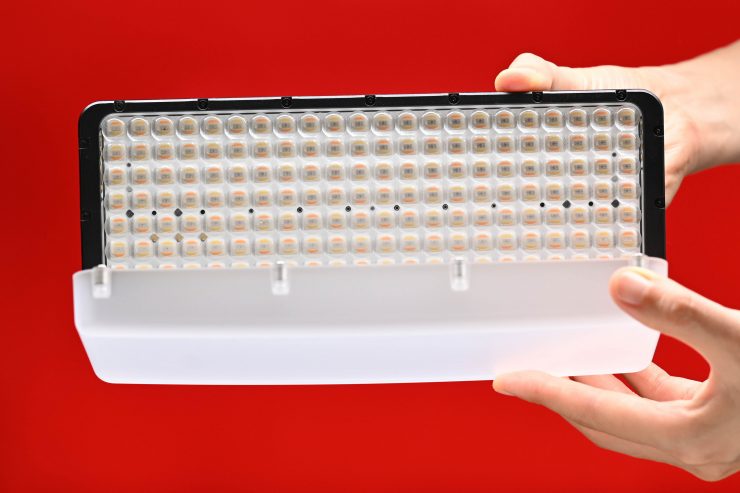
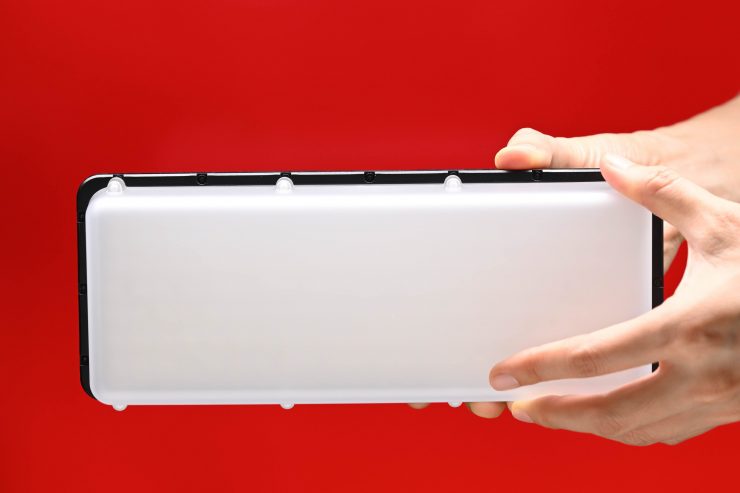
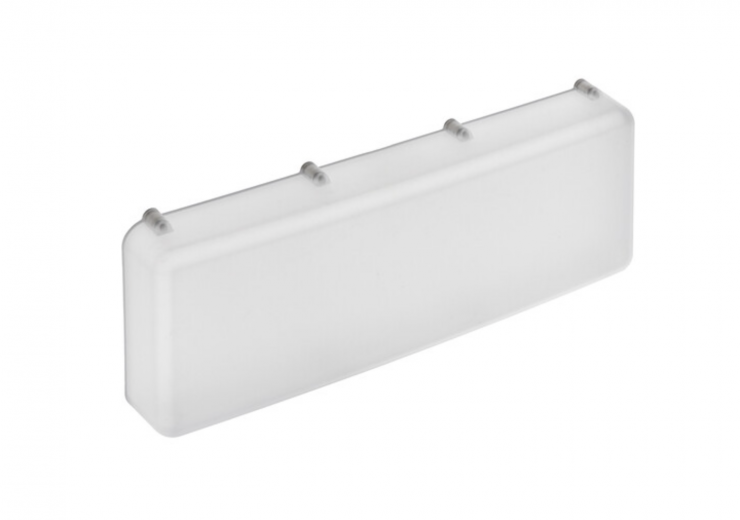
The Magnetic Diffusion filter works really well and it is so quick to put on and take off the light.
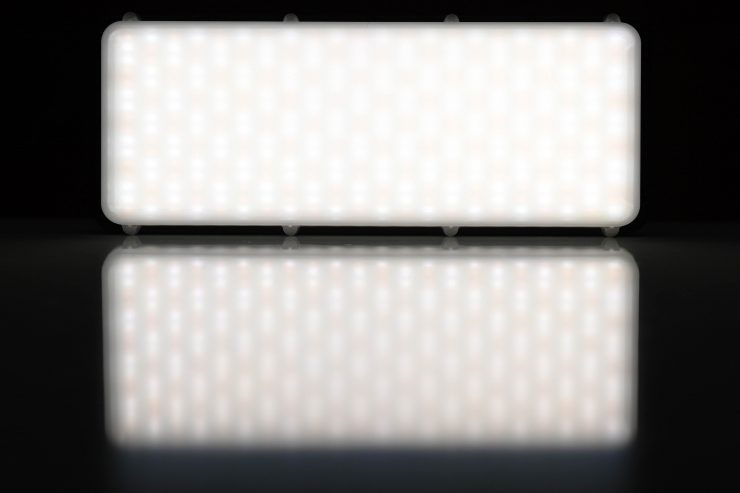


No cross-hatched shadows 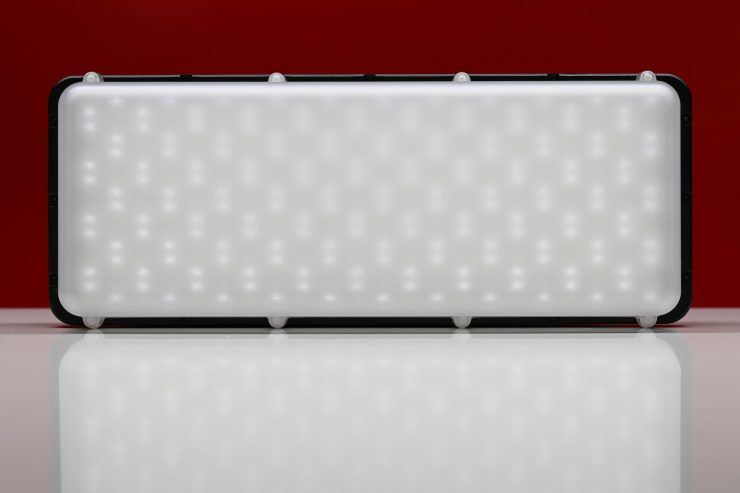
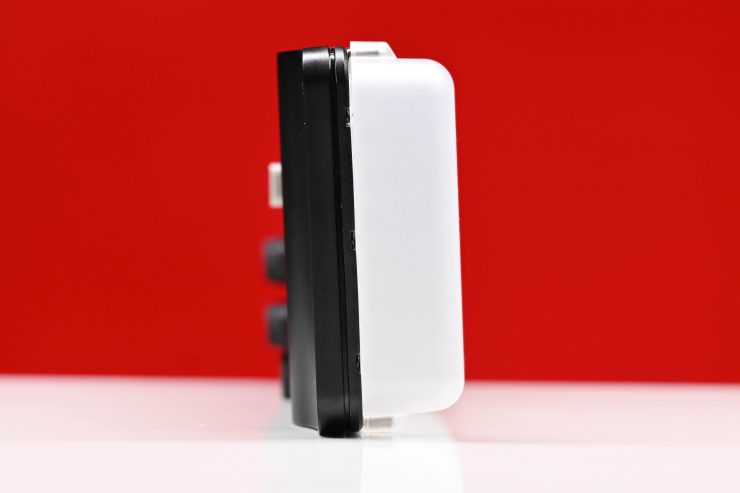
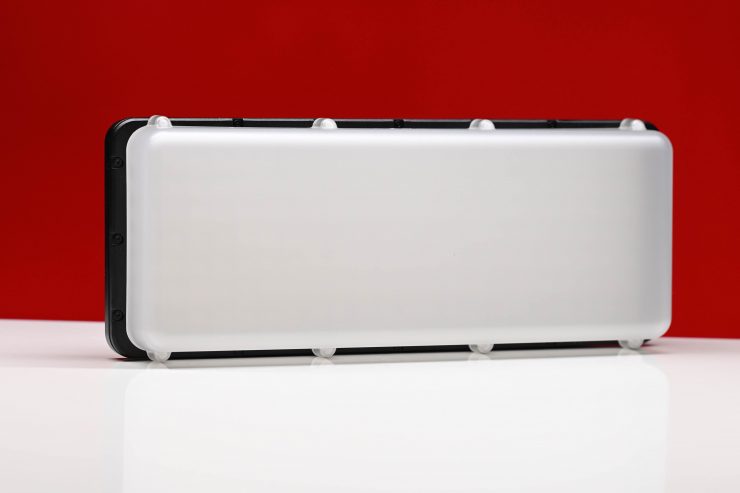
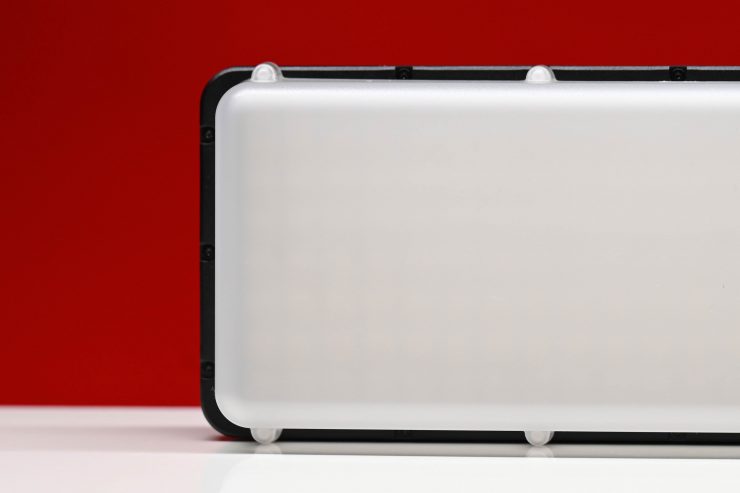
It certainly does a good job of softening up the light and it gets rid of those bad cross-hatched shadows that you get when you aren’t using it.
Firmware Updatable
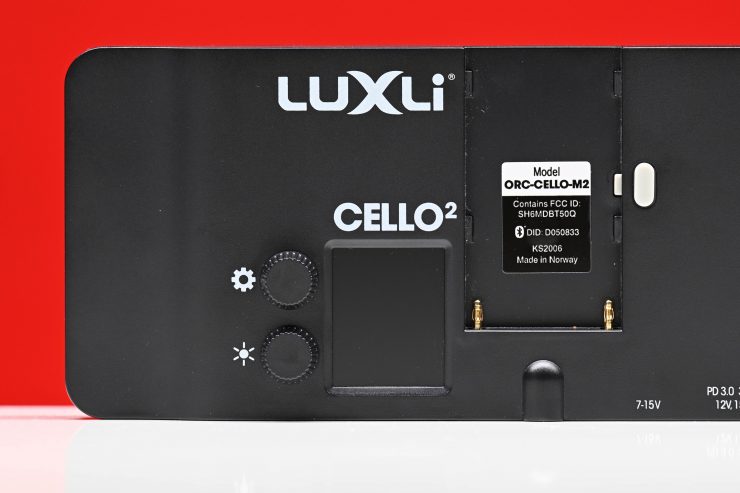
Like a lot of today’s lights, the Cello² is fully firmware upgradeable.
Who is the Cello² aimed at?
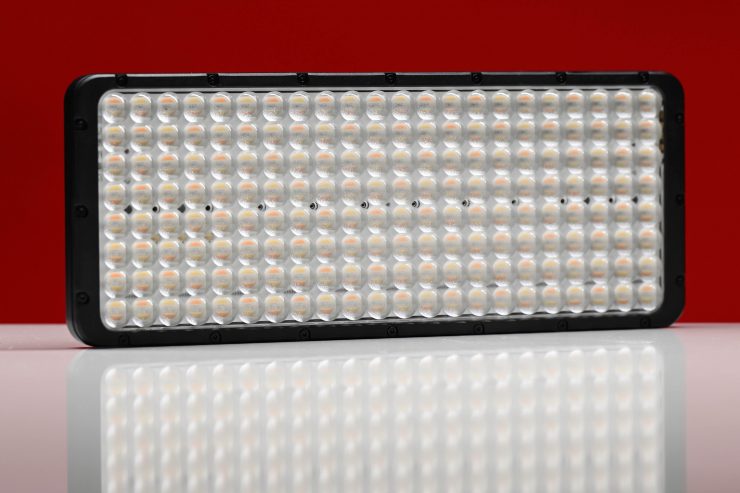
The Cello² could be used for a lot of different applications, but it is probably a fair assumption to say that it is being aimed as an on-camera light or small accent light for owner-operators or even YouTubers. In saying that it does have enough output to be used as a key light in a pinch.
The light is competitively priced given its feature set and performance, although it will cost you a little more than some other similar alternatives on the market.
Other Alternatives
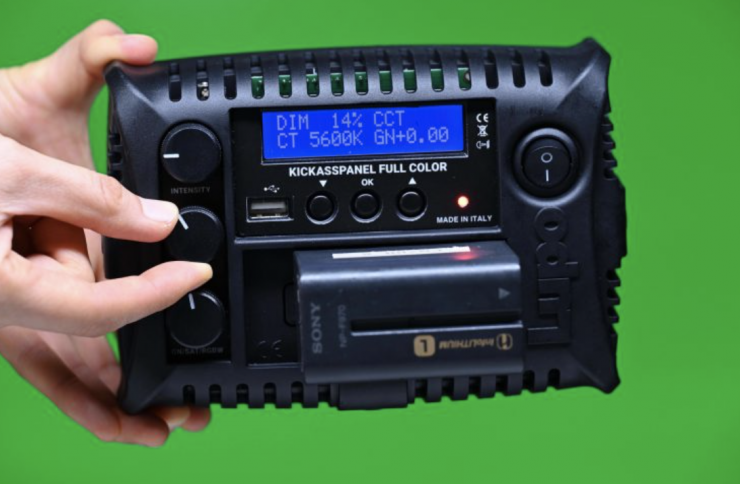
The main competition for the Fiddle comes in the form of the following lights:
- Lupo Kickassapanel Full-Color RGBW
- Luxli Fiddle Pocket
- PFY Matrix Pocket-Sized Portable Bi-Color RGB Light
- Pilotfly AtomCUBE Rx1 RGBCW Pocket LED
- YY-C150 RGB LED video light
- BOLING Pocket LED RGB Video Light
- Aputure MC RGBWW LED Light
- Falcon Eyes PockeLite F7 RGBW On-Camera Light
All of these lights have their strengths and weaknesses. It is important to note that a lot of these competing lights are actually the same light that has just been rebranded under a different name.
The closest direct competitor is certainly the Lupo Kickassapanel Full-Color RGBW.
Price & Availability
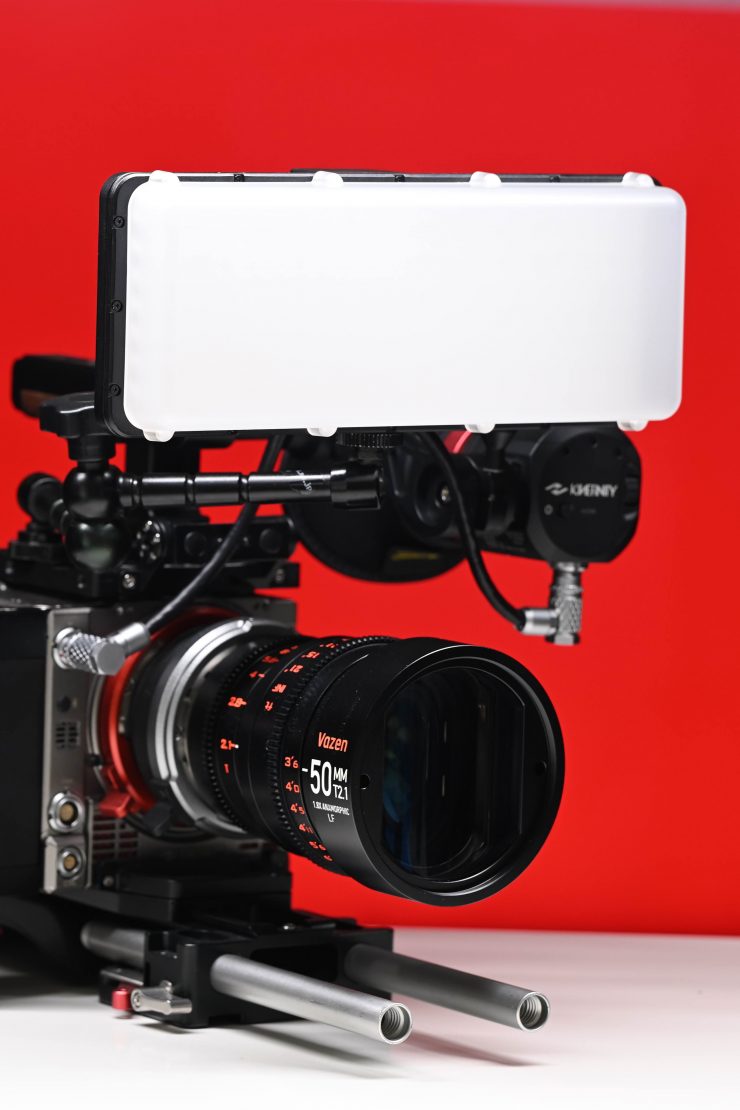
The Luxli Cello² is priced at $399 USD. This cost makes it a little higher than all of the competition. However, I personally think that the Cello² is a better option than any of these other options given its output, battery life, and color rendering performance.
Below you can see how the price compares to the competition:
| Price | |
| Luxli Cello² | $399 USD |
| Lupo Kickassapanel Full-Color RGBW | $298 USD |
| Luxli Fiddle | $199 USD |
| PFY Matrix Pocket-Sized Portable Bi-Color RGB Light | $149 USD |
| Pilotfly AtomCUBE Rx1 RGBCW Pocket LED | $169 USD |
| YY-C150 RGB LED video light | $69 USD |
| BOLING Pocket LED RGB Video Light | $119 USD |
| Aputure MC RGBWW LED Light | $90 USD |
| FalconEyes PocketLite F7 RGB LED | $99 USD |
Specifications
| LED TYPE | 5-Die RGBAW |
| BEAM ANGLE | 72° |
| KELVIN COLOR TEMPERATURE RANGE | 2800 to 10,000K |
| COLOR ACCURACY STANDARD | TLCI: 97 CRI: 95 |
| COOLING SYSTEM | Passive |
| DIMMING | 0% to 100% (continuous) |
| HOUSING MATERIAL | Aluminum |
| LEDS | 176 |
| RECTANGULAR PANEL SIZE | (W × H) 5.1 × 2.4 in. (13 × 6.1 cm) |
| FIXTURE DIMENSIONS | (W × H × D) 9.5 × 3.6 × 0.8 in. (24 × 9.3 × 2 cm) |
| WEIGHT | (without battery) 12.5 oz. (354.8 g) |
| CONNECTORS | DC Connector USB Type-C |
| MOUNTING | Fixture Mount 1/4-20 female socket (×1) |
| POWER | USB PD Input 12 V, 15 V |
| POWER DRAW | 30 W |
| WARRANTY | One-Year Limited |
In the Box
• Cello² RGBAW LED Light
• Shoe mount ball head
• NP-F750 battery
• USB Type-C wall charger
• USB Type-C cable
• QuickStart guide
• Photometric Calibration Datasheet
Accessories
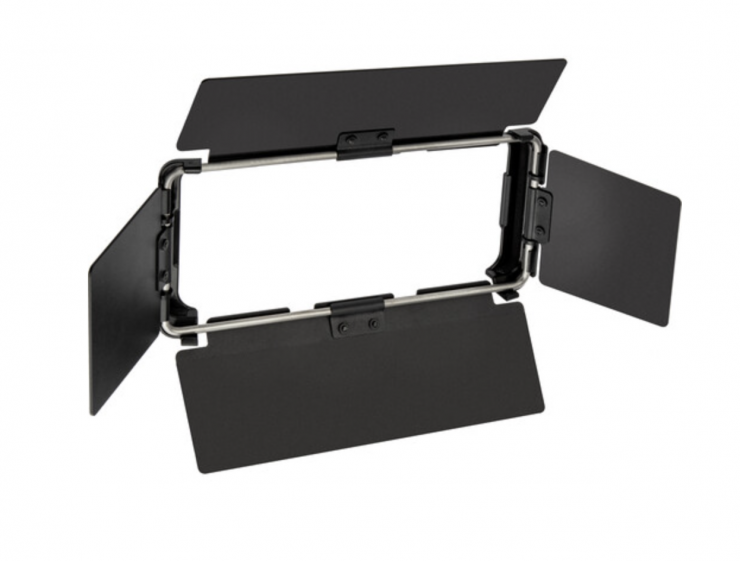
Luxli offers a few optional accessories for the light. These include:
Conclusion
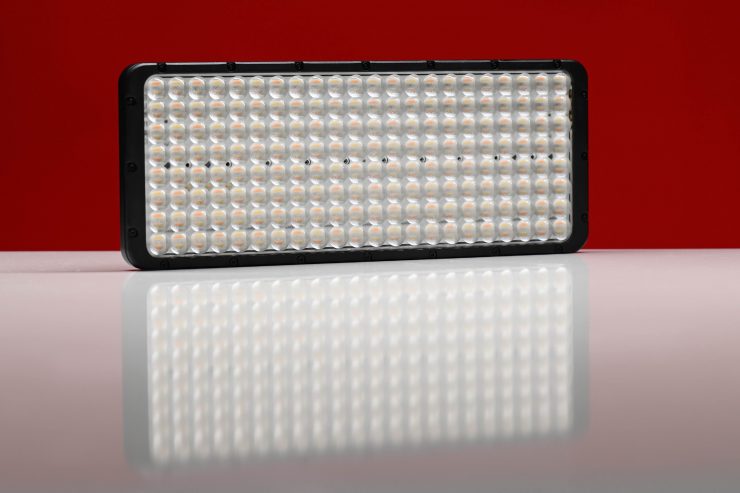
The Luxli Cello² is an outstanding light. It offers extremely good color rendering performance, a nice amount of output, good build quality, and it can be controlled by a fantastic app.
The output is almost identical no matter what Kelvin color temperature you run the light at and it is very Kelvin color-accurate across its whole range. This light is the epidemy of consistency.
The light is straightforward and intuitive to use. The Luxli Composer App is one of the best lighting control apps that is available and it has been for quite some time.
I highly recommend the Cello², and Luxli has done a fantastic job with this fixture. It delivers on all fronts and if you are after a small-sized on-camera or off-camera RGBW light then you should definitely give it a long hard look.
Like what we do and want to support Newsshooter? Consider becoming a Patreon supporter and help us to continue being the best source of news and reviews for professional tools for the independent filmmaker.

