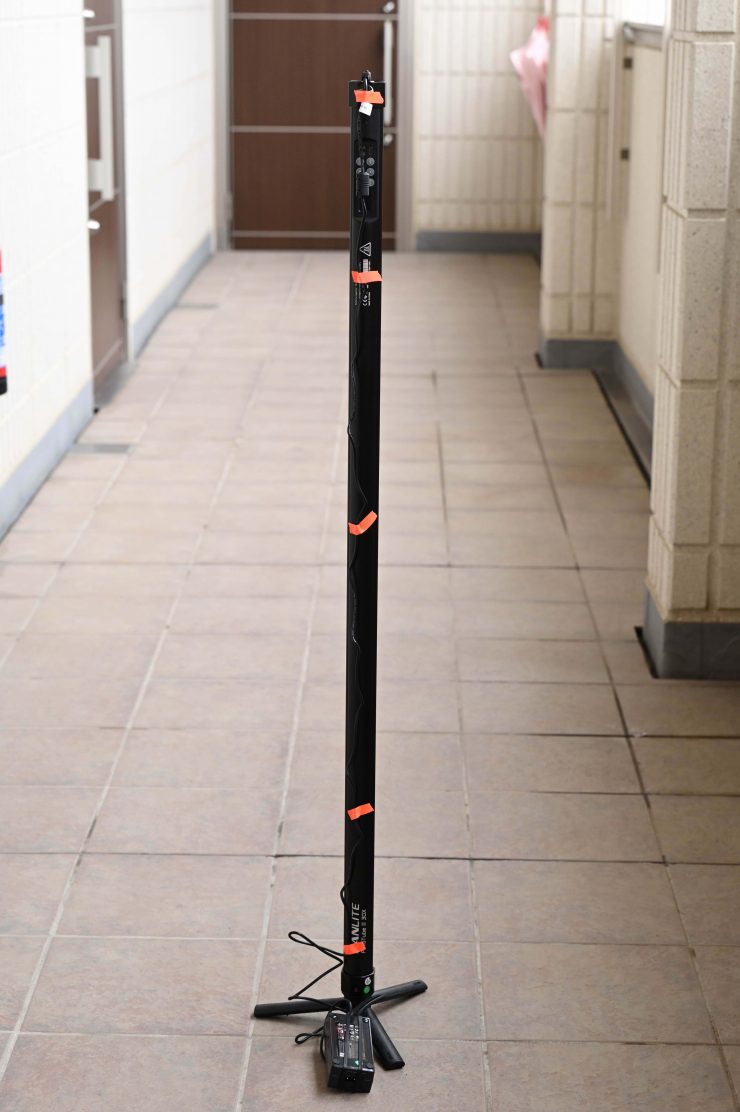
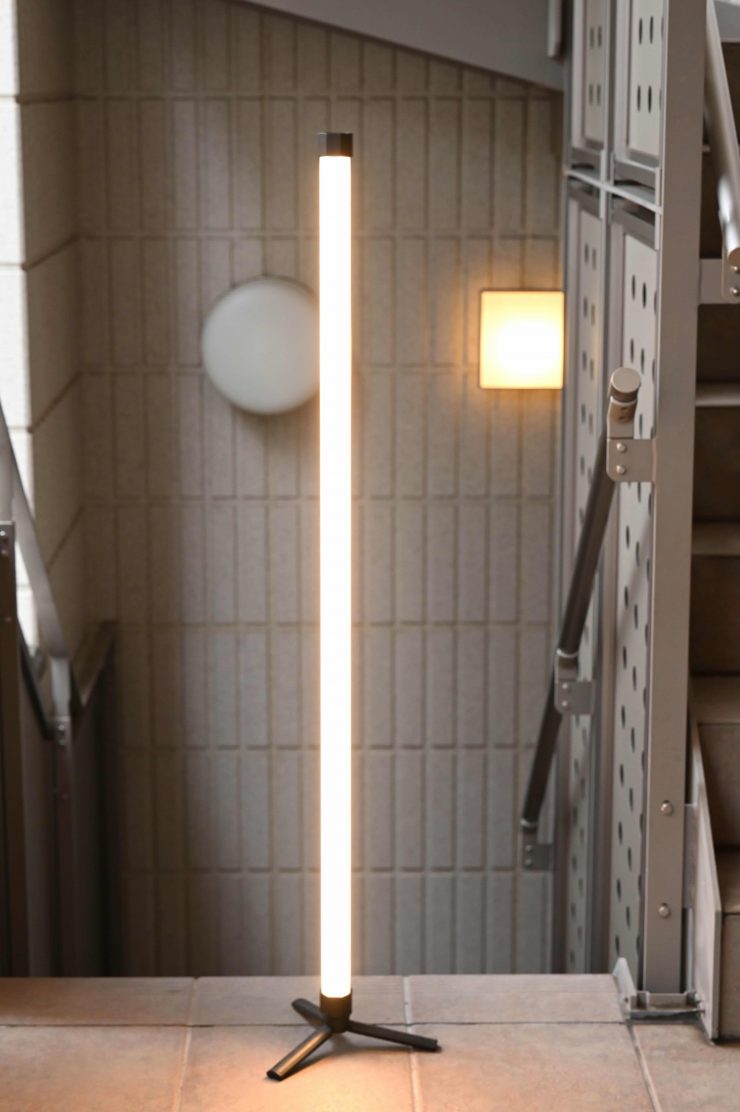
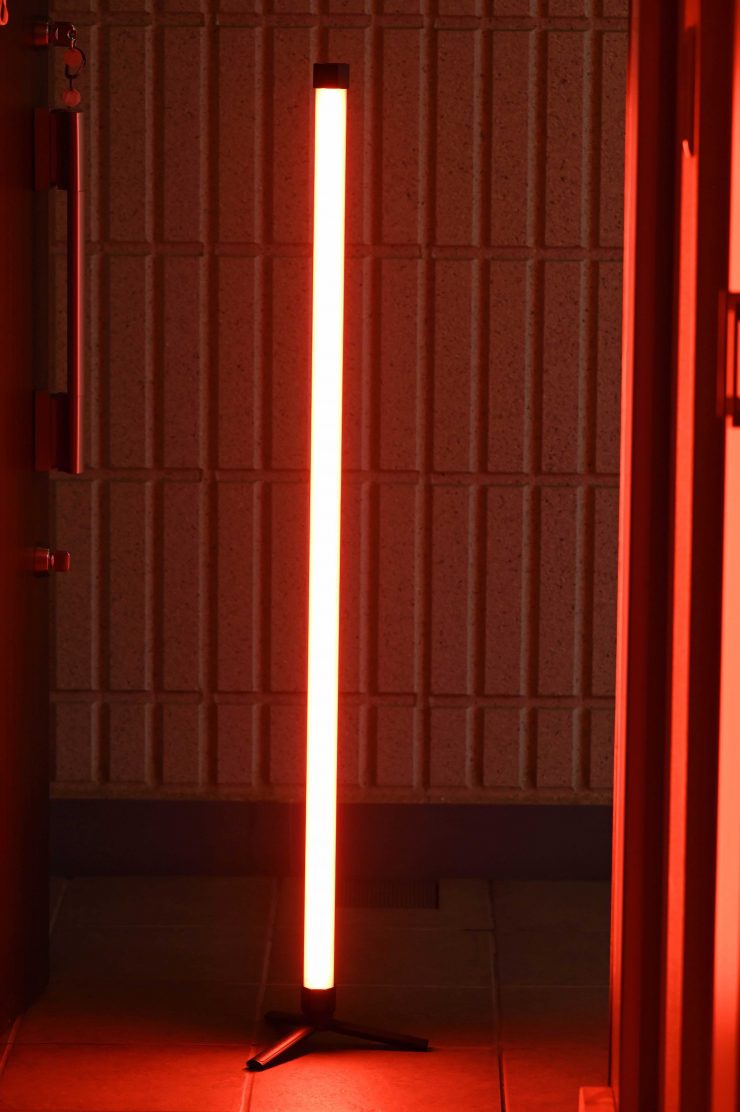
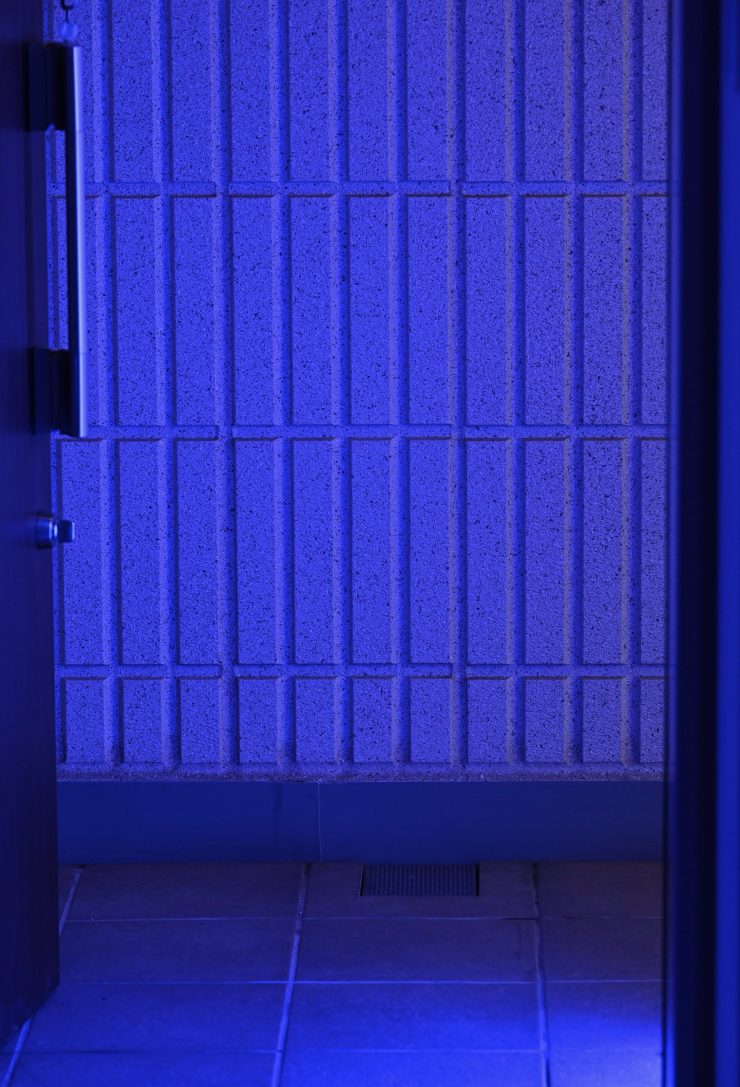
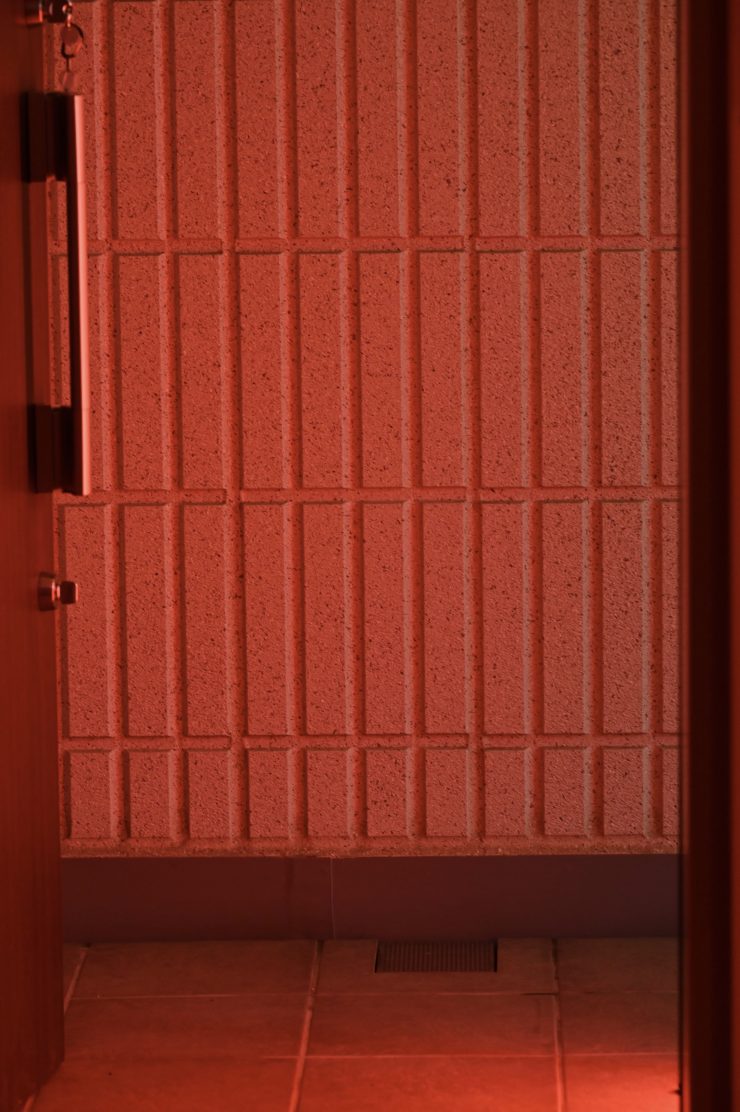
Nanlite is no stranger to making LED tube lights, and the PavoTube II 30X is their latest addition to the range.

Along with the PavoTube II 30X, they have also introduced the smaller PavoTube II 15X and the larger PavoTube II 60X.
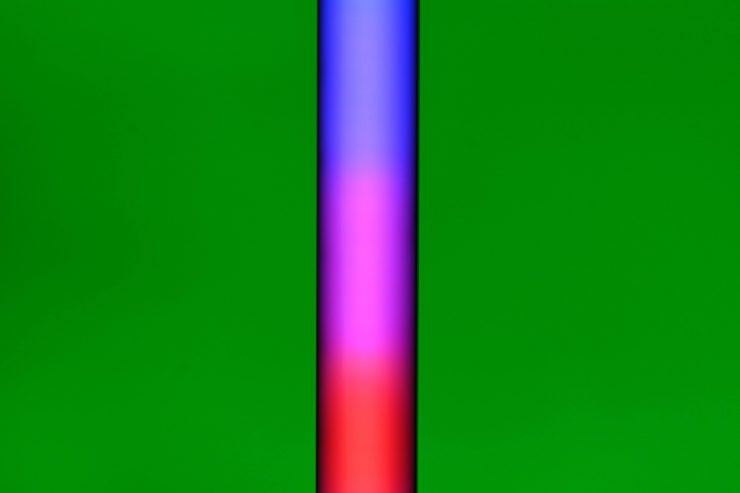
The PavoTube has a lot of built-in features including a Pixel FX mode where you can generate a wide array of colors and effects simultaneously.
The form factor of tubular sources and their ability to generate and create lots of different colors make them useful for discreet lighting effects and placement in confined or hard-to-reach places. Lots of lighting companies now have tube LED lights in their portfolio and that does make the choice of which one to get somewhat confusing.
About a year ago I reviewed the Ledgo AltaTubes on the site. If you didn’t know, Nanlite and Ledgo are both owned by Nanguang, a Chinese lighting company that has been around for almost 30 years.
I have also reviewed the Vibesta Peragos 120C Pixel tube light on the site if you want to find out more about that light you can here.
If you want to watch the 2 hour long live product announcement you can above.
Design & Concept
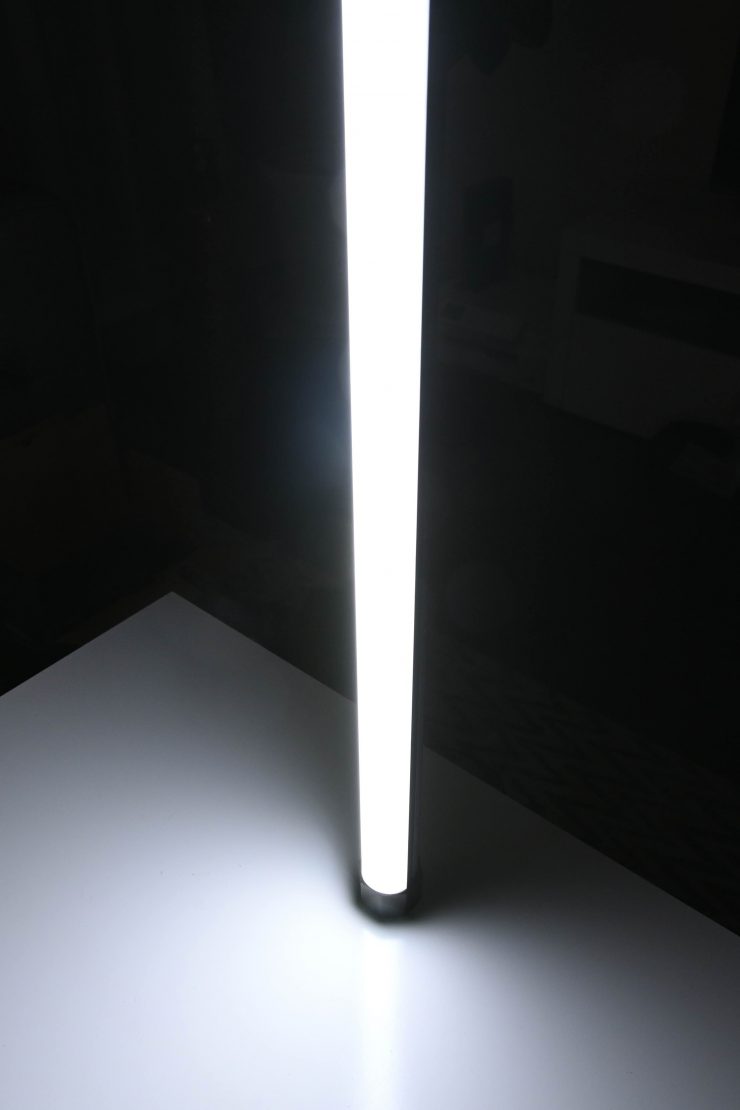
Tube lights are not a new concept. Fluorescent tubes have been around for a very long time, and in recent years we have seen quite a lot of RGB options coming to market.
The inherent problem with a tube light is you have to think carefully about how you are going to mount and power it.
The light has been designed to be an all-in-one unit, so you can run it from its internal 18.5V 4400mAh battery. This all-in-one design makes it relatively quick to set up and use.
The other problem with long tube lights is when it comes to transportation and storage. Due to their length (this especially applies to the longer versions) they are an awkward item to transport. Even though they come in a soft bag, this is not something you would want to check in on a plane. You would need to buy some sort of harder case or bag that could fit a very long light.
It is worth noting that the Nanlite PavoTube II 30X are T12 sized tubes, which is the same as tubes from Astera, Digital Sputnik, and Qusar Science.
As I previously mentioned, there are three different versions of the PavoTube II X series available:
- PavoTube II 15X
- PavoTube II 30X
- PavoTube II 60X
Build Quality
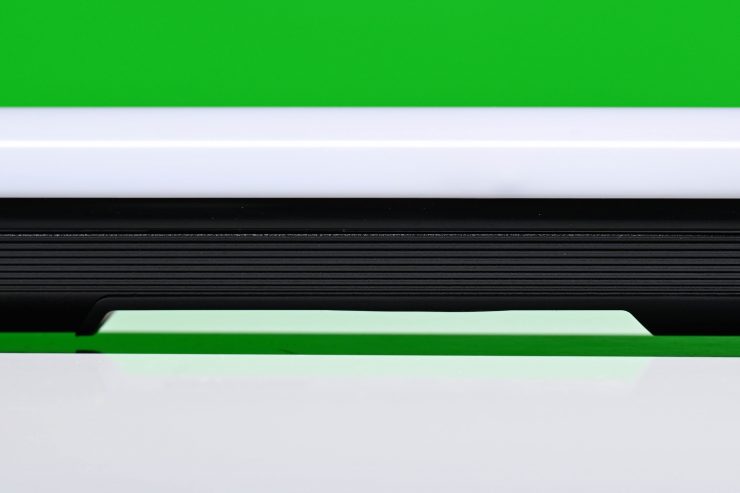
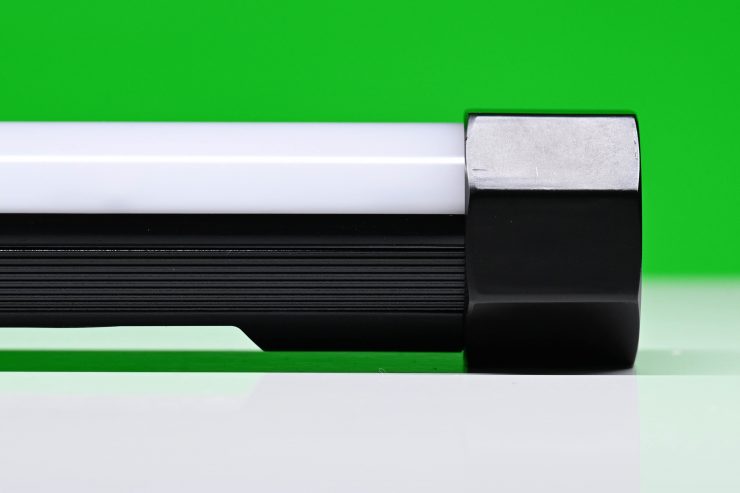
The build quality is ok, and the actual tube and casing feel solidly made. Nanlite has upgraded to a metal housing with the PavoTube II 15/30/60X models, instead of the cheap plastic housing that was used on the predecessors.
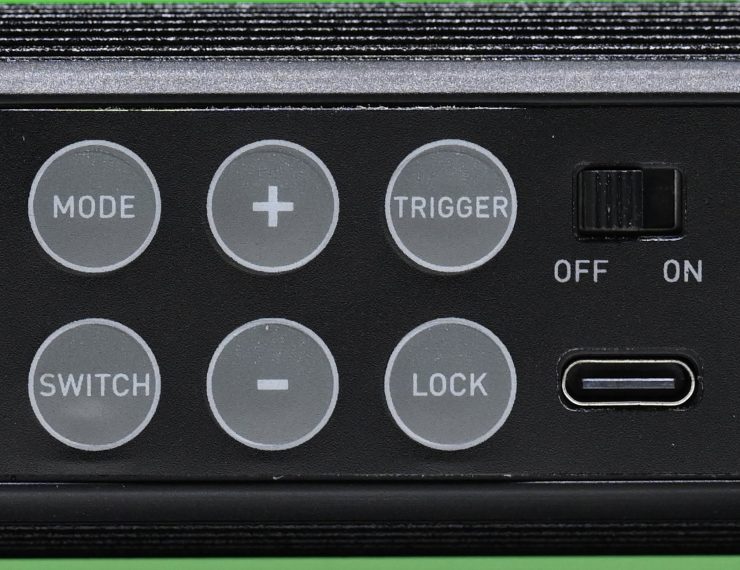
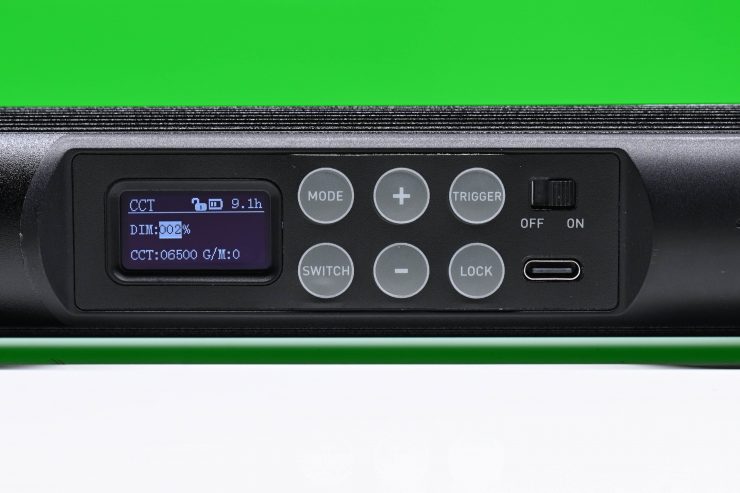
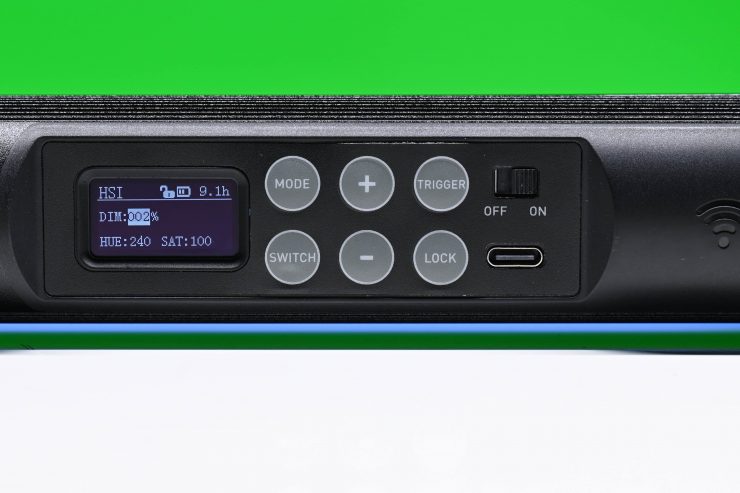
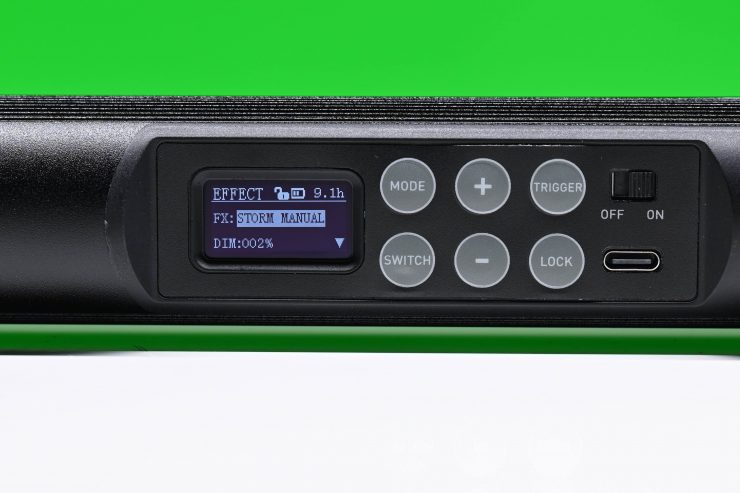
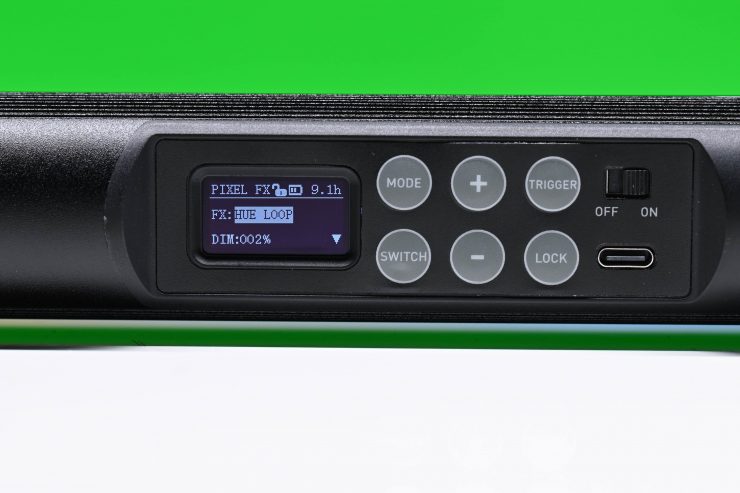
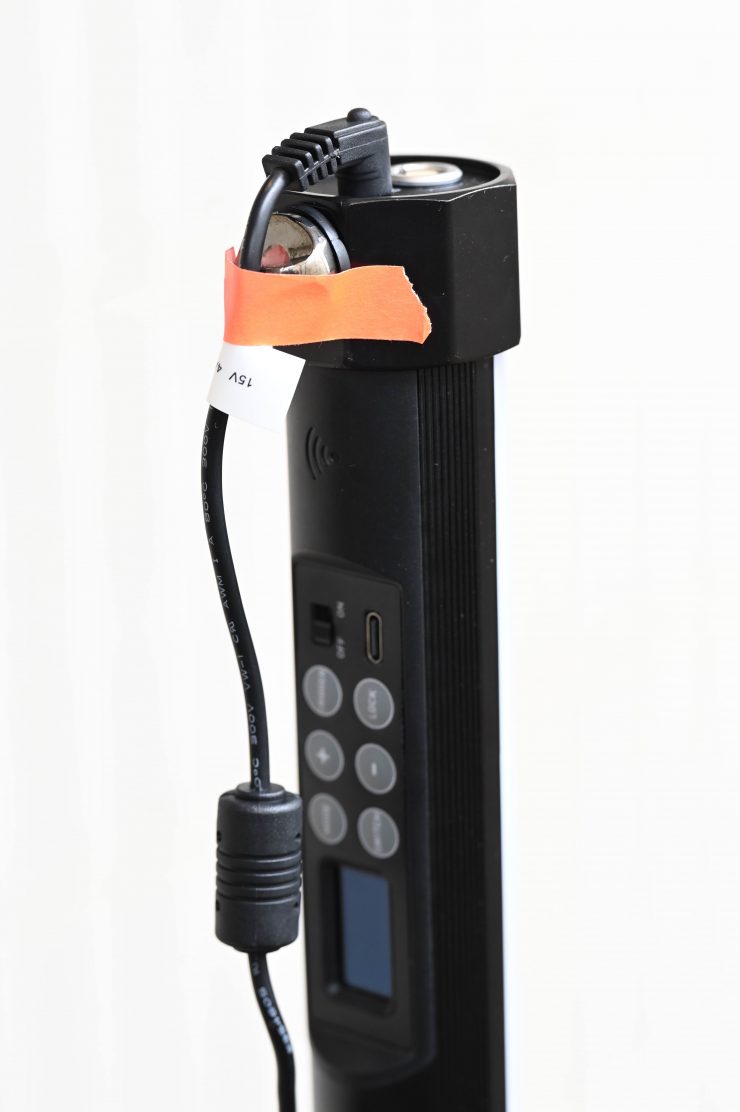
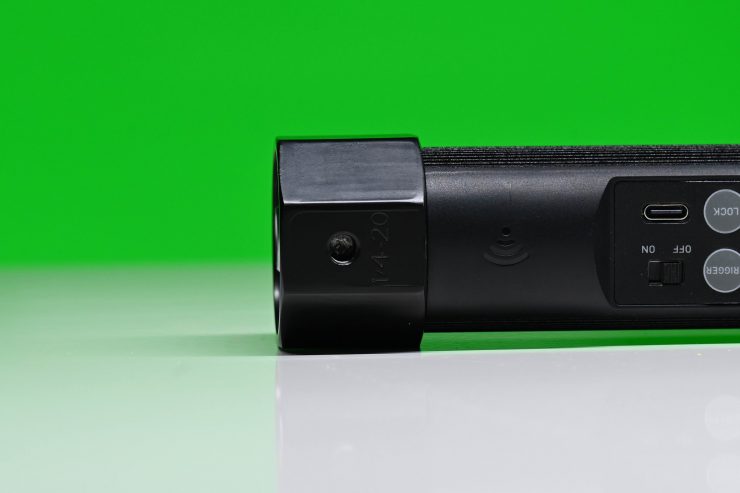
However, the buttons are not very tactile and the On/Off switch is like something you would find on an old electronics game. The LCD display is fairly average, but it gets the job done.
It is hard to judge just how robust these lights are and how they would hold up to extensive use. I wish I could be more specific than that, but I’m in no position to comment on longevity after only spending a few weeks with the lights.
I’m not a big fan of having branding all over the lights and I’m glad that Nanlite only put some small branding on the back of the tubes. The last thing a user wants is branding on the front of a fixture, especially since tube lights are often used as replacements for practicals.
Weight
The PavoTube II 30X tips the scales at 1.56kg/3.44lb. The power supply weighs in at 0.2kg/0.44lb.
While the fixture isn’t that heavy, you have to factor in the power supply, mounting brackets, and associated stands you also need to carry around to use them.
Controls & Menu System
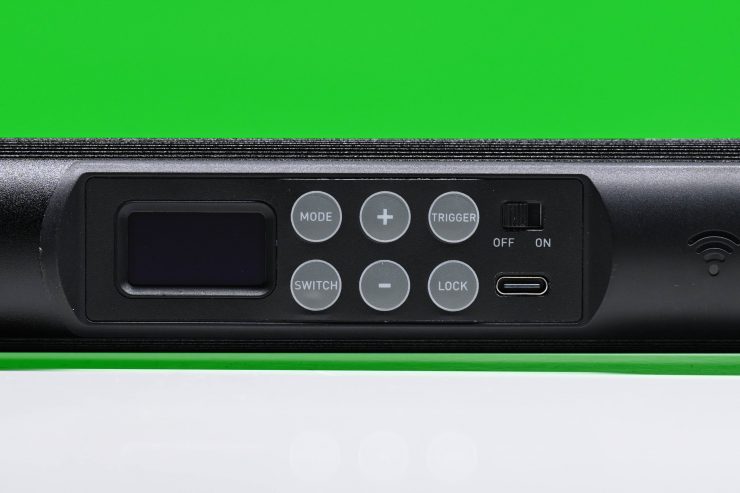
The controls and menu system are very straightforward and the light is relatively easy to use. This is not a light you need to pull out an instruction manual with.
I found making changes to be super simple and the light doesn’t have extensive menus that you get lost in. There is a free iOS and Android App available. If you want to directly control the light using the app you can only do it via Bluetooth. To do it via WiFi you need the buy the optional 2.4G Transfer Device that is sold separately. More on this later in the review.
The buttons, for making changes to things such as Kelvin color temperature and intensity are easy to use, despite not being that tactile. When you are adjusting the Kelvin color temperature you can only do it in increases or decreases of 100K. It would have been nice to be able to adjust the light more precisely.
Operating Modes
Depending on what operating mode you are in, the AltaTube lights can be configured to work in a variety of ways:
- CCT Mode
- HSI Mode
- Effects Mode
- Pixel FX
There is a normal CCT Mode where you can adjust the Kelvin color temperature between 2700K to 12000K. You also have the ability to make +/- Green adjustments.
HSI Mode lets you adjust the hue, saturation, and intensity of the light. In this mode, you can create a multitude of different colors and looks.
The Effects Mode as its name suggests, lets you create effects such as Hue Loop, CCT Loop, INT Loop, CCT Flash, HUE Flash, CCT Pulse, Hue Pulse, Storm Auto, Storm Manual, Police Car, TV, Paparazzi, Candle/Fire, Disco, Bad Bulb, Fireworks, Explosion, and Welding.
Pixel FX is a mode that lets you create multiple color patterns at once. There are options to set a Hue Loop, CCT Loop, INT Loop, Multi-Color Fade, Process, Scroll, Fire, Rainbow, and Driving effects.
The Pixel FX mode is a nice addition, but depending on what you are shooting you may never actually use it. For people shooting music videos, etc. it will probably be a popular mode.
Above you can see a quick example of some of the various Pixel FX modes. As you can see, the actual pixel effects don’t work at any type of fast speeds. The maximum speed you can do these effects at is relatively slow.
Power Draw
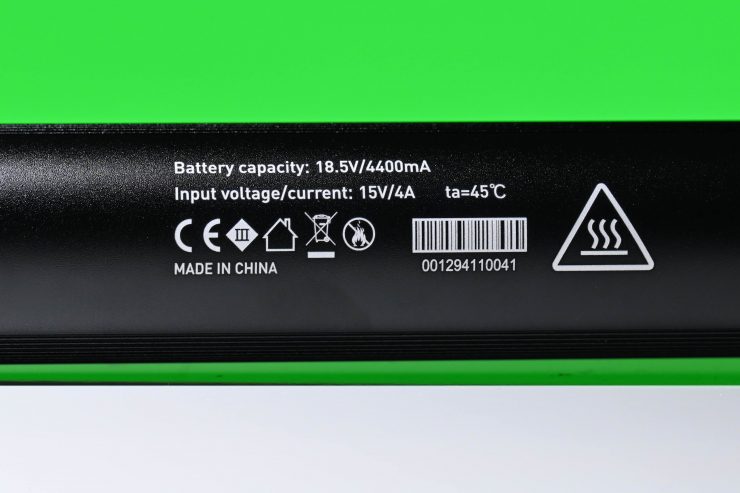
The PavoTube II 30X draws 80W of power. As I mentioned earlier, it features an in-built 18.5V 4400mAh battery.
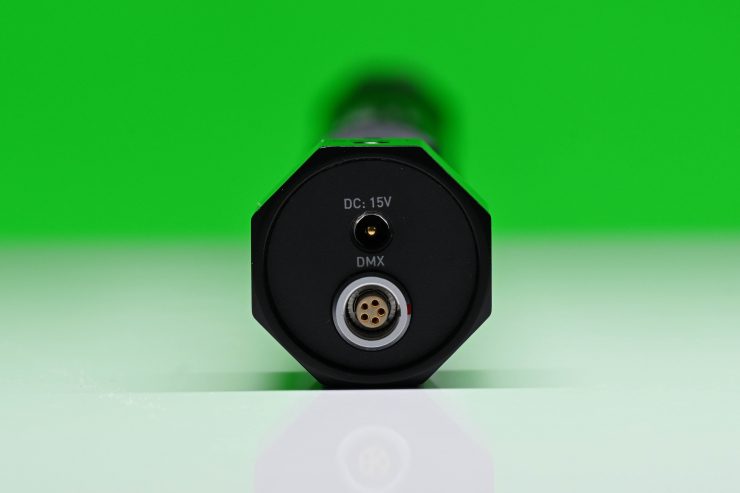
You can also run it from mains power via a 15V DC 4A input.
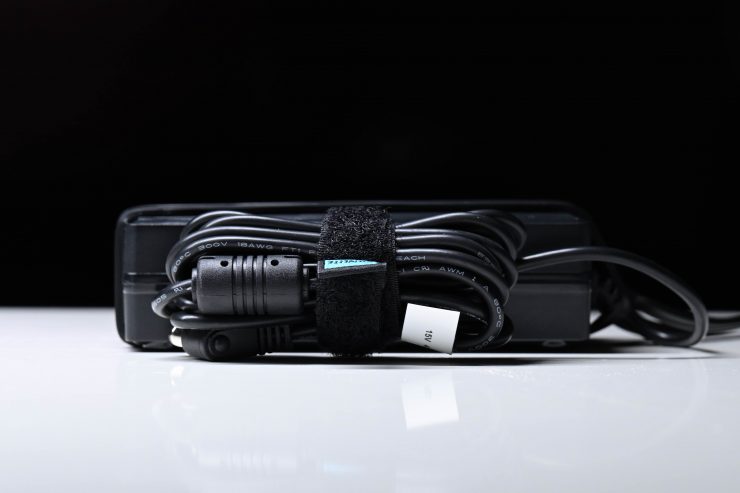
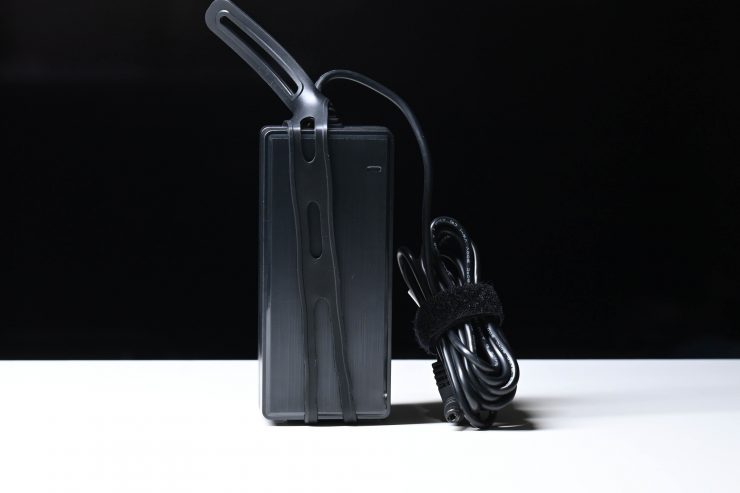
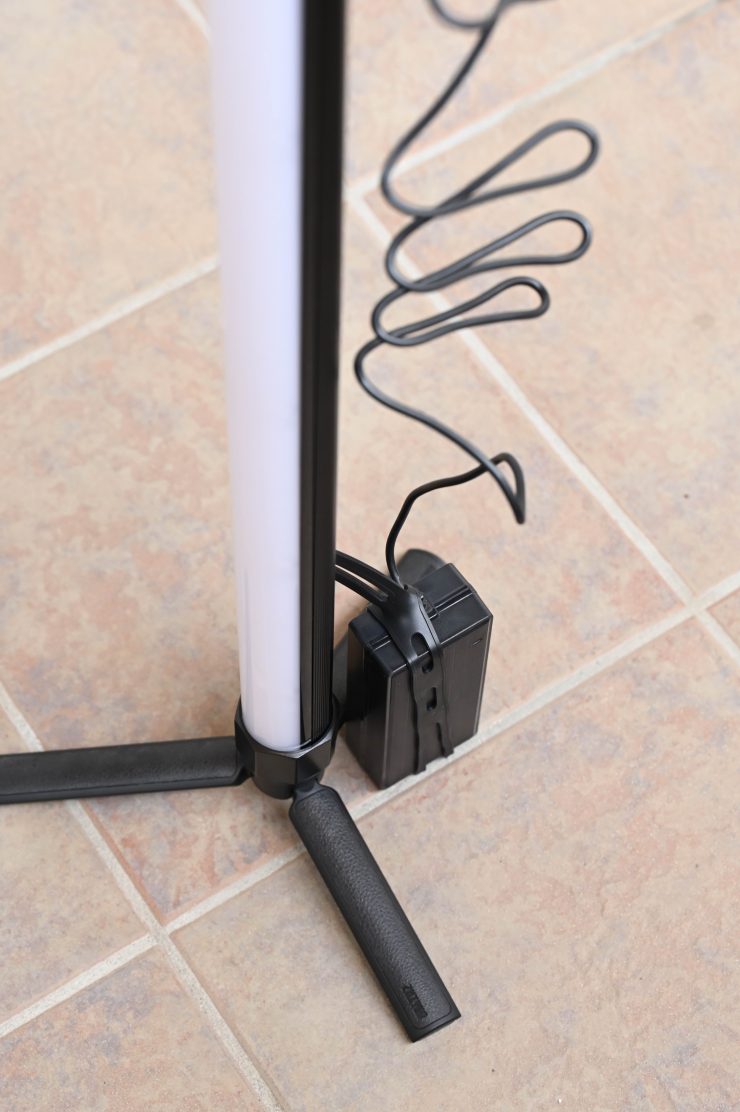
The light comes with an AC power supply and cable.
Now here is where there is a slight issue. Tube lights are great as practical replacements, but if they are going to be visible in shot, a lot of times you will want to run them via the in-built battery.
Below you can see the claimed run times when using the light at various levels of brightness:
- 100% brightness:~ 2hour 13min
- 75% brightness:~ 3hour 19min
- 50% brightness:~ 3hour 7min
- 10% brightness:~11hour 45min
- 1% brightness:~ 29 hour
This is a reasonable amount of run time on a battery, and in a lot of cases with lights such as these, you won’t be running them at 100% brightness.
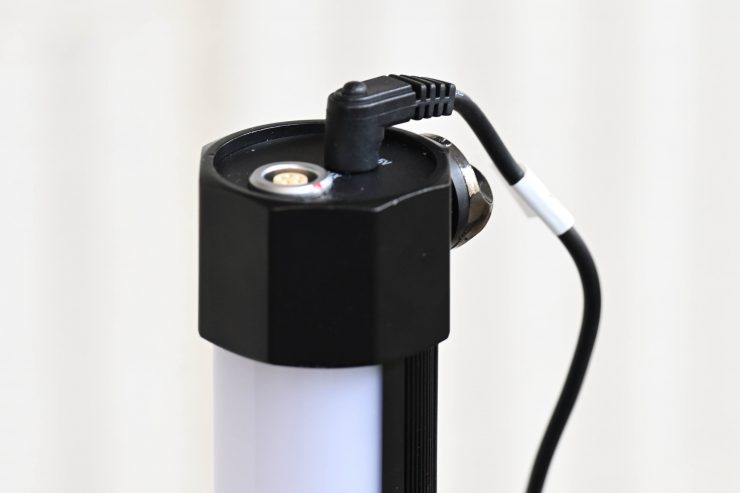
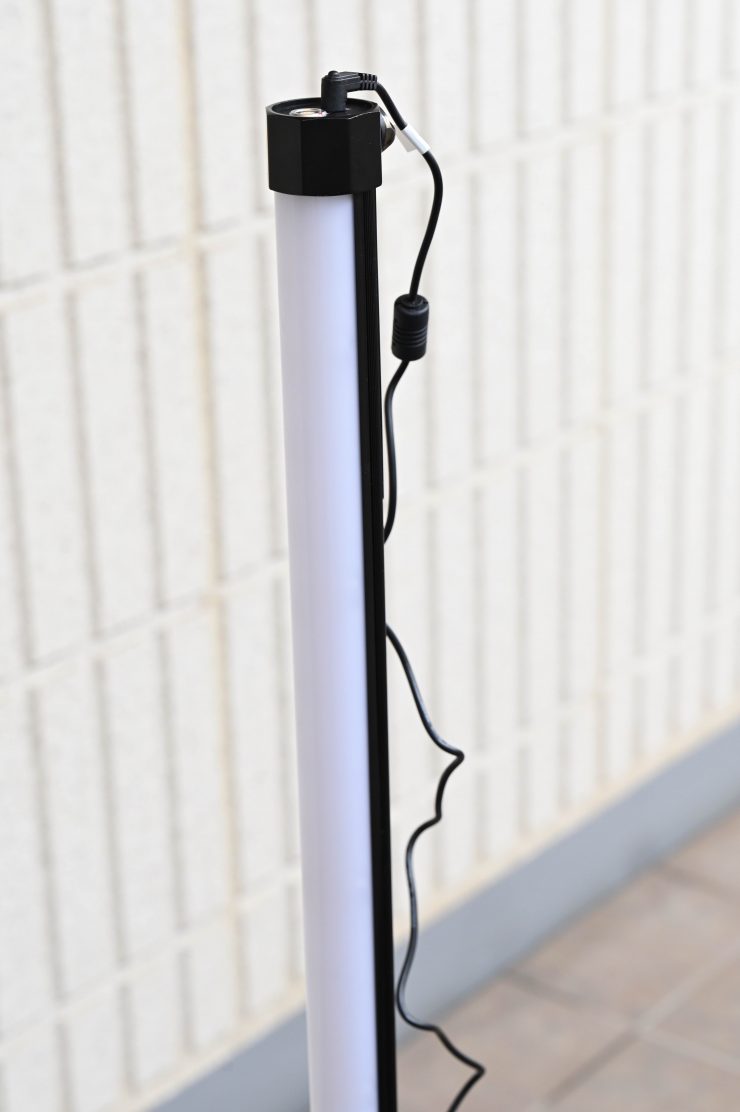
The minor concern that uses may have is that the power input sits directly on top of the light so if you are using the light with it standing vertically the power cable is going to be coming out of the top of the light and you need to be able to hide it if the light is in shot. At least the cable going to the power supply is nice and long.
What I found was that if you put one of the eye bolts in the 1/4-20″ screw hole and then tape the cable down to the back of the fixture you can end up with a pretty clean solution.
I did try to power the fixture from a camera battery using a USB-C cable, and although it would charge the light, it didn’t seem to power it. The light still looked to be running from its internal battery.
Silent Operation
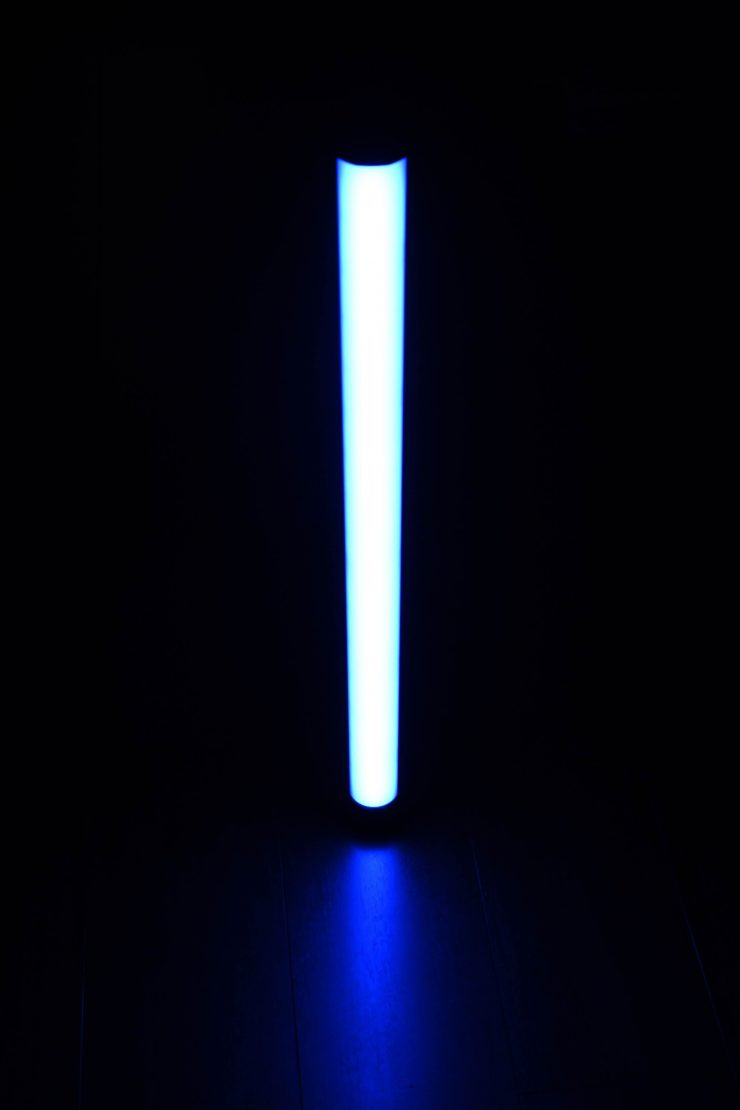
The PavoTube II 30X doesn’t feature any type of fan and it is passively cooled. While this does prevent any unwanted noise, it does mean that the light gets quite hot. The other downside of not using any type of fan is that the output is going to be limited.
Mounting
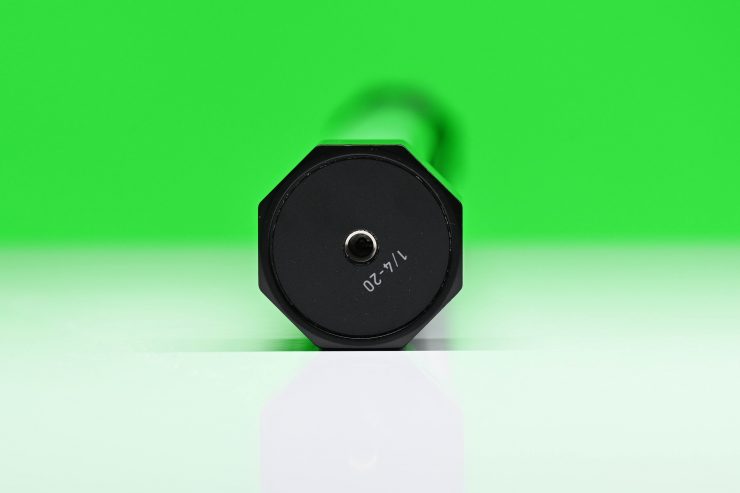
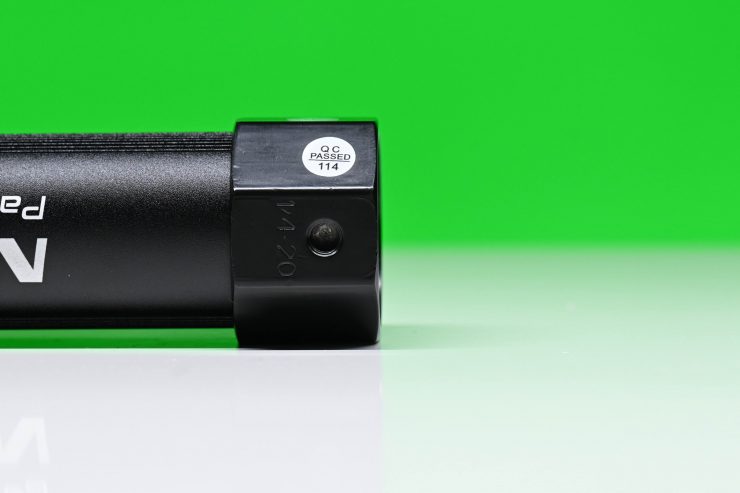
Mounting tube lights is always a little tricky. With the PavoTube II 30X, you have a 1/4-20″ mounting point on one end of the fixture as well as two other 1/4-20″ mounting points on the back of the fixture at opposite ends.
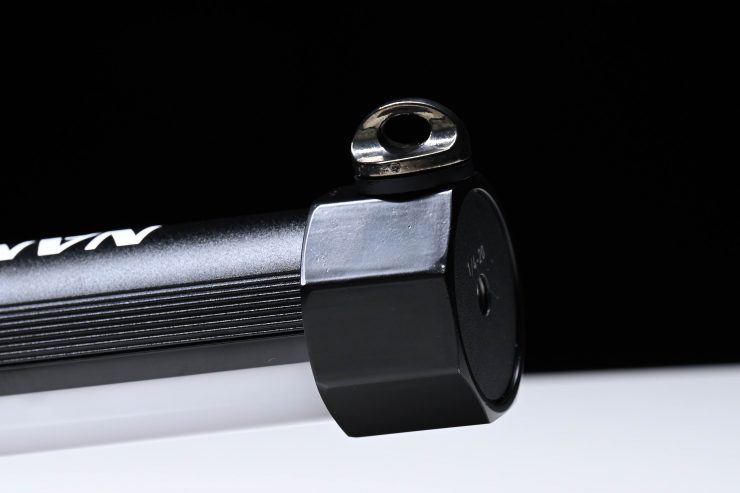
The kit I was reviewing did come with two eyebolts that can screw into the 1/4-20″ mounting points. You could use these to hang the light.
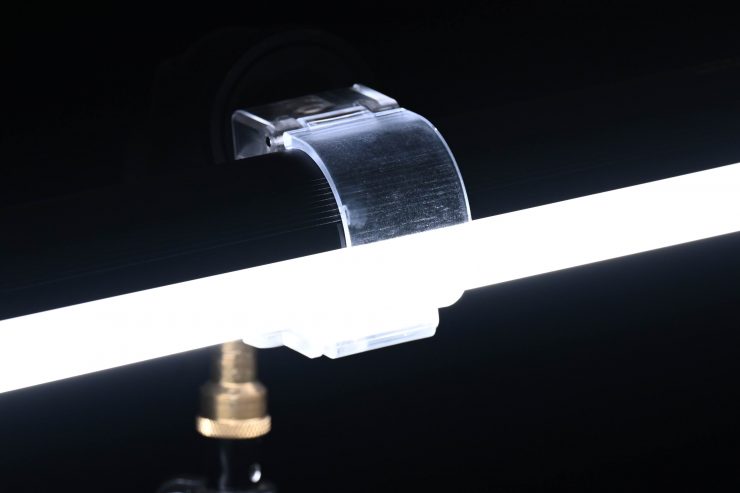
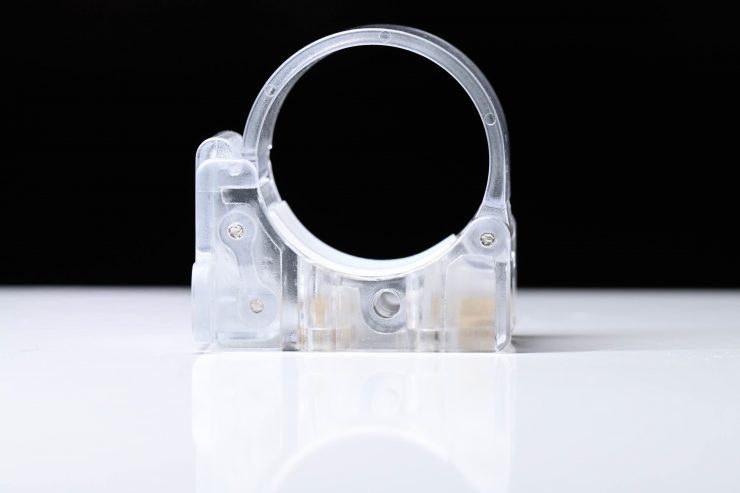
The kit also included two mounting brackets which are very similar to what you will find being used by other manufacturers of tube lights. These brackets are made out of hard plastic and they are easy and quick to mount to the tube.
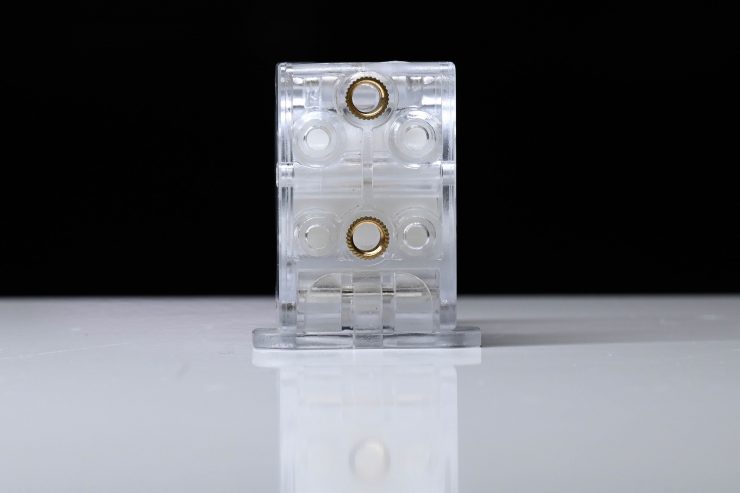
On the back of the brackets, there are two 1/4-20″ mounting points.
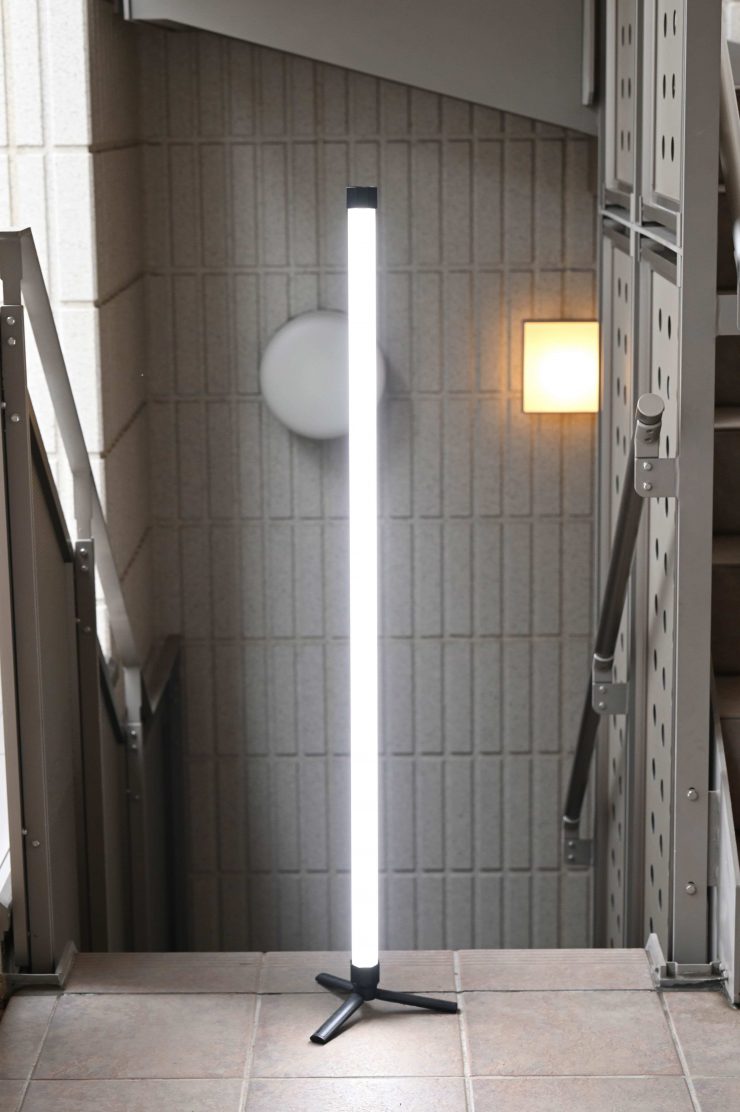
It is nice to have a 1/4-20″ mounting point on the bottom of the fixture as you can easily just attach a small stand that you may already have.
WiFi & Bluetooth Control
When I reviewed this light, the app wasn’t available. I also didn’t receive the optional 2.4Ghz remote or WiFi transfer device so I wasn’t able to test out any of the remote or app functionality.

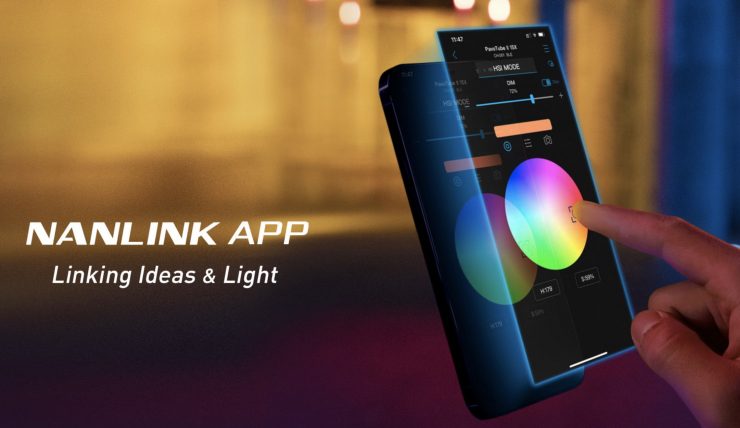
UPDATE: Nanlite has announced the NANLINK iOS and Android app. This this app only works directly if you use Bluetooth. For WiFi control you need the optional transfer device.
Now, here is what I am not a big fan of. You need to register with Nanlite to be able to use the app, you then also have to log in using an email address and password every time you open the app.

The app is also currently not working. I couldn’t get the app to see the PavoTube II 30X.
Photometrics
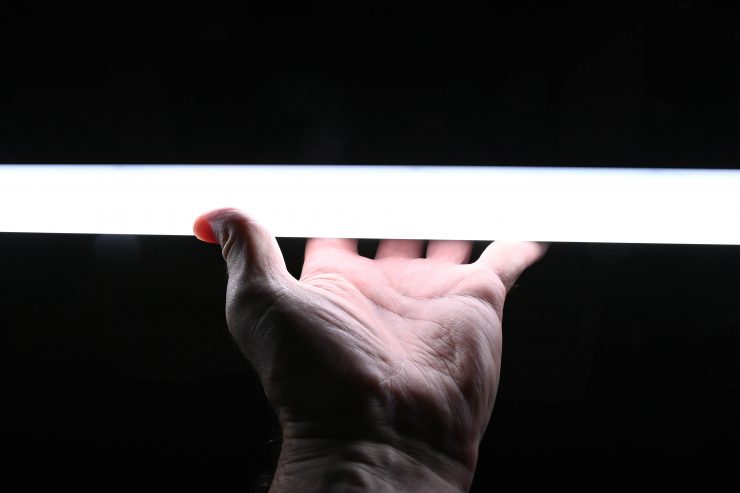
So now let’s get to the photometric results. I always test lights in this way so that I get a reference to how they compare to other fixtures. Results only tell part of the story and should never be used alone to judge a light. I have found from extensive testing over the years that certain lights that have good photometric results don’t always look good, and lights that have worse photometric scores can sometimes look better than their results indicate.
You need to look at all of the photometric results to get an accurate assessment of a light, looking at just one set of results is like reading one chapter in a book and skipping the rest.
Different lights can also look different depending on what camera you happen to be using.
Output & Color Temperature Accuracy
I tested the PavoTube II 30X at a variety of Kelvin color temperatures with a Sekonic C-800 Spectrometer to find out how much output the light had and how accurate the Kelvin color temperature reproduction was. All readings are taken at a distance of 1m (3.28ft) in a controlled environment.
5600K
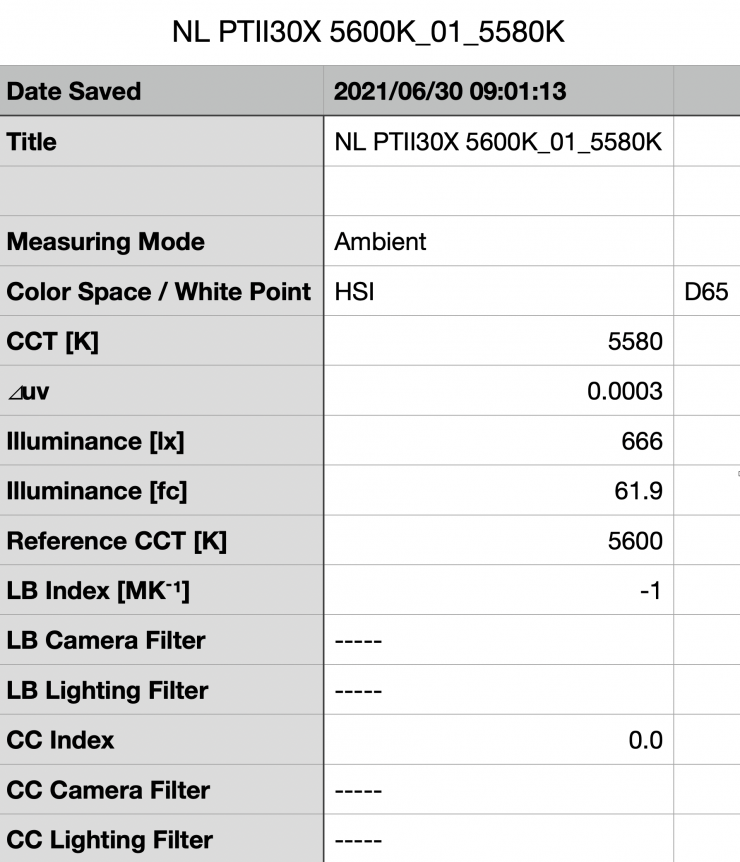
Above you can see the PavoTube II 30X recorded an output of 666 lx (61.9 fc) when set at 5600K. This is a reasonable amount of output for a single tube light, although it is not overly bright for a fixture of this size.
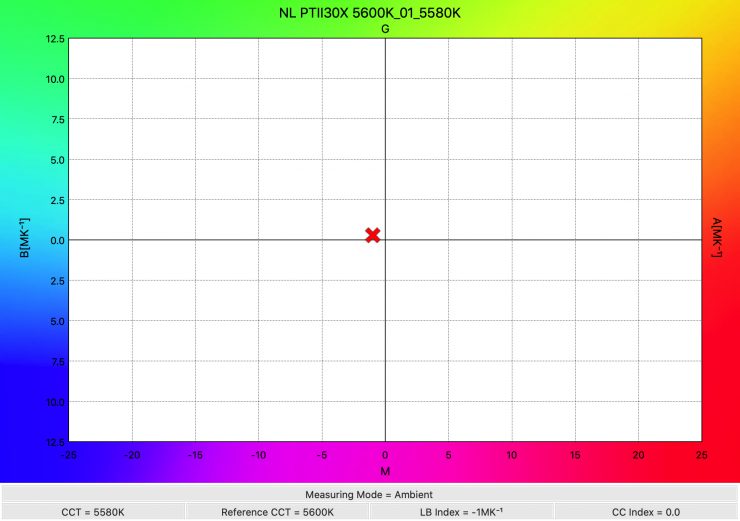
The fixture produced a Kelvin color temperature of 5580K. The light had a CC Index score of 0.0. The Kelvin color temperature it produced was very accurate for a 5600K source.
3200K
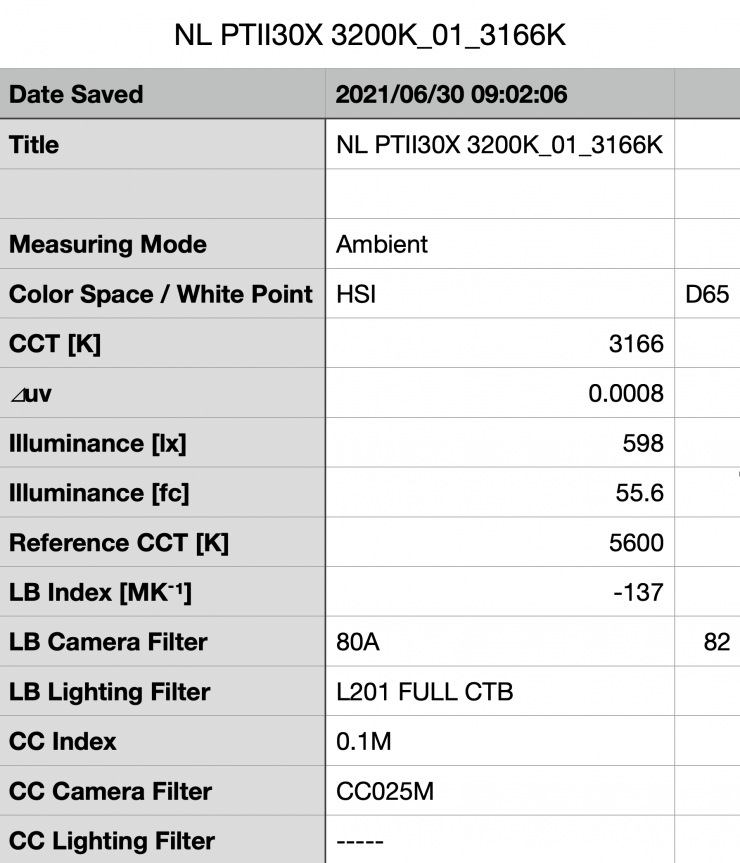
Above you can see the lights output when it was set at 3200K. It produced 598 lx (55.6 fc), which was 10.2% less than the 666 lx it produced at 5600K.
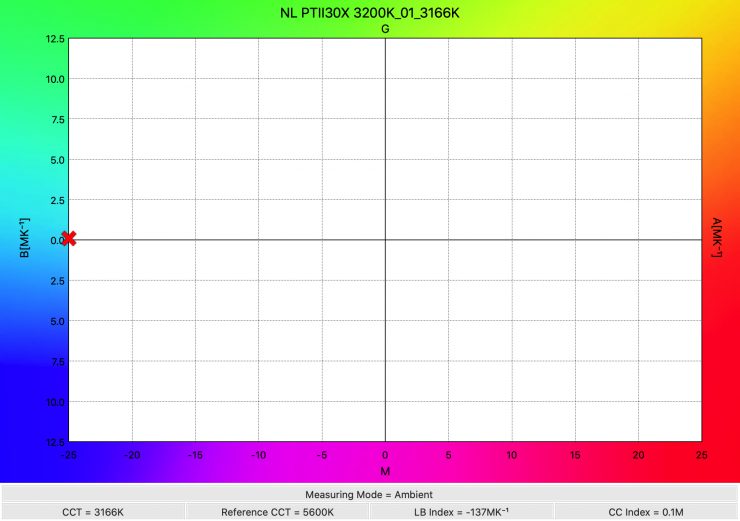
As far as Kelvin color temperature accuracy goes, it recorded a pretty accurate reading of 3166K. It recorded a CC Index score of 0.1M.
So how does it perform at various Kelvin color temperatures when it comes to output and Kelvin color temperatures? Well, below you can see.
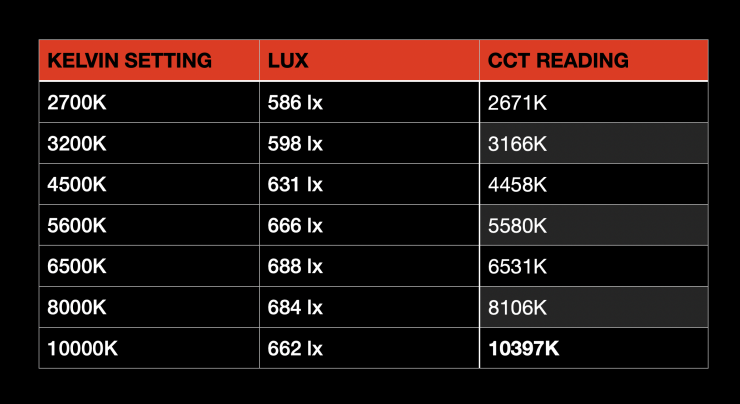
These results tell me that the light retains very good Kelvin color temperature accuracy across its range.
The output of the light is very consistent regardless of what Kelvin color temperature you set. The output only varies by 17.4% from the highest to lowest scores that I recorded.
HSI
Color Rendering
So now that we have seen how much output the thePavoTube II 30X produces, how does it perform when it comes to replicating accurate colors.? Well, let’s find out.
5600K
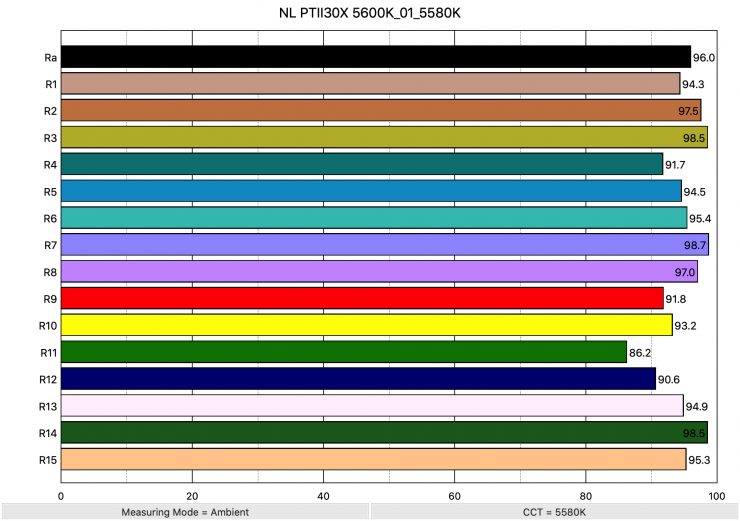
Above you can see that when the light was set at 5600K it recorded an average CRI (R1-R8) of 96.0 and an extended CRI (R1-R15) of 95.54. For replicating accurate skin tones it recorded 91.8 for R9 (red), 94.9 for R13 (closest to caucasian skin tones), and 95.3 for R15 (closest to Asian skin tones). These results were reasonably good.
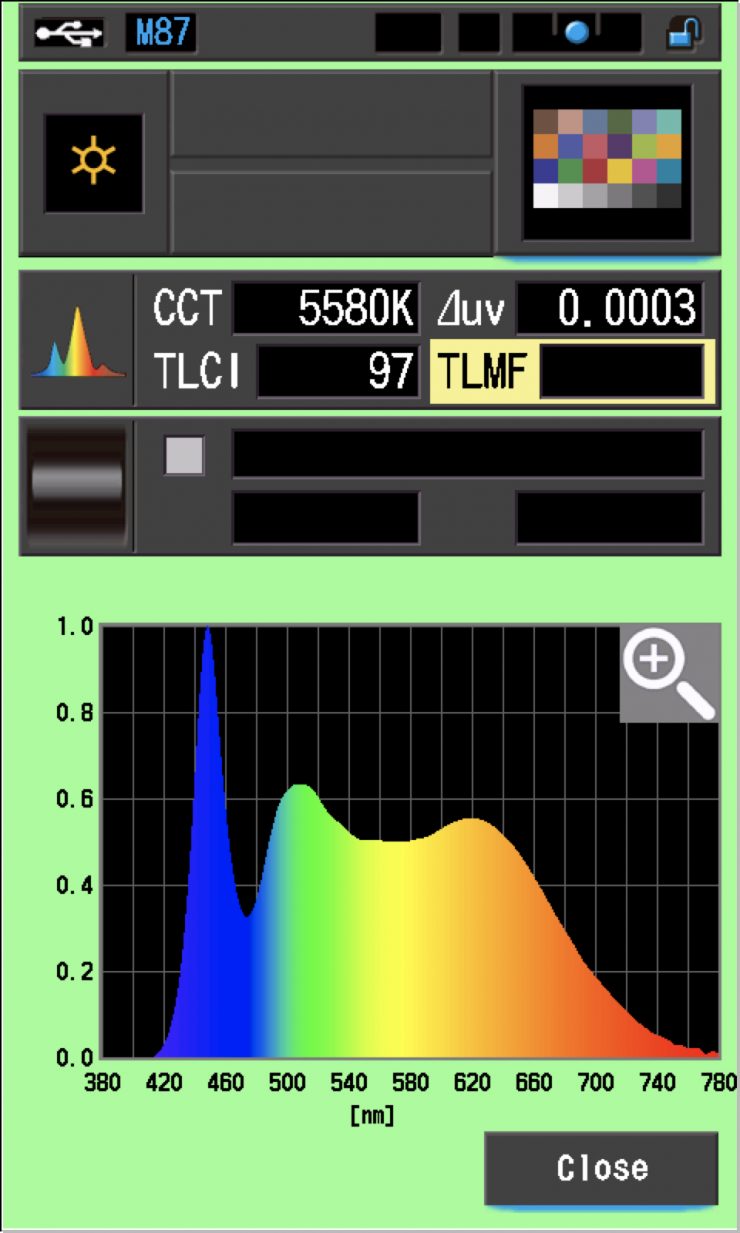
The light when set at 5600K also recorded a TLCI score of 97.
3200K
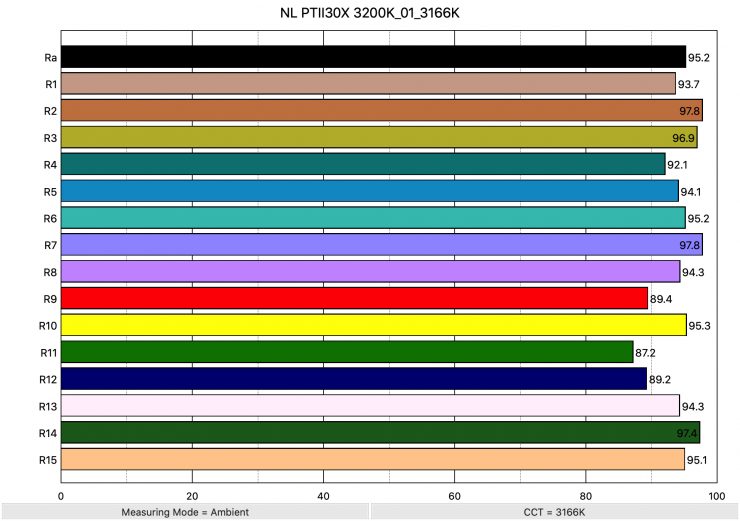
Above you can see the scores for when the light was used at 3200K. It recorded an average CRI (R1-R8) of 95.2 and an extended CRI (R1-R15) of 93.98. For replicating accurate skin tones it recorded 89.4 for R9 (red), 94.3 for R13 (closest to caucasian skin tones), and 95.1 for R15 (closest to Asian skin tones).
Just like at 5600K these results were pretty good,
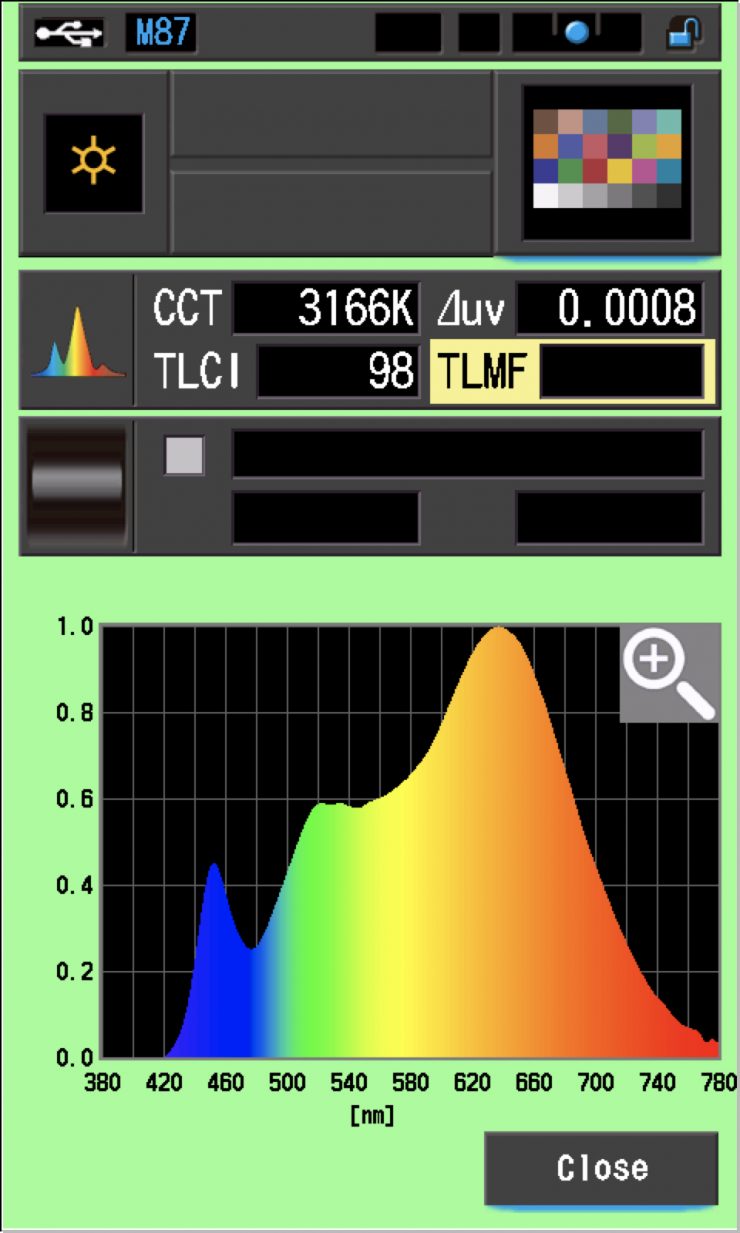
The light, when set at 3200K, recorded a TLCI score of 98.
CC Index & ⊿uv
The CC Index displays the CC correction value and whether any magenta or green need to be added or subtracted. 1 CC corresponds to 035 Kodak CC values or 1/8 Rosco filter values. Any reading less than +1.00 or -1.00 and you’re probably not going to need to make any kind of adjustment. The ⊿uv is the value to show how much this light is away from being an ideal light source (black body radiation = incandescent lamp). As with the CC Index you want this number to theoretically be zero. Kelvin is not a linear value, so we need to convert from Kelvin to MK-1 to compare the values of color temperature. To calculate from Kelvin to Mired is MK-1= 1*1000000/Kelvin. While this may sound confusing, it is the only way of measuring if the Kelvin shift is significant enough to warrant having to use a filter for correction. Below are the results for the light when it was used in its full spot position.
Kelvin Vs MK-1
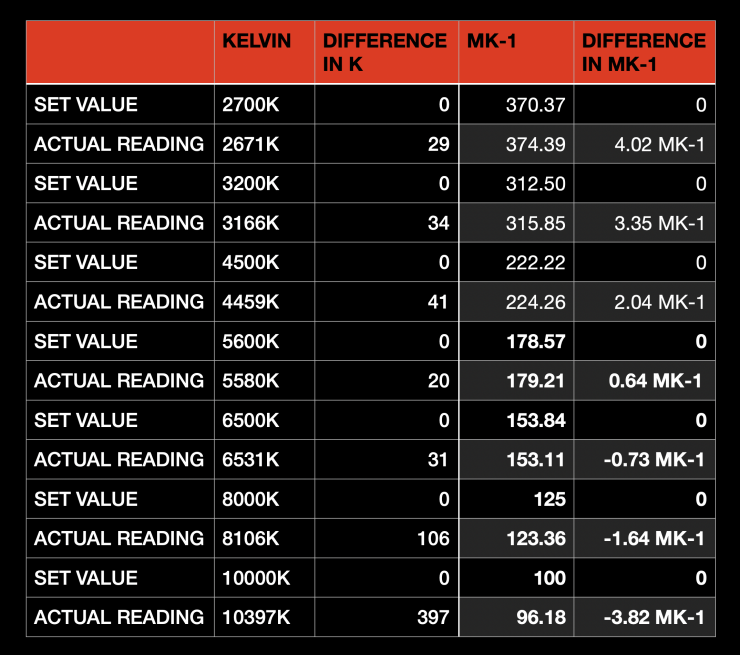
These figures might look confusing, but what it tells me is that the light is extremely accurate across its Kelvin color temperature range. Any MK-1 score that is under -9/9 means you wouldn’t have to use any color correction gels. Again, we don’t want to judge a light based on one set of scores.
CC INDEX & ⊿uv
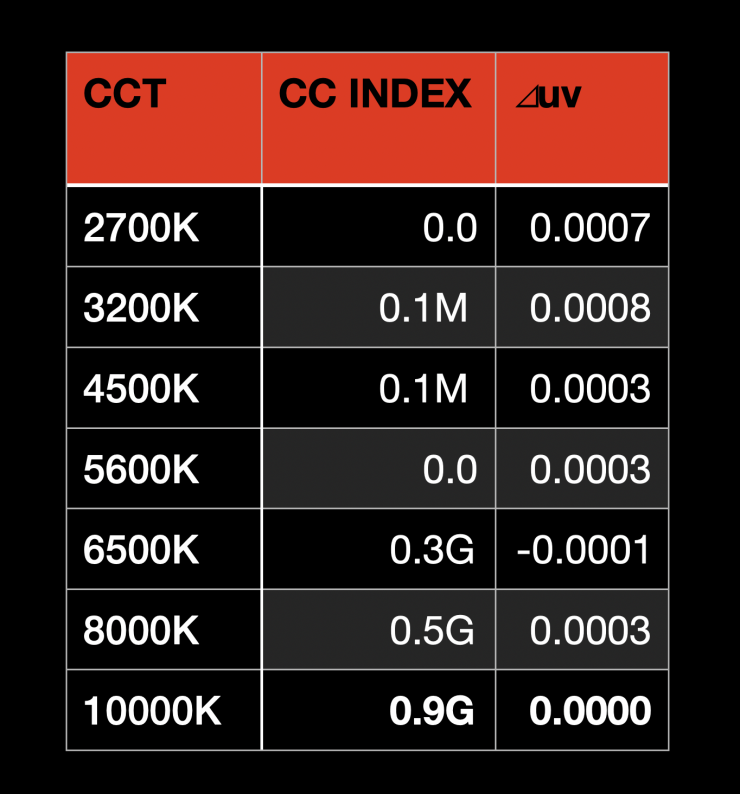
These are outstanding scores, and only when you start getting above 6500K can you see that the light starts to push slightly green.
TM-30
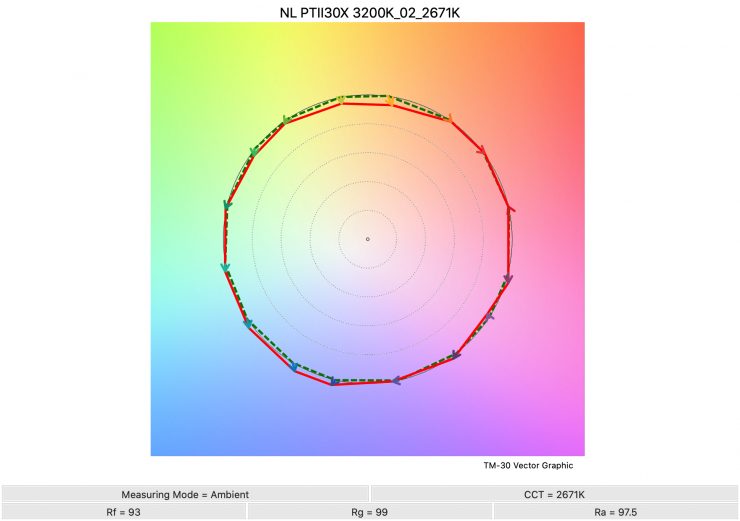
TM-30 is a relatively new color rendering standard that was developed to deal with the limitations of CRI. TM-30 looks at 99 individual colors. These 99 colors are categorized into seven groups: nature, skin color, textiles, paints, plastics, printed material, and color systems.
TM-30 scores go from 0 – 100. The higher the score, the more accurate a light is at producing colors. Any TM-30 Rf score in the ’90s is considered to be good. What is interesting and something that you need to be very aware of is that two separate light sources with the exact same CRI scores can render colors very differently. A light with a high CRI rating could have a low TM-30 score. Conversely, a light with a good TM-30 score could have a bad CRI score.
Now, there are two measurements associated with TM-30, Rf and Rg.
Rf (Color Fidelity)
Rg (Color Gamut)
With Rf value, ideally, you want a score in the 90’s.
With Rg value, a score below 100 indicates that the light source renders colors with less saturation than the reference source. So ideally you want this score to be above 100.
2700K 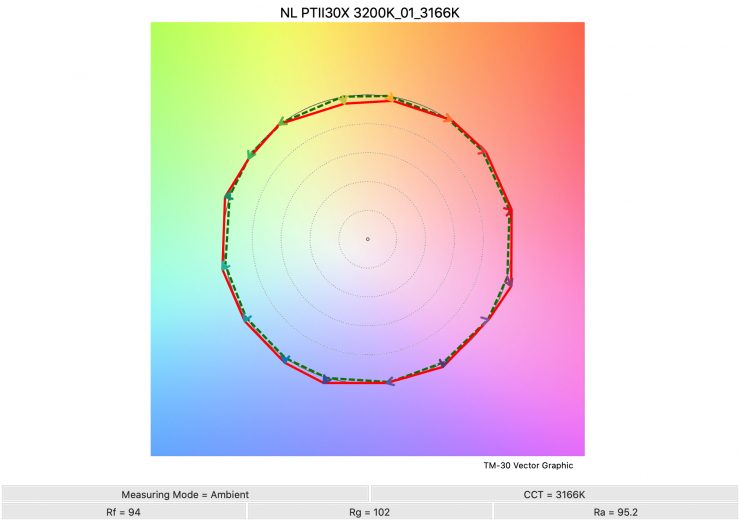
3200K 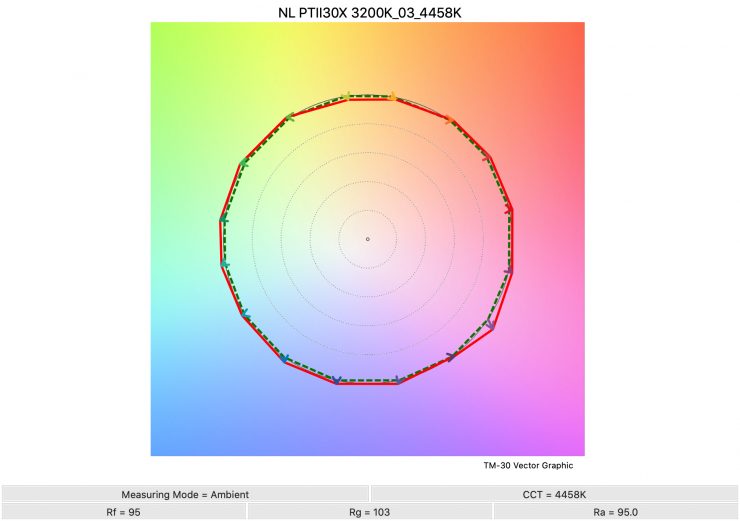
4500K 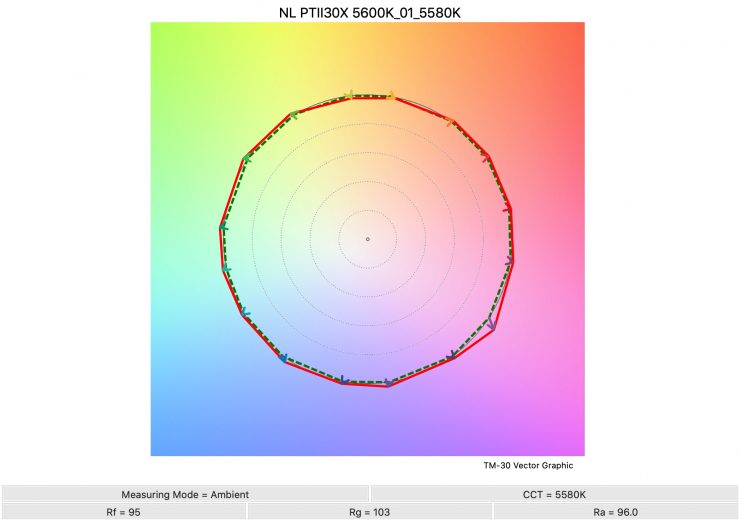
5600K 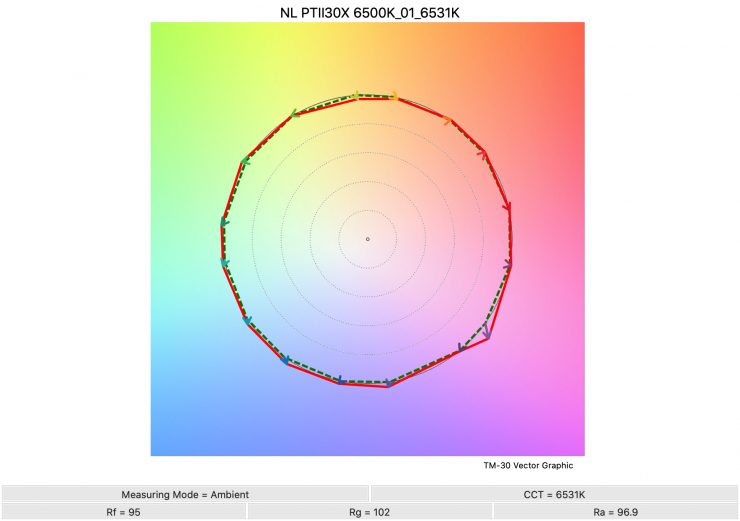
6500K 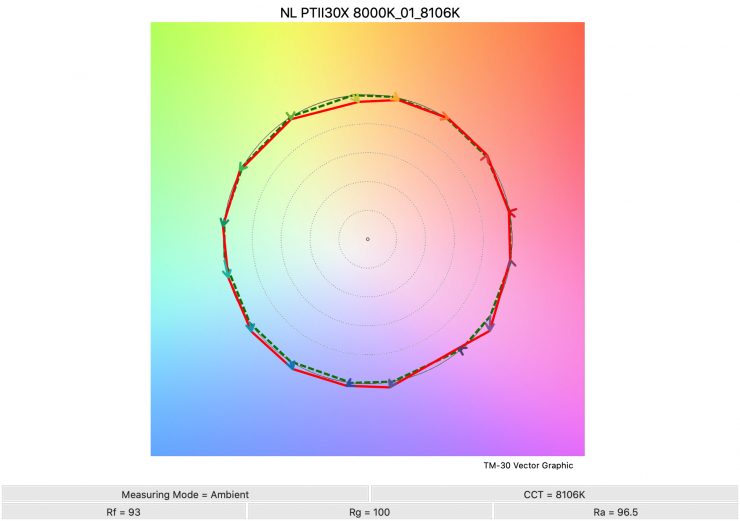
8000K 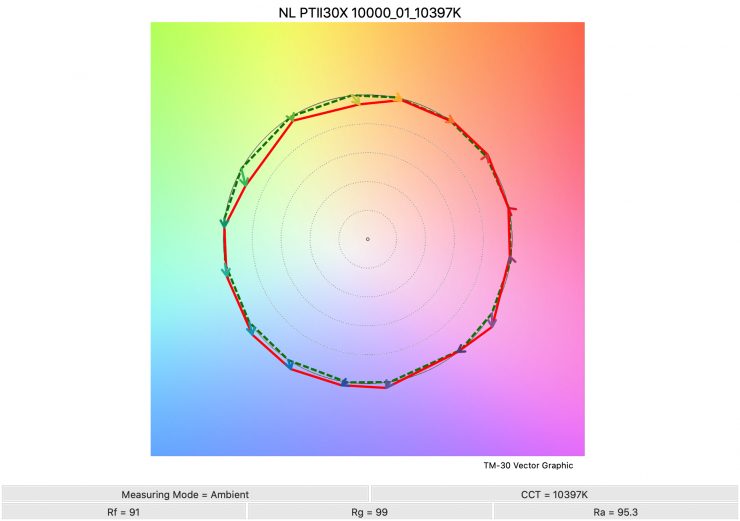
10000K
Above you can see the scores for the PavoTube II 30X at various Kelvin color temperatures. Below I have listed the figures as well.
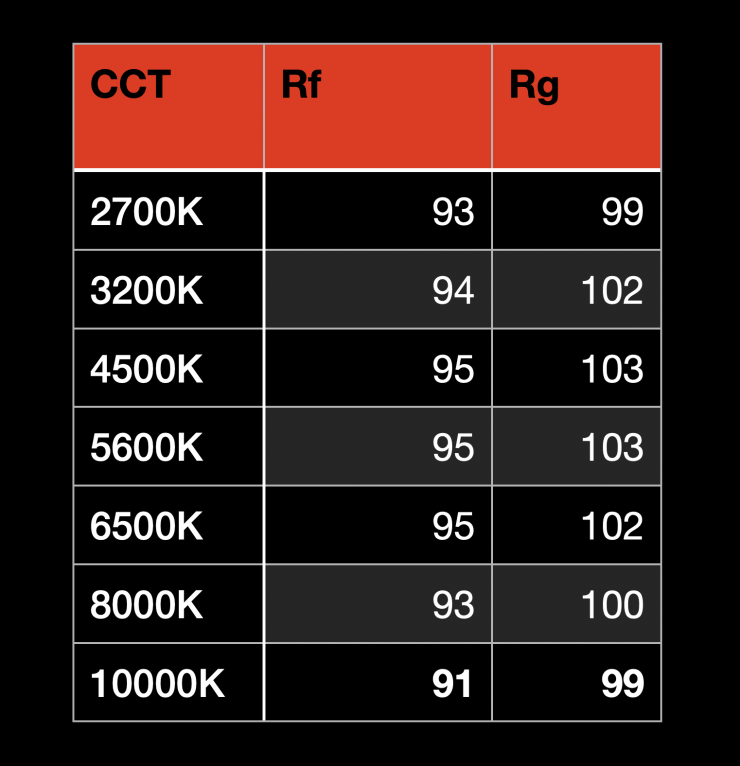
The TM-30 scores are all good and it shows me that the light is pretty consistent at replicating accurate colors with full saturation.
SSI
SSI (Spectral Similarity Index) was developed by the Sci-Tech Council of the Academy. SSI gives me the ability to set any light as a standard, or use predefined standards (such as CIE D55), and then give other lights an SSI score based upon how well they will match standards such as CIE D55 measure spectral response and compare it directly against an ideal light source.
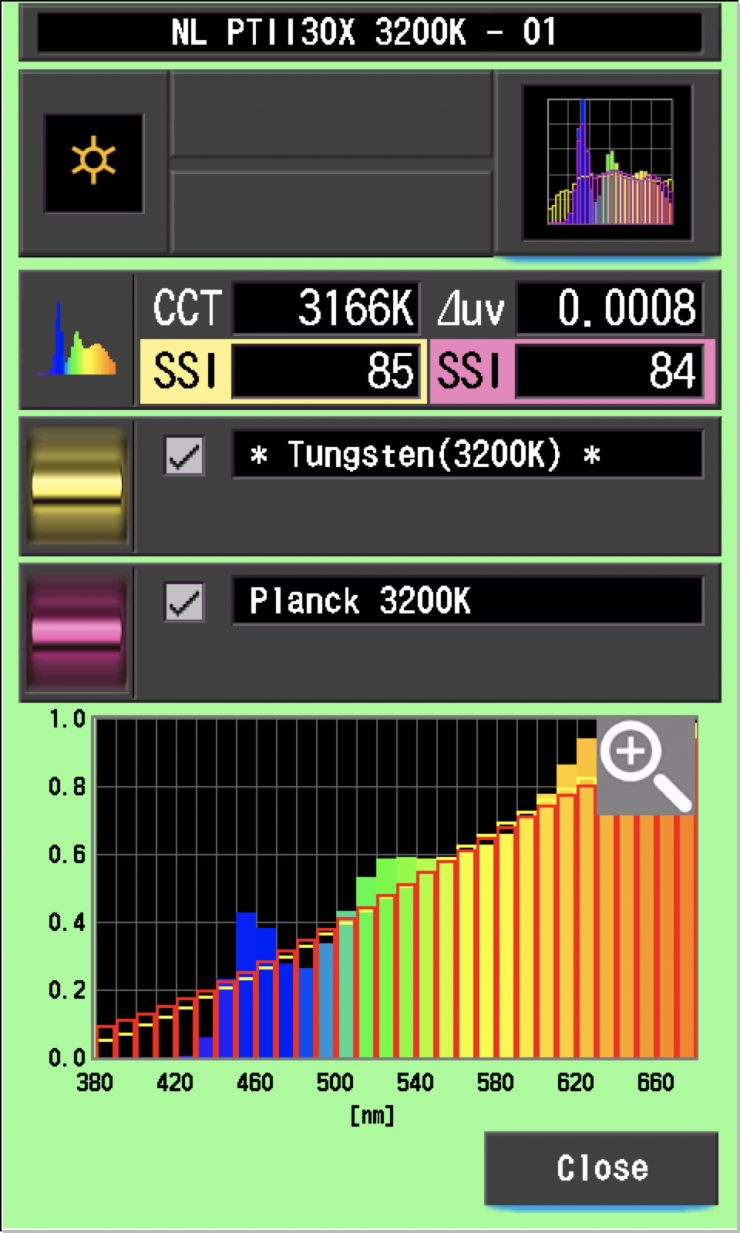
In this graph, the red bars indicate a perfect 3200 (Tungsten source. The Red bars indicate a Planck 3200K source. This lets us compare how close to a perfect 3200K lighting source the Nanlite PavoTube II 30X is. A score in the mid ’80s is very good for a LED light trying to replicate a 3200K source.
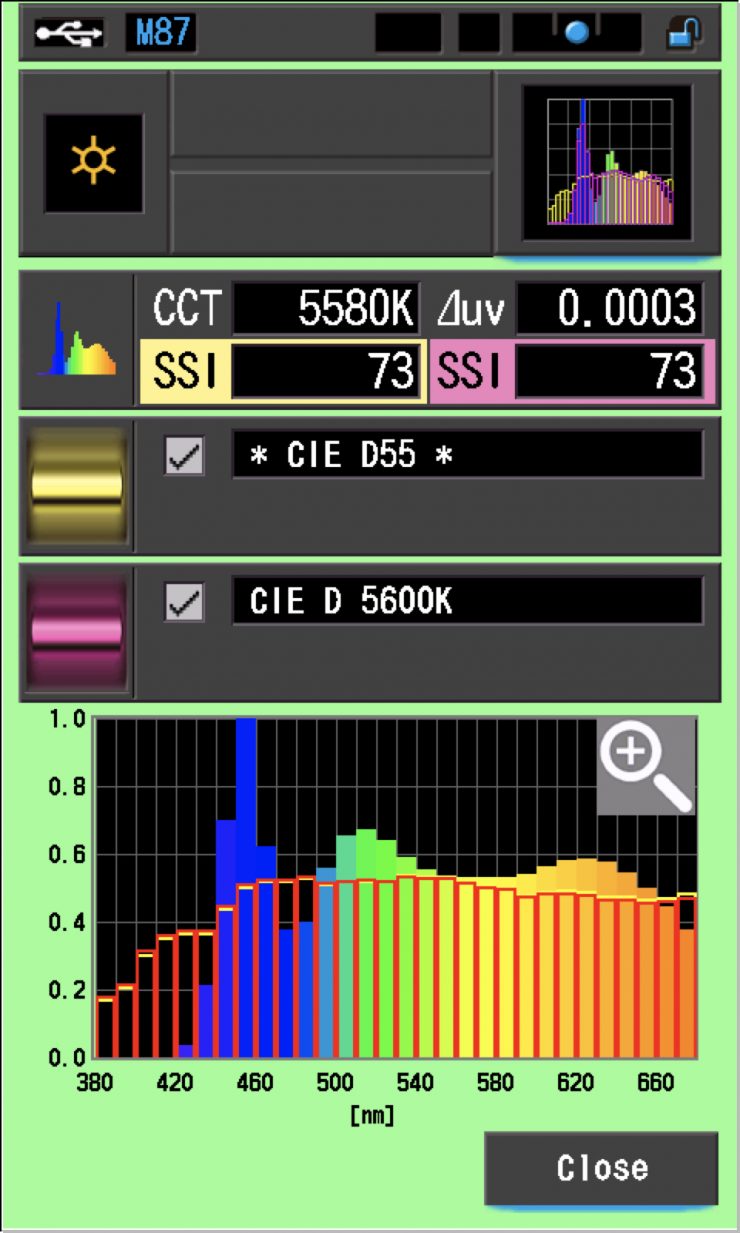
In the graph above, the red bars indicate a perfect CIE D 5600K source. The Red bars indicate a perfect CIE D55 source. This lets us compare how close to a perfect 5600K lighting source the PavoTube II 30X is.
Most LED lights only record SSI scores in the 70s when they are used at 5600K.
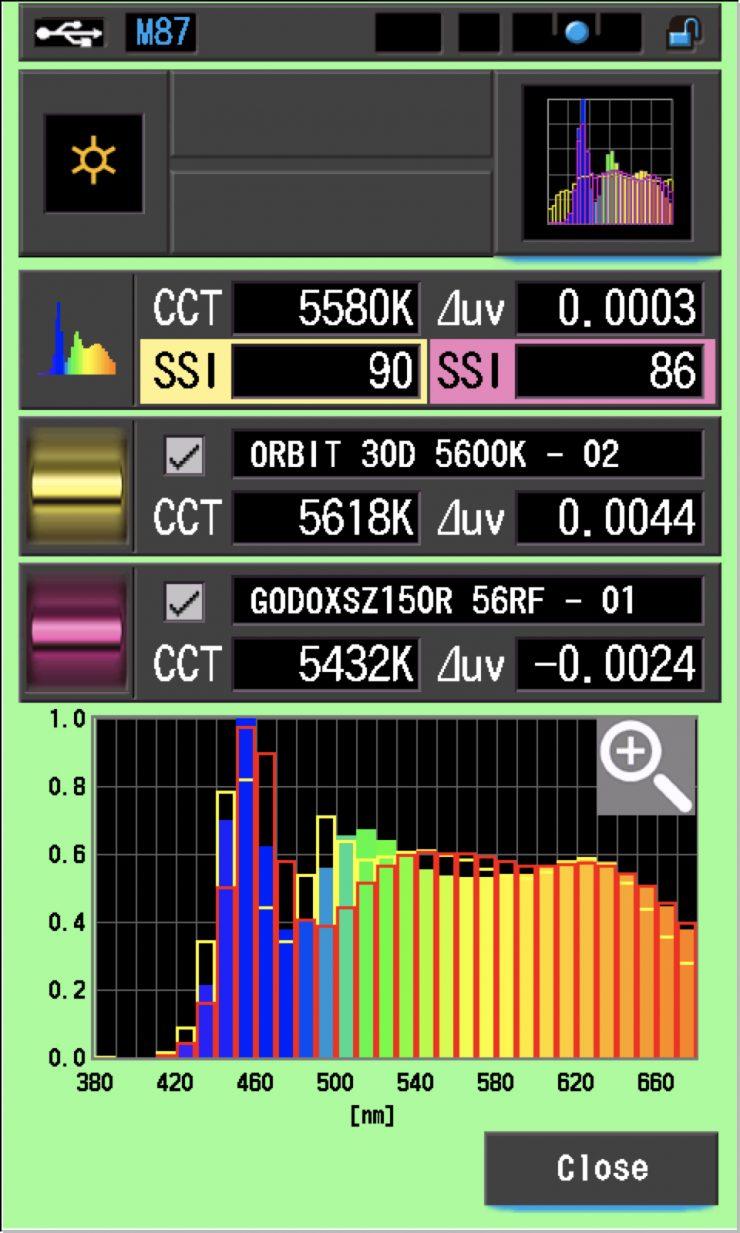
The main reason we want to record SSI scores is so we can see how well they match with other lights. As an example, let’s see how well the Nanlite matches the ARRI Orbiter and Godox SZ150R when used at 5600K. As you can see, the Nanlite is a better match with the ARRI than the Godox. In a perfect world, you would want the lights you are using to have a score of 100 if they were all being used at the same Kelvin color temperature. That is rarely ever going to be the case unless you are using the exact same lights from the same manufacturer, however, any score in the 90s should in theory provide a very decent match.
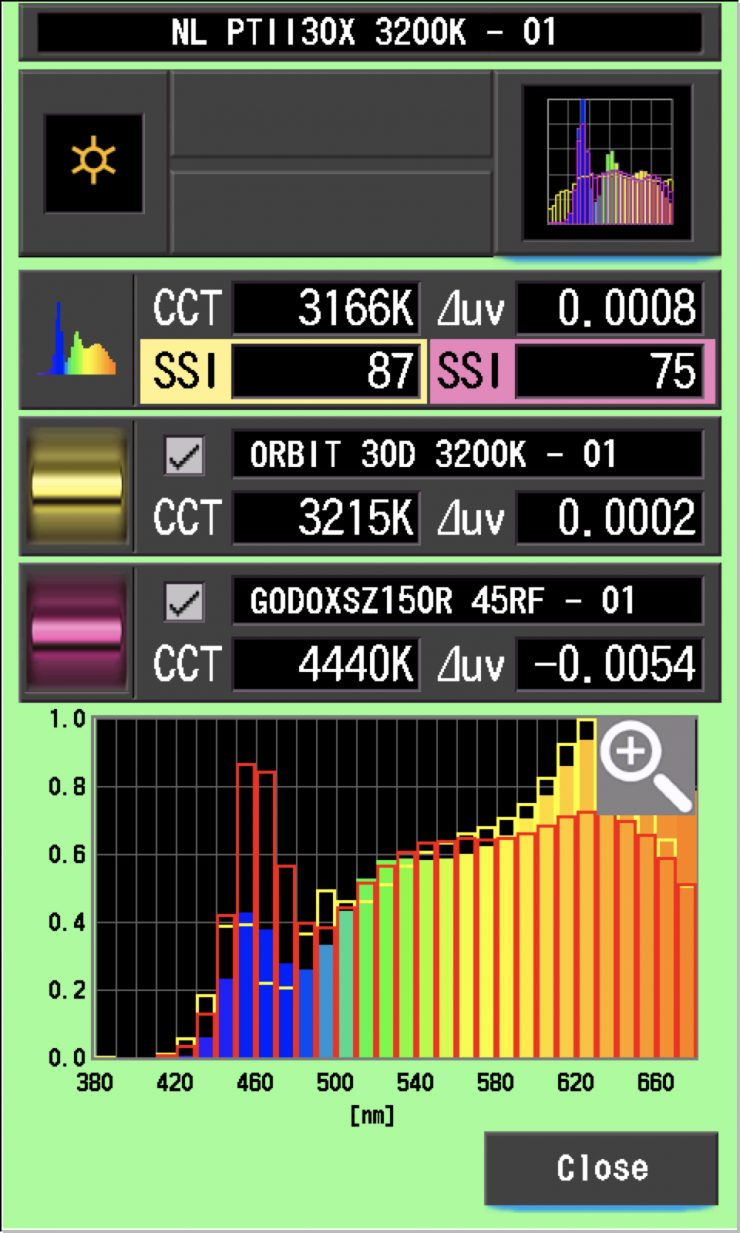
Just as another comparison, above you can see how all of those same lights match when used at 3200K. AS you can see, the Nanlite still matches the ARRI reasonably well, but it doesn’t match well with the Godox when used at 3200K.
Spectral Distribution
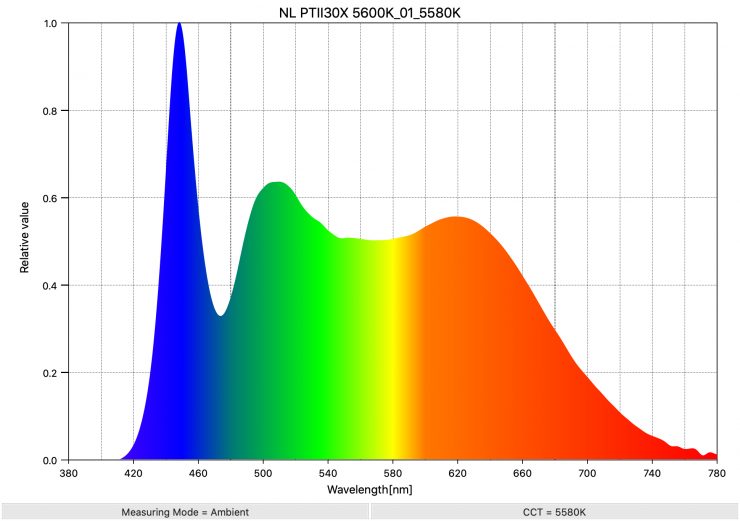
Above you can see the spectral distribution of the PavoTube II 30X when it is set at 5600K. The spectral distribution is not overly full and there is definitely a bit of a bump in green.
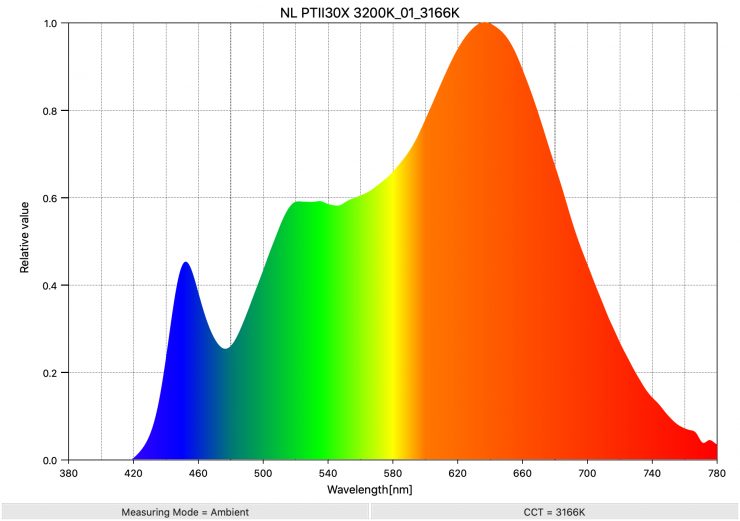
Above you can see the spectral distribution of the 180C when it is set at 3200K. The spectral distribution is pretty good for a LED light being used at 3200K, but just like at 5600K, there is a bump in green.
Real-World Performance & Quality of Light
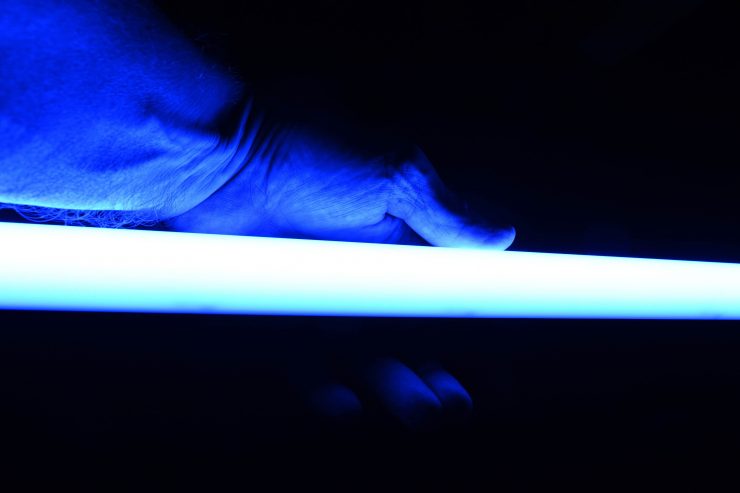
I might sound like a broken record, but as I always say in lighting reviews, photometric scores only tell you part of the story. LED lighting technology has gotten to a point where almost all of the lights that are being released score well in photometric tests. What you should be focussing on, and this goes for just about any product, is usability. How will this product fit into the way I like to work.
The Nanlite PavoTube 30X is quick to set up and you could use the light for lots of different applications. Tube lights such as this are fairly versatile and can be used as ascent lights, interview lights, replacements for practicals, etc, etc.
Yes, I would have liked to have seen a slightly longer run time when using the built-in battery, but on the other hand, you get a product that you can just pull out and turn on. I don’t like separate battery systems, but I do want the option to be able to use one if need be.
As far as output is concerned, the light isn’t overly bright, but for a lot of scenarios where it will be used as a practical or placed in shot on purpose, it doesn’t need to be too bright. If you wanted to use this tube light as a key light in an interview you could, but you do have to be mindful that it will only probably work well in controlled environments.
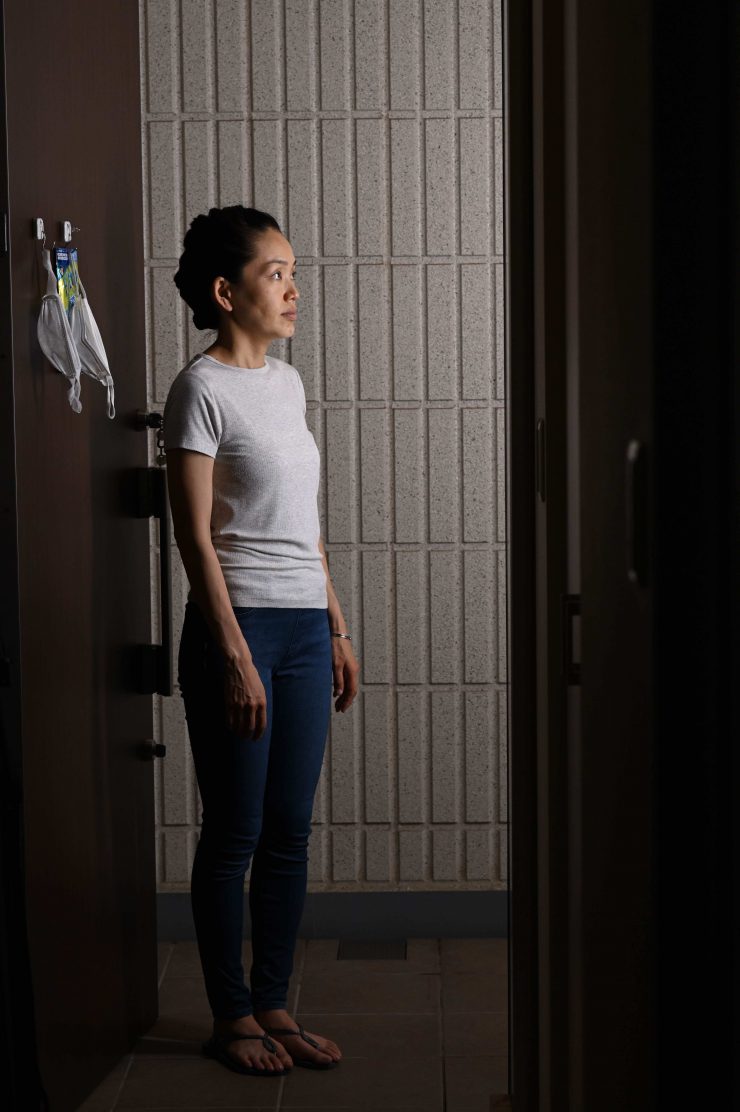
Light up higher and to the right of frame 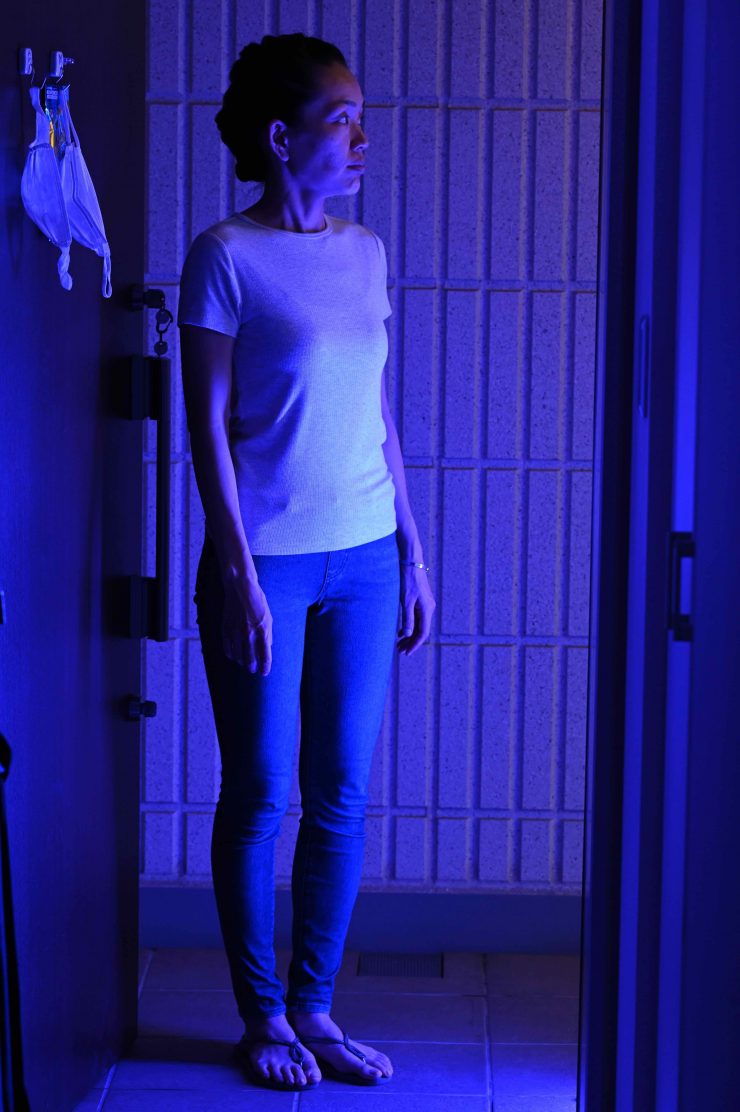
Light to the right of frame 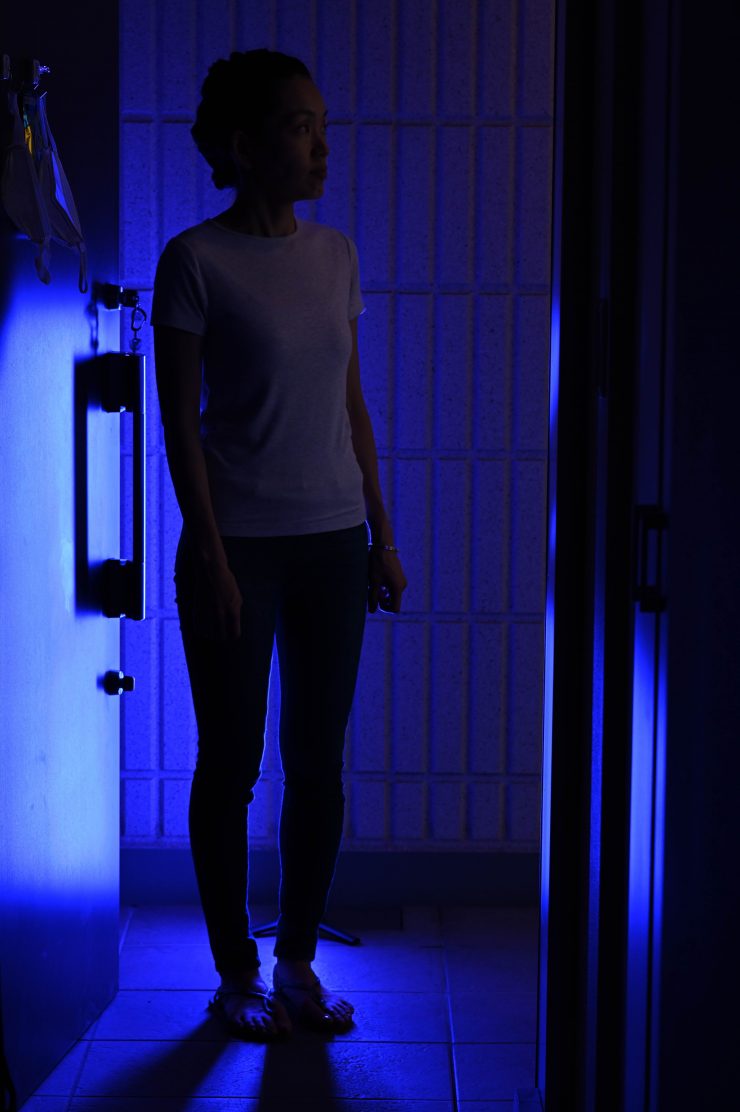
Light directly behind 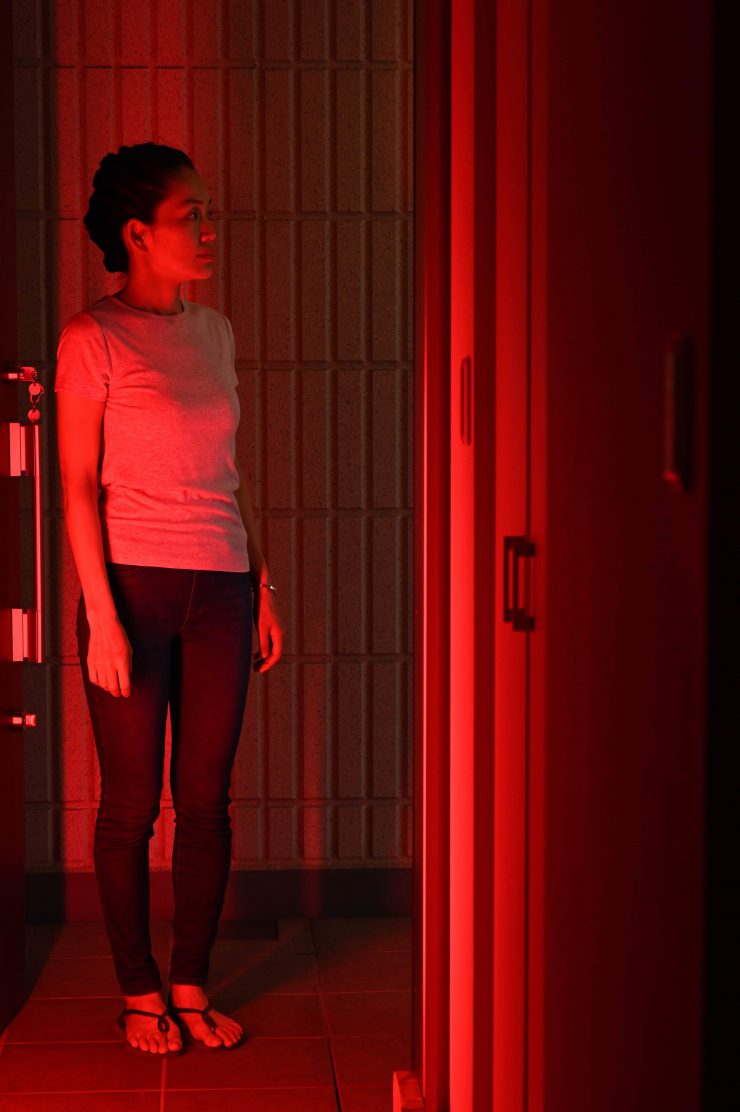
Above you can see a couple of example frames where I am just using the Nanlite PavoTube 30X to create a couple of very simple looks. Having a light like this with a built-in battery makes setting up simple shots like this really quick.
For me personally, I originally thought that a tube light is probably not something that I would tend to use that often. While it is reasonably versatile, the physical size and difficulty of transportation probably outweigh its benefits for the style of work I do. However, in recent months I have found myself using them more often on jobs.
If you are shooting music videos or other content where you need a light to be able to create colors or effects that can be discreetly placed in a scene then tube lights make a lot of sense.
Price & Availability
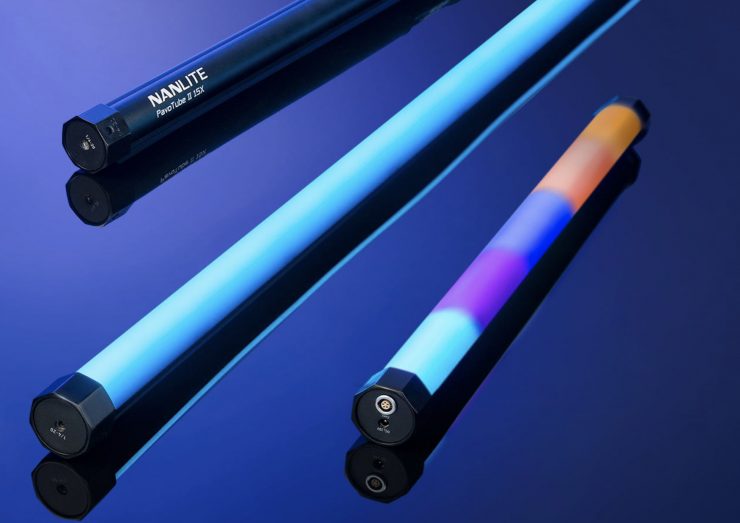
The PavoTube II 30X is now available to purchase. The PavoTube II 15X is only available to pre-order. There is no indication of pricing or availability for the PavoTube II 60X.
The new tubes are quite a lot more than the previous RGBWW PavoTubes. As a reference, the PavoTube 30C 4′ RGBW LED Tube with Internal Battery costs $329 USD. The new Nanlite PavoTube II 30X costs 76% more than its predecessor.
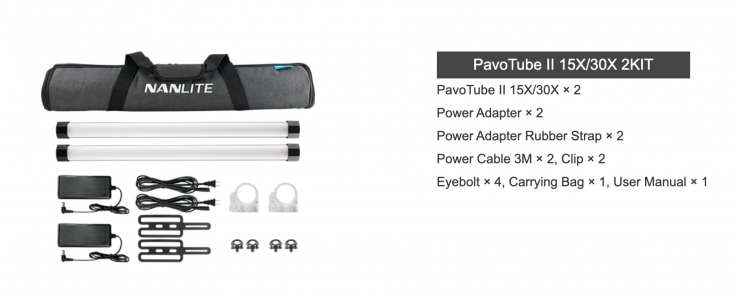
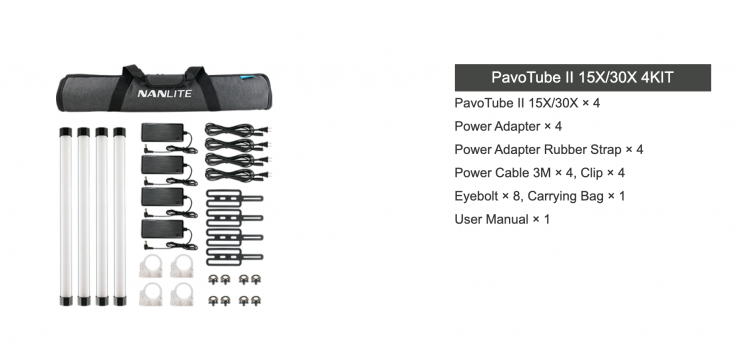
They are also available in various kits.
- Nanlite PavoTube II 30X RGBWW LED Pixel Tube 2-Light Kit with Internal Battery $999 USD
- Nanlite PavoTube II 30X RGBWW LED Pixel Tube 4-Light Kit with Internal Battery $1,999 USD
- Nanlite PavoTube II 15X 2-Light Kit (2′) $719 USD
- Nanlite PavoTube II 15X RGBWW LED Pixel Tube 4-Light Kit with Internal Batteries $1,399 USD
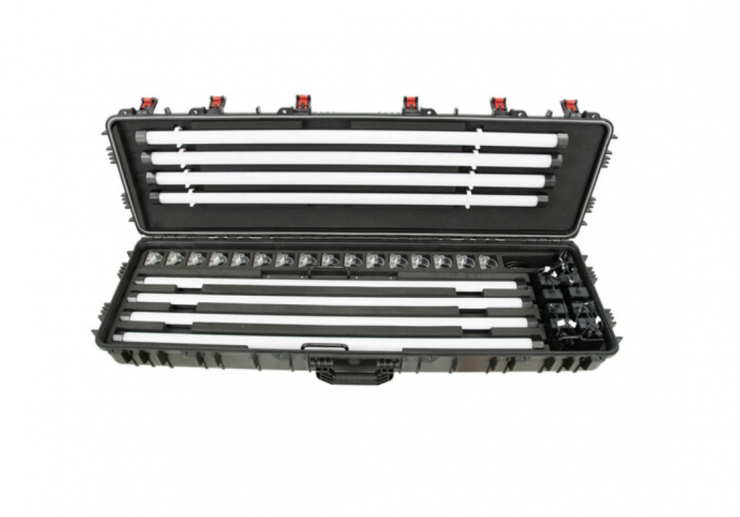
If you want a lot of lights, you can purchase the Nanlite 4′ PavoTube II 30x RGBWW LED Pixel Tube 8-Light Kit with Internal Battery $4,959 USD.
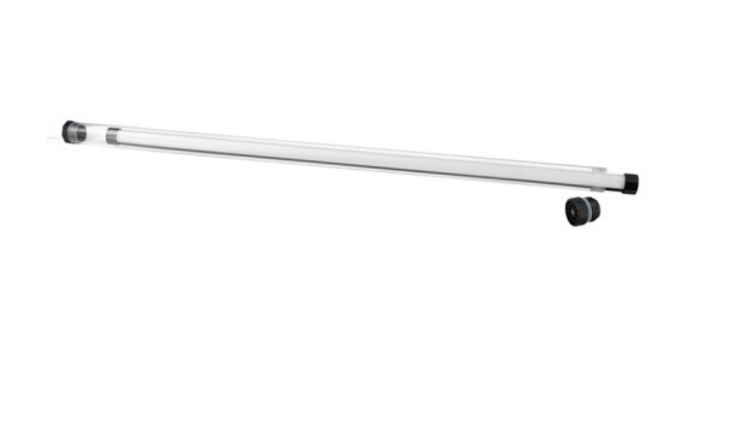
Nanlite also offers a Waterproof Housing for PavoTube II 30X $74.90 USD. This housing is also available for the PavoTube II 15X and 60X.
Competition
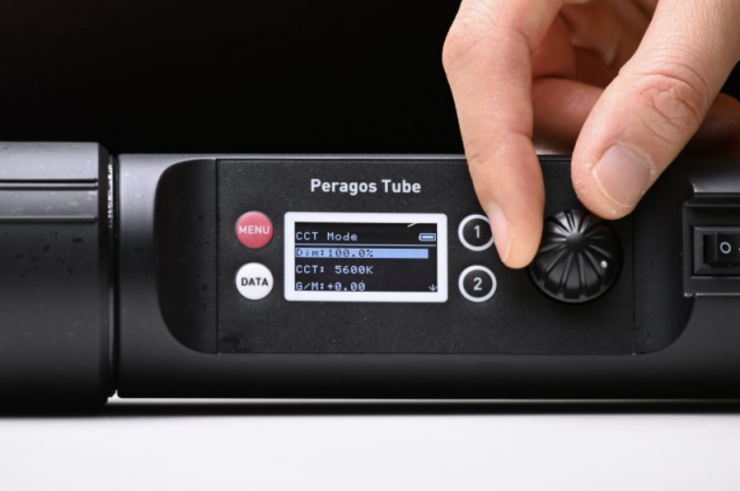
The main competition comes in the form of lights such as the Digital Sputnik Voyager (4′), which costs $690 USD, the Astera TitanTube Power Kit ($850 USD), Came-TV Boltzen Andromeda Slim Tube LED Light 4FT ($348 USD), and the Vibesta Peragos 120C Pixel.
The Astera Titan Tubes are perhaps the most well-known and widely used. They have a host of features and the ability to be run off internal batteries for up to 20 hours.
Conclusion
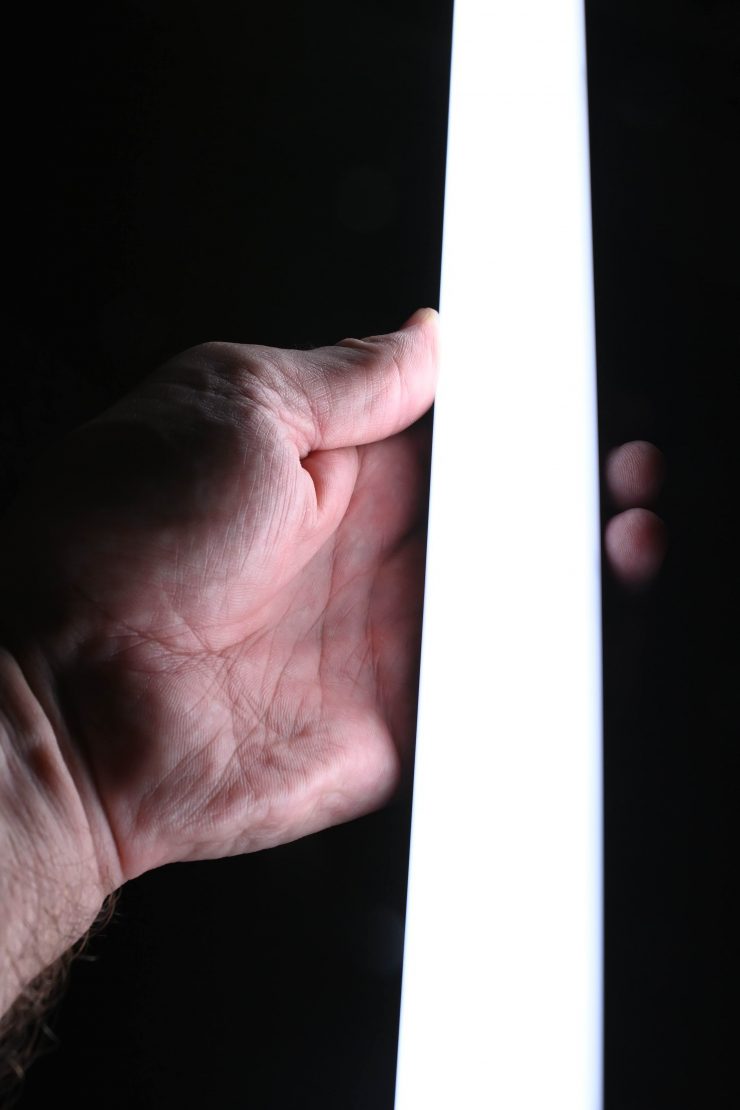
There is no such thing as a perfect light, and tube lights, in general, are filled with compromises that you need to be willing to accept. While you could use them for a whole range of different applications, they are clearly more suited to certain lighting requirements more so than others.
The Nanlite PavoTube II 30X has good Kelvin color accuracy, a nice range of features and capabilities, and it is reasonably well made. The internal battery run time could perhaps be longer and the lack of built-in WiFi or Bluetooth may put some potential buyers off.
All in all, the PavoTube II 30X is a decent offering if you are looking for a RGBW tube light.

