Hollyland has officially announced its new Cosmo C2 Wireless Video System which was first shown as a prototype at IBC 2024 in Amstaerdam.
The Cosmo C2 features a 2 TX & 1 RX design and it boasts an ultra-long LOS range of 3,000ft (1,000m) as well as a claimed latency of less than 40ms. It adopts the newly self-developed HEVO 2.0 technology which supports frequency hopping. In addition, it also has functionality for NDI support, UVC, and RTMP streaming. It looks to be a good solution for multi-camera livestreaming, and broadcast applications.
Above you can see my interview at IBC 2024 with Hollyland where we talk about the Cosmo C2.
The Cosmo C2 consists of 2 TX units (there is a version with just 1 TX as well) and an RX unit that can receive signals from both TX units. The RX units are the same size and weight and they have HDMI and SDI input/outputs.

Key features
- Wireless Transmitter and Dual Receiver Set
- Transmit 1080 up to 60p video up to 3000′ (UHD only over HDMI)
- SDI Input & Output
- HDMI Input & Output
- Operates on the 5 GHz Frequency Band
- Supports UVC Plug-and-Play for Streaming
- NDI Support
- 3000′ Transmission range (LOS)
- Smart Channel Scanning, Bright LCD
- Low Latency
- DC & Sony NP-F battery powering
What are the differences between C2 and C1?

Above you can see what the key differences are between the old C1 and the new C2. The Cosmo C2 is certainly a big upgrade and it features significantly better operating range and functionality.
Concept

With a large array of ‘affordable’ wireless video transmission systems now on the market, it is harder than ever to make your product stand out. The Cosmo C2 is the successor to the Cosmo C1 which was announced in late 2021.
The whole concept behind the Cosmo C2 was to build a relatively affordable wireless video system where two transmitters could broadcast to one receiver which is very handy when doing multi-cam shoots and needing to see images from more than one camera on a monitor at the same time.
Build Quality


I have reviewed a lot of wireless video systems over the years, from inexpensive to expensive options, and the build quality of even the most budget-friendly options continues to improve.

Hollyland Cosmo C2 RX 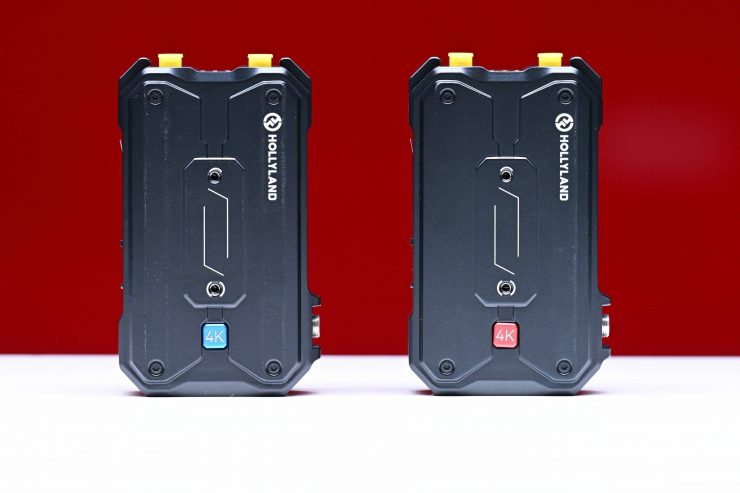
Hollyland Pyro H 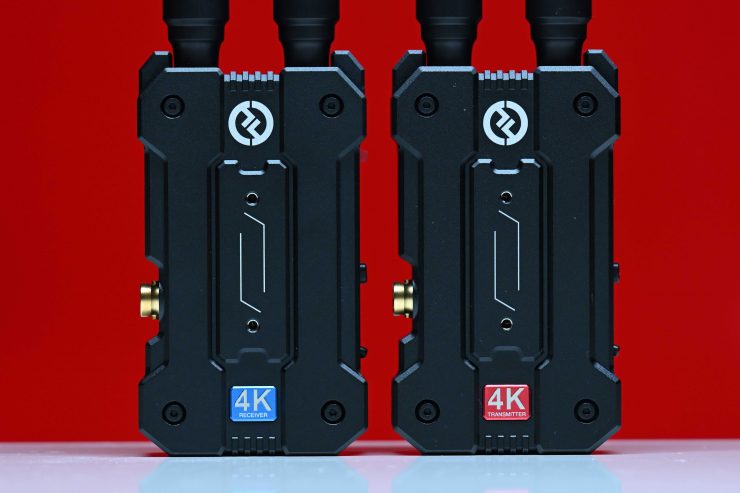
Hollyland MARS 4K
The Cosmo C2 TX units have a fairly similar form factor to the Pyro H and MARS 4K TX and RX units.


The exterior casing of both the TX units and the RX unit is robust and well-made. It certainly doesn’t feel like a product that is likely to break, even if you did accidentally drop them.

The HDMI connectors are slightly recessed, although I would like to see more companies make lockable HDMI connectors because it is very easy to break or snap an HDMI cable, especially if they are sticking straight out on an angle. The SDI ports are also slightly recessed and they do offer a bit of protection.

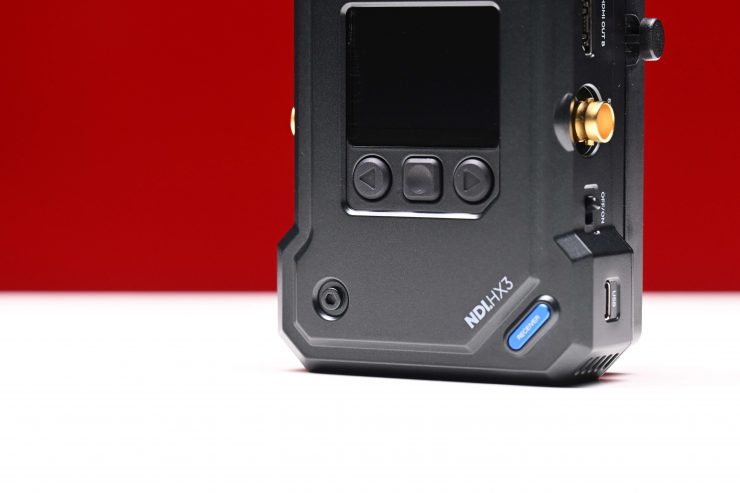
Holyland Cosmo C2 TX 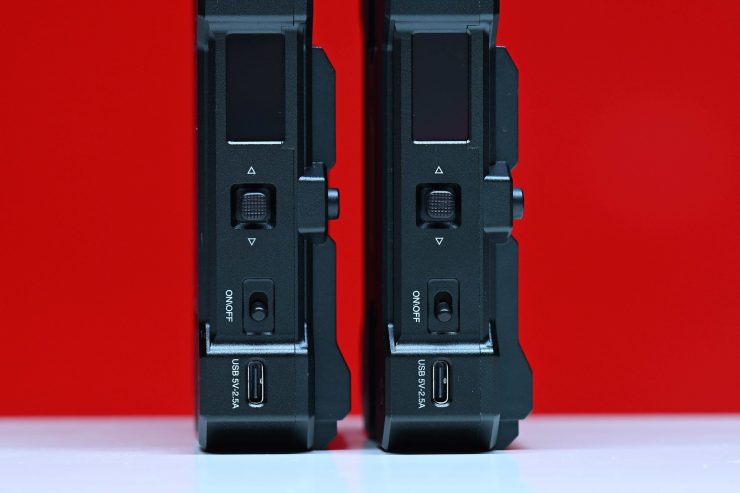
Hollyland MARS 4K
The On/Off switch on the TX units is reasonably solid and tactile. The TX units also feature a joystick-style button like you will find on the MARS 4K.

Hollyland Cosmo C2 RX 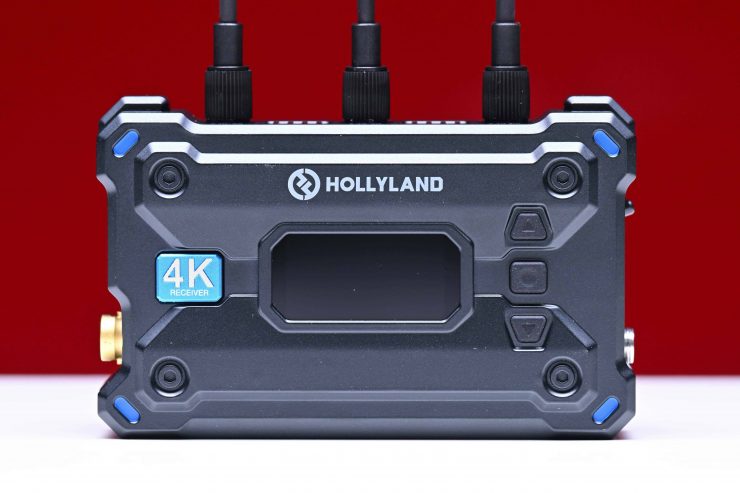
Hollyland Pyro S RX
The Cosmo C2 RX unit has a Menu/Select button as well as up and down buttons for navigating the menu. This is very similar to what you will find on the Pyro S RX unit.

Speaking of the RX unit, it is solidly made and constructed and so is the integrated V-mount battery plate on the back.
Overall I think most people will be more than happy with the build quality of the Cosmo C2. It is well made and constructed for a product at this price.
Size & Weight

Holyland Cosmo C2 TX 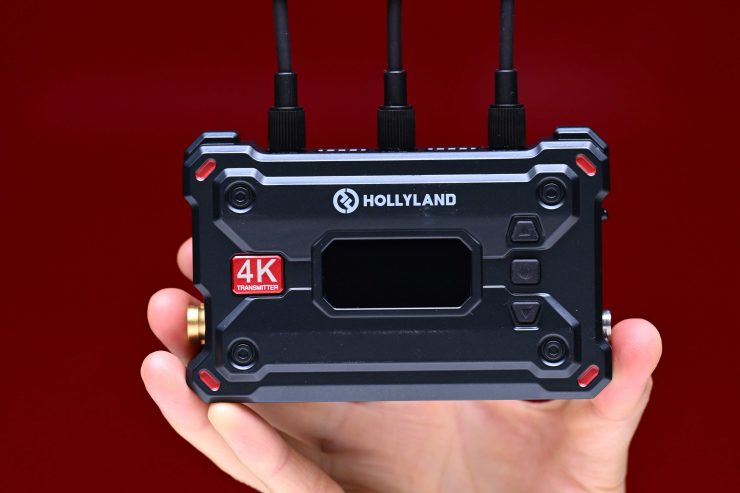
Holyland Pyro S TX
The Cosmo TX units both weigh 210g / 7.4oz (without the antennas). The physical dimensions of the TX units are L × W × H: 114.8 × 69 × 35.5mm (4.5 × 2.7 × 1.4″). As a comparison, the Pyro S TX unit weighs just slightly less at 207g / 7.3oz and they have physical dimensions of 4.4 x 2.8 x 1.3″ / 112 x 71.2 x 34.1 mm.

The Cosmo C2 RX unit weighs 440g / 15.52oz and it has physical dimensions of L × W × H: 142 × 87.2 × 33.2mm (5.6 × 3.4 × 1.3″).
The TX units are a reasonable size, and I would say that they are around a similar size to other comparable wireless SDI/HDMI systems.
The RX unit is certainly on the large size, but I don’t think that is of any concern as it’s likely to be used with a decent-sized monitor.
This weight and size arguably don’t make them overly suitable for small-sized mirrorless hybrids as they take up a lot of real estate, especially when you are powering them with a Sony NP-F battery.
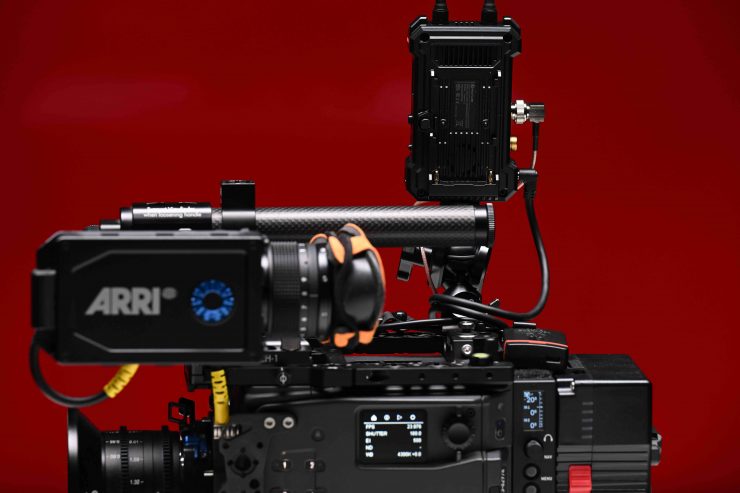
I personally think that the Cosmo C2 would be more at home on mid to large-sized digital cinema cameras as opposed to mirrorless hybrids, although you could use it on some of the larger-sized mirrorless hybrids, or smaller digital cinema cameras like a Canon C70 or Sony FX6.
I think the next big evaluation in this space needs to be making wireless video systems smaller and more compact. There is a big market out there for people who want to use affordable Wi-Fi-based wireless video systems on smaller-sized cameras, but they are hesitant to do so because of their size and weight.
What do you get?

The Hollyland Cosmo C2 Wireless Video Transmission System comes with the following items:
- Hollyland Cosmo C2 Wireless Video Receiver x1
- Hollyland Cosmo C2 Wireless Video Transmitter x2
- 7 x Blade Antenna (5 GHz)
- USB-A to USB-C Adapter
- 12V/2A DC Power Adapter
- Limited 1-Year Manufacturer Warranty
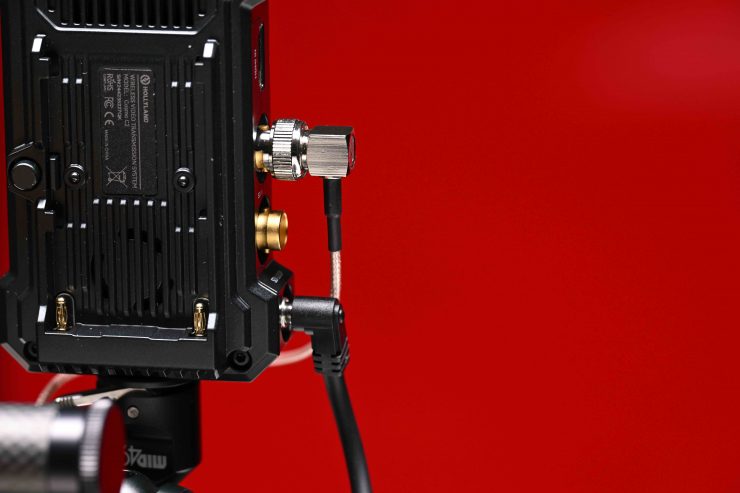
Ins & Outs


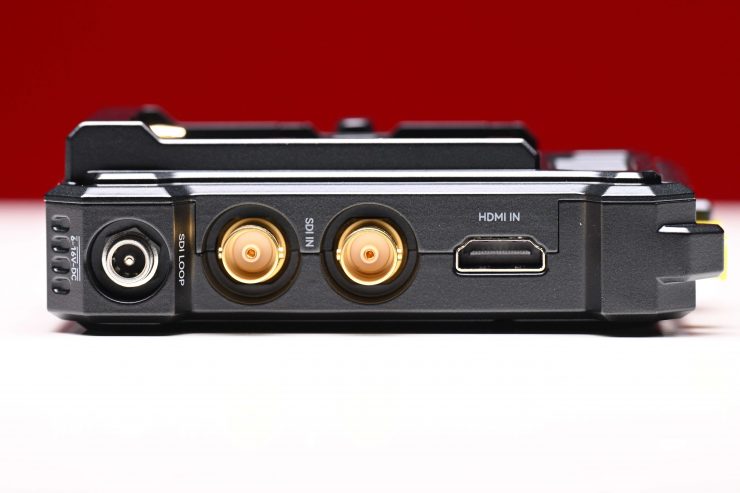
The Cosmo TX units have an HDMI In, an SDI In, and an SDI loop through output. They also feature a USB-C output.


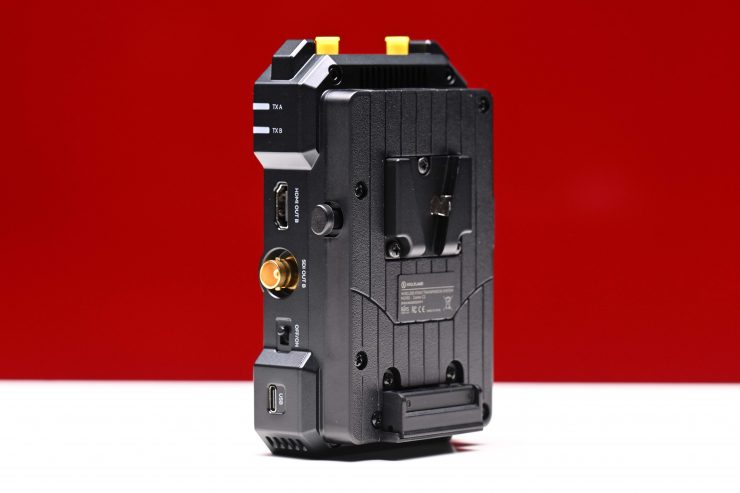
The RX unit features an HDMI Out (A), an HDMI Out (B), an SDI Out (A), and an SDI Out (B). There is also a LAN port and a USB-C out.

RX Unit 
TX Unit
There are DC inputs (6-16V) on both the TX and RX units.
Interface & Transmission


Both the TX and the RX units, there is a reasonably large color screen with a user-friendly UI design that enables quick configurations and status checks. A series of three buttons on the RX lets you access the menu and make changes. On the TX units you use a joystick-style button.
The Cosmo C2 uses Hollyland’s 5 GHz technology, and it is claimed to have a stable transmission range of up to 3,000ft / 1,000m (line of sight).
Hollyland also claims that the system has a minimal transmission latency of less than 40ms thanks to upgraded chips and optimized video encoding/decoding algorithms. Now, please be aware that when companies publish latency figures, those figures are usually for the latency between the TX and the RX and they don’t include the rest of the image chain. The actual real-world latency will always be higher. I will cover this in more detail later in the review.
What can you input & output?

The Cosmo C2 TX units have the ability to wirelessly transmit video in Full HD 1080p at 23.98, 24, 25, 29.97, 30, 50, 59.94, and 60 frames per second. These frame rates are supported on both the SDI and HDMI inputs.

Over the SDI and HDMI outputs, the RX and TX units can output Full HD 1080p at 23.98, 24, 25, 29.97, 30, 50, 59.94, and 60 frames per second.
Unlike the Pyro H and S systems, you cannot send UHD signals.

The camera feeds don’t need to be the same frame rate, so you can mix and match frame rates and have them sent without issue to the RX unit.
Frozen Frame Function
What is the Frozen Frame Function of the Cosmo C2? When activated, this function causes the RX to output the last frame continuously instead of displaying the Hollyland logo.
The Cosmo C2 also supports custom images, and you can import your own image to the receiver. If there is no signal, it will show the picture you input before.
The picture has to be: 1920×1080, JPG, size under 1MP. The name of the picture must be “logo.jpg”
- Prepare a USB disk, FAT 32, less than 32GB memory, and put the picture in the root directory.
- Turn on the receiver and insert the disk into the receiver’s USB-C port.
- Restart the receiver.
- Turn off the Frozen Frame function.
FPS Booster Function

After turning on the FPS Booster function, a “60p” style icon will appear above the receiver screen. When the transmitter inputs low frame rate signals such as P24/P25/P30, the receiver can convert it into P60 signal output.
This is useful, because the image latency is less when using higher frame rates.
Compatibility
Unfortunately, the Cosmo C2 is not compatible with the Mars or Pyro series, or the Cosmo C1.
Antennas

Hollyland Cosmo C2 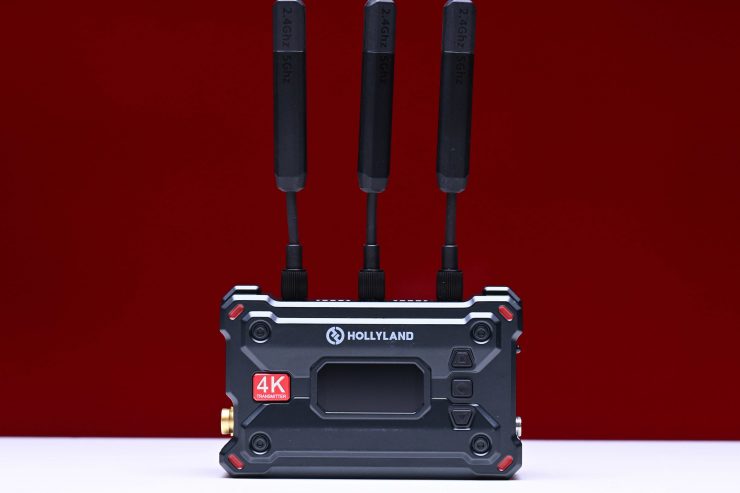
Hollyland Pyro S 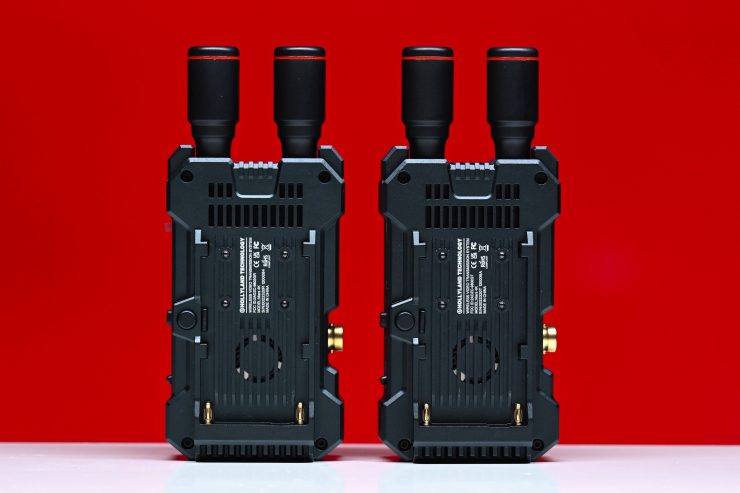
Hollyland MARS 4K
The Blade antennas look fairly similar to the ones that come with the Pyro S and Pyro H systems. They are a lot larger and longer than the ones that come with the MARS 4K which utilized small-sized antennas so that the overall footprint of the units was kept to a minimum.

These larger antennas do increase the footprint, especially on smaller-sized cameras, but they are needed with the long transmission range.
Mounting Points

Hollyland has included a single 1/4 20″ mounting hole on the bottom of the TX units.

On the RX unit there is 3/8″ and 1/4-20″ mounting holes.
Hollyland does not include an adjustable swivel mount like you get with the Pyro S.

To mount the TX units you will need to source or use your own mounting device.


With the RX unit, I mounted it to a SmallHD Cine 13 Monitor using a Wooden Camera Mini Universal Ultra Arm (Combo 1/4-20 & 3/8-16).
Power


The Cosmo C2 TX units feature in-built battery plates that can take Sony NP batteries.

You also have the option to power them through a 6-16V DC input. Hollyland does include a 12V/2A power adapter in the kit.
The TX units draw 10W, while the RX unit draws 11W.
The battery plate is well made and batteries don’t move or wobble around.
It would have been nice to have been able to power the devices via USB-C like you can with the Pyro H. Having in-built batteries would have kept the size down, but most professionals don’t want devices with built-in batteries unless they are able to power a unit for a considerable amount of time.

Using a Cosmo C2 TX with a Sony NP battery on a small to mid-sized digital camera isn’t going to make it overly heavy, however, I personally prefer to power wireless video systems directly from my camera, but that’s just the way I do it.
What is nice is that you hot-swap power sources if you happen to have two connected at once. For instance, If I have the battery on and I then want to suddenly want to swap to a DC power source I can simply take off the battery without the Cosmo C2 shutting down.
I would have liked to have seen Hollyland include a DC to D-tap power cable in the kit for this very reason. Hollyland does sell an optional AC power supply.
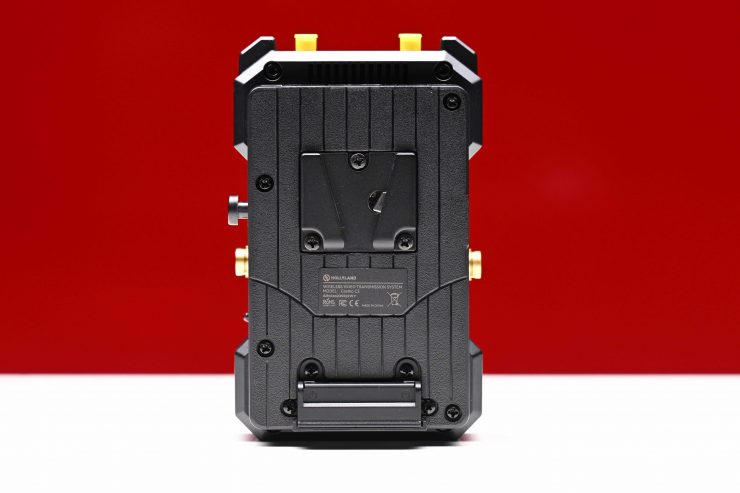
The RX unit features a built-in v-mount battery plate.

This allows you to power the RX unit for long periods of time, even with smaller sized mini V-lock batteries.
If you prefer you can also power the TX unit via the 6-16V DC input. Again, I think for a product like this that is likely to be used quite a bit with a monitor, a LEMO input would have arguably made a lot of sense.
Fan Noise


Both the TX and RX units have an in-built fan. The fans do seem to be pretty quiet which is good if you have a TX unit mounted close to an onboard microphone.

Hollyland does give you the option to change the fans on the TX units from Auto to Mute in the menu.

Strangely the fan option is different with the RX unit, where you can choose from Auto or Mute in the menu.
Even after having both the RX and TX units on for a considerable amount of time, they didn’t get overly hot.
Setup & Ease Of Use
As I say in every wireless video system review, a good solution should be easy and fast to set up and get running. In all honesty, this shouldn’t be a difficult task, and if it is, then, in my opinion, the product has already failed.
The Cosmo C2, like most of Hollyland’s wireless video transmissions, was designed to essentially be plug-and-play. You just power up the TX units, input video sources, and then power up the RX and hook it up to a monitor or other device.

All you need to do is make sure that the TX and RX units are on the same channels, however, the system will automatically select the same channel on both the TX and RX automatically for you.

Once everything was powered on I got a picture within around 14 seconds. 14 seconds is reasonably good for a wireless system.

I also like that you can do a manual channel scan on the RX unit to see what the best available channels are to use.

If you need to manually pair the units for some reason you can do that.
So, what about if you start pulling cables out or turning the TX and RX on and off gain? These are real-world things that happen and you need to test how the system works by seeing how quickly it can re-establish connections. If I pulled the SDI cable out of the TX unit it took roughly 1.5 seconds for the image to re-establish.
If I suddenly changed the framerate on the camera, it took around 4 seconds for the RX to re-establish the connection.
Ok, what about if I turn the RX unit off and turn it back on again? It took roughly 19 seconds for an image to re-appear on the connected monitor.
If I turned a TX off and then back on again it took about 14 seconds for the image to appear on the connected monitor with the RX.
The Cosmo C2 was reasonably good at re-establishing a signal and getting up and running again if any changes were made. This was good to see.
You can’t send images to a smartphone or a tablet
Unlike the Pyro H/S and MARS 4K, you can’t send images to a smartphone or a tablet using the Hollyview App.
Streaming


You can stream from the RX unit in three different ways:
- UVC
- NDI
- RTMP
USB Video Class (UVC)
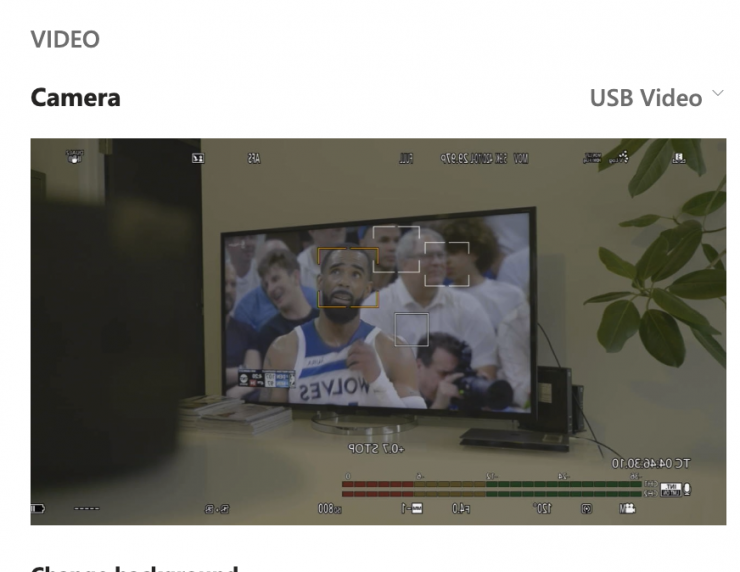

You can output a signal directly via USB-C from the RX unit into a computer etc. so you can stream images and video.
Use a standard USB-A to USB-C data or USB-C to USB-C cable cable to connect the receiver to the computer.
Long press the middle button of the receiver to enter the menu, select the “Streaming” function, and then select the “UVC” option to confirm
Open OBS and other live broadcast software to add a video capture device=》Driver selection: UVC_A_xxxxxx or UVC_B_xxxxxx
Cosmo C2 UVC supports up to 1080P60, and the video format is MJPEG.
NDI
NDI can transmit and receive multiple broadcast-quality signals in real time over IP networks, with low latency, frame-accurate video, and data stream mutual recognition and communication. You can connect the C2 receiver to a network switch and use other devices that support NDI to capture the video.
You can use a standard CAT 5e or above cable to connect the Cosmo C2 receiver to the switch of the LAN.

Observe the image transmission receiver: the network status appears (spherical icon).
- Long press the middle button of the receiver to enter the menu, select the “Push Stream” function, and then select the “NDI” option to confirm.
- Use a device that supports the NDI function to connect to the same LAN to capture the video source of the receiver.

For example, in OBS you will see 2 videos source.
RTMP

Long press the middle button of the receiver again to enter the menu, select the “Web Information” function, and then you can view the receiver Web address.Then find the “Streaming” function, choose RTMP.


- Use an internet cable to connect the receiver to a PC. Enter the Web address in your browser. Then write your URL and stream key.
- Remove the Internet cable from PC to a router, or connect the USB network card to the USB-C interface of the Cosmo C2 receiver through the OTG adapter.
- Check if the receiver appears or displays the network status (spherical icon).
- Click the stream button on the web setting.

When streaming successfully, the icon will change to the green arrow CAM as in the above picture.
Image Delay
Zero (or close to) image delay is one of the big reasons you pay more money for a higher-end system. Most high-end wireless video systems have basically zero latency, while a lot of the budget systems can have quite a lot of latency, especially those systems using HDMI. Hollyland claims that the Cosmo C2 has a latency that is under 40ms, but they don’t state how they are measuring or coming up with that figure. So let’s find out what the latency actually is.
SDI

Ok, so let’s try using SDI first. I measured the delay average over a series of three tests at 75.33ms to see what the delay was from what I was seeing directly from a monitor attached to the camera as opposed to the monitor that was connected to the RX when the TX was transmitting a 1080 60p image. This was using an ARRI ALEXA 35. 1080 60p over SDI should provide the lowest latency.


I then decided to see what the latency was if we were transmitting and receiving a 1080 23.98p signal over SDI doing the exact same test. I measured the delay average over a series of three tests at 192.33ms.
What do these figures actually mean? Well, anything below 100ms is considered to be low, because most humans don’t perceive a delay that small. Once you get over 100ms we perceive a noticeable delay. 75.33ms is pretty decent, but not quite as good as the claimed latency of under 40ms. The tests don’t lie, but what you may not realize is that the latency of compressed systems is variable and not constant. If I wanted to take a single-frame test I could find latency as low as 32ms when sending 1080 60p. So technically, you could say that the latency is under 40ms, but that isn’t a constant number.
HDMI
So what about if you use HDMI? I did a test sending 1080 60p over HDMI from a Nikon Z9 to see what the average latency was. I measured the delay average over a series of three tests at 179.66ms.

Ok, now let’s do that same test, but this time at 1080 23.98p. I measured the delay average over a series of three tests at 196ms.
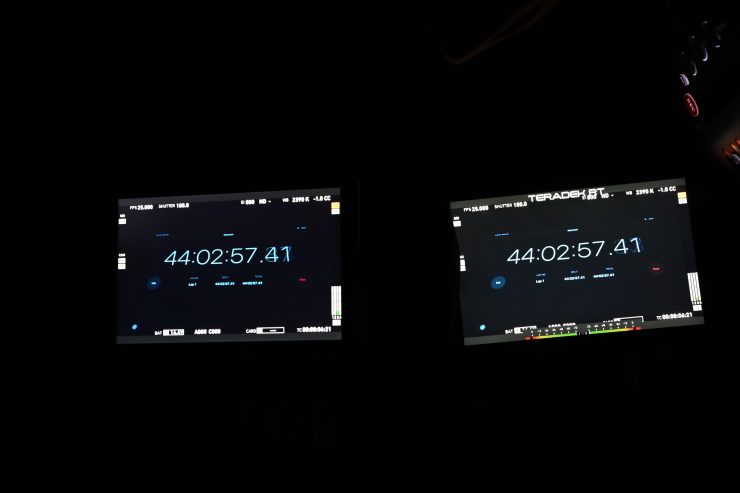
As a reference, above you can see that there is zero latency when using an expensive Teradek system (well, as close to zero as you can get. No wireless system is really zero in the scientific sense). This is a prime example of why you pay more money for a high-end wireless video system.
Real World Delay
SDI 1080 60p
Above you can see what the real-world delay looks like when you are transmitting 1080 60p over SDI. You can see the delay from the monitor attached to the camera, to the monitor connected to the RX. The screen for the camera is on the bottom, and the output from the RX is above on the larger screen.
SDI 1080 23.98p
Above you can see what the real-world delay looks like when you are transmitting 1080 23.98p over SDI. You can see the delay from the monitor attached to the camera, to the monitor connected to the RX. The screen for the camera is on the bottom, the output from the RX is above on the larger screen.
HDMI 1080 60p
Above you can see what the real-world delay looks like when you are transmitting 1080 60p over HDMI. You can see the delay from the rear screen of the camera, to the monitor connected to the RX.
HDMI 1080 23.98p
Above you can see what the real-world delay looks like when you are transmitting 1080 23.98p over HDMI. You can see the delay from the rear screen of the camera, to the monitor connected to the RX.
Whether image latency is a big deal for you will depend on your personal requirements for a wireless video transmission system.
Comparison Table v’s Accsoon CineView Master 4K & Hollyland Pyro S
| MEASURED DELAY | |
| Hollyland Cosmo C2 1080 60p SDI | 75.33ms |
| Accsoon CineView Master 4K 1080 60p (Low Bitrate) SDI | 25.66ms |
| Accsoon CineView Master 4K 1080 60p (High Bitrate) SDI | 22ms |
| Hollyland Pyro S 1080 60p SDI | 55ms |
| Hollyland Cosmo C2 1080 23.98p SDI | 192.33ms |
| Accsoon CineView Master 4K 1080 23.98p (High Bitrate) SDI | 107.33ms |
| Hollyland Pyro S 1080 23.98p SDI | 95.66ms |
| Accsoon CineView Master 4K 4K 60p (Low Bitrate) HDMI | 77.66ms |
| Hollyland Cosmo C2 1080 23.98p HDMI | 196ms |
| Accsoon CineView Master 4K 4K 23.98p (High Bitrate) HDMI | 139.66ms |
| Hollyland Pyro S 4K 23.98p HDMI | 257.33ms |
Above you can see tests that were done using the exact same methodology so you can get an idea of how various systems compare.
Thoughts on image delay
When using SDI at sending 1080 60p, the image delay was reasonably minimal. If you send 1080 23.98p over SDI then the latency does increase. If you use HDMI the latency does increase quite a bit, however, HDMI latency changes from camera to camera.
You are not going to get the same sort of results as you will with an uncompressed, zero-latency system, but some of these new compressed systems are getting pretty good and to the point where latency is becoming a lot more acceptable for more applications. At the end of the day, there needs to be an acceptable limit that you are willing to tolerate. If you are using dedicated TX and RX units then latency really needs to be below 100ms. When I say below 100ms, that is for ‘affordable’ budget systems. For high-end systems, it should be almost zero.
Some cameras have the ability to send 50p or 60p signals over SDI while still recording 23.98, 25p, etc. This certainly helps with latency.
Latency figures can be a bit like dynamic range figures in that manufacturers like to quote numbers that are sometimes not explained or quantified.
Real-world performance
Pulling out connectors, changing settings, and turning receivers and transmitters on and off is one thing, but how does it actually perform in the real world?
How about the operating range? The real transmission distance is relevant to the current air electromagnetic environment, because the system works in the ISM band, and therefore has exposure to all kinds of 5GHz band air interference.
With this in mind, I decided to test the range and performance of the system. To test the range of the system I remained in line of sight of the Cosmo C2 TX and started walking away with the RX unit. I could easily get a distance of 450m / 1476′, and still have a stable signal with no issues. I could have gotten more distance, but I ran out of straight road. I was also able to go around 100m around a corner out of line of sight with plenty of obstacles in the way and still get a good signal which was impressive.
Now, Hollyland claims a maximum operating range of 3000′ / 1000m (line of sight), but this is usually only going to be achievable on flat, open terrain where there is little wireless interference. I did this test in the middle of Tokyo which is one of the most heavily congested RF and WiFi traffic areas on the planet.
| OPERATING DISTANCE TX-RX | |
| Hollyland Cosmo C2 | 450m / 1476′ (ran out of straight road) |
| Hollyland Pyro S | 350m / 1150′ |
| Hollyland Pyro H | 350m / 1150′ |
| Hollyland MARS 4K | 170m / 557′ |
| Accsoon CineView Master 4K | 400m / 1312′ (ran out of straight road) |
| Accsoon CineView Quad | 111.86m / 367′ |
| Vaxis Atom 500 HDMI | 350m / 1148′ |
Above you can see how this compares to some of the other similar wireless video systems I have reviewed in the past.
Whenever I review wireless video transmitters I do the test in the exact same place under the same operating conditions. This way I get a good idea of how various competing systems compare.
Pricing & availability

The Cosmo C2 is launching globally on February 13th, and it is available through local distributors, as well as at Hollyland’s Amazon store: https://hollyland.info/amazon. Below is the price:
- Hollyland Cosmo C2 HDMI/SDI Wireless Video 2-Transmitter System $1,299 USD
- Hollyland Cosmo C2 HDMI/SDI Wireless Video Transmission System $999 USD
This represents pretty good value for money considering its capabilities and the fact that you get both a TX and a RX.
Competition
The Cosmo C2 doesn’t really have any direct competition. I’m not personally aware of any other 5GHz compressed system that features an RX unit that can receive signals from two TX units that are available for anywhere near this price.
Conclusion
A wireless video transmission system needs to have rock-solid reliability. It also has to not get in your way and be easy to set up and use. Nobody wants to be messing around trying to fix wireless video transmission issues on set, especially if you are working in small teams or by yourself. A lot of the compressed systems have gotten a lot better when it comes to latency and features, and if you don’t need to pull critical focus or view uncompressed images then they are more than up to the task for a lot of applications.


The Cosmo C2 is well-built, relatively easy to set up and use, and it offers a lot of functionality and features. Having a system that features both SDI and HDMI and the ability to transmit two images to a single RX unit makes this a very versatile and appealing product for quite a few different applications.
The operating range of the system is excellent, and the image remains stable without dropping out. As soon as you do go out of range and then come back into range it re-establishes a connection straight away.
Like most of the Hollyland offerings, the UI is pretty easy and straightforward to navigate.
Yes, there is image delay and it is something you need to be aware of, however, you are going to get latency with just about every compressed wireless video system on the market. My tests showed that image latency actually varies quite a lot depending on the frame rate and whether you are using SDI or HDMI. If you are just viewing an image then latency isn’t necessarily a big deal, but if you are trying to pull focus remotely then it could be an issue depending on what you are doing. What you clearly need to be aware of is that any system that isn’t sending uncompressed video is going to have latency, and this is why certain systems cost more than others.
You don’t want to buy a product, regardless of how much it costs, or who it is aimed at, and then find out it doesn’t perform in the way you were expecting. With wireless video systems, you need to look at the overall performance in real-world scenarios so that you are aware of what you should expect and what the limitations are. Some quick overview without any real world testing tells you nothing about a product. Latency, image quality, mounting options, app, and real-world operating distance are all things you need to consider before making a purchase.
More affordable wireless video transmission systems have continued to get better and better in recent years and you can now obtain a pretty good system without having to spend too much money.
The Cosmo C2 is a solidly made and well-featured system that is a good option if you need to send signals from multiple cameras to a single RX unit. The latency is pretty decent for a compressed system and the range is excellent. For those shooters who often need to set-up two cameras, it is an easy way to show a client both images as long as you have a monitor that can display two inputs at once.
Specifications