Portkeys has been making monitors for several years, and I have used them, too. I reviewed the original BM5 five years ago. I first saw their products at NAB 2019 and since they have released new monitors and EVFs such as the LEYE that I also reviewed.
They keep getting better in every way, from the image quality to the overall build. With their new CINENORM OS, I feel PortKeys is coming full circle, improving the user experience and included tools.
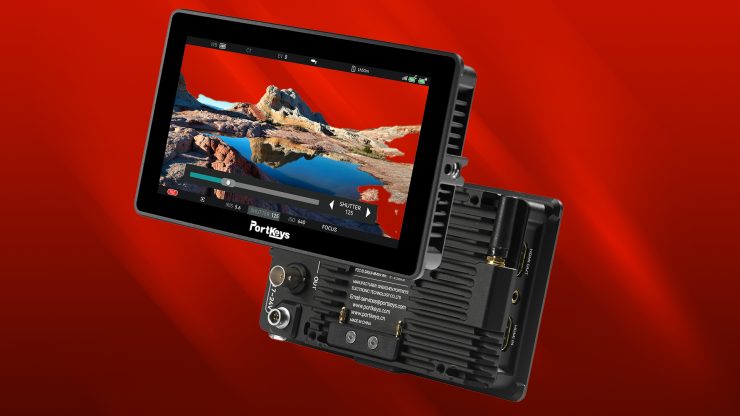
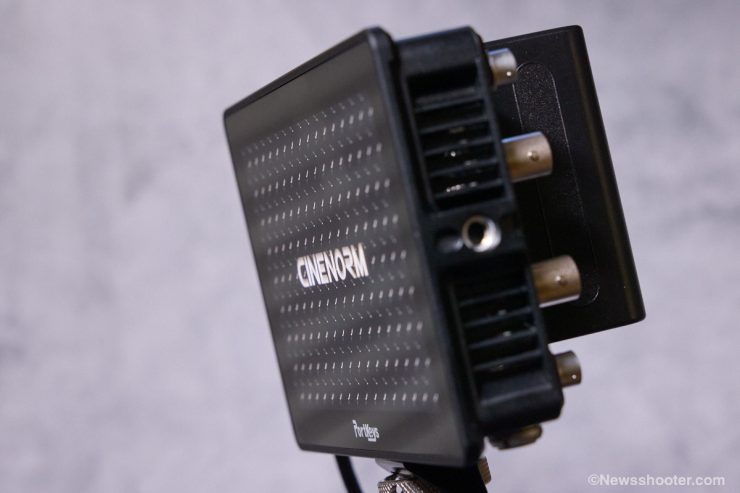
The BM5 IV WR is a rugged yet light, fully featured 5.5-inch touchscreen monitor with DCI 4K60P HDMI input/output ports, 3G-SDI input/output ports, wired and wireless camera controls, and a full suite of professional monitoring tools.
Out of the box it was loaded with the most current firmware ver. BM5_V4WR_06_2C_C41_B53.
Below is what has been improved and added to this version.
Firmware
PORTKEYS_BM5_V4WR_06_2C_C41_B53
1. Fixed the RGB histogram issue in separate display mode during fullscreen
2. Fixed the fullscreen button issue in the oscilloscope’s multi-window feature
3. Addressed the abnormal display of the waveform after resetting
4. Fixed the issues with Sony-MULTI camera control
5. Fixed the issue of display error after enabling the channel information of dual-screen mode
6. Fixed the issue of HDMI input error when screen A is set to SDI in dual-screen mode
7. Added four colors into Peaking : yellow, cyan, purple, black
8. Added automatic connection feature for RED-DSMC2 camera
9. Fixed the issue of page error that occurs when importing data
10. Fixed the issue of screenshots during HDMI on and off
11. Fixed the issue of no HDMI signal after reset on SDI signal.
12. Added preset feature for user 1 among false color.
10-bit 8+2 FRC (Frame Rate Control) Display
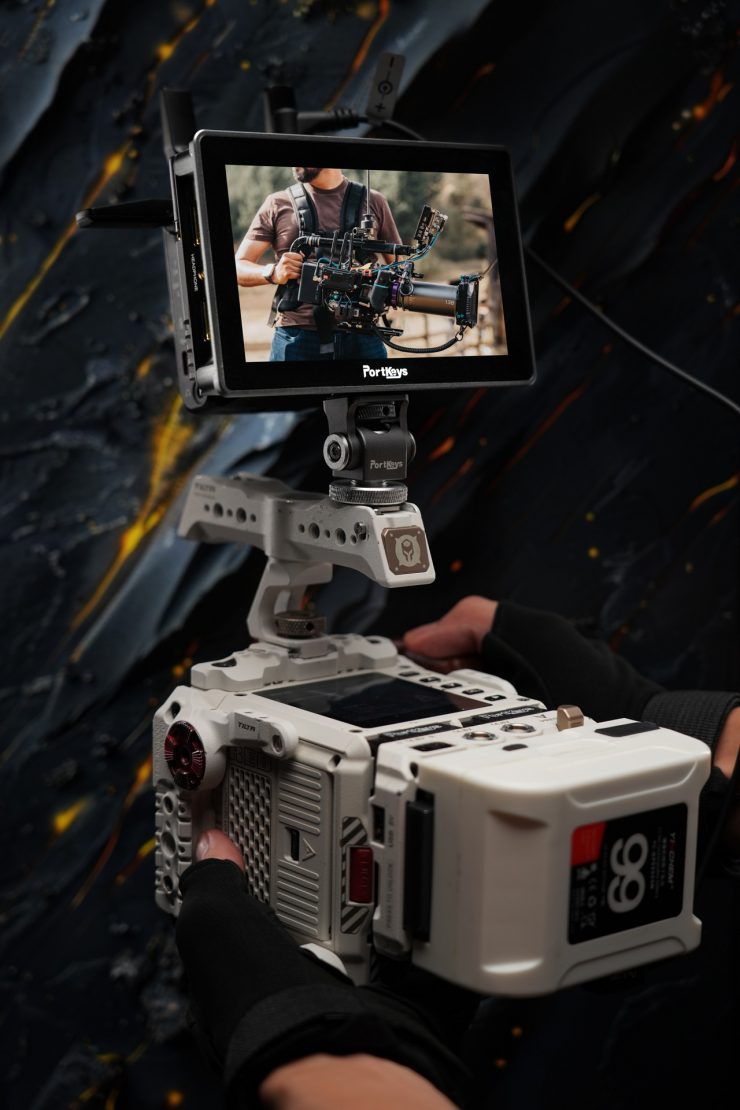
The monitor is 10-bit 8+2FRC, which gives you all the colors of 10-bit with an 8-bit monitor. “Frame Rate Control” manipulates pixels so they flash two alternating colors so quickly that you perceive any of the shades in a billion-color experience. Does the monitor display those billion+ colors? No. Will you be able to tell? Likely not. True 10-bit monitors are costly, and 8+2FRC is a great way to have your cake and eat it, too.
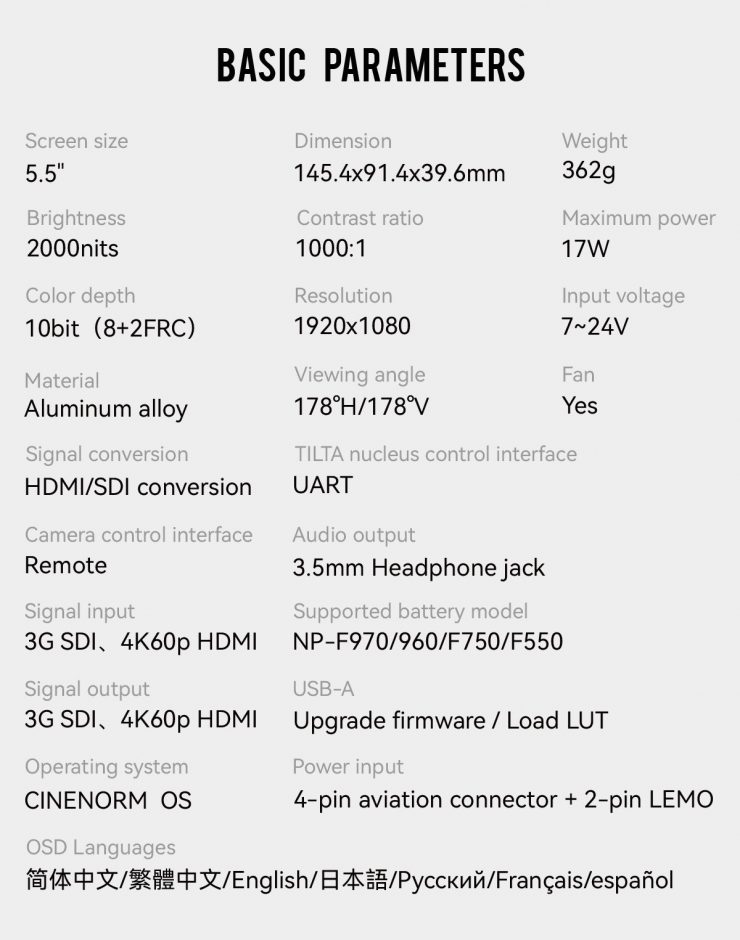
The 5.5-inch monitor has 1920 x 1080 resolution, a large 178° viewing angle, and a 1000:1 contrast ratio. The display is factory color-calibrated, but if needed over time, you can use an X-Rite color probe to create a calibration 3D LUT. At the time of this review, the calibration software isn’t available. Out of the box, it looked good. I did bring down the saturation a little to match the LCD on the C70 better.
The screen is glossy and does get reflections, but that is expected from glossy screens. It’s also susceptible to finger smudge.
Bright 2000 nits Screen
The Portkeys BM5 IV and BM5 IV WR are daylight-viewable with a high brightness of 2,000 nits. I feel this is just past the entry point for outdoor use in the sun. In very bright conditions, you must boost the backlight almost to 100%. Yes, the image can get a little washed out but at least you can see what the heck you are shooting and still have a good idea of the color balance. With cameras like the C80 and Sony FX3 that don’t have an EVF and poor LCD screens, a bright monitor is essential for outdoor use.
Portkeys doesn’t offer a sun hood for this model, and I would buy one if they did, as you never know when the conditions can get tricky, and having the sun hood could save your bacon.
Screen Brightness Test
With the backlight set to 100%, I put the camera to maximum exposure exceeding 100 IRE and used a Screen Luminance Meter to take a reading from the center of the screen and got 2375 cd/m2 (NITS).
On the left side, I got a reading of 2100 cd/m2 (NITS), and on the right side, of 2200 cd/m2 (NITS).
I would say the BM5 IV WR is delivering its stated NIT value and a little more.
FYI cd/m2 is the same as NITS. They are interchangeable.
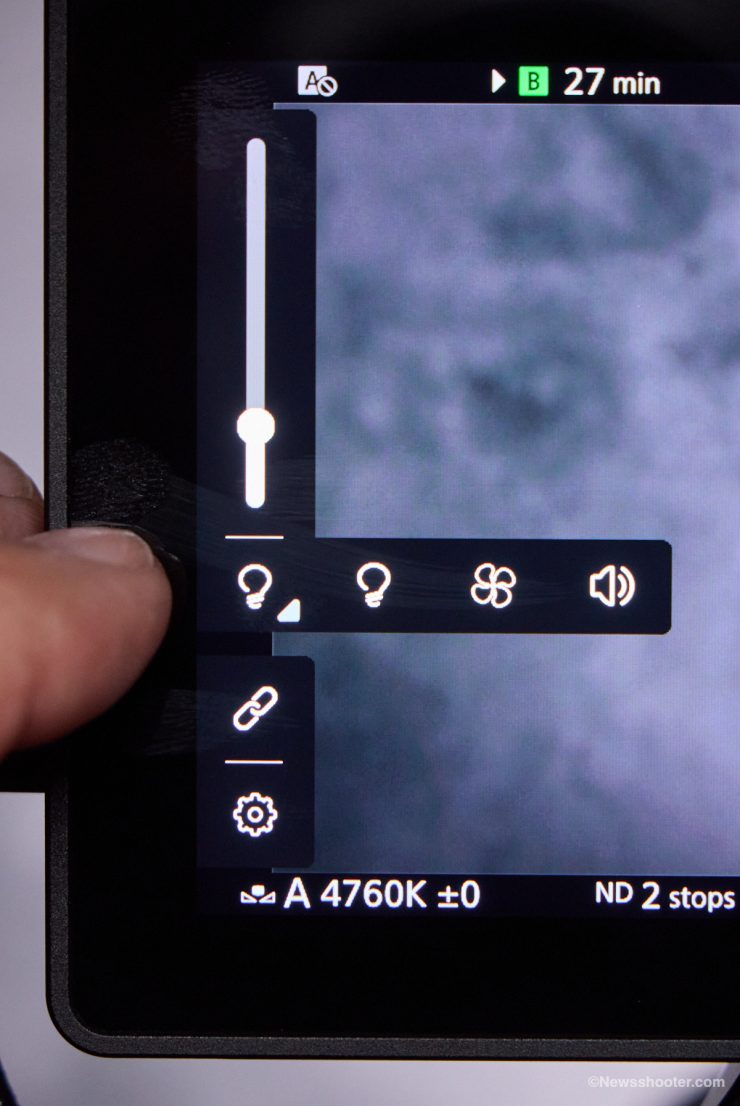
Changing the backlight brightness is a fast process as well. Tap the screen, and on the left is a vertical brightness slider. You can slide it with your finger to quickly adjust the backlight or enter the settings menu, choose the brightness setting, and use the wheel on top to scroll for the perfect setting. You can also set the wheel as a shortcut to set brightness. I did that, and it’s the fastest way to change it.
Image Quality
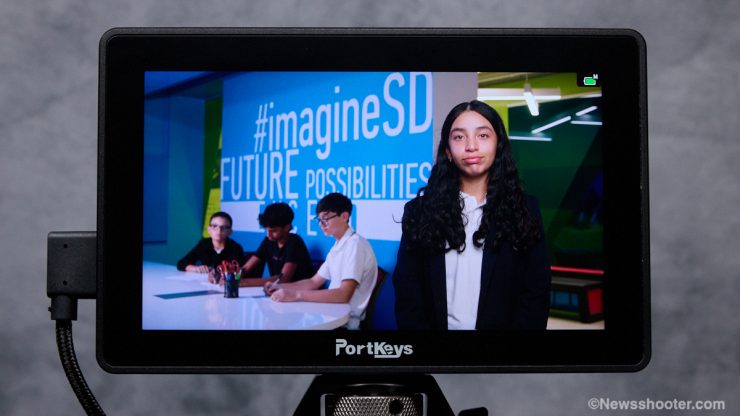
The monitor looks good. Out of the box, I felt the saturation was a bit high, but the color looked good, and the image was nice and sharp. I did lower the saturation as I felt it was too high and wanted to match the LCD better so I wouldn’t be distracted by two different images.
Basic Specifications
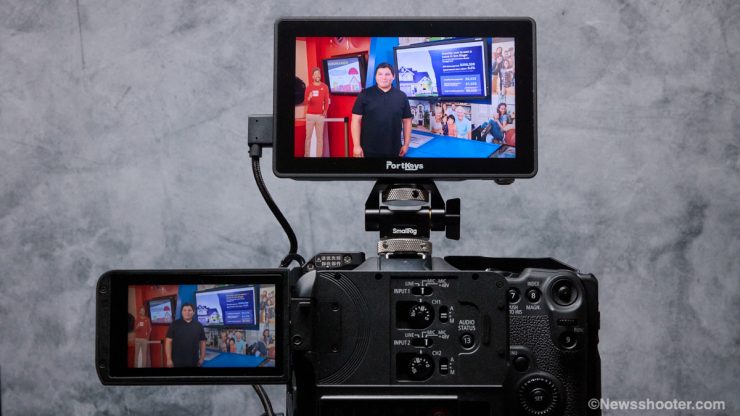
Above is an example of the color compared to the C70 LCD. Granted, the LCD on the C70 isn’t very good, but I find its color accurate and can trust it when shooting without a monitor. The brightness of the C70 LCD isn’t good, and I feel you need an external monitor to ensure everything is in focus and nothing weird is in the frame. This isn’t solely a Canon issue, as most cinema cameras and hybrids have fairly lame LCD screens.
As you can see, the BM5 IV WR is much more punchy and brighter. The BM5 IV WR monitor brightness is set to +3, and it’s very clear, while the C70’s LCD is kind of flat and set to +14. Increasing the camera’s LCD screen is not a backlight adjustment but more a brightness increase that washes out the image. That is not the case with the BM5 IV WR.
Settings
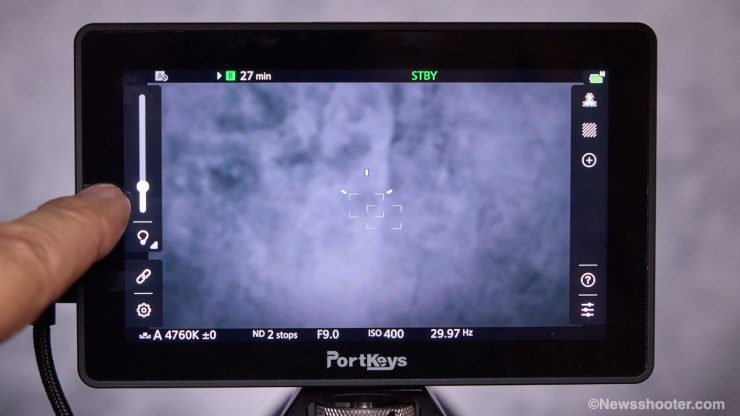
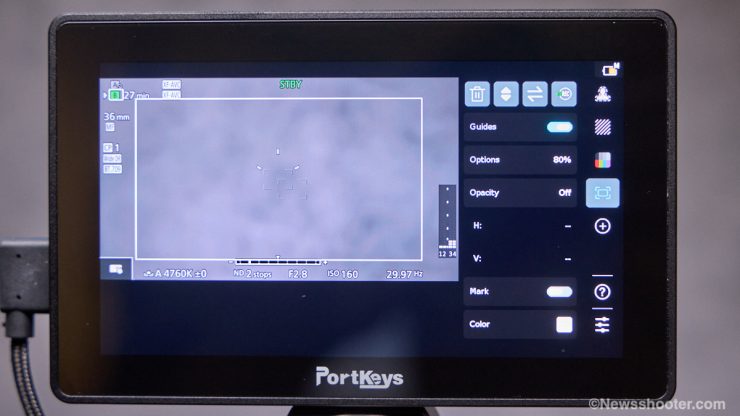
The monitor is a touchscreen, and accessing the settings is fast and straightforward. By tapping on the screen, you enter the menu. On the left, you get options for monitoring settings and camera control. It’s laid out intuitively with minimal sub-menus to make changes. The bar is for the backlight adjustment.
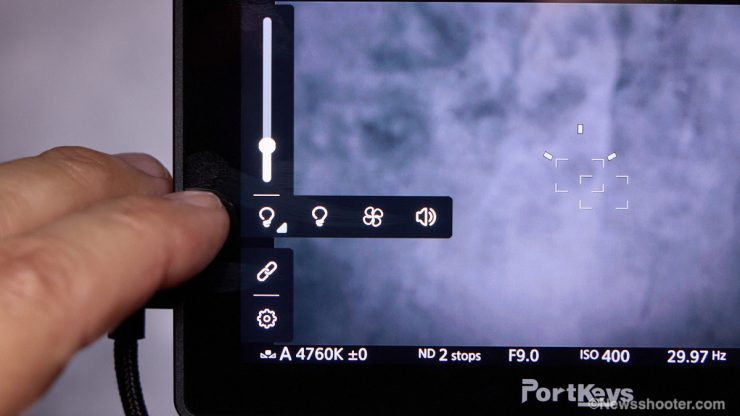
Under that are settings for the fan and headphone output.
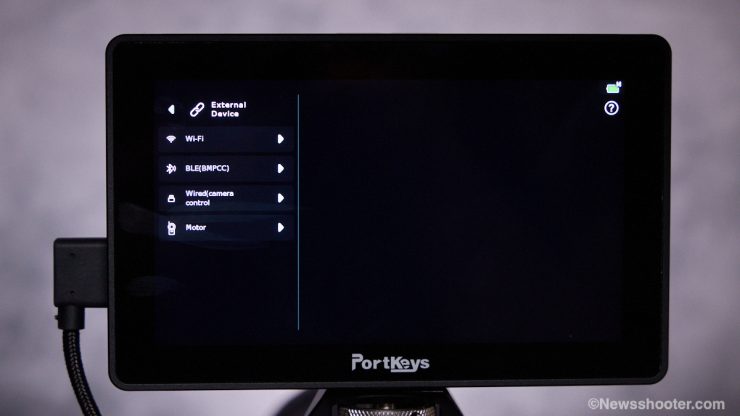
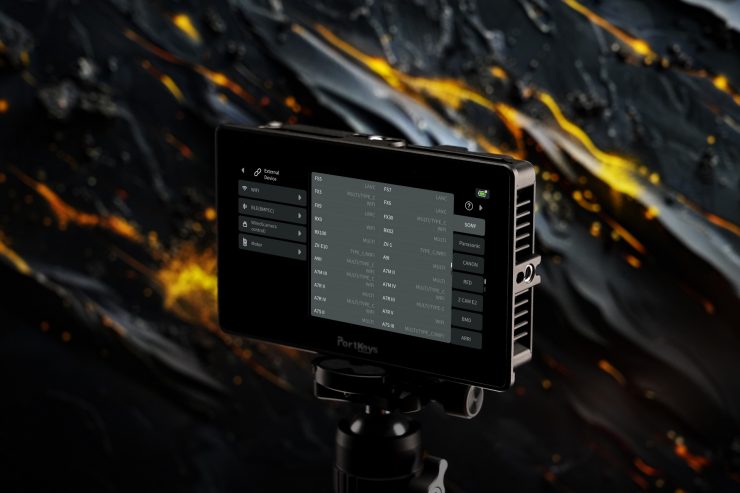
The chainlink icon is for external devices/camera control. Here, you can select the camera and connection type.
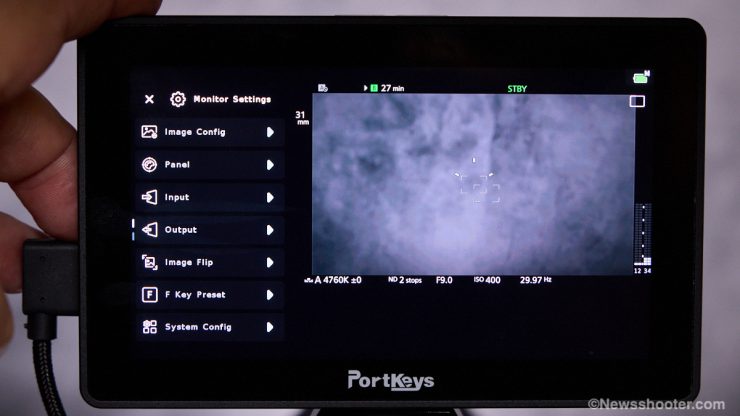
The last option is the gear icon, which is Monitor Settings. You can scroll the options with the scroll wheel on top of the monitor.
Input and Output Specifications
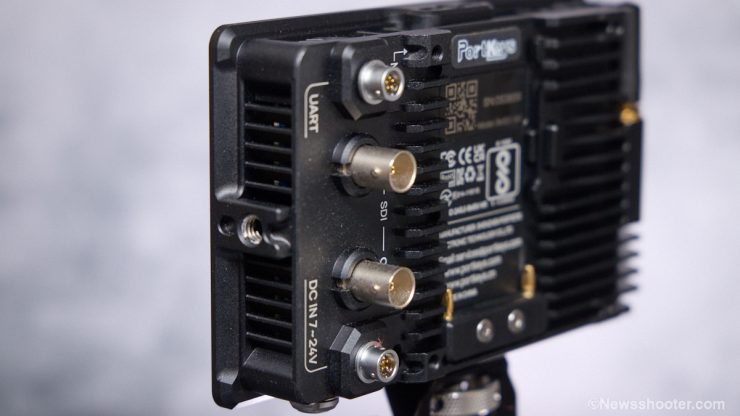
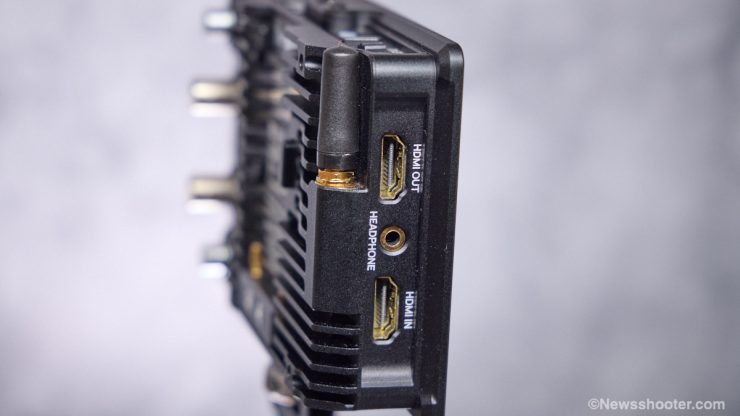
The inputs and outputs are in a good location. There are many of them, and with a small 5.5″ monitor, real estate is tight. I like that the LEMO for powering with a D-Tap is located on the back, not underneath. I like to have monitors as low as possible on my camera body as looking up all day isn’t fun on my neck. The SDI IO is also on the back. The HDMI, while on the left side, isn’t an issue since I use angled cables to keep it compact. All in all, PortKeys did a good job with IO placements.
a 5-pin aviation connector port can connect to TILTA Nucleus N/M wireless follow focus, allowing users to control focus motors. The focus scale can even be displayed, which makes it very handy for focus pullers.
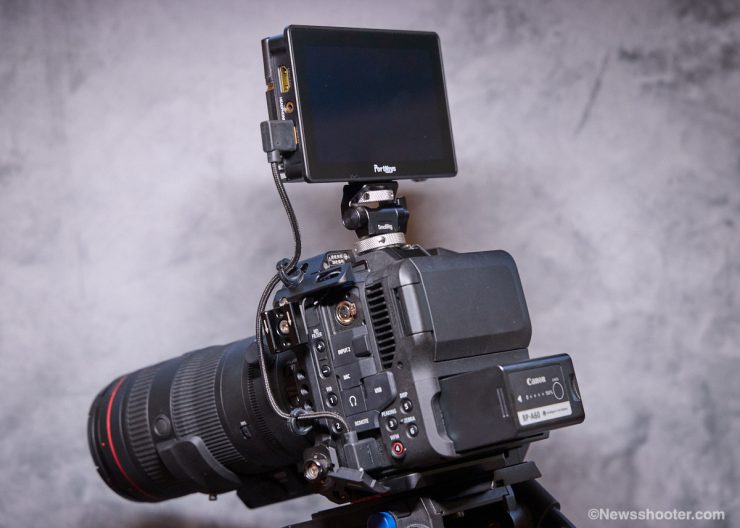
With the HDMI on the side, an angled short cable makes for a clean setup. The SDI is on the back right side, so it’s not as convenient when the inputs for the camera are on the opposite side.
4K Downconvert
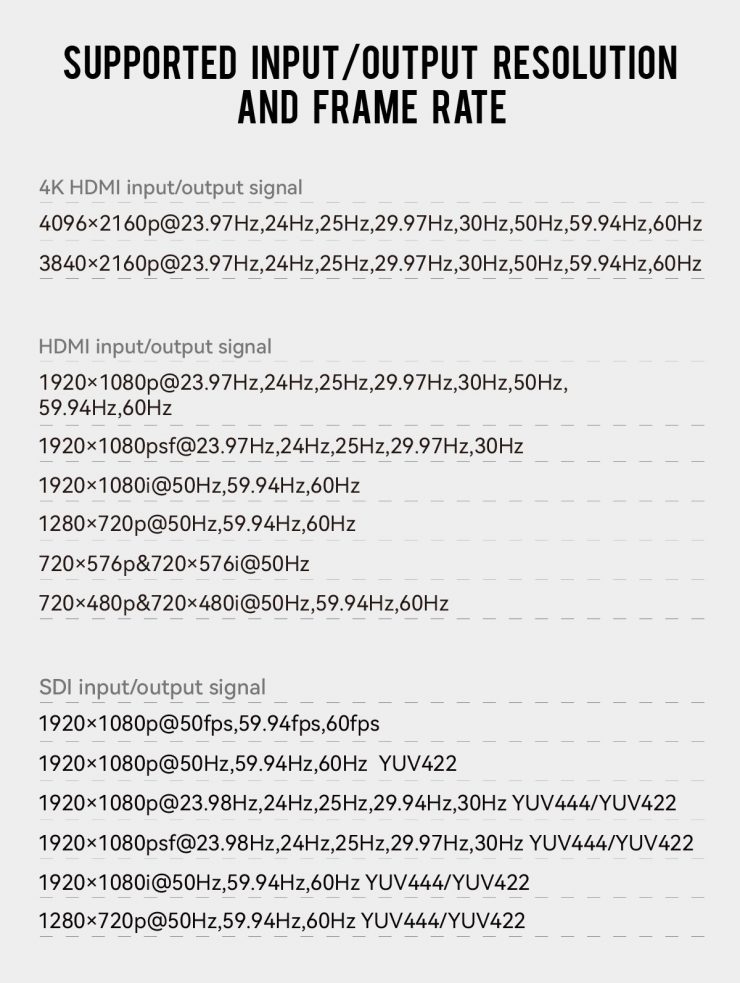
You can feed a 4K signal to the HDMI input, and it downconverts the signal. This is nice. However, most cameras offer an HD output option when shooting in higher resolutions. The 3G SDI input is HD only. The outputs crossconvert so you can use the HDMI in and SDI output to another monitor.
Cross-conversion
There are 3G-SDI input and output ports (up to 1080P60). The SDI video output can output a clean video feed, but it can also output the image with a 3D LUT and peaking if needed.
Also, with HDMI cross-conversion, the BM5 IV and BM5 IV WR can be placed anywhere you need in the video signal chain. Lastly, thanks to the two video input ports, you can view two different video signals simultaneously with multiple viewing modes, including picture-in-picture mode, dual horizontal, dual vertical, left horizontal/right vertical, and left vertical/right horizontal.
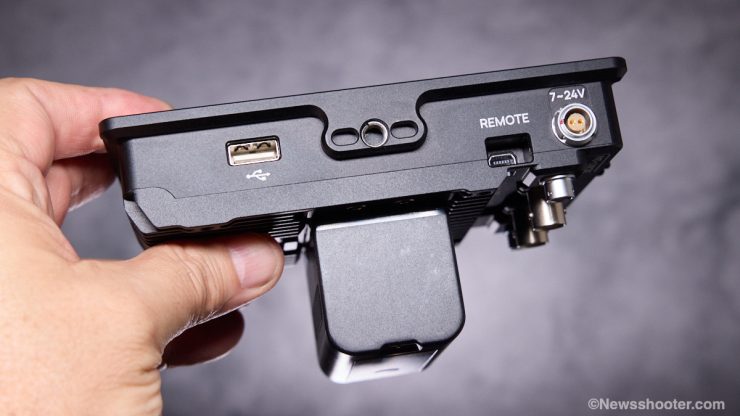
The bottom of the monitor is a USB-A port for future firmware updates and loading custom LUTs. I love that it has the ARRI accessory pin slots to prevent twisting when mounted to a 1/4 20″ monitor mount. The camera control input is also on the bottom and a 7-24V power Lemo power input.
Powering the BM5 IV WR
The monitor uses the popular Sony NP-type batteries. These come in several different sizes depending on your runtime needs and overall bulk limitations. With a low power draw of only 17W despite the highly bright 2,000 nits display, you get several hours of use from a Core SWX NANO-F 6300mAH 47wh NP battery. These are great because they pack the capacity of the larger NP-F900 versions into the midsized NPF-700 options.
With the included D-tap to Lemo cable, you can power the monitor from an external battery. I like to use the Core SWX NANO-C98X 6600mAh Battery Canon BP-A ($285 USD). These offer USB-C charging and powering of devices as well as a D-Tap. These types of batteries are also becoming more common, and I love them!
Build Quality
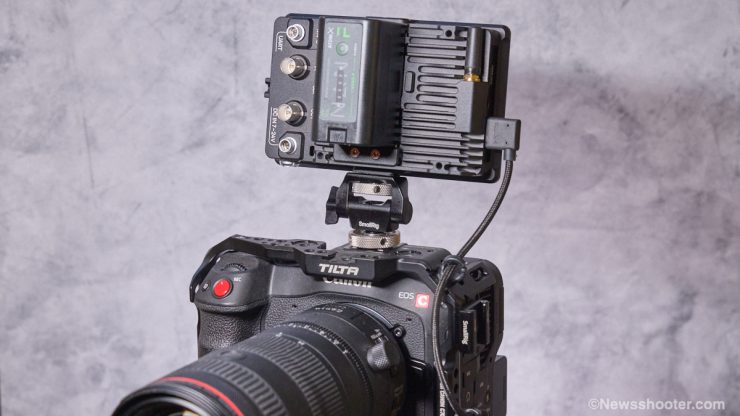
The Portkeys BM5 IV and BM5 IV WR are rugged, thanks to a housing made of aluminum alloy and toughened glass in front of the display. The BM5 series monitors are designed to endure the demands of shooting daily. The build does have a feel of durability while being relatively light, weighing only 358g/12.62oz (without battery).
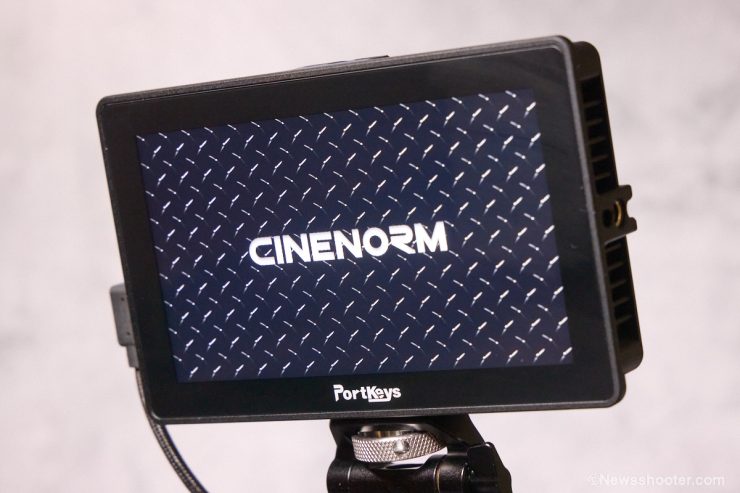
The bevels around the screen are now thinner, resulting in a smaller form factor: it measures only 145.4 x 91.4 x 39.6mm / 5.72 x 3.58 x 1.55in.
When mounted on a C70 and using a SmallRig monitor mount, the BM5 IV WR tilts flat, making it fit into my camera bag without the need to remove it from the camera. I like to have as many accessories on the camera as possible to get to shooting faster.
Mounting Points
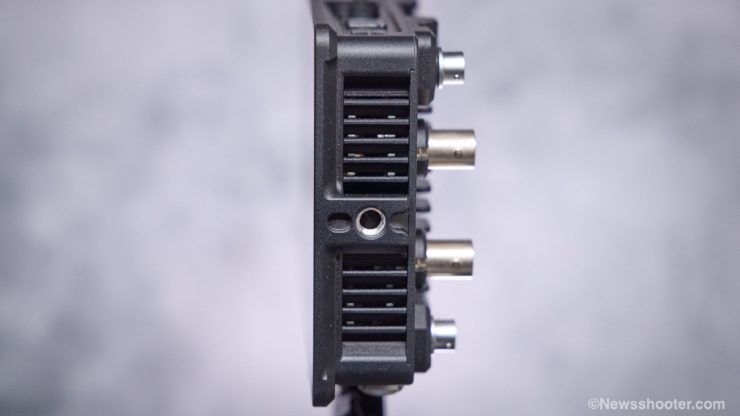
When it comes to mounting the BM5 IV and BM5 IV WR on your camera, camera rig, tripod, or gimbal, there are three 1/4″-20 mounting points with locating pin slots at the bottom, top, and right sides of the monitors.
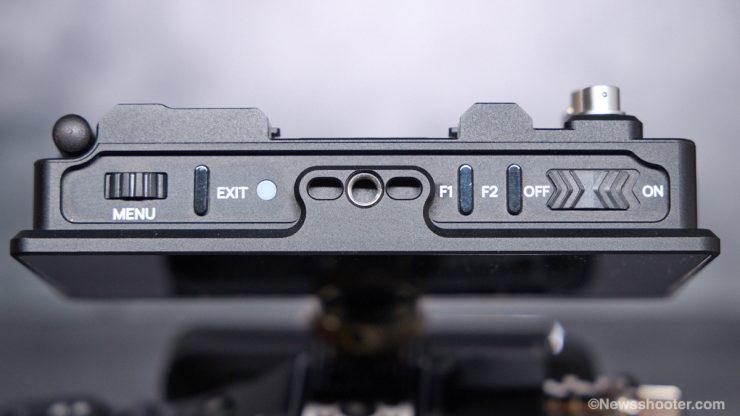
On top of the monitors, you’ll find two user-assignable function buttons to access your favorite monitoring tools quickly. The scroll wheel is also an assignable button.
Multi-Speed Fan
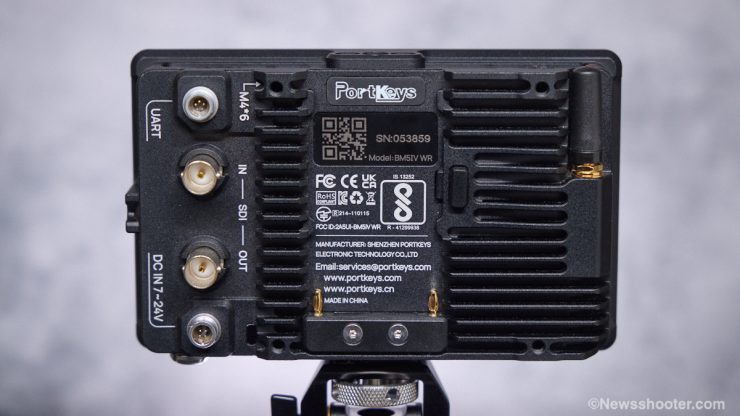
The monitor does run warm, but there is nothing to worry about. There are fins on the back and an internal fan to keep it cool. The fan is adjustable in case you are in a very quiet situation. It can be turned off or set to medium or high. I found that setting it to medium is quite enough to capture interviews and dialogue without issue.
CINENORM OS
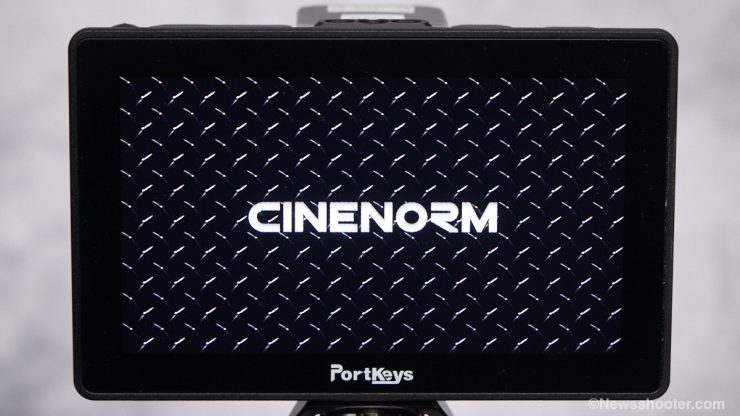
CINENORM OS is now based around a new Custom Page System. You can access up to seven custom pages to add and store your favorite monitoring tools in groups like Director or Focus Puller. You can add a custom name for the group as well. Add the tools to the group to make them easier to access for a particular user type, or load them with tools of a specific type, like exposure or inputs, etc. It’s nice to have so many options.
Custom Pages
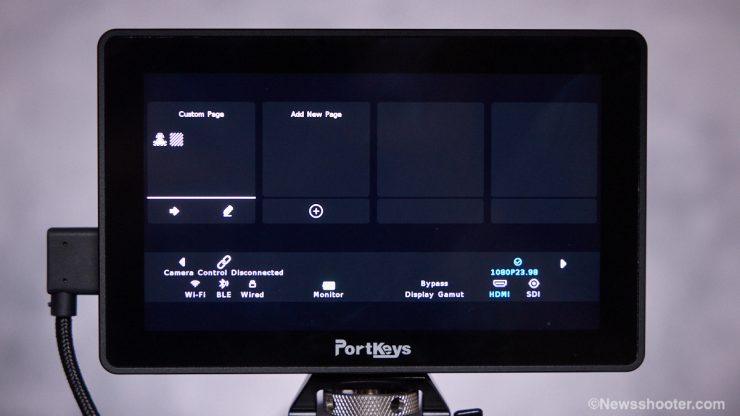
You swipe down to pages the settings and add the tools on each page you want. You can rename the page as well. When the monitor is in use, you swipe to the right or left to change the page tools. Switching from exposure to focusing or framing tools is easy. Your monitor settings can be saved on a USB stick, so you can import and load your user profile to any Portkeys monitor running CINENORM OS.
All monitor tools have been categorized into six categories: exposure, focus, waveform, monitoring, color mixing, and dual screen. This categorization makes searching, finding, and adding tools to each page faster without browsing all of the 25+ monitoring tools.
Assist Tools
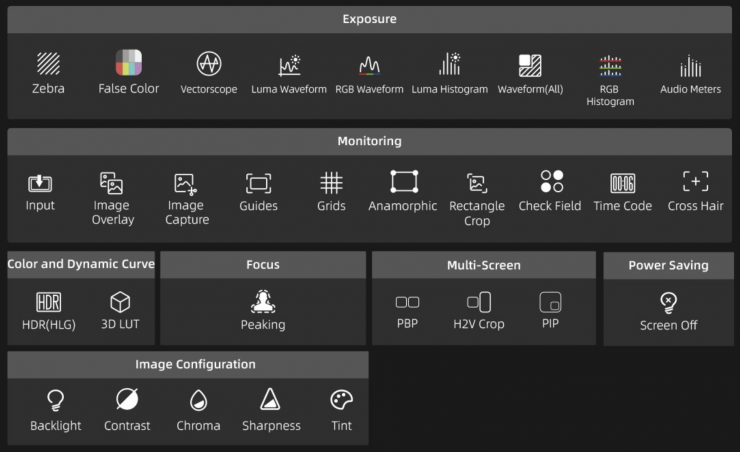
The Portkeys BM5 IV has many tools to assist in exposing and focusing. It’s easy to call them up and you can set the monitor up to keep your favorites for quick recall. On top are two shortcut buttons that you can set. I like Waveform and False Color. One issue I found with False Color as a preset button is I can’t set it to have the Tooltip or guide with the values at the bottom. If you add False Color to the side, you can turn it on, but it doesn’t pass that setting to the shortcut button. Hopefully, this can be added with a firmware update.
- Exposure: Zebra, False Color, ARRI False Color, LOG False Color, and user-defined mode.
A high-precision Waveform that can be displayed full-screen. Waveform SDI output is also possible. Histogram and Zebra tools are also available. - Image analysis: with Waveform, Luma and RGB Waveforms, Vectorscope, Luma and RGB Histograms, and Audio Meters.
- Focus: nailing focus with the new Peaking algorithm. Grayscale, Colour, and Edge enhance modes are also available, as well as a Zooming feature.
- Color: 3D LUT monitoring and 3D LUT SDI output. Users can load custom LUTs via the USB port at the bottom of the monitor and the included USB key. An HDR (HLG) mode is also available.
- Framing and Image Monitoring: precisely frame your shots with multiple tools, including framing guides, grids, crosshair, check field, rectangle crop, aspects. Also, the monitors support anamorphic image de-squeeze with all the standard ratios (1.33x, 1.5x, 2.0x) and the possibility of entering a custom aspect ratio of 0.25 to 4.0x. Lastly, the Image Capture feature allows you to take a snapshot of the HDMI or SDI video input and save it to the monitor’s memory. Then, you can recall the image and adjust its transparency/opacity with the Image Overlay feature.
- Monitor Adjustments: you can adjust the sharpness, chroma, backlight, tint, and color temperature. Users can also load a 3D calibration LUT via the USB port. The Portkeys BM5 IV has a maximum power draw of only 16W (17W for the BM5 IV WR) and can be powered for hours by one Sony NP-F-style battery at the back of the monitor. Designed with versatility in mind, both monitors feature a 4-pin aviation 7.4V- 24V power input port. If you use a V-Mount or Gold-Mount battery, you can power the monitors infinitely with the included D-Tap to 4-pin aviation cable. Last but not least, the BM5 IV WR also has an industry-standard 2-pin LEMO power input port.
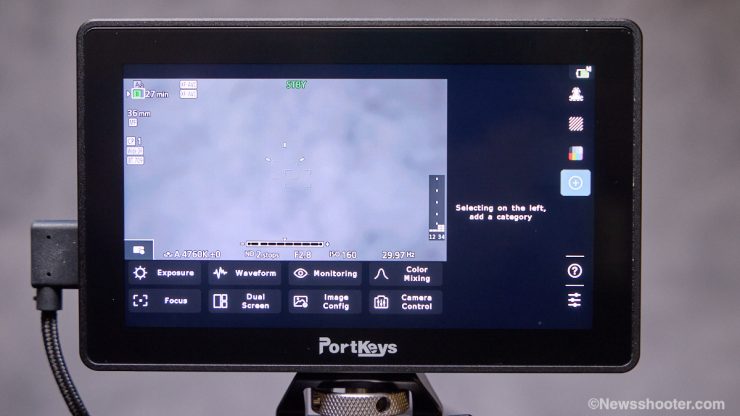
Speaking of quick access, the BM5 IV can quickly access the tools you want. Tapping the screen or pushing the scroll wheel as a button opens a menu with several options. On the right are the fully customizable image tools. Six appear on the first set, and six more can be accessed by using the scroll wheel. You can have a lot of tools assigned to these sets of six.
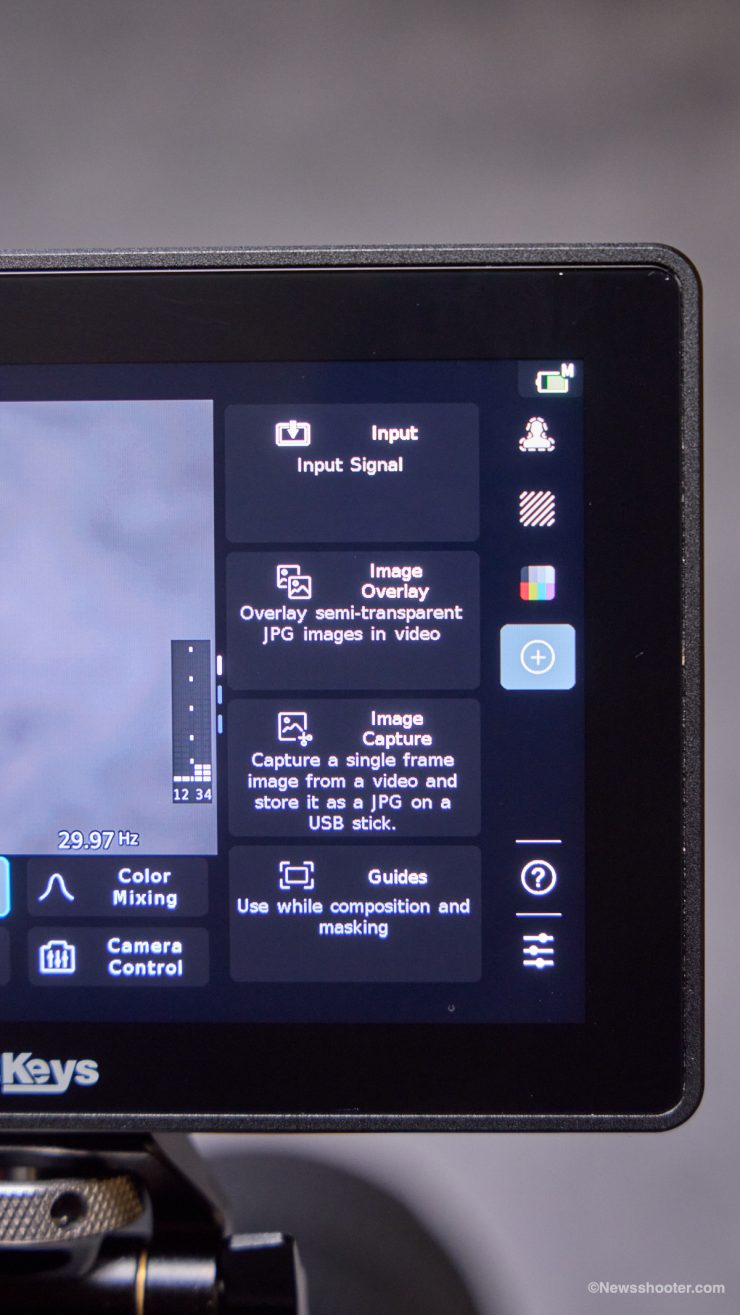
You might want to change things up since you can assign so many tools to the Quick Acess page. To remove a tool, tap its name in the upper right. A sub-menu appears with editing options. You can trash it, move the tool up or down, change it altogether, or add a “Tool Switch Bind to Record Button” option to the tool. After binding the record button, when recording starts, the monitor function will be enabled. (If a function does not support the current operation, a yellow exclamation mark will appear on the function icon. This feature only works when using the camera control option.
False Color
False color is gaining in popularity and it’s a great tool but it needs to be intuitive to take advantage of. Many false color options on monitors don’t give you the full feature, like settings for specific cameras and log profiles. These settings are essential to get the right exposure when using it.
The tutorial above covers all the settings very well. Note that the ARRI settings are non-editable and don’t include extra exposure references like underexposed and skin tone exposure light and dark. I like how much control you have and how Log values are displayed for exposure reference.
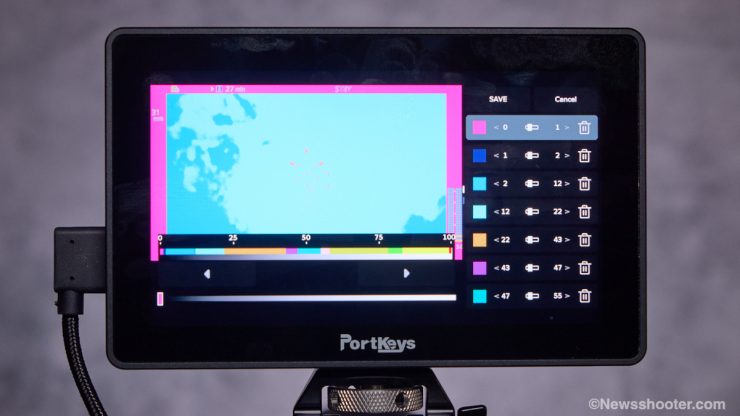
LOG, MAP 1, MAP 2, and MAP 3 are customizable.
Exposure-Zebra
The tried and true Zebra exposure tool is also customizable. The low and high can’t be changed, but the middle value and colors can be customized.
Pinch Zoom
The pinch-to-zoom feature doesn’t work as well as it should. It has some lag when zooming in and out, and sometimes it gets stuck in the zoomed-in mode, and a reboot is required to exit. There is some room for improvement here.
Wired and Wireless Camera Control
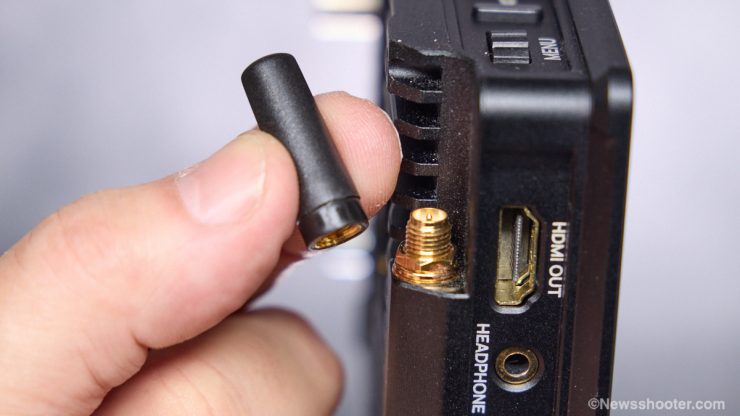
The Portkeys BM5 IV includes wired camera control capabilities, and the BM5 IV WR offers wireless connectivity. The BM5 IV WR has a small, recessed wireless antenna that mounts flush to the body. This design is good, as it keeps the antenna safe from bumps.
Camera Control Cables
The cables required depend on the camera you have. For example, the Canon R5 uses Lanc 3 and Mini USB 10-pin. Below is a guide to the available cables. Since there are several options, Portkeys doesn’t include camera control cables with the monitor. Cables vary in price from $25 to $40 USD. To purchase the cable for your camera, go to the PortKeys web store.
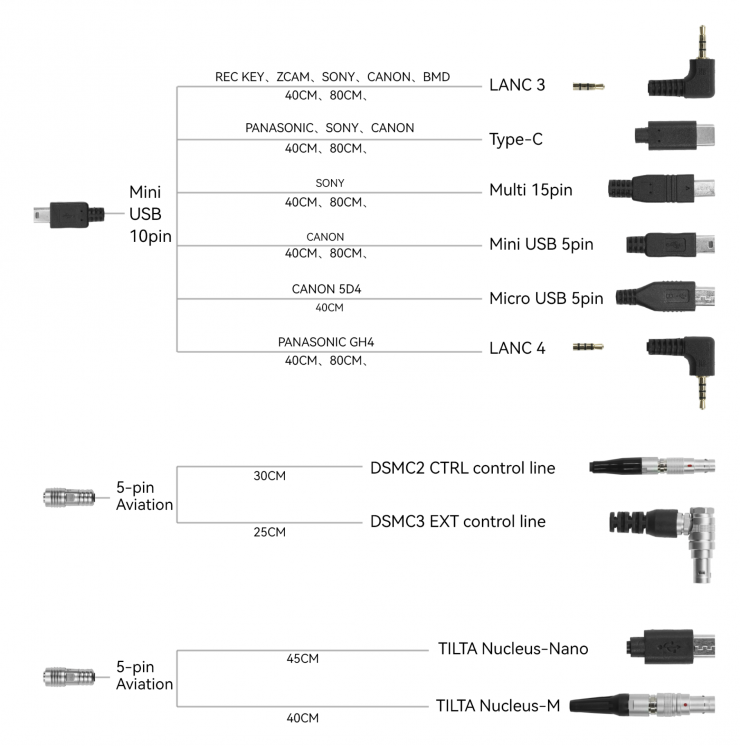
Below is a list of all the cameras supported by the BM5IV WR:
RED DSMC2, KOMODO, KOMODO-X, V-RAPTOR, and V-RAPTOR XL
- Connects wirelessly to KOMODO/V-RAPTOR series cameras. You can change your camera settings directly from the monitor and touch to focus.
Panasonic
- Support for the LUMIX S1/S1H/S1R/S5/S5 Mark II/S5X Mark II via a USB-C cable. The Panasonic BGH1/BS1H supports wireless camera control.
Nikon Z8 and Z9
- Wireless control of the Nikon Z8 and Z9 mirrorless cameras.
ARRI
- Wireless control of the ARRI Alexa Mini cinema camera.
Canon
- Wireless control of the EOS R5, EOS R6/R6 Mark II, EOS R7 and EOS R8. Wired camera control for the Canon EOS C70, C80, C400, C300 Mark II/III, and EOS C100/200/700. Not all models support Touch Focus.
ZCAM
- Wired control is also available ZCAM E2 cameras.
* Wireless control does not mean wireless video transmission; the video signal cable still needs to be connected.
Sony
- Control wired/wirelessly, including Zoom and Touch Focus capabilities on the Sony A1, A7M and II/III/IV, Sony A7S II/III, Sony A6000/6300/6400/6500, Sony RX0 and RX10, and so on. Also, multiple cinema cameras are supported via a LANC, USB-C, or MULTI control cable, including the Sony FX3, FX30, FS5, FS7, FX6 and FX9.
Blackmagic Design BMPCC 4K, 6K, 6K Pro, and URSA Mini Pro 4.6K
- Supports Bluetooth connection and camera control
Camera Control Features
Each camera will have a different method of connecting via WiFi especially. When you use the cable, it will connect without setting it up too much.
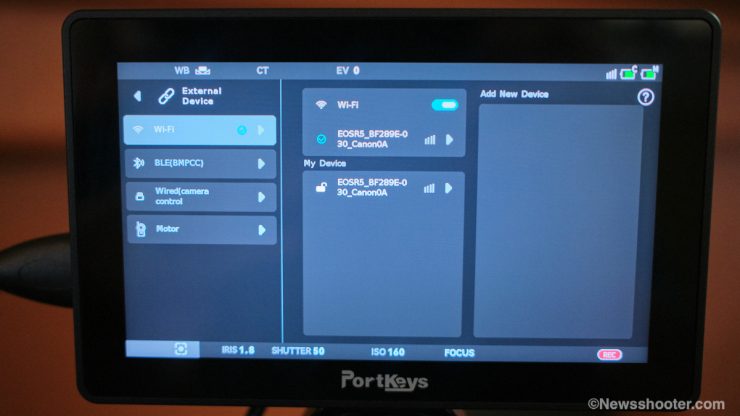
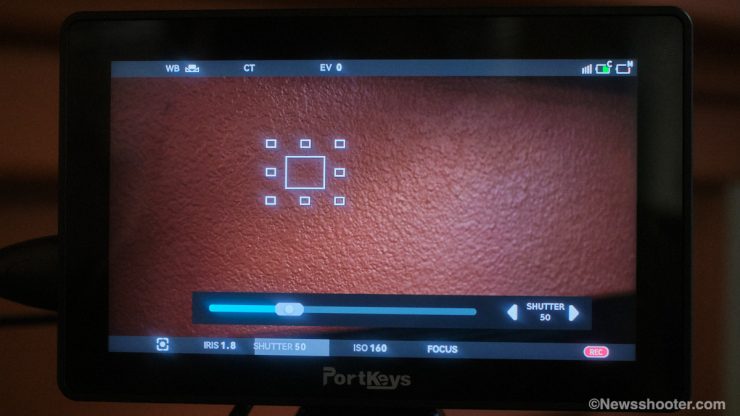
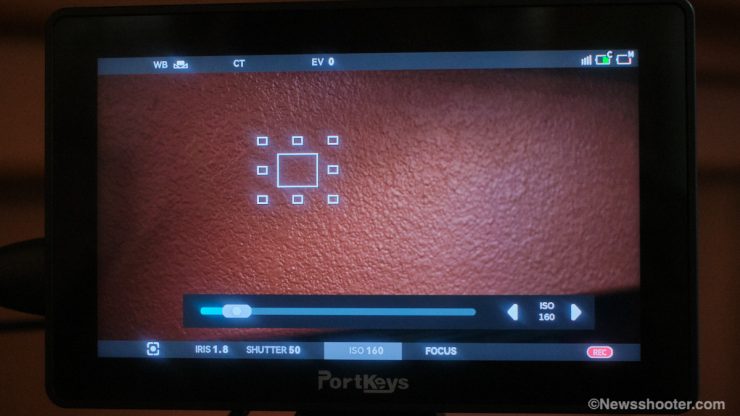
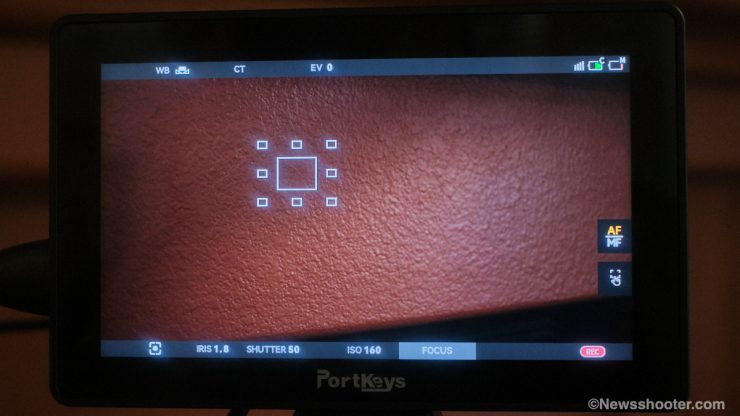
The camera control feature is nice to have. It gives you all the main settings you need in one place, including record. All the camera control options appear on the bottom and top of the screen. You can also switch from manual to auto-focus.
I can’t tell you how many times I have tapped on an external monitor to tap to focus, now it actually works.
As I mentioned, all cameras will perform differently, but it is nice to have control over them. I’m also impressed with the responsiveness of the camera control on the Canon R5 WiFi connection. There is very little latency—nothing annoying, and it stays connected while the camera is powered up. You do have to reestablish the connection every time you power the camera up, but the Canon R5 and the Portkeys BM5IV WR save the connection setting, so it’s easy to recall it and get both of them relinked.

When using camera control, you can change the position of the REC option on the screen from left to center or right. I moved it to the right side as it’s easier for me since I’m right-handed. The nice thing is that I can change it if I use my left hand to make changes. The options are so good.
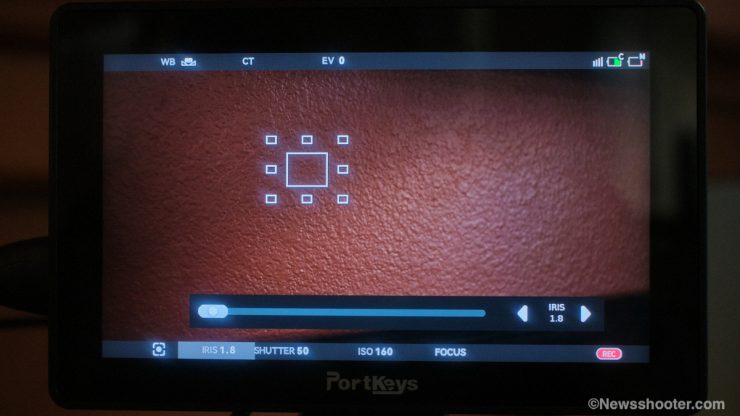
You have Iris, Shutter, ISO, Focus, and Record settings that can be controlled. These are displayed at the bottom of the screen. With a simple tap on the function, you can adjust the parameters. Again, it’s responsive and feels OEM.
Tap To Focus
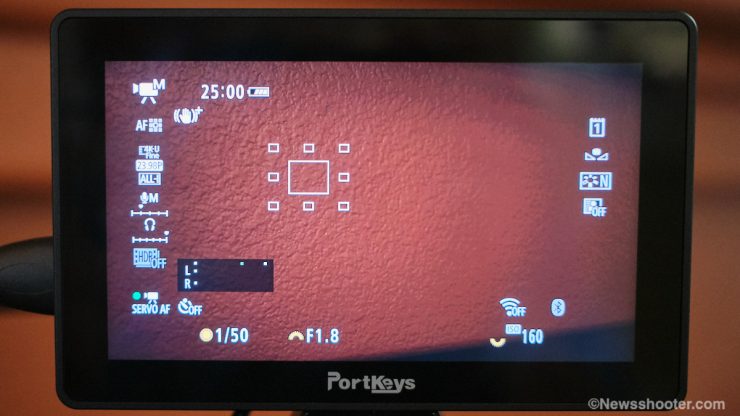
One thing I like a lot about the EOS R5 is that when you set the camera to HDMI Display on an external monitor, you get the focus box. You also have all the camera settings that you would see on the R5 LCD. To clean it up, I turn off all the camera information with the INFO button on the camera. Now I have all the camera control features and the touch focus box on the BM5IV WR. If I want to remove the box, I tap the INFO button again.
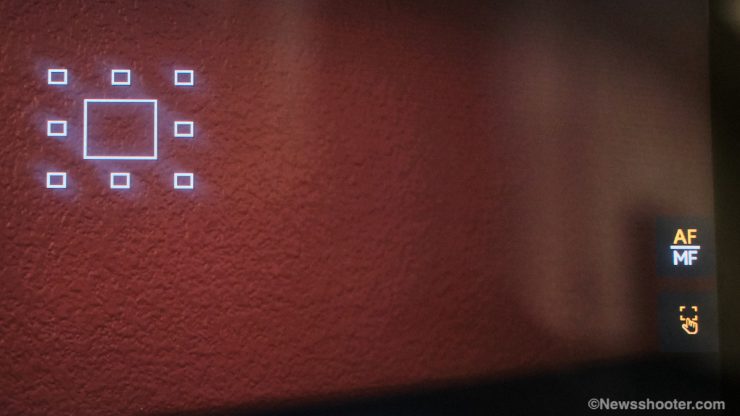
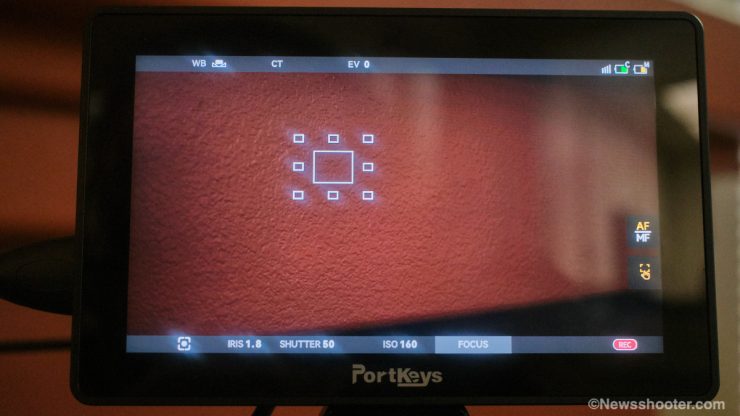
As you can see in the image above, after connecting to the camera, you need to select the focus option and turn on AF and touch feature on the monitor. Now, you can use touch focus and see the focus square on the BM5IV WR screen.
Monitor Calibration
The BM5IV comes factory-calibrated, and Portkeys added recalibration for the BM5IV, but it’s not ready yet. It will use the Xrite probe with Portkeys software. I like that this is an option, as, over time, monitors do need to be recalibrated. Whether it will be PC-only software is unknown at this time. I hope it will have a Mac version as many creatives use Apple computers, including me.
Banding Issue
After my initial review had been posted, some reviewers found an issue with banding. I didn’t see these issues while I was using and testing the monitor. I retested several times and still didn’t see it.
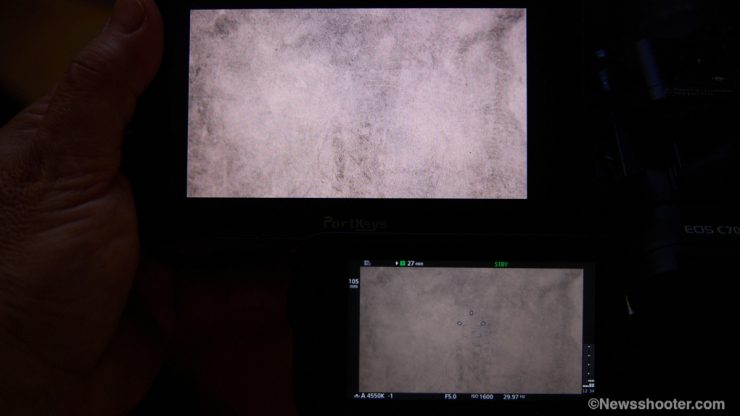

The top is BM5 IV WR, and the bottom is the C70 LCD. The reddish banding appears. 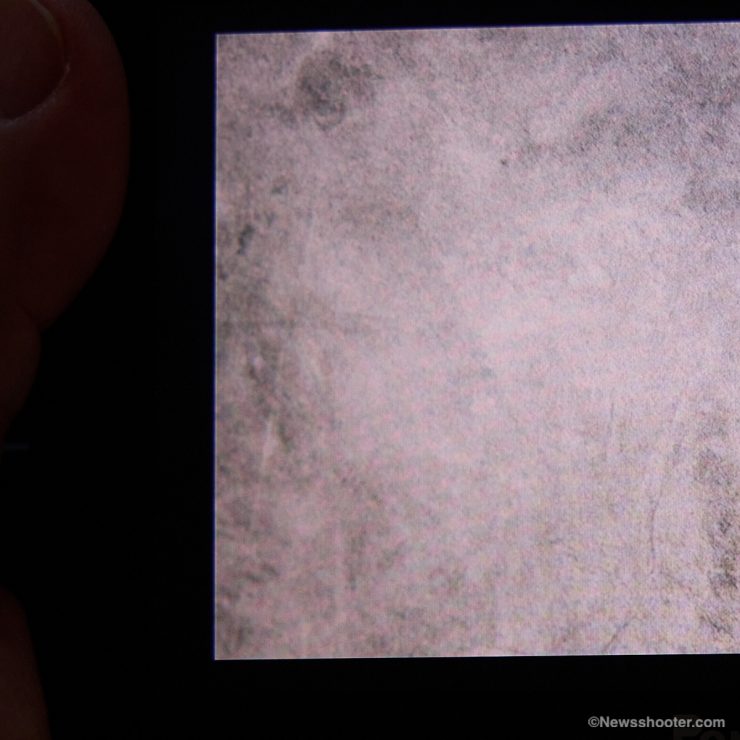
100% Crop
I decided to shoot different textures, and that is where I found it. It seems that some textured gray objects, like fabrics or surfaces, will cause the reddish banding to appear. I didn’t see any banding in under-exposed areas and deep black low IRE areas.
While I see the issue now I had to create the right situation. I don’t see it as a deal breaker since I’ve been using the monitor as my main driver, and it works great. I contacted Portkeys to see if a future firmware update could fix the banding issue.
Final Thoughts
This is the best Portkeys monitor I have used to date. Its new CINEFORM OS is stable on the BM5 IV WR and will improve with more user feedback that Portkeys encourages giving. I wouldn’t buy a monitor without a solid operating system. That makes SmallHD monitors such a good product, but for many, they are too expensive and don’t fit into a budget. I get that, and Portkeys is punching above its weight, offering a lot of monitor for the price. It’s not cheap but affordable.
I’ve tested many cheap monitors, and I advise spending a little more. One issue with the ultra-low entry point monitors is the build quality, and as I mentioned, the OS and tools are not very good.
Another important feature to me is the monitor is light and slim. While I use my SmallHD Ultra 5 ($2199.) a lot, I dont like that it is so bulky and heavy. This makes handheld shooting problematic with small nonergonomic cameras like the C80. If shooting on sticks, the accessories’ weight and size don’t matter as much. Another plus is batteries. The Ultra 5 requires a V mount/AB plate and doesn’t have an NP option. This again adds more bulk and weight. Finally, the price is almost a third of the SmallHD Ultra 5. $2199 versus $749 for the WR version, making it an incredibly good value.
Pricing
The Portkeys BM5IV and BM5IV WR ship in a safety box with a micro USB key, 4-pin aviation to D-Tap power cable, and 2.4Ghz straight head antenna (BM5IV WR only).
The Portkeys BM5 IV is shipping now and retails for $599 USD.
The Portkeys BM5 IV WR is also available now for $749 USD.
Camera Control cables are not included. They vary in price from $25 to $40 SD. To purchase the cable for your camera, go to the PortKeys web store.
CINENORM OS is now a free firmware update for all existing Portkeys BM7 II DS, BM5 IV, and BM5 IV WR users.

