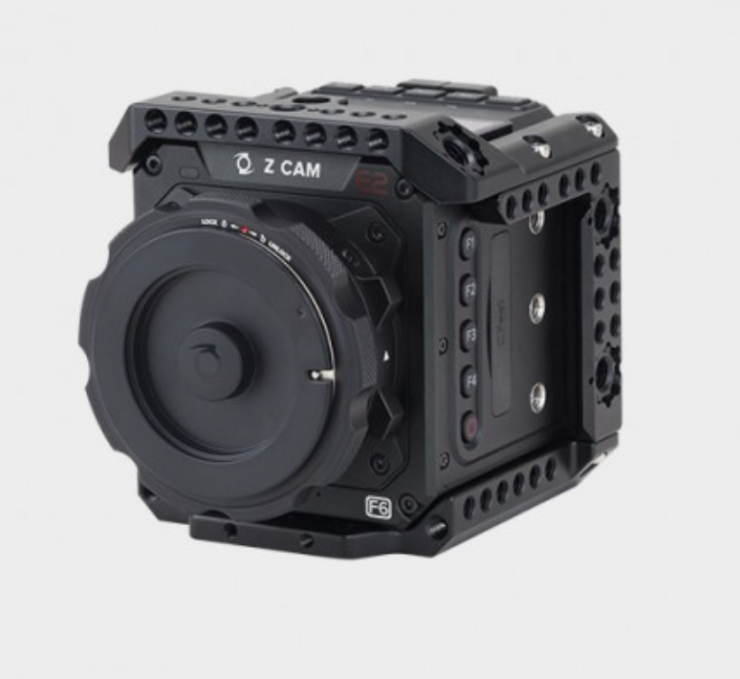
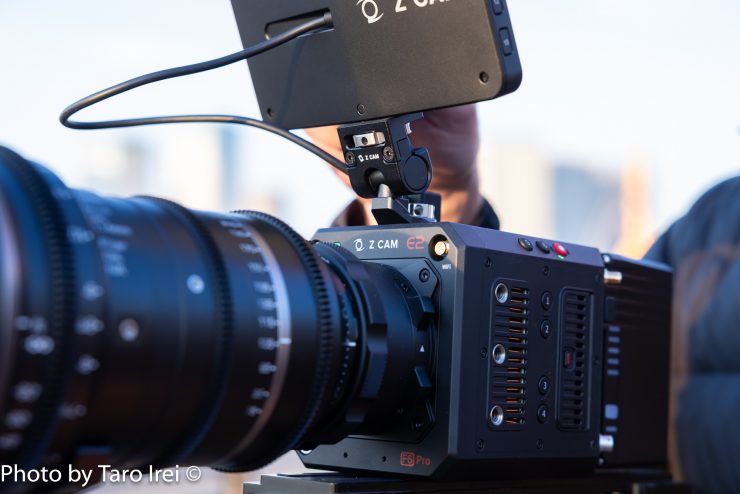
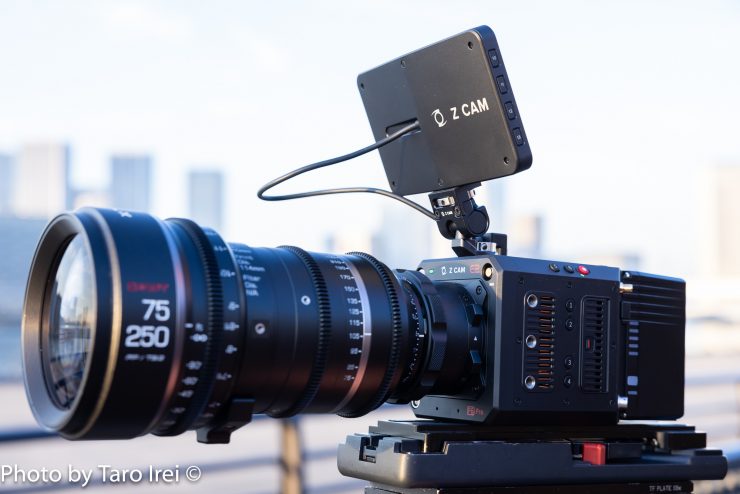
The Z CAM E2-F6 Pro is the company’s flagship camera. It was first shown as a prototype back at IBC 2022, and it started shipping in mid-2023.
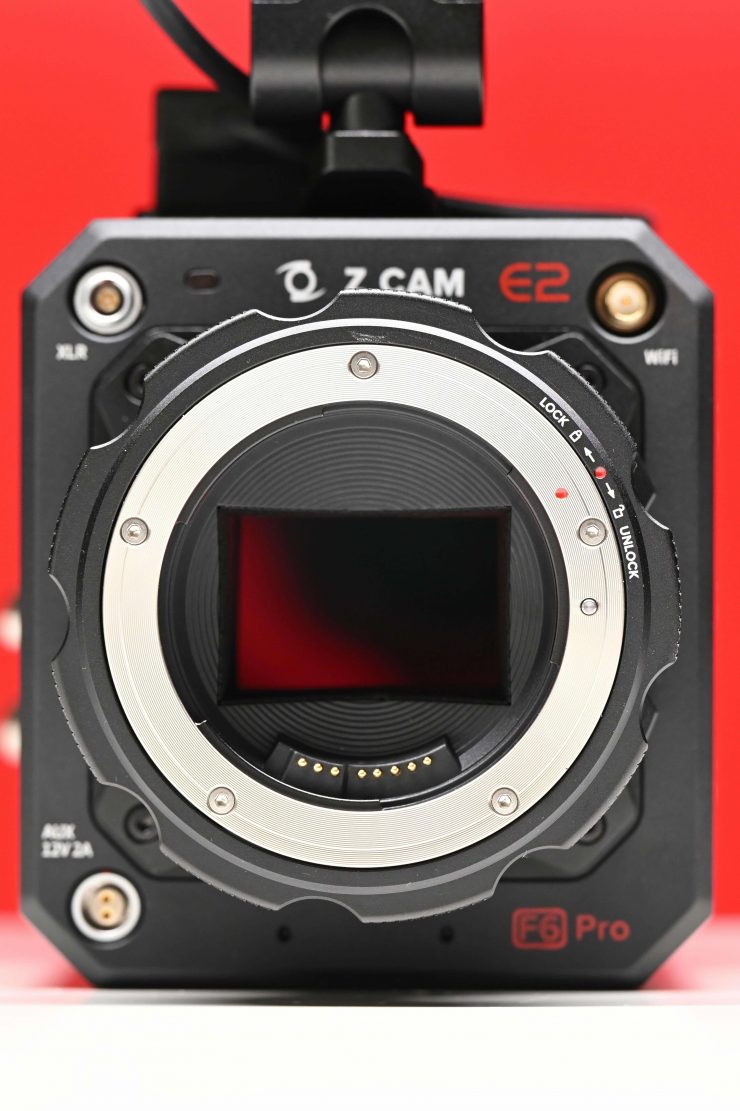
The Z CAM E2-F6 Pro Full-Frame Cinema Camera comes with a Canon EF lens mount, however, it can also be used with separately available ARRI PL and Leica M mounts. The EF mount and PL mount can both use an optional eND module.
Key features
- 6K up to 60 fps, 4K up to 120 fps
- Full-Frame CMOS Sensor
- Up to 15 Stops of Dynamic Range
- Interchangeable Canon EF Lens Mount
- Z-Log2, 10-Bit Color, ProRes 422/422 HQ
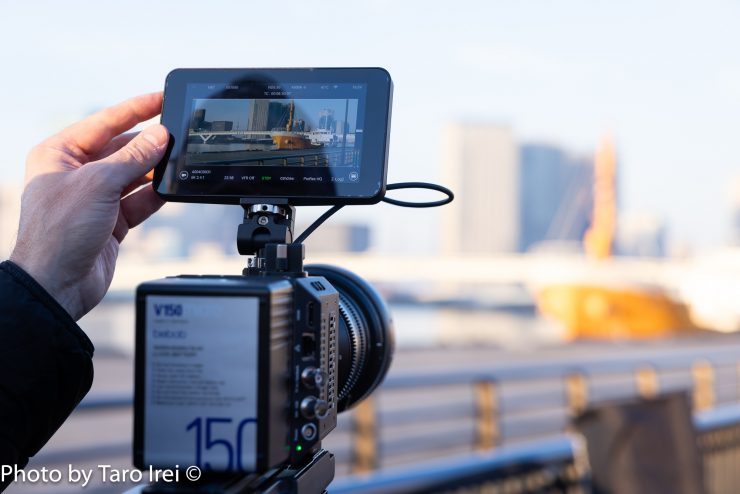
- 5″ Touchscreen Monitor, Camera Control
- Genlock and Timecode Support
- 12-G-SDI and HDMI Outputs
- CFast 2.0 or ZBlade Custom Media
- Integrated V-Mount Plate

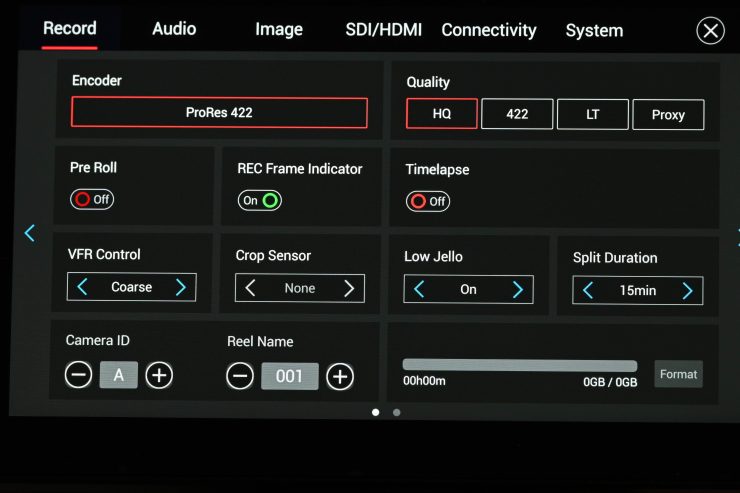
The E2-F6 Pro is capable of capturing up to 6K 60p full frame in ProRes 422HQ 10-bit and DCI 4K120 video internally. You can also record externally via the 12G-SDI and HDMI video outputs. Other ProRes recording options include ProRes 422 LT, ProRes 422, and ProRes Proxy.
Z CAM, along with Kinefinity have historically offered features and functionality in a lot of their cameras that no other manufacturer was doing for a lot less money. However, times have changed, and now most camera companies are offering impressive full-frame digital cinema cameras that are very competitively priced. This has made it harder and harder for smaller companies such as Z CAM and Kinefinity and to compete.
6K Full Frame Sensor
The Z CAM E2-F6 Pro features a 6K 3:2 (26MP) Full-Frame CMOS sensor. The physical size of the sensor is 37.09 x 24.75 mm.
Z CAM claims that the E2-F6 Pro can capture up to 15 stops of dynamic range.
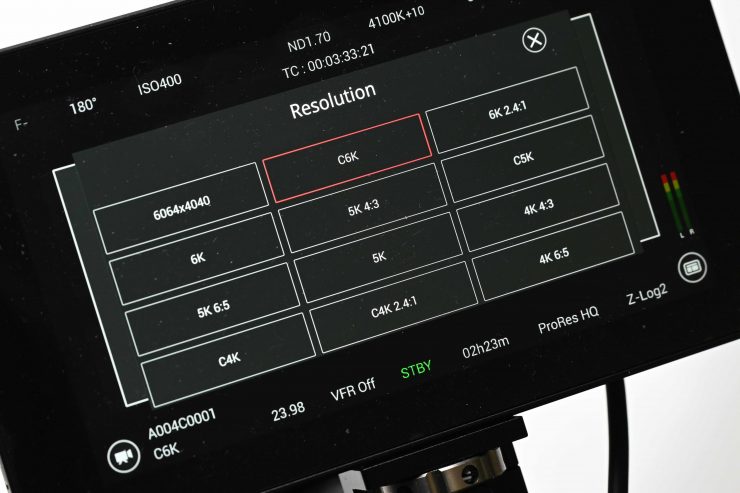
The Z CAM E2-F6 Pro can shoot in a maximum resolution of 6064 x 4040 @30fps max (Open Gate).
Sensor Crop Modes
You can shoot in the following formats on the camera:
- Full Frame (this is shown as None in the Crop Sensor menu)
- Super 35
- Pixel to Pixel
Obviously, you can only choose the Super 35 crop mode when shooting in certain resolutions.
To shoot in Super 35 you need to select either 4K DCI, C4K 2.4:1, C4K 3:2, UHD, or HD (1920 x 1080).
If you select no crop then the camera is supersampling (superior quality) from 6K.
Dual Native ISO
The Z CAM E2-F6 Pro has a dual ISO of 400 and 2500. I will do ISO tests further down in the review.
Resolution, Frame Rates & Codecs
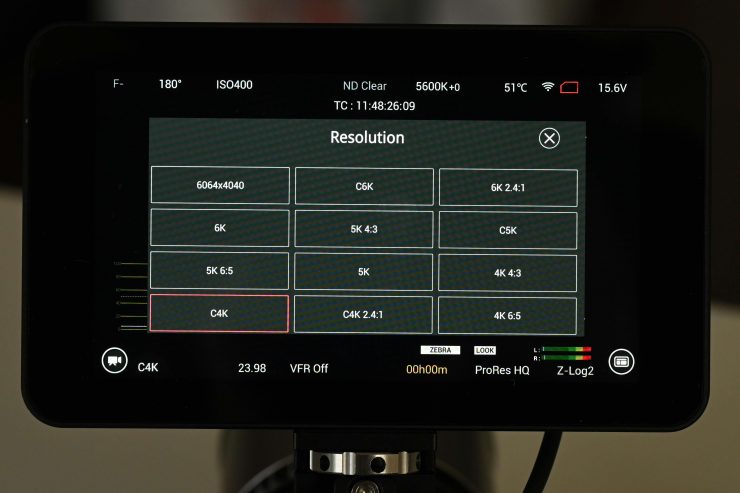
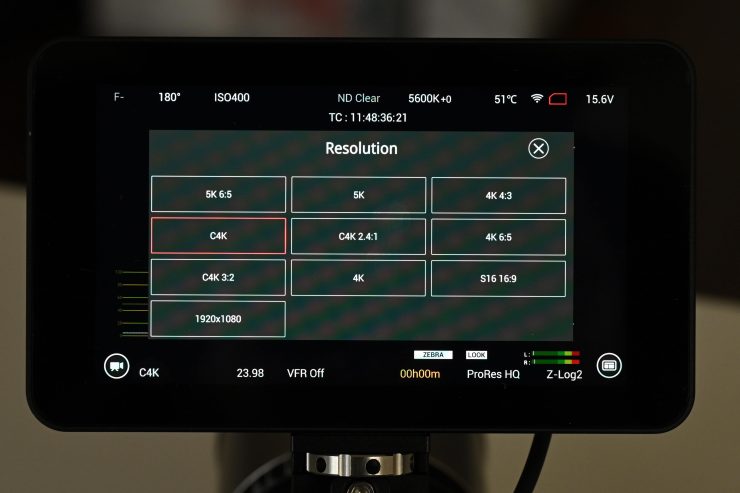
The Z CAM E2-F6 Pro can record in resolutions of 6K, 5K, DCI 4K, UHD, DCI 2K, and HD. In 6K Open Gate (6064 x 40400 you can record up to 30fps, and in 6K DCI (6064×3196) you can record up to 48fps.
Everything is recorded in 10-bit, Z-Log2.
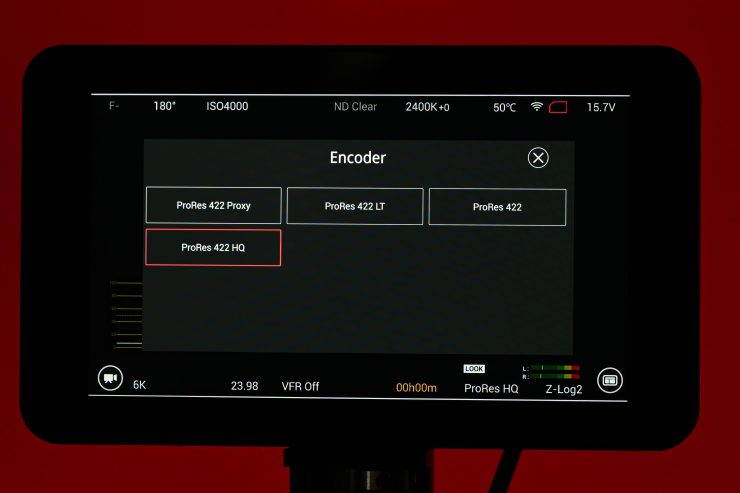
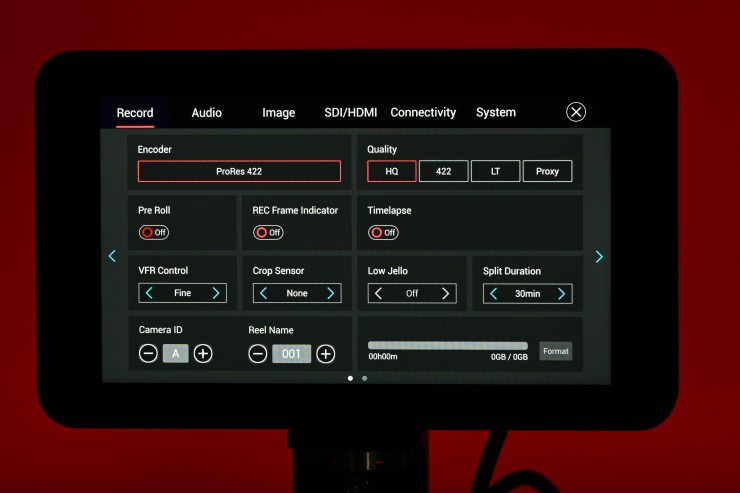
The camera can record in the following flavors of ProRes:
- ProRes 422HQ
- ProRes422
- ProRes LT LT
- ProRes Proxy
This is a decent range of recording codecs to choose from, however, unlike the competing Kinefinity MAVO Edge 6K, there is no ProRes 4444 or ProRes 4444XQ options. I am a big fan of ProRes because it is very robust, and most importantly, it is an easy codec to deal with. The downside of ProRes is that is does produce a lot of data.
Having all of these flavors of ProRes is great, but you do have to remember that there are currently no other recording options available other than ProRes, unless you record externally.
Below you can see what resolutions, max. frame rates, and codec are available:
| FORMAT | RESOLUTION | MAX FPS | CODEC |
| 6K Open gate | 6064 x 4040 | 30 | ProRes |
| 6K DCI | 6064×3196 | 48 | ProRes |
| 6K UHD | 5760×3240 | 48 | ProRes |
| 6K HD 2.4:1 | 6064 x 2560 | 60 | ProRes |
| 5K (4:3) | 5376 x 4032 | 30 | ProRes |
| 5K DCI | 5120 x 2704 | 70 | ProRes |
| 5K HD 2.4:1 | 5120 x 2700 | 60 | ProRes |
| 5K (6:5) | 4848 x 4040 | 30 | ProRes |
| 5K UHD | 4800 x 2700 | 60 | ProRes |
| 4K HD (3:2) | 4064 x 2712 | 60 | ProRes |
| 4K DCI | 4096 x 2160 | 90 | ProRes |
| 4K 2.4:1 | 4096 x 1728 | 120 | ProRes |
| 4K UHD | 3840 x 2160 | 90 | ProRes |
| 2K S16 | 2112 x 1188 | 170 | ProRes |
| HD | 1920 x 1080 | 120 | ProRes |
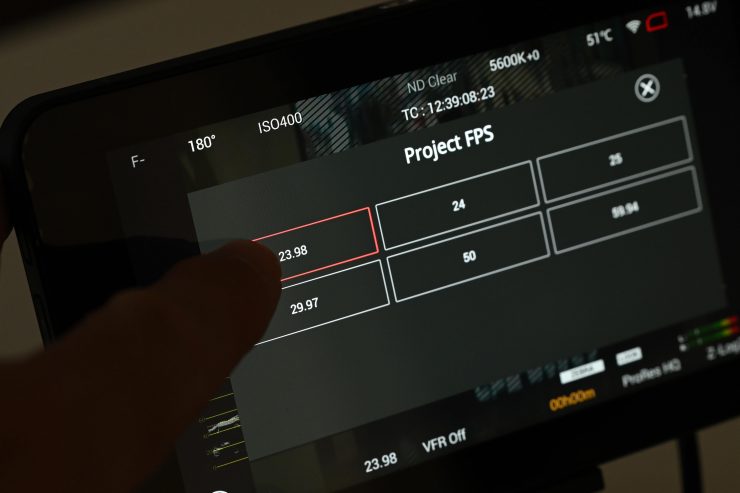
VFR
You need to activate the VFR mode to shoot in frame rates that are different from your project rate.
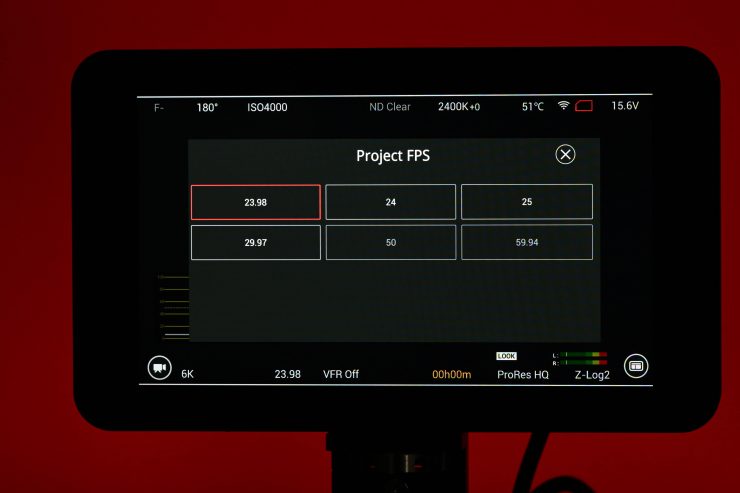
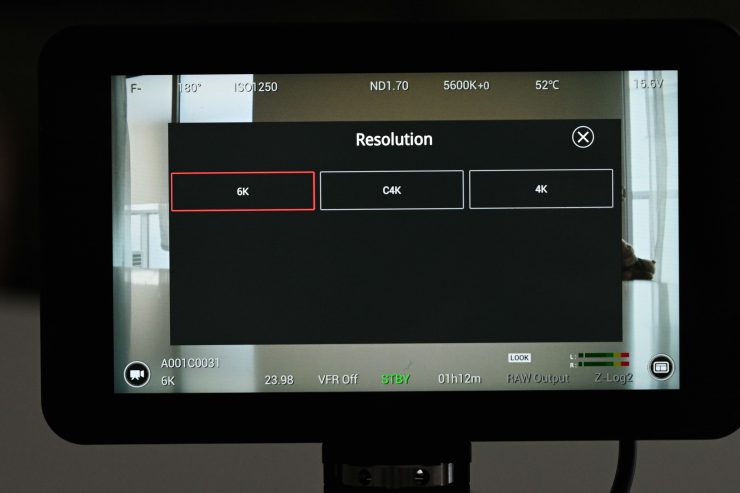
On the Z CAM E2-F6-Pro, you first need to set your project frame rate. The options available to you will depend on what shooting resolution you have selected.
I prefer cameras where you can set your project frame rate. That way any changes you make to frame rate, such as shooting at a higher frame rate, will be recorded as slow motion. This avoids confusion and makes things more simplified for the user.
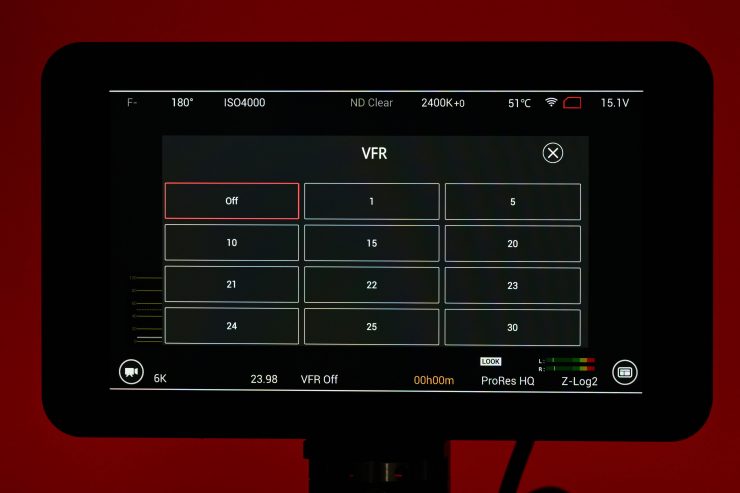
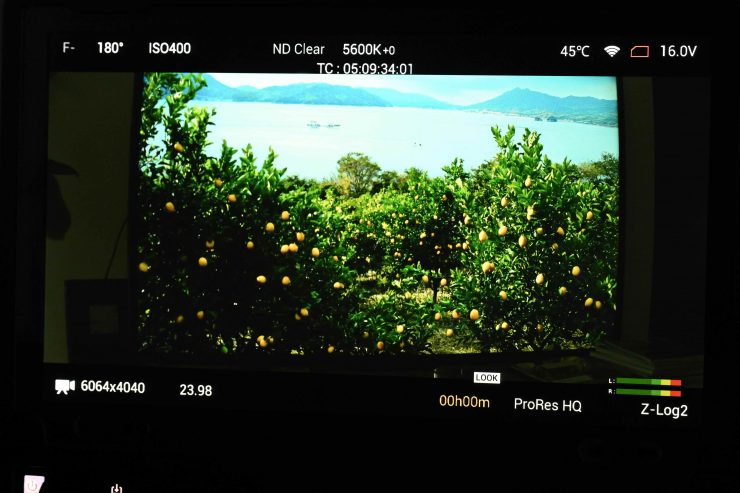
Once you enter the VFR mode you can select how many frames per second you want to shoot. Again, this depends on what resolution you are shooting in. You don’t ned to re-boot the camera when choosing a VFR which is nice.
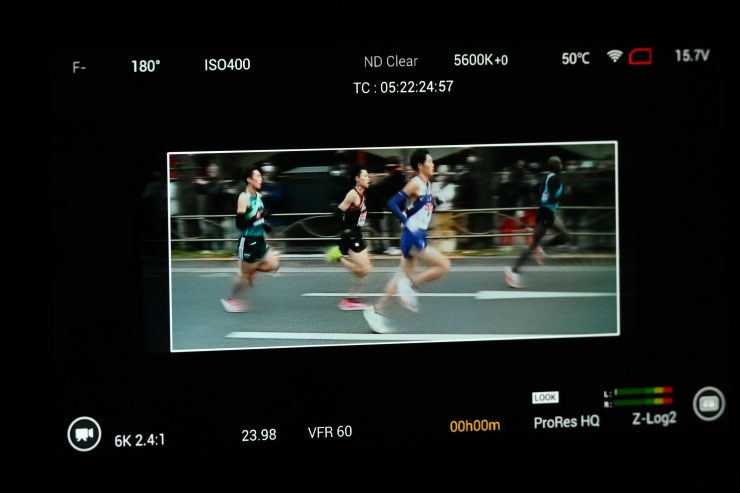
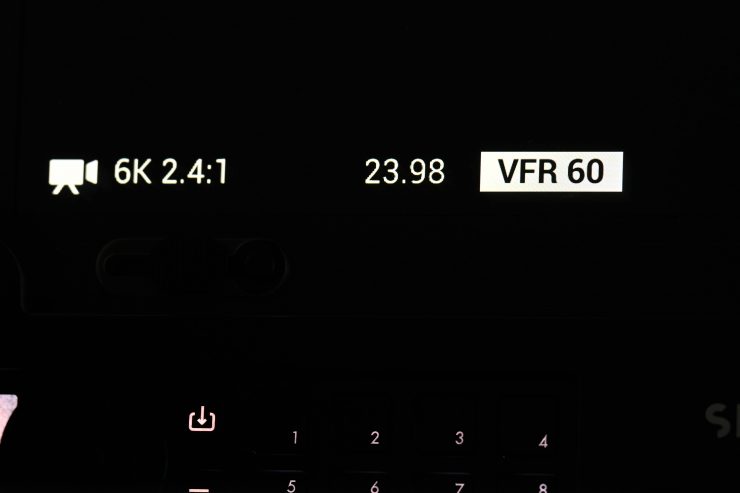
On the monitor, or an external monitor when the OSD is selected, you get a nice clear indicator showing when the VFR is activated and what fps you are recording. Now, when outputting to an external monitor the VFR is actually highlighted in a white box. his doesn’t happen on the camera’s monitor.
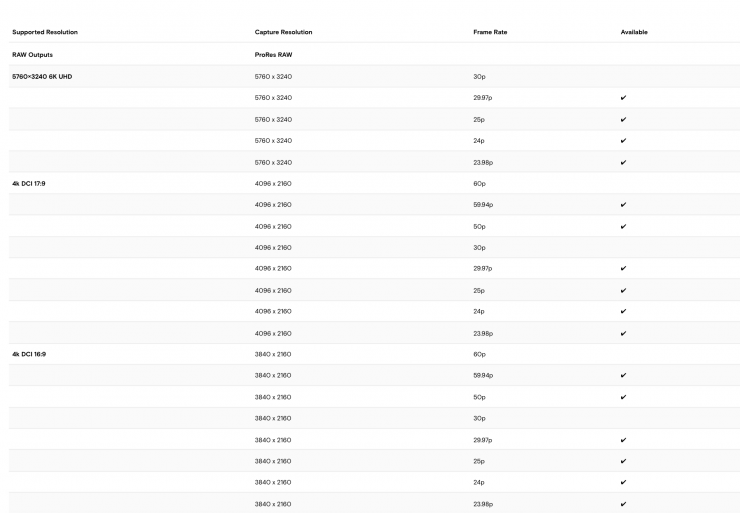
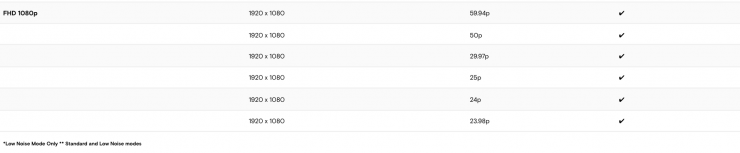
External RAW
You can output a RAW signal over HDMI to a compatible Atomos device and record in 12-bit ProRes RAW. You can then capture 12-bit Apple ProRes RAW 5.8K ProRes RAW at up to 29.97p and up to 4K (UHD) up to 59.94p via free firmware from Z CAM and an AtomOS update from Atomos.

You can’t internally record and externally record RAW at the same time
I don’t have a compatible Atomos product for recording the RAW signal so I wasn’t able to test the RAW recording out.
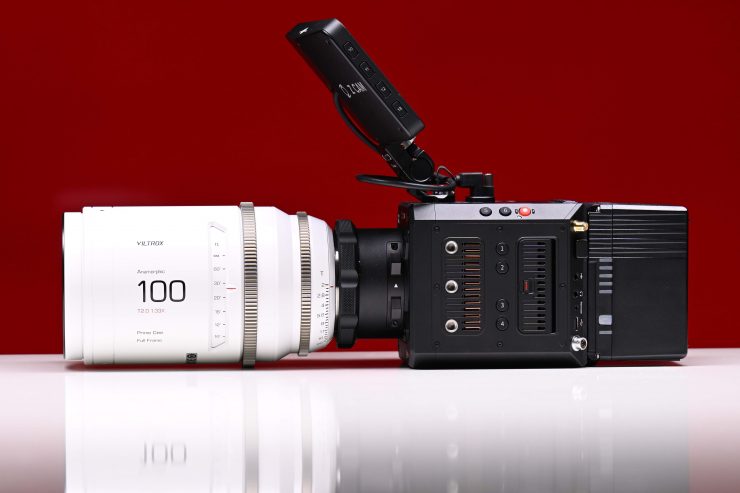
Anamorphic Shooting

A lot of the Z CAM cameras, including the Z CAM E2-F6 Pro are good choices for anamorphic shooting, as the CMOS imaging sensor is 3:2.
The 37.09 x 24.75 mm full-frame CMOS imaging sensor of the Z CAM E2-F6 Pro is a pretty big canvas that allows users to easily work in a variety of anamorphic modes:
- 6K (6064 x 4040) 3:2 Open Gate
- 5K (5376 x 4032) 4:3
- 5K (4848 x 4040) 6:5
- 4K (4096 × 2732) 3:2
The camera supports 2x, 1.8x, 1.5x, and 1.33x anamorphic shooting, which covers almost all anamorphic lenses on the market.
What does it output over SDI & HDMI?
The Z CAM E2-F6-Pro is capable of outputting a 4K DCI 10-bit signal up to 59.94p over both 12G-SDI or HDMI. You can also choose to output an HD signal as well.
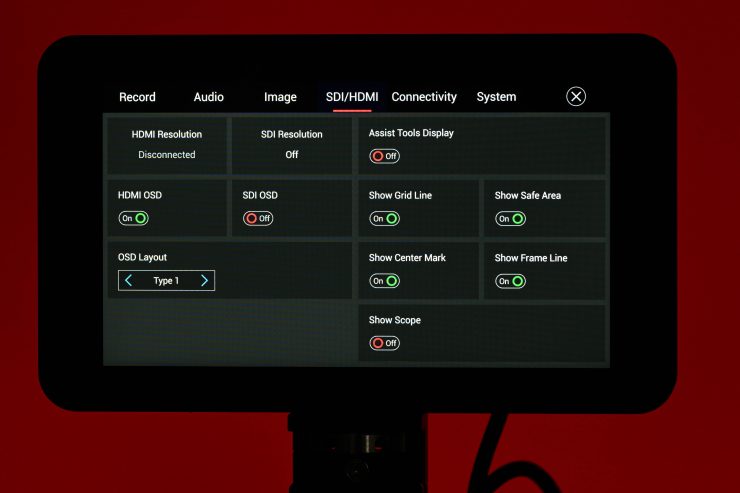
What is nice is that Z CAM gives you the ability to have the on screen displays turned on/off when outputting over SDI (this also applies to HDMI as well).
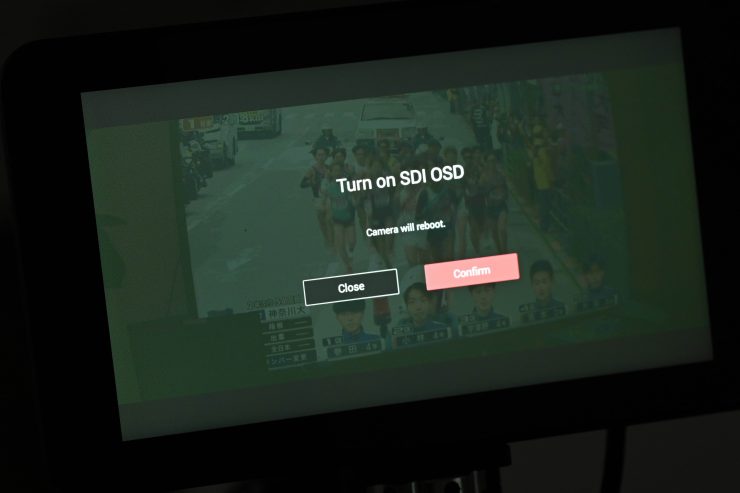
What you do need to know is that if you choose to turn the OSD on when outputting over SDI or HDMI you will need to reboot the camera.
You can also choose to individually have the following items turned on/off over SDI or HDMI:
- Assist Tool Display
- Grid Lines
- Safe Area
- Center Mark
- Frame Lines
- Scopes
You do get audio being passed over SDI and HDMI.
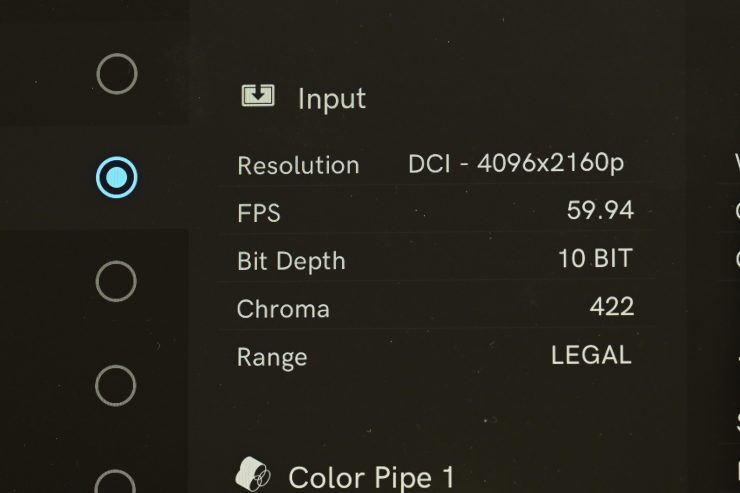
When I did some tests by outputting a signal over SDI to a SmallHD Cine 13 monitor I found a couple of things. If I was in a recording resolution of 4K DCI I could get a 4096 x 2160 up to 59.94p 10-bit signal on the SmallHD.
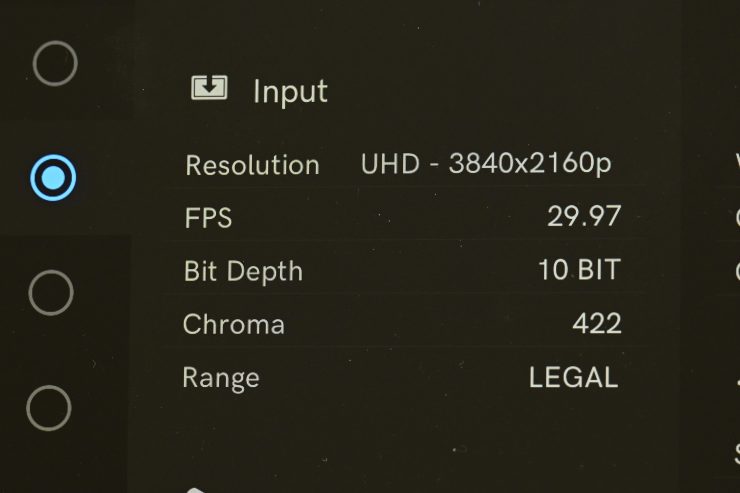
If you are in a recording resolution above 4K DCI, the monitor will receive a 3840 x 2160 up to 29.98p 10-bit signal.
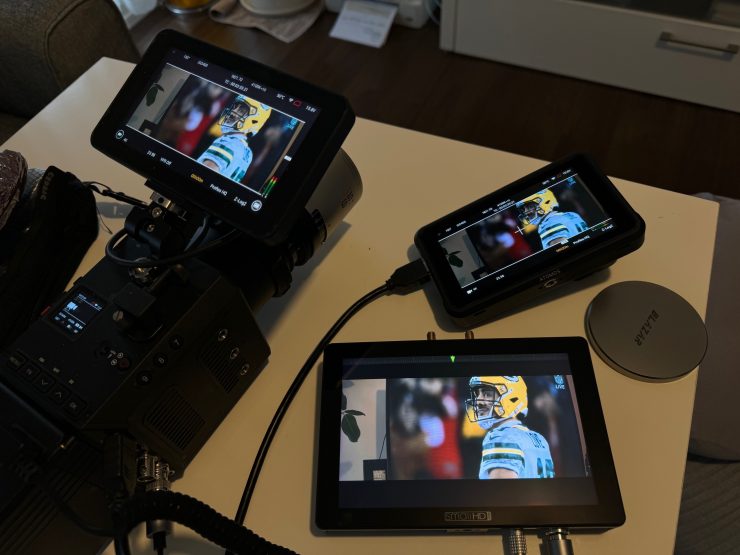
I also did a test to see what would happen if I connected up two monitors, one via SDI and one via HDMI, while also simultaneously using the included monitor. I was able to output signals to both monitors as well as control whether or not I wanted the on-screen displays on or off. It is great to have this ability on an affordable digital cinema camera. The only thing you can’t do is select whether or not you want to have a LUT or LOG going out over SDI or HDMI. Anything you select on the camera automatically sends that over the outputs as well.
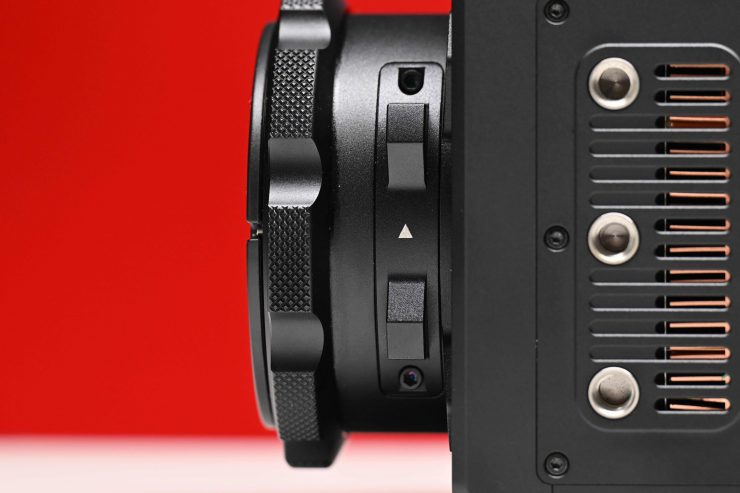
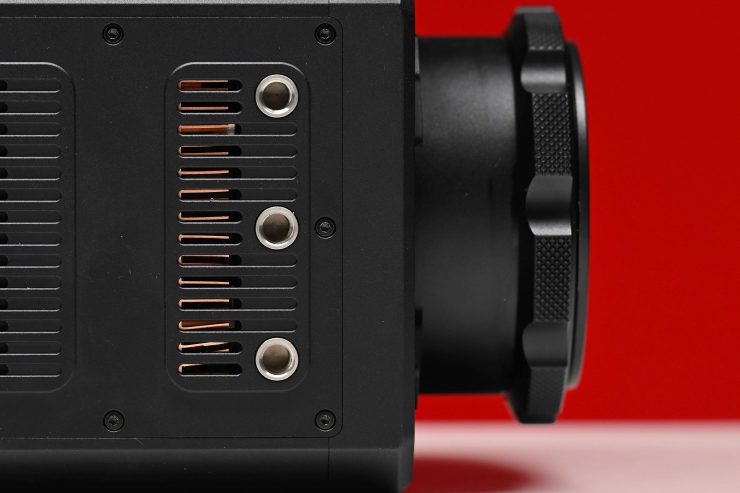
How does the camera stay cool?
Like any modern-day camera capturing high resolutions and high framerates, they generate a lot of heat. That heat needs to be dissipated and the E2-F6-Pro has a fan to keep the camera cool.
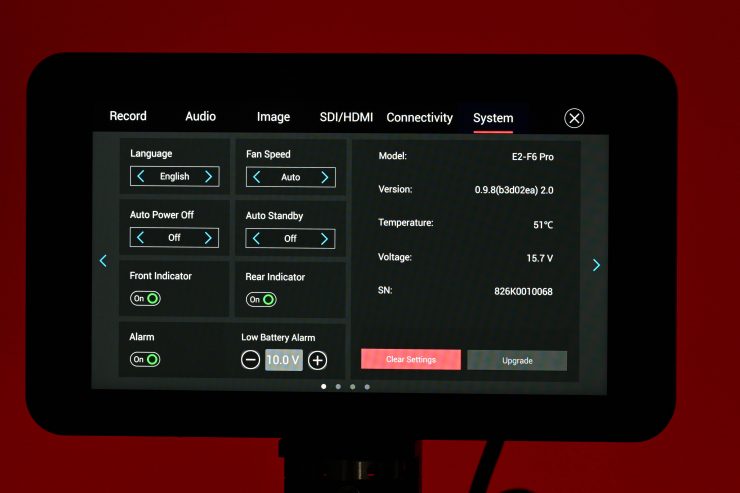
In the menu under System you can change the fan speed to the following settings:
- Low
- Medium
- High
- Auto
On High and sometimes Auto (if the camera gets too hot), the fan noise is a little loud for my liking.

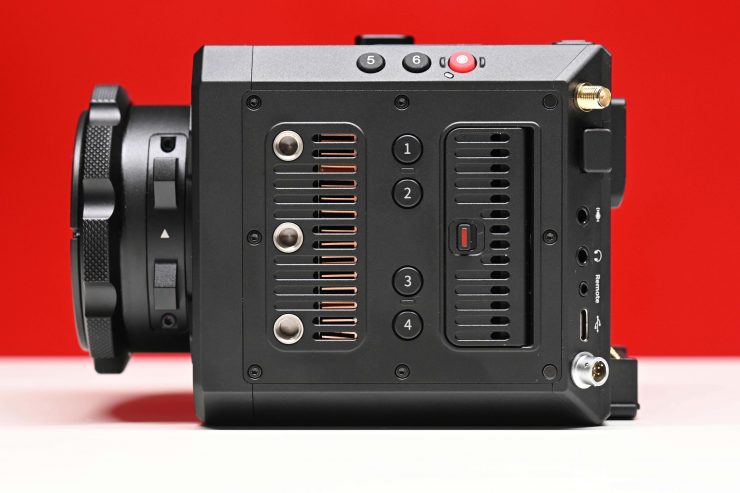
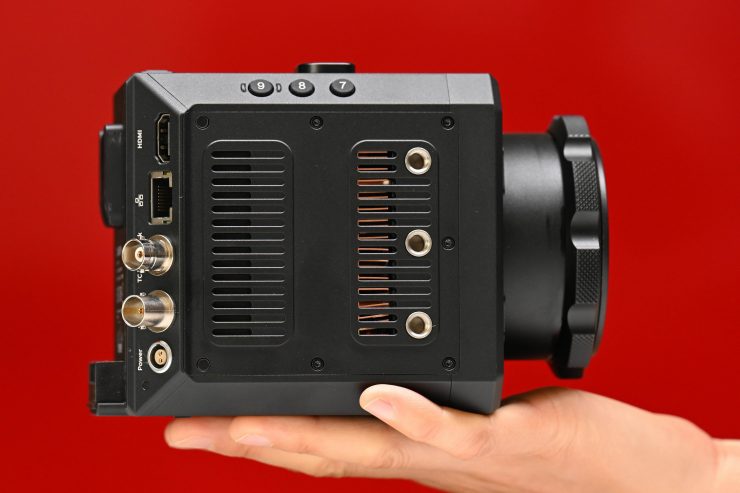
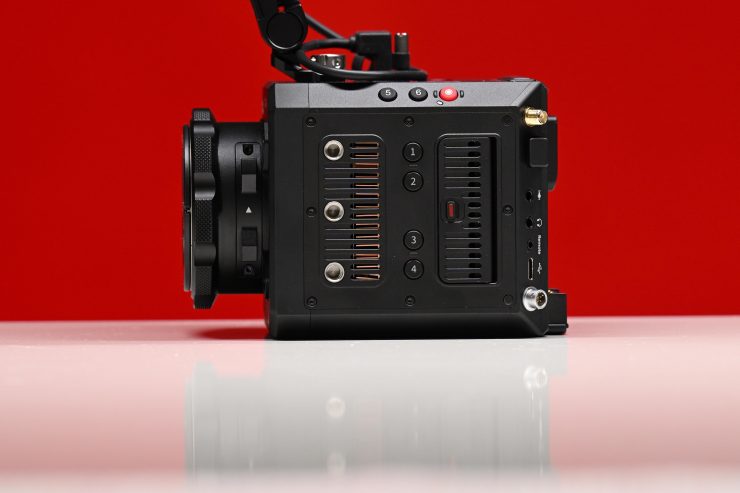
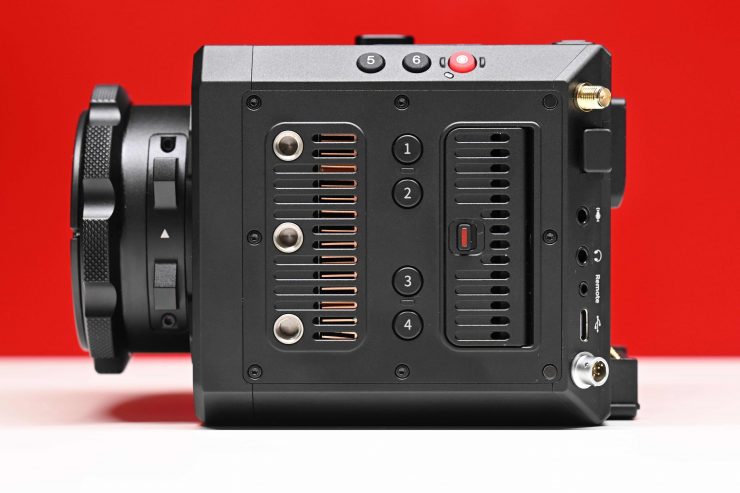
Non-operators side 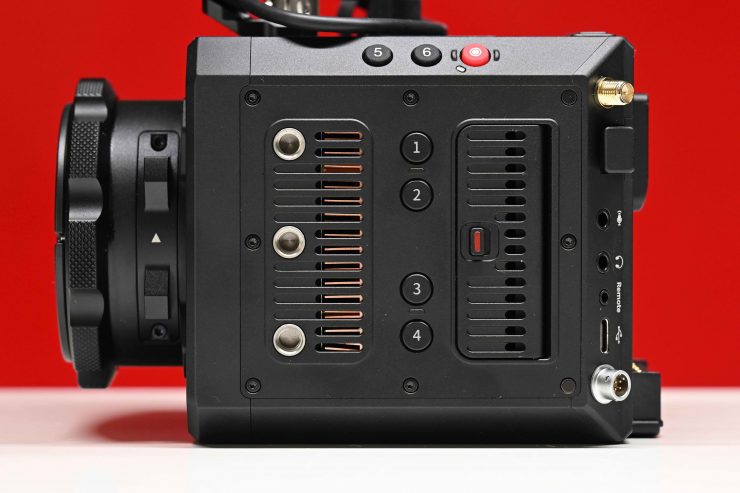
Operators side
Air gets drawn in through the non-operator side of the camera and then exhausted out through the operator’s side. This at least in my opinion, is a bad design decision. Why would I say that? Well, with a small-sized camera such as this, a lot of people are likely to hold it in their right palm when operating handheld.
The problem with this is that the camera does get quite hot and the exhausted hot air goes straight onto your hand and it becomes uncomfortable to hold the camera. The bottom of the camera also gets quite hot as well.
The Core Temperature is the real-time temperature of the core processor. It is shown on the UI with full parameters so that users can monitor it.
No Built-in eND
The Z CAM E2-F6-Pro doesn’t feature any built-in ND, although this doesn’t come as any big surprise given it is a sub $4K digital cinema camera.
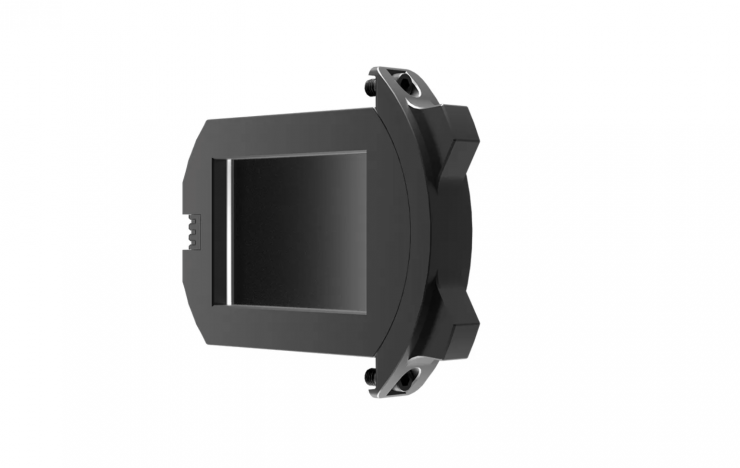
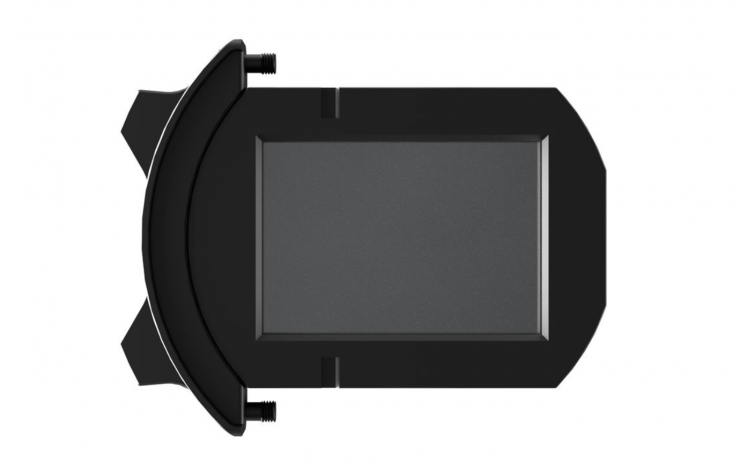
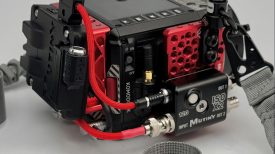
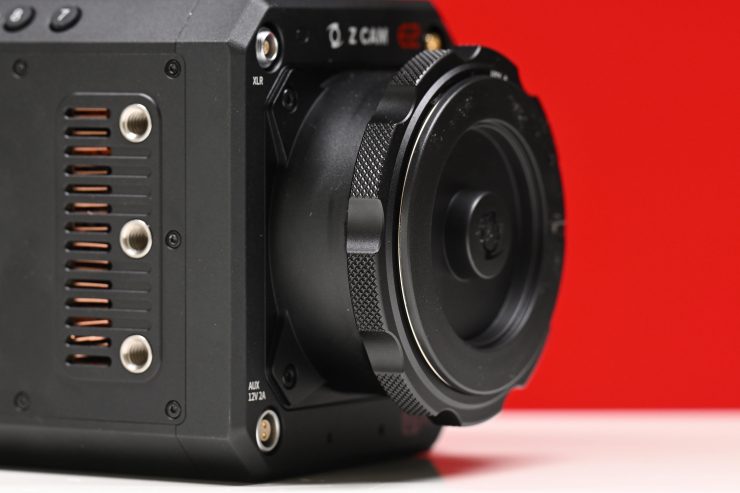
What Z CAM does offer is an eND Module for its E2 Flagship Series cameras.
This module replaces the removable clear-glass module in the camera’s EF (or the optional PL) lens mount to give the user electronically variable ND. You can see where it goes in the above image.
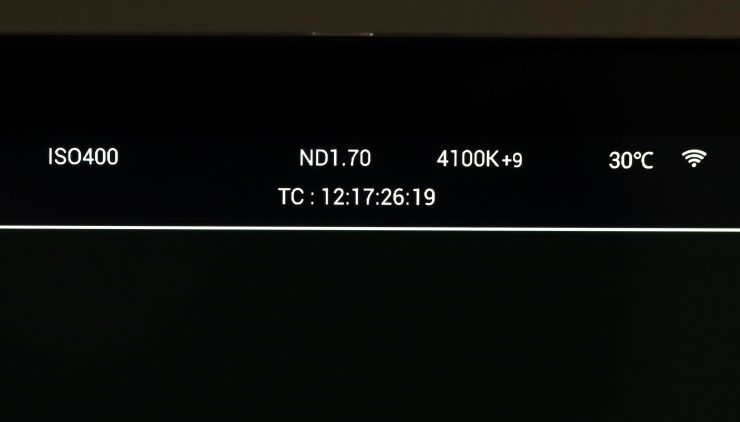
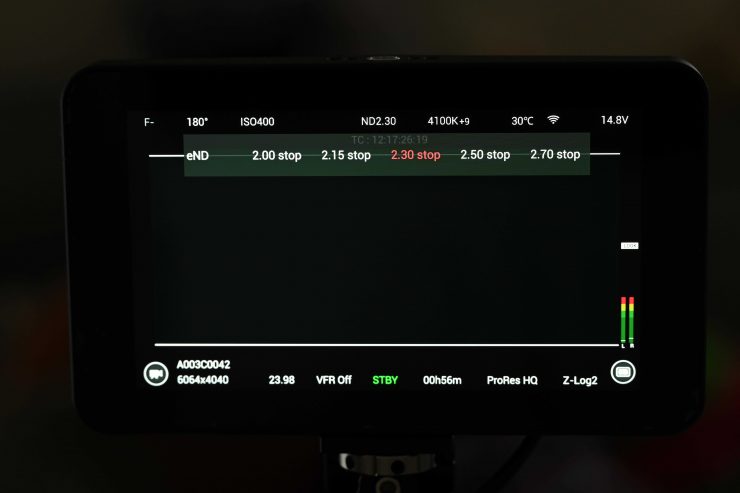
The eND module has a minimum setting of 1.7 stops and can provide up to 6.7 stops of exposure adjustment in 1/3 of a stop increments. Z CAM claims that because the E2-F6-Pro features an IR cut filter in front of the sensor, IR pollution is not an issue, even when the eND Module is used at its strongest settings.
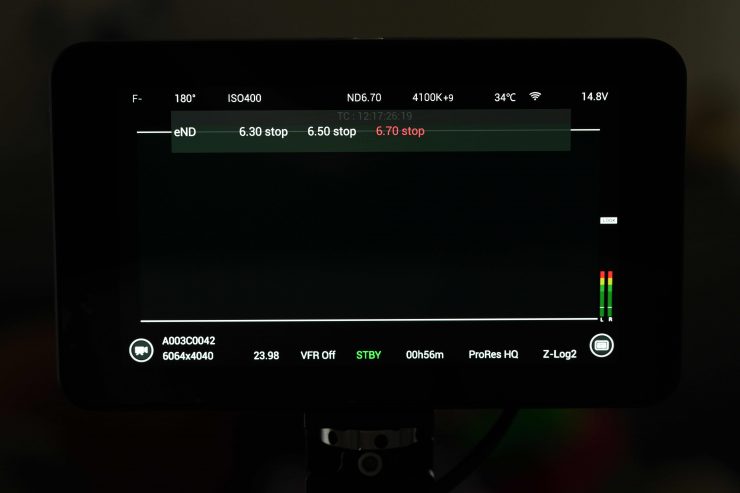
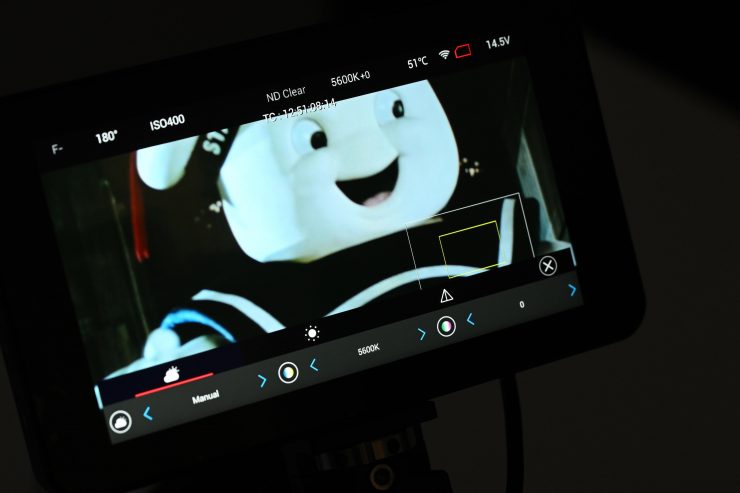
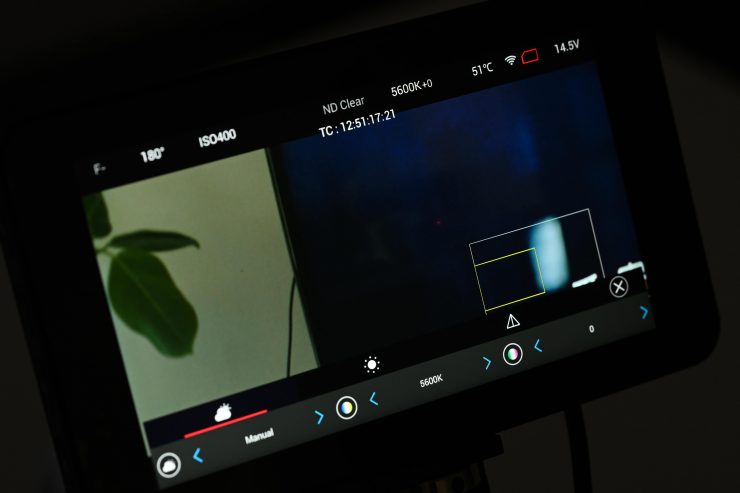
You can adjust the eND via the touchscreen or directly on the camera using the menu. I couldn’t find any way of using the app to adjust the eND. It is much easier to adjust the eND on the touchscreen monitor than via any other method.
Touchscreen monitor 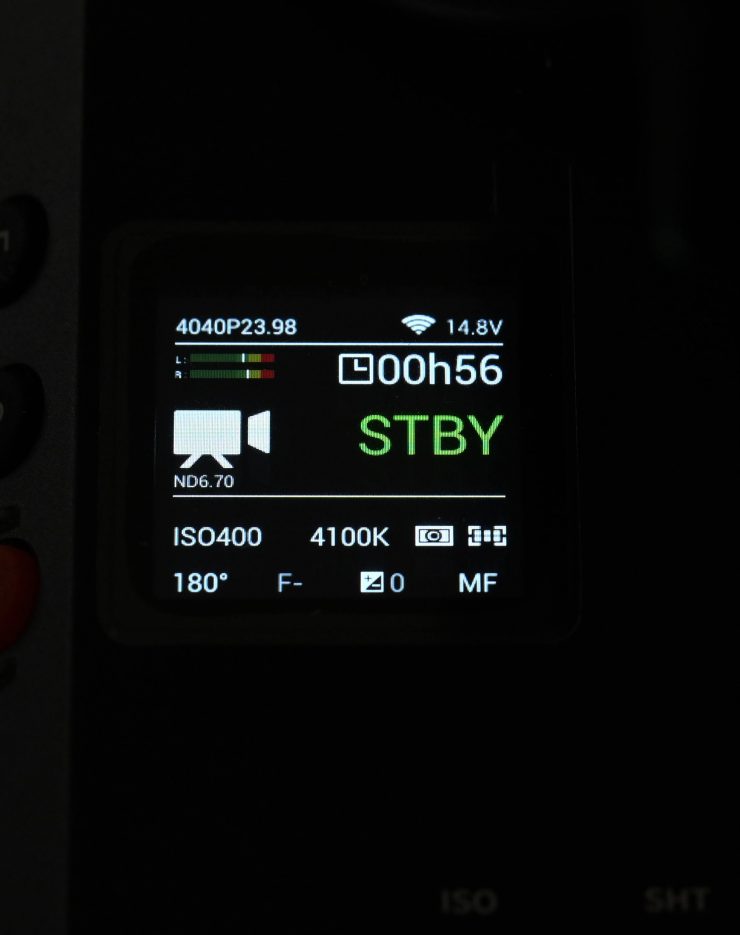
Camera LCD
While you can clearly see the amount of eND on the touchscreen monitor, you won’t see anything on the camera’s LCD screen unless you enter the menu.
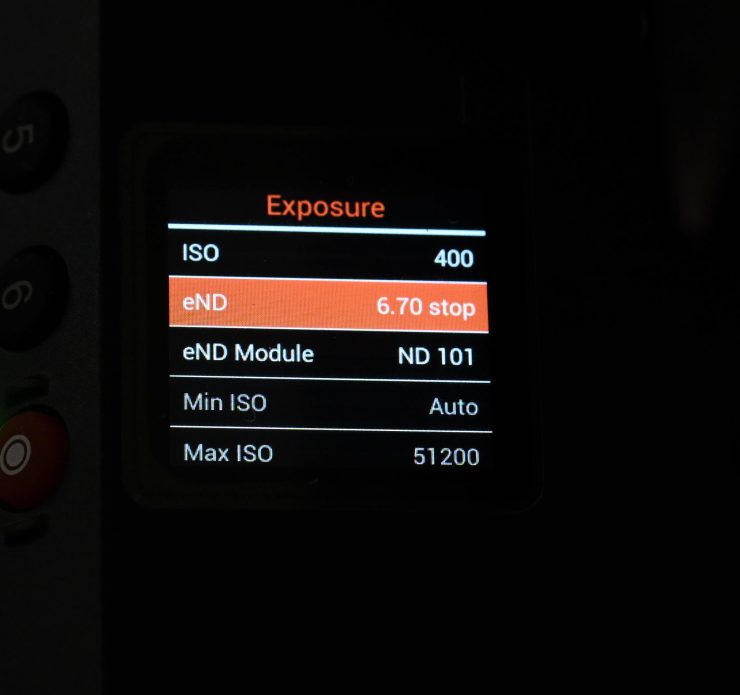
In the menu you can enter the eND settings and make adjustments.
You can adjust the eND in real-time, but as it isn’t a linear adjustment, you won’t get a smooth transition.
There also didn’t seem to be any way of assigning the eND to a function button.
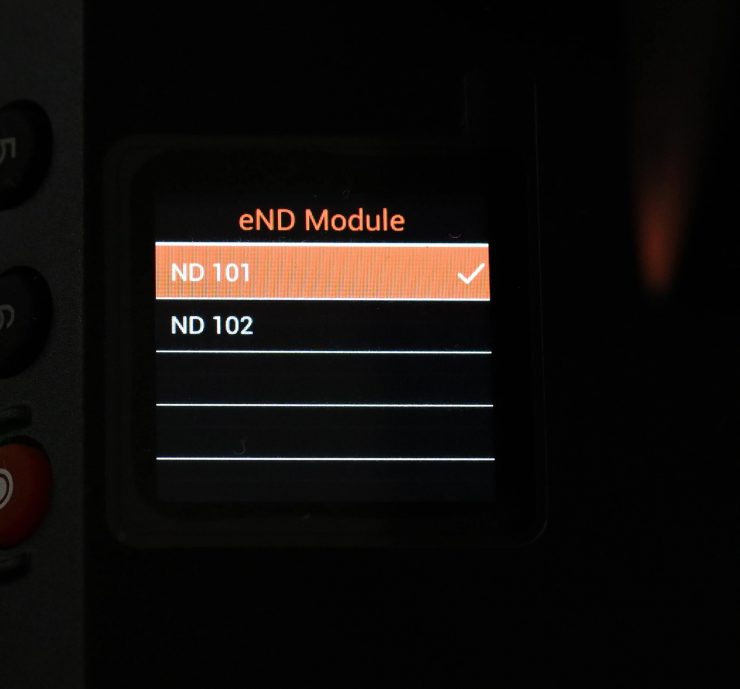
There is a menu item where you can choose between eND 101 and 102, but I couldn’t work out what this is for and nothing changed when I tried changing between the two settings.
Does the eND produce a color shift? Well, I did some tests to find out. In the past, I have found that cameras using eND do tend to create color shifts, especially when higher levels of ND are being used. I white balanced the camera with the eND set at its minimum value of 1.7. I kept the aperture of the lens, the ISO, and the lighting exactly the same for all of the tests. All I did was adjust the shutter speed to maintain correct exposure.
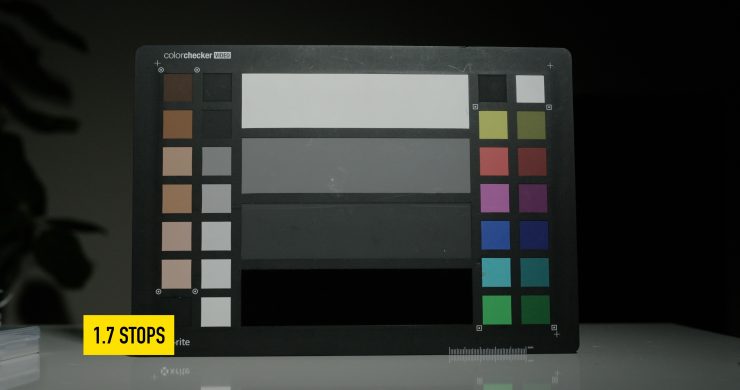


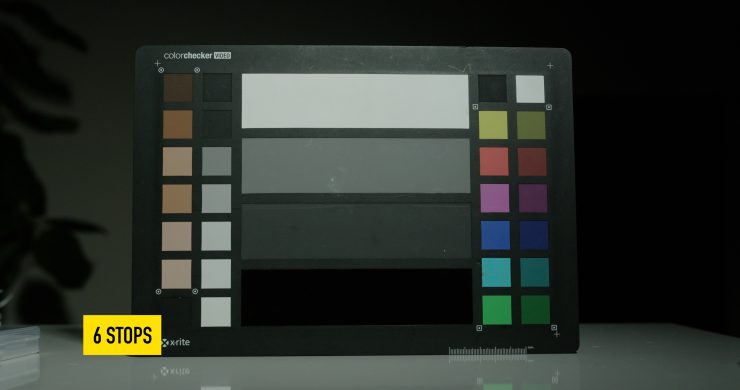
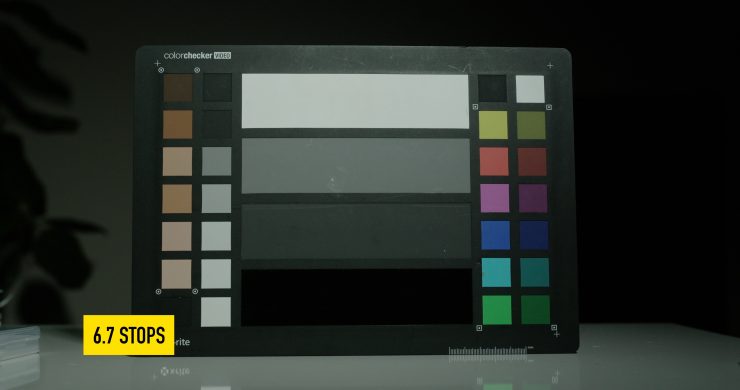
From my test, I found that the eND remains reasonably neutral from 1.7 up to 3-4 stops. After that, it does start to push slightly green. At 6 stops and the maximum of 6.7 stops you can certainly see the green tint pretty easily. Above you can see the individual frames from the test.
While there is a definite color shift it isn’t huge and you could easily dial it out in post. There was also no IR pollution which was good to see.
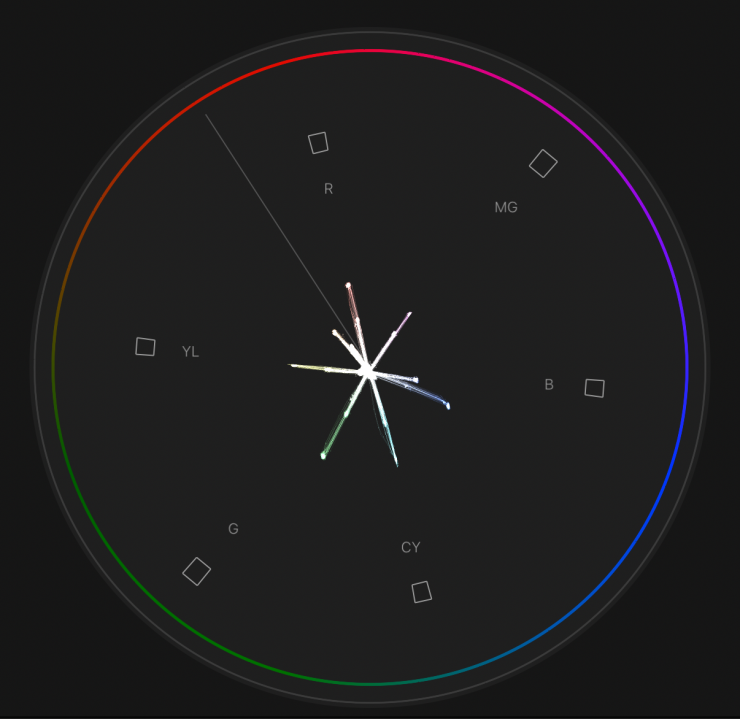
1.7 stops 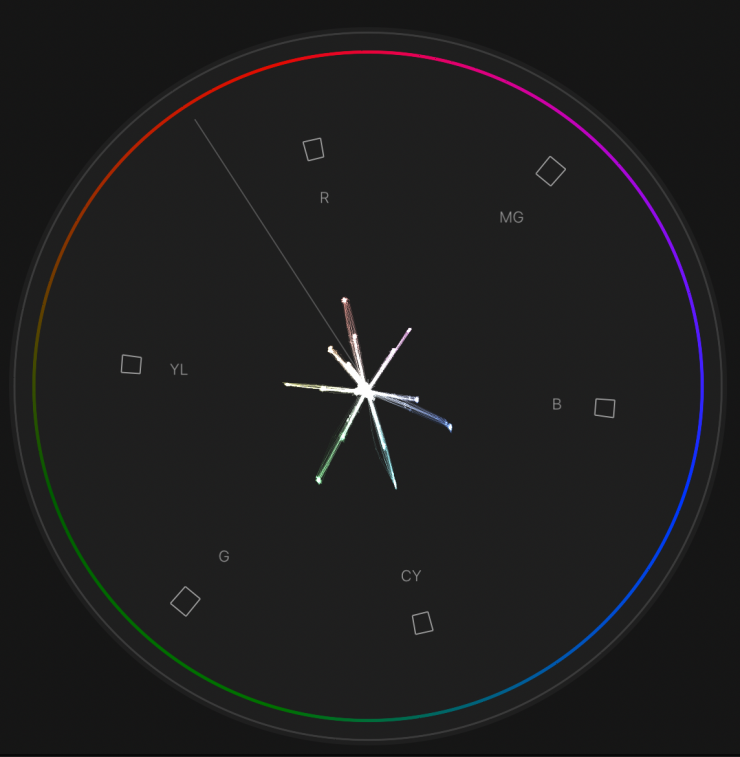
2 stops 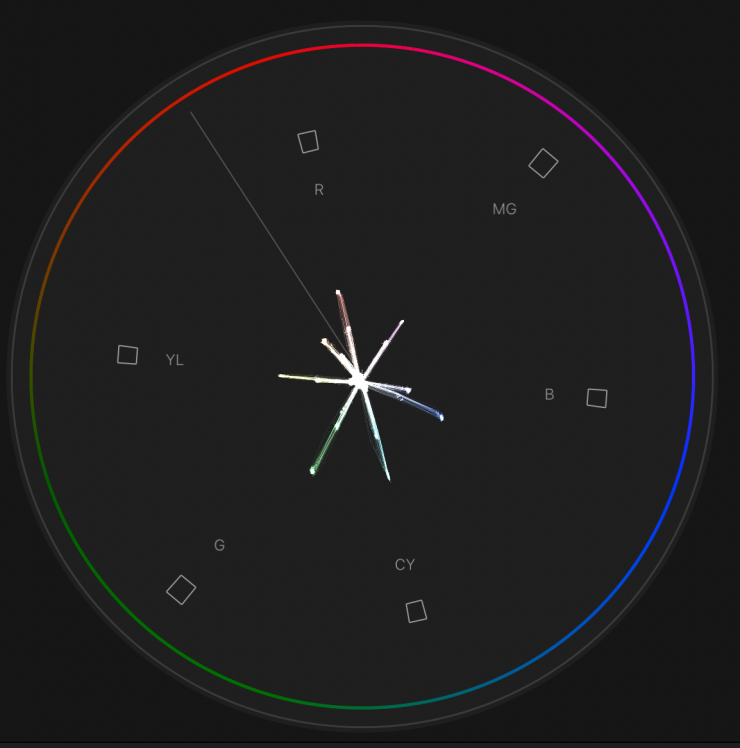
3 stops 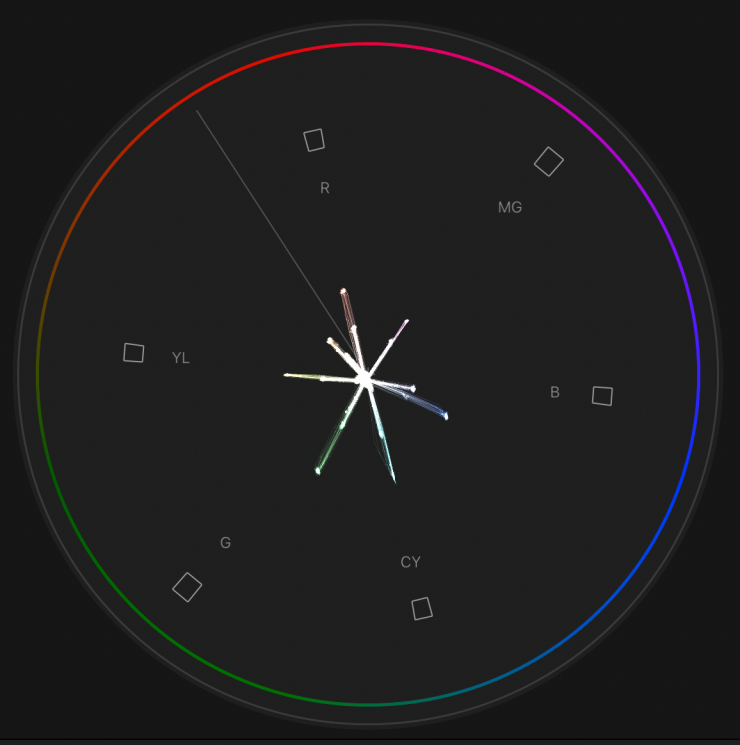
4 stops 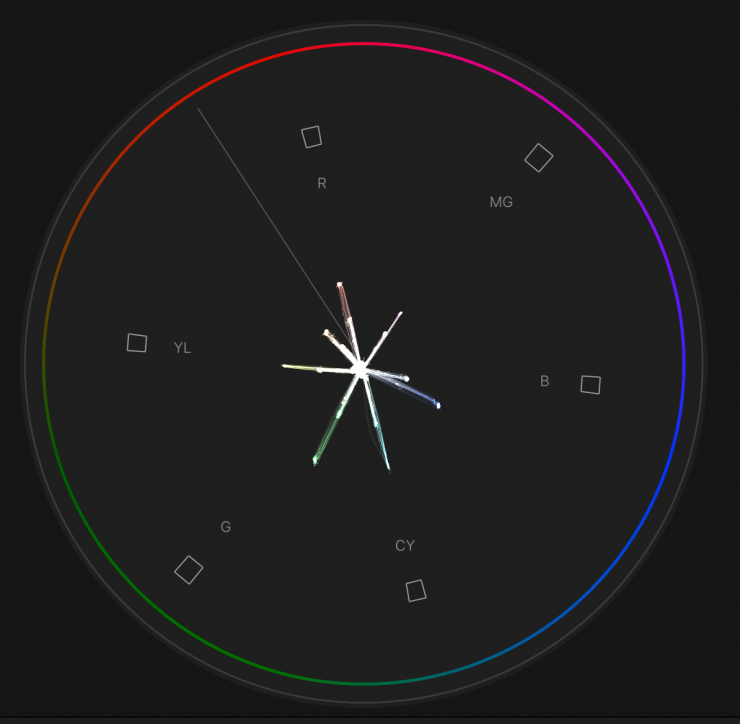
5 stops 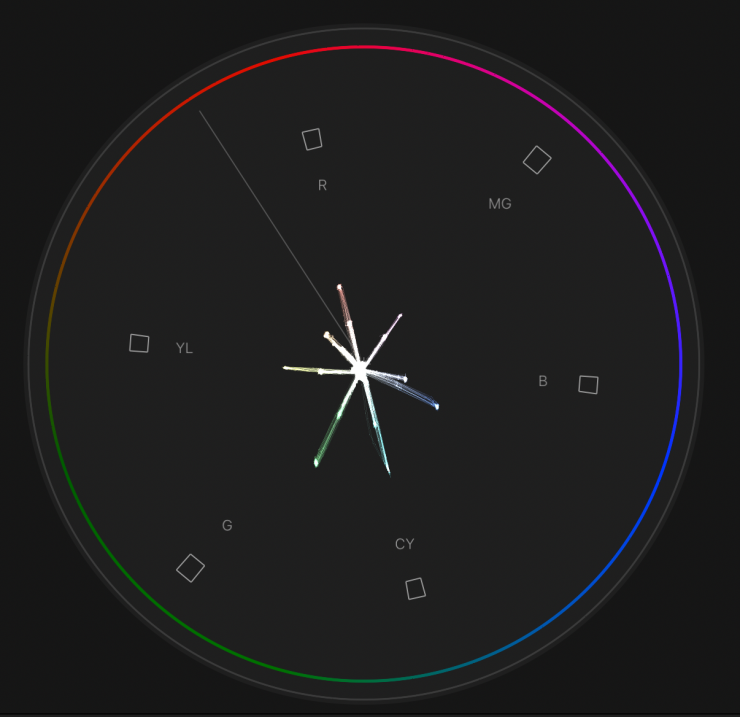
6 stops 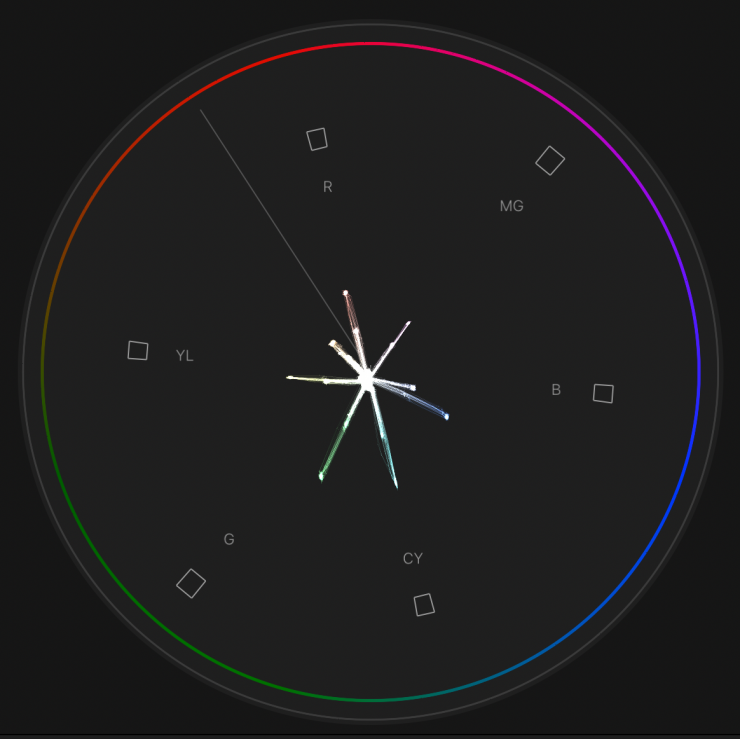
6.7 stops
Above you can see the vectorscope images for the various strengths of ND that I tested.
Now, there are a couple of caveats when using the eND module. The first is that there will always be 1.7 stops of ND being applied as there is obviously no way of setting the module to be clear. The next caveat is that if you want to take the eND module out, then you need to carry around the supplied tool and the original module with the clear filter that sits inside the mount. As you need to undo two screws, remove the eND module, and put in the clear one, this isn’t a process that takes 30 seconds. You need to keep this in mind when using the camera. If you need to go between bright environments and dark ones then you would need to up the ISO to compensate for the eND. You could just not put the screws in so it is easier to take the modules in and out without tools, but there is probably a good reason why it does have screws.
I would have also liked Z CAM to have at least included a small plastic hard case to keep the eND or the clear module in.
Having the eND module is great and it certainly increases the versatility and usability of the camera. It is also nice how you can use it in both the Canon EF and PL mounts.
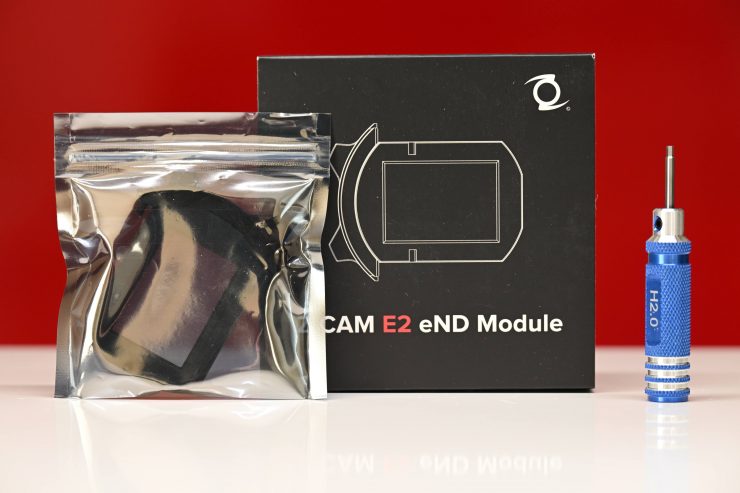
The eND Module for its E2 Flagship Series cameras retails for $399 USD and I am slightly puzzled as to why Z CAM didn’t just include it with the E2-F6-Pro and make the camera price slightly higher. I say that because I personally think most people buying this camera are going to want to use the eND module.
Who is the Z CAM E2-F6 Pro aimed at?
This is a hard question to answer. There is no reason why you couldn’t use the camera for anything from small jobs, all the way up to large productions. Every camera has its strengths and weaknesses and it is up to the end user to work out what works best for their individual requirements. It is probably a disservice to Z CAM to think of the E2-F6-Pro as a low-cost alternative to a RED, ARRI, Sony, or Canon, especially since their cameras have been used on large productions. I personally think the E2-F6-Pro is a camera that punches well above its weight and it can certainly compete with more high-end offerings for substantially less money.
In the past, lower-cost digital cinema cameras from Z CAM and Kinefinity were arguably being aimed at mid-tier indy filmmakers who perhaps couldn’t afford to buy or rent an ARRI, RED, or Sony. I don’t necessarily think that holds true in 2024 because a lot of affordable cameras offer very good functionality, features, and image quality that can certainly rival higher-cost options in a lot of areas.
The E2-F6-Pro offers quite a lot of features that are not available unless you are prepared to spend a lot more money. Unfortunately, what is likely to hurt companies like Z CAM is that the price of cameras has come down in the last few years and the huge pricing advantage Z CAM used to enjoy has certainly been minimized.
Dynamic range & sensor response
The dynamic range of the Z CAM E2-F6 Pro is reasonably good, and in the real world, it is going to be able to handle a lot of situations.
What I wanted to do is to compare the highlight handling of the Z CAM E2-F6 Pro against the ARRI AMIRA, because according to Z CAM, it should have the same, if not more dynamic range. Now, what I wanted to specifically look at was highlight handling.
I set up a test with a color-checker chart and a bright LED light. I exposed the ARRI AMIRA for middle grey and then I adjusted the LED light to the point just before any hard clipping occurred using false color. The camera was set at 800 ISO. This was my benchmark for the test.
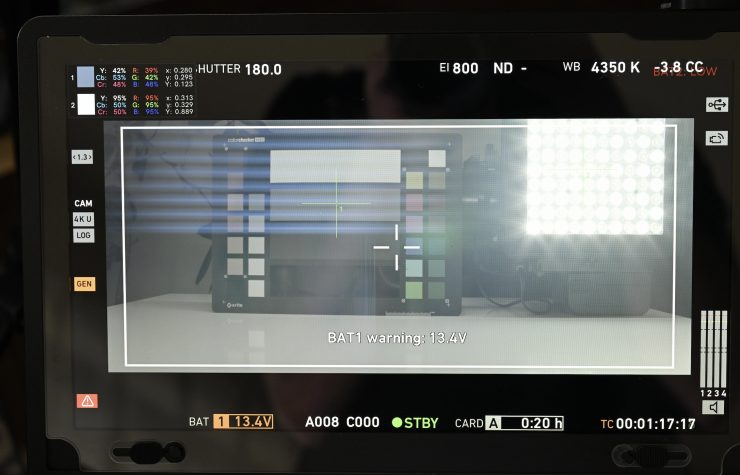
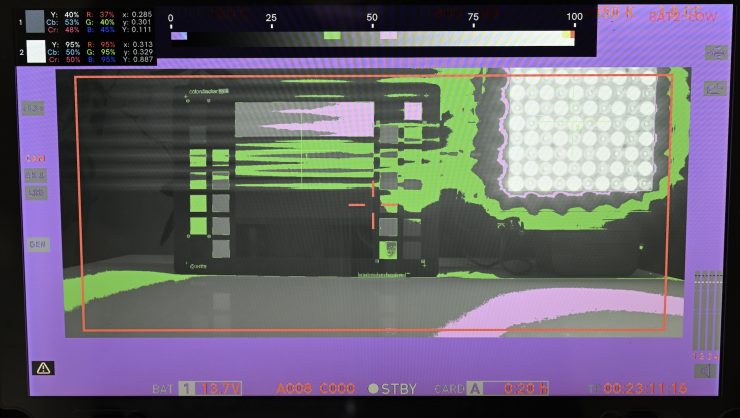
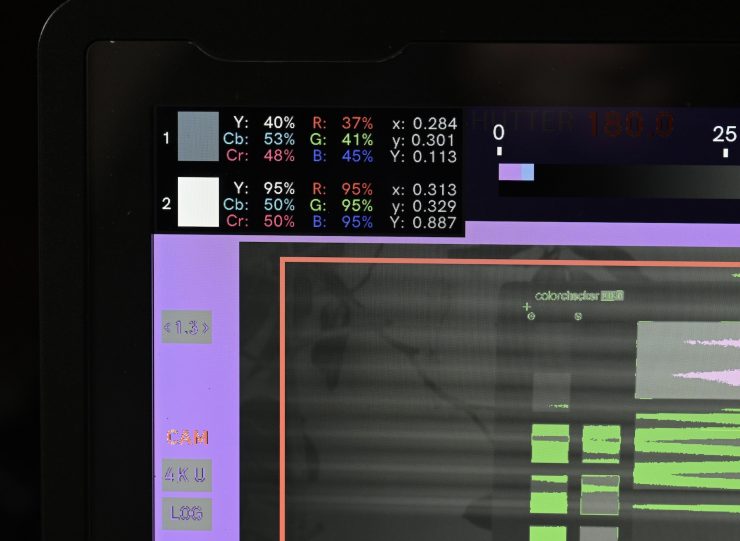
Above you can see the ARRI C-LOG images for the ARRI AMIRA. You can also see the IRE values for middle grey and for the brightest part of the light, as well as the waveforms.

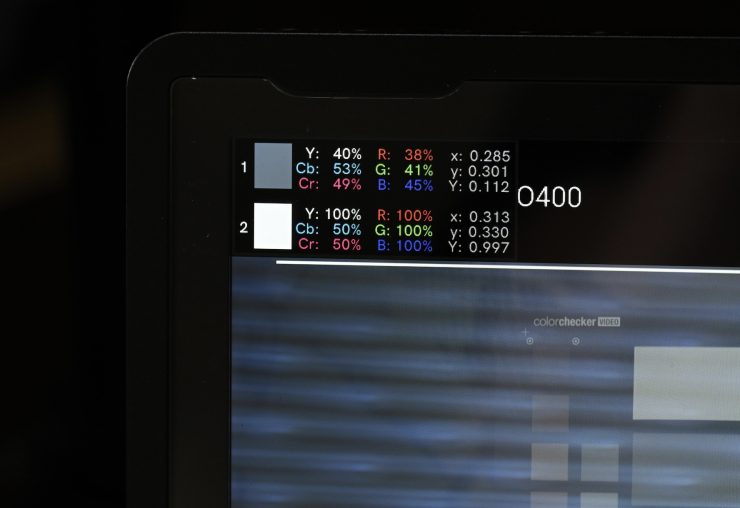
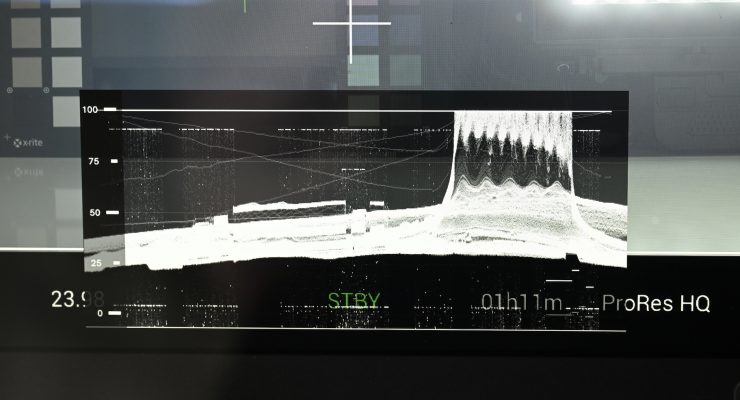
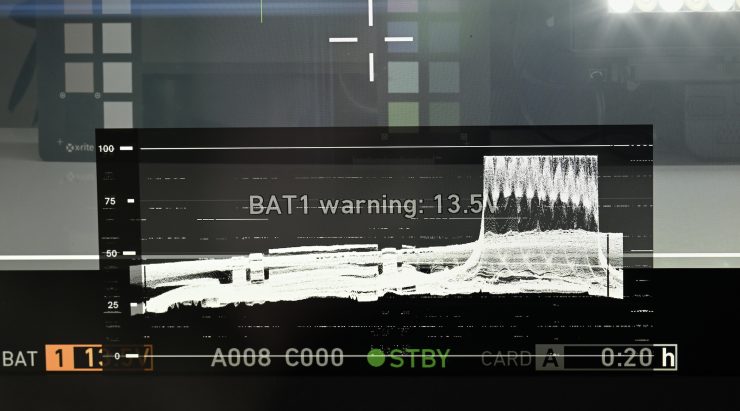
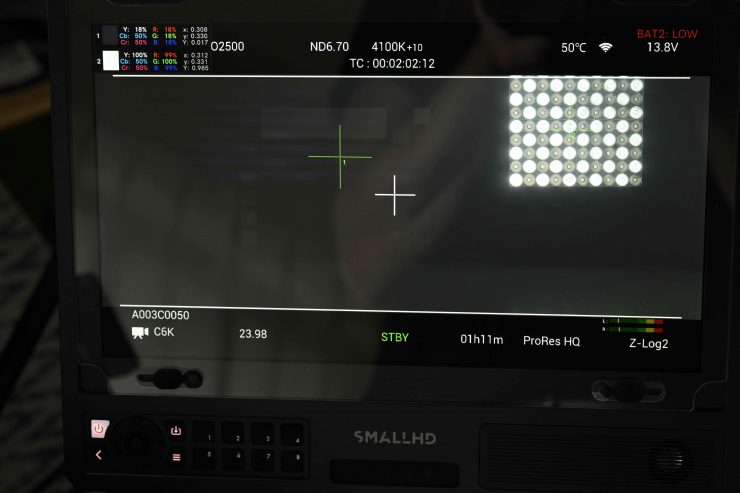
Ok, so now let’s do that exact same test with the Z CAM E2-F6 Pro set at its native ISO of 400 using the exact same test conditions. As you can see with the camera set at its correct middle grey IRE value, the highlights are completely blown out.

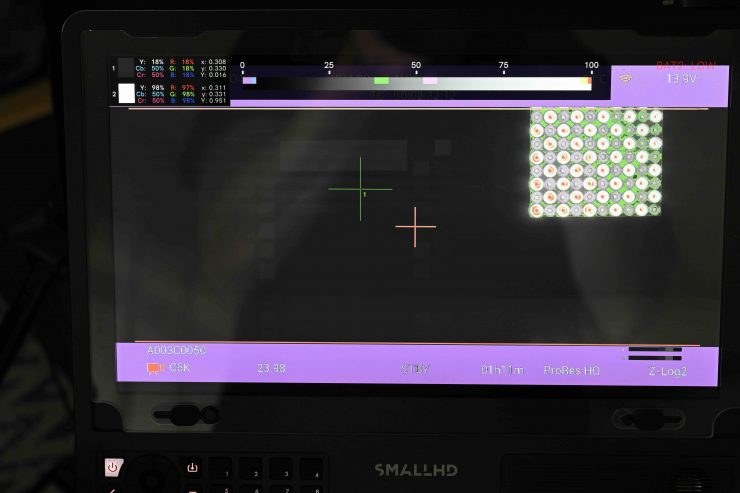
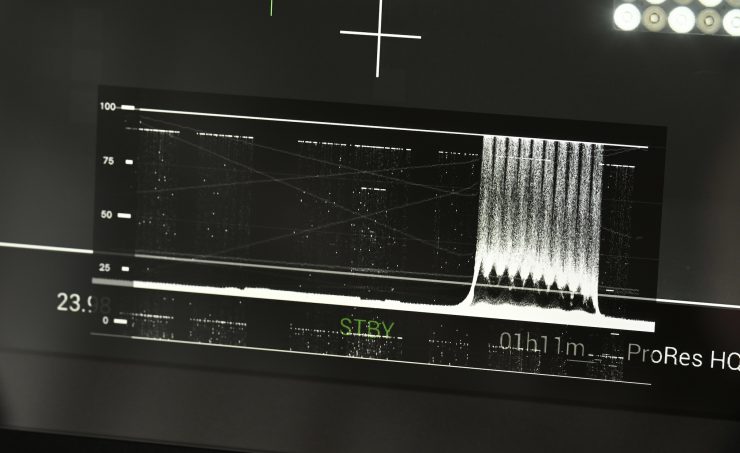
Now, I am going to reduce exposure until the highlights are no longer clipping. What I am looking at here is how much lower I had to set middle grey to avoid highlight clipping.

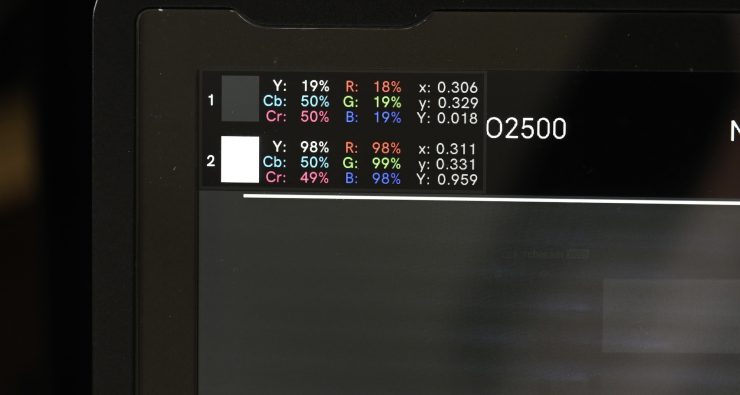
Above you can see that I had to reduce middle grey all the way down to 19IRE to avoid clipping highlights.
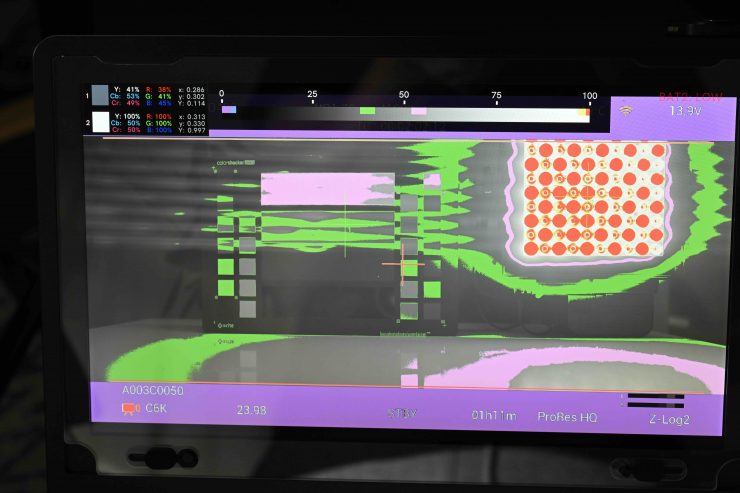
Let’s run that same test with the ISO of the Z CAM set at 2500 as that is its second native base ISO. It didn’t come as any surprise that the result was the same as setting the camera at 400 ISO.

My tests showed that the Z CAM E2-F6 Pro isn’t nearly as good as the ARRI when it comes to handling highlights (few sensors, if any, are). The ARRI has roughly 2 more stops of highlight latitude than the Z CAM.
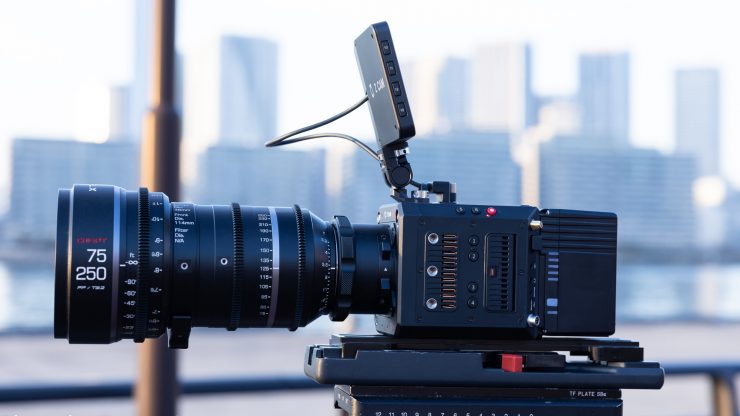
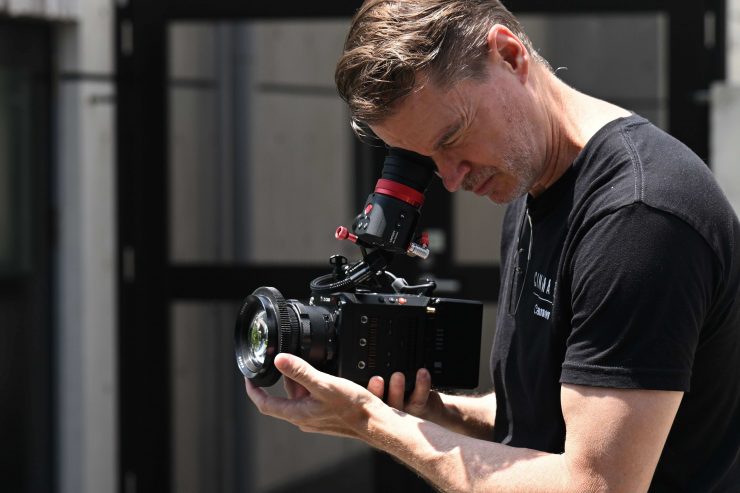
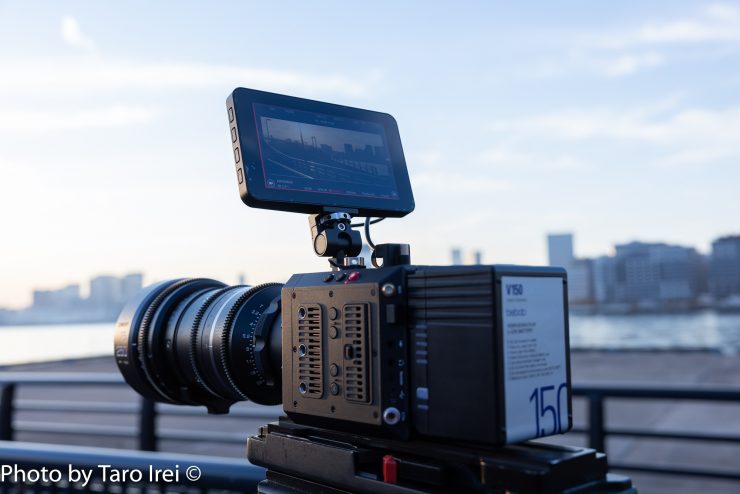
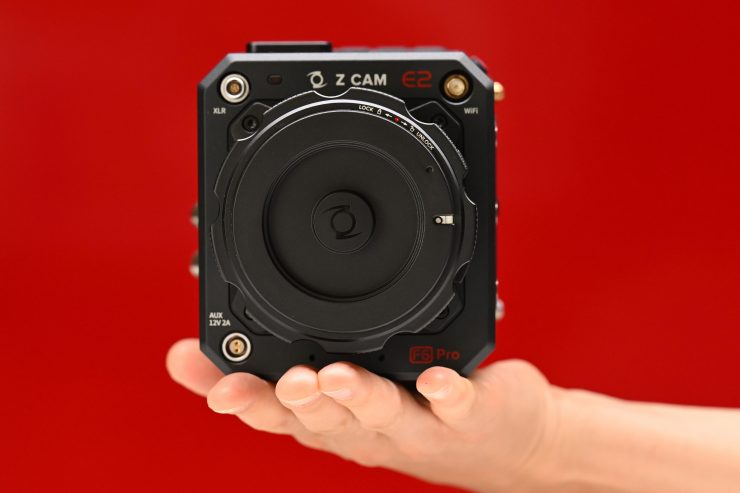
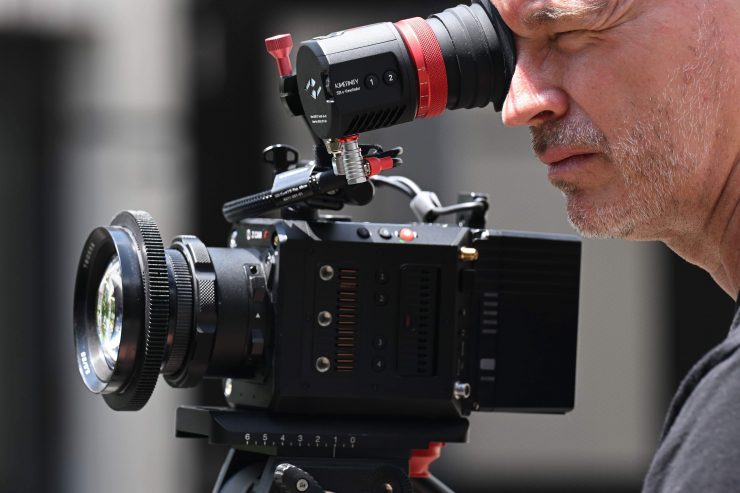
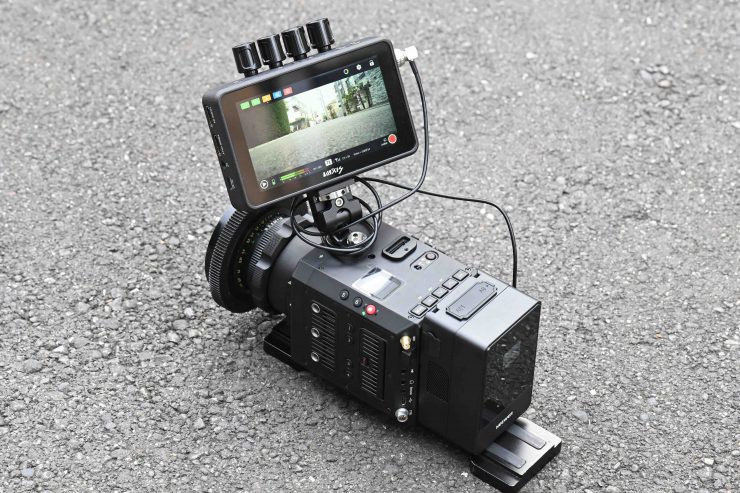
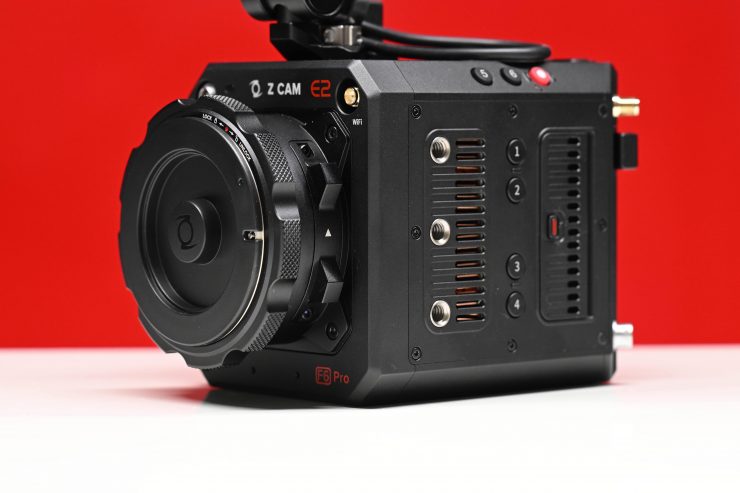
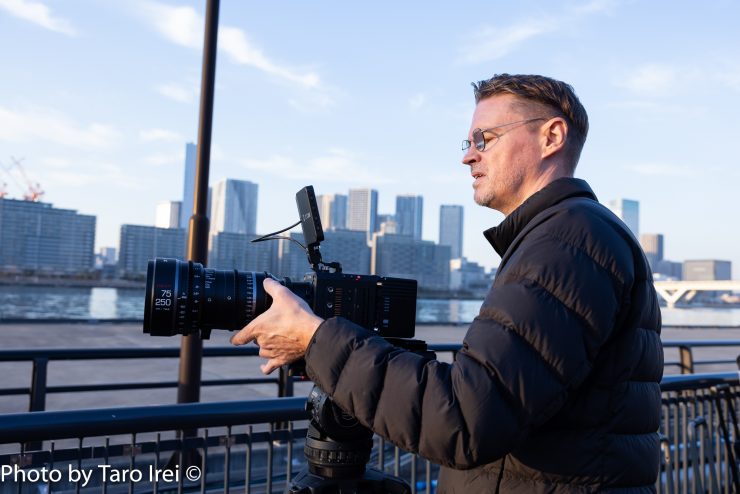
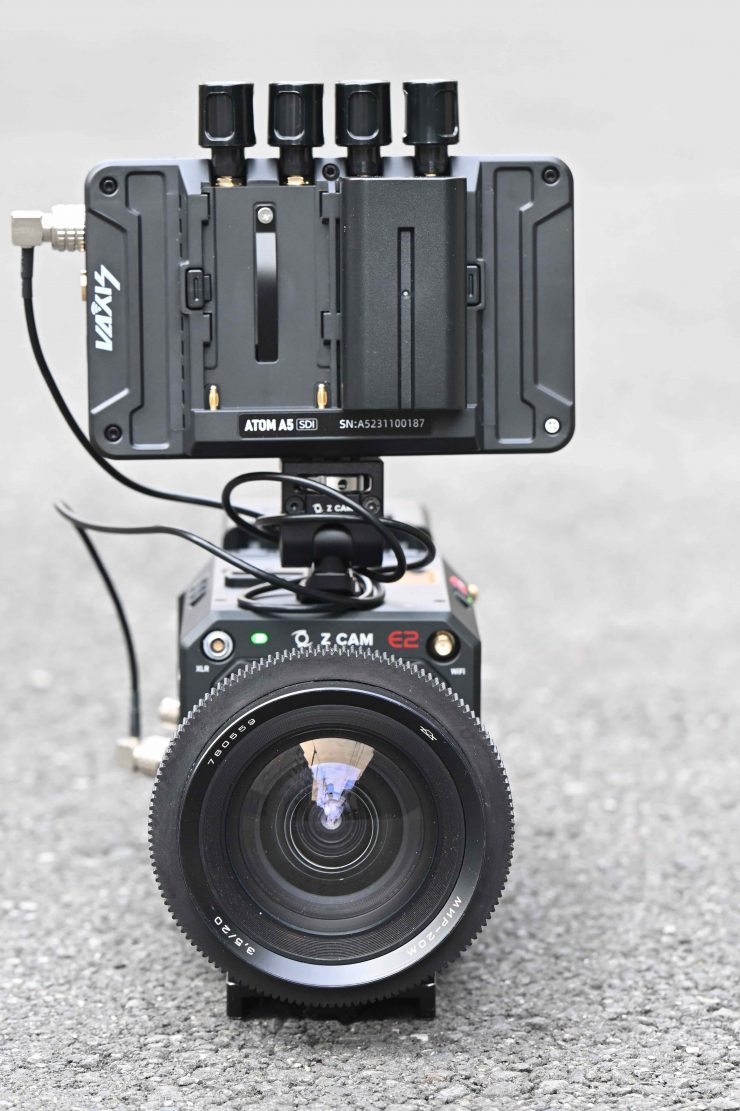
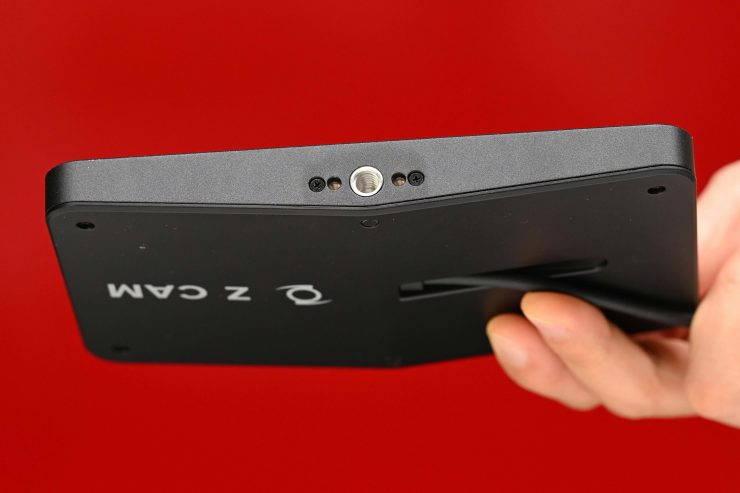
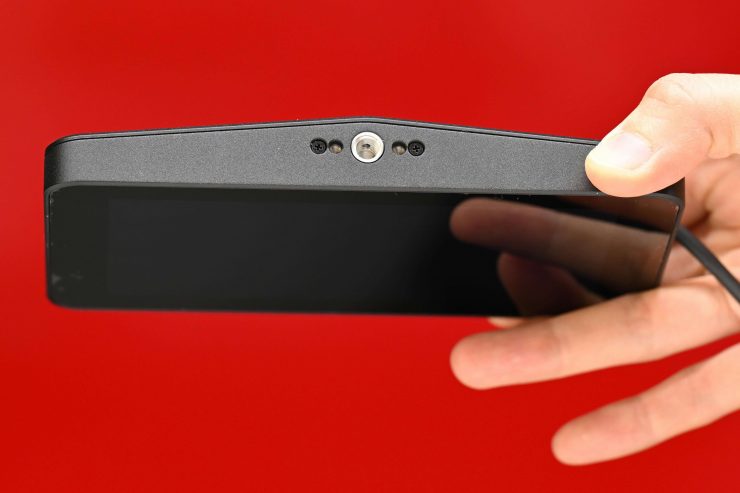
Size & weight
The Z CAM E2-F6 Pro really is tiny and it can literally fit in the palm of your hand. It weighs 1.39kg / 3.06 lb (with EF mount), and just 1.68kg / 3.7 lb with the monitor. It has physical dimensions of 108.5 x 107.9 x 156.7mm / 4.27 x 4.24 x 6.16″ (with EF mount).
The other positive aspect of the camera being so light is it’s easy to switch it from a tripod to a gimbal or even a drone (but you will need a large drone).
A lot of shooters are looking for a small-sized camera with the flexibility to build it up or strip it down. This is one of the reasons we see so many cameras coming to market that have been designed with this in mind.
Here is what some of the other smaller cameras on the market weigh (body only):
| WEIGHT | |
| Z CAM E2-F6 Pro | 1.39kg / 3.06 lb |
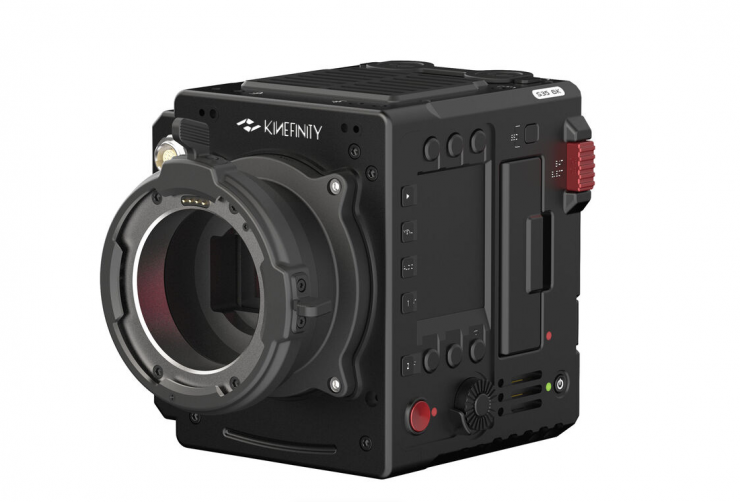
| Kinefinity MAVO EDGE 6K | 1.6kg / 3.6lb |
| ARRI ALEXA Mini LF | 2.6 kg / 5.7 lb |
| ARRI ALEXA 35 | 2.9 kg / 6.4 lb |
| RED V-RAPTOR | 1.82 kg / 4.03 lb |
| RED KOMODO | 952g / 2.1 lb |
| RED KOMODO-X | 1.19 kg / 2.62 lb |
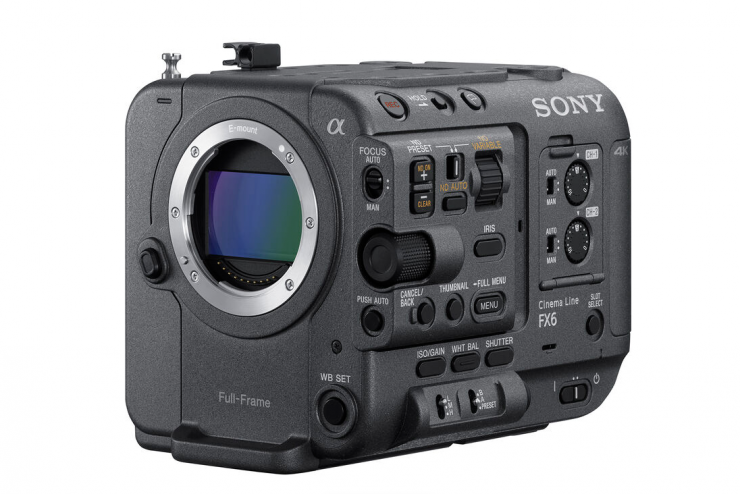
| Sony FX6 | 890 g / 2.0 lb |
| Sony FX9 | 2 kg / 4.4 lb |
| Canon C70 | 1.17 kg / 2.58 lb |
| Canon C300 Mark III | 1.77 kg / 3.9 lb |
| Canon C400 | 1.5 kg / 3.4 lb |
| Canon C500 Mark II | 1.77 kg / 3.9 lb |
| Blackmagic Design PYXIS 6K | 1.5 kg / 3.3 lb |
| Blackmagic URSA Mini Pro 12K | 2.54 kg / 5.62 lb |
What you do need to keep in mind is that with the Z CAM E2-F6 Pro, like most cameras, is that you may need to add accessories to turn it into a workable camera, although this will depend on your specific needs and application.
By the time you add a lens, battery, and other accessories, the size and weight of the camera will increase. As the E2-F6-Pro uses removable lens mounts, you will find that the camera can get quite long.
In saying that, I like that with the included monitor, all you need is a lens and a battery to get up and running.
Build quality


The Z CAM E2-F6-Pro may be lightweight, but it is still solidly made. It doesn’t have the plastic feel of some of the more affordable offerings from Sony, Panasonic, and Canon. The overall build quality of the camera is very good. While I don’t think the build quality is perhaps quite as good as the latest Kinefinity or RED cameras, for a sub $4K digital cinema camera, there is certainly nothing to complain about. Z CAM has done a good job, considering the low cost of the camera.
The physical buttons on the top and edges of the camera, at least in my opinion, do lack a tactile feel, but they all work correctly.
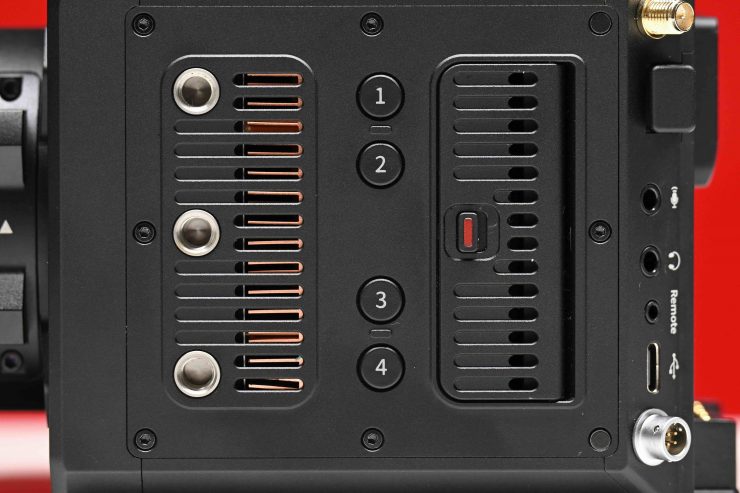
The four assignable function buttons on the side of the camera do seem to have a more tactile feel.
The included monitor that comes with the E2-F6-Pro arguably doesn’t feel as solidly made as the camera, but I think that is partly due to its lack of weight.
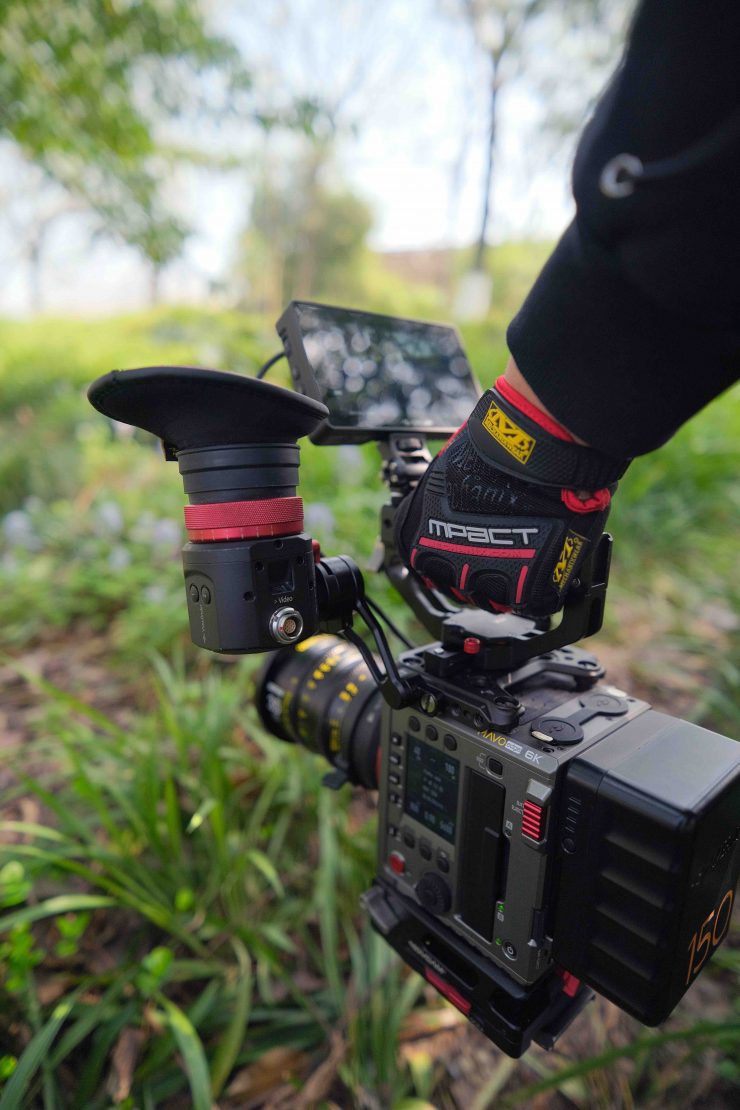
Ergonomics
The Z CAM E2-F6-Pro, like so many of today’s cameras, is just a box that certainly needs other accessories if you plan on shoulder mounting it or making it more usable. I have a love-hate relationship with this type of form factor. On one hand, it’s great to be able to break a camera down and use it in a very minimalistic way, but on the other hand, I don’t like having to put a ton of things on a camera to make it usable for most shooting scenarios.
Yes, the E2-F6-Pro is nice and compact and a relatively self-contained camera, but as I previously mentioned, you may need to add a lot of accessories depending on your requirements.
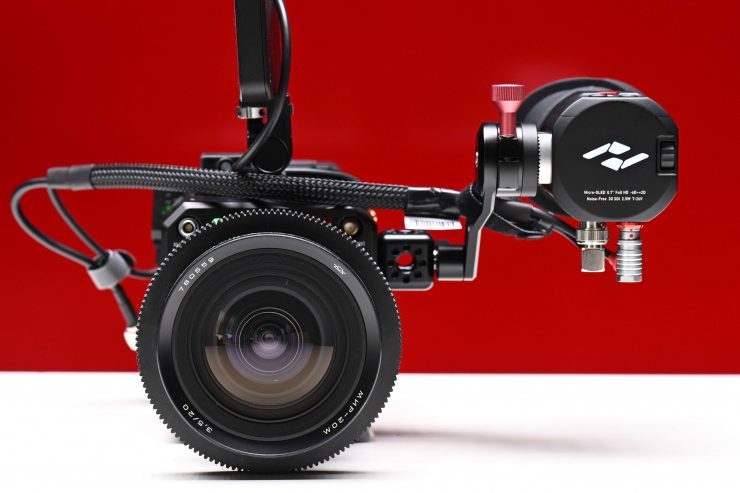
Everyone’s shooting style is different, but I like to be able to put a camera on my shoulder and use an EVF. If you want to do this with the Z CAM, you need to add a camera cage, some sort of shoulder support system, and the optional EVF, although this is the case with all box-style cameras. In all honesty, while you could construct a shoulder rig, I personally wouldn’t recommend this camera if shoulder mount shooting is one of your requirements. There are arguably a lot of other cameras out there that would be better suited for that type of shooting style.
The other issue with very small-sized digital cinema cameras is that they lack real estate. It is very easy to quickly run out of room to mount accessories such as wireless video transmitters, an assistants monitor, remote FIZ control units, and anything else you may need. If you do manage to mount everything you may end up with a dreaded Frankenrig!
With the touchscreen monitor that you get with the camera, mounting a top handle would be tricky.
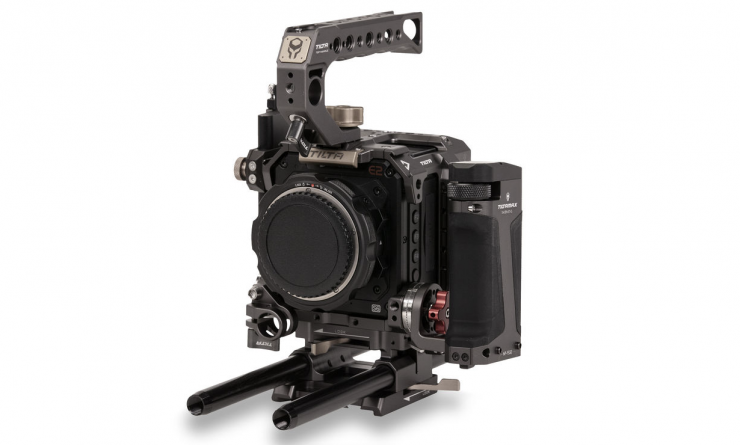
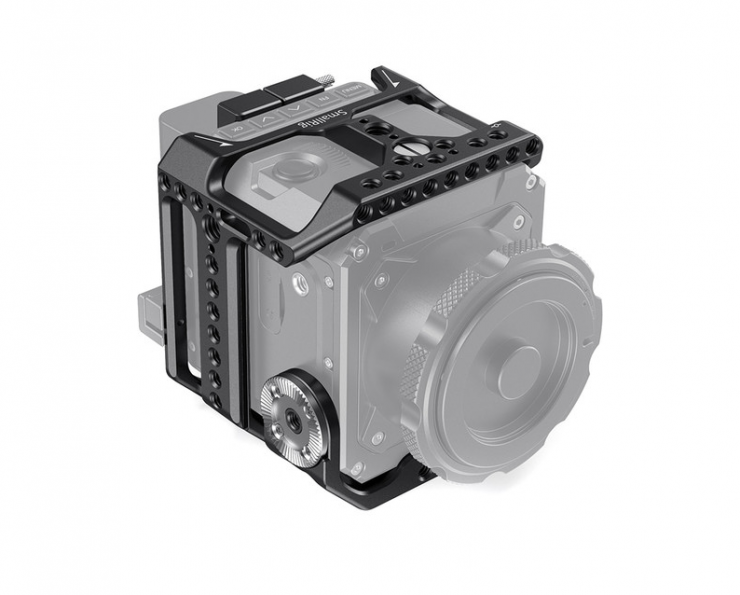
Tilta and SmallRig have made cages and ways of mounting accessories for the E2-S6/F6, but when I reached out to Tilta they told me that they don’t have a cage for the E2-F6 Pro. I am not sure whether or not the SmallRig Cage for Z CAM E2-S6/F6/F8 Cinema Camera works with the E2-F6 Pro either.
At a very minimum, I think you need some type of cage for the camera, but currently, there seems to be a lack of available options.
I would have liked for Z CAM to come up with its own cage and accessory solution for the camera or at the very least, partner up with a third-party manufacturer.
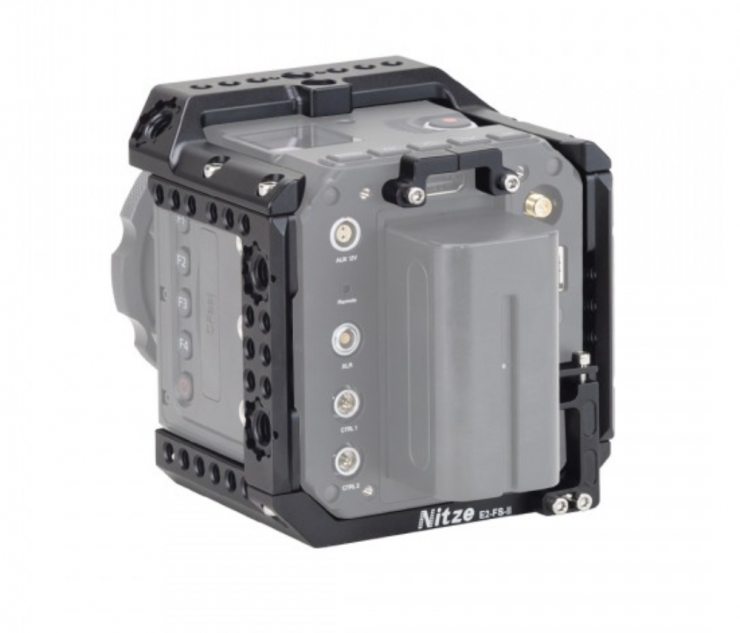
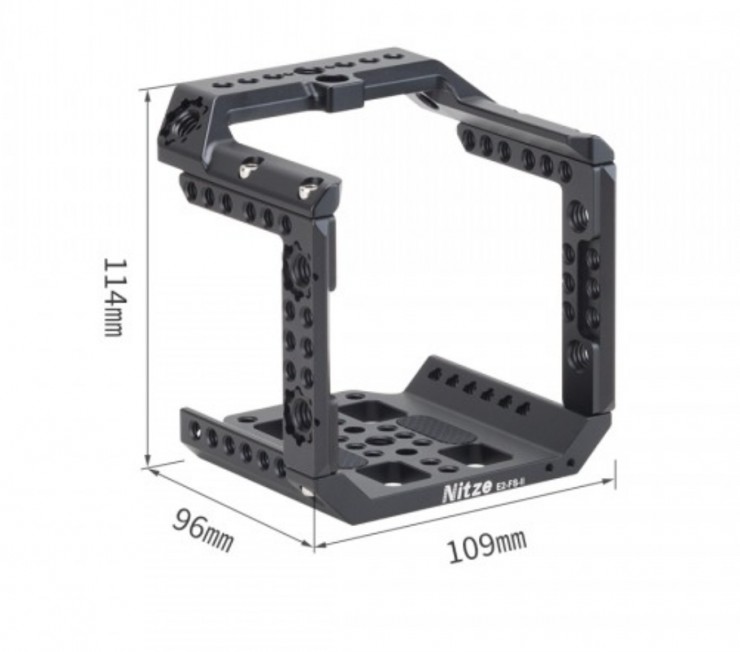
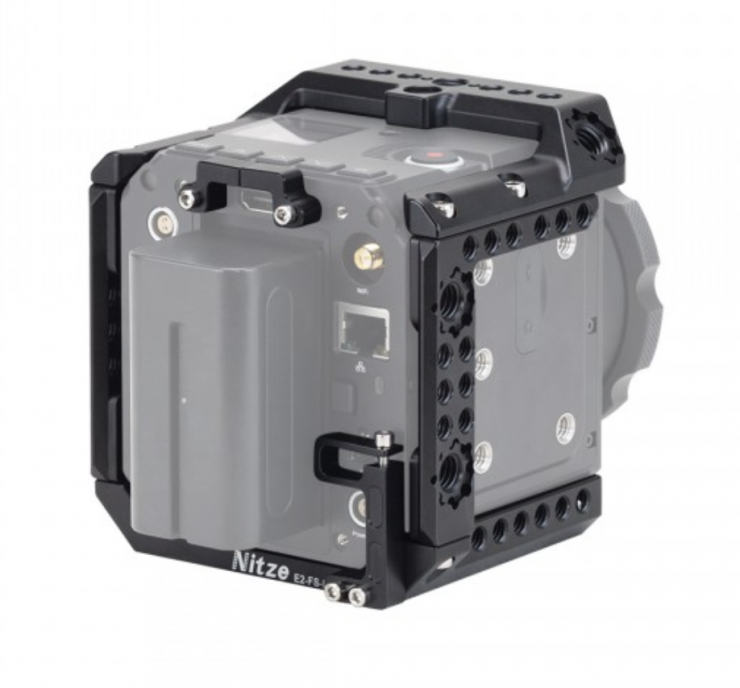
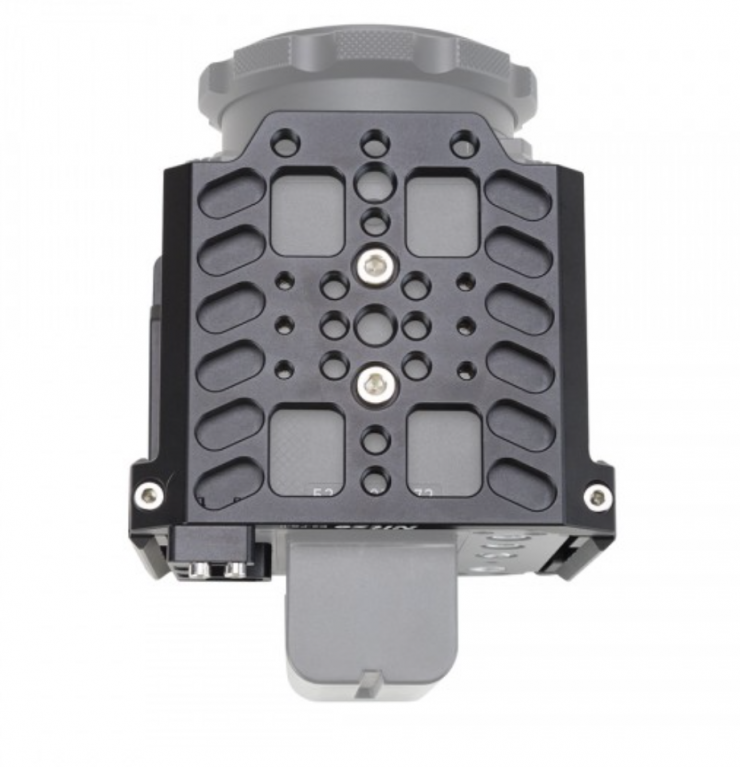
UPDATE: One of our readers pointed out that the Nitze Camera Cage for Z CAM E2-M4/S6/F6/F8 – TP-E2-FS-II will work with the E2-F6 Pro. This cage retails for $99.99 USD.
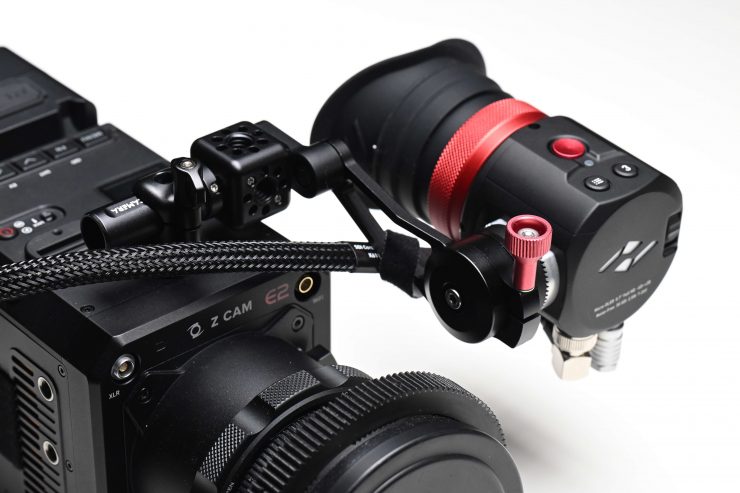
With no cage solutions available I did find it difficult to rig up items like an EVF to the camera.
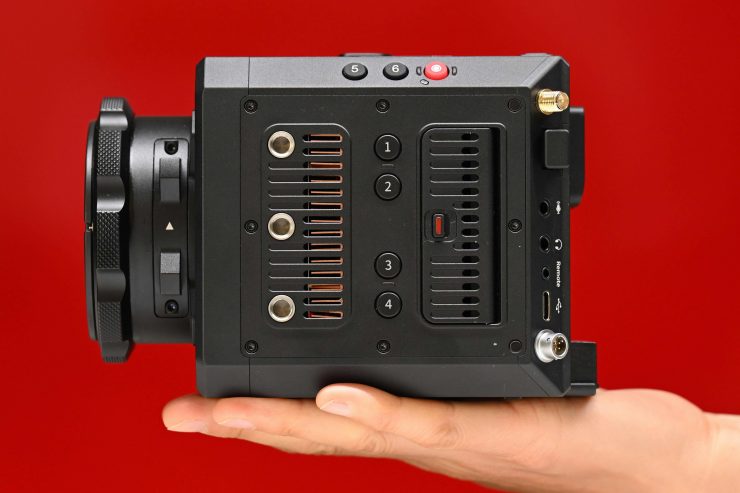
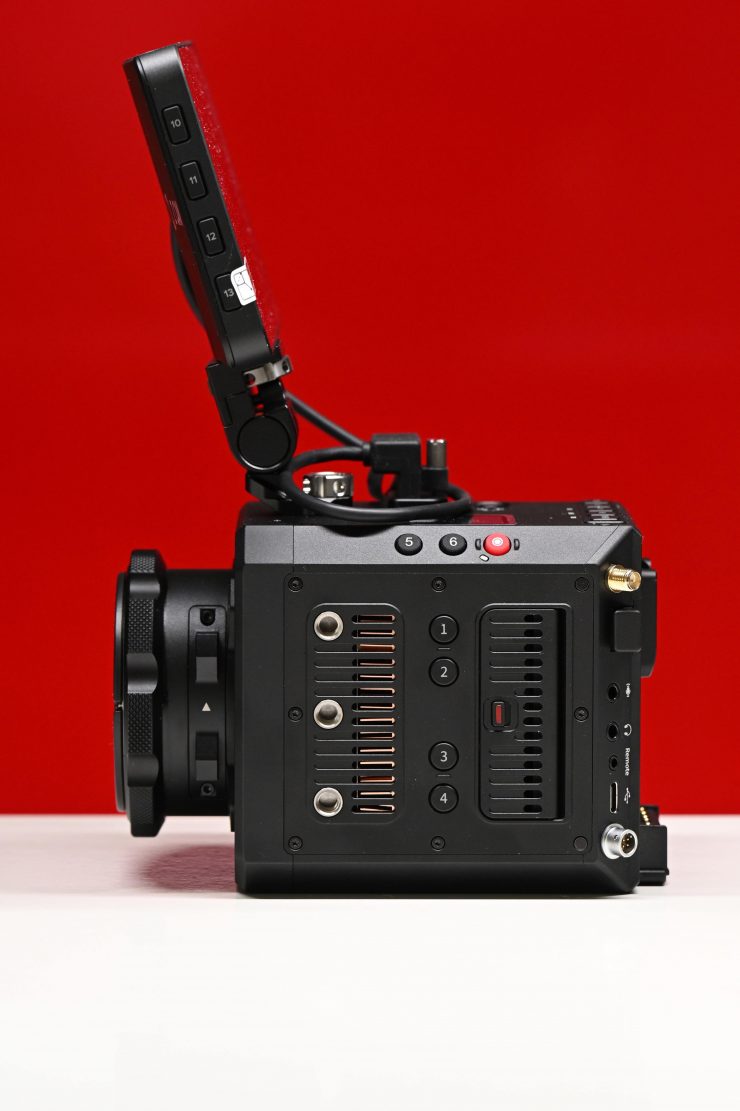
Mounting Points
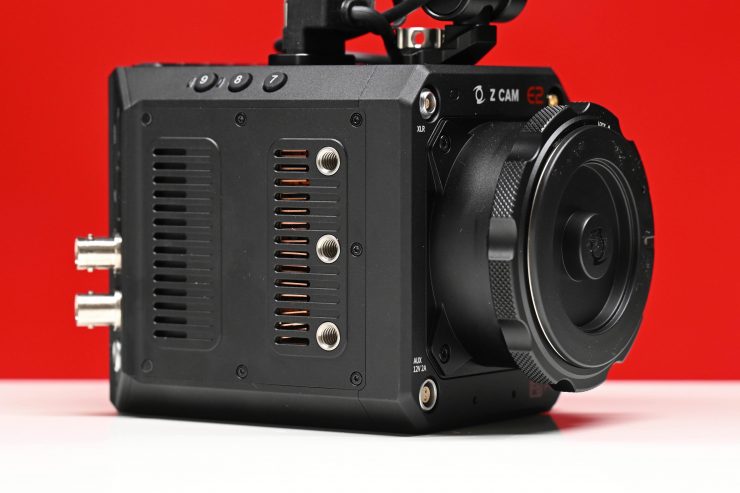
One thing Z CAM has done well is to include a lot of mounting points on the camera. Given its small size and the way some people are likely to use it, this makes a lot of sense.
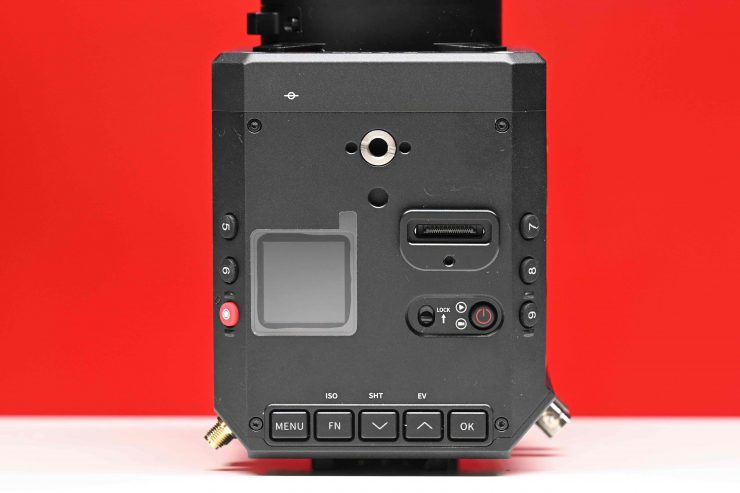
There is one 1/4-20″ thread with locating pins on the top of the camera where you mount the included monitor.
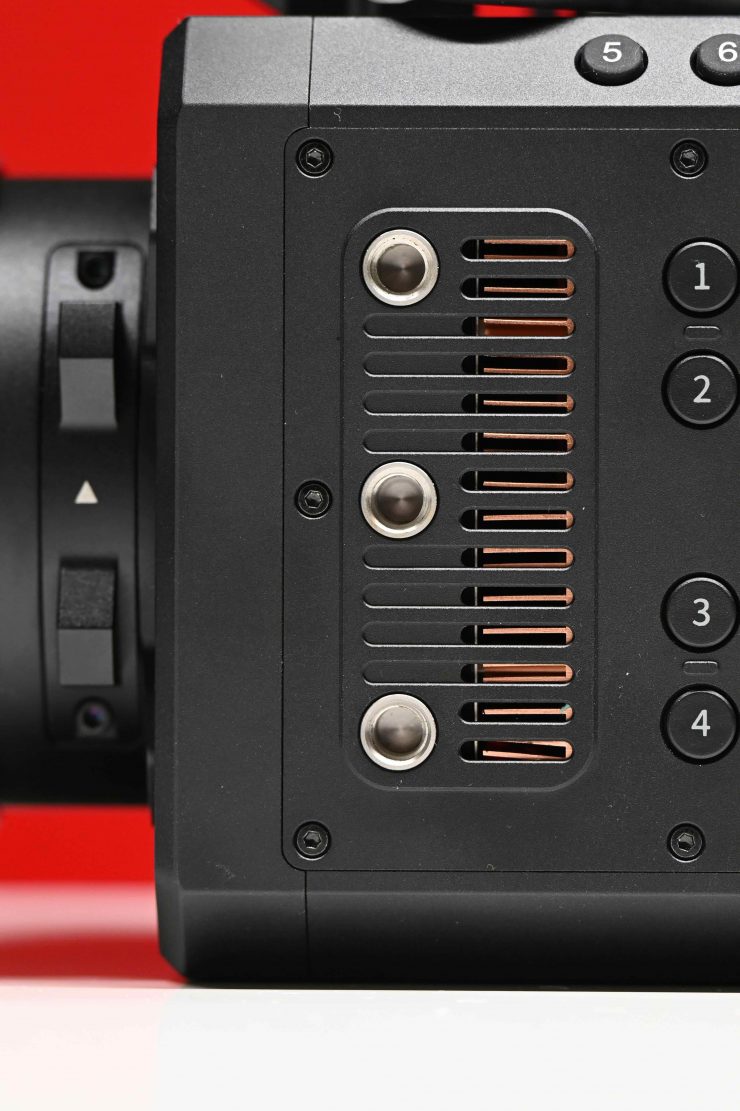
On both the left and right-hand side of the camera body there are three 1/4-20″ threads.

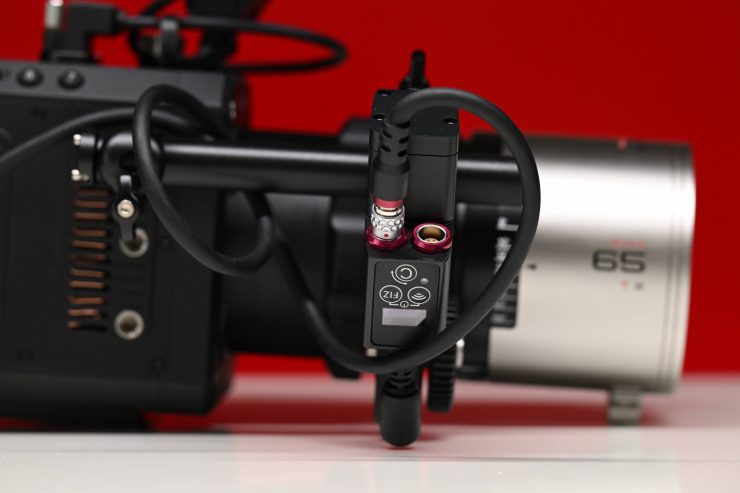
I used one of these side mounting points to attach a Wooden Camera 15mm rod clamp and rod so I could run a follow-focus motor.
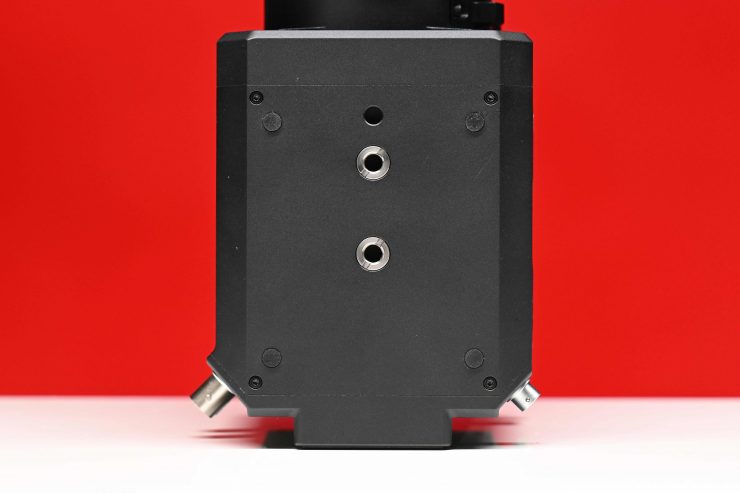
On the bottom of the camera, there are two 1/4-20″ threads.
Ease of use & operation
I’m a stickler for wanting to use cameras that are easy to control and operate. There is nothing worse on a camera than confusing menus and badly labeled or placed buttons and switches. So how does the Z CAM E2-F6-Pro fare?
The camera is reasonably easy to use and operate, and I think the touchscreen monitor that features full camera control capabilities is a big part of the reason why. The true test of a well-designed operating system is that users should be able to turn the camera on and get up and running within 5 minutes of using it for the first time. Operating the E2-F6-Pro is pretty straightforward and fairly intuitive. Even without a manual, you can work it out quickly.
I will talk about the menu system and operation system in the next section, but I like how Z CAM has thought closely about how people are likely to use and control it.
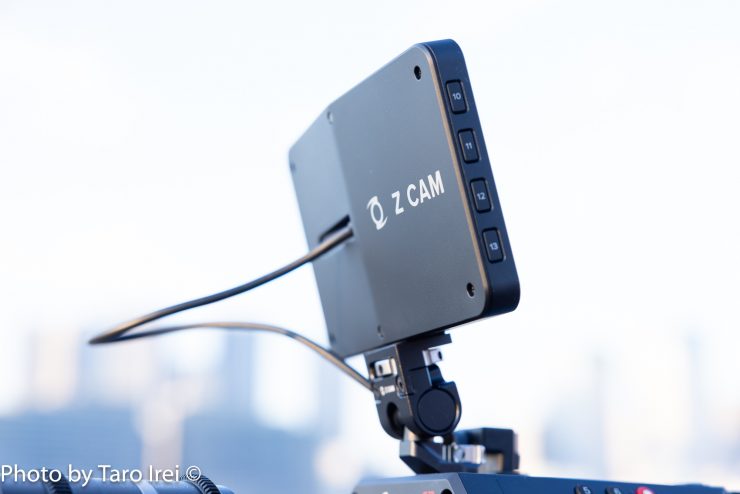
The E2-F6-Pro doesn’t have a ton of physical buttons on the body like you find on a lot of Japanese cameras, which I like. I don’t like cameras with tons of buttons as it can end up being overly confusing. In saying that, the E2-F6-Pro does have 13 user-assignable buttons (if you include the four that are on the monitor).
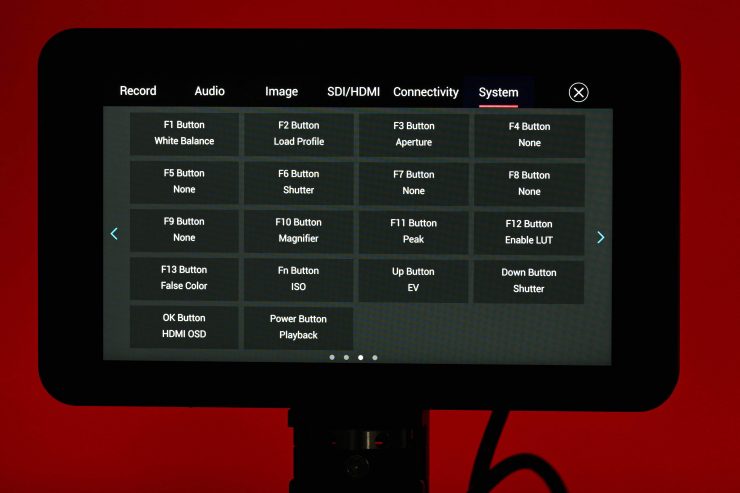
To assign what these buttons do you simply go into the menu to System and scroll to the third page.
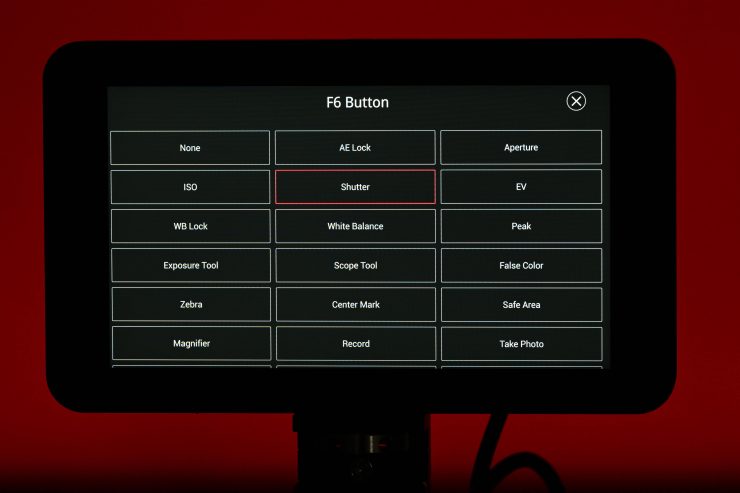
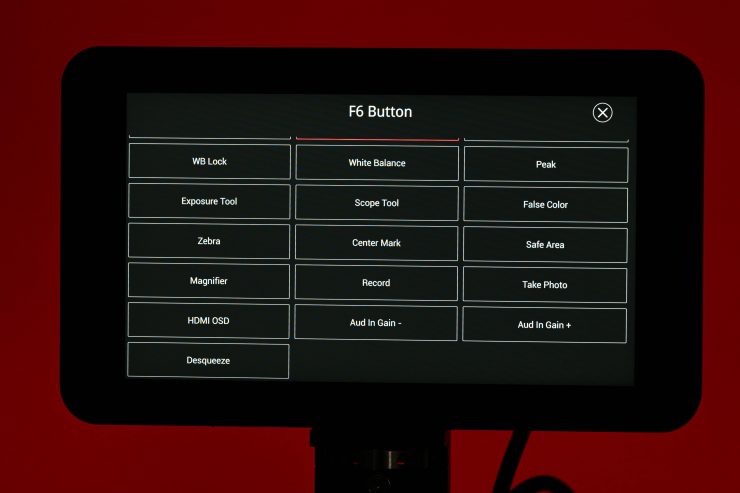
You then can touch on the one you want to assign and then choose from a large array of options.
While Z CAM has made it easy to assign what these buttons do, the only problem I had was that it is very hard to remember what they all do once you do assign them!
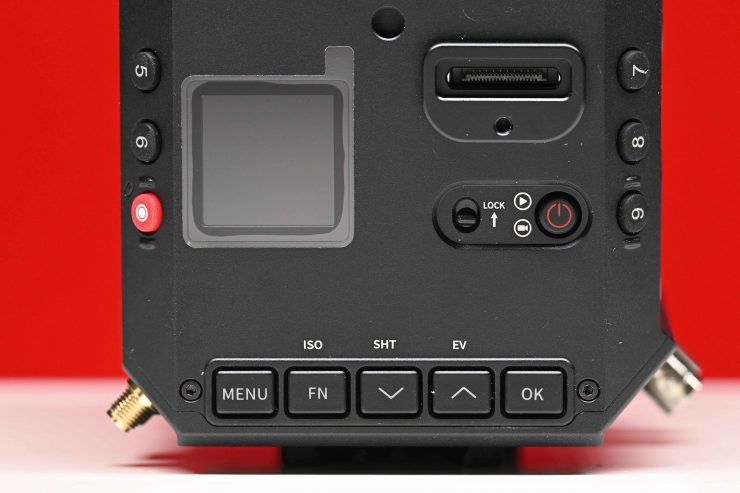
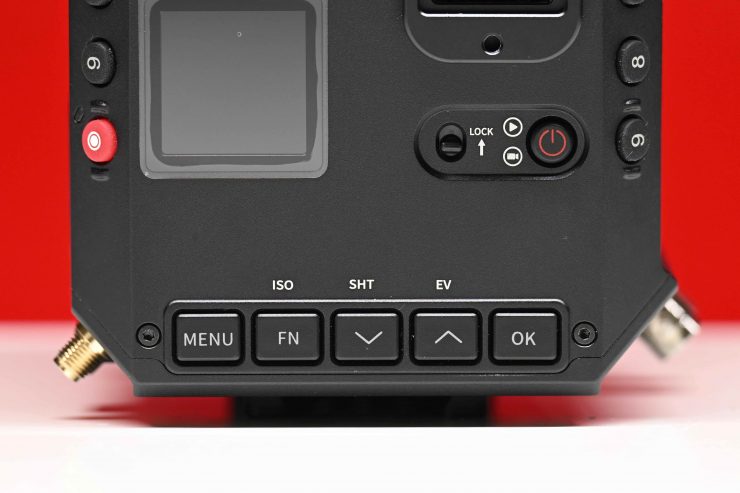
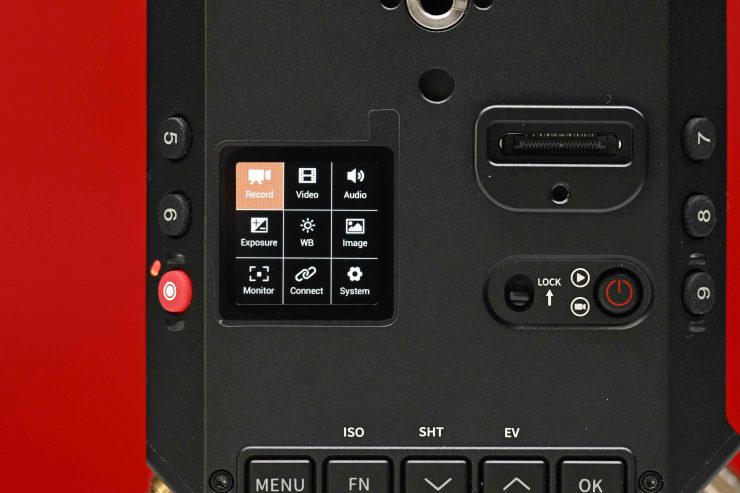
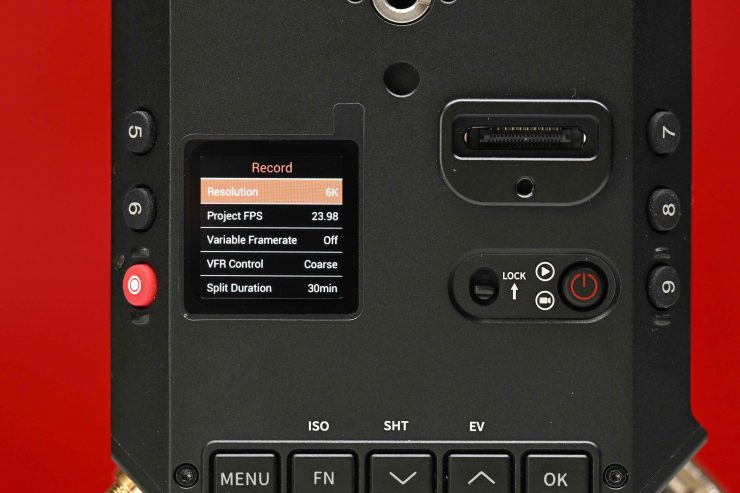
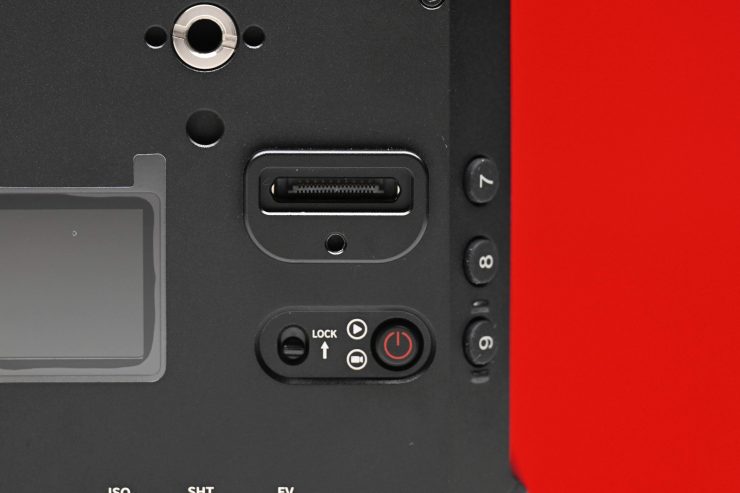
On the camera body itself, you can change certain parameters quickly by pressing their corresponding buttons. These parameters are limited to ISO, Shutter, and EV. However, you can assign these buttons to other functions if you want.
Once you press the ISO or Shutter button the indicated value will turn orange. When it does, you can then change the value by using the up and down buttons. To set the value you then press either the Ok or Menu buttons.
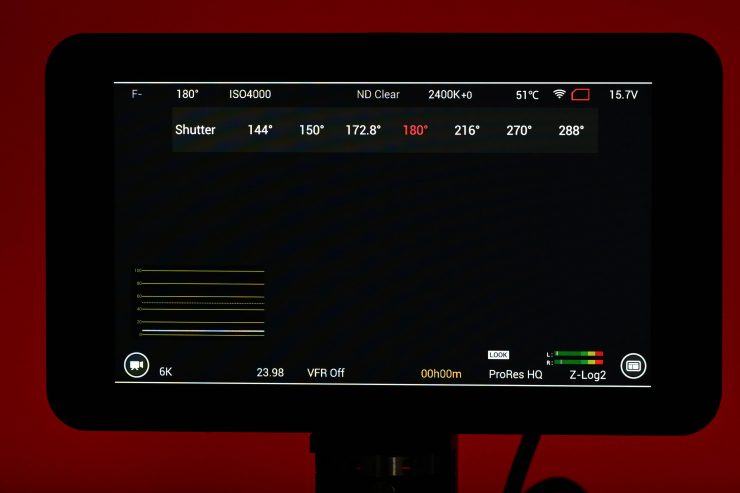
If you are using the touchscreen monitor you can make changes quickly to most operating parameters by simply touching on the screen and then adjusting the value. In the example above, if I want to change the shutter speed I simply press the shutter value on the screen and then make my adjustment.

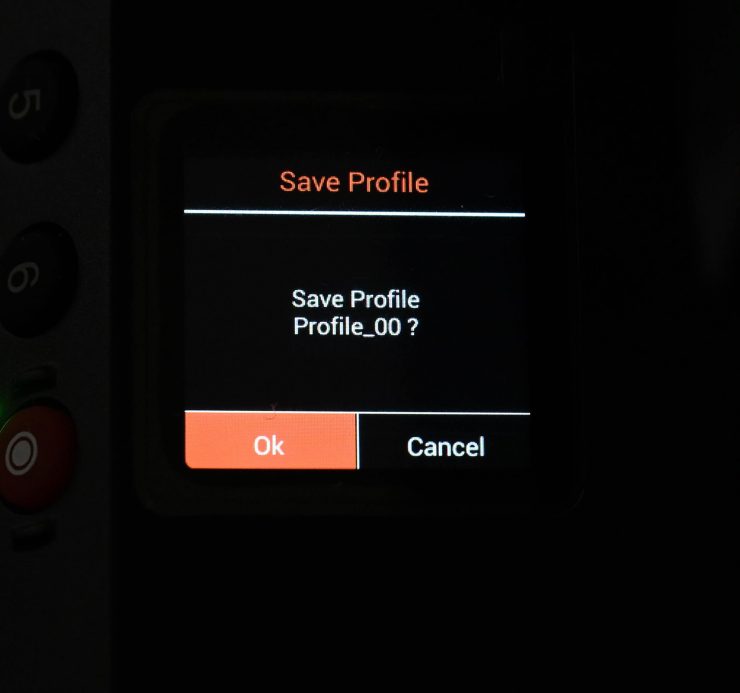
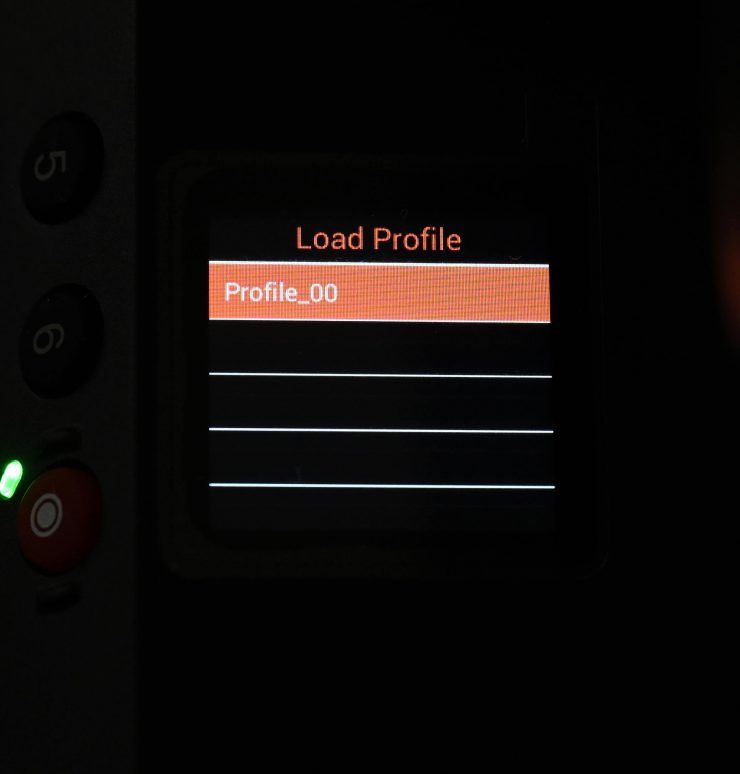
You can save your own user profiles to the camera and they recall them, but I couldn’t work out or see a way of how to change the names of the profiles.
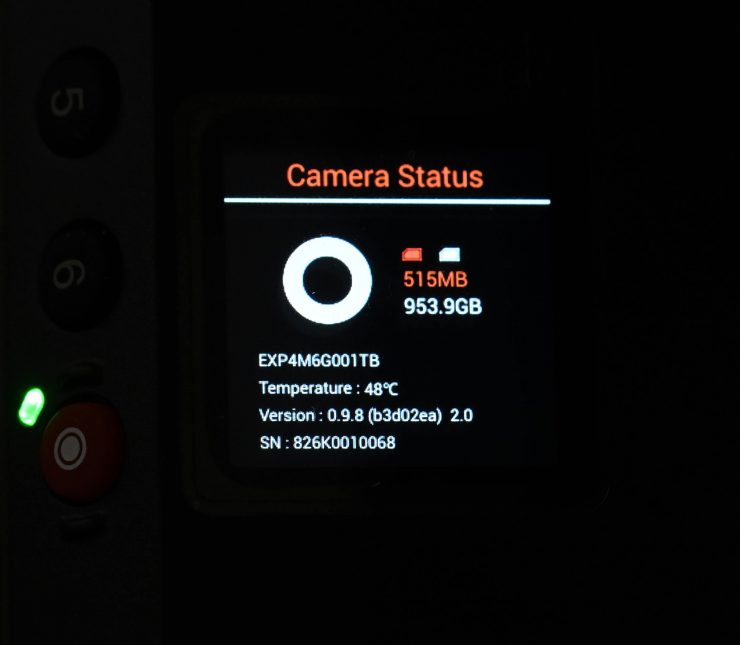
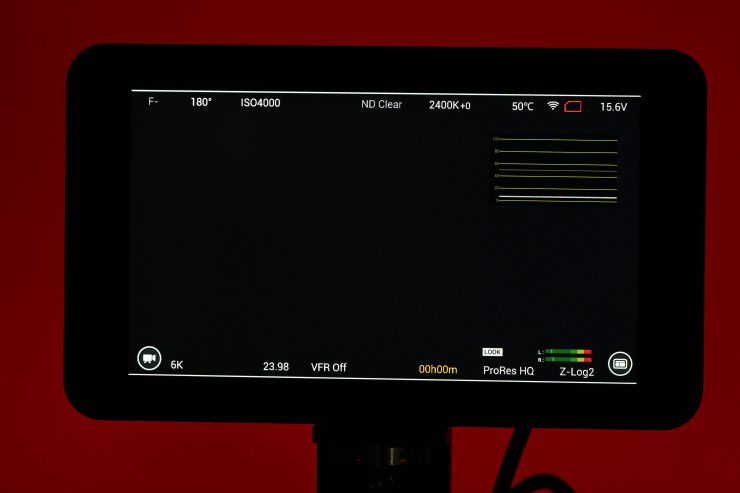
You can also bring up a Camera Status screen that gives you information about how much media space is remaining, the operating temperature of the screen, your camera’s serial number and firmware version, etc.
Menu System
The menu system certainly is a lot less complicated than some of the offerings from Sony, Canon, and Panasonic. Like any camera, the more I used it, the more comfortable I got with the controls and menu.
You can access the menu and make changes to the camera in three different ways:
- Directly on the camera
- On the touchscreen monitor
- Via the Z CAM Camera app for iOS/Android
I really like how Z CAM gives you all of these options to control and use the camera.
Making changes on the camera
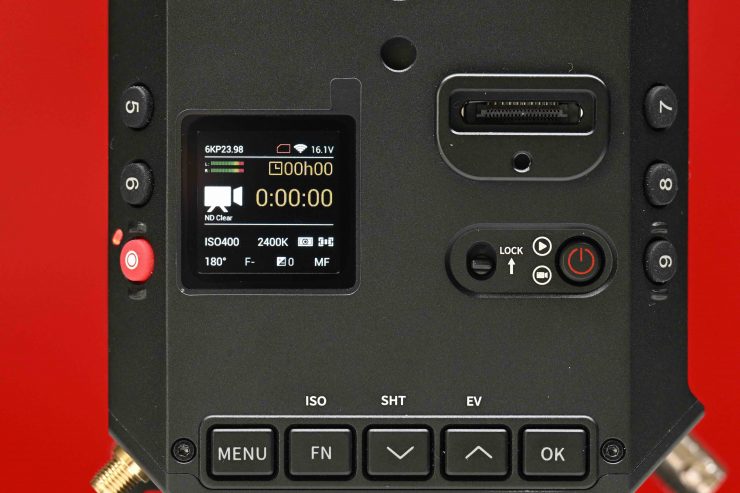
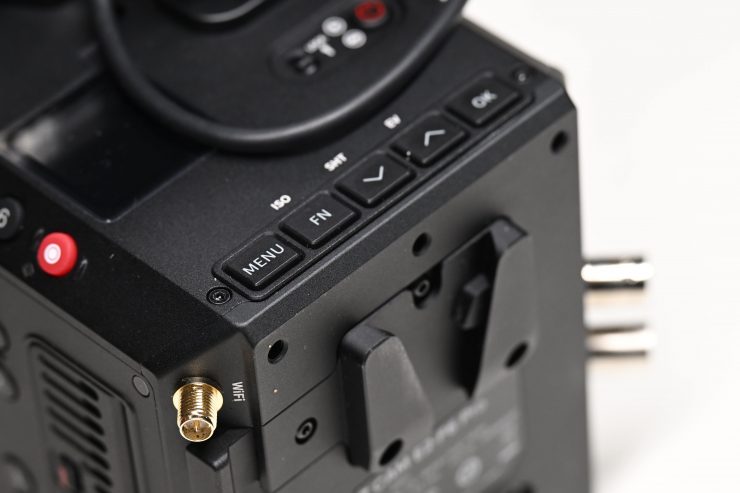
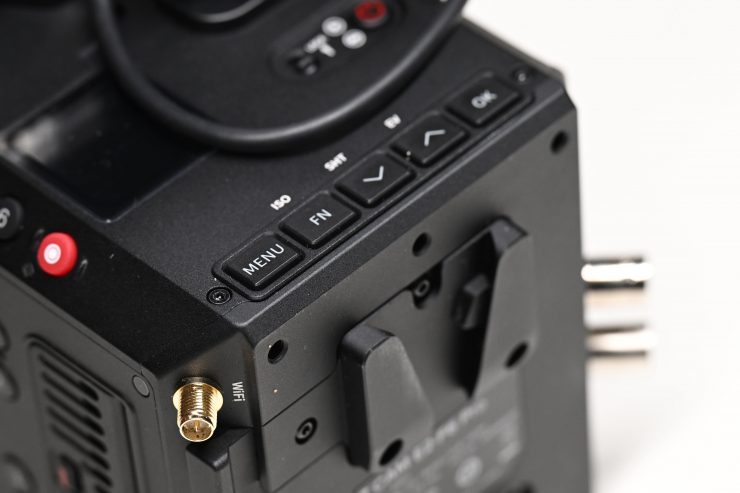
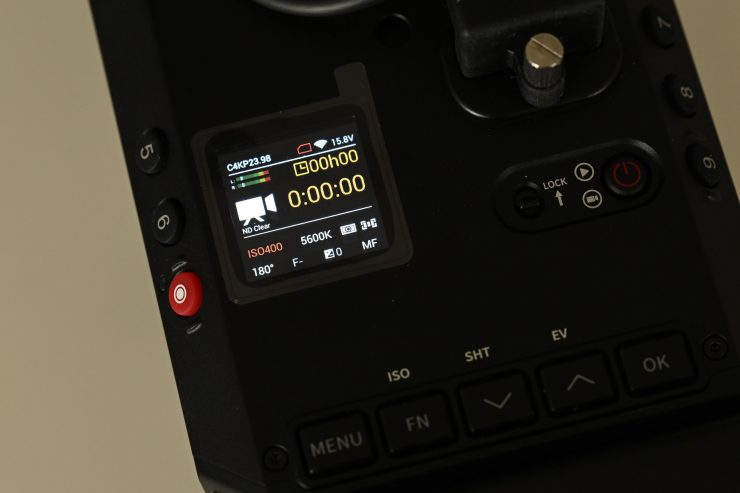
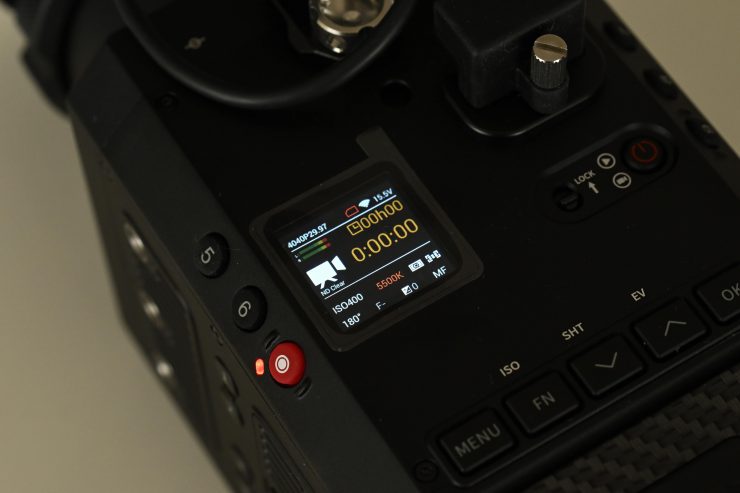
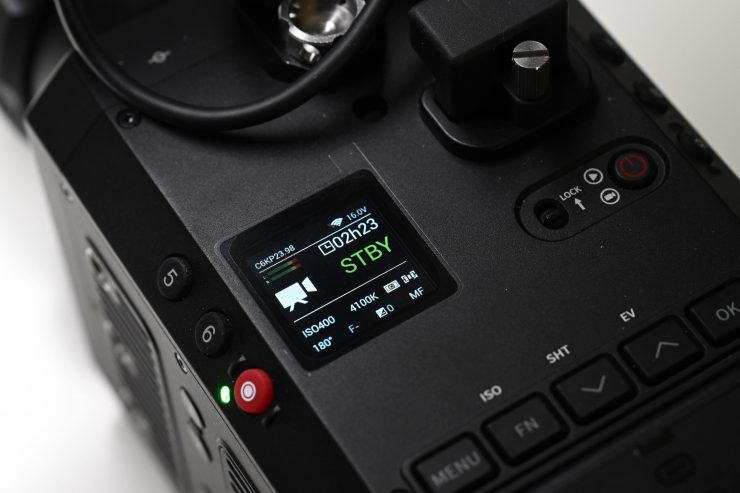
The E2-F6-Pro has a small color LCD display on the top of the camera body that shows you key operating parameters.
There are 5 buttons also on top of the camera that allow you to access the menu to toggle through and make changes to the camera’s operating parameters. Making changes is reasonably straightforward and easy to do, but it is more time-consuming and fiddly than making the changes via the monitor.
Making changes using the touchscreen monitor
Using the touchscreen monitor is by far the easiest way to control and operate the camera. As so many of us are used to touchscreen smartphones and tablets, it is a very intuitive experience to control and operate the camera using this method.
Making changes using the Z CAM Camera App
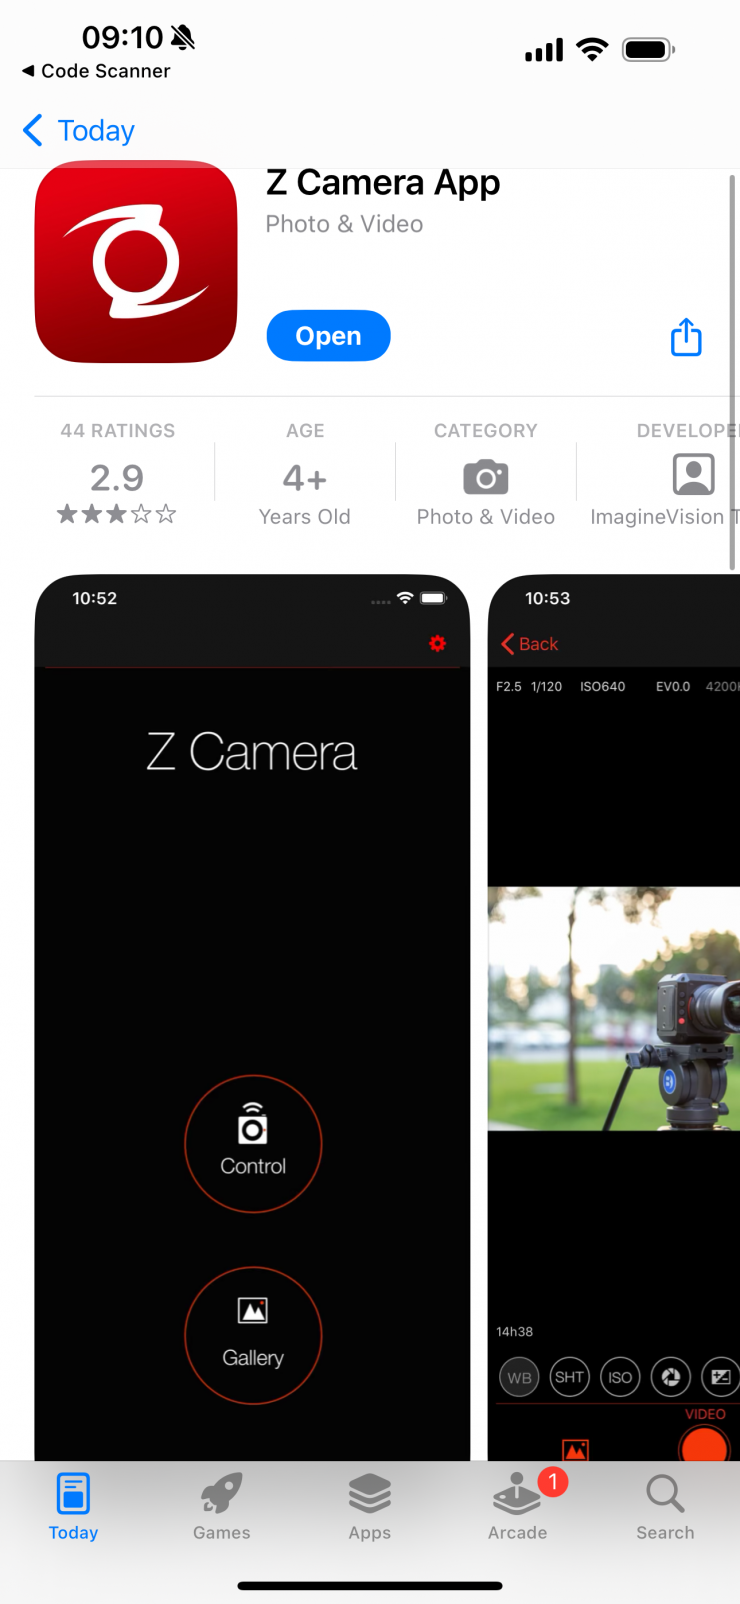
Z CAM has a free Camera App that can be downloaded for iOS or Android devices.
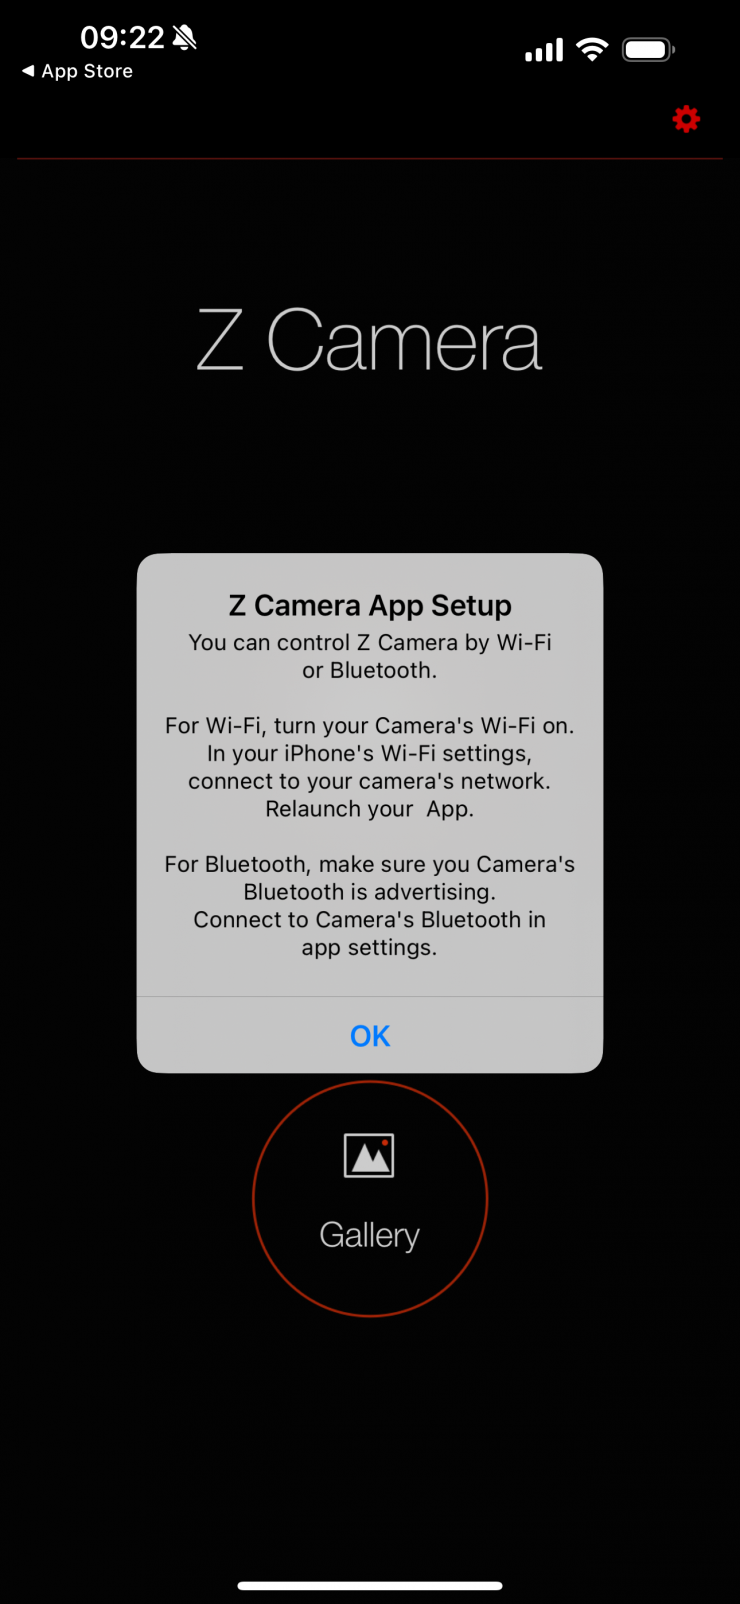
You have the option to either control the camera through Wi-Fi or Bluetooth.
To use Wi-Fi you need to turn it on in the menu. Once you do the camera will generate its own Wi-Fi network. You then connect up to this network on your smart device (the default password is 12345678). The next step is to launch the app.
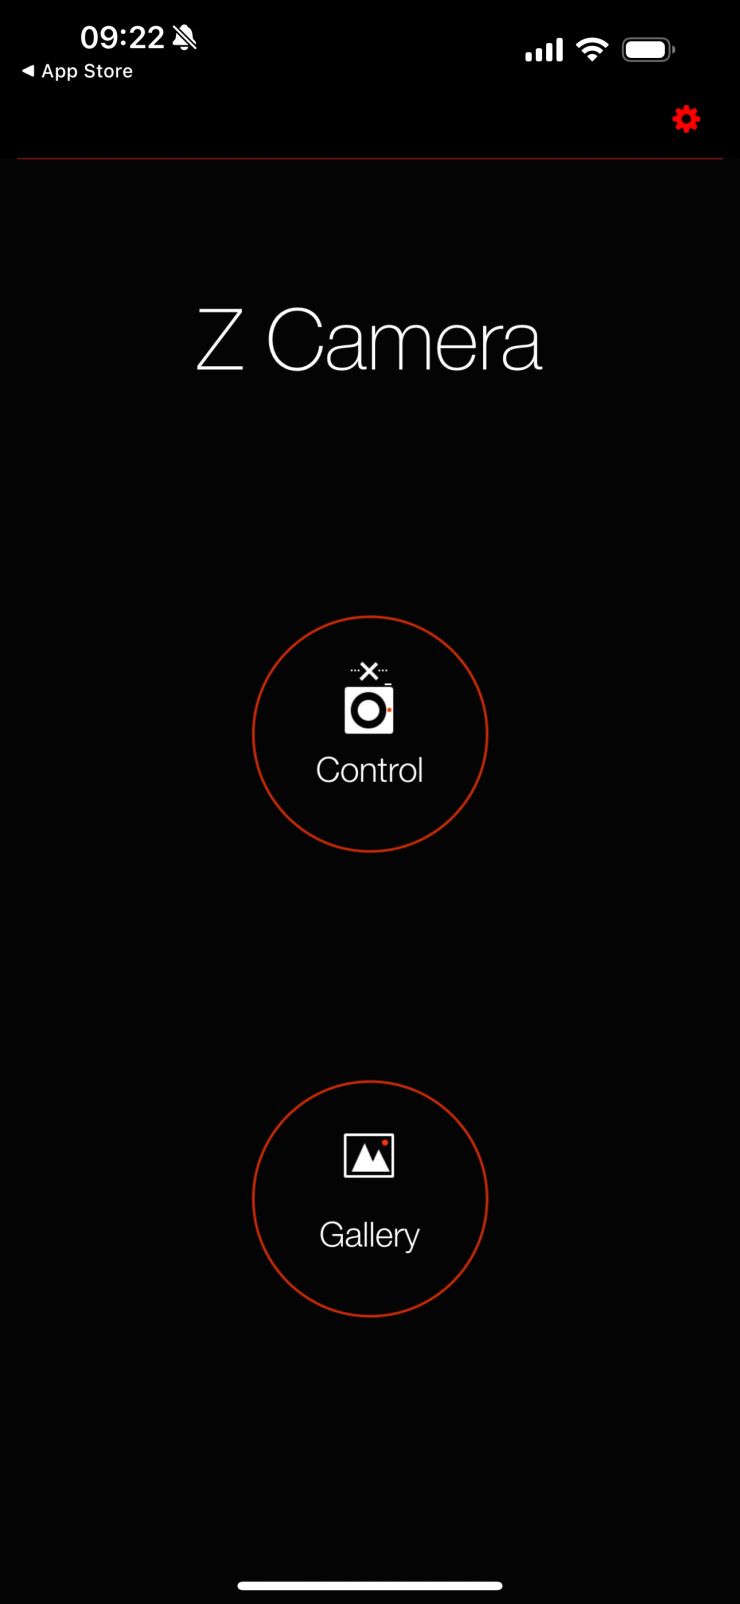
You then press control on the app.
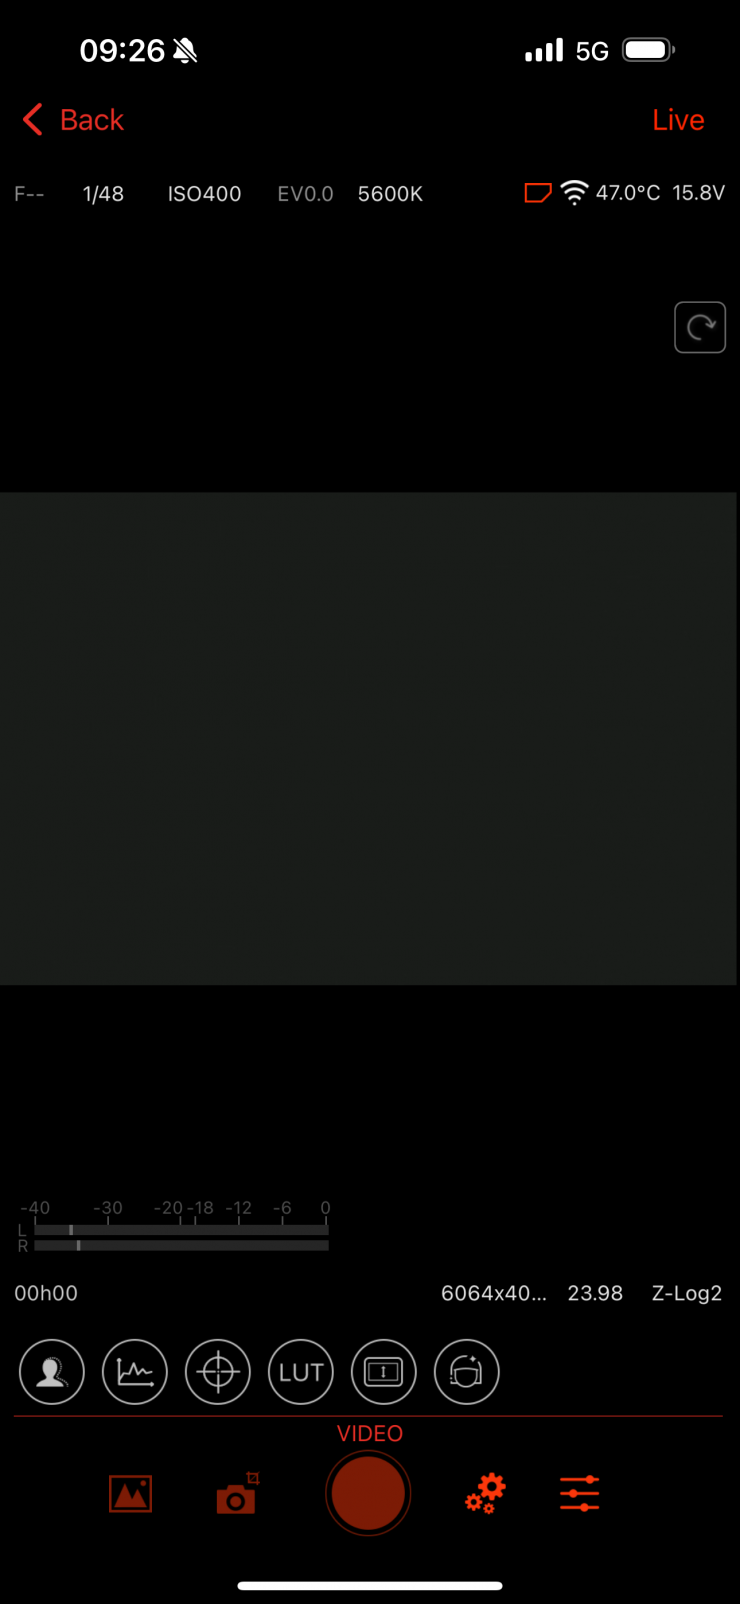
After pressing control you will see the following screen.
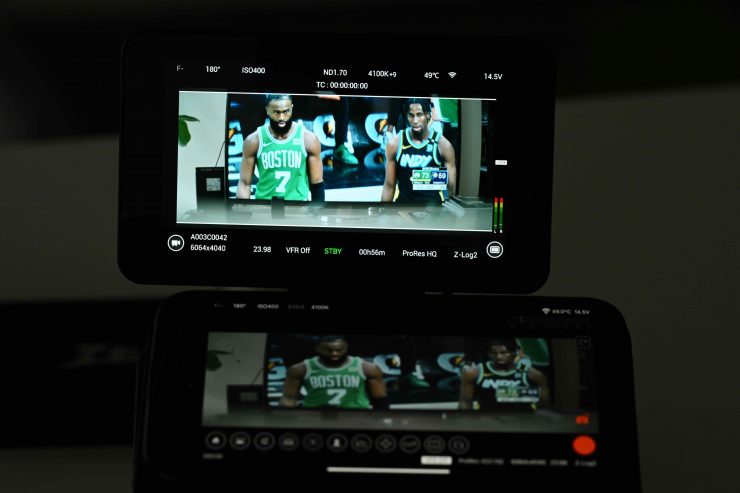
Having the ability to see a live image is a nice touch and you could use your smartphone as a monitor if you wanted to. Yes, there is a slight delay, but it is great if all you need to do it to check framing, exposure, etc. It also allows others to be able to see an image remotely, which is also handy.
Above you can see a quick video showing you how the app works.
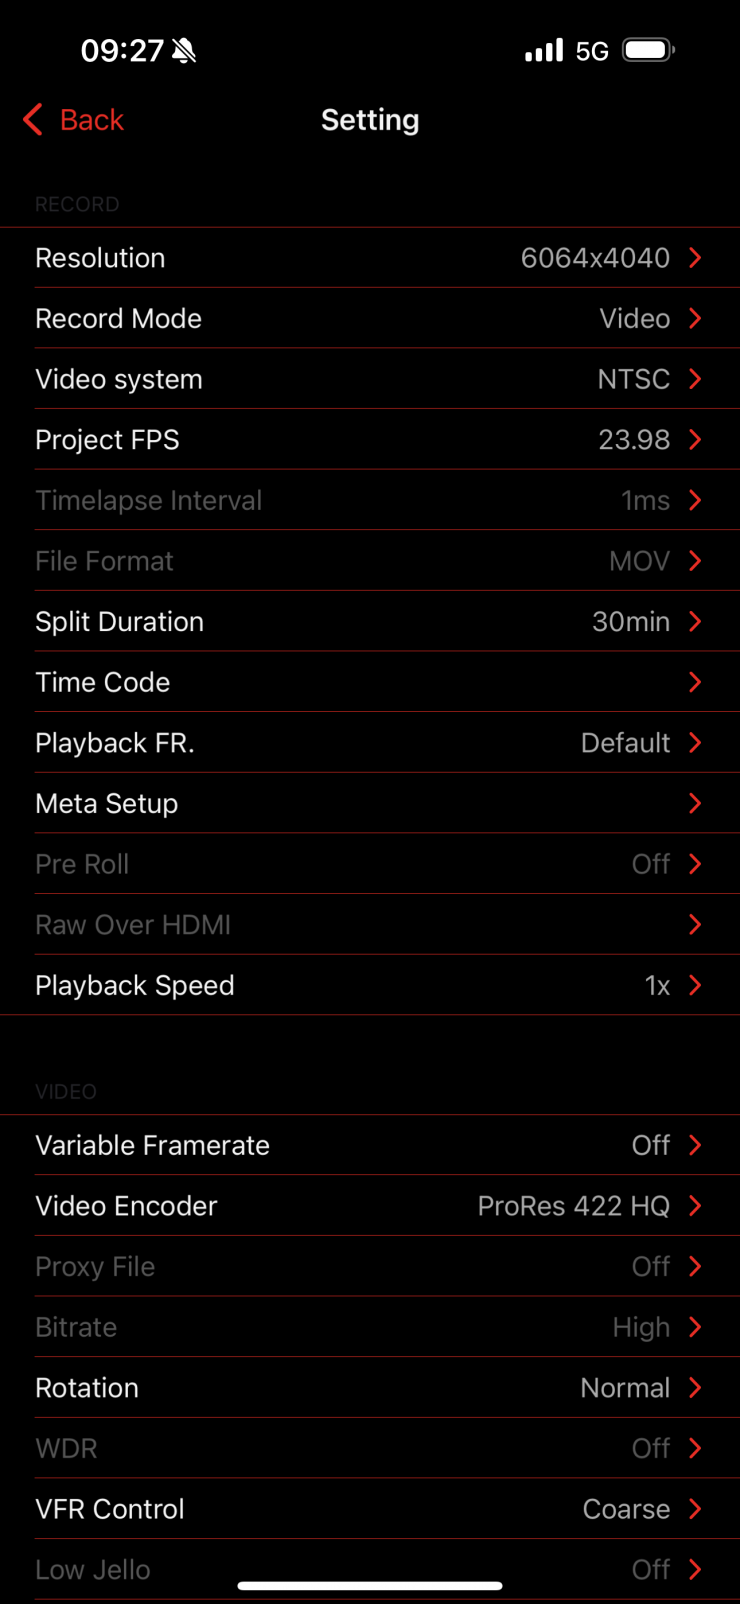
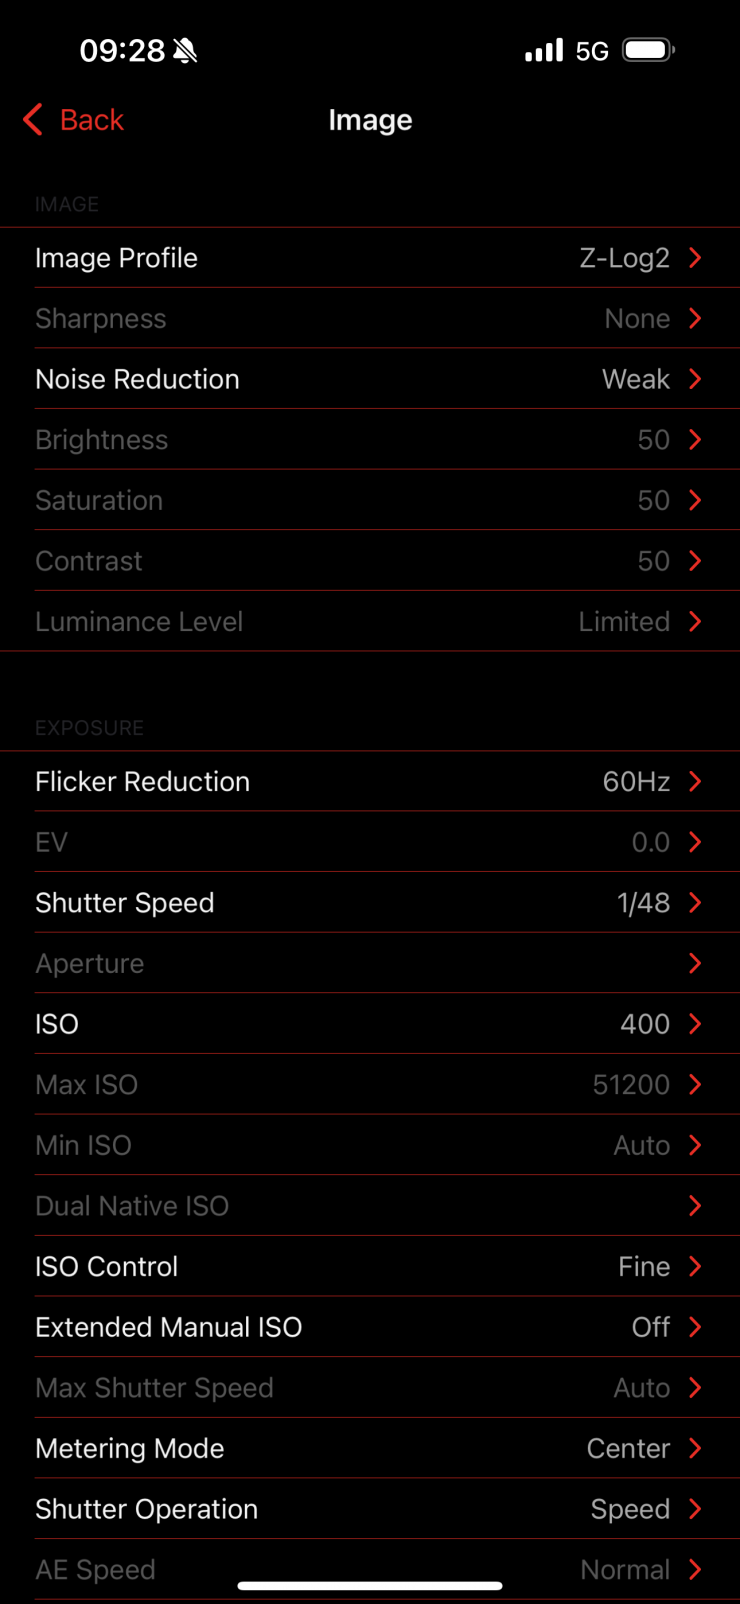
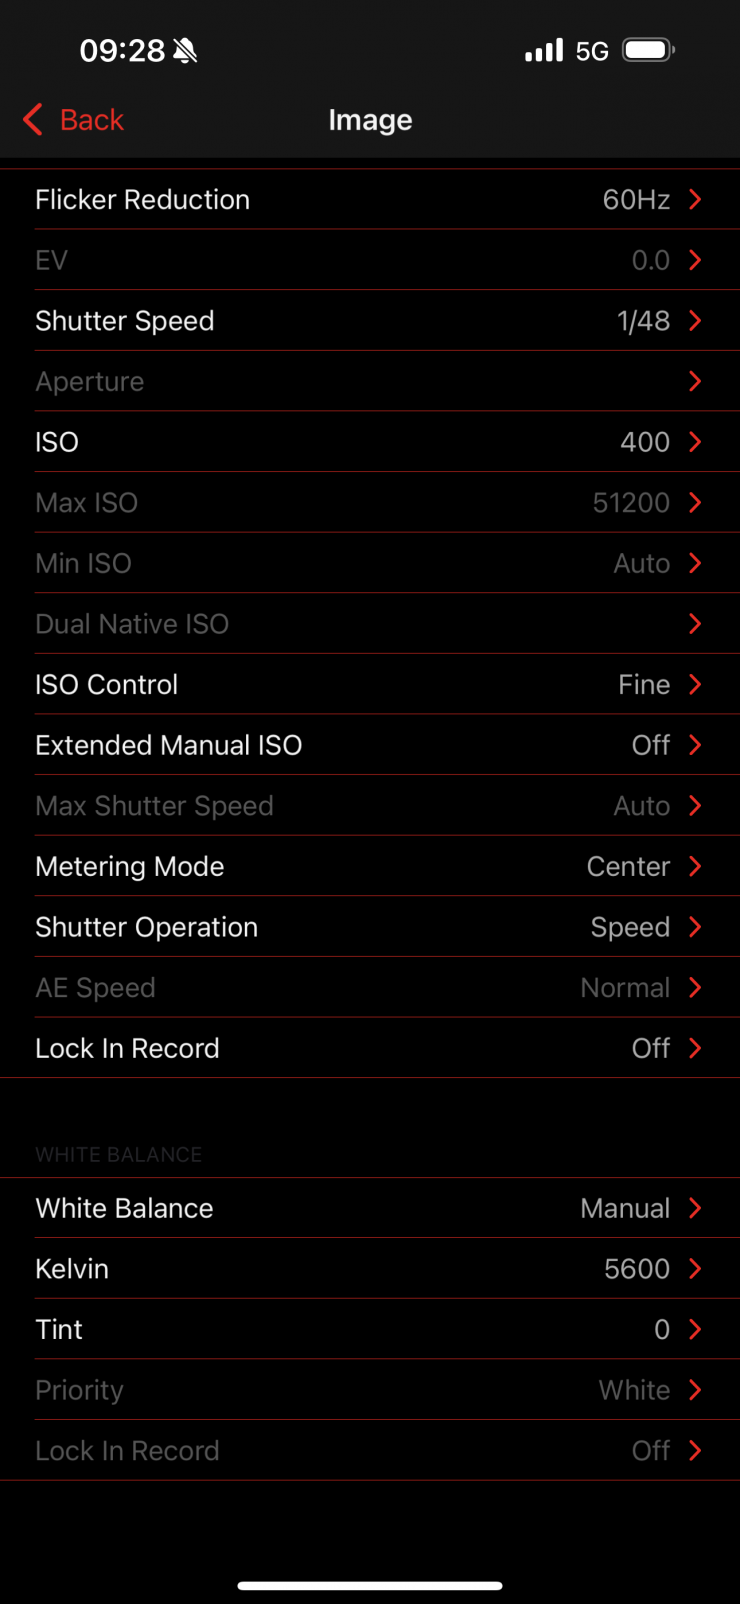
If you click on the Settings icon you get taken to a screen where you can make changes to the recording resolution, frame rate, codec, noise reduction, ISO, shutter speed, etc.
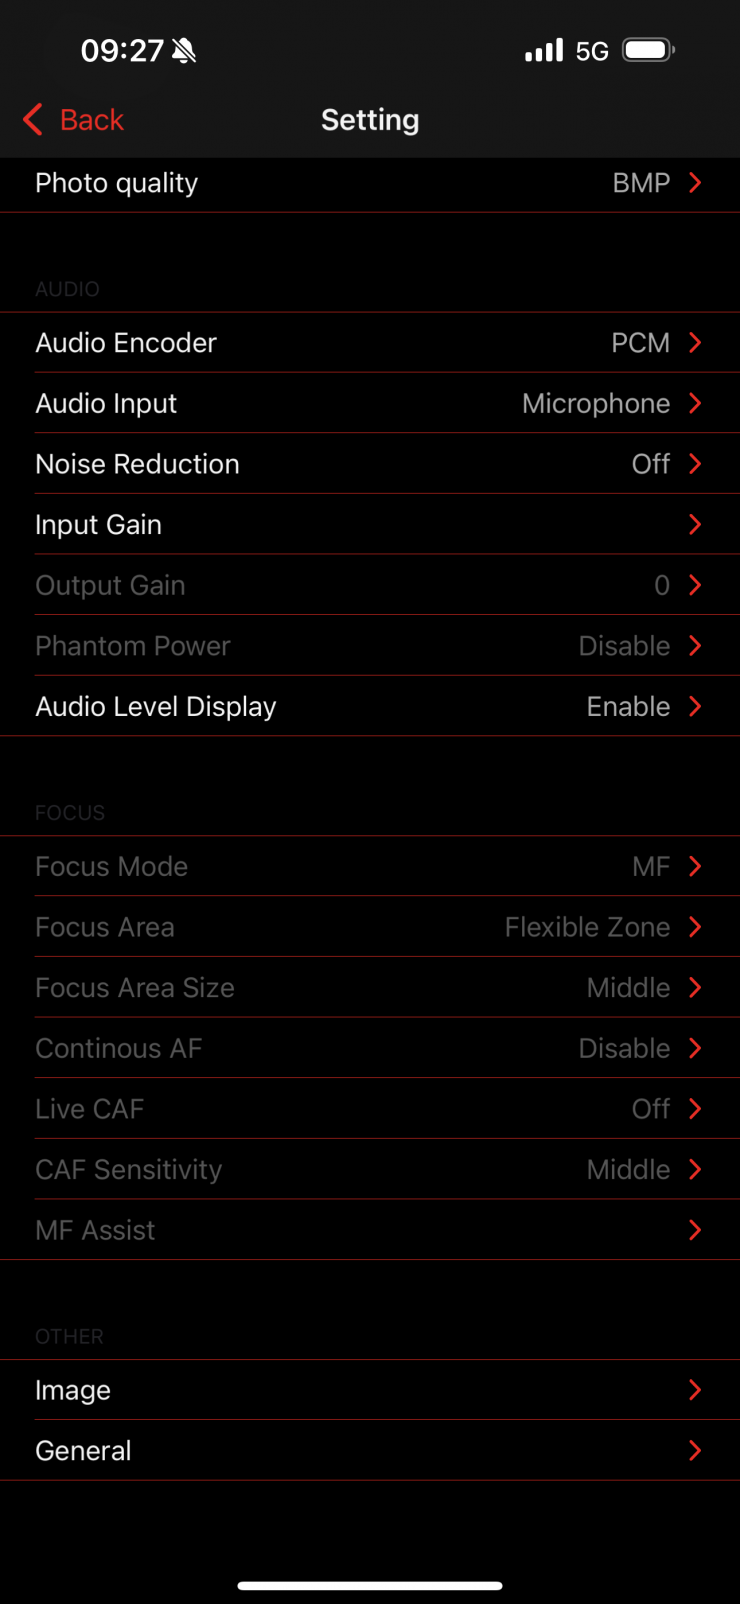
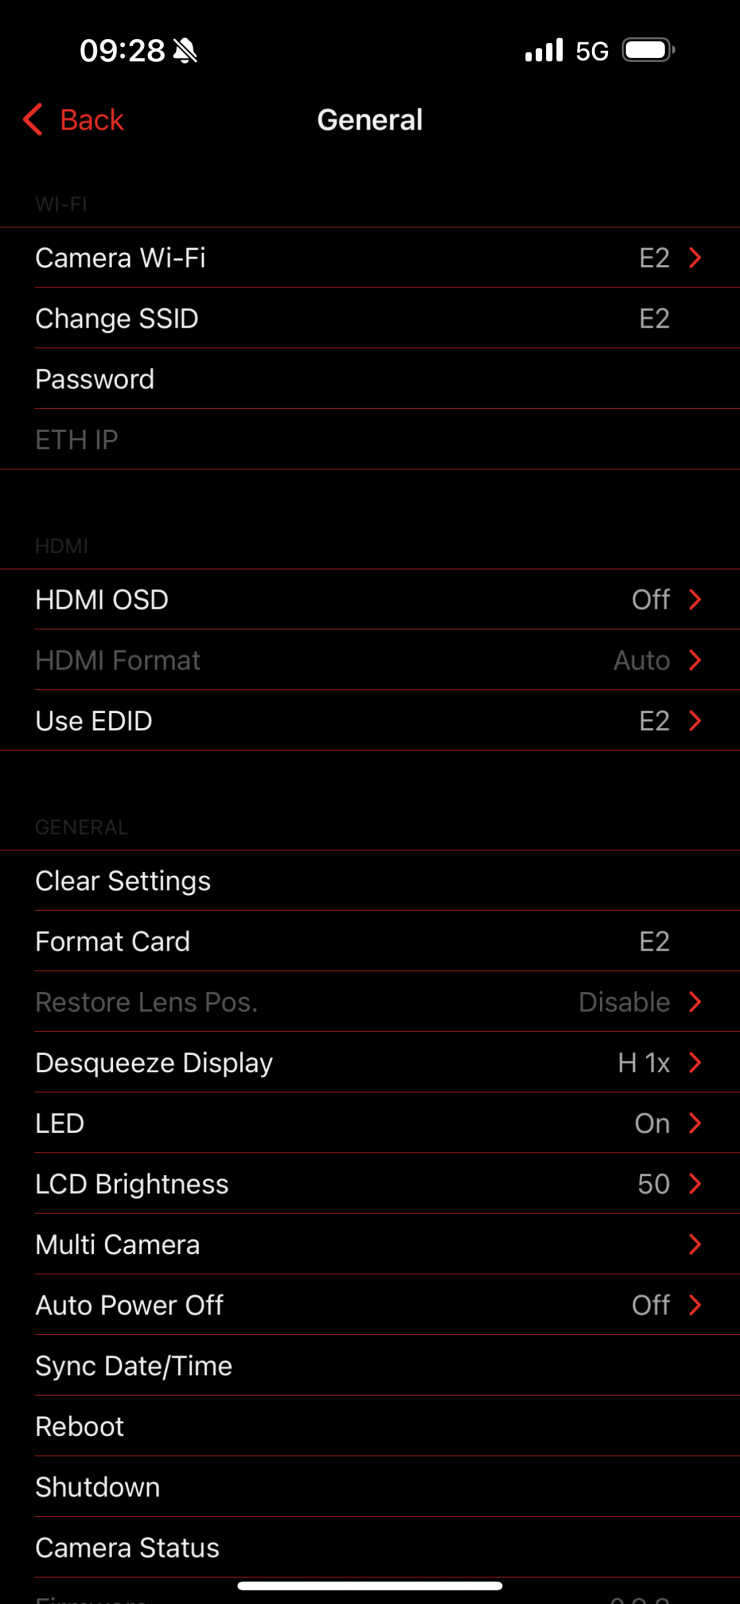
As well as the video settings you can also make changes to audio settings, Wi-Fi, LCD, etc.
Playback/Recording Modes
To access recorded files in the playback mode you need to re-boot the camera. While there is nothing wrong with this, if you are still in the playback mode and you turn the camera off, next time it boots up it will still be in the playback mode and not the recording mode. This is something you need to be aware of.
Power

The Z CAM E2-F6 Pro features a built-in V-mount battery plate that you can use to power the camera. The camera only draws 50W, so you can get a significant amount of run time from flight-safe camera batteries.
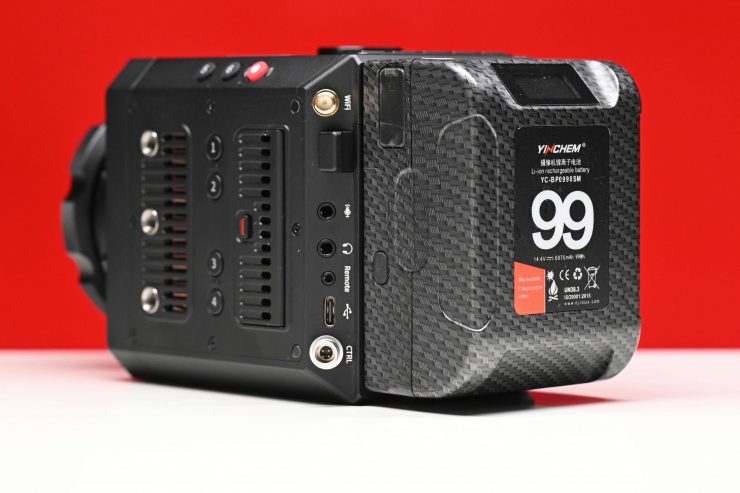
A 99Wh V-mount battery can power the camera for quite a long time.
You could also power the camera via the DC 12~18V (2-pin LEMO socket), with LEMO connector.
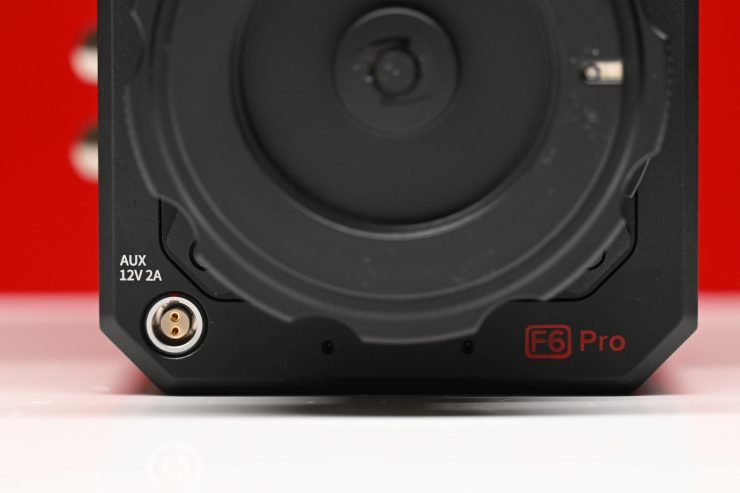
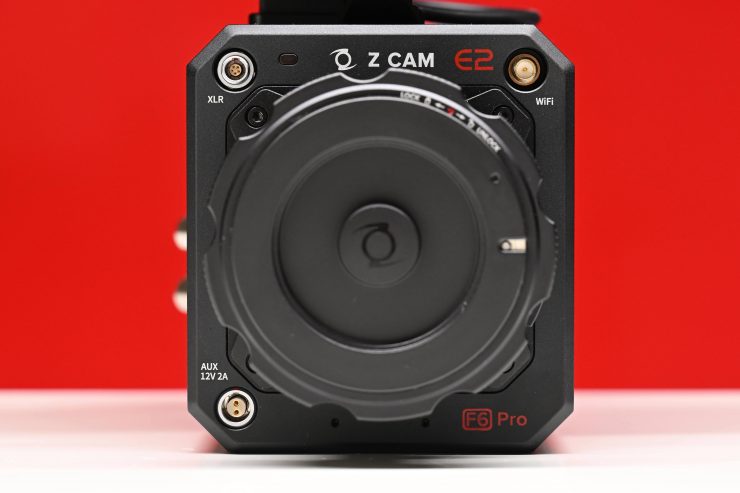
As far as power outputs are concerned you only have a single DC 12V 2A max (2-pin LEMO socket). This is located right at the front of the camera, which is arguably not necessarily the best place for it to be.
If you need to power multiple accessories you would either need to use a D-tap from a V-mount battery or run an actual battery for a third-party monitor/EVF.
You could argue that it would have made more sense to use a Sony NP-F battery plate instead, but with so many small-sized and affordable V-mount batteries now on the market, I think Z CAM made the right choice.
The caveat with very small-sized cameras without additional modules, such as the Z CAM E2-F6 Pro, is that they don’t tend to have many power outputs. This is something you need to keep in mind if you are someone who needs to run multiple accessories on your camera.
Boot-up Time
The Z CAM E2-F6 Pro takes around 10 seconds from the time you power it on until you get a picture up and can start to record. This is reasonably quick and arguably allows it to be used for filming events, news, or documentaries where often you need to fire up the camera quickly. The camera doesn’t draw a ton of power so my advice would be to just leave it turned on and fired up if you are filming applications where you may need to get a shot in a hurry.
Whether a quick boot-up time is important or relevant to you will depend on what type of work you do.
Exposure Tools
White Balance
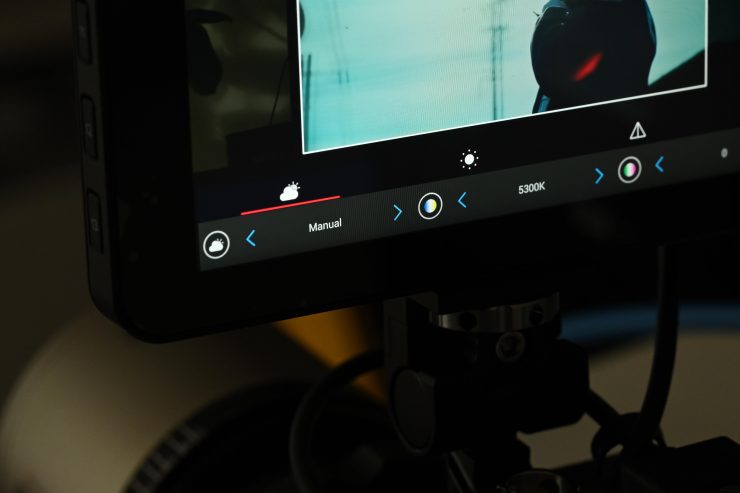
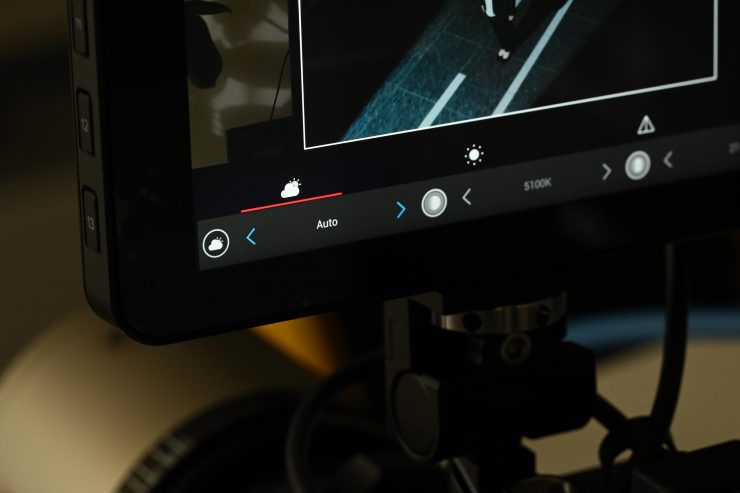
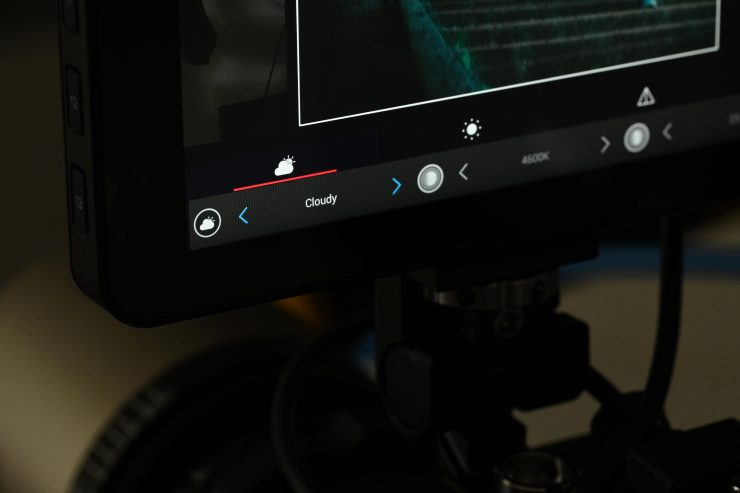
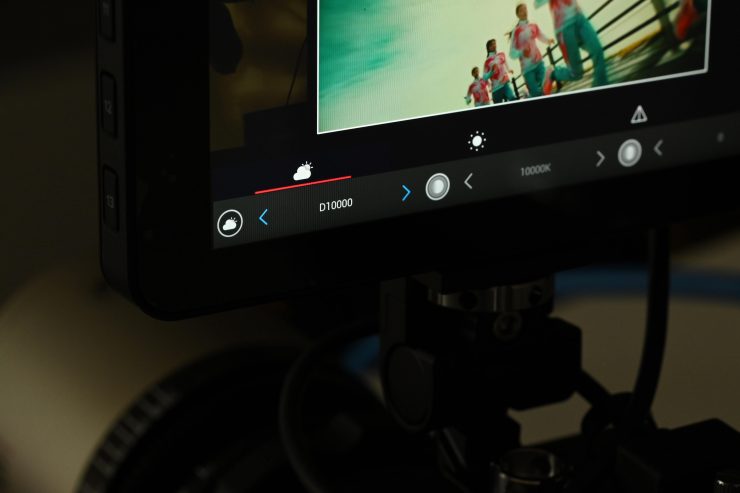
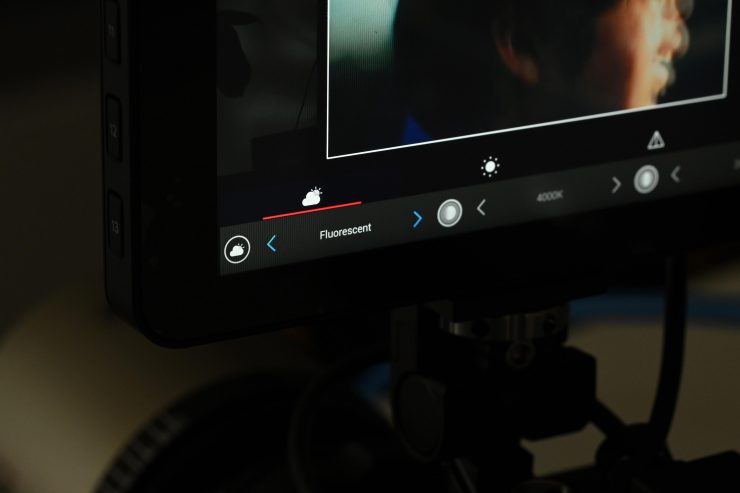
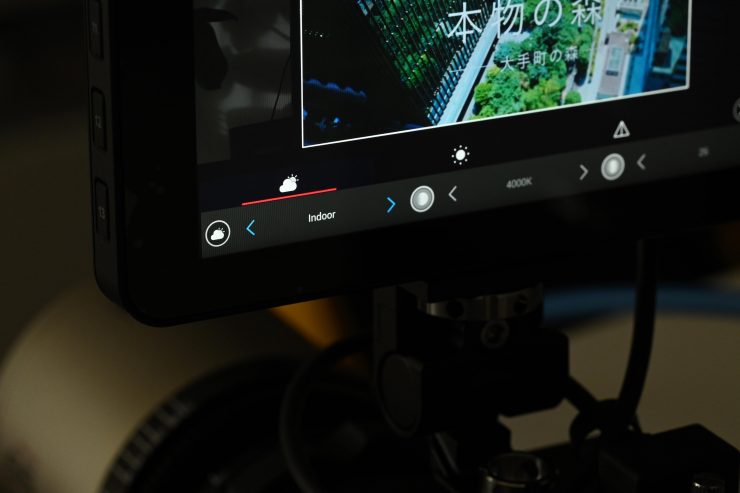
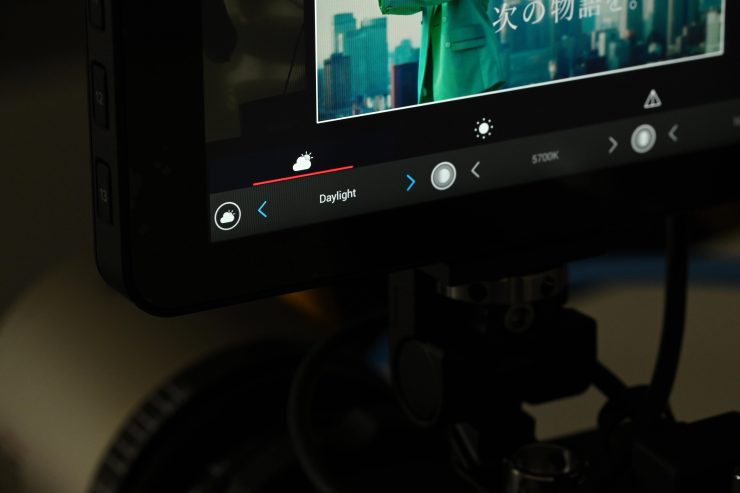
The camera has Auto, Preset, Manual (2300K up to 30,000K) white balance options. These preset values go up or down in 100K increments. I do wish that you could make increments in 10K, because sometimes 100K can be too much.
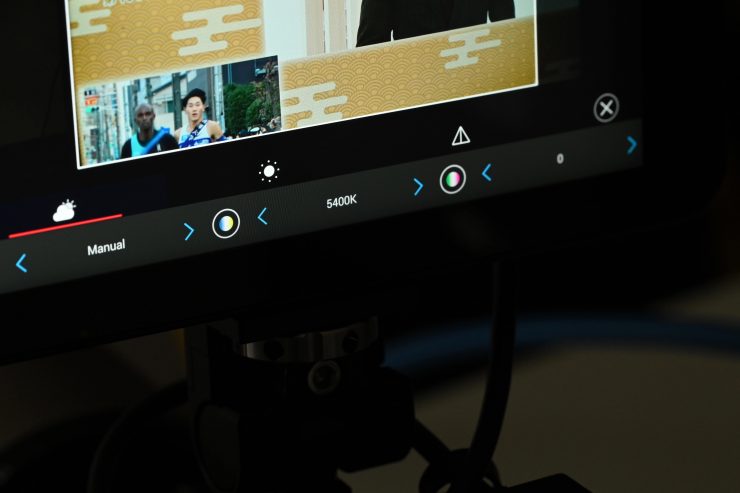
In the manual mode, you can choose the Kelvin value and also adjust the +/- G/M bias.
Despite having preset white balance options, the camera doesn’t have the ability to store more than one manual WB setting. I would have liked to have seen at least three user presets for white balance made available.

You can assign any function button to WB.
When you press the assigned function button, the WB display on the camera’s LED screen will turn orange and then you can manually change the value. The problem I found (and this is a little odd), is that the WB adjustment page doesn’t come up on the monitor when you do this, it only comes up on the camera’s LCD.
Originally I couldn’t find any way of actually doing your own manual WB. What I ended up discovering is that if you have WB assigned to a function button and you press and hold that button you can do a manual balance. I didn’t find this process overly intuitive because you don’t get any indication on the screen saying a WB is being done. This is something I would like to see improved and it would also be good to be able to do a manual WB directly from the monitor as well.
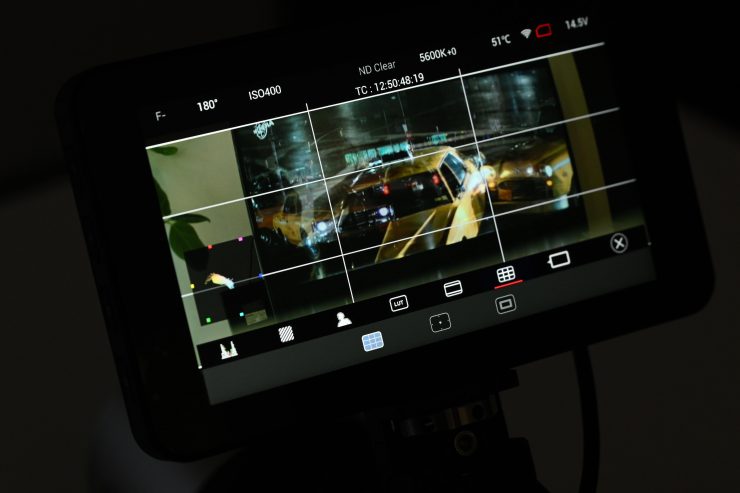
Waveform & Zebras
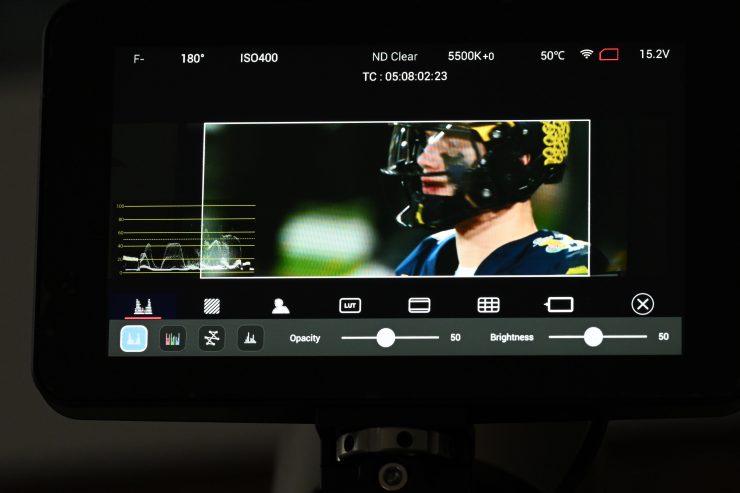
LUT Applied 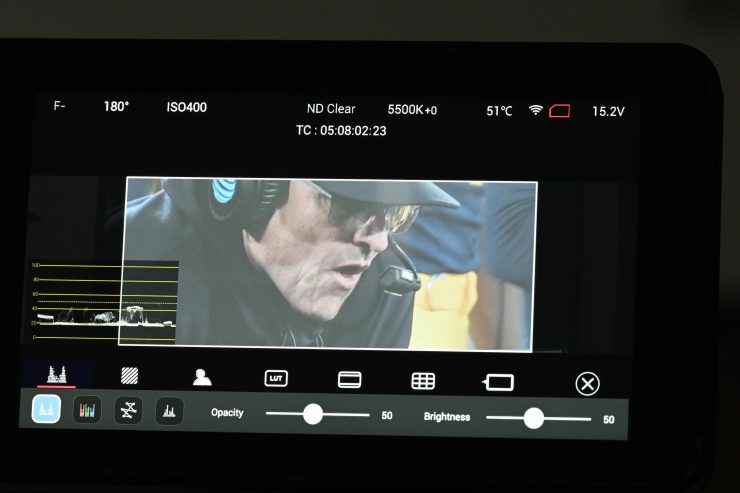
LOG
You can bring up a waveform on the display. The waveform display can be moved by simply dragging it with your finger. It indicates the brightness of images over the horizontal direction. The waveform shows whatever is being displayed. For example, if you have a LUT selected, the waveform will show the values for that LUT. If you are viewing a LOG image without a LUT it will be different.
What I would have liked to have seen was the ability to change the waveform to display LOG even when you are using a LUT. This would allow you to show the distribution based on the LOG image and not one with a LUT. Why would you want to do this? Well, for example, with the waveform set to LUT, if your waveform goes over 100% you will still probably not be clipping your image. If you could set the waveform to LOG then if the information is exceeding 100% then you will definitely be clipping your image.
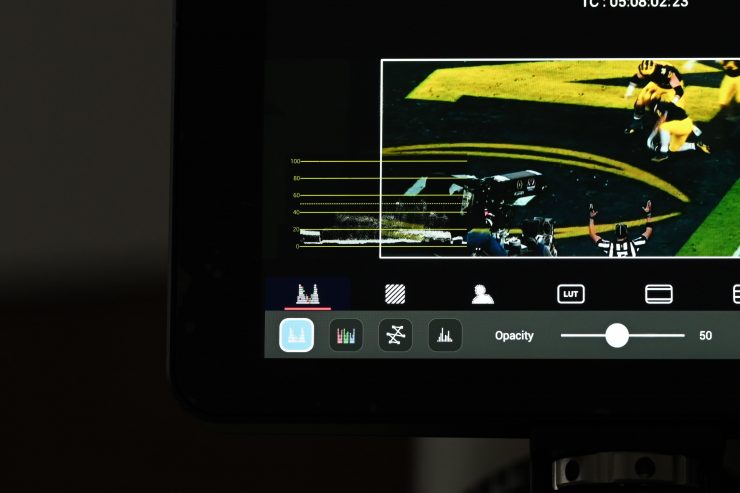
The waveform has a dotted line marked on it showing where 50 IRE is. For exposing ZLog2 correctly, Z CAM states that 40 IRE is where an 18% grey card should be exposed correctly.
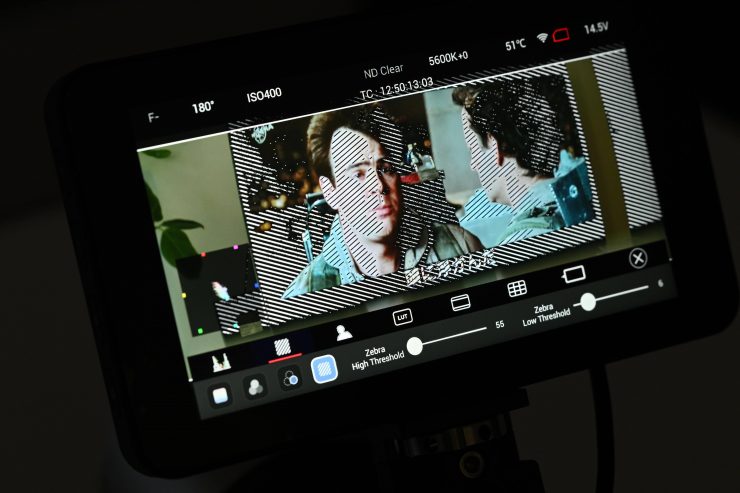
The zebras on the E2-F6-Pro are a very easy way to show overexposed areas in the image.
You can set the zebras anywhere from 0% to 99%. You can also set the low and high thresholds separately.
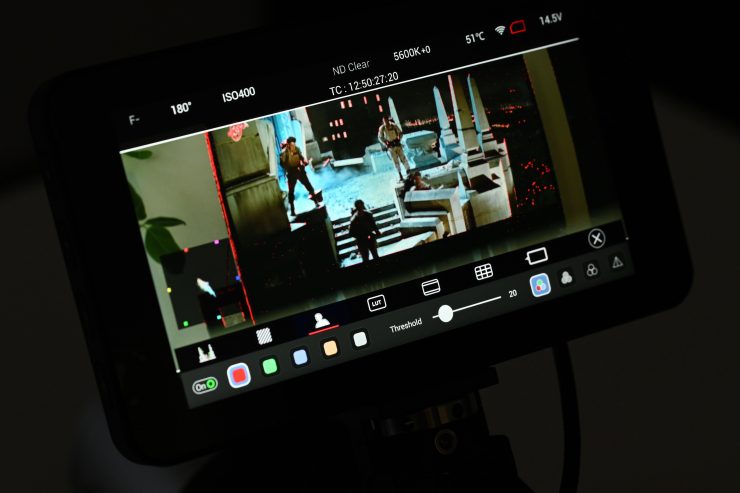
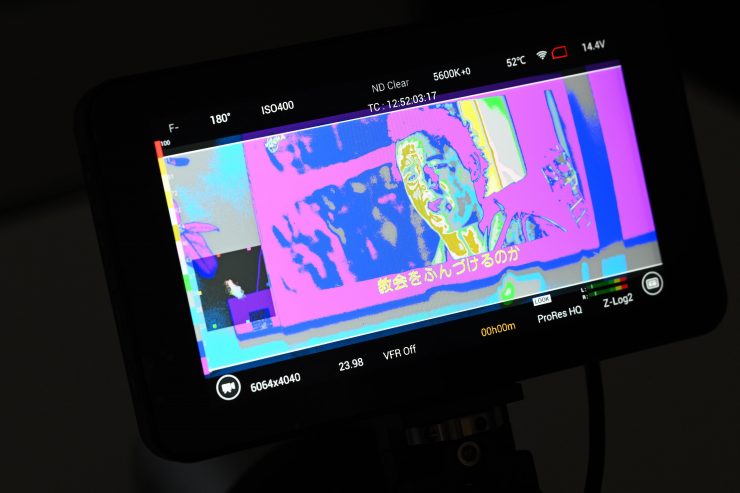
False Color
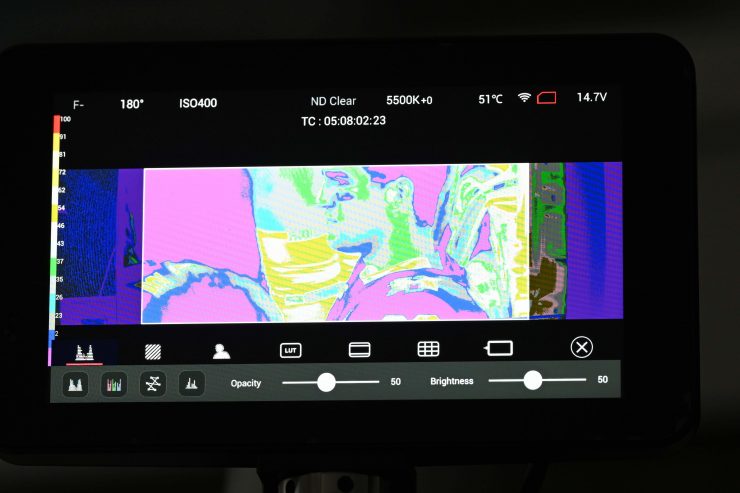
False color is also available to use on the Z CAM E2-F6-Pro.
Z CAM gives you a scale indicator on the right-hand side that shows you what the IRE values are for certain colors. As I mentioned earlier, Z CAM states that 40 IRE is the correct middle grey exposure point when using ZLog2.
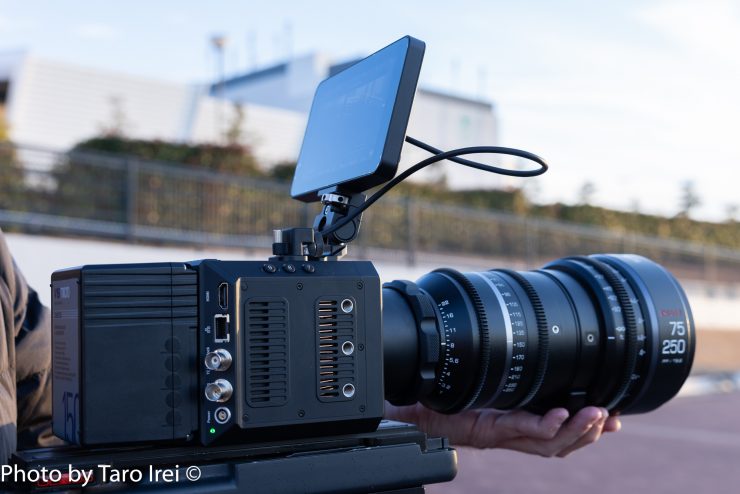
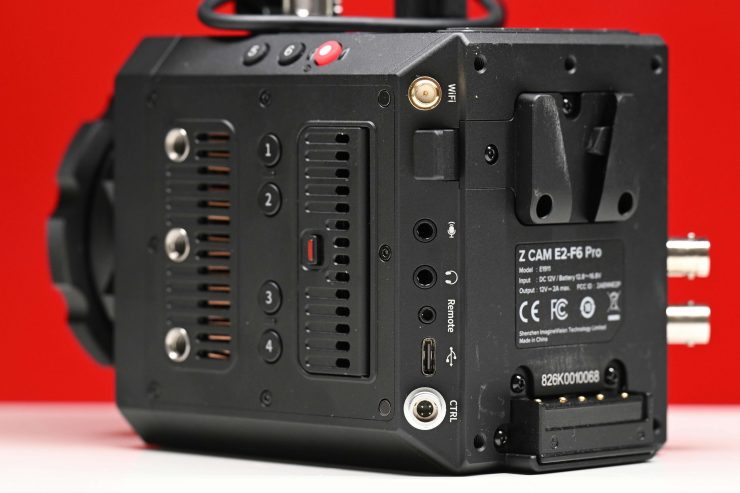
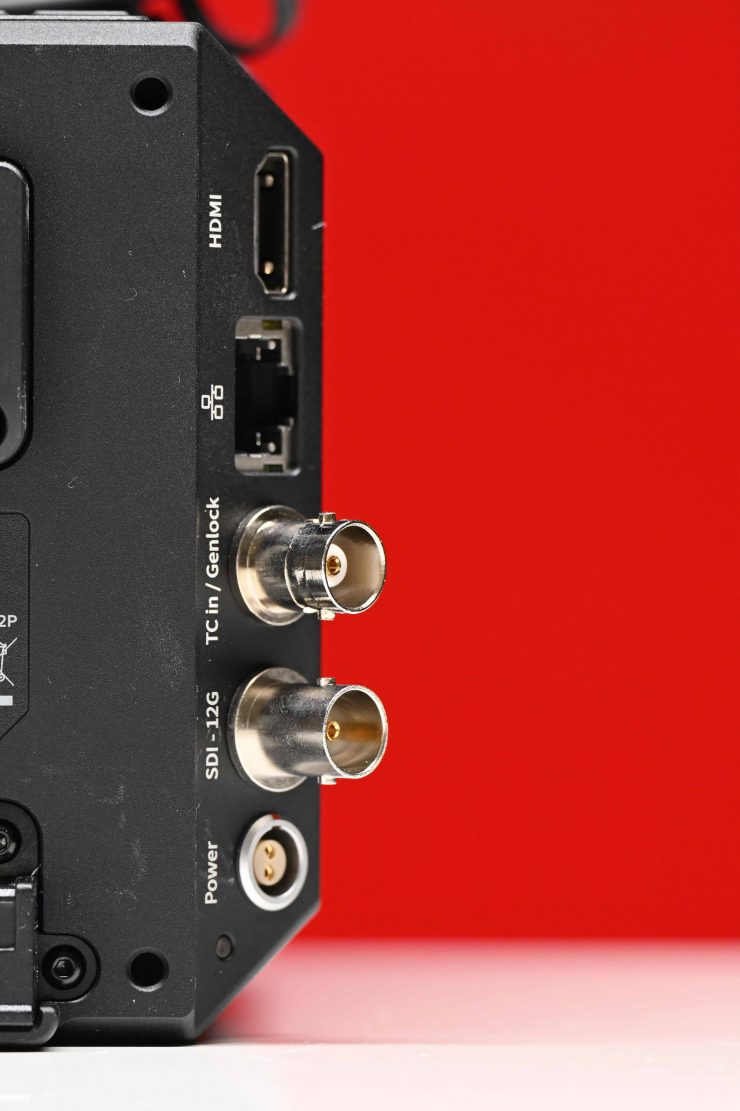
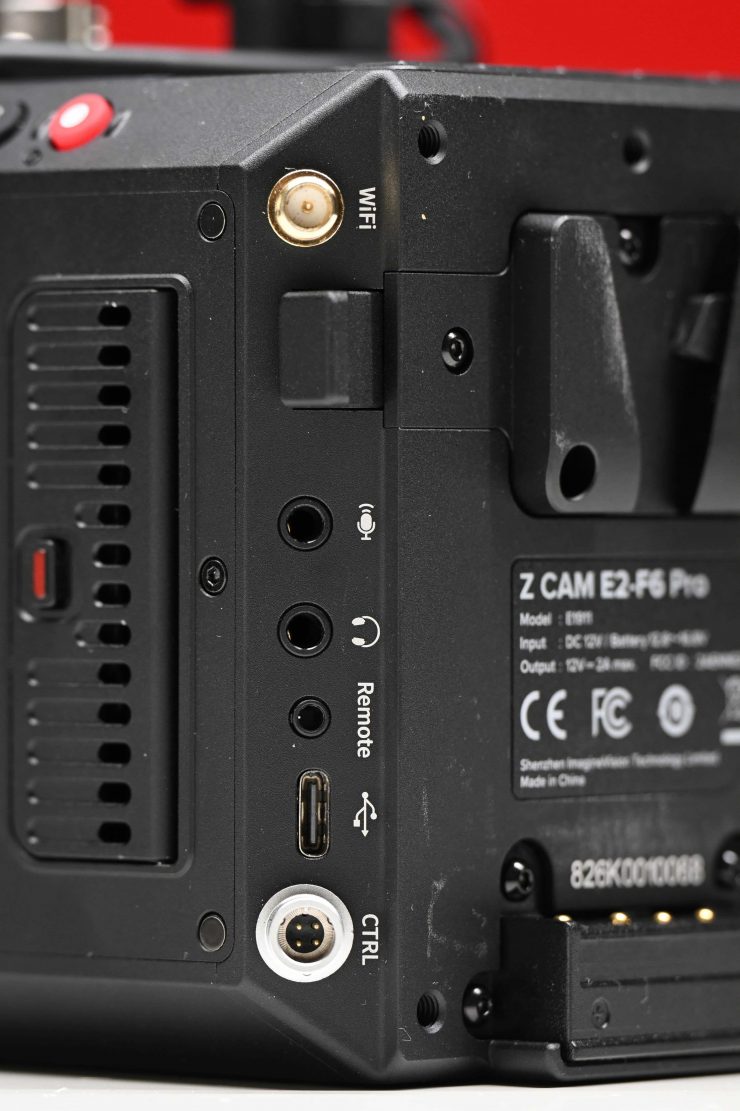
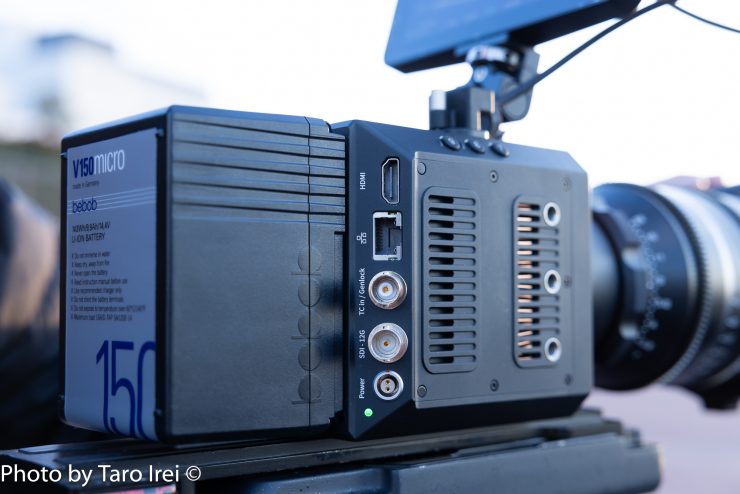
Inputs & Outputs
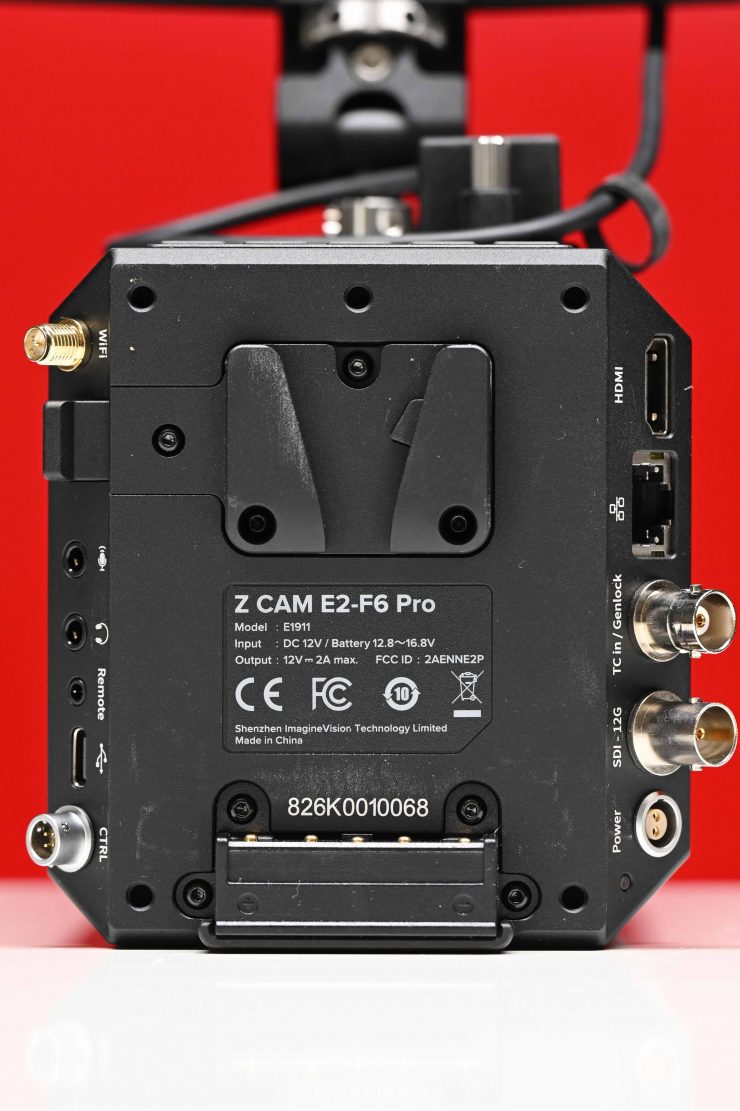


The camera has the following inputs and outputs:
- 1x 12G SDI
- 1x HDMI Type A 2.0
- 2x Phantom 48V power input XLR ports
- BNC with Genlock/Timecode
- 3.5 mm stereo jack socket (TRS)
- Audio output (3.5mm stereo headphone)
- USB-C port
- 2.5 mm jack socket (Sony LANC compatible)
- 1 x Serial Port
- 5-pin LEMO port for dual channel XLR microphone (requires additional XLR audio connector)
- USB 3.0 Type C for camera control & data transfer only
- Gigabit Ethernet port for control, setting & live streaming

It is nice that the camera features a 12G SDI output as this allows you to send a 4K signal over SDI and not just over HDMI. Yes, there is only one SDI out, but I think that is ok considering the size of the camera, and the fact that it has its own monitor that doesn’t tie up one of the outputs.
The 2-pin DC out works well and it allowed me to power a follow focus motor and receiver.
I would have liked to have seen a D-tap output on the camera, but you could easily solve that issue by using a V-mount battery that has one.
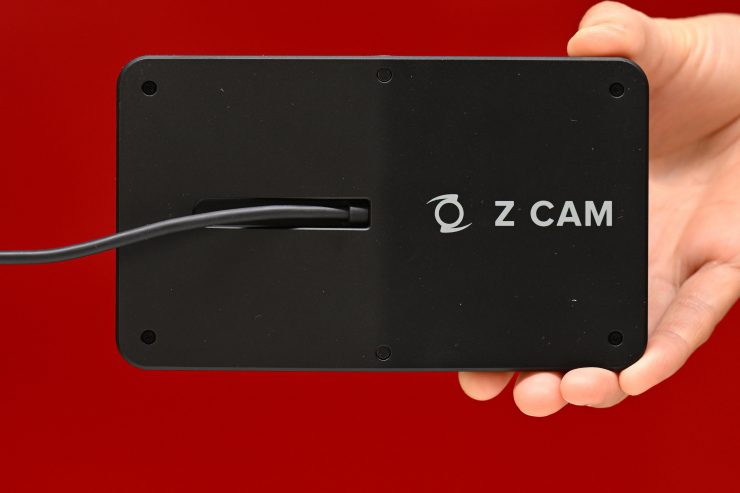
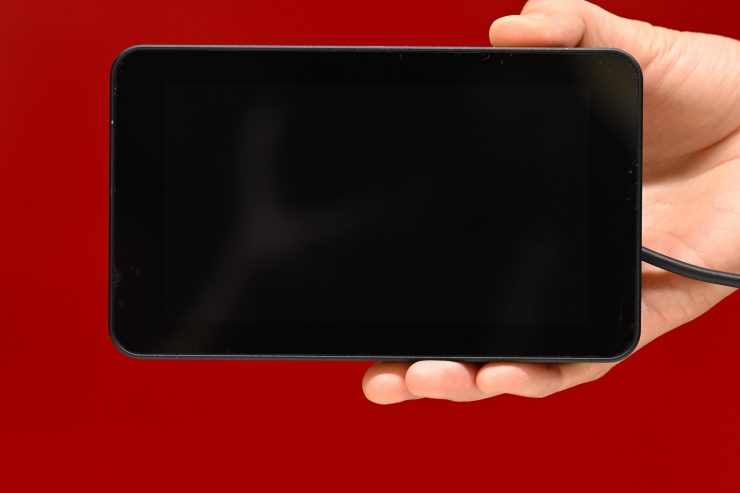
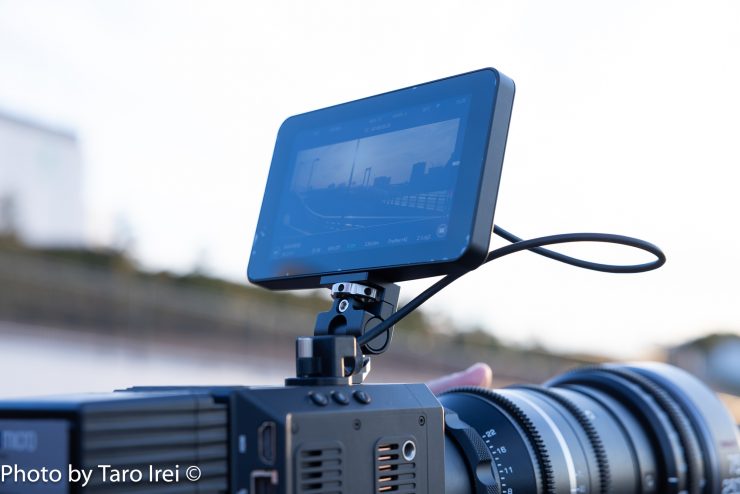
Monitor
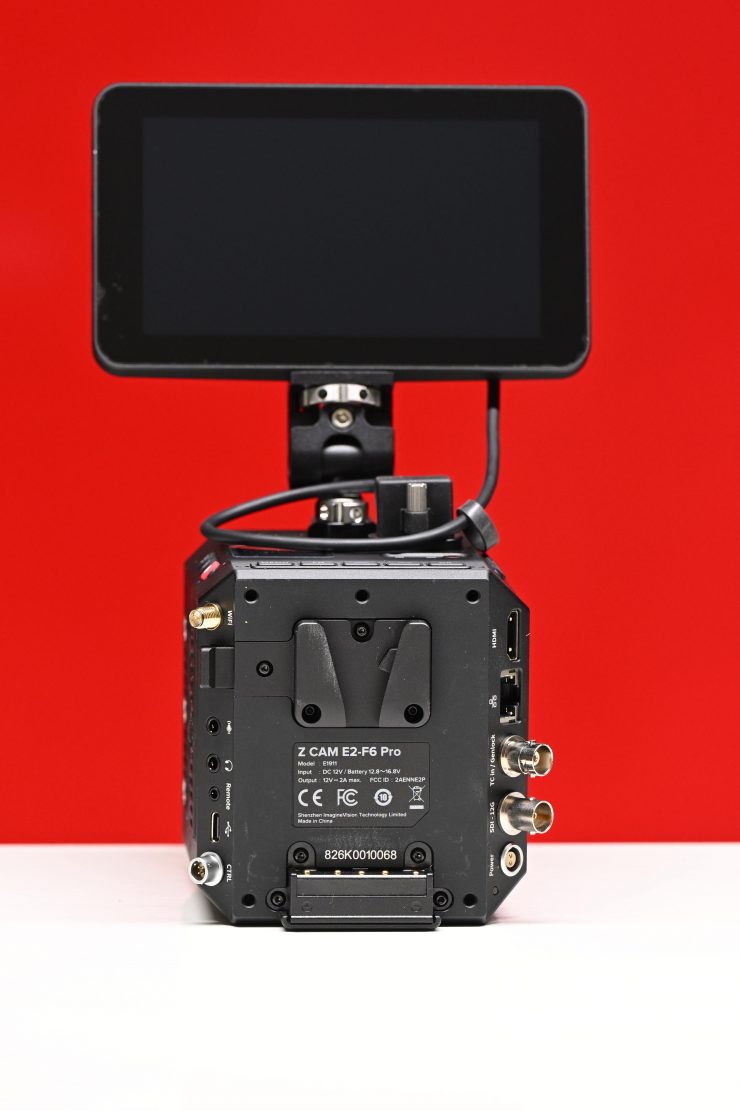
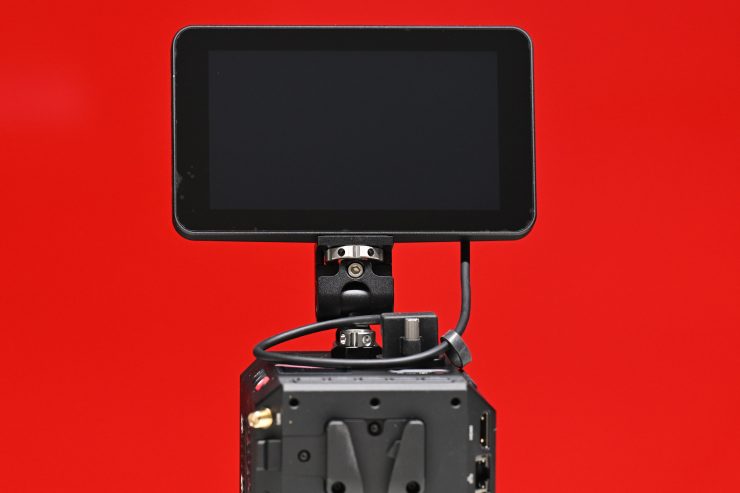
The Z CAM Z CAM E2-F6 Pro comes with a proprietary 5″ 1920 x 1080 Touch Screen LCD Monitor with 1000 Nits of brightness.
I like that Z CAM includes a monitor with the camera, and because the E2-F6 Pro only has a limited amount of outputs, this doesn’t tie up the SDI or HDMI output if you need to run an EVF or wireless video TX, etc.
I couldn’t find out how many PPI, or what the contrast ratio was.
The monitor utilizes a single cable that plugs into a pin interface on the camera body. Having a single cable that supplies power, data, and vision keeps things tidy and prevents you from having to run multiple cables.
The 5″ monitor has a standard threaded hole 1/4-20″ screw hole with anti-rotational pins on both the top and bottom.

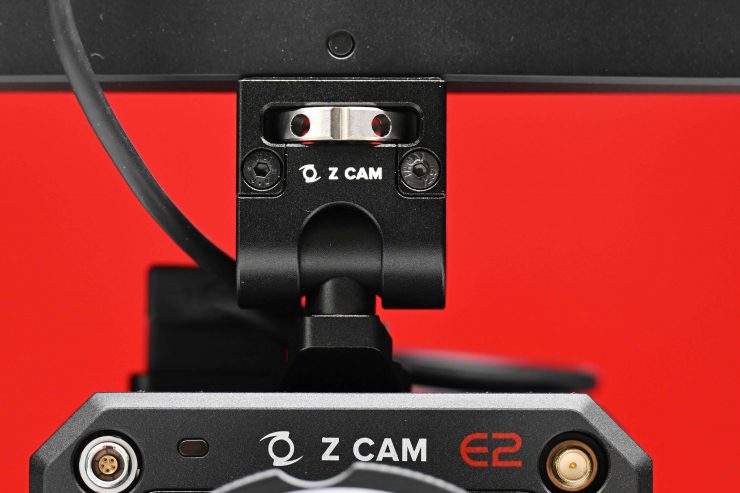
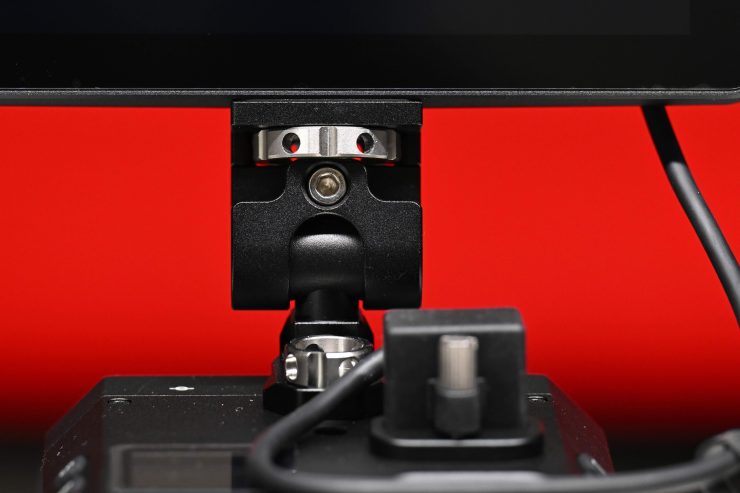
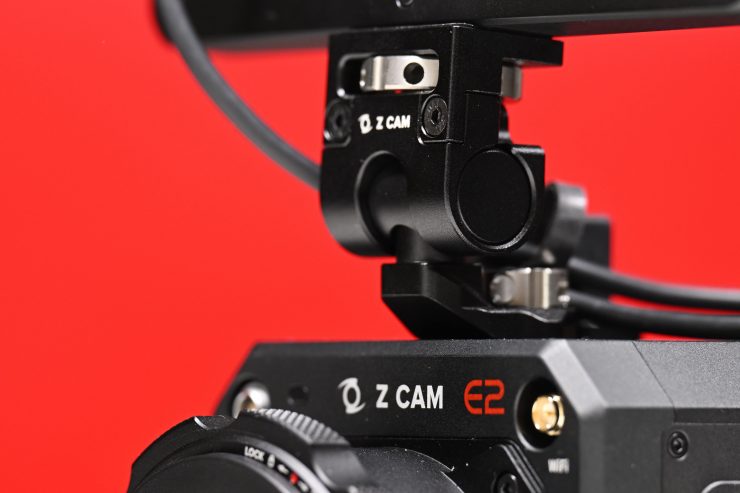
The mount allows you to move the monitor back and forth and from side to side.
As the monitor gets its power and video signal through a single cable the monitor is always displaying whatever you have up on the camera. You don’t have to turn it on as it automatically powers on whenever the camera is on.
You can see a clean view of your image by just touching on the main part of the screen as that removes any overlays.
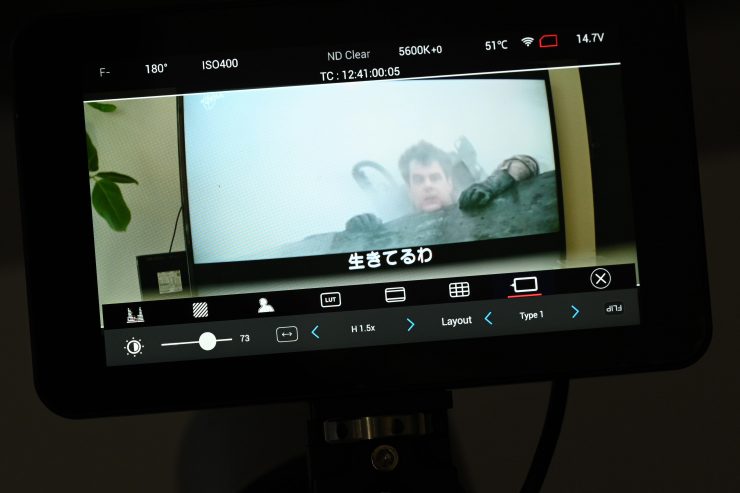
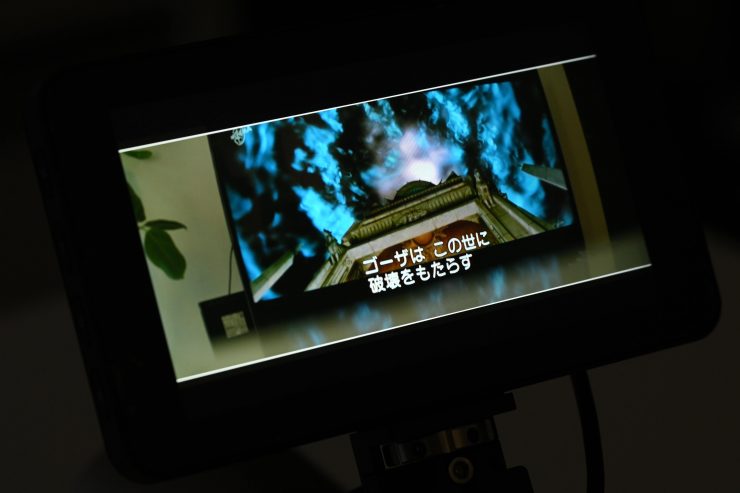
The quality of the image on the screen is pretty good, and you would think that with only 1000nits you might struggle to see it outdoors in sunny conditions, but I was actually surprised that it was very usable. Now, in saying that, it isn’t going to be suitable for use in all conditions, especially if the sun is behind you and shining directly on the screen.
Where things get interesting, as I previously mentioned earlier in the review, is that you can control and make adjustments to the camera via the touchscreen interface.
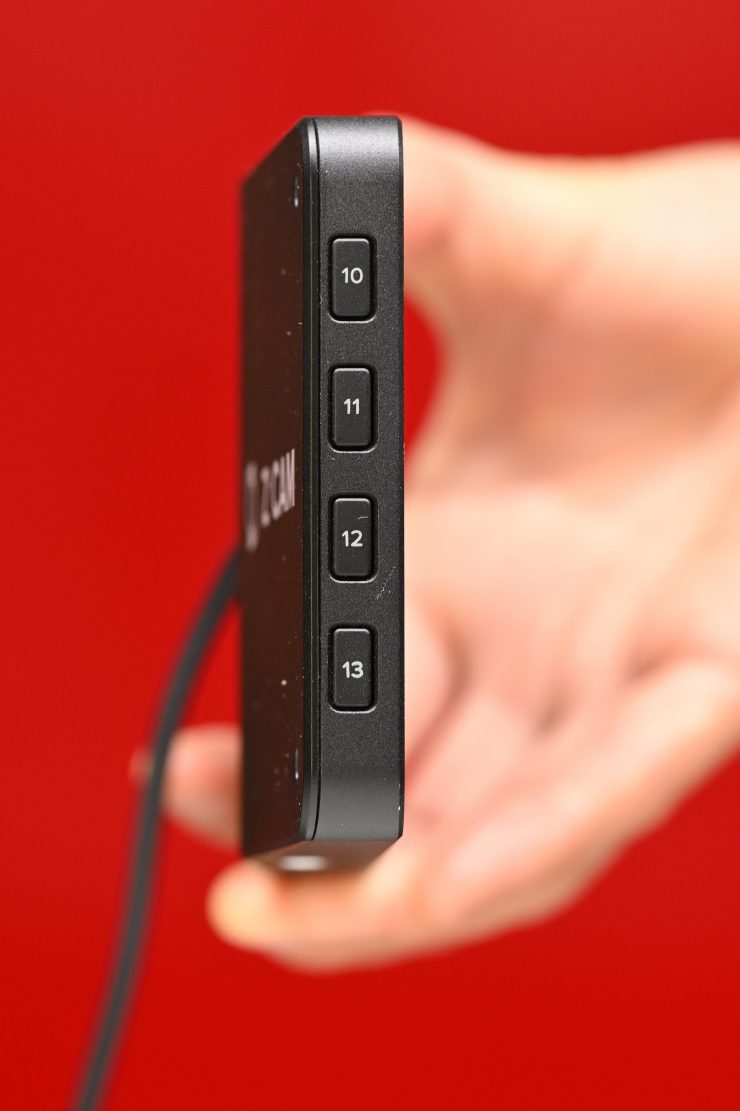
The monitor also has 4 assignable buttons on the side that you can program. By default, these are set to:
- F10- Image zoom
- F11- Peaking
- F12- LOG/LUT
- F13- False Color

As you would expect from any modern-day monitor, there is a large array of video assist tools you can utilize.
Unfortunately, you can’t pinch to zoom on the screen. If you want to do focus magnification you need to assign it to a function button (by default it is assigned to F10) and then you can drag the positioning around using your finger on the screen.
With the scopes, you can just click and drag them around on the screen. Unfortunately, you can’t have more than one scope active at the same time.
The monitor does have False Color (this is by default set to F13). There is a false color scale indicator for what IRE the colors represent.
I like touchscreen monitors with camera control because they are very intuitive and easy to use. They allow you to make changes far quicker than using traditional menu systems.

The included monitor is pretty good, but I would have preferred something a little brighter or for Z CAM to at least give you a sunhood for it. However, in saying that, with touchscreen monitors, sunhoods can be problematic.
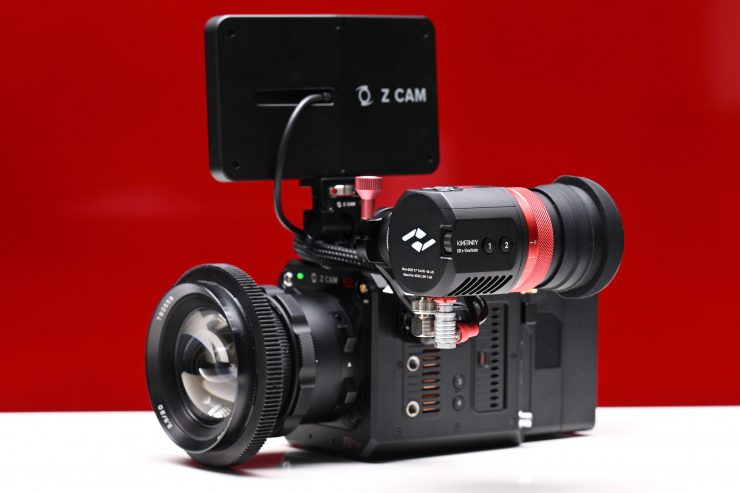
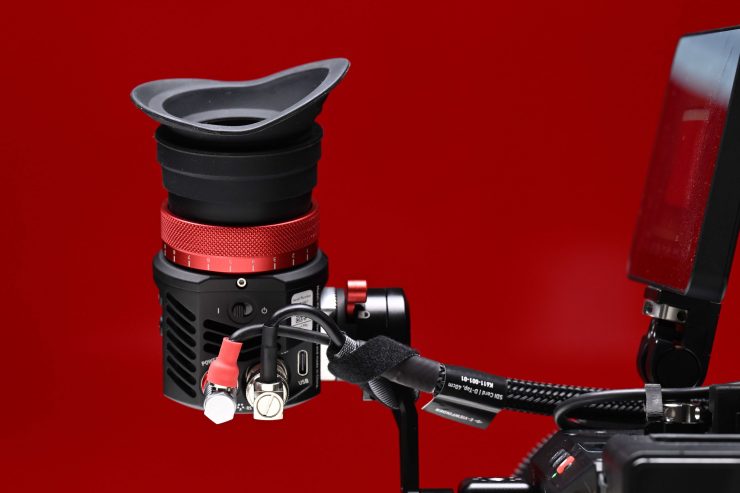
Optional EVF
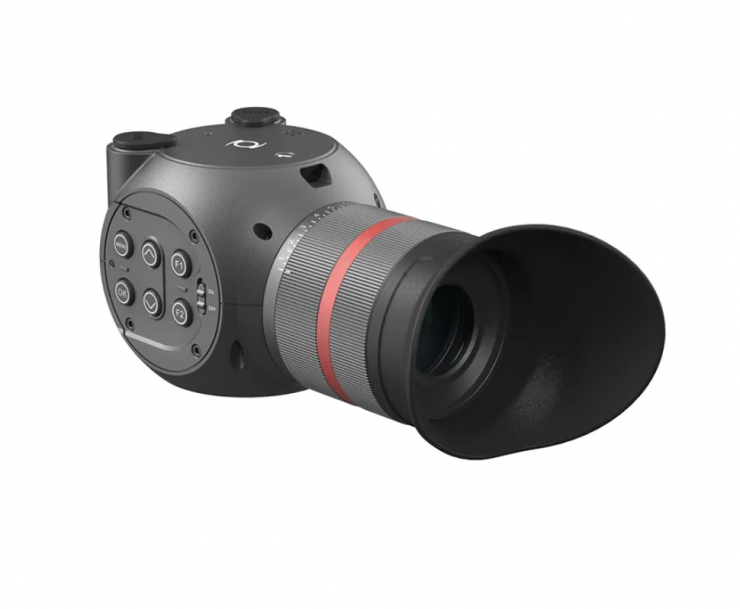
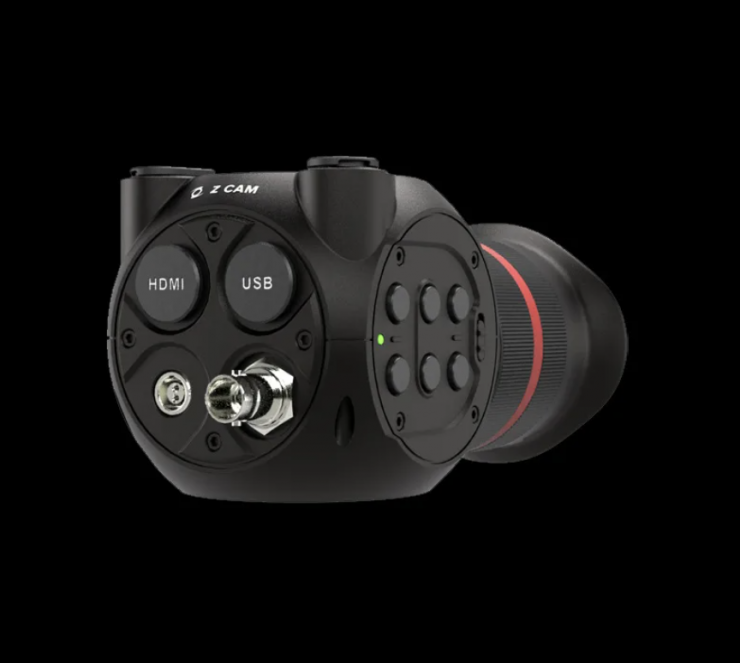
Z CAM, just like Kinefinity, sells an optional EVF. The Z CAM Electronic Viewfinder features a 1440×1440 resolution, Wireless HDR, built-in LUTs, Built in exposure tools, Adjustable diopter, and HDMI / SDI inputs.
The viewfinder’s HDMI input supports up to UHD 4K30 video and the SDI input supports up to 1080p60 video. There is a two-pin LEMO power input, an ARRI-style rosette mount with an M6 thread, and image display tools including focus peaking, zebra, waveform, histogram, and vectorscope. The diopter adjusts from -8 to + 4, offering a wide range of eyesight correction that minimizes the need to wear glasses while operating your camera.
The Z CAM Electronic Viewfinder retails for $999 USD.
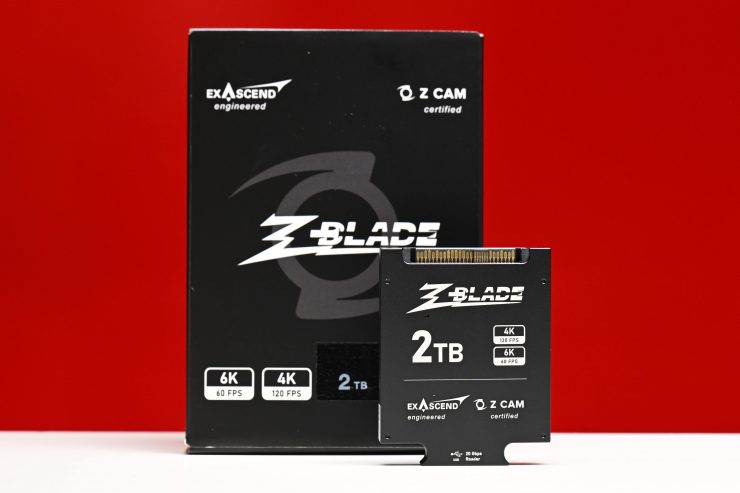
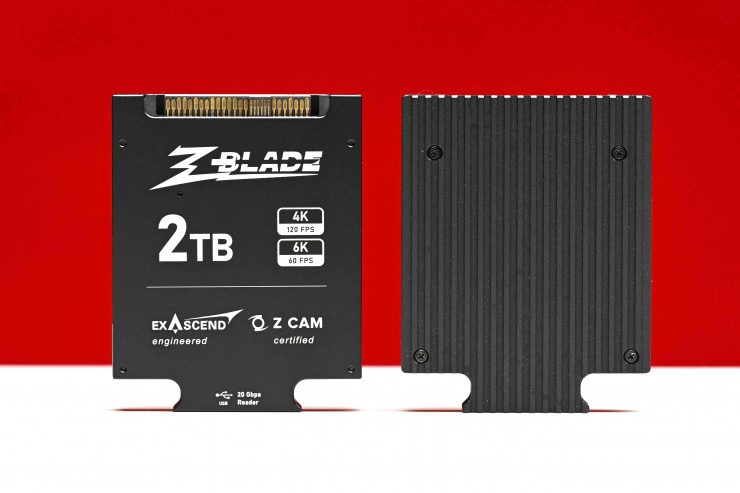
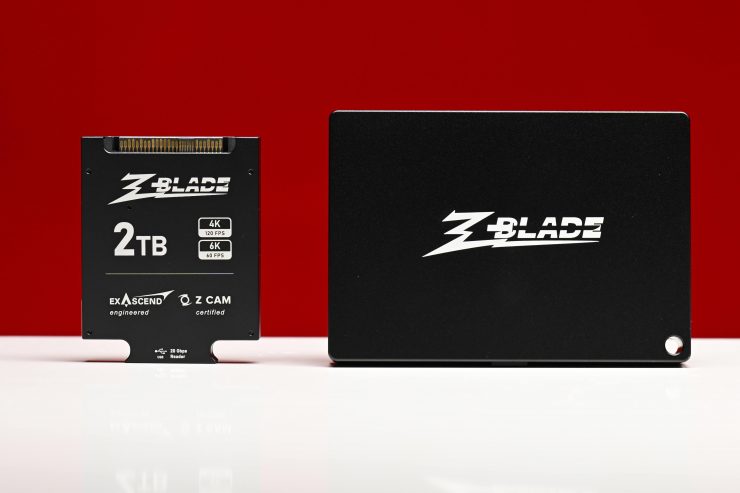
Recording media
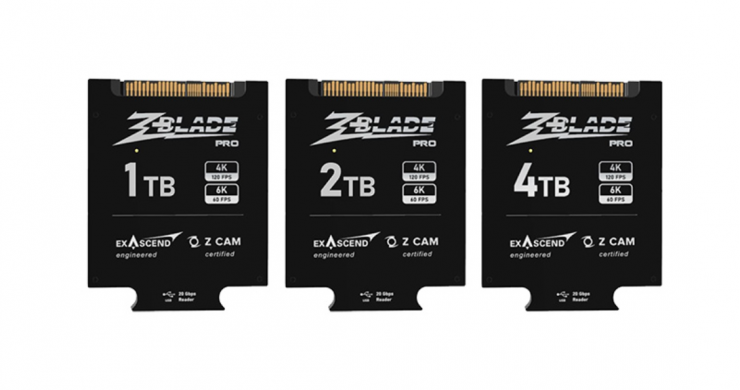
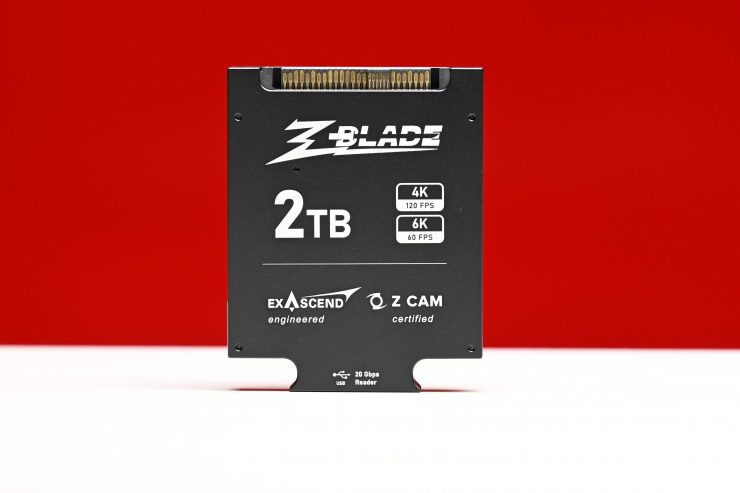
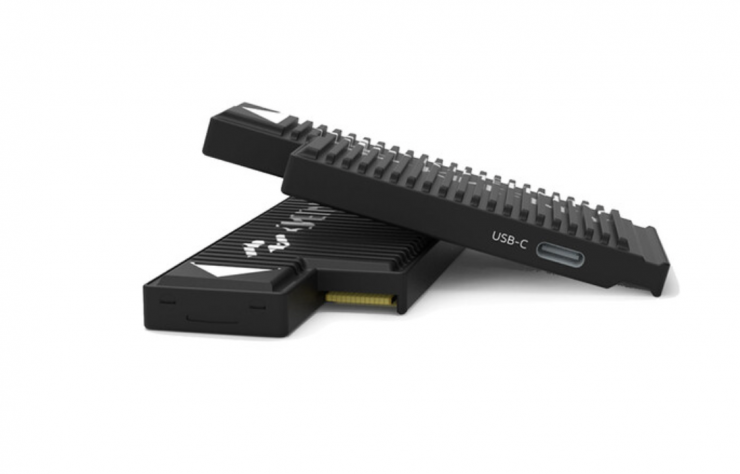
The E2-F6 Pro utilizes ZBlade media which is made by Exascend and certified by Z CAM. The Blade is available in capacities of 1TB, 2TB, or 4TB and they feature a built-in USB 3.2 Gen 2×2: 20 Gbps reader so you don’t need an additional card reader to offload material.
- Available in 1TB, 2TB & 4TB memory sizes
- Large storage capacity, affordable price
- Capture ProRes 422 HQ, 4K 120fps, 6K 60fps
- Hardware RAID ECC protection
- Optimized consistent media capture to ensure no frame drop
- USB 3.2 Gen 2×2: 20 Gbps built-in reader for lightning fast file transfer
- Worry free data recovery service by Exascend
I like the ZBlade media, but because it is a proprietary design, you have no other choice when it comes to media. While this isn’t a deal breaker you do have to be aware that it won’t be easy or quick to find replacement media if you lose a ZBlade.
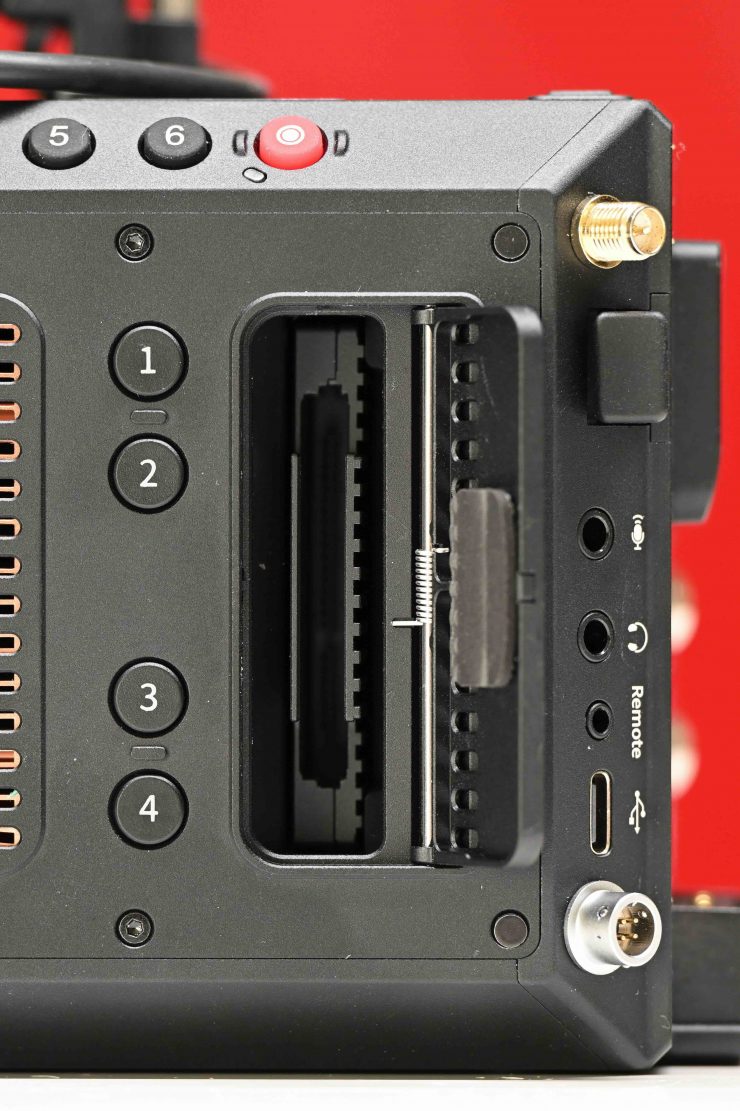
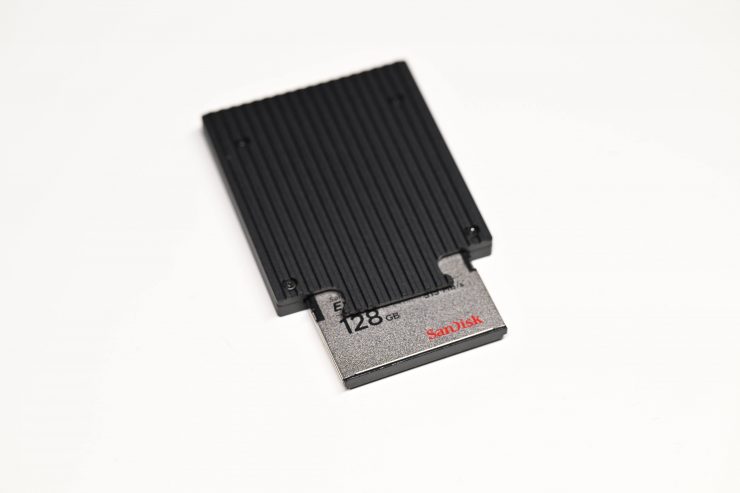
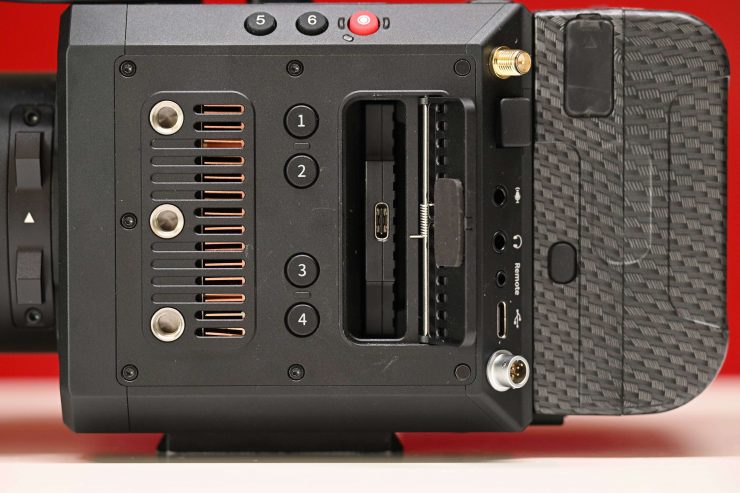
The camera has a single slot for the media. Out of the box you get what is essentially a ZBlade interface where you can use a CFast 2.0 card.
To use a ZBlade you first need to remove the media interface from the camera.
The ZBlade can be a little tricky to insert and it is best to take your time and do it carefully.
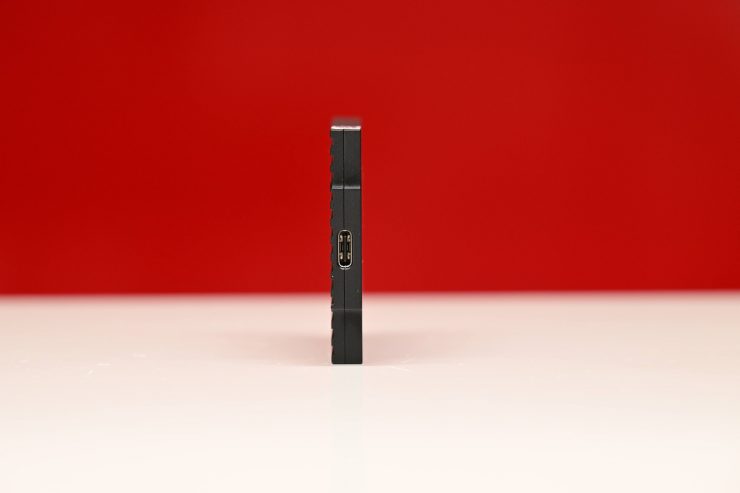
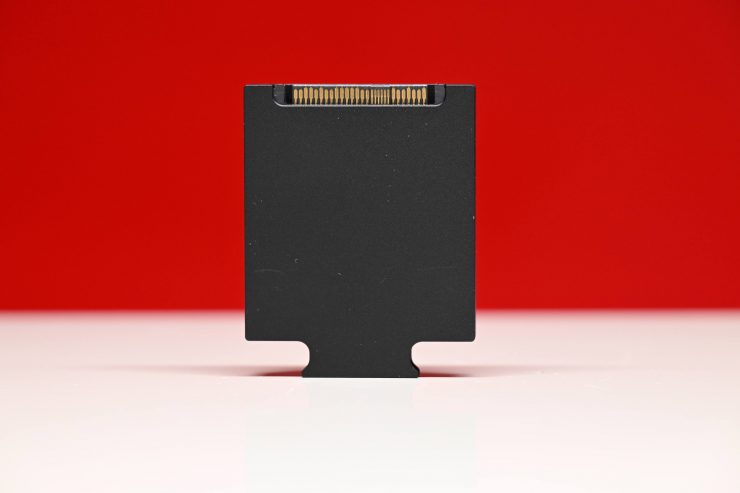
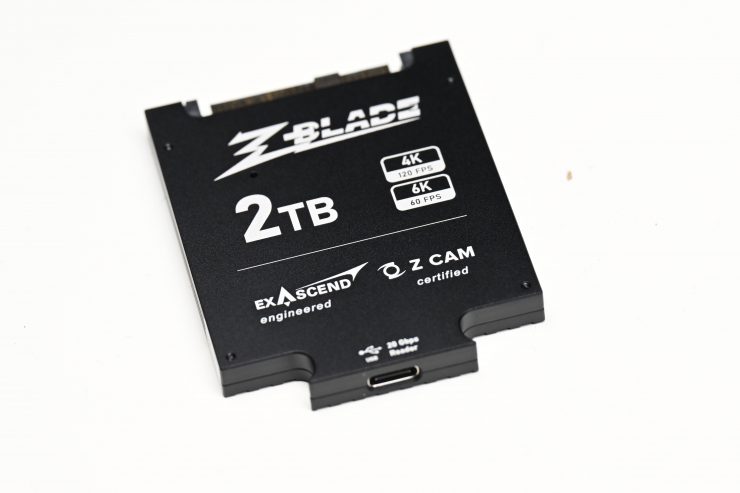
It is nice that the ZBlade has a built-in USB-C port so you can connect it straight up to a computer without needing to use any type of media reader.
The ZBlade retails for the following prices:
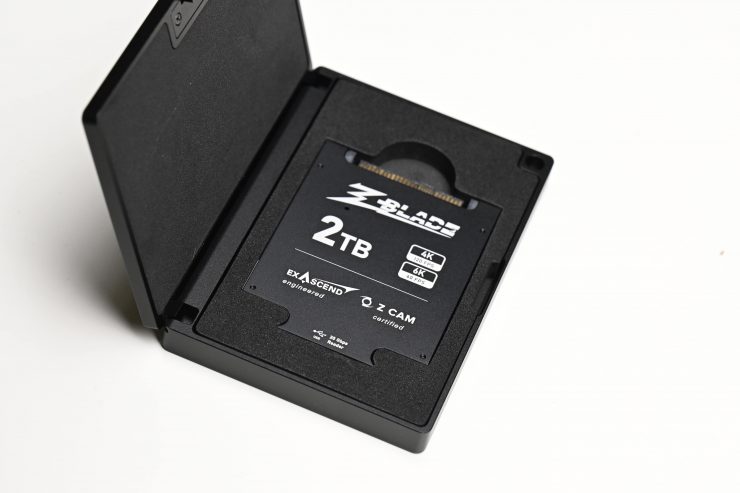
I like that Exascend has made a nice aluminum enclosure for you to keep the ZBlade in.
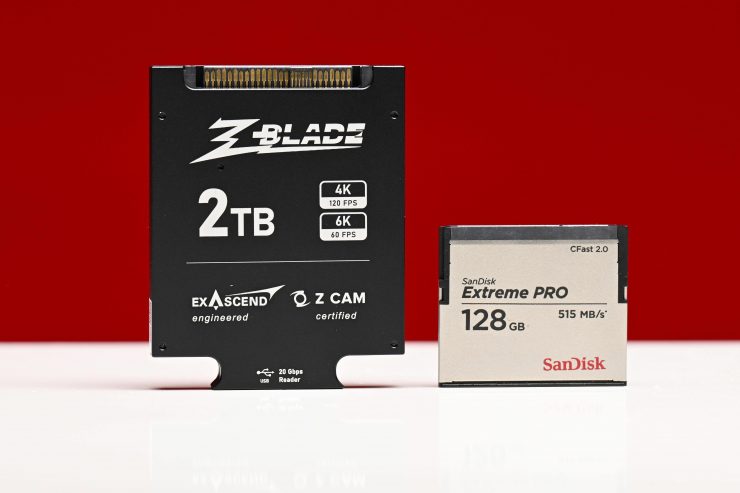
Above you can see a size comparison of the ZBlade next to a CFast 2.0 card.
It is good to see that the ZBlade media is very reasonably priced. If you are buying a sub $4K camera the last thing you want to be doing is paying an arm and a leg for the recording media. I think you would need at least 3-4 ZBlade 1TB media drives to ensure you could get through a whole day of shooting.
As a media price comparison, a Kinefinity KineMAG Nano (1TB) retails for $999 USD, but you can also buy a Kinefinity KineMAG Nano Body ($199 USD), which is essentially just an enclosure where you can use your own NVMe M.2 SSD drives.
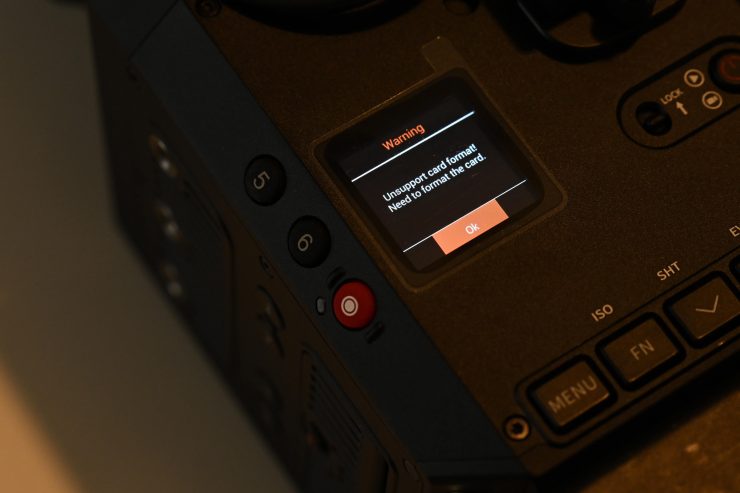
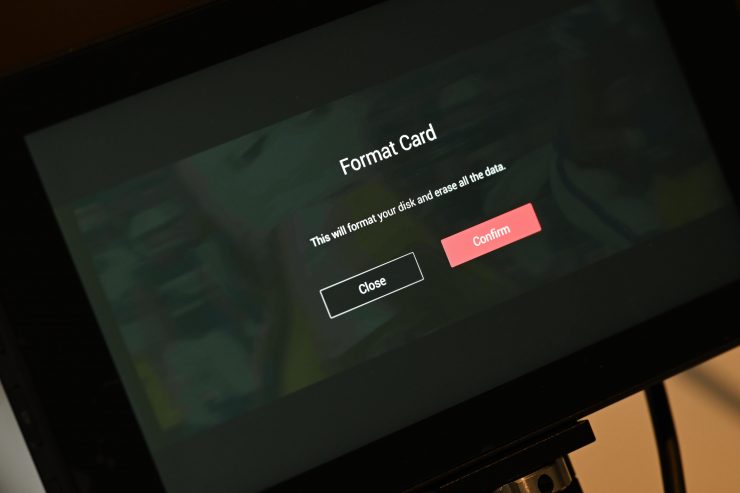
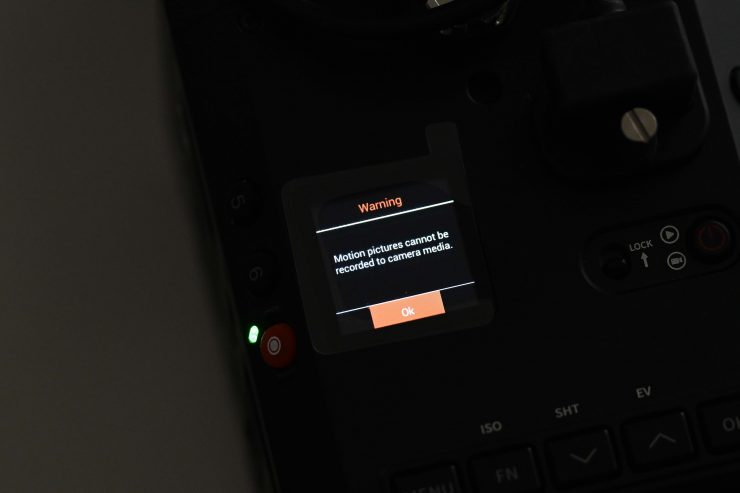
If you use CFast 2.0 media with the camera, when you put a new card into the camera it will ask you to format it. Now, if you put a card in that may not be fast enough, you will get a warning, but the camera still allows you to record. While everything appears to work as normal while you are recording, you will end up with dropped frames which causes black flash frames in your vision. I would prefer to have seen a system in the camera where if the card isn’t fast enough it won’t allow you to record. Yes, a slower card will still work fine with lower resolutions such as 4K, but there should be a safety net for users that prevents any issues from occurring.
6K file sizes are going to be pretty big when recording in ProRes. Recording 6K 3:2 Open Gate in 23.98p in ProRes 422HQ gets you just 14 minutes of recording time on a 256GB CFast 2.0 card.
If you record 4K DCI at 23.98p in ProRes 422HQ you can get 2 hours and 37 minutes of recording time on a 2TB ZBlade.
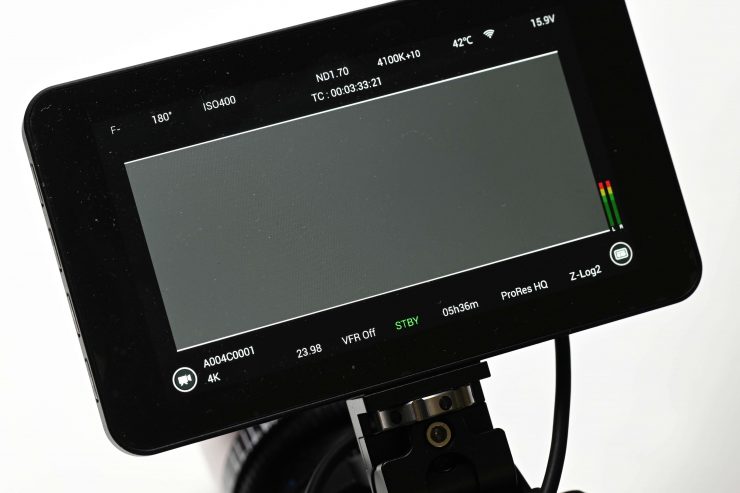
If you record 6K DCI at 23.98p in ProRes 422HQ you can get 5 hours and 36 minutes of recording time on a 2TB ZBlade.
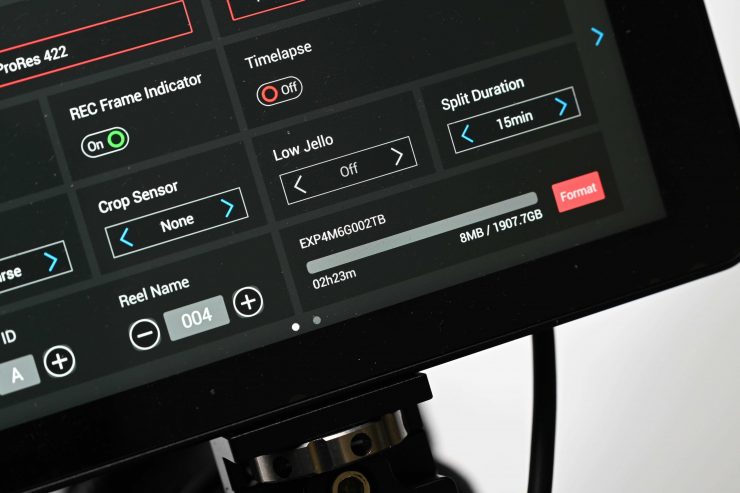
When I formatted and put a 2TB ZBlade into the camera it showed a capacity of 1.907TB.
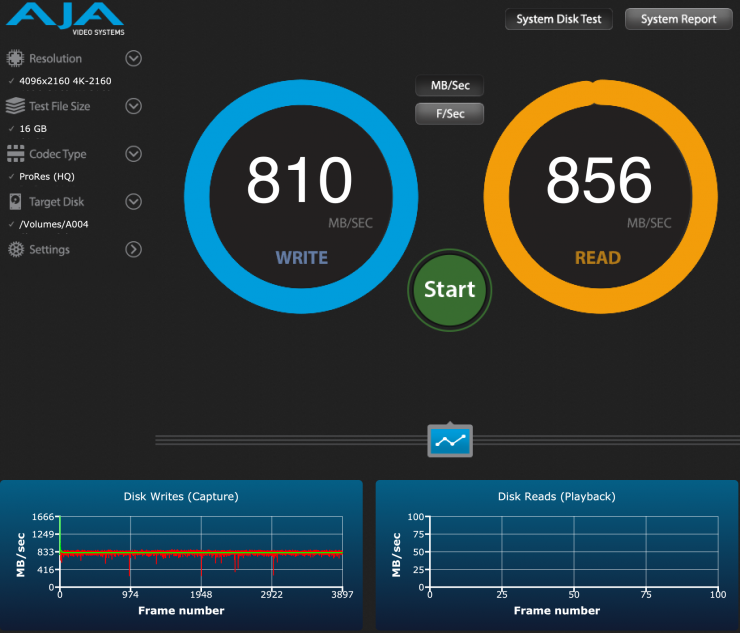
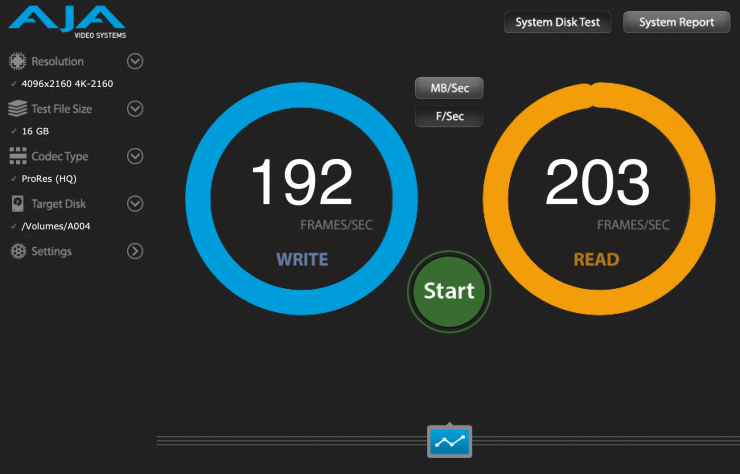
I also did a speed test using AJA System Test Lite of the ZBlade media. Above you can see the results. The ZBlade media is more than fast enough to handle anything the E2-F6 is capable of throwing at it.
I really like the ZBlade media. It is affordable and easy to use.
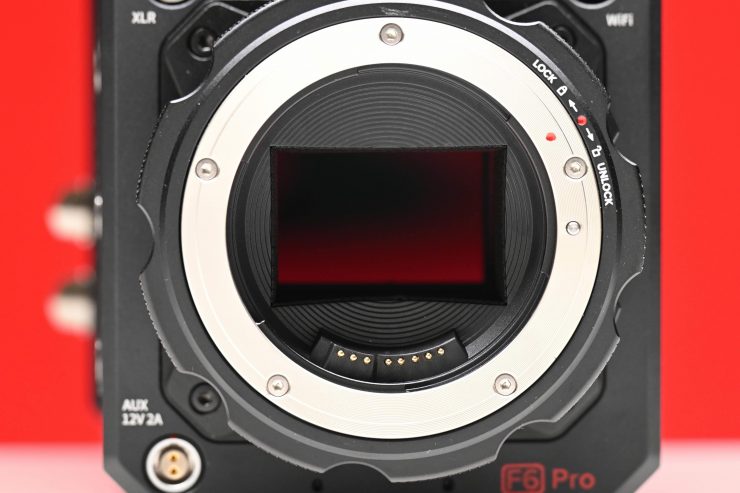
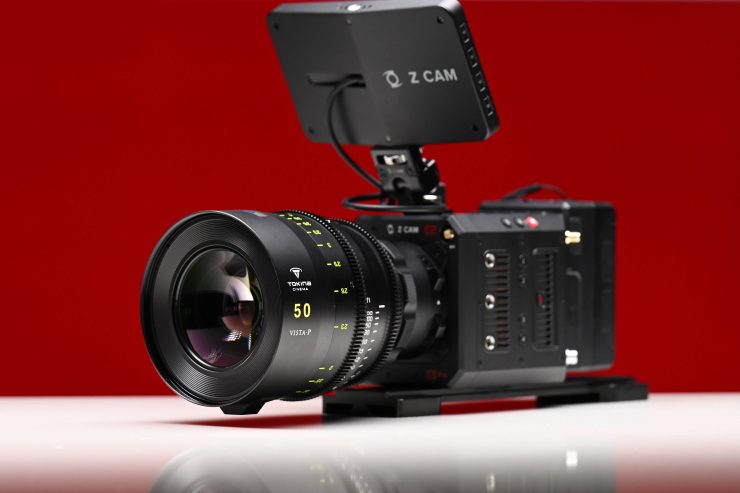
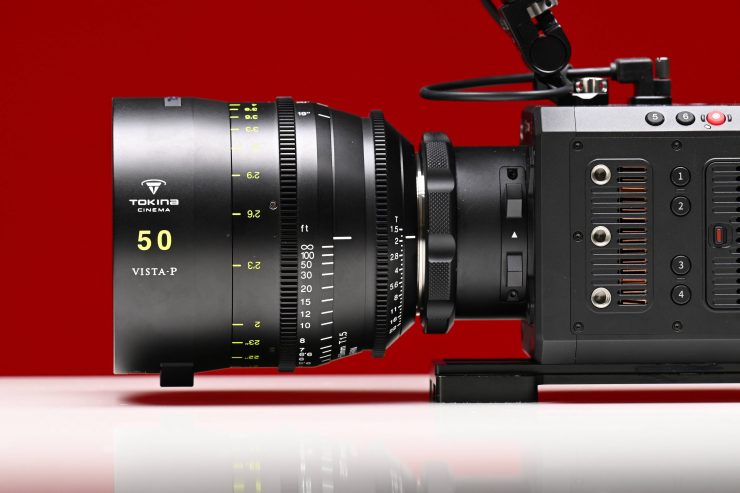
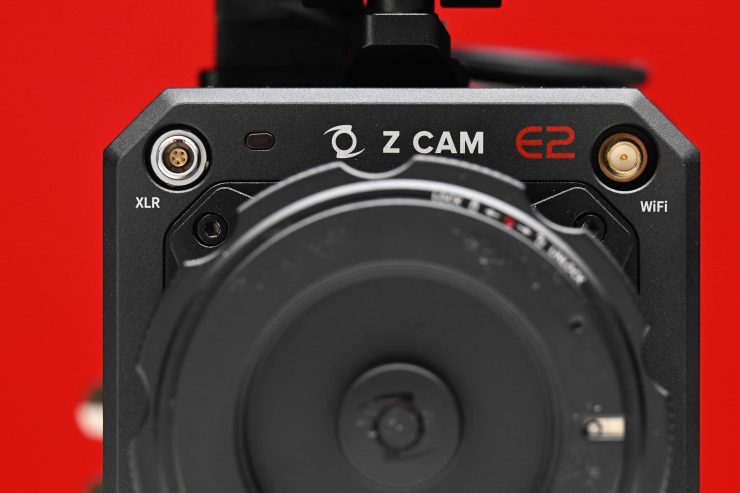
Mounts
The Z CAM E2-F6-Pro comes with a Canon EF mount as standard.

You could argue that going with a Canon EF mount in 2023/24 is a bit of a backward decision, but there are still plenty of people out there who use and have Canon EF glass. Would a mirrorless mount like Canon RF or Sony E make more sense as the default mount? Maybe.
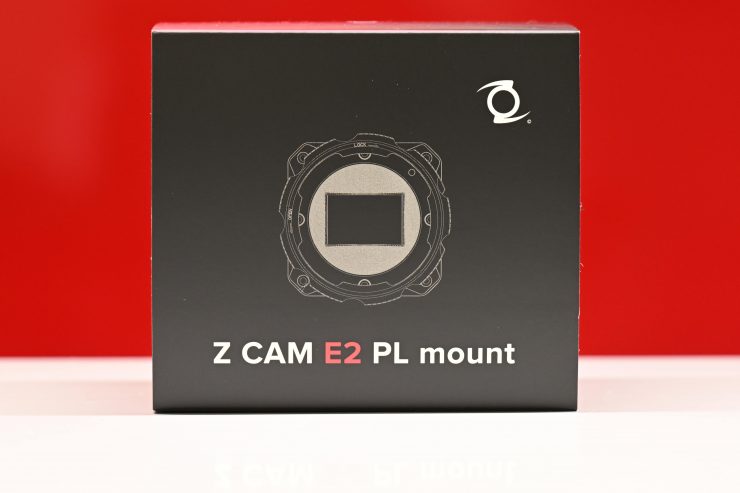
The good news is, that you aren’t locked into using Canon EF glass. Z CAM also makes M, MFT, PL, and LPL mounts as optional accessories.
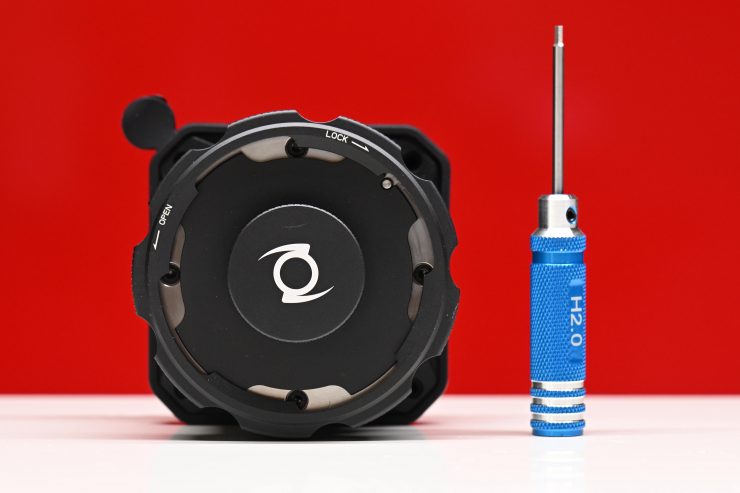
Z CAM includes the tool you need with the optional mounts.
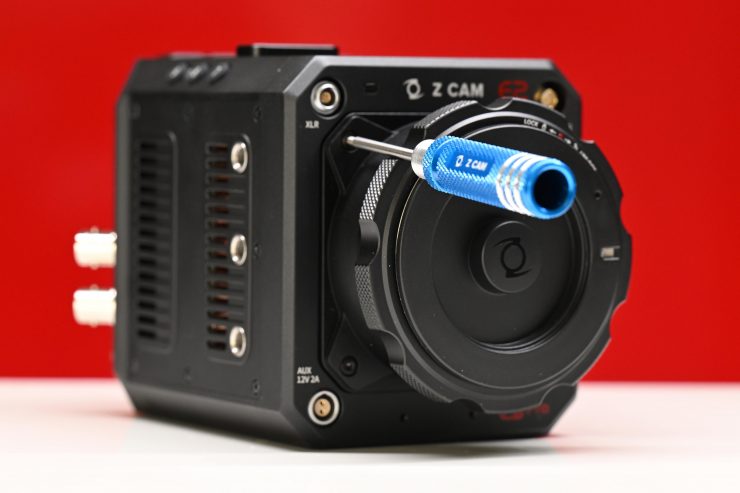
The mounts simply come off the camera body by undoing four screws.
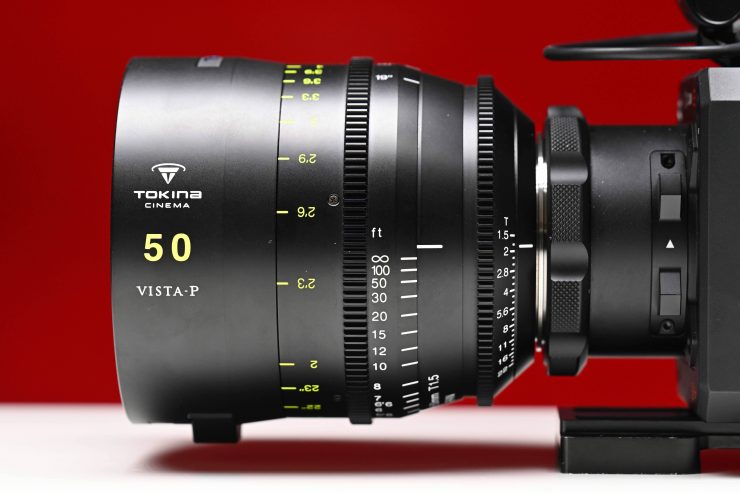
The PL mount is very robust and I didn’t have any issues utilizing large and heavy lenses.
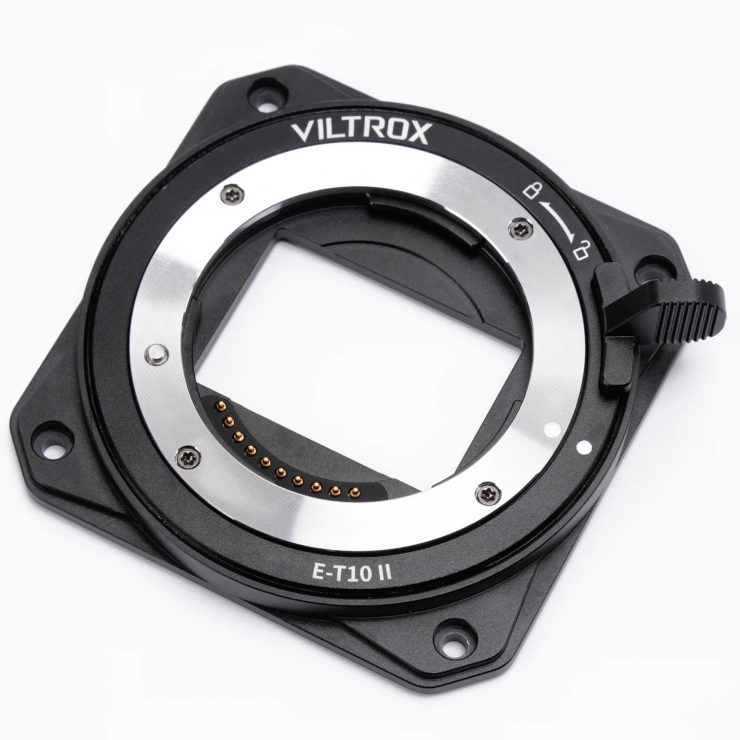
Right at the end of 2023, VILTROX announced the E-T10 II Sony E-mount Auto Focus Adapter for the Z CAM E2-F6.
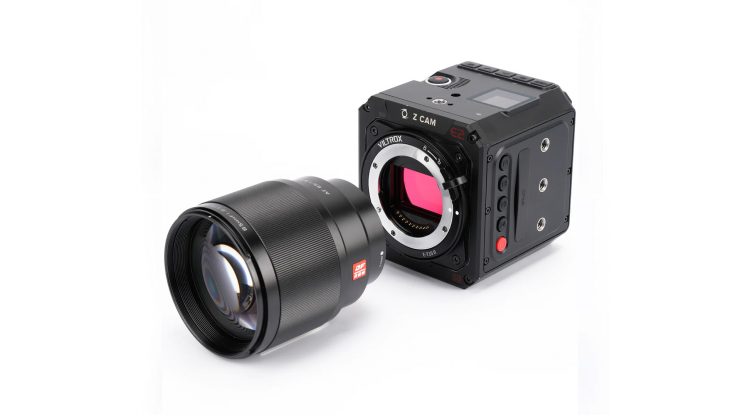
This version is for the Z Cam E2 F6 and other models with a swappable lens mount. The mount allows full functionality of Sony E Lenses, including autofocus.
Below you can see what lenses have currently been tested by Viltrox.

While this currently isn’t a massive number of lenses, having the ability to use Sony E mount lenses on the camera only adds to its versatility.
Since the adapter is fully electronic, it passes through the aperture, shutter, ISO, and other lens information to the Z Cam.


The installation process is very straightforward and you simply remove the original mount’s four screws and replace them with the E-T10 II. The mount is also firmware updatable.
The mount retails for $199 USD.
Custom in-camera LUTs
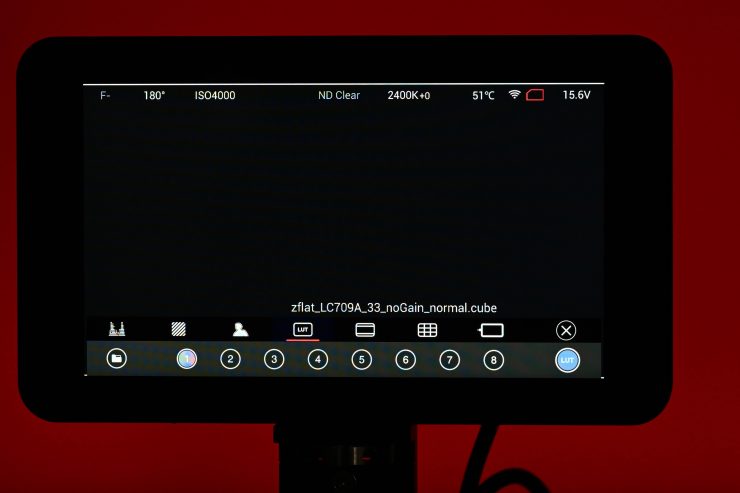
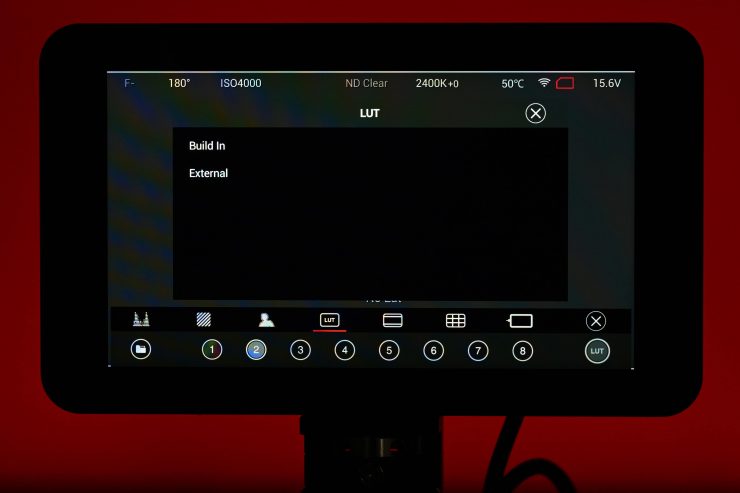
The Z CAM E2-F6-Pro allows you to upload a custom LUT to the camera or to utilize quite a few of the in-built Z CAM LUTs.
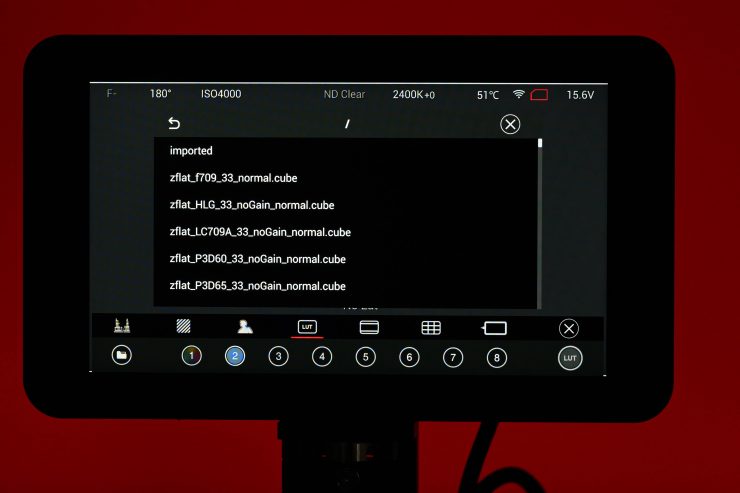
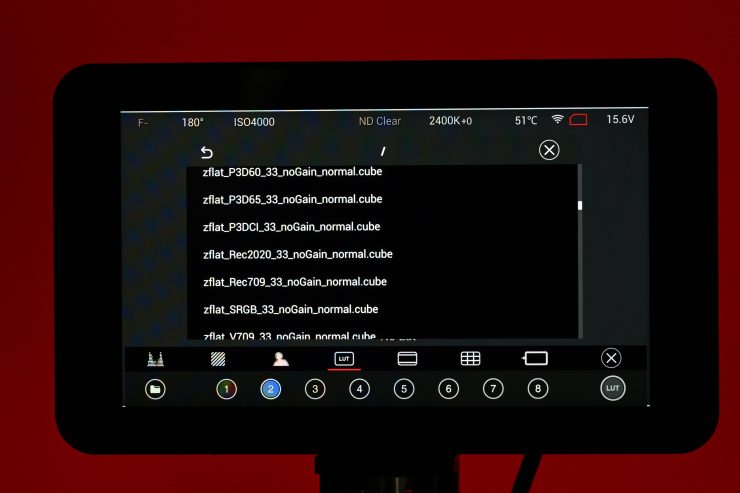
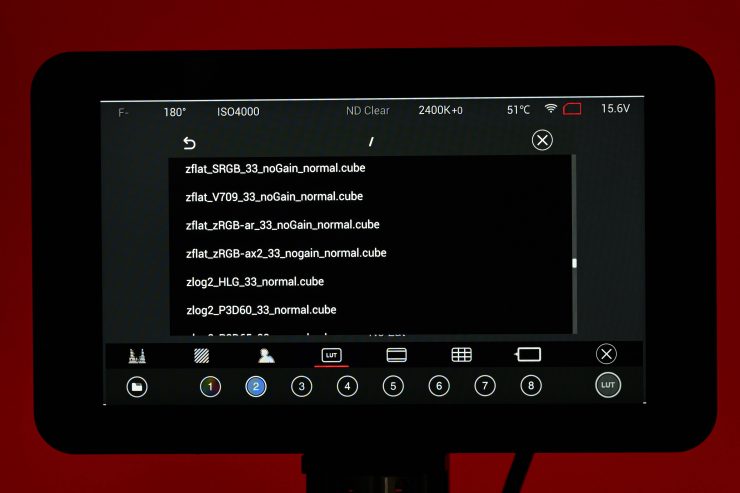
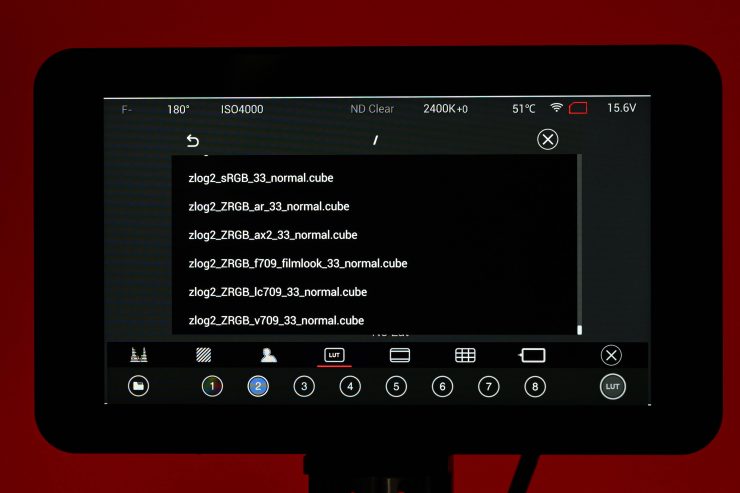
Z CAM includes a large collection of in-built LUTs that you can choose from. These range from standard Rec.709 LUTs to film looks, HLG, P3DCI, and Rec.2020 LUTs.
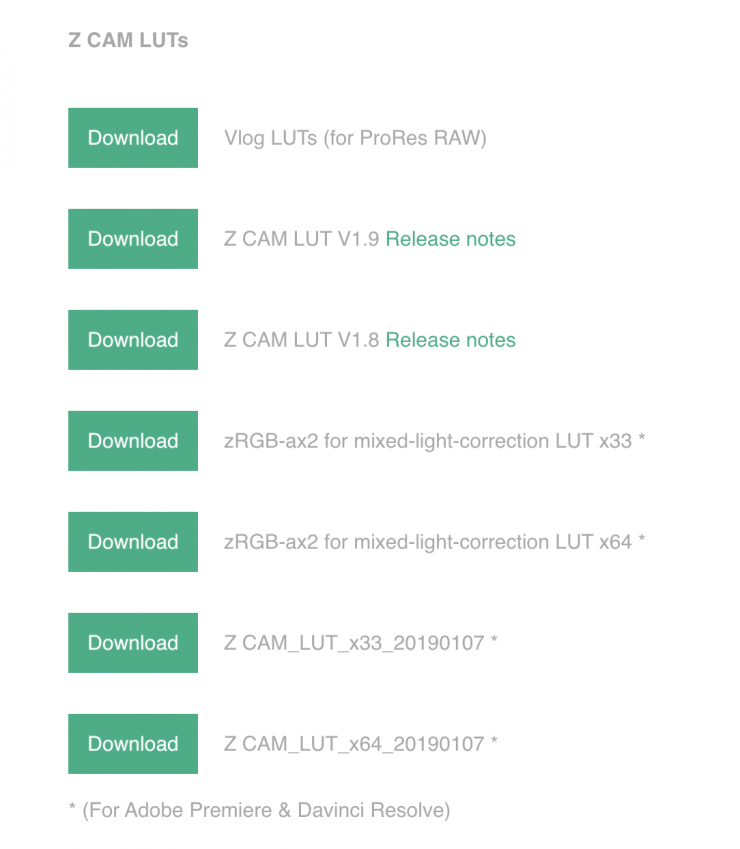
You can also download the above LUTs for use in color grading or NLE programs here.
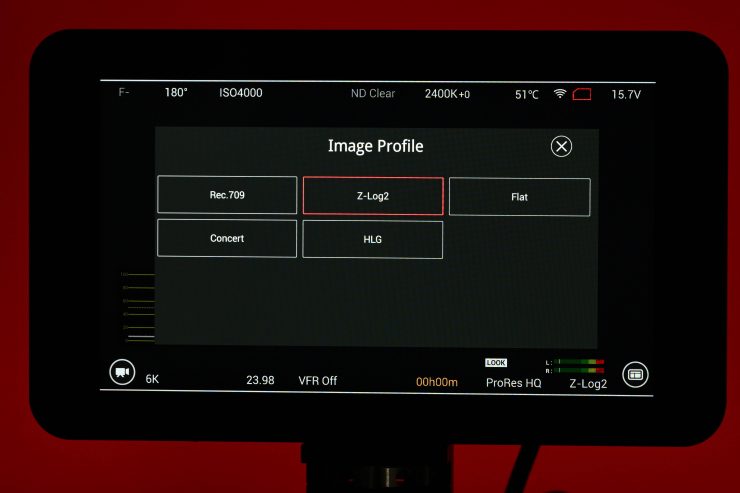
The E2-F6-Pro can also shoot with a baked-in ‘Look’ or picture profile, you don’t have to record in Z-Log2 if you don’t want to. This is handy for fast turnaround or projects where no color grading/correction will be made.
- Rec.709
- Z-Log2
- Flat
- Concert
- HLG
Above are the Image Profile choices that are available.
Z CAM Color Correction Plug-in
Z CAM has a Color Correction Plug-in available for both Mac and Windows that integrates within DaVinci Resolve, Premiere, or FCP.
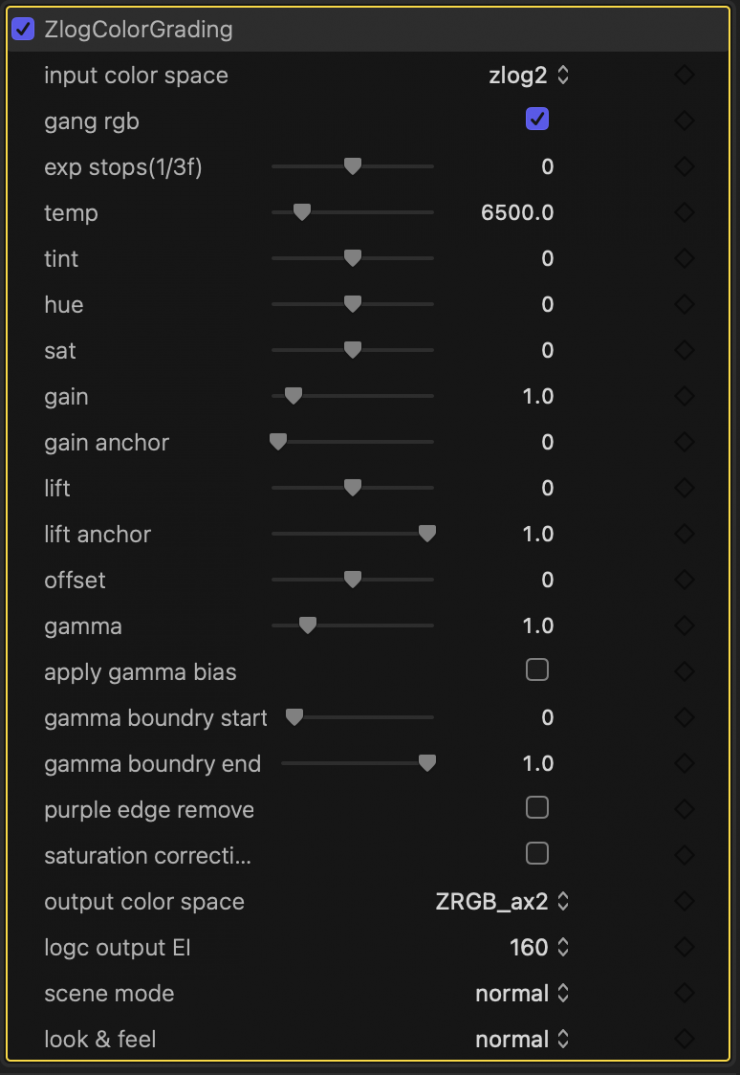
In FCP once you install it, you can find it in the Effects tab, and once you drag it onto a clip or clips you will get a tab with the options you can see above.
I really like this plug-in, it is simple and reasonably intuitive to use. I did, however, find it a little confusing when using the plug-in with DaVinci Resolve as it essentially handles the color management for you, but there are no instructions as to what to set the color management to in Resolve’s settings.
ACES

If you want to use an ACES workflow in DaVinci Resolve you can download the DCTL files for Z-Log2 here.
Audio
When it comes to audio, the Z CAM E2-F6 Pro is a bit of a mixed bag. You only have the option of using a 3.5 mm stereo jack socket (TRS) or 5-pin LEMO port for dual channel XLR microphone (although this requires an additional XLR audio connector). I would argue that if recording your own audio internally in the camera is on your ‘must have’ list of features there are better options out there.
As I just mentioned, there are no full-sized or mini XLR inputs on the camera, which is hardly ideal, but you could make an argument that there wasn’t really any space to put them anywhere.
The 3.5mm mic input is located on the operator’s side of the camera, next to the headphone jack.
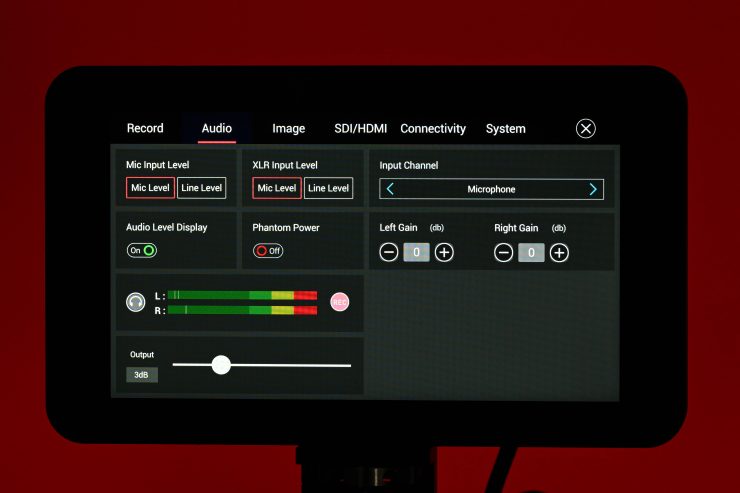
In the main menu, there is an audio section you can go to. Here you can change the Mic Input Level from Mic Level to Line Level, and the XLR Input Level from Mic Level to Line Level.
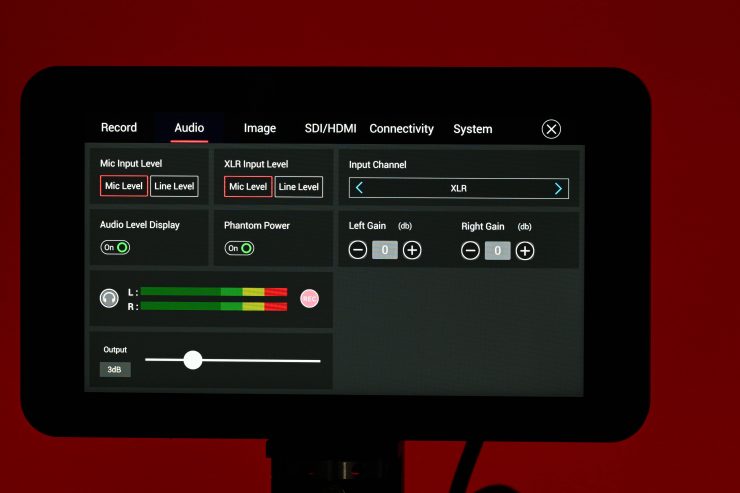
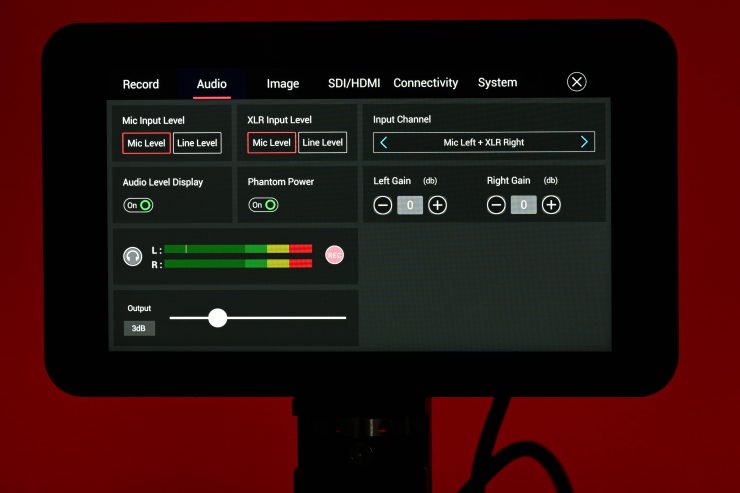
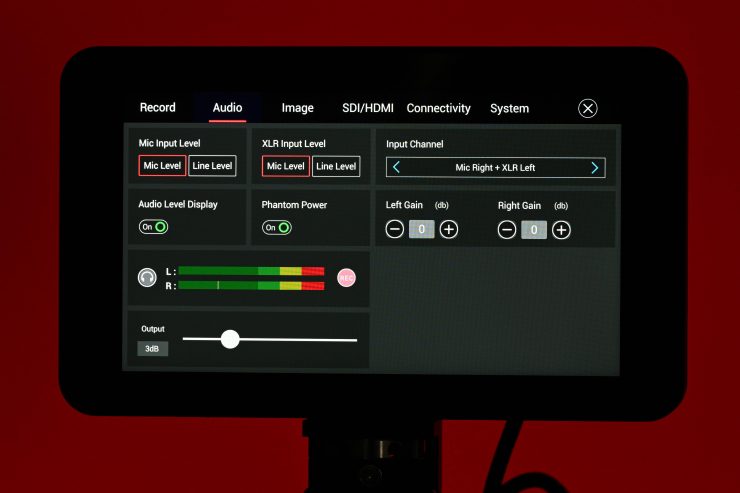
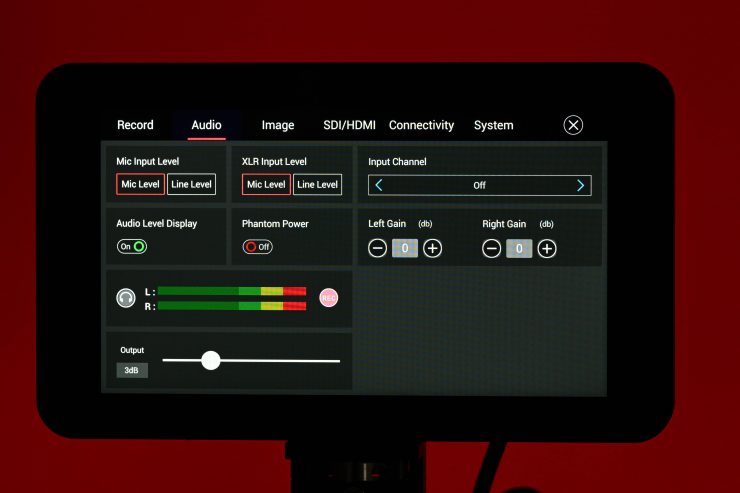
There is also the ability to change the Input Channel to the following:
- Microphone
- XLR
- Mic Left & XLR Right
- Mic Right & XLR Left
- Off
There are separate gain adjustments for the Left and Right channels. You can adjust the gain anywhere from -10db to +12db.
You can also adjust the headphone volume, turn the headphone monitoring on/off, and turn +48V Phantom Power for the XLR input on/off.

You can set any of the function buttons to be Audio Gain (-) or Audio Gain (+) which is a relatively easy way of adjusting levels on the fly if you don’t want to do it from the touchscreen.
There are in-built stereo scratch microphones which are only really usable for reference audio.
The 3.5mm input works well and it is a nice option to have if you want to use a small-sized onboard microphone or a budget wireless system.
As far as headphone monitoring goes, you can adjust the headphone volume in the Audio Menu as I mentioned, however, you can’t choose to just listen to Channel 1 or just Channel 2.
One of the other big drawbacks with the audio is you can’t set any of the channels to auto. That means if you are running an on-camera microphone you have to continually adjust the levels.
The camera also only shows you small colored bars to display audio levels. There are no numbered indicators as to what levels you are actually recording.
I was only able to test audio using the 3.5mm input and I found that the pre-amps didn’t sound that good. In reality, the audio recording and control options on the camera may not make it suitable if you are someone who needs to record your own sound in the camera and is used to cameras with physical audio dials.
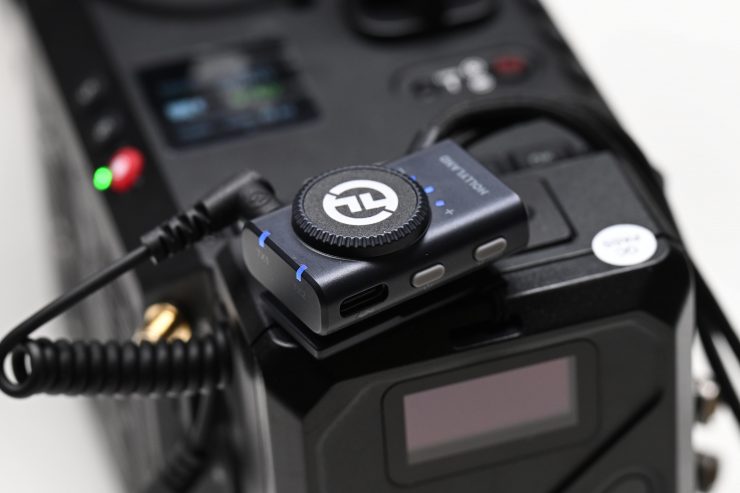
Above you can see a test I did with the Holland LARK M2 where I recorded audio directly into a Nikon Z9, Z CAM E2-F6 Pro, Blackmagic Camera app on an iPhone 15 Pro MAX, and a ZOOM F3. The LARK M2 TX was placed on my shirt in the exact same place for all of the tests.
It was no real surprise to me that the audio quality sounded a lot better from the recordings done to the ZOOM F3 as opposed to the Nikon Z9 and Z CAM E2-F6. Mirrorless hybrids don’t tend to have very good pre-amps, and neither do a lot of the more affordable digital cinema cameras.
Yes, you could argue that there are other cameras on the market that have audio limitations, but most mirrorless hybrids and lower-cost digital cinema cameras have pretty decent audio options now available. I would have liked to see Z CAM come up with a small-sized module that focuses more on audio.
I don’t want to sound overly negative because you certainly can record reasonably decent audio with this camera, but you do need to be aware of the limitations and caveats.
Timecode/Genlock
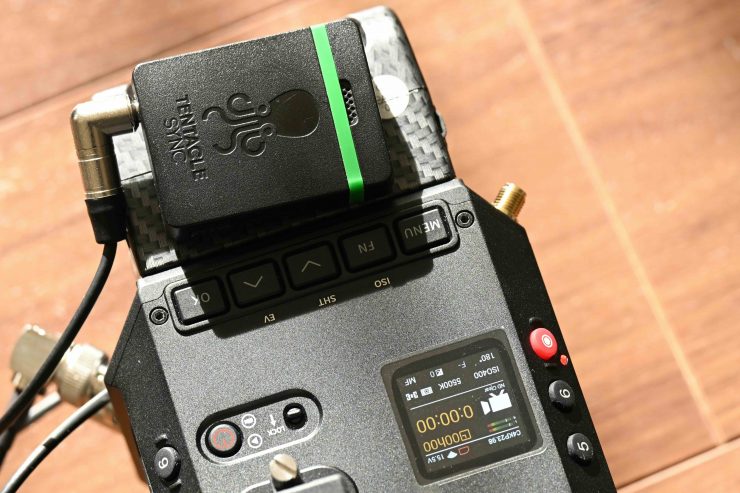
The E2-F6-Pro has a dedicated Timecode/Genlock BNC input. This is nice to see and having a proper timecode input is crucial when working in professional environments where multiple cameras are being used and/or seperate audio is being recorded.
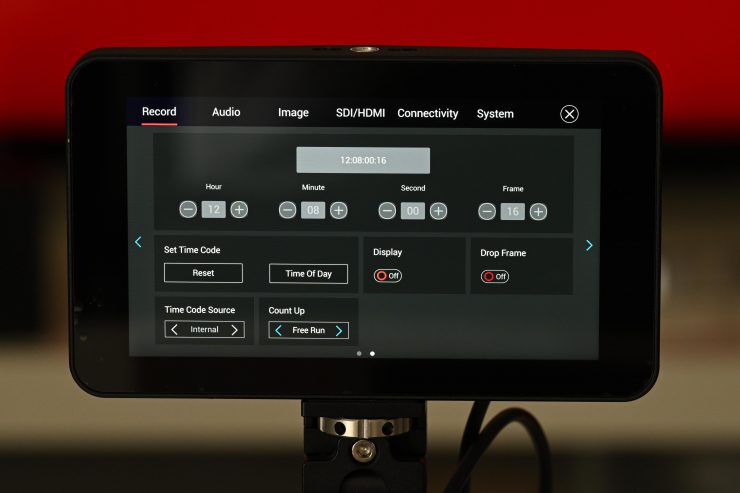
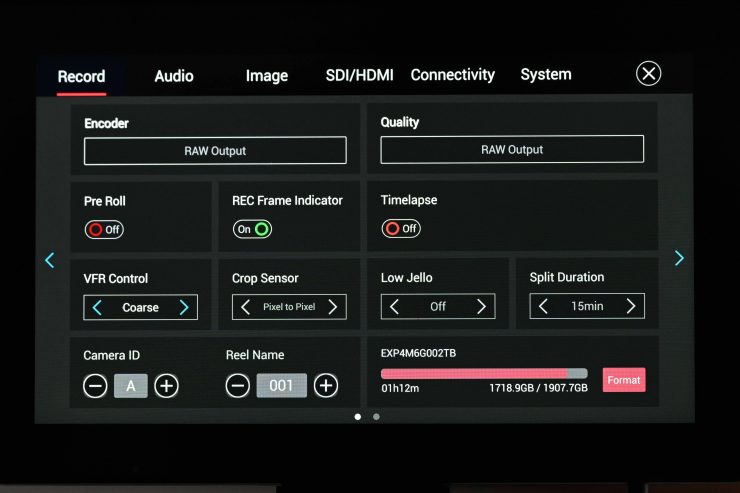
The camera has a dedicated Timecode page you can access in the Record section of the Menu. Here you can make changes to the timecode settings.
You won’t get any option to choose External Timecode unless the camera has a timecode signal being sent through the BNC port.
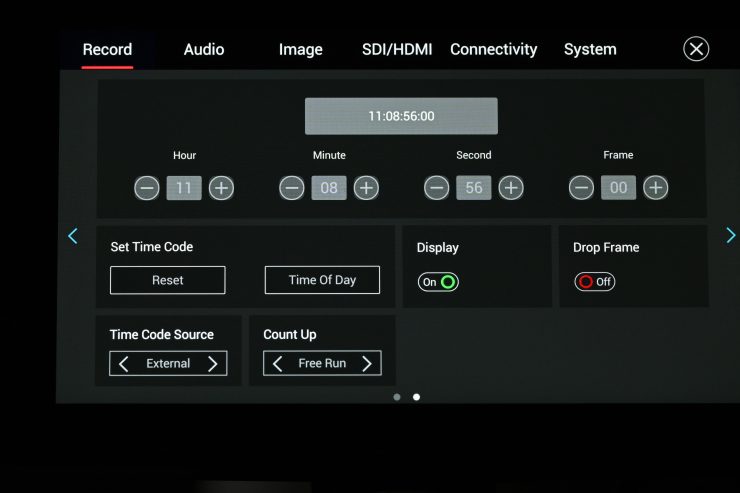
As soon as your timecode signal is sent through the BNC port it will automatically change to External Timecode and you will notice that the timecode value will change to whatever is being received.
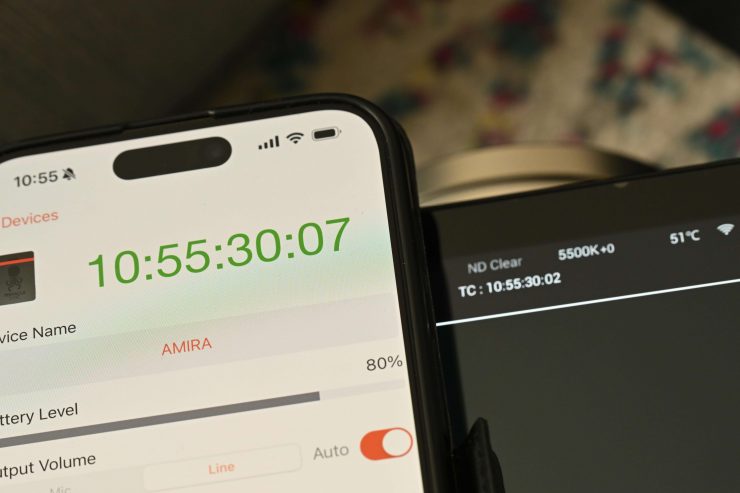
You will see a slight difference between the timecode being displayed from your timecode device to what is being shown on the camera’s screen but don’t worry, this is simply just the slight delay in the image path from the camera to the monitor.
Everything works well, but what I found slightly disconcerting is that the actual timecode value shown on the camera and the monitor stutters as you can see above. Again, this is nothing to be concerned about, but it did bother me.
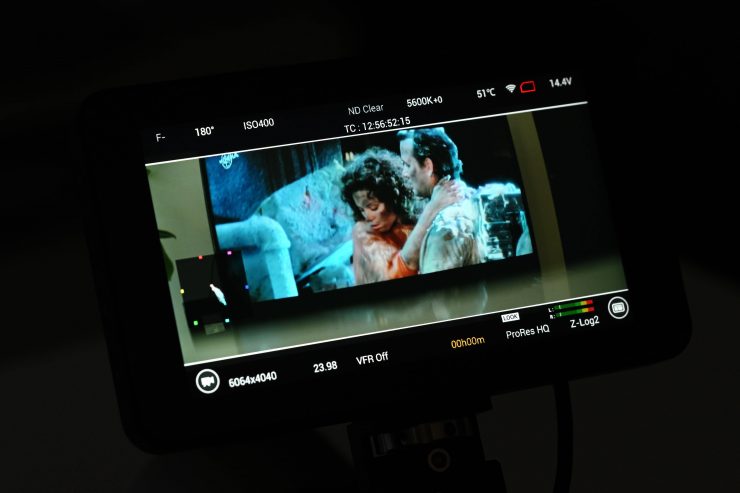
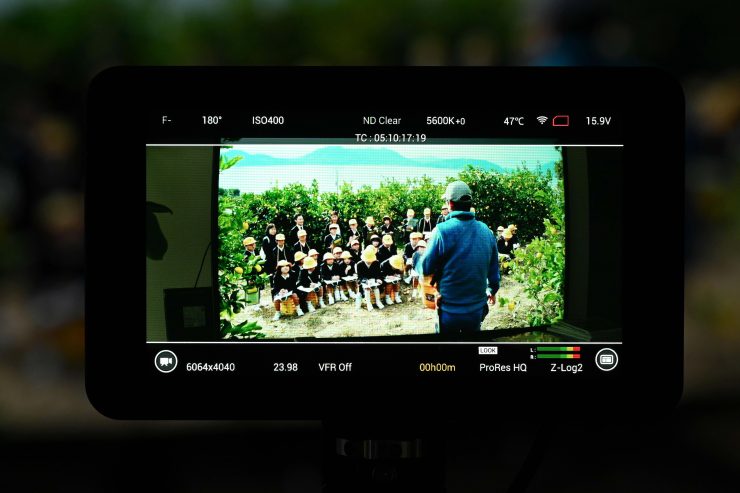
Example Footage
Above, you can see some example footage I shot with the Z CAM. I shot in the 6064 x 2560 wide mode at 23.98fps and captured material in ProRes 422HQ.
I wanted to shoot in a variety of different conditions to get an idea of how the camera performed. Like any modern-day camera, you can create looks or adjust color tones, etc. in any way you want. All you are looking for with. camera is something that can get you a good base to start with.
The Z CAM E2-F6 Pro produces nice imagery and I was reasonably happy with the results I got, especially considering its low price. The dynamic range could arguably be a bit better as I found that it would clip bright highlights, but I am used to using ARRI cameras so perhaps I have been spoilt. YouTube seems to struggle with some of the shots and there are image artefacts lime macro clocking and banding that are not present in the original footage.
The footage from the Z CAM is super easy to edit and very easy to grade. Shooting in good quality codecs allows you to move the image around depending on what direction you want to take it.
Image quality
For me, image quality and usability are the two most important factors I look for in a camera. All the specifications mean absolutely nothing if the camera isn’t easy to use and doesn’t produce nice imagery. The Z CAM E2-F6 Pro produces good imagery without having to do much in post. The ProRes imagery is really nice and I was happy with the results I got from the camera.
All cameras are capable of producing nice images these days and you create whatever look you are trying to achieve. In saying that, there are a lot of factors that come into play when creating a look, from lens choice to lighting conditions, to how you grade the images.
Resolution & Detail
The Z CAM E2-F6-Pro resolves fine detail reasonably well. It is sharp without looking overly sharp, however, like any camera, it will depend on what lens you are using.
Above you can see a video where I have shot in 6K (6064 x 4040), 6K DCI, 5K DCI, 4K DCI, 4K DCI (S35), HD, HD (S35), and S16. I have put everything on a 4K DCI timeline. The detail being resolved even when cropping in 300% is impressive.

These tests were done at the camera’s native ISO of 500 and I used a Tokina Cinema 85mm Vista prime lens set at T5.6.
If you would like a comparison, above you can see a similar test I did with the Kinefinity MAVO Edge 6K.
Skin tones & colors
The E2-F6-Pro’s colors look reasonably nice. I hate to use the term ‘color science’, because if you are shooting Log or RAW then what exactly are we talking about? I think color science can only be talked about if you are shooting with a baked-in look or just adding a LUT and doing nothing else.
In saying that, the camera produces pretty accurate colors straight out of the box and the skin tones look reasonably natural and pleasing to the eye.
The skin tones have a very slight push towards magenta but in a pleasing way. Of course, what skin tones are going to look like is determined by not only the camera’s sensor and processing but also by the lens and lighting conditions. Skin tones can also be massively manipulated in post and taken in any direction you wish.
Arguably the camera wasn’t designed to be used for turning around material quickly, however, it’s nice to know you can just add a LUT to your footage and get a nice-looking image straight away.
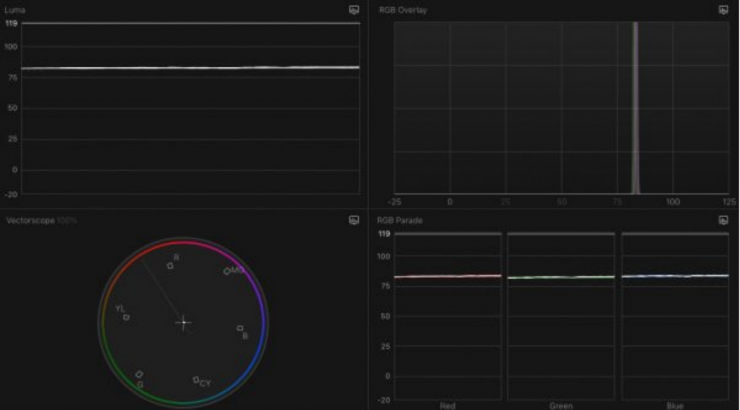
I shot pure white on a color checker chart with the camera set at 5600K and a Luxli Timpani 1×1 RGBAW light was also set to output 5600K. I wanted to see if the Z CAM had a color push in any direction. As you can see from the above scopes, it is fairly neutral. There is a tiny push towards magenta, but it is very, very small.
Reliability
I didn’t have any issues when I was testing the Z CAM E2-F6-Pro. In saying that, I can’t really make any definitive comment about reliability as I haven’t used the camera for long enough. I think Z CAM has worked really hard to make sure that their cameras work well and can be relied upon in professional environments. This is probably most evident by the fact that their cameras have been used on several big Hollywood blockbusters.
Rolling shutter
The E2-F6-Pro certainly does suffer from some rolling shutter like a lot of other CMOS sensor cameras. In full frame mode, the rolling shutter is pretty bad.
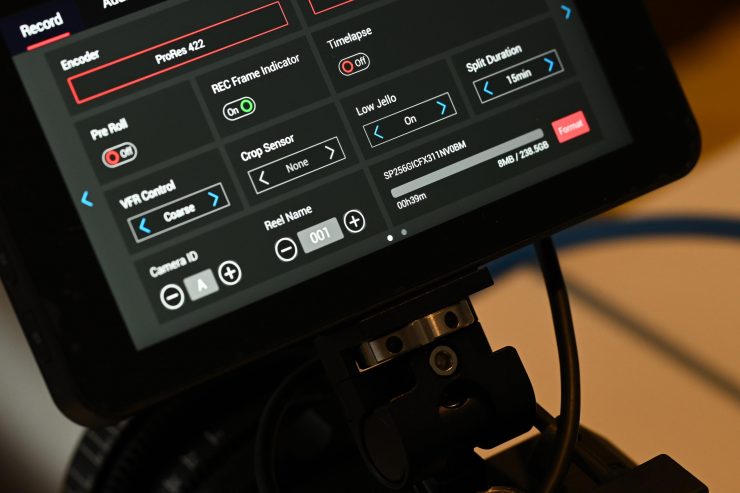
There is a Low Jello setting that you can turn on/off. The caveat is that this can only be used when recording in the following resolutions:
- 4K DCI
- C4K 2.4:1
- 4K
In the 4K or UHD mode the low jello mode increases the sensor read out thus reducing the jello effect.
Above are a couple of tests I did. When shooting 6K DCI at 23.98p the rolling shutter is pretty bad. As you can see, the rolling shutter performance does improve when shooting in 4K DCI with the Low Jello setting activated.
The rolling shutter is certainly one of the camera’s Achilles Heels.
Rolling shutter performance is hard to generalize. It really comes down to what you are shooting as to whether you find the amount of rolling shutter acceptable or not. There seems to be an over-fascination with rolling shutter that I can’t quite understand. I personally can’t recall anything that I have shot in the last decade that was ruined because of too much rolling shutter, but that probably also has to do with the cameras I choose to use.
How’s the noise?
The Z CAM does a decent job in low-light situations, although it isn’t going to be a low-light beast and compete with cameras like the Sony a7S III. As I mentioned earlier in the review, the camera has a dual ISO of 400 / 2500.
Here is what Z CAM Founder Jason Zhang states about how the E2 series cameras utilize noise reduction:
Intra-frame noise reduction is employed in all ISPs and that’s the easiest method to adopt. Basically it uses filters inside the frame to detect noise and apply different blur parameters to make noise weaken. The tradeoff is more or less sharpness and details. I think this is where the previous complaint about our noise reduction comes from. If bit depth is enough, PC software can always do a better job on this part. So our strategy on this part is to minimize the noise reduction for log and perform fine-tuning only on sRGB output.
We want the best detail and best SNR for final output, then what can we do with it? There are two steps:
In camera, we do advanced MCTF. In short, we detect noise with an important factor: time. Noise is always high frequency signals in time scale. E2 has the world’s most advanced ISP inside to buffer multiple frames and analyze them pixel by pixel in real time even in 4K@120fps! In this step, we use a conservative and complicated strategy to make sure the pixels that falls into the rules have a lower likelihood of being correct pixels and when we apply noise reduction we do it more gently. Some people don’t like noise reductions just because of their bad experience on other cameras with too aggressive/naive tuning strategy. The resulting artifact is ghosting. Worst case you would see the ghost edges of the objects. And in slightly better ones, when you have lights in dark area you would see ghosts of the lights. E2 will give you a brand new impression with our new technology and implementation.
When in-camera noise reduction is so called conservative (even it’s conservative I believe it’s still way better than other cameras in the same circumstances), if we want to reduce further noise but without the right knowledge, what do we do about it? Well, here comes our optical-flow based noise reduction software. Thanks to the GPU technology, we can calculate the movement of each single pixel accurately and then apply different strength on noise reduction accordingly. The most important thing is that it is fully automatic. You don’t need to understand how it works. It would simply work for you.
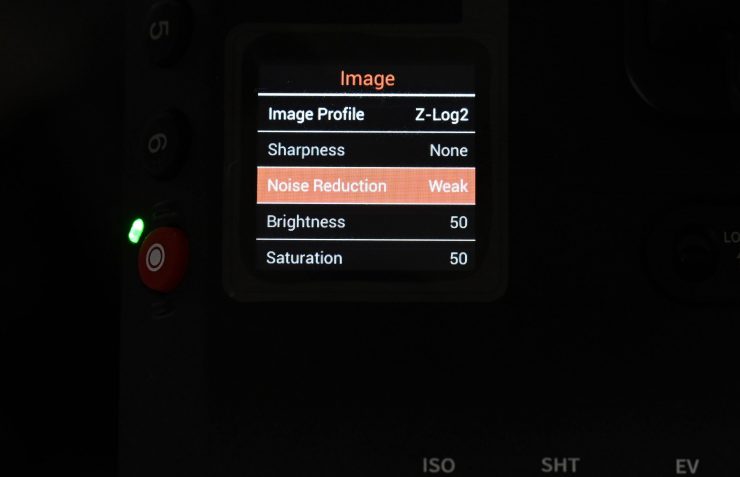
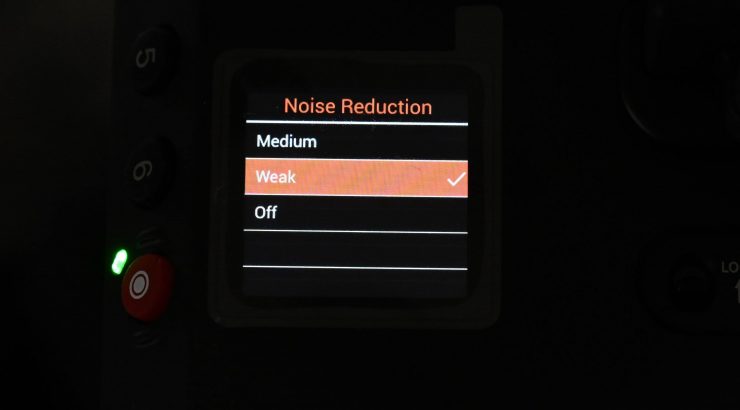
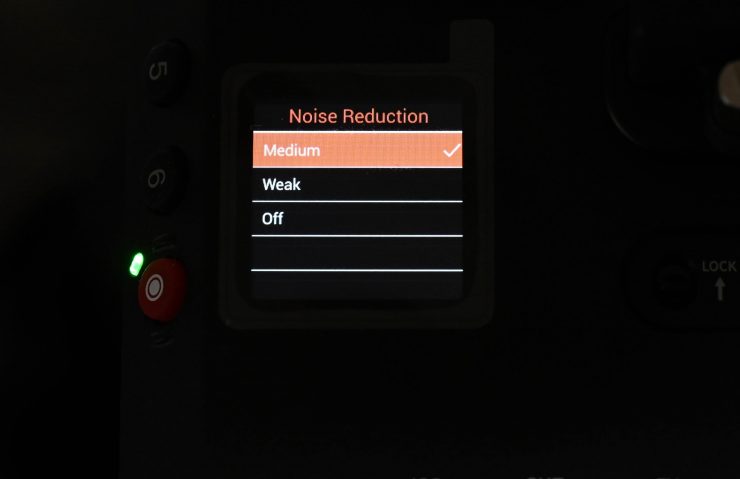
You have the ability to choose from three Noise Reduction settings when using the camera:
- Medium
- Weak
- Off
By default, I found it was set to Weak. Now, whether or not you want to have it turned on or off really depends on what you will be doing with the material. If it is fast turnaround material or material that will be handed off to a client who isn’t going to grade it, then I would probably suggest just leaving the Noise Reduction on Weak.
I did a few tests to compare what the Noise Reduction settings actually did. At least from my testing and to my eye, I couldn’t see any real difference between any of the three settings. All of my tests for the above and below videos were done in 6K DCI.
I was interested to see how the noise compared when using the two dual ISO values of 400 and 2500. 2500 ISO has significantly more noise than 400 ISO as you would expect, but to see that noise you really need to do a lot of pixel peeping. On a correctly exposed image, 2500 ISO still looks pretty good.
Next, I wanted to see how if the various Noise Reduction settings made any big difference when shooting at 2500 ISO. Again, just like at 400 ISO, I couldn’t see any big difference between the three modes.
I also wanted to see how the noise difference compared between 2000 and 2500 ISO. 2500 ISO does have less noise than 2000 ISO, so it is certainly worth using if you are going to be shooting at ISO values over about 1250 ISO.
So how much noise is there at various ISO settings? Well, I did some tests with the camera in 6K DCI to find out. I set up a small scene and illuminated a small robot so he was exposed to around 50 IRE as some camera manufacturers recommend that the main image should exceed at least 50 IRE to avoid noise. I kept this 50 IRE value consistent on the robot when I changed the ISO values by adjusting the light intensity or changing the iris or shutter speed.
At 6K I found that the images looked pretty good up to about 5000/6400. Once you go above 6400 ISO the noise starts to get a bit too much for my taste. In saying that, it still wasn’t that horrible at 10000 ISO. You can clearly see when the dual native ISO kicks in. 2500 ISO is a lot cleaner than 2000 ISO. I would say that the noise at 2500 ISO is pretty close to that of 1000/1250 ISO.
The Z CAM E2-F6-Pro isn’t a low-light beast, but it still performs reasonably well up to around 6400 ISO. How high you can shoot really depends on what type of work you are doing. I personally barely ever shoot over 2000 ISO, but I know plenty of people who shoot at levels above 5000 ISO.
If you are looking for a digital cinema camera that looks great at 5000 ISO and below, then this will certainly tick that box. If you stick to the two base ISO settings and below I think you will be pretty happy with the results.
Price
The Z CAM E2-F6-Pro is shipping and it retails for $3,999 USD. For your $3,999 USD you get the following:
- Z CAM E2-F6 Pro Full-Frame Cinema Camera with 5″ Touchscreen Monitor (Canon EF)
- 5″ Touchscreen Monitor
- D-Tap Power Cable
- Limited 1-Year Manufacturer Warranty
What you clearly need to know is that the true cost of the camera is really going to be more once you buy media, batteries, other camera accessories, and a camera cage.
If you buy the camera, the eND Module, a couple of 1TB ZBlades, and a camera cage, you will probably end up spending around $5,500 USD.
Competition
As far as competition goes, that is a tricky one, because of the camera’s specifications and low price you could literally compare it to a multitude of different cameras.
At $3,999 USD, the Z CAM E2-F6 Pro is very affordable given its capabilities, however, in the last few years, the prices of digital cinema cameras from Sony, RED, Canon, etc. have come down. This, perhaps, arguably makes the E2-F6 Pro a hard sell, despite how good it is for the money.
There really isn’t any other full-frame digital cinema camera that I would consider direct competitor that comes close to the price of the Z CAM.
Below are the prices of some other full-frame digital cinema cameras and more video-centric mirrorless hybrids on the market that I would personally consider competition:
- Sony FX6 $5,998 USD
- Sony FX9 $10,998 USD
- Sony FX3 $3,698 USD
- Canon R5 C $3,599 USD
- Canon R5 Mark II $4,299 USD
- Nikon Z8 $3,696.95 USD
- Nikon Z9 $5,496.95 USD
- Canon C400 $7,999 USD
- Canon C500 Mark II $8,999 USD
- Panasonic S5IIX $1,997 USD
- Blackmagic Design PYXIS 6K $2,995 USD
- Blackmagic Design Pocket Cinema Camera 6K Pro $2,535 USD
- Kinefinity MAVO Edge 6K Digital Cinema Camera (Space Gray) $9,999 USD
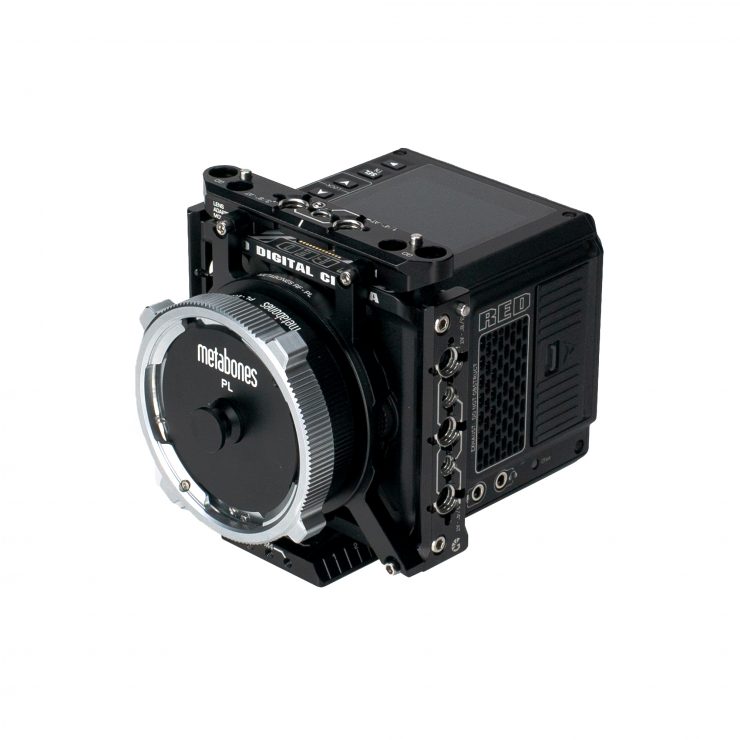
Despite only having an S35 sensor, cameras such as the RED KOMODO ($4,995 USD), RED KOMODO-X ($6,995 USD), Canon C70 ($4,999 USD), Blackmagic Design URSA Mini Pro 12K with OLPF ($6,385 USD), Canon C300 Mark III ($7,999 USD) and Kinefinity mark2 6K S35 Digital Cinema Camera (Active PL Mount) ($4,698 USD) are also going to be cameras that a lot of people considering a Z CAM will also look very closely at.
So should you buy one?
The biggest stumbling block for owning a Z CAM (this also goes for Kinefinity) camera is still when it comes to after-sales service and support. If you buy one of their cameras in China or a select few other countries, there is someone you can turn to for information and support. Unfortunately, in many other places in the world, there is no easy way of getting repairs done or receiving after-sales service. For many potential owners, this is probably the primary reason that they shy away from buying a camera that isn’t made by one of the large manufacturers. This really is a shame, because I think that both Z CAM and Kinefinity make good cameras that are a nice alternative to what’s on offer from other manufacturers. Below you can see the repair and service facilities that are available in North America and Europe
Repair Service (North America)
Cine Pro Service
Online registration: https://www.soltyscameras.com/service
Repair Service (UK & Europe)
Dark Chamber Media
Email: repair@darkchambermedia.com
For many owners and prospective users, the Z CAM Facebook user group is one of the quickest ways to have your questions or issues about the camera answered. Z CAM’s Kinson Loo is frequently posting updates and answering questions in the Facebook group. You can also email Kinson (kinson@z–cam.com) and he is pretty quick at responding back to issues or problems.
The other two problems you may well encounter when buying a Z CAM are resale value and clients having no knowledge about the camera. In some cases, clients will either request a particular type of camera or want to know what you are shooting on. In the case of owning a Z CAM, you may well be met with some resistance because the client has never heard of that camera before and could be reluctant to want to use it. These are real-world situations that you have to think about carefully before investing in a Z CAM camera.
So should you buy one? That is not a question I can answer. It really depends on the type of work you do and the clients you have. If you are working for clients or production houses they may not want to hire someone who has a camera they are not familiar with. Is this a stereotype, absolutely, but it’s also the reality. If you are a mid-tier Indy filmmaker and you can choose to use whatever equipment you want, then the E2-F6 Pro makes a lot of sense, especially given its capabilities and feature set.
At least in my opinion, the Z CAM E2-F6 Pro is worth looking at if you are after a 6K full-frame camera and are on a budget. The camera offers a lot of bang for your buck. The hardest thing for potential customers is there aren’t a lot of places where you can go and try one out or rent one for a few days to see how you like it. With cameras from the main manufacturers, it is easy to find a camera and try it out.
There have been and always will be a lot of people who dismiss cameras from smaller camera companies such as Z CAM and Kinefinity without ever having used or even seen their cameras. This is a real pity because they offer performance and usability which is right up there with what many other mainstream, camera manufacturers are doing.
Conclusion
Z CAM cameras, while arguably niche, have started to get a lot more mainstream recognition, especially after they were recently used in the latest Mission Impossible movie. If you are still looking at Chinese-made cameras with a negative view or skepticism, you really shouldn’t.
Companies like Z CAM and Kinefinity may be relatively small, but what they have been able to do is extremely impressive. Making a good digital cinema camera, let alone a good one is no easy task. Many have tried and failed.
I was very impressed with how easy it was to obtain good vision that I didn’t have to spend much time finessing. To me, that is a very important aspect of any camera. Lots of cameras can be made to look great, but a good proportion of them require time in post to achieve a good result. With the Z CAM, you don’t have to work that hard. The footage is robust and easy to grade and work with,
Almost all of the camera offerings these days are very capable of producing nice pictures regardless of the cost. Usability, reliability, and features are what now set the majority of cameras apart.
I enjoyed using the camera and it is nice and small and compact. The E2-F6 Pro has a good variety of inputs and outputs, and a decent OS, and I like the included touchscreen monitor and the ZBlade media. Another nice addition is the eND modules that you can use with the PL mount and the EF mount.
Being able to record ProRes in every single resolution and frame rate is impressive. If you need RAW, then that is available too.
On the negative side I wish Z CAM had of partnered with a third-party company to come up with a good cage solution for the camera, that still allows it to work with the monitor.
The caveat with buying any product from a small company is that it has to be better or more affordable than what’s on offer from the big boys. You can’t just make a product that is the same, otherwise, nobody will buy it. Z CAM has done a good job of positioning itself as an alternative solution to more popular cameras on the market. They have done this by offering cameras with good feature sets at a cost that is far lower than the competition. In saying that, a lot of the big players have been bringing the prices down on their cameras which has made it increasingly more difficult for Z CAM.
You would be hard-pressed to find any other digital cinema camera on the market that offers such good value for money as the Z CAM E2-F6 Pro.