Blackmagic Design has released a short video that shows you how to use the DaVinci Resolve Micro Color Panel that works with Mac, Windows and even iPad.
Here’s a quick look at the new DaVinci Resolve Micro Color Panel. Works with Mac, Windows and even iPad. pic.twitter.com/N9ztIHYCHy
— Blackmagic Design (@Blackmagic_News) June 27, 2024
Key features
- For DaVinci Resolve Software
- 3 High-Resolution Trackballs
- Precision Machined Control Knobs
- Navigation and Transport Keys
- Connects via Bluetooth or USB-C
- Mounting Slot for iPad Pro
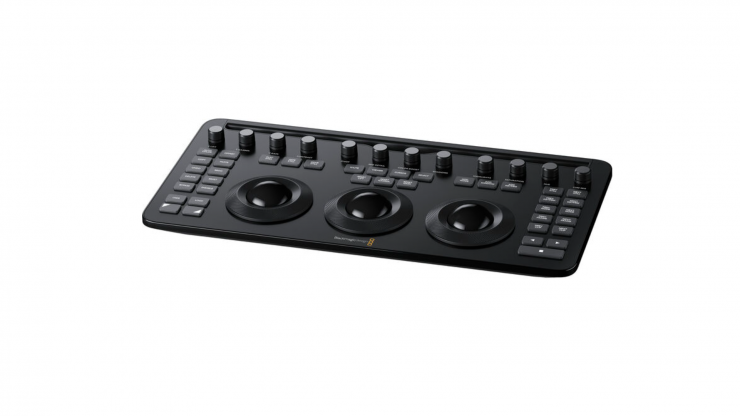
Designed to work in tandem with your Apple iPad Pro, the DaVinci Resolve Micro Color Panel provides the same level of professional color control as other panels but with a beginner-friendly interface. The panel provides more color and a faster workflow to DaVinci Resolve Studio software than working just with a keyboard and mouse. It consists of three high-resolution trackballs, 12 control knobs, and several buttons to adjust parameters like Y lift, Y gamma, Y gain, and contrast.
The controls of the panel are in similar places as the controls of the advanced versions. You can even adjust the power window shape, size, and position, softness, or resize the input image. The Micro Color Panel is not much larger than a standard keyboard and features a slot to mount your iPad Pro and use the tablet as your software display. Connect to your iPad or personal computer via Bluetooth or USB-C connection. The panel runs on an internal battery or USB-C power.Primary Adjustment ControlsControl knobs are grouped into four sets of three knobs.Luminance
- Y Lift control: Adjust the contrast of the image in the darker areas, specifically in the Y (luminance) channel only. This adjustment allows changing the black point without changing saturation.
- Y Gamma control: Adjust the contrast of the image in the mid-tone areas, specifically in the Y (luminance) channel only. This control helps add depth and extra vibrancy to shots.
- Y Gain control: Adjust the contrast of the image in the highlight areas, specifically in the Y (luminance) channel only. This adjustment allows you to change the highlights without changing saturation.
Contrast
- Contrast Control: Increase contrast to make the blacks darker and the whites brighter, or decrease contrast to do the opposite.
- Pivot: Change the center of tonality about which dark and bright parts of the image are stretched or narrowed during a contrast adjustment.
- Mid-Tone Detail: Affect the contrast of regions of the image with high edge detail to increase or decrease the perception of image sharpness and definition. Often used for softening facial features, making it popular for beauty shots.
Detail
- Color Boost Control: Raise the saturation in regions of the image with low saturation while leaving properly saturated areas alone. Also known as a vibrance operation, this is useful for adding color without oversaturating the image.
- Shadow Control: Selectively lighten or darken shadow detail without affecting your image’s mid-tones.
- Highlight Control: Enable retrieving blown-out highlight detail in high dynamic range media by lowering this parameter. This allows you to achieve a smooth blend between the retrieved highlights and unadjusted mid-tones for a natural-looking image.
Saturation
- Increases or decreases overall image saturation. You can turn your color image into a grayscale image with this control.
- Hue Control: Rotate all hues of the image around 360° of the color wheel. The default setting is 50, which retains the original distribution of hues.
- Luminance Mix Control: Control the balance between the YRGB adjustments and Y-only adjustments made using the Y channel lift, gamma, and gain controls.