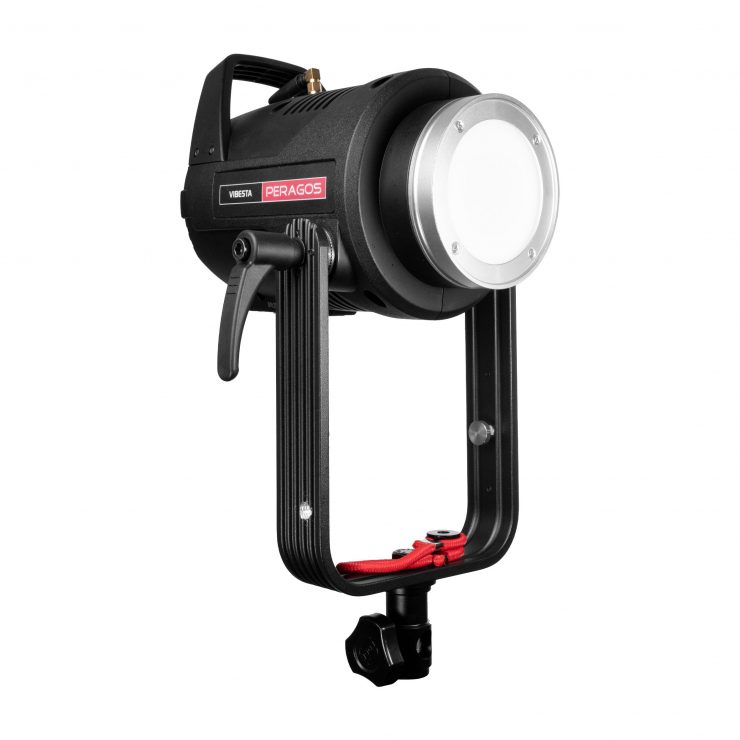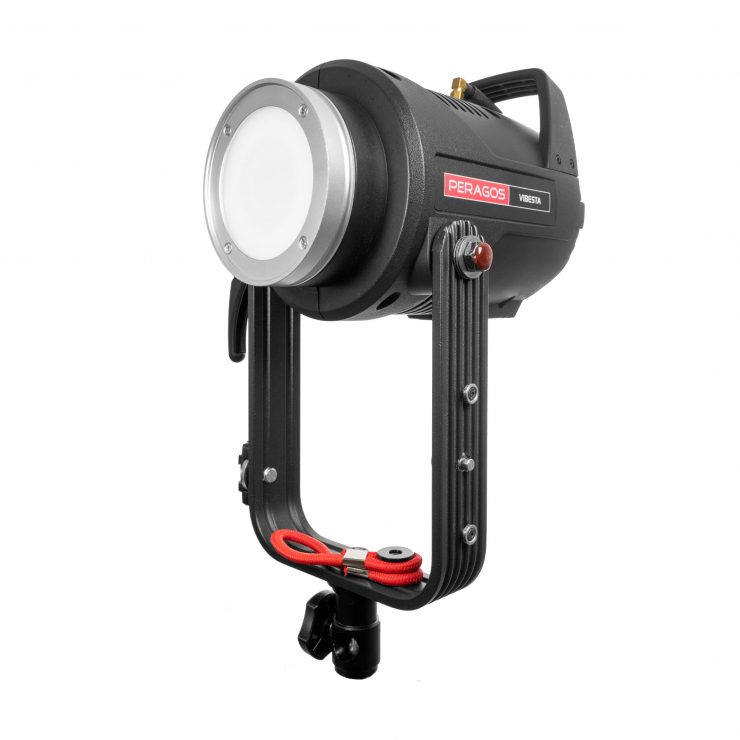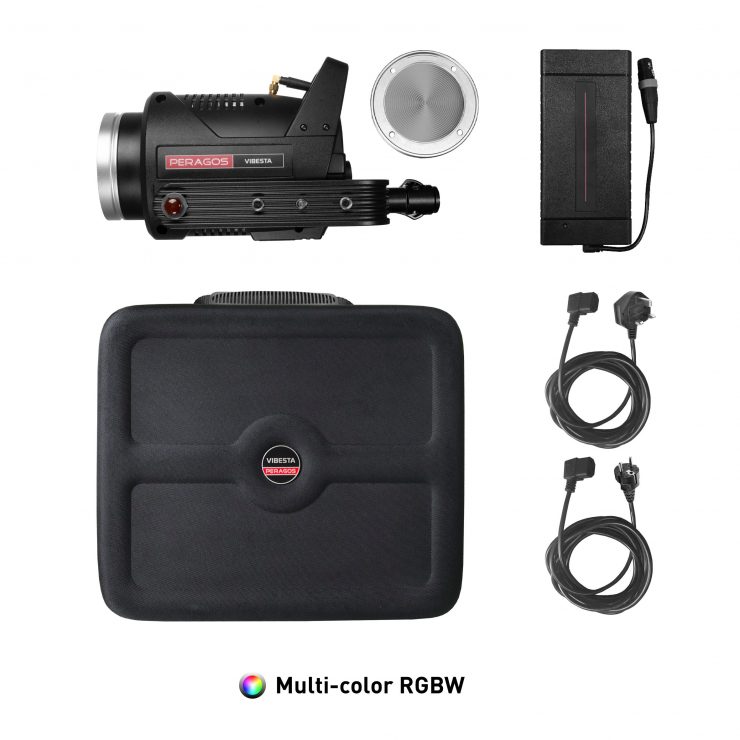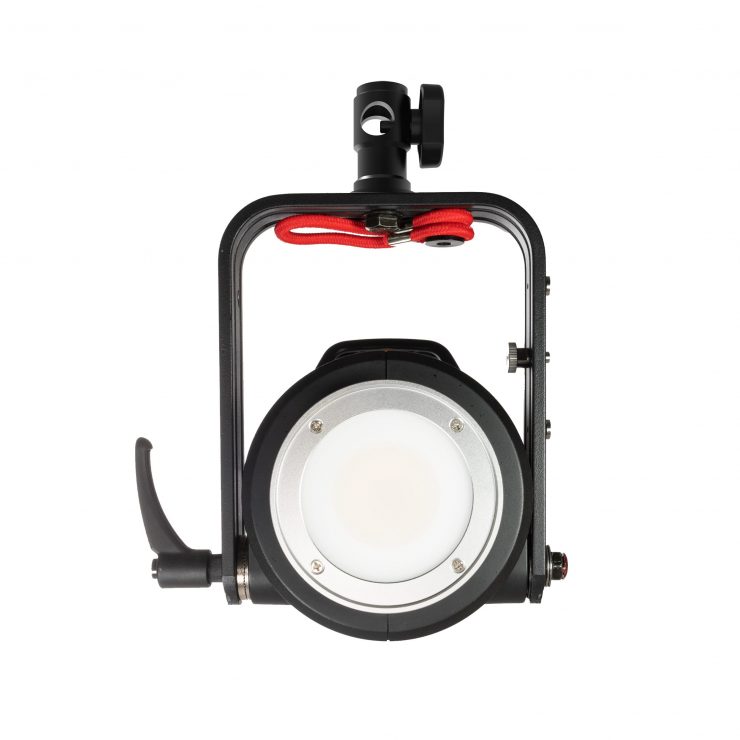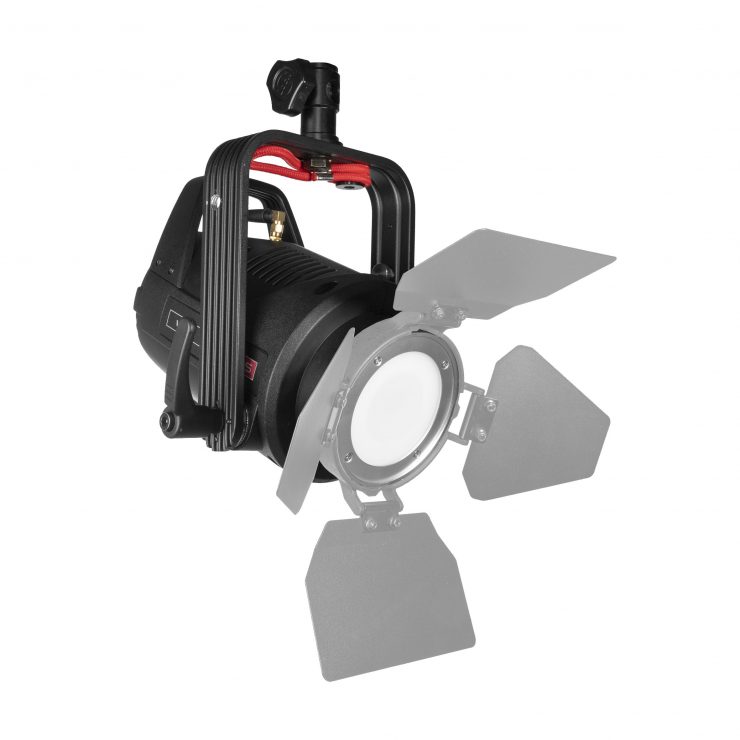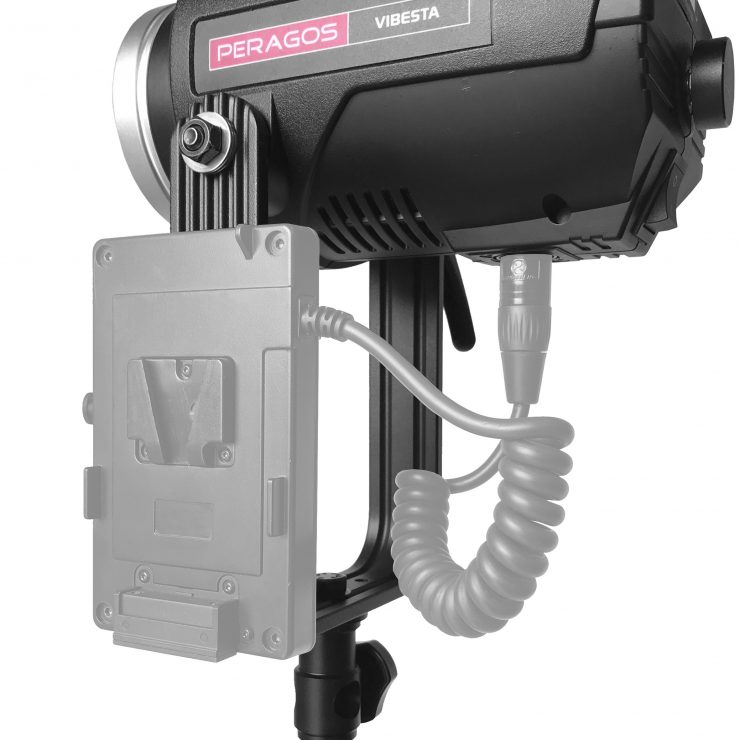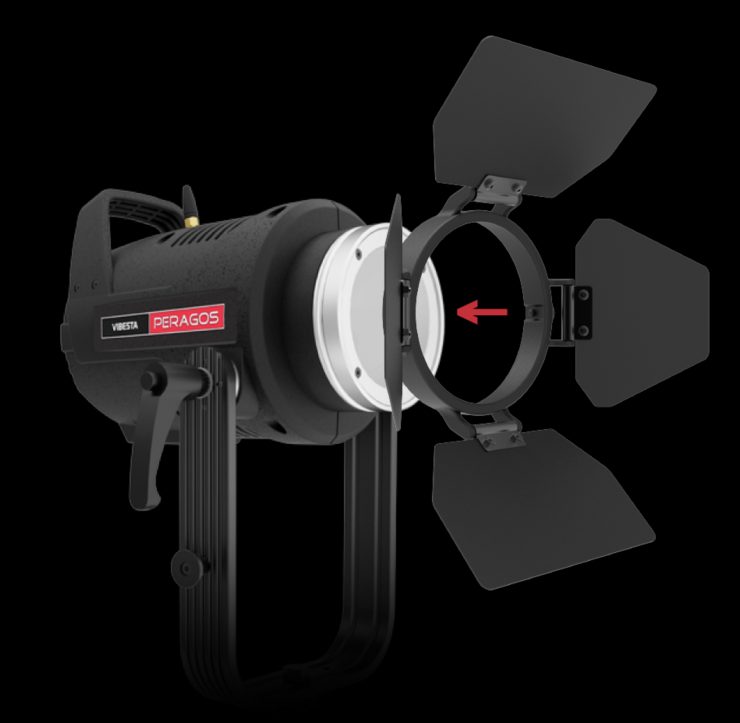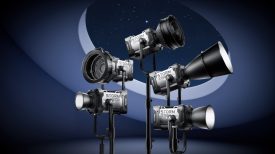
The Vibesta Peragos 150C Head Multi-Color COB is a compact, fully color-tunable, battery-operatable, spotlight, that is compatible with lots of light modifiers.
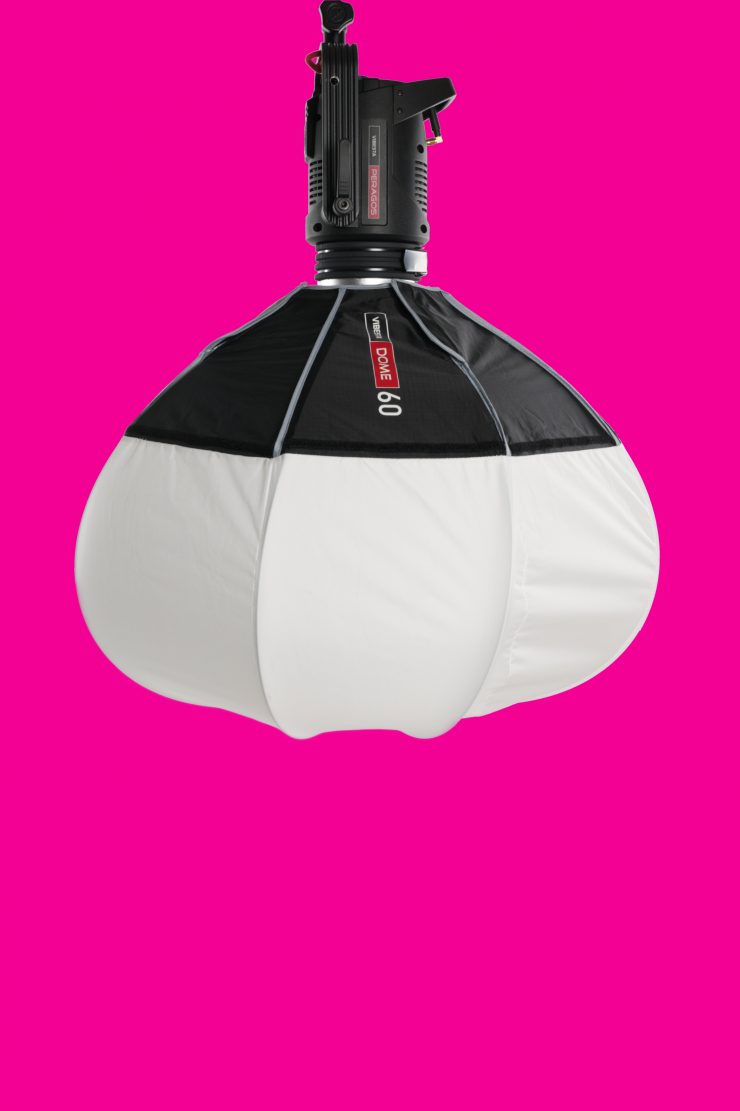
This 180W fixture looks to be a good option if you are looking for an affordable, well-featured, and versatile COB light that doesn’t weigh much or take up much space.
Key features
- 180W Multi-Color Monolight
- Magnetic Lightshaper System
- 1500 – 30000K CCT Range
- Rayzr Light Engine
- Profoto compatible + Bowens adaptable

The light draws a maximum of 180W and it is CCT adjustable from 1,600-30,000K. It also features full +/- G/M correction. The native beam angle with no modifiers is 120 degrees.
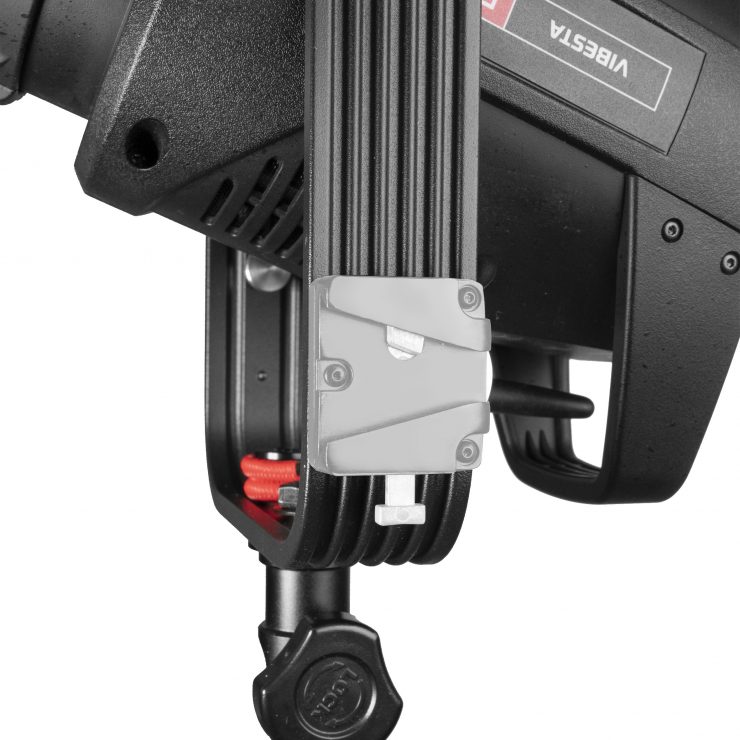
It can be powered via AC or through a V-mount battery. Vibesta also states that you can also use two Sony NP-F batteries, but I would imagine that only allows the light to be run at reduced output.
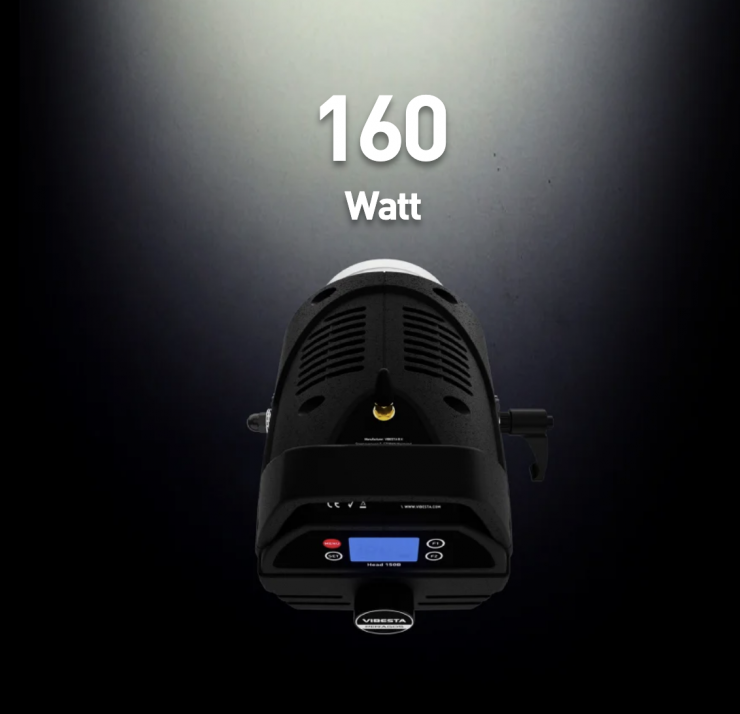
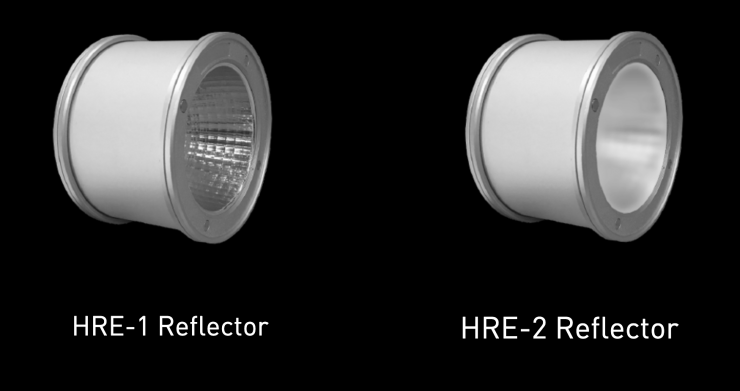
According to Vibesta, the combination of its specially designed reflector and optional lens attachable through the magnetic attachment system, allows the Peragos Head 150 to produce a brightness equivalent to an 800-1000W incandescent tungsten light.
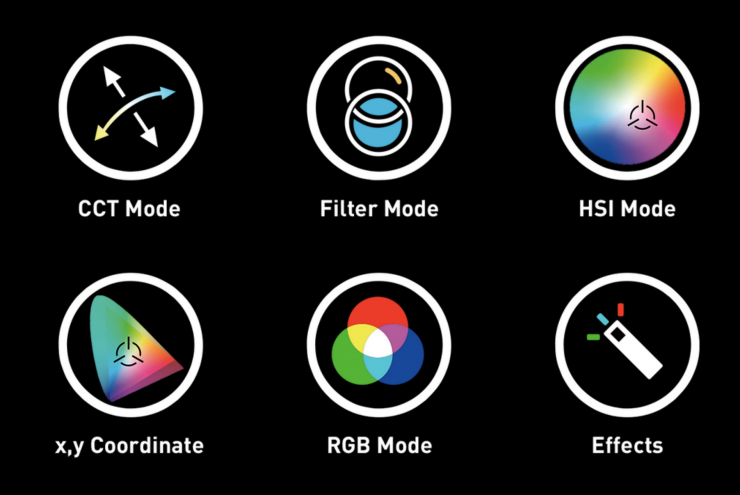
The Vibesta Peragos Head 150 Multi-Color COB has the usual assortment of operating modes such as CCT Mode, HSI Mode, RGB Mode, x,y Coordinate, Filter Mode, and Effects.
The light has an adjustable refresh rate of up to 125000 Hz which makes it flicker-free if you are shooting at higher frame rates. There are also four user-selectable dimming curves you can choose from.
Four Different Mounting Options
Vibesta gives you four different ways of mounting accessories to the light.
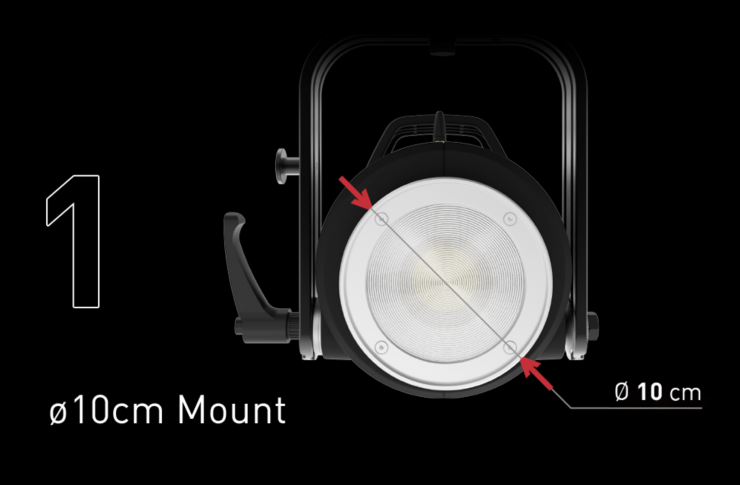
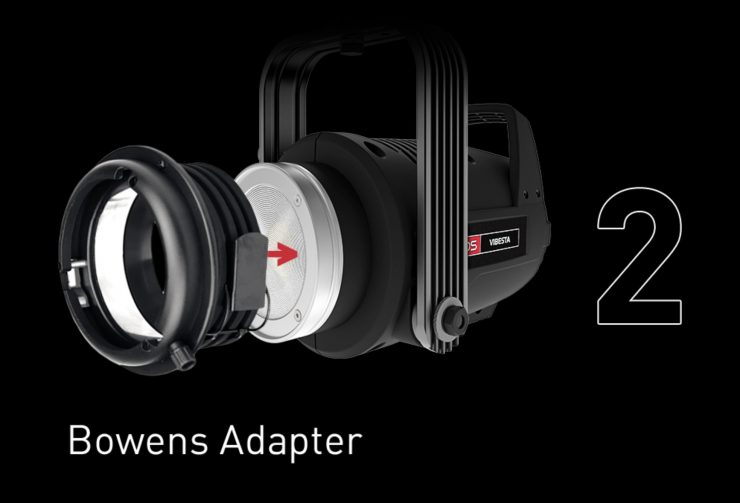
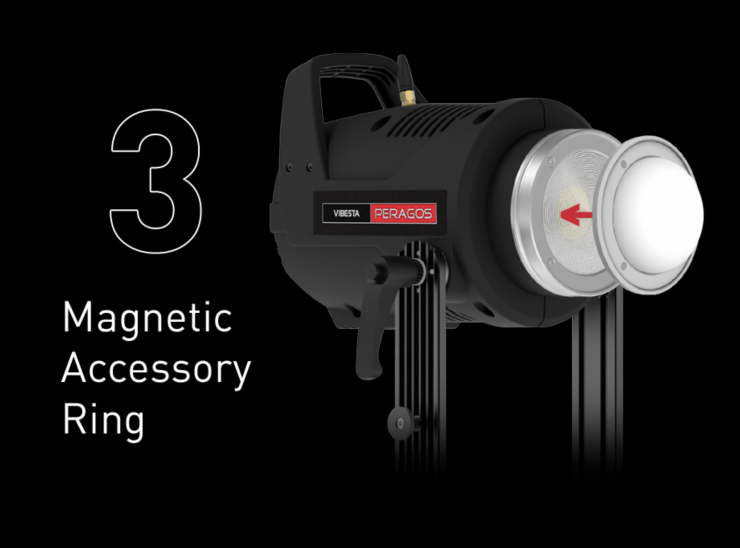
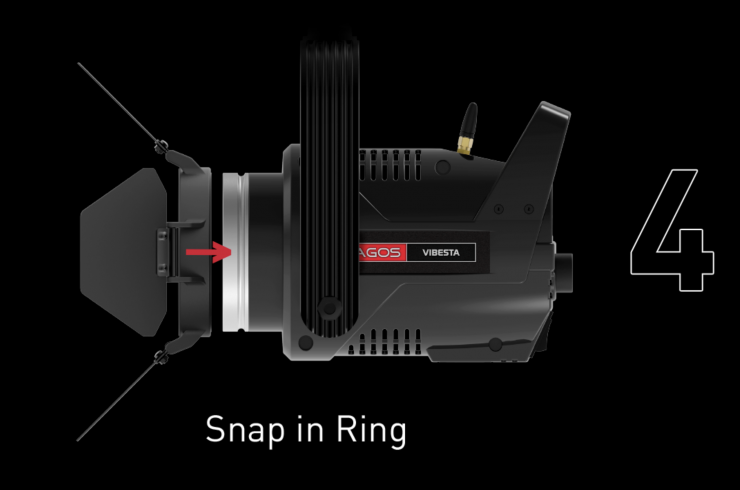
It is nice to see some versatility with mounting options, as a lot of companies making similar lights just throw on a Bowens Mount and call it a day.
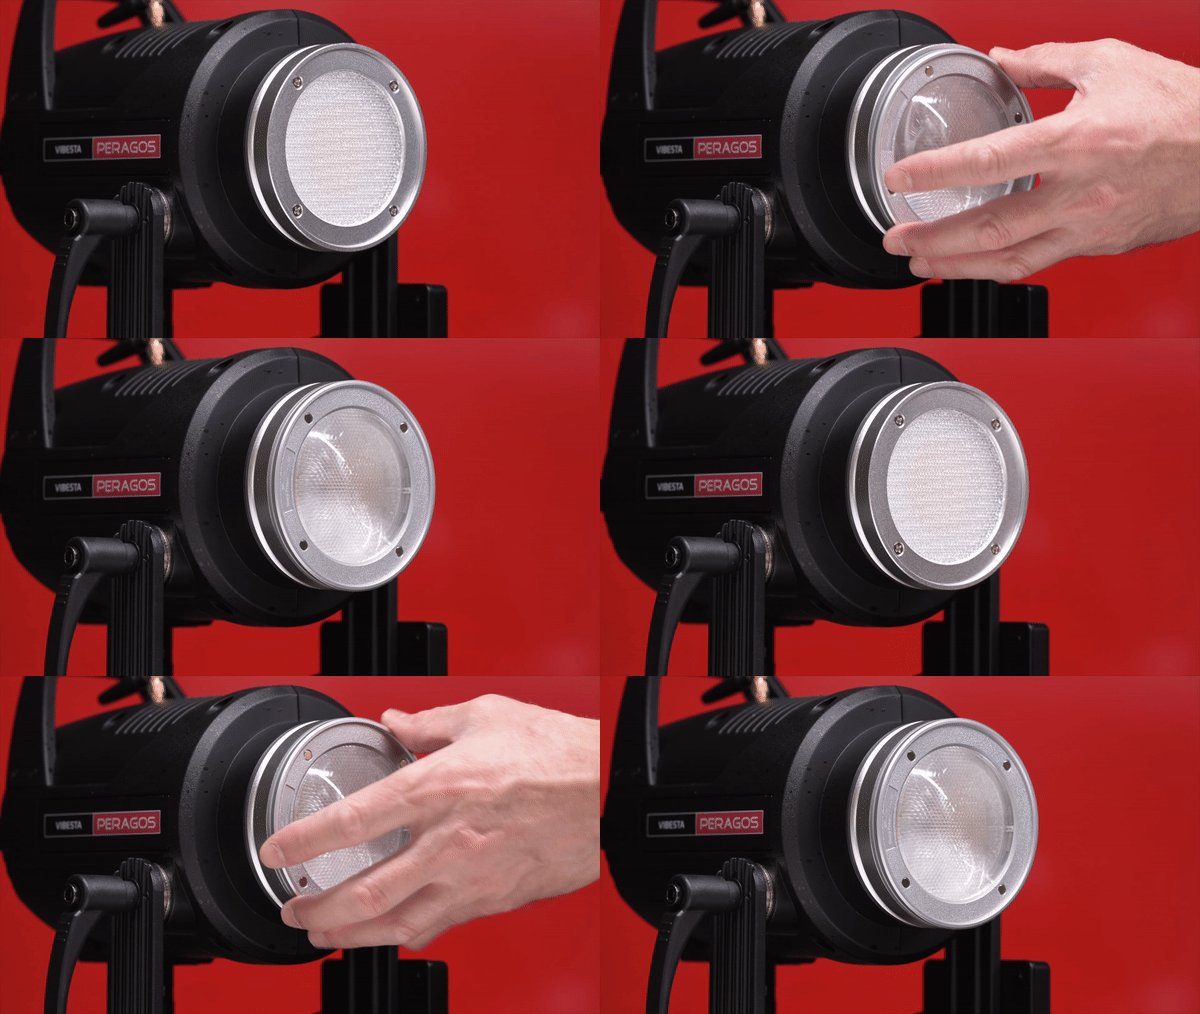
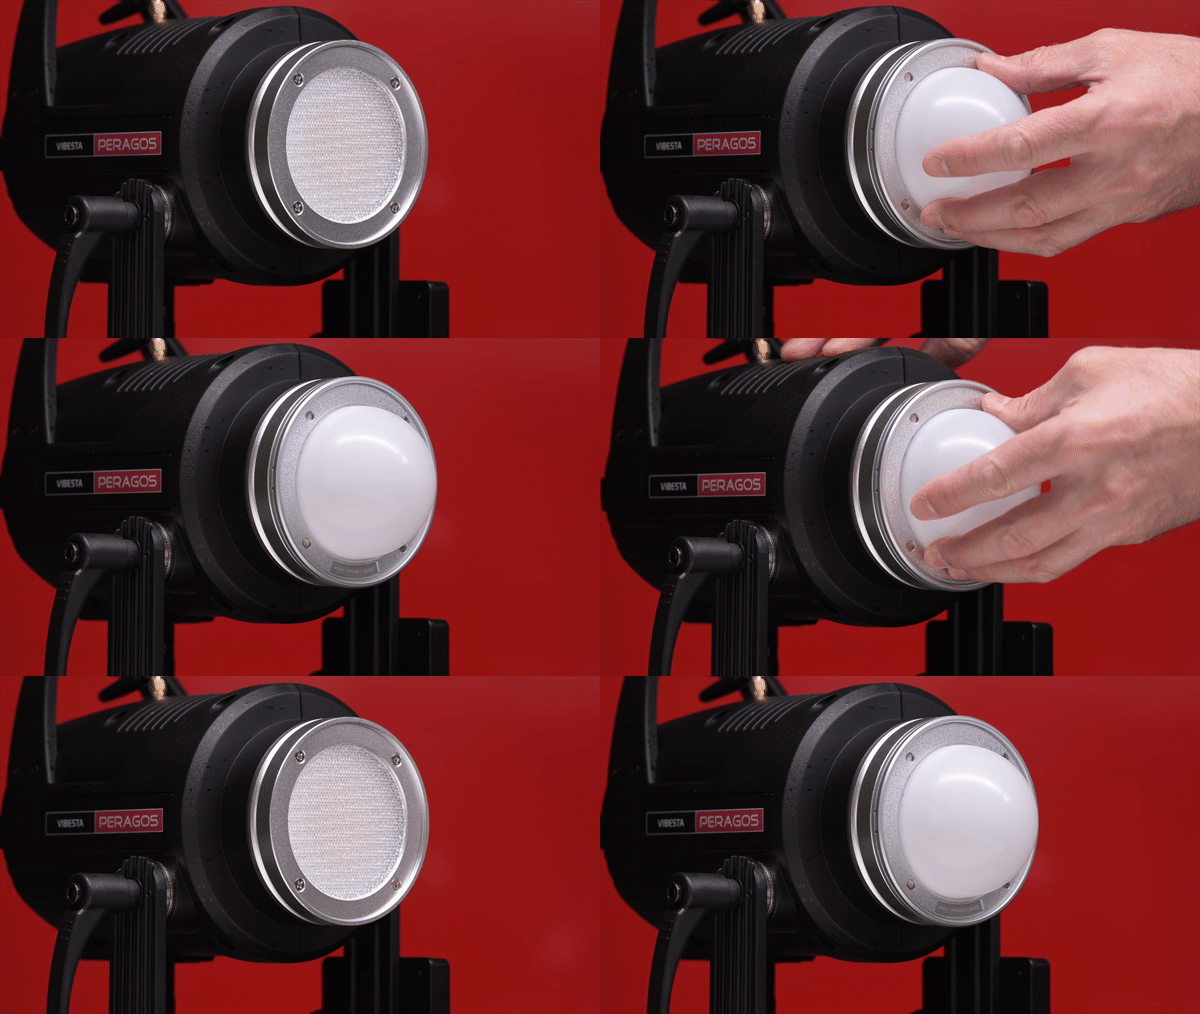
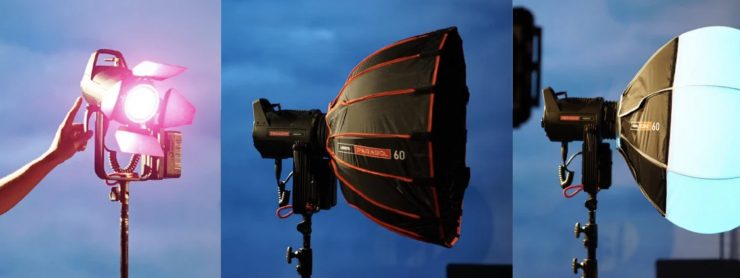
Above you can see how easy it is to attach lighting modifiers.
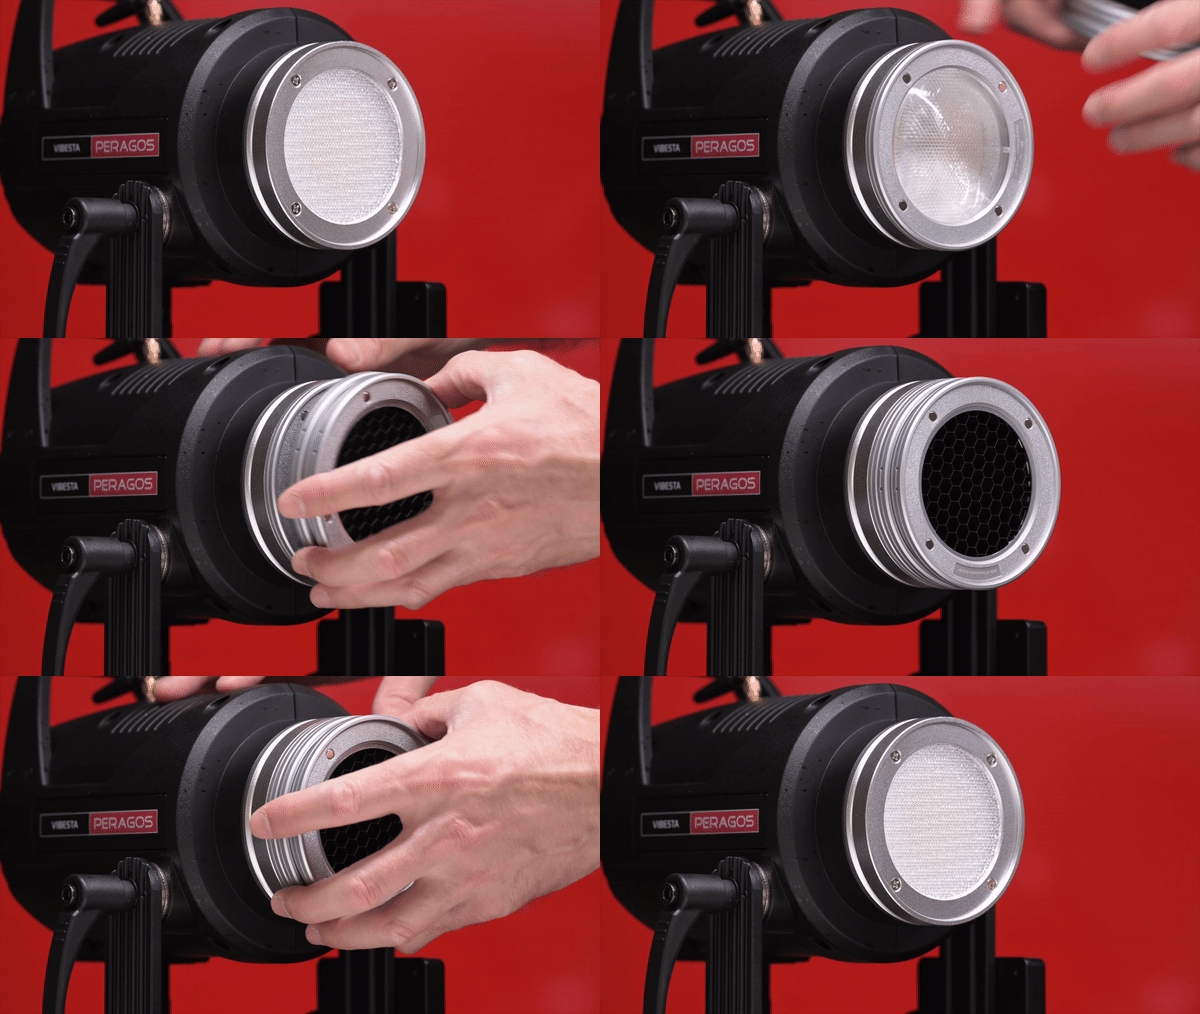
Above you can see how you also have the ability to stack the magnetic lighting modifiers.
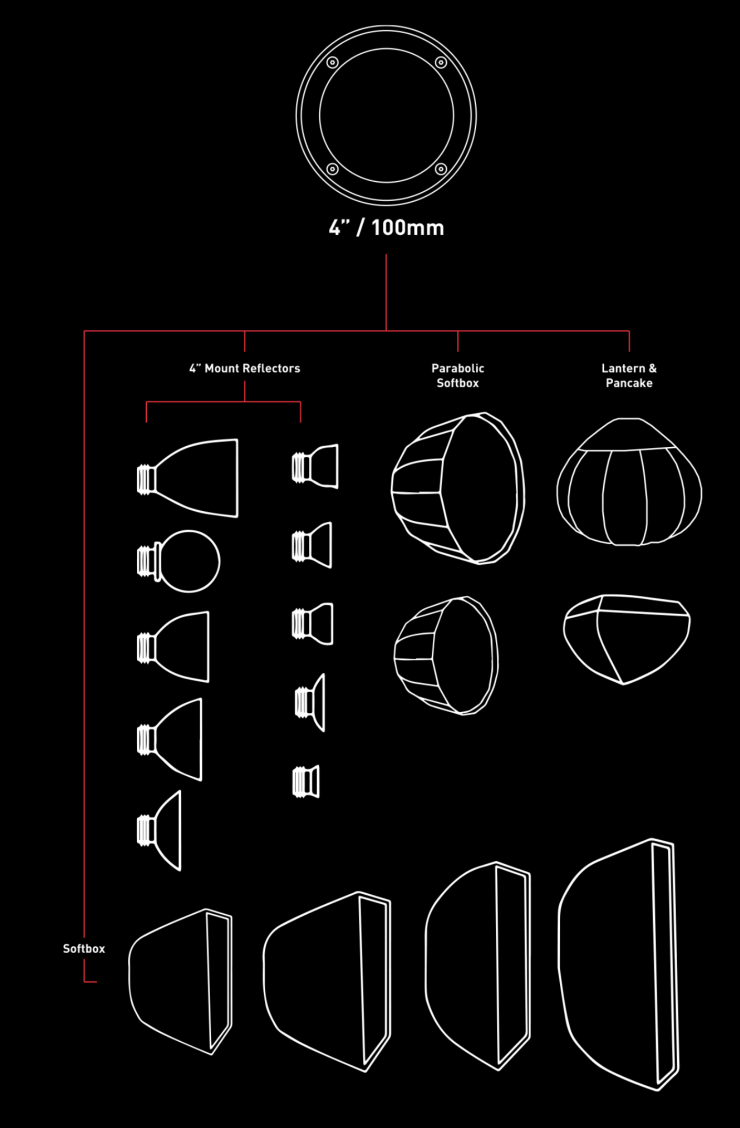
Speaking of versatility, it is good to see Vibesta offering a large array of lighting modifiers that you can use with this fixture.
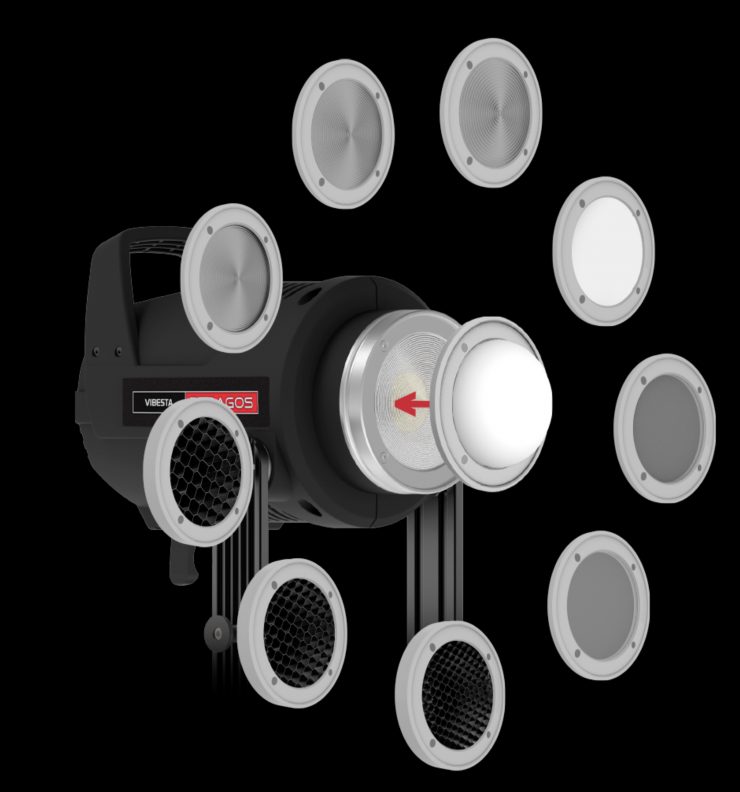
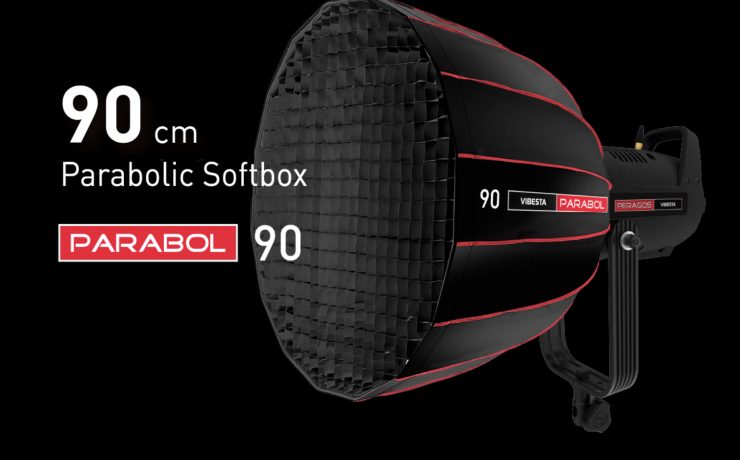
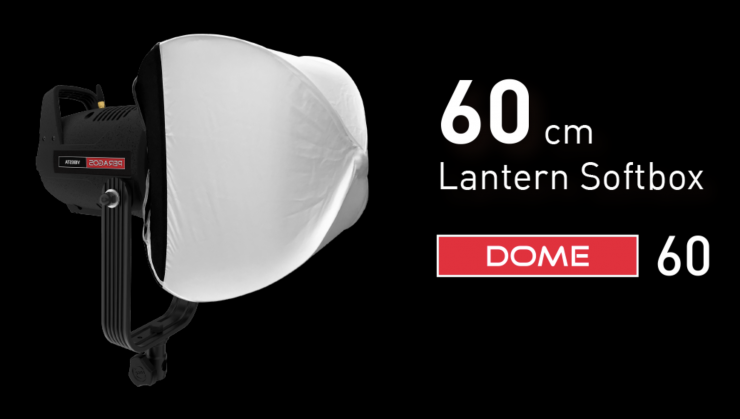
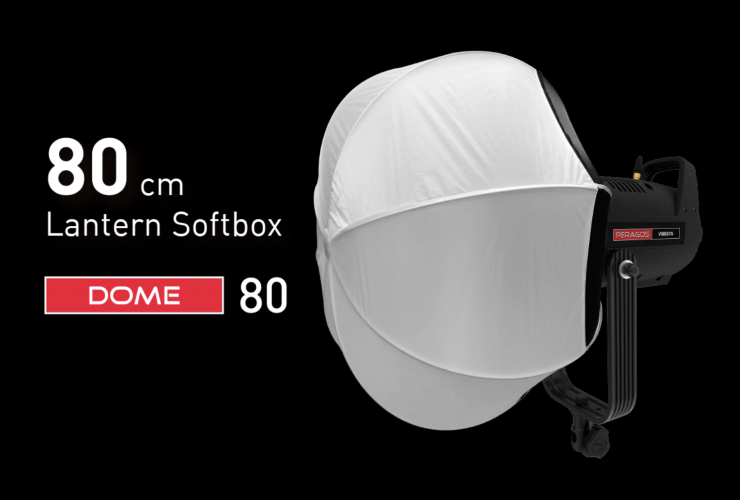
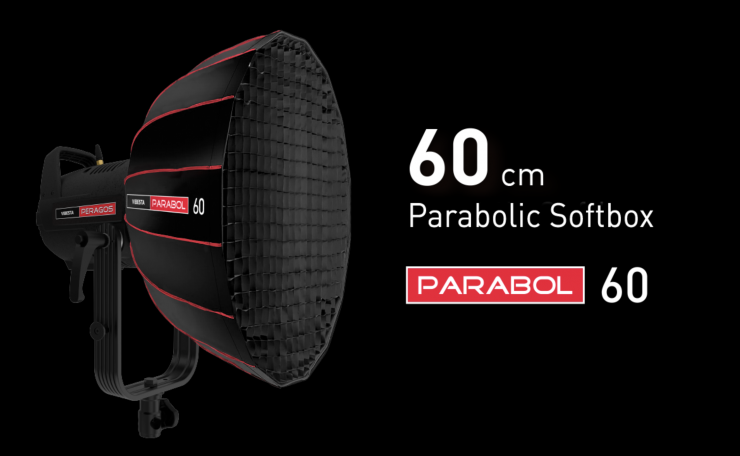
There are optional reflectors, softboxes, lanterns, and barn doors.

The lighting modifers such as the lantern, barn doors, and soft box all work well and they are quick to set up.

The softbox and the lantern simply fit over the top of the front of the light and there is a small latch that locks it down. It is a simple solution but it works well.
Concept

The concept behind the Vibesta Peragos Head was to come up with an inexpensive, lightweight, versatile, full color lighting source that could be used for a variety of different applications.

The Vibesta Peragos Head looks similar, although a little different to most other spotlights with a similar power draw that are on the market.
Who is Vibesta?
Vibesta is a Dutch lighting company that has been around for a few years now. The same people who own and operate Vibesta also made the Rayzr panel lights and Fresnels that you may well have seen before.
RGBW
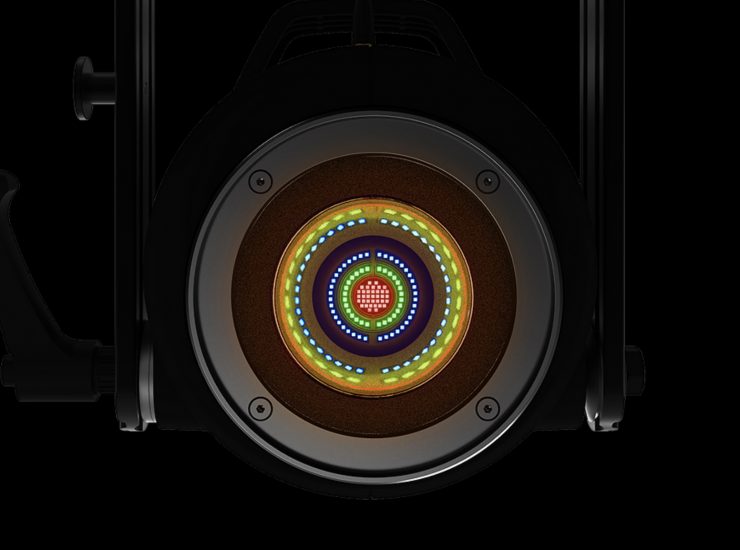
The light features a Multi-Color COB LED array powered by the Rayzr Light Engine.

The light utilizes RGBW, although the LED colors are listed as RGBT, which is different from other lights that we have seen before such as the Prolycht Orion 675 FS and ARRI Orbiter that use RGBACL. The Orion 675FS and Oribiter don’t use any white LEDs, instead, they are mixing all of those different color LEDs to produce white light. Hive Lighting has also been using 7 LED-chip blending. Instead of the traditional 3 colors, Hive uses red, amber, lime, cyan, green, blue, and sapphire. The advantage RGBACL has over RGBWW is that it is capable of giving you a larger CCT range and it can produce more saturated colors with more output. RGBWW lights tend to struggle to create saturated colors like yellow and they don’t always have as much output when generating saturated colors. They can also have a large drop-off in output at different CCT settings.
There is a lot of debate and argument over what is better when it comes to RGB lighting engines. Prolycht will tell you that RGBACL is better, while Aputure will tell you that RGBWW is better. I don’t have any horse in this race, so I am not influenced by what lighting companies say. All my reviews are based on data and facts, and every light gets the same unbiased treatment regardless of who makes it or how much it costs.
I am not a fanboy of any lighting company who is going to give you a biased assessment of a light. I have seen, used, and reviewed hundreds of lights over the years so I think I have a pretty solid background in giving you a professional opinion that isn’t influenced by marketing hype.
Build Quality

The build quality of the Vibesta Peragos Head is ok considering how lightweight and affordable it is. The casing of the light is reasonably robust despite being made out of some type of lightweight material.

In fairness to Vibesta, it probably wasn’t designed to stand up to the rigors of field use and it is more suited to content creators.
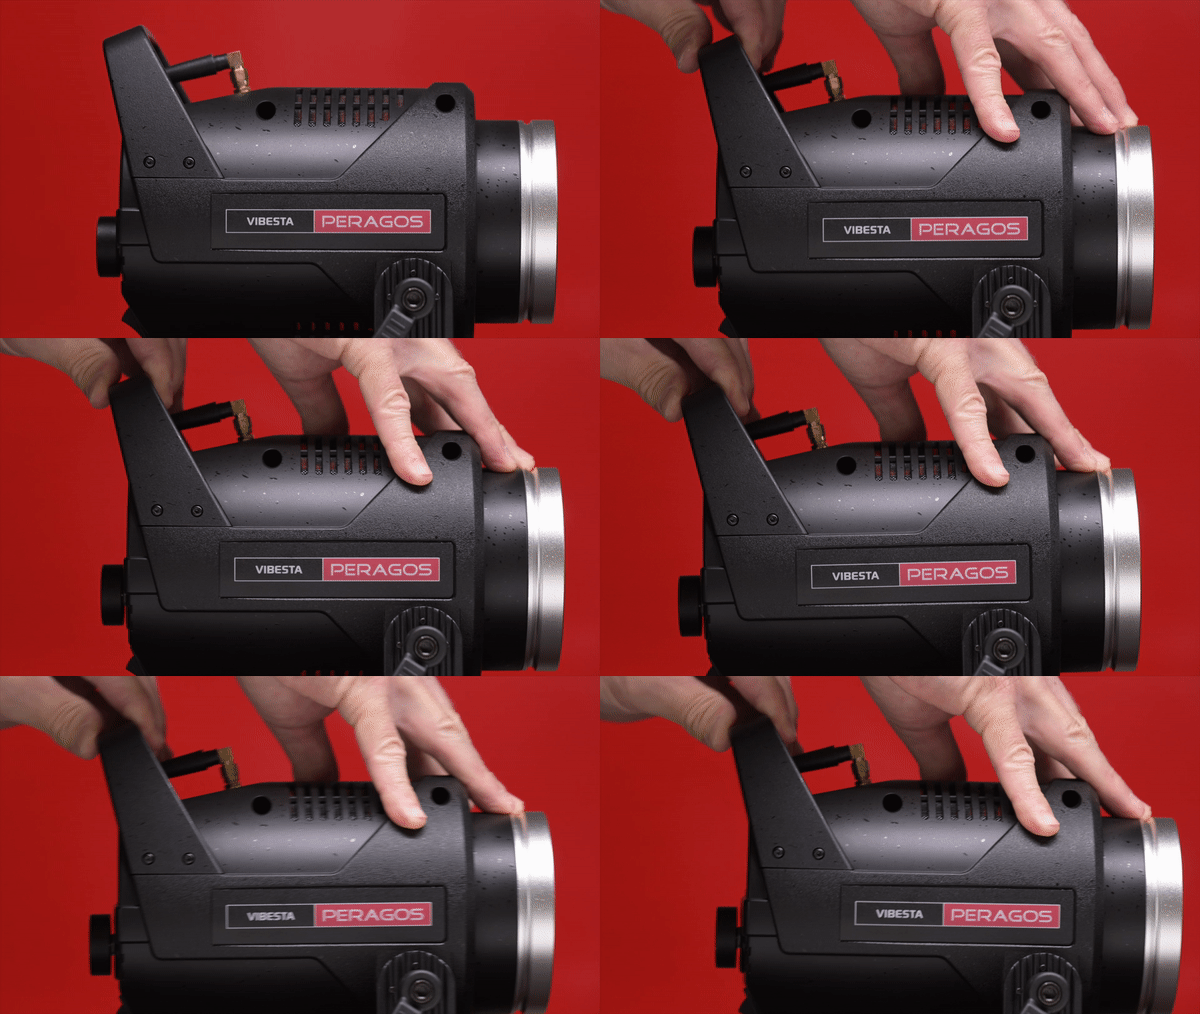
If you grab the back handle and pull on it you can hear a lot of creaking and the light will start to flex. While I don’t particularly think the light looks elegant or pretty, it’s not how it looks, that matters.

The power supply was designed to be as lightweight as possible and it is made out of some hard plastic material. Again, I am not sure how well it would stand up to the rigors of field use if you weren’t careful with it.
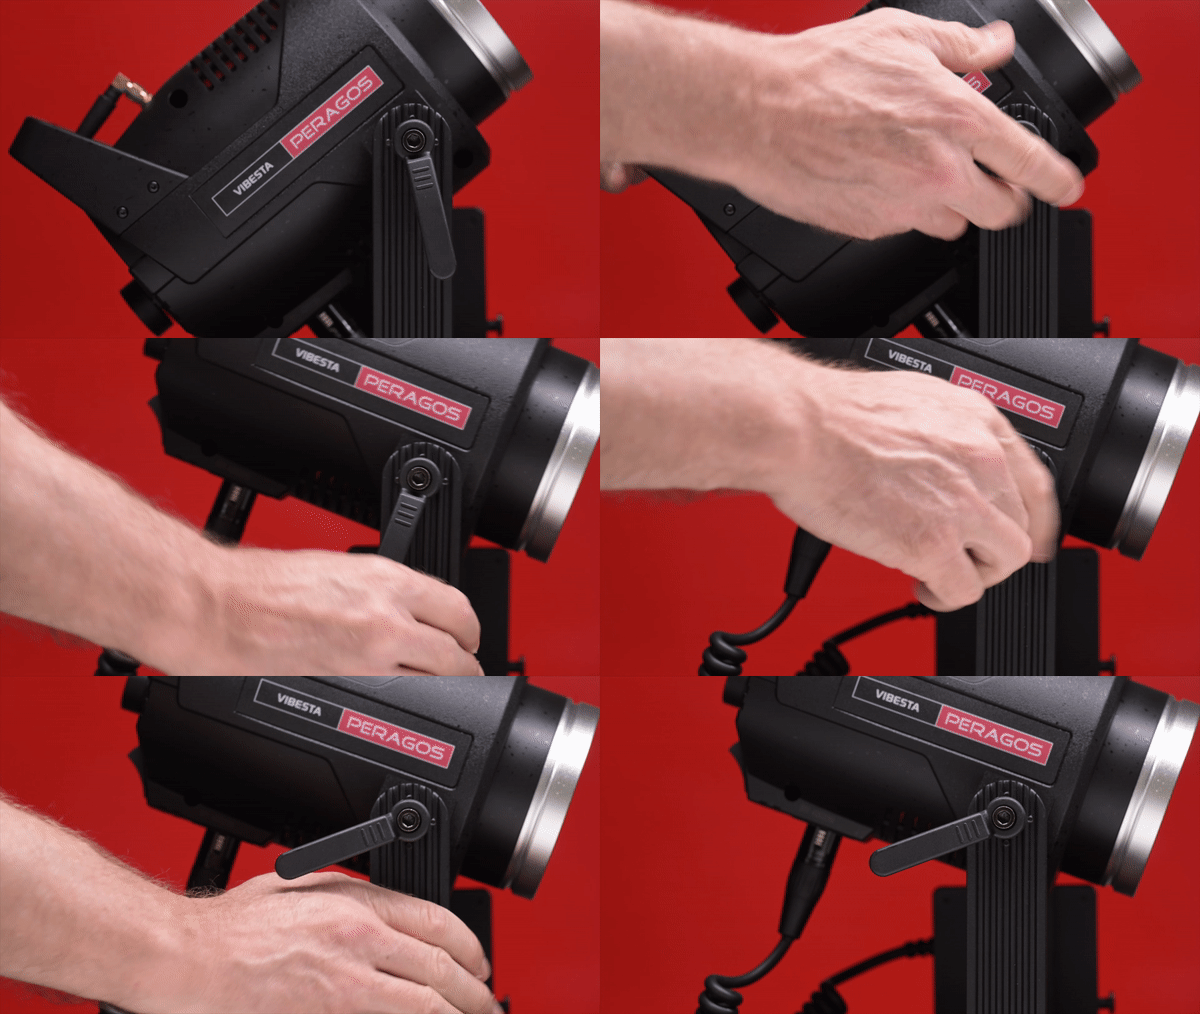
The light features a single locking mechanism on the yoke frame. It uses a rosette-style system and while it locks down securely it isn’t particularly smooth to move.

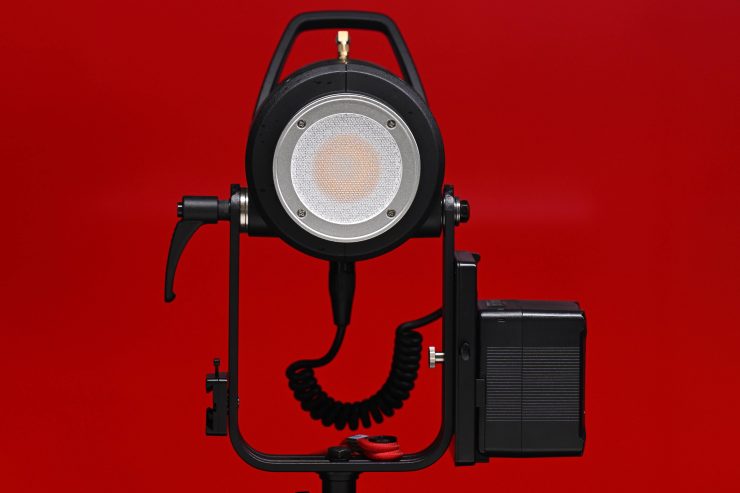
The power cable that goes from the power supply to the light head is very short which means you have no choice but to mount it to the fixture. You can’t put the power supply on the ground. While there is nothing wrong with this I would have preferred to have seen an additional cable included so that you could put it on the ground. As the light doesn’t weigh much you can place it out on arms or use it with lightweight light stands, but this is compromised by having to attach the power supply to the yoke frame.
COB

Quite a few LED lights on the market, including the Vibesta Peragos Head, are using variations of COB technology. COB stands for “Chip On Board” where multiple LED chips are packaged together as one lighting module. The advantage of COB LEDs being multi-chip packaged is that the light-emitting area of a COB LED can contain many times more light sources in the same area that standard LEDs could occupy. This results in a greatly increased lumen output per square inch.
The first caveat with COB LEDs is that they produce a ton of heat and that heat needs to be effectively dispersed. The second caveat is that you will usually need to diffuse them as they are very bright to look at and unsuitable for directly lighting talent. The trouble is if you use them with diffusion, such as a softbox, you are going to lose a ton of output because that output is coming from a small-sized source. With a lot larger source, say a 2×1 panel, you don’t lose as much output.
Weight & Size
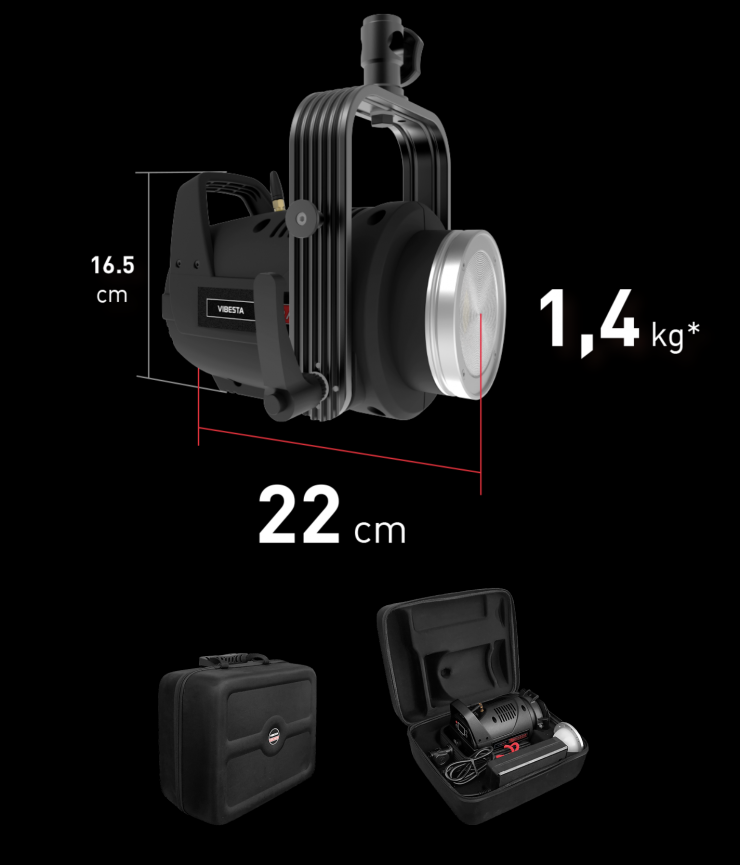
The Peragos Head is just 22 cm long and weighs 2.0 kg / 4.4 lbs with its yoke frame. The separate power supply weighs 800g / 1.8 lbs. Its compact size and low weight make it a good option for anyone who is traveling.

So how does this weight compare to other COB spotlights such as the amaran 150c RGB LED Monolight? Below you can see:
| TOTAL WEIGHT | |
| Vibesta Peragos Head 150 | 4.4 lbs / 2.0 kg (Fixture) |
| amaran 150c RGB LED Monolight | 5.8 lb / 2.6 kg (Fixture) |
| GVM SD200R RGB | 6.94 lb / 3.15 kg |
If you look at the weight comparison above, you can see that the Vibesta is just over half a kg lighter than the amaran and considerably lighter than the GVM SD200R RGB.
Mounting

As I mentioned earlier, the Peragos Head utilizes a single lockdown lever on its yoke frame.

The yoke frame is nice and robust and it certainly is capable of locking the light head down securely even when attaching large lighting modifiers.
The single lock works really well and once you tighten it down the light will not move no matter how much force you put on it.

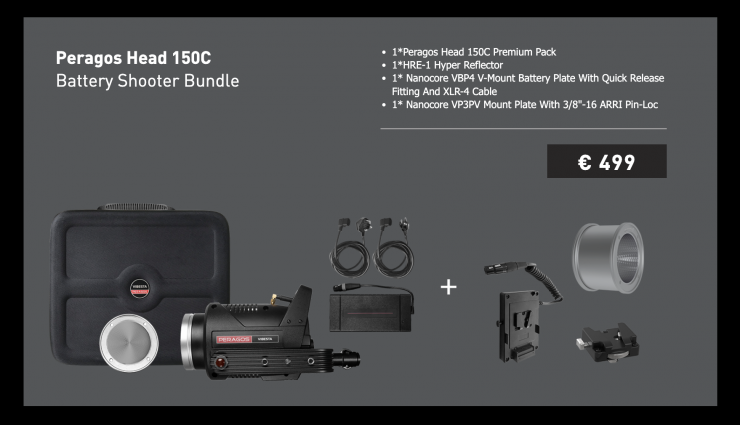
The yoke also features a quick release mechanism to attach the V-mount battery plate that comes standard in the Battery Shooter Bundle.

On the opposite side of the yoke frame is where you can attach the Nanocore VP3PV Mount Plate With 3/8″-16 ARRI Pin-Lock that you can use to attach the power supply. What is a little odd is that this doesn’t come in the base kit so I have no idea how you would use the light with the power supply.

I like that Vibesta has put two holes on the lightstand adapter so you can mount the light in multiple ways.
Power Draw

The Vibesta Peragos Head draws a maximum of 180W. The competing Amaran 150C also draws 180W. The GVM SD200R RGB & Bi-Color LED Studio Video Spotlight draws 200W.

The Vibesta Peragos Head can be powered via 100 to 240V AC power or from a V-mount battery.

You can also use two NP-F batteries with an optional battery plate, however, the light will only operate at a reduced output.
How does it stay cool?
COB lights get very hot, and keeping them cool is not an easy task. Using fans is the best solution, but the caveat with fans is that they can create noise.

The Vibesta Peragos Head does utilize a fan.

The light gives you the option of changing the fan speed. You can set it to:
- Variable
- Quiet
- Off
- Boost
If you choose Off the output is very limited as you will see from my tests further down in the review.
The fan in the Vibesta Peragos Head does make some noise when used at 100% output for long periods of time in the Variable mode. My biggest issue is that the fan noise is not consistent and it can suddenly go from being very quiet to making unwanted noise.
If you don’t want any noise then the Quiet mode is the one to use, however, the caveat is that the output will be reduced by about 40%.
Beam Angle

The native beam angle of the Vibesta Peragos when used open face is 120°.

You can alter that by using the magnetic modifiers.
Controls & Menu System

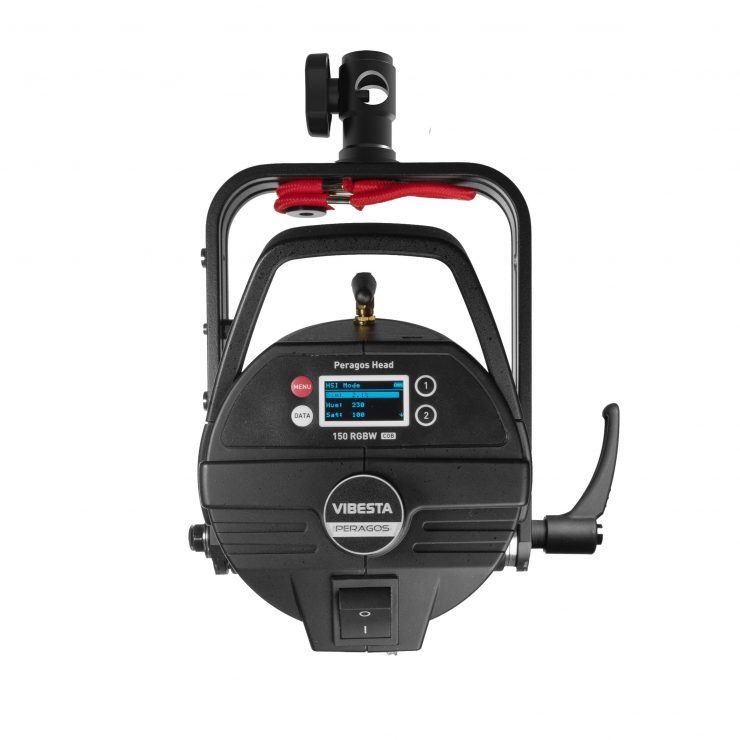
The Vibesta Peragos Head has a very basic LCD screen that clearly shows you information about the light. While there is nothing overly fancy about it, it does the job.

There is one large control dial that you turn and click to make adjustments as well as a Menu button and a Data button. You also have two buttons that seem by default to switch between the White light mode and HSI.
With a good light, you shouldn’t have to read a manual to work out how to operate it. You should be able to turn it on and use it straight away. You won’t find any deep sub-menus or complicated way of making changes on the Vibesta Peragos Head. It was designed to be simplistic and easy to operate.
The dial that you use to control the light isn’t super tactile and I found that it was very easy to shoot straight past the CCT value you wanted to choose.

The menu also gives you the ability to adjust the dimming curves, and the fan speed, check the operating temperature of the fixture, update firmware, etc.
Operating Modes

The light has 8 key lighting modes:
- Ultra White
- CCT
- Extended CCT
- x,y Coordinate
- Gels
- Effects
- RGB
- HSI
Ultra White

In this mode, you can choose to set the fixture at CCT settings between 2800K and 6500K. This mode was designed to create the most accurate light when working in these ranges.
Correlated Color Temperature (CCT)

This is the mode most people are probably going to use the light in. In the CCT Mode, you have full access to making CCT adjustments between 2400-13,000K.
The fixture also has continuous variable (full minus green to full plus green) correction.
Being able to dial in more or reduce the amount of green coming from your lighting source can make a huge difference. Different camera companies use different sensors in their cameras and they all react differently to light. Some camera sensors may lean towards magenta, and some, more towards green. By making CCT adjustments you can dial in the light so that it looks better for whatever camera system you are using. CCT adjustment also helps when you are trying to match lights from different manufacturers.
The CCT range is very impressive and it should suit most people’s needs.
Extended CCT

In this mode, you can adjust the CCT from 1500K to a whopping 30,000K. I haven’t personally come across any LED fixture that has this type of range before.
HSI

The HSI mode lets you create just about any color you can think of. It gives you full hue and saturation control as well as intensity. By manipulating, the hue and saturation you can create some really interesting colors that depending on the project you are working on can really add some creative flair. I quite like using this mode to create a lot of color separation between the foreground and background, or for recreating a really cold or warm-looking image.
The colors are represented as degrees from 0-360. The interface doesn’t feature any visual aids so it isn’t that easy to dial in the exact color you want to create.
xy

In xy mode, you can dial in exact xy coordinates. Dialing in xy coordinates is a fairly easy way to get a light to match other lighting sources, or at least get it in the ballpark.
Gels

Inside the fixture, there is a huge assortment of industry-standard gels from both Lee and Rosco. In fact, you can choose from 300 Rosco/LEE Gels.
Having built-in Digital Gels not only means that you don’t have to physically carry gels around, but you can also quickly and easily replicate popular gels. Using the gel mode can help you match other lighting sources, especially if you are working with other lights with physical gels.
Effects

The 6D light engine allows the fixture to deliver a lot of very realistic full-color lighting effects.
Effects mode lets you recreate a wide range of lighting effects that can be handy for certain scenarios. The effects include:
- Candle
- Clouds
- Club
- ColorChase
- CopCar
- Fire
- Fireworks,
- Fluorescent
- Lightning
- LightStrobe
- Paparazzi
- Party
- Pulsing
- Television
- Welding
All the effects modes can be individually adjusted and tailored to your lighting needs.
RGBT

In this mode, you can individually adjust the RGBT values of the fixture
Bluetooth App

You can control the light via the RTctrl- Kight Control app using Bluetooth. This app is available for both iOS and Android devices.

The first thing you need to do is to create a project and then name that project.

Once you have created a project and named it you will be greeted with the above screen.

You then need to add a fixture.

Once it finds the fixture you are looking for you select it and then hit connect. You need to make sure that on the light the DMX setting is on Bluetooth or Auto otherwise you won’t see your fixture.

Once connected you will be greeted with this screen.

Above you can see the modes that you can access.

Above you can see the various options that are available in the app.
The app is responsive and straightforward to use. It also allows you to do firmware updates.
Photometrics

So now let’s get to the photometric results. I always test lights in this way so that I get a reference to how they compare to other fixtures. Results only tell part of the story and should never be used alone to judge a light. I have found from extensive testing over the years that certain lights that have good photometric results don’t always look good, and lights that have worse photometric scores can sometimes look better than their results indicate.
You can’t judge a light from one set of photometric results. You have to look at all of the different results to be able to come to a conclusion. Judging alight on one set of results is like reading one chapter in a book and thinking you know the whole story.
Different lights can also look different depending on what camera you happen to be using.
Output & Color Temperature Accuracy
I tested the Vibesta Peragos Head at a variety of CCT settings with a Sekonic C-800 Spectrometer to find out how much output the light had and how accurate the CCT reproduction was. All readings are taken at a distance of 1m (3.28ft) in a controlled environment. The readings were all taken directly from the lighting source. In the case of using the light with a Reflector or any attachment, the readings were taken from the edge of those attachments. This is how I test all lights.

Above you can see Vibesta’s published claimed outputs for the Peragos Head.
So just how much output does it have? Well, let’s find out.
Vibesta Peragos Head 5600K (open face) Ultra White Mode

Above you can see the Vibesta Peragos Head recorded an output of 3930 lx (366 fc) when set at 5600K and used open face in its Ultra White mode.

The light recorded a CCT reading of 5598K which was almost perfect and one of the best results I have ever seen from any LED light.
Vibesta Peragos Head 3200K (open face) Ultra White Mode

Above you can see the light’s output when it was set at 3200K in the open face configuration was 3990 lx (371 fc), which was 60 lx more than it produced at 5600K.

As far as CCT accuracy goes, it recorded a reasonably good reading of 3286K.
Vibesta Peragos Head 5600K Open Face CCT Mode
Now, that we have seen some results in Ultra White mode, what happens if we switch to the standard CCT mode?

Above you can see the light’s output when it was set at 5600K in the open face configuration when used in the CCT mode was 3540 lx (371 fc), which was 390 lx less than it produced when used in the Ultra White mode.

As far as CCT accuracy goes, it recorded a reading of 5706K, which wasn’t nearly as good as the 5598K it recorded in the Ultra White mode.
Vibesta Peragos Head 3200K (open face) CCT Mode

Above you can see the light’s output when it was set at 3200K in the open face configuration was 3770 lx (351 fc), which was 220 lx more than it produced at 3200K in the Ultra White mode.

As far as CCT accuracy goes, it recorded a reading of 3770K which was way off being accurate by almost 600K.
What these results clearly show me is that the Ultra White mode is a way better mode to use if you are looking for accurate CCT reproduction without any loss in output.
Sharp Fresnel Lens 45° 5600K Ultra White Mode
So, now let’s see how much output the light has when used with its Sharp Fresnel Lens 45° at 5600K in the Ultra White Mode.

Above you can see the light’s output was 3820 lx (355 fc). This surprised me because it was actually less than the 3930 lx (366 fc) it recorded when set at 5600K and used open face in its Ultra White mode.

As far as CCT accuracy goes, it recorded a terrible reading of 7761K.
Output using the Dome Diffuser 5600K Ultra White Mode
So now let’s look at how much output the Vibesta Peragos Head puts out when using the Dome Diffuser.

Above you can see the light’s output when it was set at 5600K with the Dome Diffuser was 1070 lx (99.5 fc), which was 72.77% less than what it put out when used open face.

As far as CCT accuracy goes, it recorded a reading of 5189K, which was a lot worse than the 5598K it recorded when used open face This tells me that the Dome Diffuser is altering the CCT.
Output when using the light at 5600K Open Face with the fan set to Off
As I mentioned earlier in the review, you can operate the Vibesta Peragos Head without the fan, but the output is greatly reduced.

Above you can see the light’s output when it was set at 5600K and used Open Face with the fan set to Off was 640 lx (59.5 fc). This is a significant reduction in output and it was 83.71% less than when it was used with the fan set to variable.

As far as CCT accuracy goes, it recorded a reading of 5637K. This tells me that the CCT accuracy when you use the light with the fan turned off doesn’t alter much.
Output when using the light at 5600K Open Face with the fan set to Quiet

Above you can see the light’s output when it was set at 5600K and used Open Face with the fan set to Quiet was 2440 lx (226 fc). This is 37.91% less than when it was used with the fan set to variable.

As far as CCT accuracy goes, it recorded a reading of 5694K. This tells me that the CCT accuracy when you use the light with the fan set to Quiet doesn’t alter much.
Output when using the light at 5600K Open Face with the fan set to Boost

Above you can see the light’s output when it was set at 5600K and used Open Face with the fan set to Boost was 4440 lx (412 fc). This was 12.97% more than it output when the fan was set to Variable.

As far as CCT accuracy goes, it recorded a reading of 5713K. This tells me that the CCT accuracy when you use the light with the fan turned to Boost is being altered slightly.
How does it perform at various CCT Settings?
Summary of results (Open Face)
| SETTING | OUTPUT | CCT READING |
| 2500K | 3980 lx | 2596K |
| 2800K | 4130 lx | 2857K |
| 3200K | 3990 lx | 3286K |
| 4500K | 3760 lx | 4595K |
| 5600K | 3930 lx | 5598K |
| 6500K | 3500 lx | 6552K |
| 8000K | 3390 lx | 7964K |
| 10000K | 3290 lx | 9891K |
These results show me that the light’s output varies by 20.33% depending on what CCT temperature you are using between 2500-10,000K.
The CCT accuracy across the range is very good. It was no more than 109K off at any reading which tells me the light has very good CCT consistency across its range.
CCT consistency & linear output when dimming the light
Now, what you should always do when testing lights is to see if the CCT remains consistent when dimming the light. Just because you set a light at say 5600K, that doesn’t mean that the CCT will remain stable as you start dimming the fixture down. I also wanted to see how linear the dimming curve was.
I decided to do a series of tests at 100%/75%/50%/25%10% to see if the CCT being recorded changed. This was done at a distance of 1m using a Sekonic C-800. These tests were done at 5600K Open Face in the Ultra White mode with the light set in its Linear dimming mode.
| CCT READING | OUTPUT | INTENSITY % |
| 5598K | 3930 lx | 100 |
| 5712K | 2670 lx | 75 |
| 5677K | 1850 lx | 50 |
| 5690K | 985 lx | 25 |
| 5658K | 462 lx | 10 |
The Vibesta Peragos Head maintained pretty good CCT consistency as you start dimming the fixture. My testing showed that the CCT readings varied by 114K.
As far as how linear the output is when you start dimming the light, at 50% output it had 52.92% less output than when used at 100%. At 25% it had 74.93% less output than when used at 100%. At 10% output, it had 88.24% less output than when used at 100%. This shows me that the light’s dimming curve is very linear.
There are various dimming curve options that are available.
Output & accuracy when creating saturated colors
I also wanted to test the light to see how it performed when creating a super-saturated Red.
0° – RED

Above you can see that the light when using its Medium reflector recorded an output of 906 lx (84.2 fc). What you clearly need to know when using RGB lights like this is that the output levels you can produce when creating super saturated colors are a lot less than when using the light in a CCT mode.

As far as creating an accurate 0° RED, the Vibesta Peragos Head was spot on with a 0° reading and 100% saturation.
Color Rendering
So now that we have seen how much output the Vibesta Peragos Head produces, how does it perform when it comes to replicating accurate colors?
Vibesta Peragos 5600K (Open Face) Ultra White Mode

Above you can see that when the light was set at 5600K in the Ultra White mode recorded an average CRI (R1-R8) of 95.4 and an extended CRI (R1-R15) of 92.09. For replicating accurate skin tones it recorded for R9 89.8 (red), 94.4 for R13 (closest to caucasian skin tones), and 95.7 for R15 (closest to Asian skin tones). These are ok results, but R9 (red), R11 (green), and R12 (Blue), were all under 90. The result for R12 (blue) was one of the worst results I have seen from any recent LED light I have tested.

The Vibesta Peragos Head, when set at 5600K, recorded a TLCI score of 92. This wasn’t a great result.
Vibesta Peragos Head 3200K (Open Face) Ultra White Mode

Above you can see the scores for when the light was used at 3200K. It recorded an average CRI (R1-R8) of 96.2 and an extended CRI (R1-R15) of 92.56. For replicating accurate skin tones it recorded 69.9 for R9 (red), 99.8 for R13 (closest to caucasian skin tones), and 93.3 for R15 (closest to Asian skin tones). These were ok results. R8, R9, and R12 were all below 90. The score for R9 (red) was particularly bad for a modern day LED light.

The Vibesta Peragos Head, when set at 3200K, recorded a TLCI score of 89. This is not a great score and most modern day LED lights I have tested tend to score in the very high 90s.
Vibesta Peragos 5600K (Open Face) CCT Mode
I was curious to see if the results were better or worse when setting the light in its CCT mode instead of the Ultra White mode.
Vibesta Peragos 5600K (Open Face) Ultra White Mode

Above you can see that when the light was set at 5600K in the CCT mode recorded an average CRI (R1-R8) of 95.8 and an extended CRI (R1-R15) of 92.44. For replicating accurate skin tones it recorded for R9 83.0 (red), 96.5 for R13 (closest to caucasian skin tones), and 95.5 for R15 (closest to Asian skin tones). These are ok results, but R9 (red), and R12 (Blue), were all under 90. The result for R12 (blue) was one of the worst results I have seen from any recent LED light I have tested.
What was interesting is that the color rendering scores were very similar in both Ultra White and CCT modes. The Ultra White mode may be more of a marketing thing than anything else based on my testing.

The Vibesta Peragos Head, when set at 5600K and used in its CCT mode, recorded a TLCI score of 93. This wasn’t a great result, but it was slightly better than when using the Ultra White mode.
CC Index & ⊿uv
The CC Index displays the CC correction value and whether any magenta or green need to be added or subtracted. 1 CC corresponds to 035 Kodak CC values or 1/8 Rosco filter values. Any reading less than +1.00 or -1.00 and you’re probably not going to need to make any kind of adjustment. The ⊿uv is the value to show how much this light is away from being an ideal light source (black body radiation = incandescent lamp). As with the CC Index you want this number to theoretically be zero. Kelvin is not a linear value, so we need to convert from Kelvin to MK-1 to compare the values of color temperature. To calculate from Kelvin to Mired is MK-1= 1*1000000/Kelvin. While this may sound confusing, it is the only way of measuring if the Kelvin shift is significant enough to warrant having to use a filter for correction. Below are the results for the Vibesta Peragos Head:
Prolycht Orion 675 FS Kelvin Vs MK-1
| Kelvin | Difference in K | MK-1 | Difference in MK-1 | |
| SET VALUE | 2500K | 0 | 400 | 0 |
| ACTUAL READING | 2596K | 96 | 385.20 | 14.8 MK-1 |
| SET VALUE | 3200K | 0 | 312.5 | 0 |
| ACTUAL READING | 3286K | 86 | 304.32 | 8.18 MK-1 |
| SET VALUE | 4500K | 0 | 222.22 | 0 |
| ACTUAL READING | 4595K | 95 | 217.62 | 4.6 MK-1 |
| SET VALUE | 5600K | 0 | 178.57 | 0 |
| ACTUAL READING | 5598K | 2 | 178.63 | -0.06 MK-1 |
| SET VALUE | 6500K | 0 | 153.84 | 0 |
| ACTUAL READING | 6552K | 52 | 152.62 | 1.22 MK-1 |
| SET VALUE | 8000K | 0 | 125 | 0 |
| ACTUAL READING | 7964K | 46 | 125.56 | -0.56 MK-1 |
| SET VALUE | 10000K | 0 | 100 | 0 |
| ACTUAL READING | 9891K | 109 | 101.10 | -1.10 MK-1 |
These figures might look confusing, but what it tells me is that the light is very CCT accurate at 5600-10,000K. Any MK-1 score that is under -9/9 means you wouldn’t have to use any color correction gels. The MK-1 scores for this light were excellent at 5600K and above, but not so great once you went below 4500K. Any MK-1 score that is under -6/6 is a very good result.
Ok, now let’s look at the CC INDEX & ⊿uv.
Vibesta Peragos Head CC INDEX & ⊿uv
| CC INDEX | ⊿uv | |
| 2500K | 0.1M | 0.0015 |
| 3200K | 0.3M | 0.0022 |
| 4500K | 0.3M | 0.0024 |
| 5600K | 0 | 0.0015 |
| 6500K | 0.1G | 0.0020 |
| 8000K | 0.2G | 0.0023 |
| 10000K | 0.7G | 0.0019 |
These were reasonably good results across the board. There was nothing here that anyone should be concerned about.
TM-30
TM-30 is a relatively new color rendering standard that was developed to deal with the limitations of CRI. TM-30 looks at 99 individual colors. These 99 colors are categorized into seven groups: nature, skin color, textiles, paints, plastics, printed material, and color systems.
TM-30 scores go from 0 – 100. The higher the score, the more accurate a light is at producing colors. Any TM-30 Rf score in the ’90s is considered to be good. What is interesting and something that you need to be very aware of is that two separate light sources with the exact same CRI scores can render colors very differently. A light with a high CRI rating could have a low TM-30 score. Conversely, a light with a good TM-30 score could have a bad CRI score.
Now, there are two measurements associated with TM-30, Rf and Rg.
Rf (Color Fidelity)
Rg (Color Gamut)
With Rf value, ideally, you want a score in the 90’s.
With Rg value, a score below 100 indicates that the light source renders colors with less saturation than the reference source. So ideally you want this score to be above 100.


2500K 
3200K 
4500K 
5600K 
6500K 
8000K 
10,000K
Above you can see the scores for the Vibesta Peragos Head at various CCT settings. Below I have listed the figures as well.
Here are the results:
| Rf | Rg | |
| 2500K | 93 | 100 |
| 3200K | 92 | 100 |
| 4500K | 91 | 100 |
| 5600K | 90 | 102 |
| 6500K | 89 | 98 |
| 8000K | 87 | 97 |
| 10000K | 86 | 96 |
The TM-30 scores were good up to 5600K and it shows me that the light is pretty consistent at replicating accurate colors with full saturation. However, at 5600K and above the light struggles to create full saturation.
SSI
SSI (Spectral Similarity Index) was developed by the Sci-Tech Council of the Academy. SSI gives me the ability to set any light as a standard, or use predefined standards (such as CIE D55), and then give other lights an SSI score based on how well they will match standards such as CIE D55. This way I can measure spectral response and compare it directly against an ideal light source. This is actually a much better test than recording CRI scores.
Vibesta Peragos 3200K

In this graph, the red bars indicate a perfect Planck 3200K source. The gold bars indicate a perfect 3200K Tungsten source. This lets us compare how close to a perfect 3200K lighting source the Orion 675 FS is. Any SSI score in the high 70’s, low ’80s is very good for a 3200K LED light. The results for the Vibesta Peragos Head were ok when used at 3200K. As you can see, LED lights have a hard time replicating colors below about 450nm.
Vibesta Peragos Head 5600K

In the graph above the gold bars indicate a perfect CIE D55 source. The red bars indicate a perfect CIE D 5600K source. This lets us compare how close to a perfect 5600K lighting source the Vibesta Peragos Head is. A score in the low 70’s is typical for a 5600K LED source. This light scored in the low 60s which is the worst result I have seen from any LED light I have tested in the last few years.
The main reason we want to record SSI scores is so we can see how well they match with other lights. As an example, I wanted to see how well the Vibesta Peragos Head matched the Prolycht Orion 675 FS and the ARRI Orbiter. Below you can see the results.

As you can see neither lights were even vaguely close to being a perfect match to the Vibesta Peragos Head. Any score in the high ’80s and low 90s would be decent enough, but you can see that the light was way off being a match with an ARRI Orbiter.
As another test, I thought I would compare those same lights against the Vibesta Peragos Head at 3200K. Below you can see the results.

As you can see, the Vibesta Peragos Head was a much better match at 3200K than it was at 5600K. Very few lights from different manufacturers are ever going to be an exact match.
Ok, so let’s do some more comparisons. This time I wanted to see how well the Vibesta Peragos Head when used Open Face in Ultra White mode matched the light when it was used in its CCT mode. I also wanted to see how it matched the light when it was using the Dome Diffuser.

As you can see, with a score of 94, the light matches very well when used in different configurations. This tells me that if I had two of the Peragos Heads, and I used different mode settings or magnetic attachments, they would still work together well.

In the above test, I wanted to see how well the Peragos Head matched itself when used in the Ultra White and CCT modes. I also wanted to see how it matched with a Nanlite PavoTube 30C II. As you can see, the matches were pretty good.
SSI tests are a great way of telling you what lights you own or use will work well together.
Spectral Distribution
5600K

Above you can see the spectral distribution of the Vibesta Peragos Head when it is set at 5600K. The spectral distribution is not good and you can see the massive green spike.
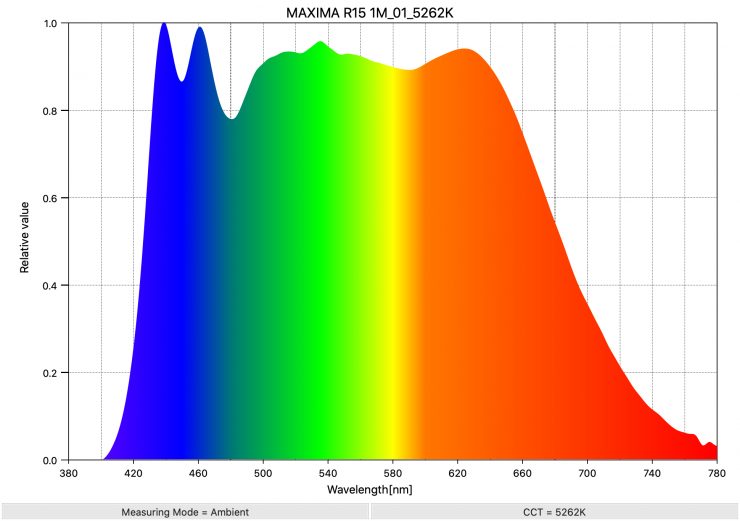
If you want to see what a really good spectral response looks like for a LED light at 5600K, above is the result for the Maxima 3.
3200K

Above you can see the spectral distribution of the Vibesta Peragos Head when it is set at 3200K. The spectral distribution only has a big push towards green.
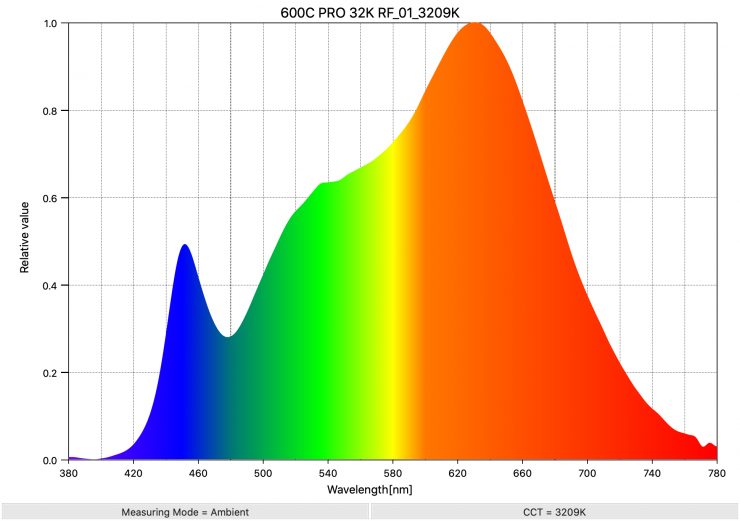
As a comparison, above you can see the spectral distribution of the Aputure 600c Pro when it is set at 3200K. The spectral distribution only has a very marginal push towards green, but overall it is very good.
Real-World Performance & Quality of Light

As I always say, photometric scores only tell you part of the story. So let’s find out if the scores from the Vibesta Peragos Head translate into good real-world performance.
The photometric results can only give me scientific data and it is much more important for me to see how the light looks and performs. Contrary to popular belief, if you are in the business of making lights you don’t want to try and achieve perfect scores because perfect scientific scores don’t equate to a light looking good. A good light should look good to a camera because, after all, that is what is capturing the image. Cameras and our eyes see differently and ideally, you want to use a light that looks good to your camera. There’s a bit of alchemy in knowing what to prioritize in order to render colors that appear accurate, natural, and pleasing. It’s not just about hitting certain numbers.
Lighting really comes down to how you use the light and having a great light isn’t suddenly going to produce better results for you unless you know what you are doing.


Light On 
Light off
The beam spread is nice and even and you don’t get any hotspots. The 120 degree beam spread you get when using the light open-faced allows you to create a nice broad spread of light. Above you can see it being used at a distance of 3m /9.9′ from the wall.


Light on 
Light off
If you use something like the 60 degree Fresnel attachment you can see how the beam spread changes.


Light on 
Light off
While the light isn’t overly bright, it does have a reasonable amount of output for a light of this size with this power draw. Above you can see a comparison with the light being used open face and punched through a sheer curtain from outside as opposed to the natural light.


Light on 
Light off 
Light on 30,000K 
Light on 1,500K
Above you can see what the light looks like being used open-faced.

Like most modern-day LED lights, it is fairly easy to create a very soft, flattering light source using a softbox or other lighting modifier.

The optional Lantern is a nice option if you want to do tabletop shooting.

Even when used open face the light can create nice defined shadows.
Despite some of the photometric scores being subpar, the light still performs well in the real world.
Who is the Vibesta Peragos Head aimed at?

This is certainly a fixture that could be used for lots of different applications, by lots of different people. However, it is pretty clear that it is being targeted at content creators and people on tight budgets.
The ability to use the light as a soft source, hard source, or anything in between makes it an appealing option, especially given its small size and weight.
Price & Availability
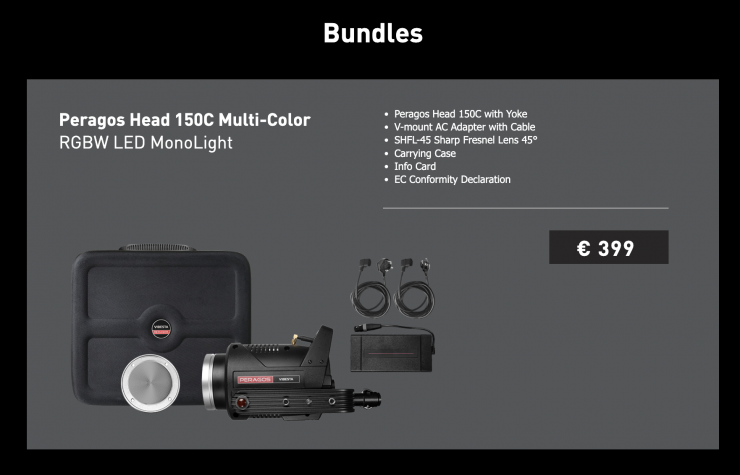
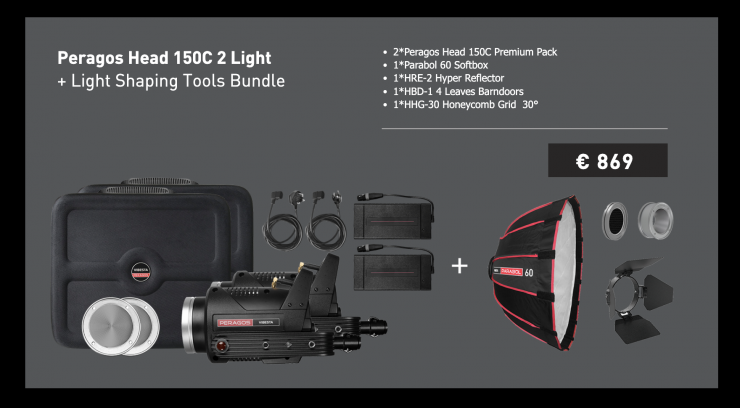
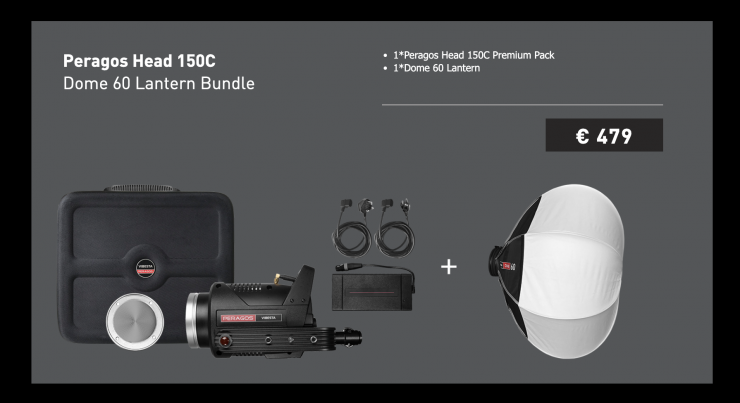
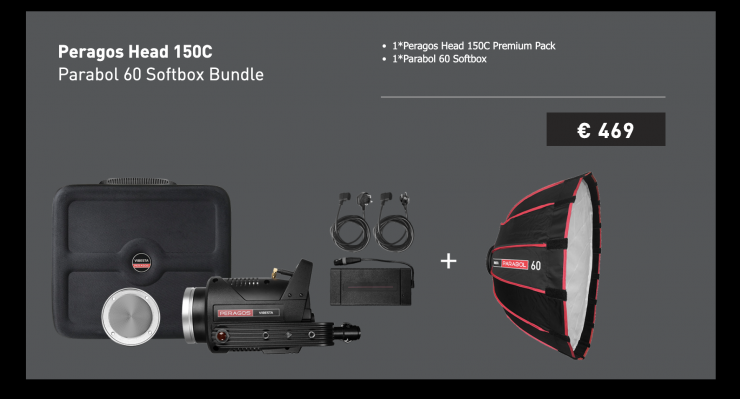
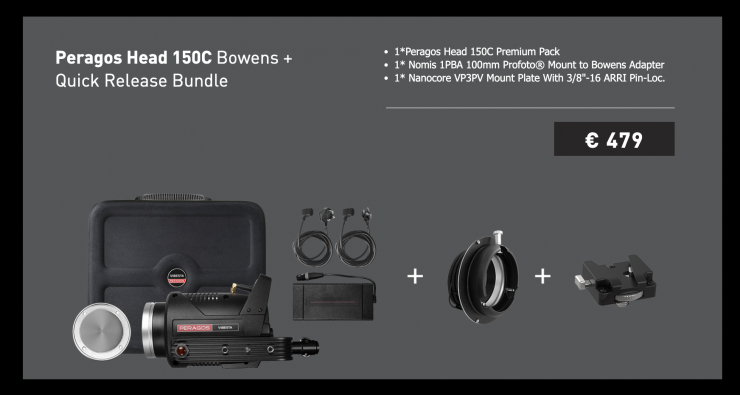
The Vibesta Peragos Head 150 Multi-Color COB is now available to purchase. There are quite a few bundles that you can choose from. The base kit costs €399.
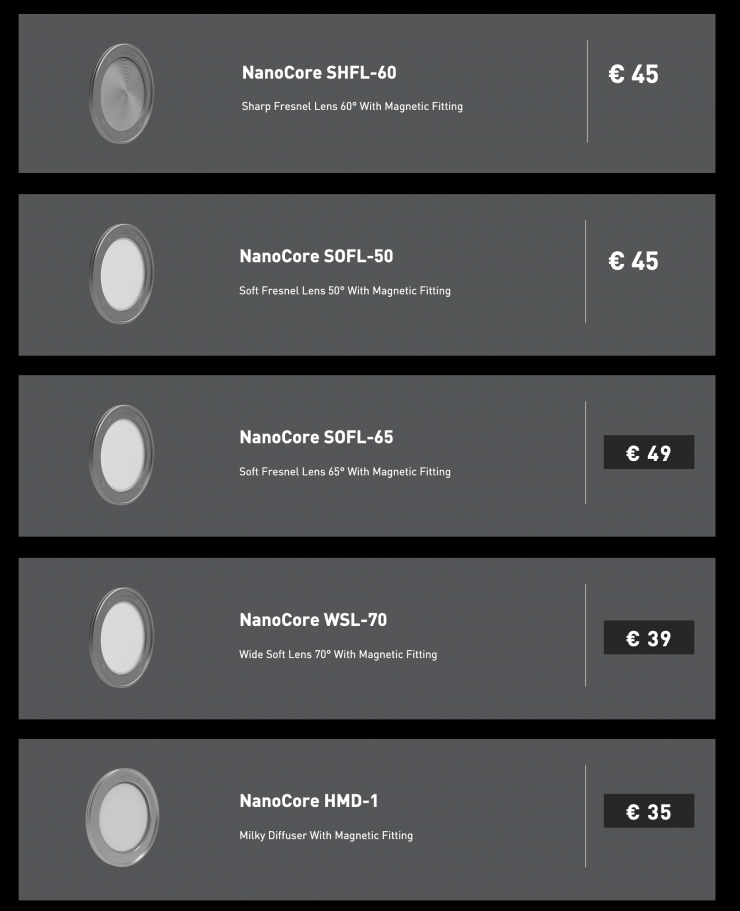
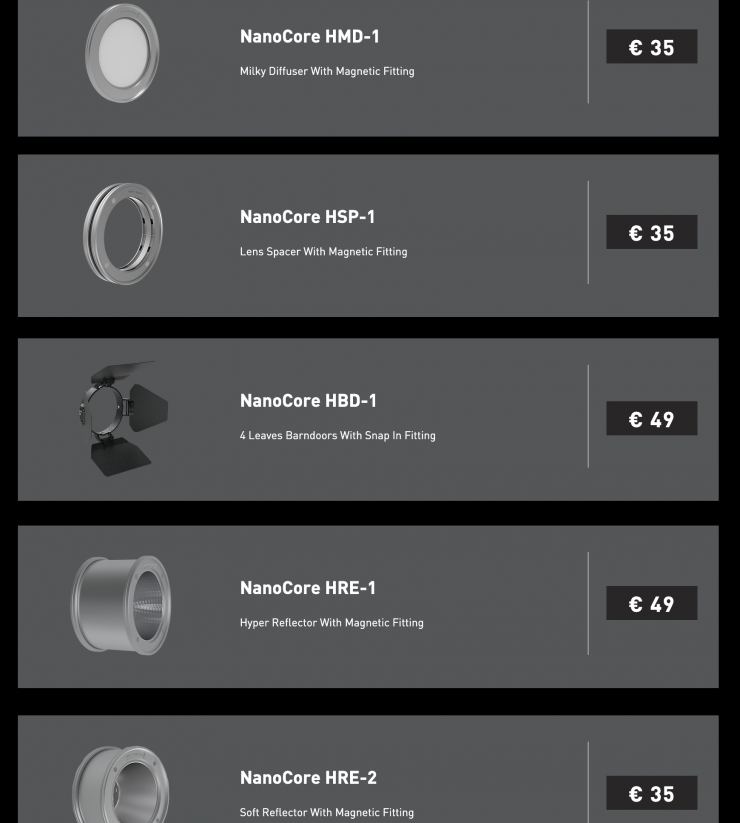
Accessories
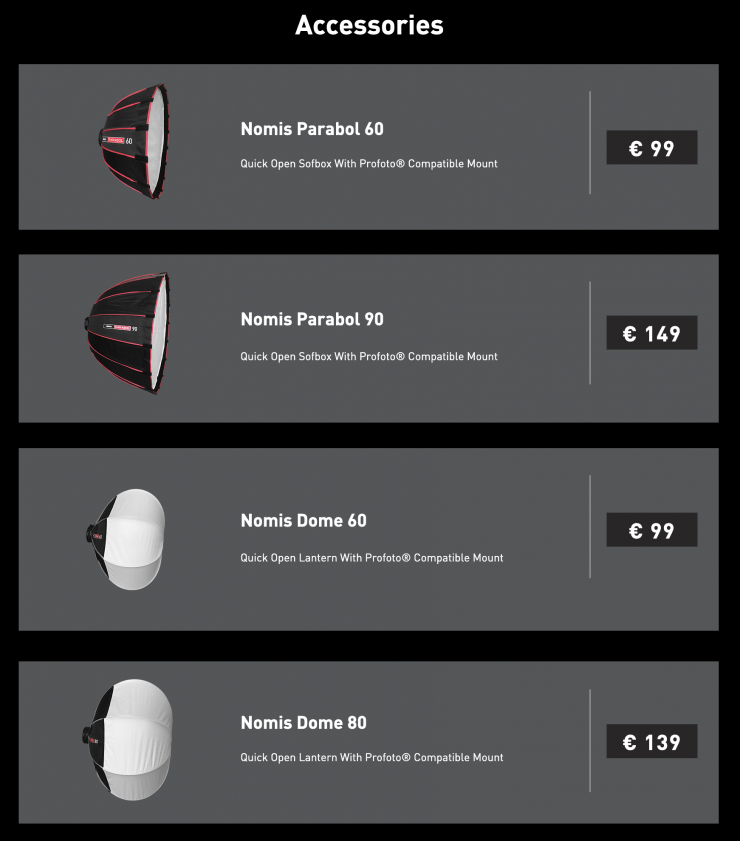
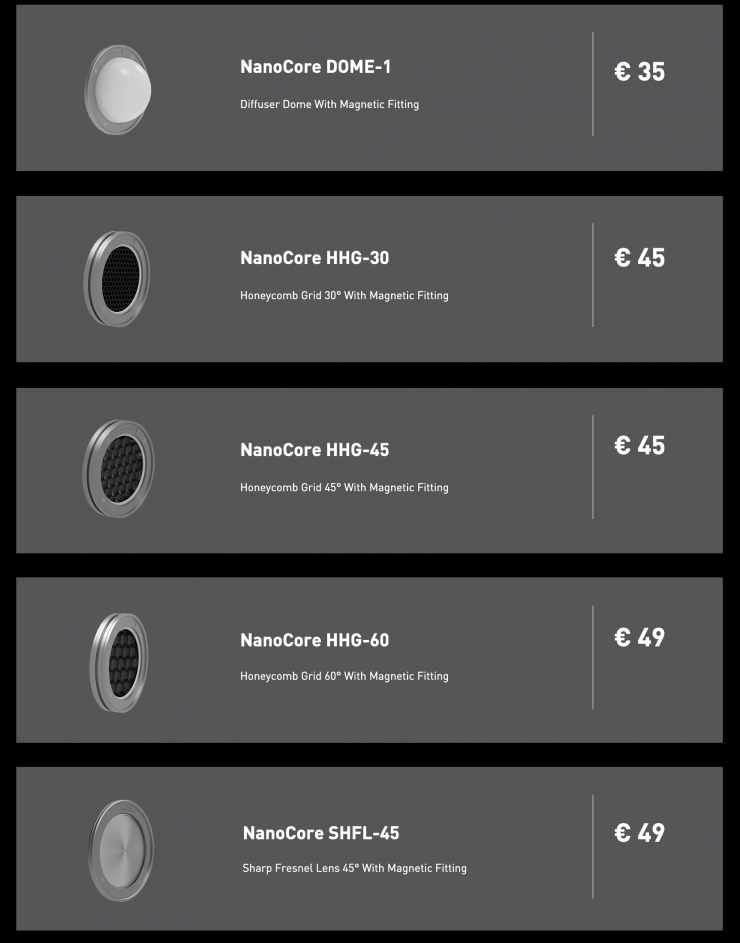
Below you can see how the price compares to some of the competition.
Conclusion

The Vibesta Peragos Head 150C is a bit of a mixed bag. I like the innovation and the ability to use lots of different lighting modifiers, as well as its compact size and weight, but the photometric results were all over the place. In some tests, it scored well, and in others, it was pretty bad. In saying that, photometric tests never tell you the whole story and you shouldn’t judge a light solely on data alone.
The magnetic lighting modifier attachment system is a smart idea and the light certainly offers a lot of versatility when it comes to deciding how to use it.
The interface and operating system are easy to use, and I like that it can be run via a flight-safe V-mount battery.
The output is decent, but once you start to diffuse the light then you lose a lot of it. When combing this fixture with a softbox or lantern it is going to have to be placed fairly close to your subject unless you are in a very controlled environment.
The Vibest Peragos Head 150 is certainly a capable light. While it is far from perfect, it offers a lot of nice functionality in a compact and lightweight package.
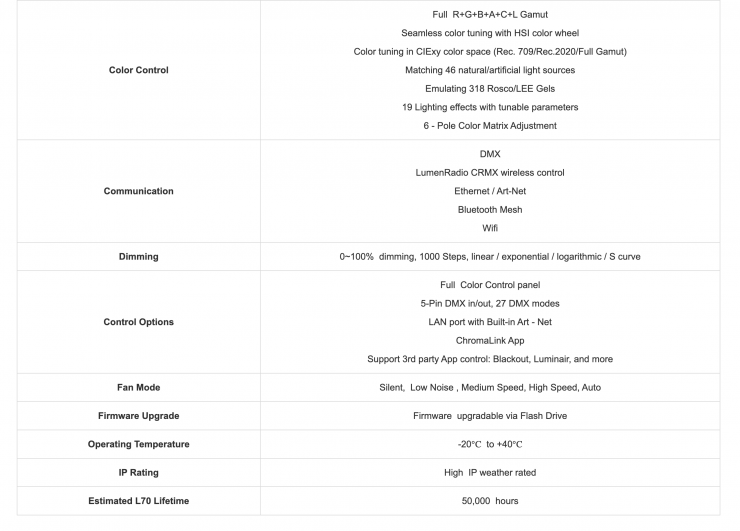
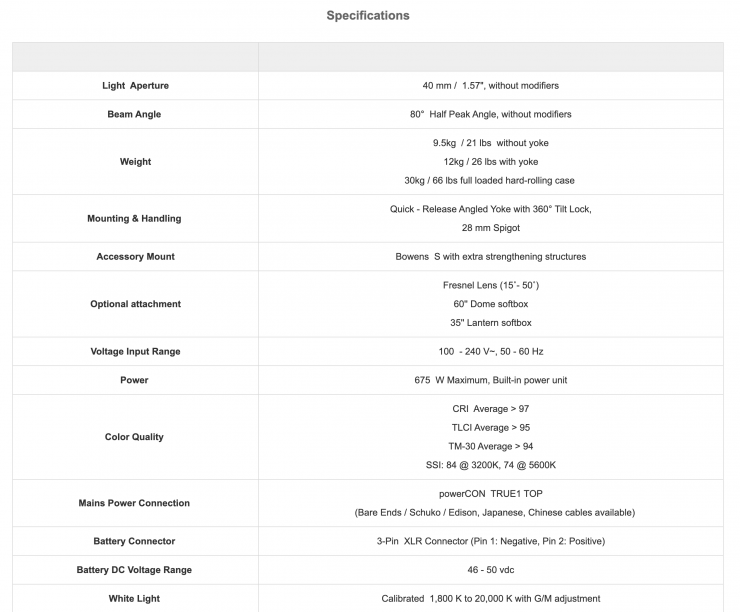
Technical Specifications
Like what we do and want to support Newsshooter? Consider becoming a Patreon supporter and help us to continue being the best source of news and reviews for professional tools for the independent filmmaker.


