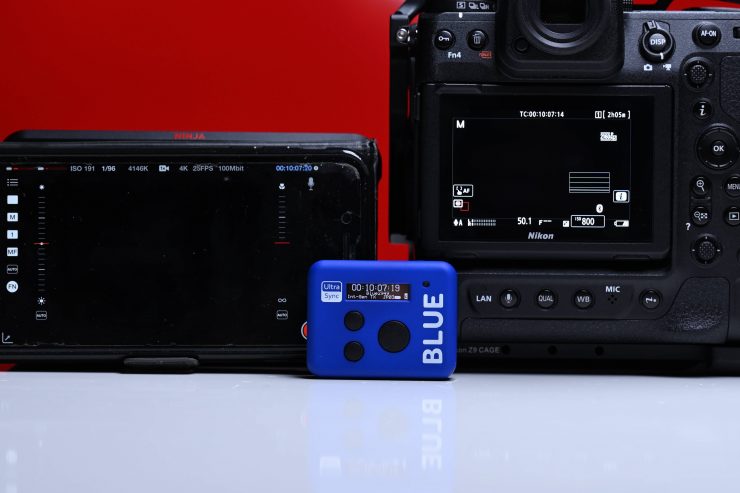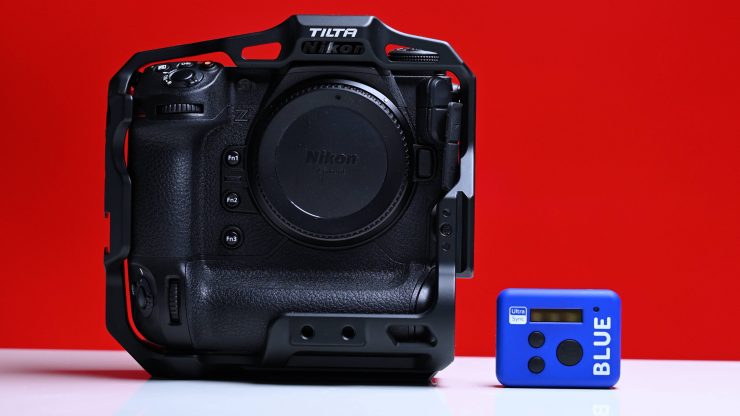
Nikon recently released quite an extensive firmware update for its flagship Z9 and in that update one of the features that were enabled allows the camera to work with the ATOMOS UltraSync BLUE and ATOMOS CONNECT devices.
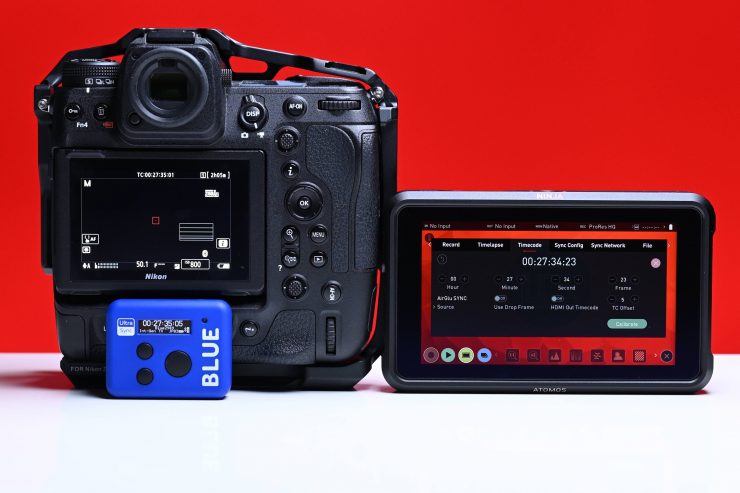
What this fundamentally means is that you can now use an ATOMOS UltraSync BLUE to send timecode via Bluetooth directly to the Nikon Z9. You can also send timecode from a compatible ATOMOS device that has an AtomX Expansion Module.
It is exciting that manufacturers such as Nikon are now starting to adopt and utilize Bluetooth protocols that work with the UltraSync BLUE and ATOMOS Connect products. I would expect moving forward that we will see more manufacturers making their cameras compatible as well.
Ok, so let’s see how all of this works with the Nikon Z9.
UltraSync BLUE
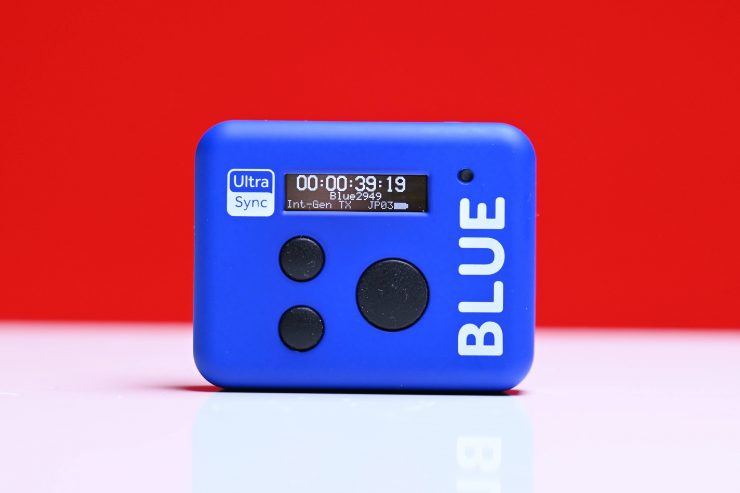
The UltraSync BLUE ($149 USD) uses Bluetooth pairing to connect to a device. This enables timecode to be transmitted wirelessly from UltraSync BLUE directly into the media file of a connected device. The nice facet of this is that the timecode is embedded directly into a timecode track, so there is no need for any additional conversion software. In essence, the metadata is in the right format to be automatically recognized by professional NLEs. If you are worried that timecode accuracy over Bluetooth won’t be great, you shouldn’t be. Timecode System’s UltraSync BLUE is claimed to have the same level of accuracy over Bluetooth, as their hard-wired solutions.
The UltraSync BLUE has dimensions of 55mm × 44mm × 17mm (width × height × depth) and weighs in at 36g (1.26oz). The 128 x 32-pixel resolution OLED screen is easy to see. Despite its low weight, it feels robust enough for field use. I wouldn’t have any concerns with it breaking if I happened to drop it.
The UltraSync BLUE can be run for around 20 hours on a single charge.
New “ATOMOS AirGlu BT Options” Item
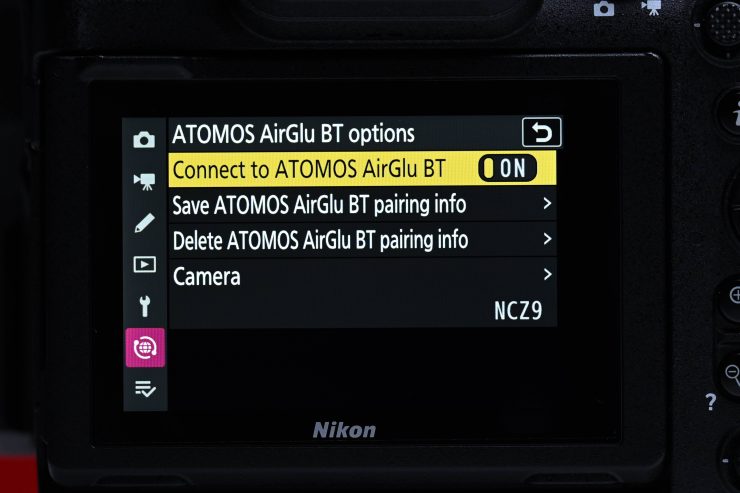
As I have already mentioned, with the Version 3.00 firmware update for the Nikon Z9 you can now wirelessly send timecode via Bluetooth to the camera.
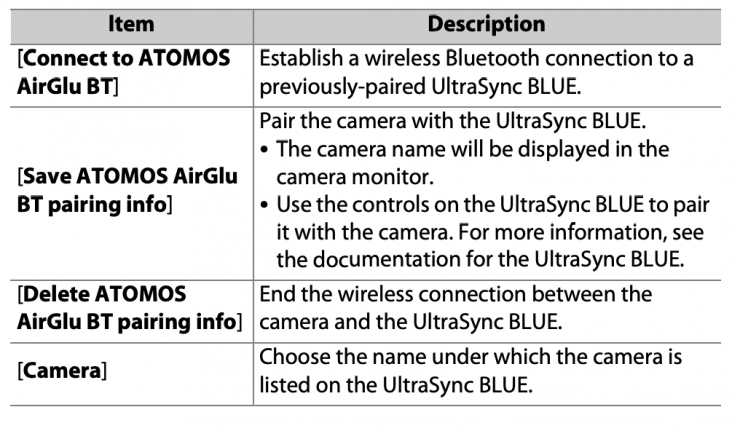
An [ATOMOS AirGlu BT options] item can now be found in the network menu. You can use this for wireless Bluetooth connections between the camera and Atomos UltraSync BLUE AirGlu accessories.
The UltraSync BLUE can be used for wireless connections to up to six
compatible cameras or audio recorders. Time codes are transmitted to the connected devices from the UltraSync BLUE, synchronizing time codes even across devices from a mix of manufacturers.
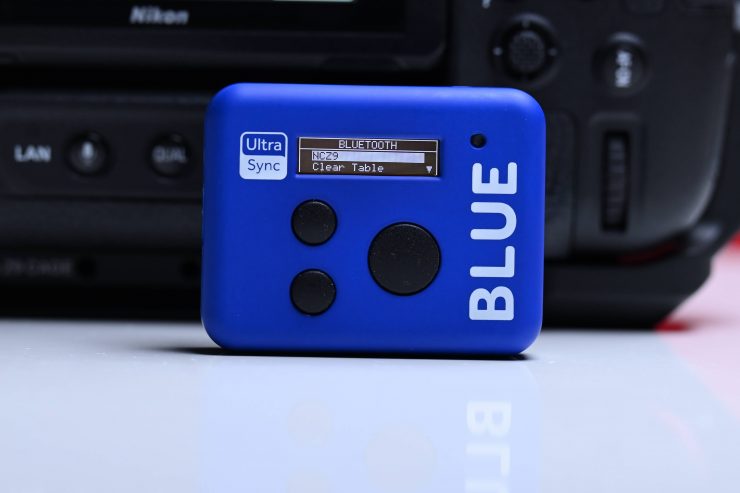
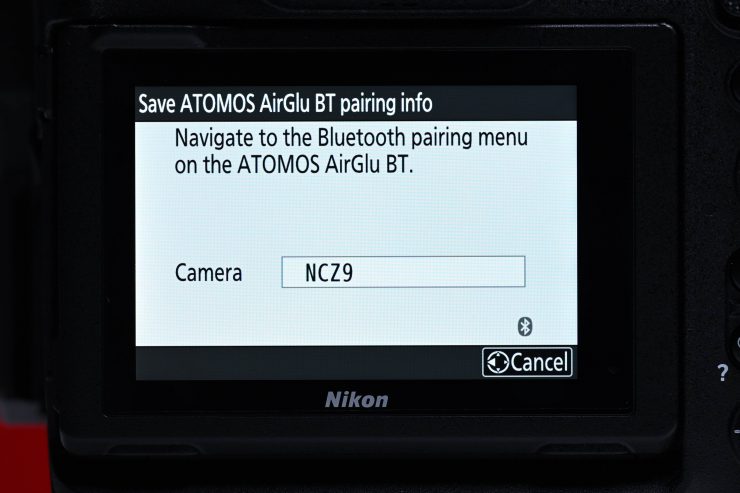
This is reasonably easy to do. You just turn your Z9 and UltraSync BLUE on and then in the UltraSync ONE menu, you go to Bluetooth Pair and then press the large button and it will say searching. It will then display your camera.
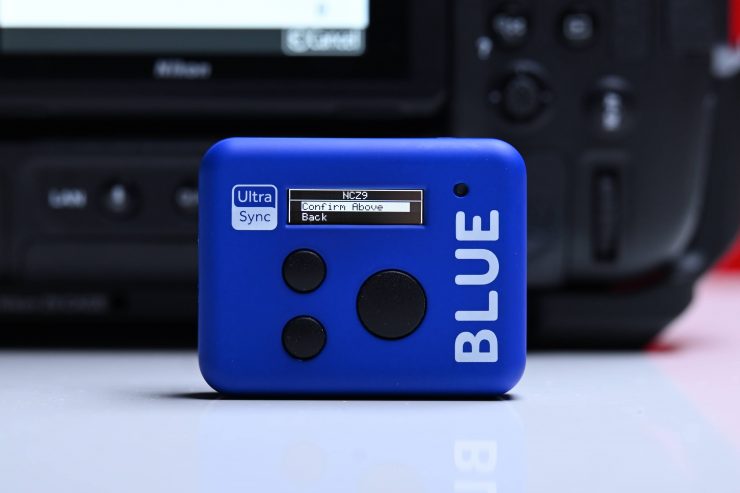
You then press the large button again and then select Confirm Above.
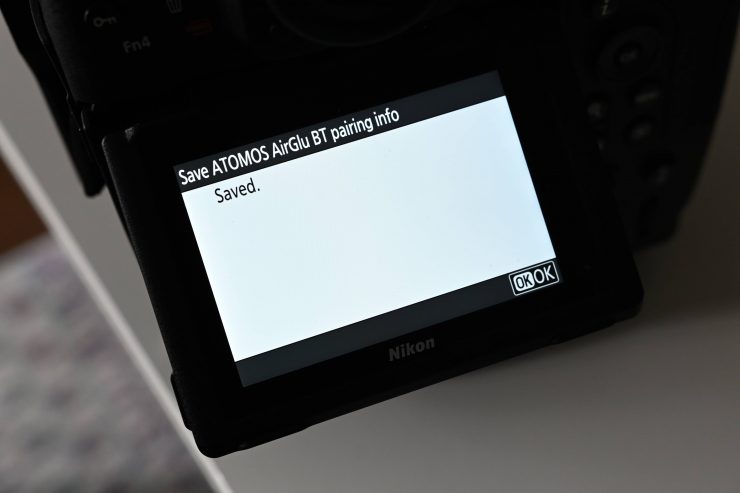
You will then get a message on the back of the Z9 telling you that the pairing information has been saved.
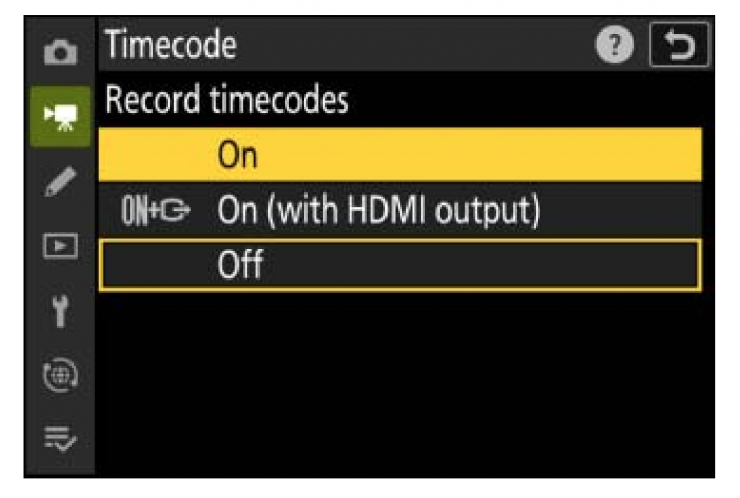
After establishing a wireless connection to the UltraSync BLUE, you select [On] or [On (with HDMI output)] for [Timecode] > [Record timecodes] in the video recording menu to start receiving time codes.
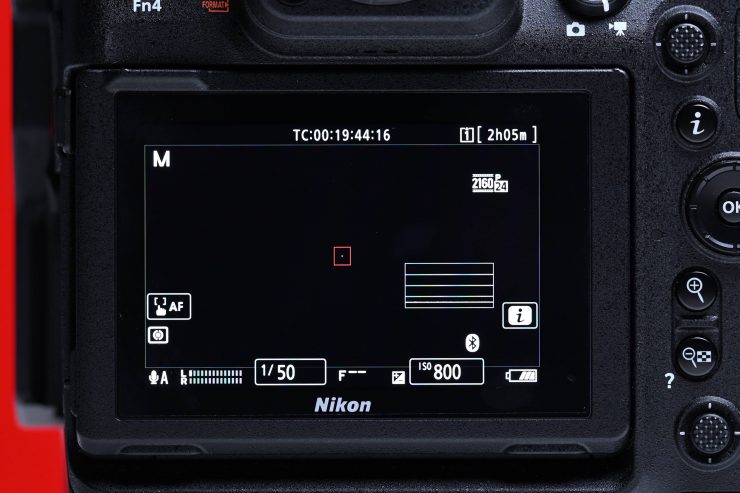
The camera display should now show the same time code values as the UltraSync BLUE.
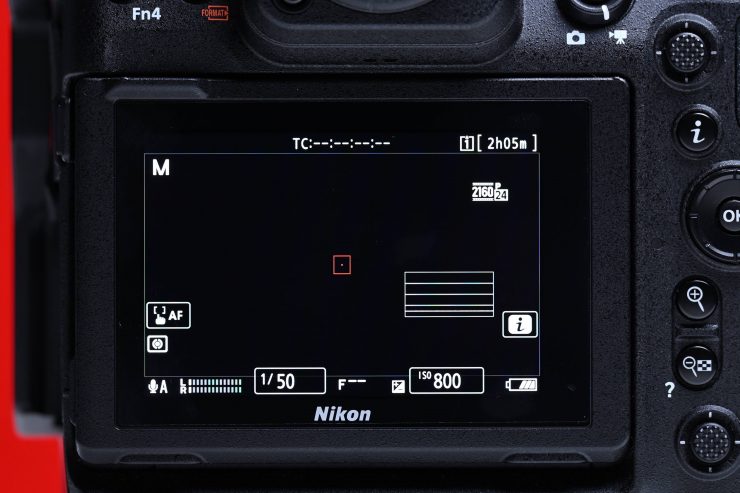
If no time code is received, the shooting display will show “–:–:–:–” (or
“00:00:00:00” when an external device is connected via HDMI). What you clearly need to know is that no timecode will be recorded if you press record before the timecode appears.
Time codes will also not be recorded if [H.264 8-bit (MP4)] is selected for
[Video file type] in the video recording menu.
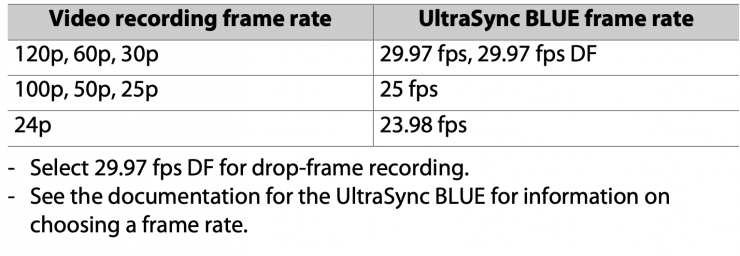
The UltraSync BLUE allows users to choose the frame rate. If the value is not a match for that chosen with the camera, time codes will not be recorded or output via HDMI. You need to match the frame rate for the UltraSync BLUE to the video recording frame rate as follows:
The options selected for [Timecode] > [Count-up method], [Timecode origin], and [Drop frame] in the video recording menu cannot be changed
while the camera has a wireless connection to the UltraSync BLUE.
You also need to have at least one CFexress Type B card in the camera otherwise it won’t show timecode at all.
According to Nikon, if the camera loses the wireless connection to the UltraSync BLUE while filming is in progress, it will continue to record time codes until the end of the current shot, although the time code shown in the shooting display will switch to “–:–:–:–“ about 60 seconds after the connection is lost. The time code will reappear when the wireless connection to the UltraSync BLUE is re-established.
You don’t want to hit record before the timecode is shown on your camera’s screen otherwise no timecode will be embedded in your clip. The timecode does not display if you happen to do this. This could be a potential issue for anyone working in fast-paced environments who needs to quickly do a battery swap and hit record quickly.
The wireless connection to the UltraSync BLUE will end when the camera is turned off or the standby timer expires. Nikon recommends choosing [No limit] for Custom Setting c3 [Power off delay] > [Standby timer].
Now, here is where things take a turn for the worse. Every time I turned the Nikon Z9 off and then back I lost the timecode. This means that every time you turn the camera off and then turn it back on you will have to Bluetooth pair the Z9 and the UltraSync BLUE again. Above you can see a demonstration. If you are working in fast-paced environments the last thing you want to do is Bluetooth pair your devices all the time, because this can take up to a minute or so to do.
The caveat to this wireless Bluetooth timecode ability is that it doesn’t appear to be set and forget like LTC (audio) timecode. With LTC timecode you don’t need to worry about the timecode needing to be re-established or pairing up devices.
UPDATE: After doing some further investigation it seems that you shouldn’t have to repair the devices every time you turn them off. One of our readers wasn’t having any issues with his Z9 automatically re-establishing the timecode from the UltraSync Blue, so I decided to look into it further.
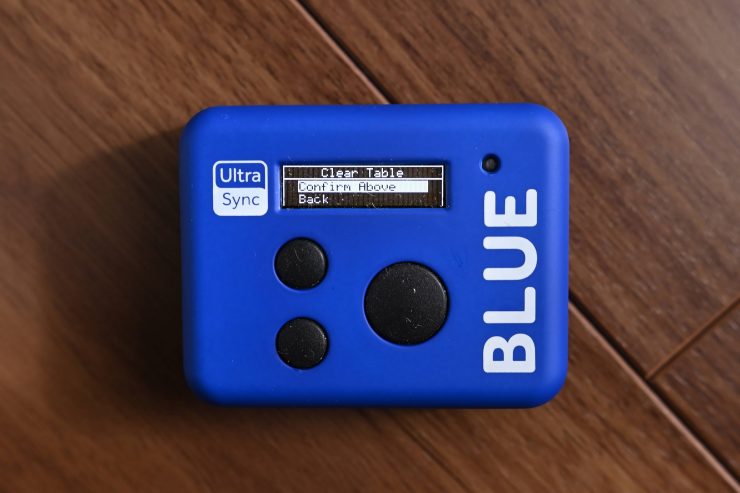
Now, according to the UltraSync BLUE manual, if your recording device is within range and the UltraSync BLUE cannot pair with it, make sure that you have enabled Bluetooth on your device. If it is already enabled, try disabling Bluetooth and then re-enabling it. If the UltraSync BLUE is still unable to pair, select the Bluetooth Pair menu and choose Clear Table, and then Confirm. This clears the UltraSync BLUE’s memory of previous pairings. If you are still unable to pair the UltraSync BLUE with your recording device, contact Timecode Systems for advice.
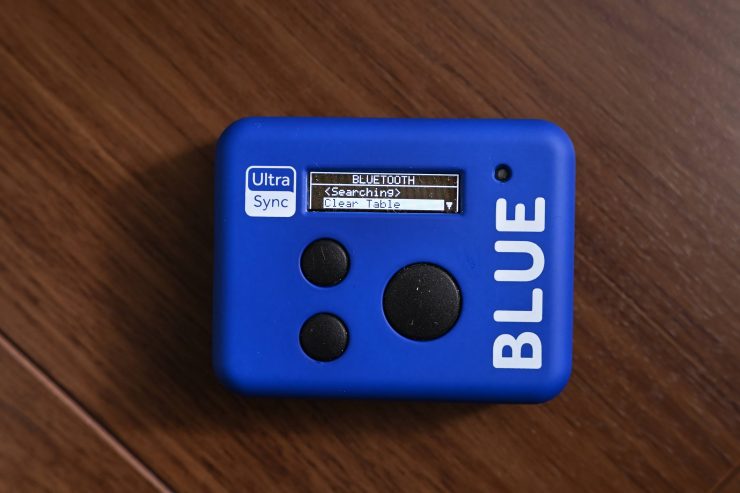
What I found after a lot of testing and changing settings, etc. was that I needed to Clear Table in the Bluetooth settings menu of the UltraSync BLUE. What seems to be the issue is that the UltraSync BLIUE gets confused if you have previously paired it with other devices.
Why this is slightly confusing is that the UltraSync BLUE was able to pair with the Z9, however, it just wasn’t able to automatically re-establish the Bluetooth connection. Because the manual only states to Clear Table if your UltraSync BLUE can’t pair with a device some users are unlikely to try this option. The manual needs to be amended, to state that if your device won’t automatically re-establish and pair you need to Clear Table in the settings.
Once I did this, it fixed the issue I was having, and if I turned the Z9 off and then on again, the timecode signal from the UltraSync BLUE returned after around 10 seconds.
You can’t set time of day from an app
One of the biggest caveats I found when using the UltraSync BLUE is that there is no way to have it automatically set time of day from an app. Why is this an issue? Well, if I was using another timecode system, such as options from Deity or Tentacle Sync with other cameras or audio devices, I can set the timecode value as time of day from my phone. However, I can’t do this with the UltraSync BLUE. If I could, then I would be able to use the UltraSync BLUE and other timecode devices from different companies and have all of them record the exact same timecode. I wish the app for the UltraSync BLUE could be updated so you could easily set the timecode to time of day.
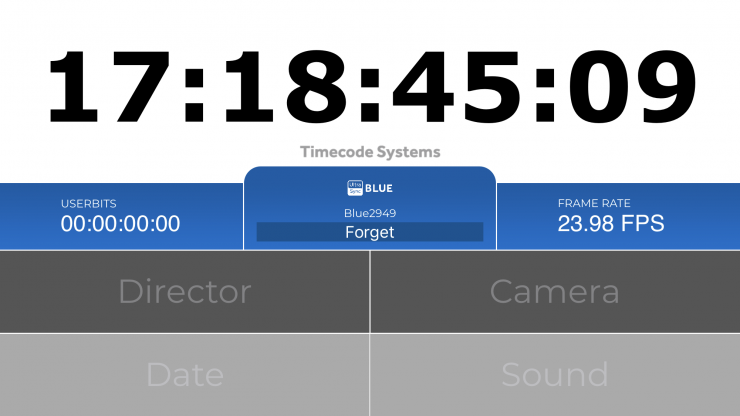
There is an UltraSync BLUE Slate app, but this app doesn’t let you set the timecode and make changes.
I reached out to Timecode Systems about this and they told me that, ‘Currently isn’t a way of loading time of day into the UltraSync Blue, however, they have had a few requests for this, and they are working on an update to the iOS UltraSync Blue Slate app which will add a button to JAM TOD from that into the Blue.’
AtomX SYNC Expansion Unit
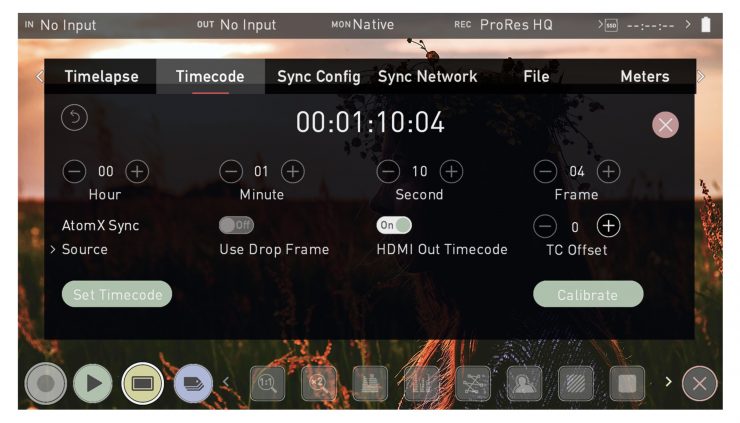
You can also use the AtomX SYNC Expansion Unit to send timecode via Bluetooth to the Nikon Z9. You can also sync and/or control any number of Atomos devices on the same network at ranges of up to 300m.
This can be a little confusing to set up, especially when doing it for the first time. I wouldn’t call this system plug-and-play, because it does require knowing the correct settings and adjustments to make sure everything works properly.
There are numerous options and steps you need to follow to set this all up correctly.
If you are just connecting the Z9 to an ATOMOS device and you aren’t using any other cameras or attached devices then it is reasonably straightforward.
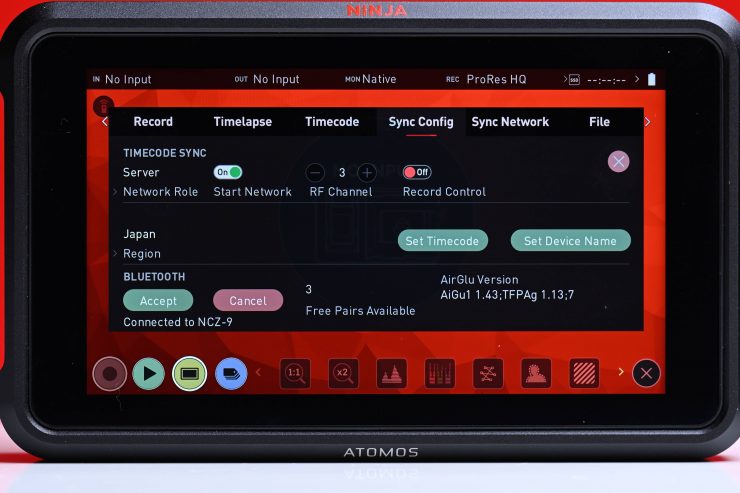
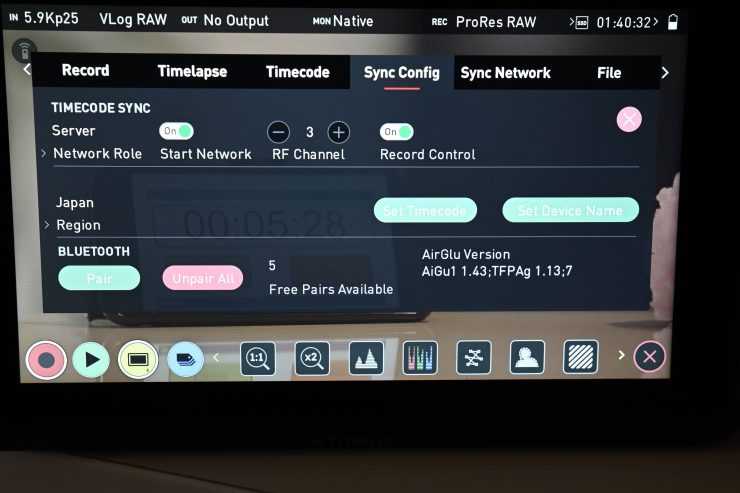
All you need to do is to make sure that the Network Role is set to Server on the Sync Config page. You can then Bluetooth pair the Z9 to your ATOMOS CONNECTED device.
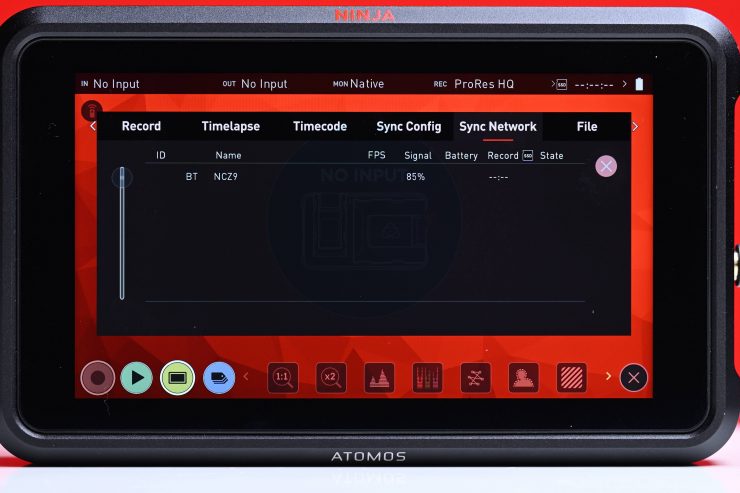
Once you have done this it will appear in the Sync Network.
Now, if you want to attach multiple devices to the ATOMOS DEVICE you are using then things do get slightly more complicated.
The first time you power on your ATOMOS device that has the AtomX SYNC Module attached, you will be prompted to select a region. It is important to select the correct geographical region here as these accessories adhere to strict guidelines for each region.
TC Offset allows you to set a timecode offset value to account for audio delay when using wireless timecode synchronization. This is a must when using HDMI-connected sources as they often have fairly bad delay. You can use the – and + icons to manually adjust the amount of frames to delay. Where the Calibrate function has been used, the frame delay will be automatically displayed and you can select it.
Speaking of the Calibrate function, before using the wireless timecode and SYNC, it is important to use this feature. HDMI cameras deliver their video and audio to your ATOMOS device with a delay, so calibration is necessary to identify the amount of delay that your camera has and take that into account. This will ensure that your video, audio and timecode are in sync, especially if you plan to use multiple ATOMOS connected devices on a multicamera shoot.
Here are the steps to sync your video, audio and timecode, that you need to repeat for each ATOMOS connected device.
Navigate to the Timecode menu on your connected device.
Select AirGlu as the timecode source. The following screen will appear.
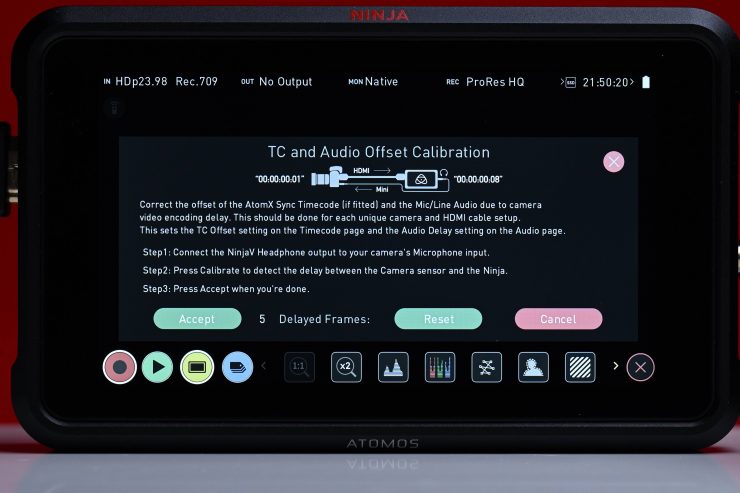
Using an HDMI cable, connect the HDMI output of your camera to the HDMI in connector on your connected device. Using an AUX cable, connect the headphone Out of your device to the mic/line in connector on the camera and press Calibrate. Your device then calculates frame delays and displays them as shown above. As you can see with the Panasonic S1H this delay was 5 frames.
Tap ACCEPT to select the calibrated frame delay. The frame delay will be listed at TC Offset on the Timecode menu page.
When AirGlu is selected as the source, you press the Set Timecode button to open the Sync Network Timecode page. In this menu, you can then select the timecode to use as the clock for the Server unit.
You can then tap to cycle through the options:
Time of Day: Each new clip that is created will contain embedded Timecode starting with the time of day when the recording is started. Please check that your device’s clock has been set correctly. This can be set in the TIME ZONE
Manual: With this setting, the Timecode will reset to the timecode you have defined whenever you press record. All your clips start with this same Timecode. Use the – and + icons above each unit to adjust the numerical values for the hour, minute and seconds sections.
Real World Use
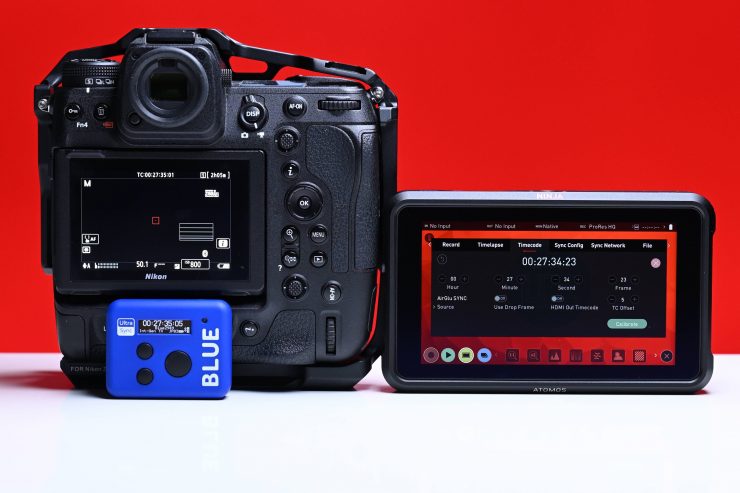
You can have both the UltraSync BLUE and the NINJA with AtomX SYNC running at the same time on the same network.
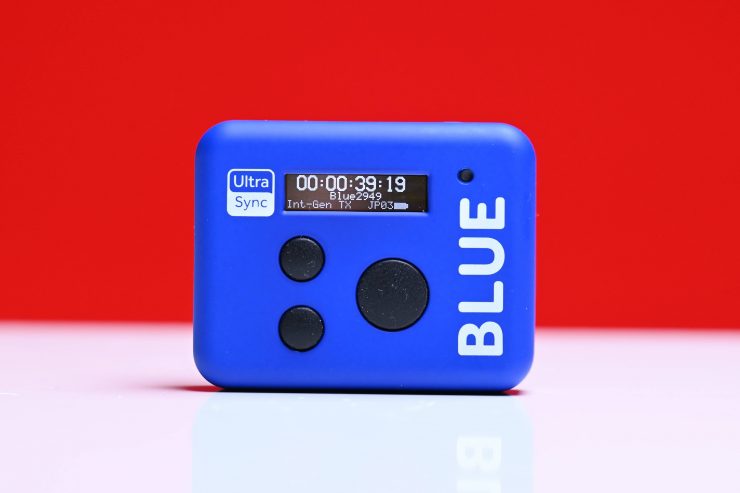
I found the best way to do this was to set the UltraSync BLUE to Int-Gen TX.
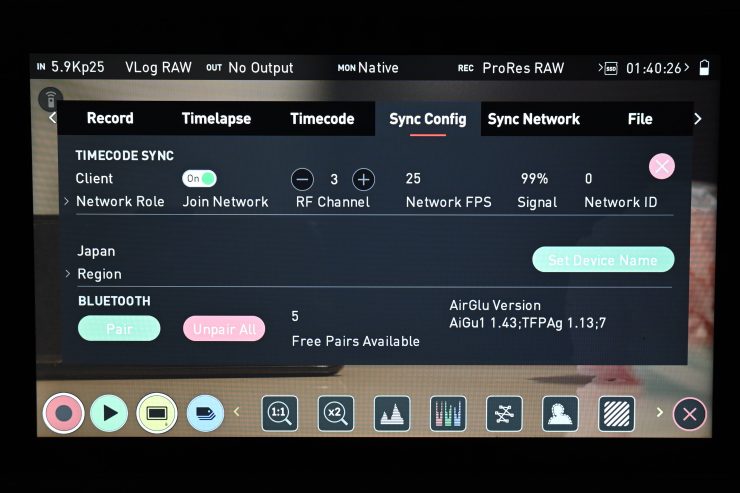
I then went into the Ninja Sync Config menu and select Client mode and then make sure the same country and channel were selected as I set on the UltraSync Blue.
Both the NINJA and UltraSync Blue are then both on the same network using AirGlu RF wireless.
I would then pair the Z9 to the UltraSync Blue to get the timecode over Bluetooth to the camera.
The caveat I found when doing this, was that every time I turned the Z9 off and then back on again it lost the timecode and I had to pair the camera to the UltraSync BLUE once more.
UltraSync Blue & ZOOM F3
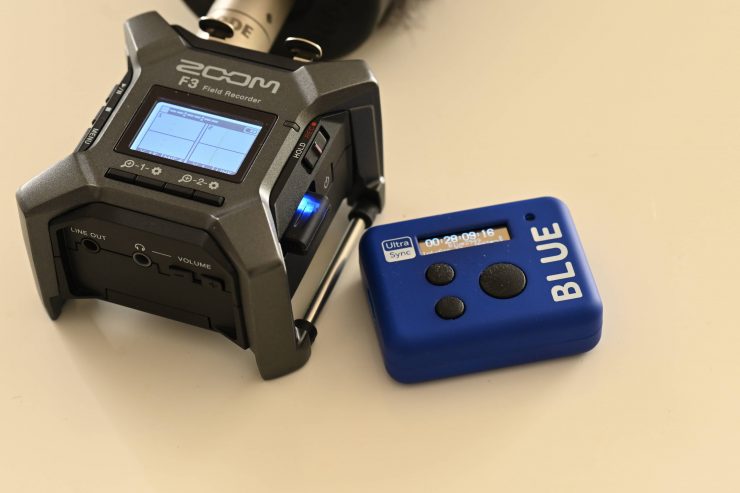
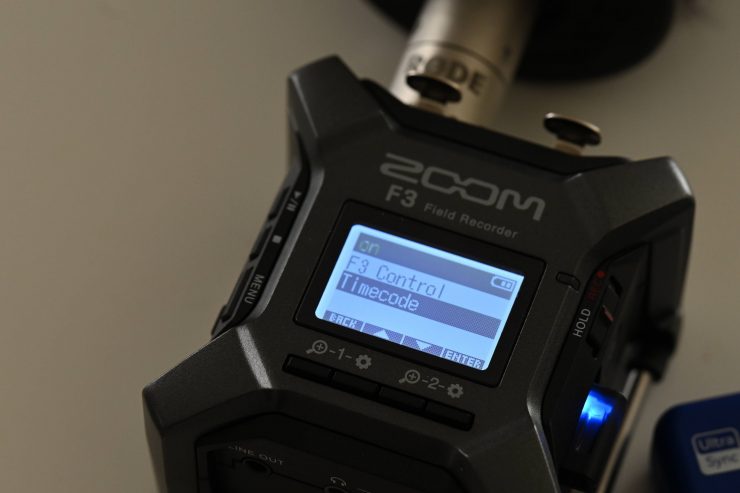
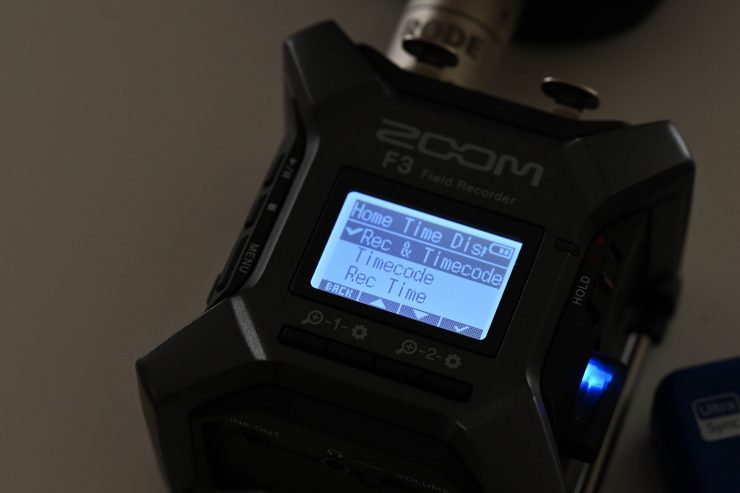
I tried using the UltraSync Blue in combination with the Nikon Z9 and the ZOOM F3 with its optional BTA-1 Bluetooth Adapter.
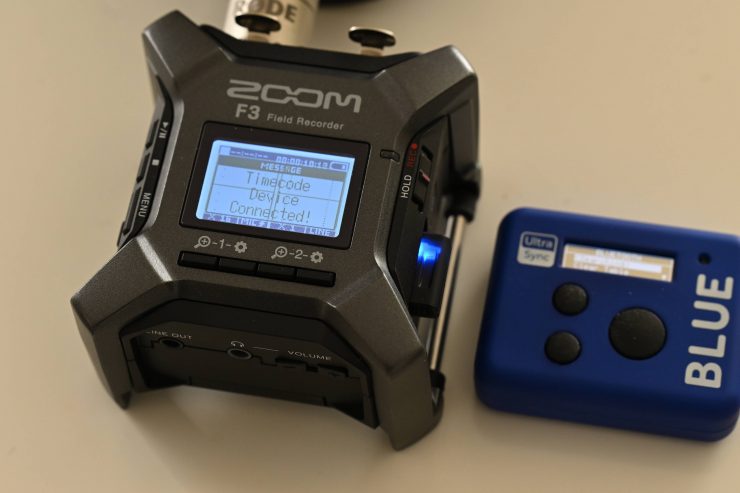
This combination works, but it is a little time-consuming to set up. Once you pair the devices once you shouldn’t have to do it again. If you have any issues go to the Bluetooth menu in the UltraSync BLUE and select Clear Table.
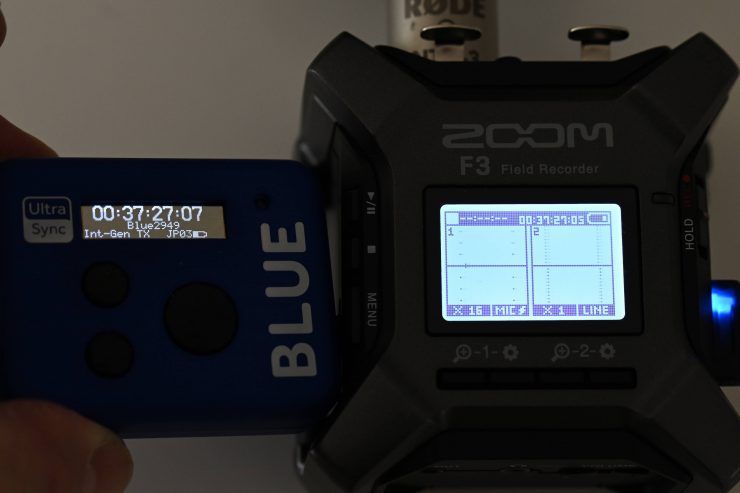
On the display of the ZOOM F3, it was showing that it was 2 frames behind the UltraSync Blue.
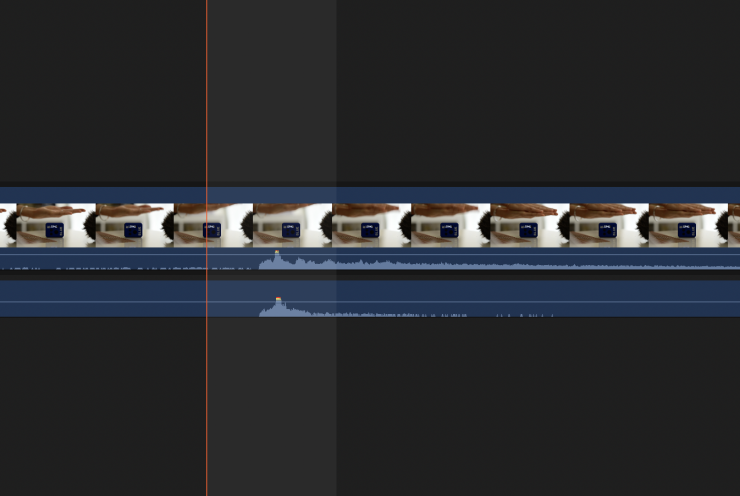
However, after I brought both recordings from the Nikon Z9 and the ZOOM F3 into an NLE, they synched up without any issues.
I recommend this combination if you want to record separate sound from the ZOOM F3 and have it timecode matched with the Nikon Z9.
UltraSync Blue & Other Apps
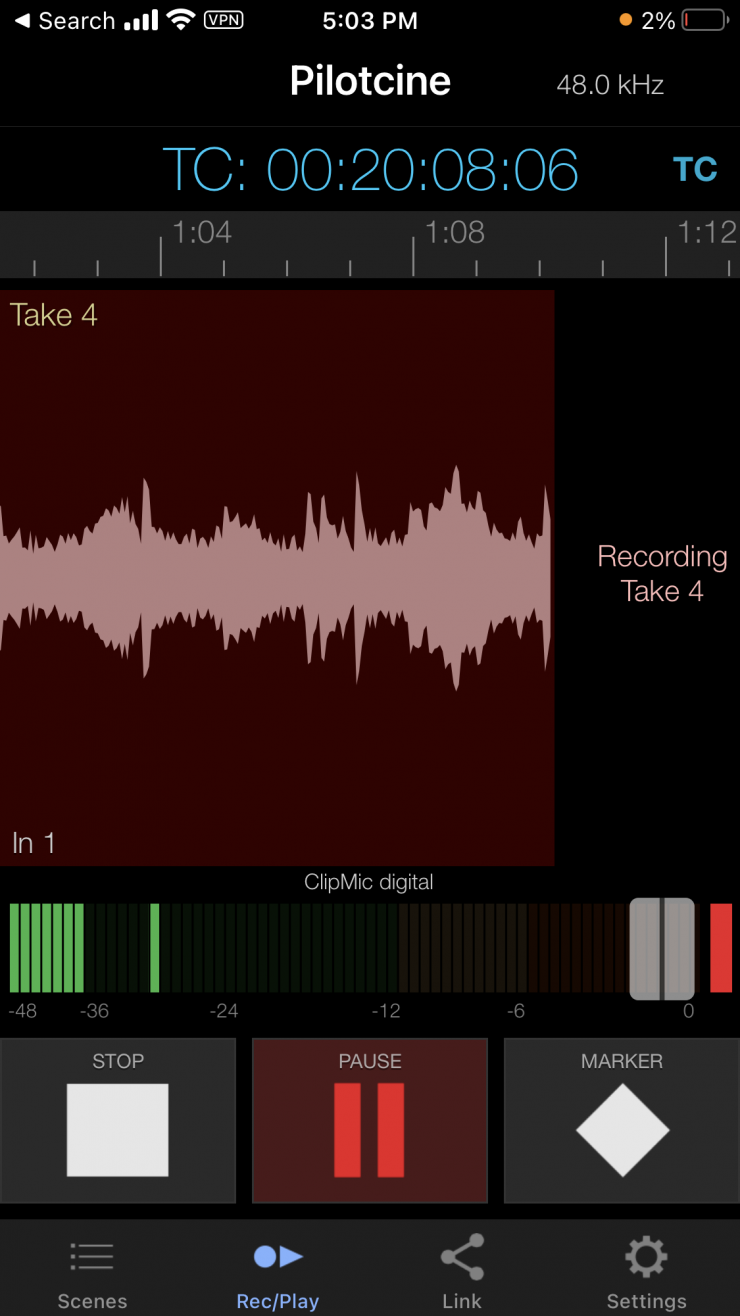
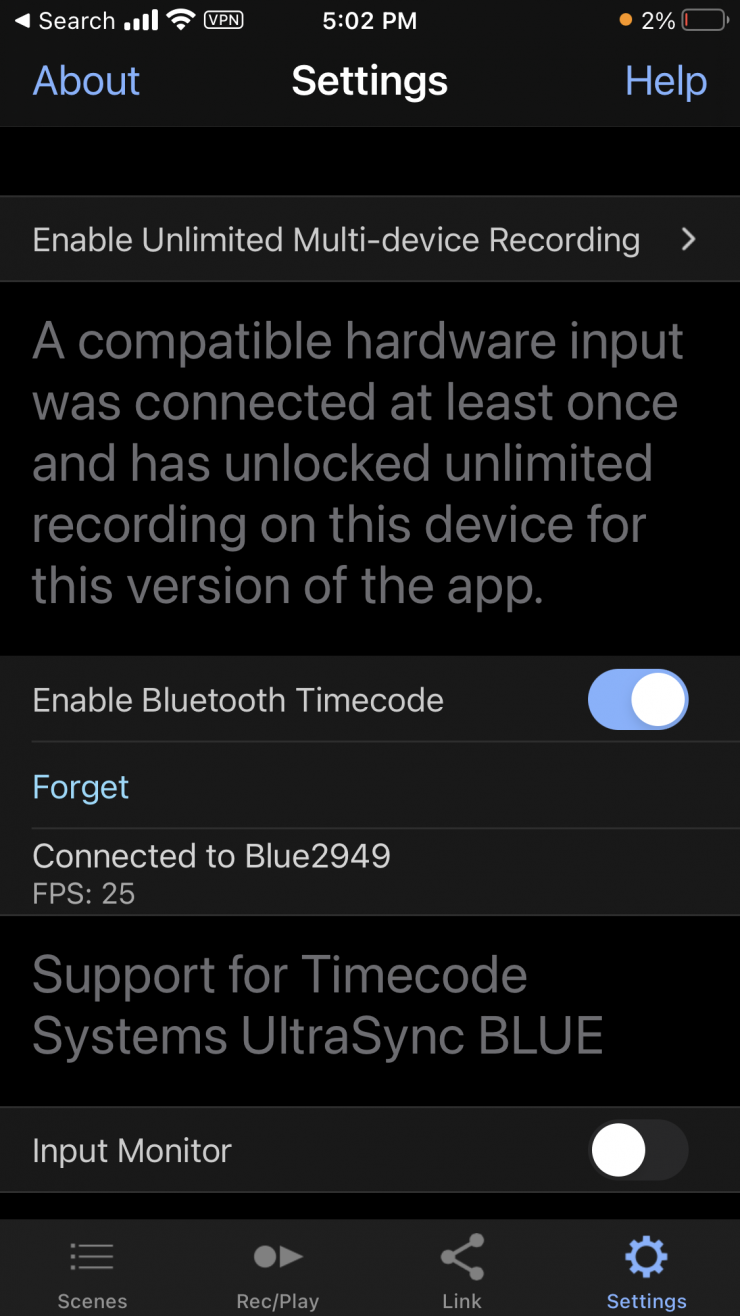
You can also use relatively affordable apps like Apogee MetaRecorder or Mavis with the UltraSync BLUE in conjunction with the Z9. Both these apps support Bluetooth timecode from the UltraSync BLUE.
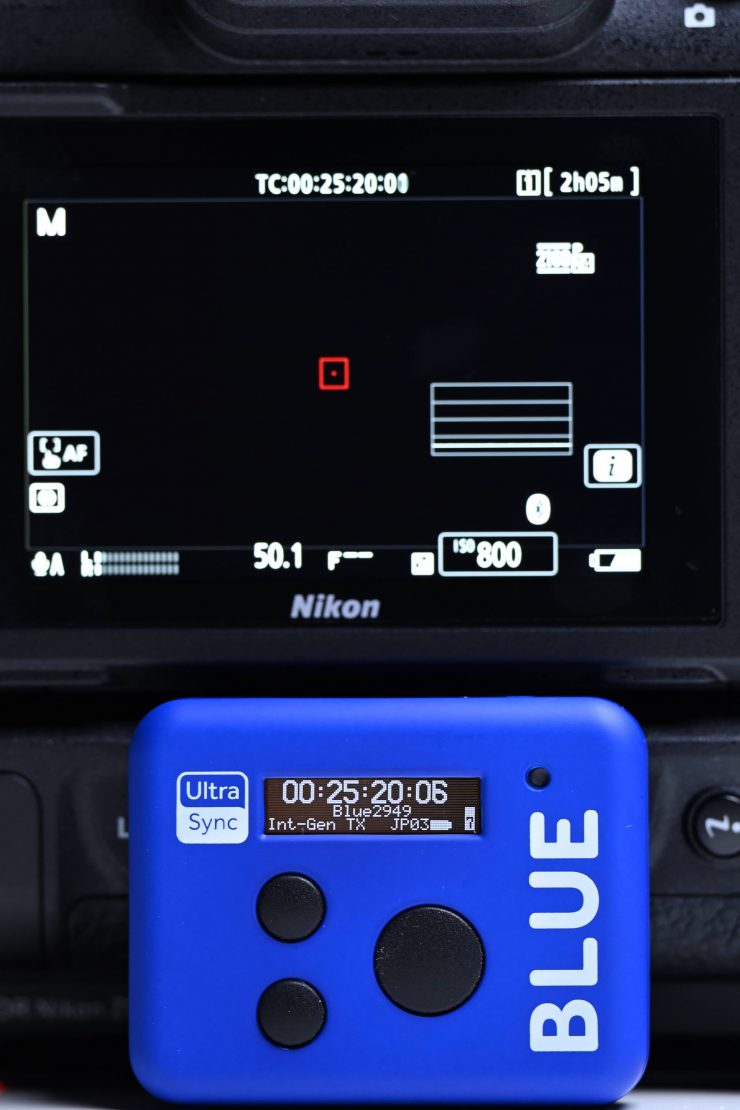
What is interesting is that if I took an image of the UltraSync BLUE and the Z9’s screens showing the timecode, the Z9 was always showing that it was 5 frames behind.
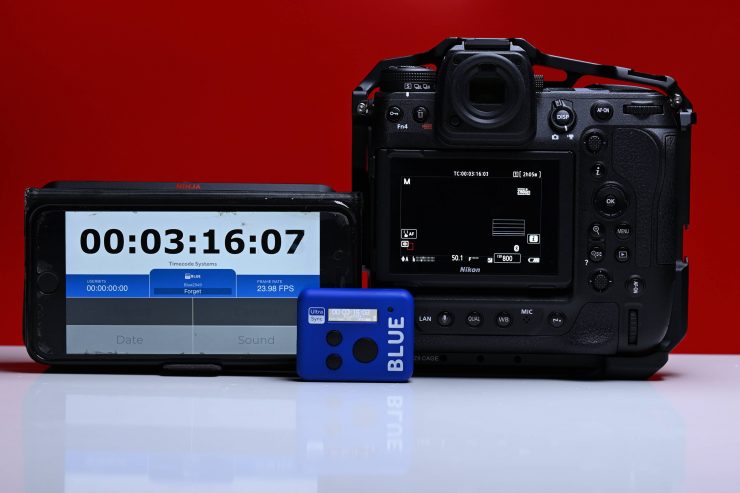
It also shows different values on the UltraSync BLUE Slate, Atomos Ninja V, and Apogee MetaRecorder.
Now, is this actually happening with the recording?
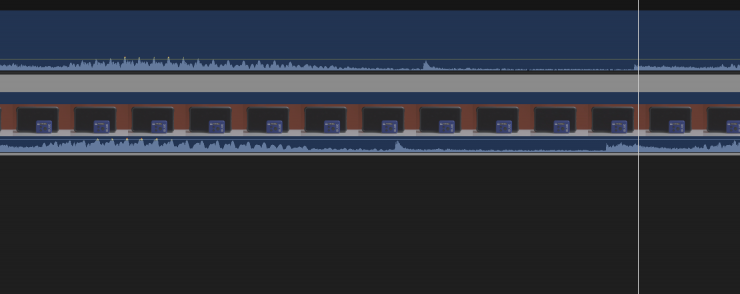
When I used the UltraSync BLUE to send Bluetooth timecode to both the Z9 and the Apogee MetaRecorder (to record separate audio) and then I bought those two files into an NLE and created a multicam clip based on timecode values I found that there was a 1/2-1 frame delay. Now, the saving grace is that the timecode doesn’t appear to drift. I did some tests recording for a few hours and it still had a 1/2-1 frame delay. 1/2 to 1 frame is not the end of the world, and although it isn’t completely frame-accurate these errors are expected and normal when using timecode.
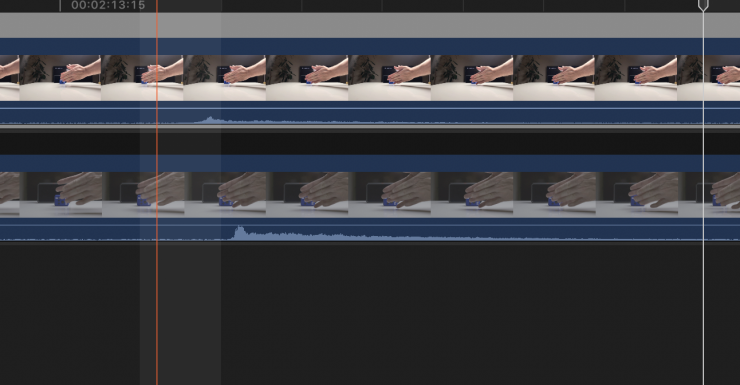
If I did this same test again but swapped the Apogee MetaRecorder to the Mavis app there was also a 1 frame delay.
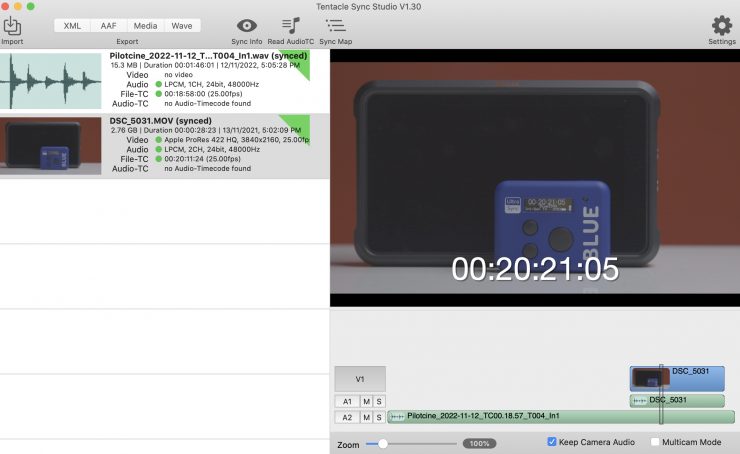
I wanted to try yet another test where I used the UltraSync BLUE to send Bluetooth timecode to both the Z9 and the Apogee MetaRecorder (to record separate audio) and then I bought those two files into Tentacle Sync Studio and synched them up based on timecode and played back the clip, it was almost correct, but there was a 1-frame delay.
In another test, I wanted to see what would happen if I had a Panasonic S1H recording to the ATOMOS Ninja and the Nikon Z9 (recording internally) when both were receiving the same timecode source.
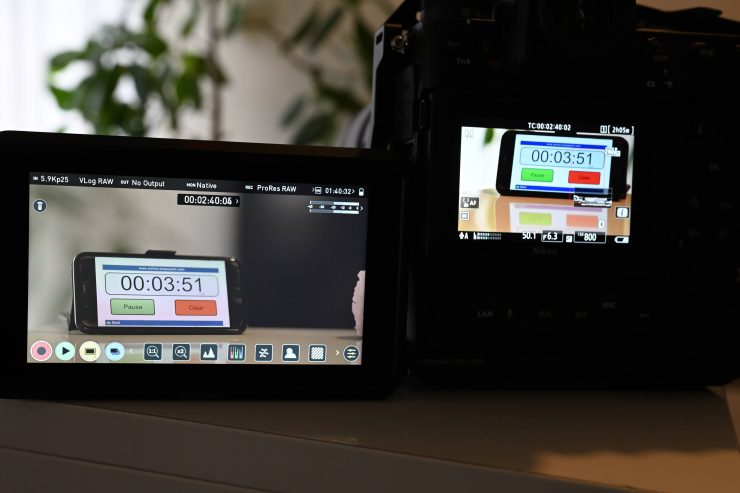
Just like in the previous tests, the Nikon Z9 was showing that it was 2-3 frames behind the ATOMOS Ninja V. However, if I brought the files into an NLE I found the frame discrepancy to be closer to 1 frame.
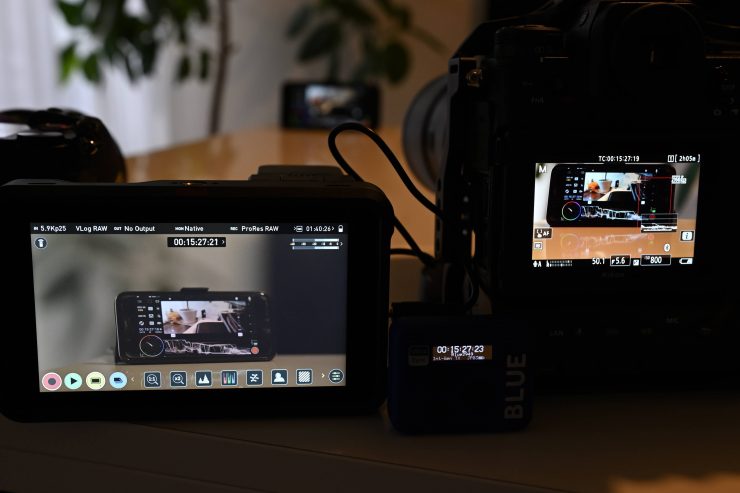
If I introduced the UltraSync BLUE and the Mavis app into the equation along with the Z9 and the S1H recording to the ATOMOS Ninja V, all the devices were showing frame discrepancies. The Ninja V was 2 frames behind the UltraSync BLUE, the Nikon Z9 was 4 frames behind, and the Mavis app was 5 frames behind. Now, this is nothing more than a display error. The actual frame accuracy if you bought these clips into an NLE was off by around 1 frame.
I reached out to Timecode Systems to let them know the results of my tests and they told me that they will pass on the feedback to Nikon and they should be able to sort it out via a firmware update. As the apps and audio recorders/Z9 are not genlocked or world clocked all the clips should be within a frame duration of each other but because the frame edges are not locked the devices could slip 1 frame either way of each other.
Conclusion
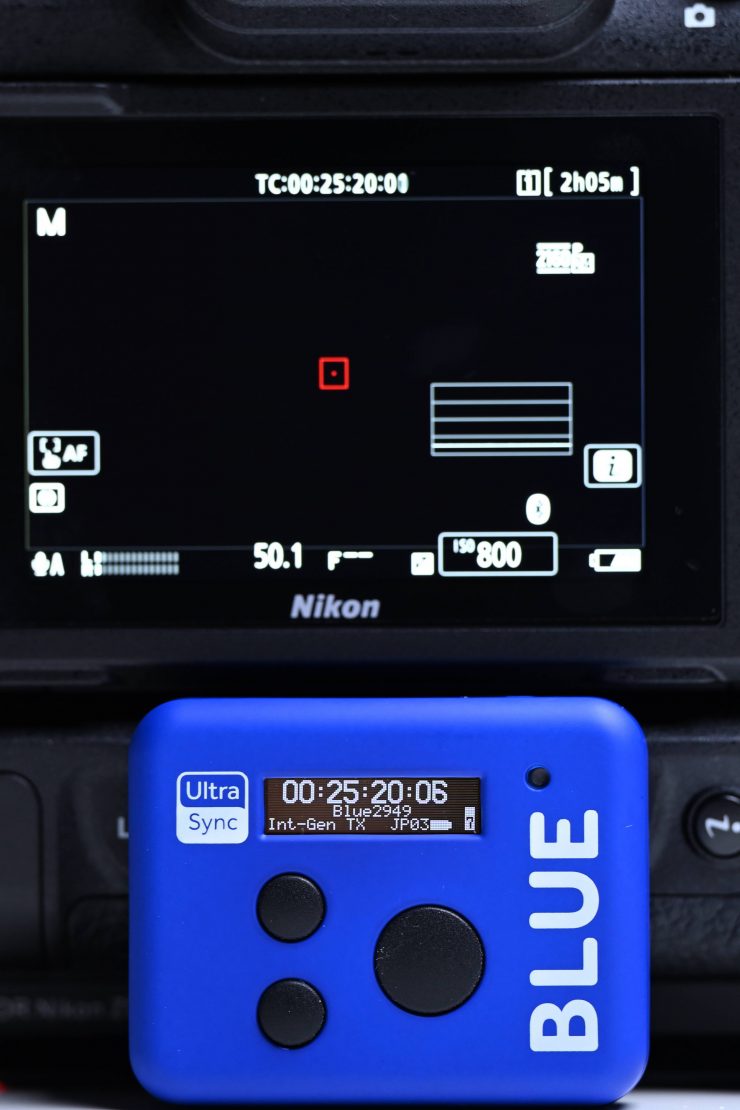
Having timecode sent wirelessly via Bluetooth to the Nikon Z9 is a great feature, but Nikon and ATOMOS need to sort out the frame delay display issue. As I previously mentioned 1 frame is not the end of the earth and in a lot of cases, you may not even be able to tell. Also, with any timecode, these errors are expected and normal. Genlock or using a world clock is the only way to truly synchronize two cameras or a camera and other devices such as audio recorders. Timecode isn’t a replacement for Genlock or a World Clock, but it is going to get the job done in a lot of cases, and it is certainly a whole lot better than not using timecode at all!
If you are recording separate sound to something like a ZOOM F3 (with the optional Bluetooth dongle) you can create a nice little package with the piece of mind that everything is going to be within a frame or so of being accurate. If you couple the Z9 and UltraSync BLUE with an ATOMOS Ninja V/V+ or one of the other CONNECT devices that is hooked up to another camera you can very easily have multiple cameras’ timecode matched. However, from my testing, I did find that there was a delay of around 1 frame when using this system, but that is to be expected. You also need to be aware of the caveats of hitting the record button on the Nikon Z9 too soon if the camera hasn’t re-established the timecode.
I do wish that there was an app for the UltraSync BLUE so you could set time of day from your phone. This would make it a lot more versatile system and allow it to be used in conjunction with other timecode devices. In saying that, it does look like that will be possible very soon through an update to the UltraSync BLUE Slate app.
The UltraSync BLUE is a very affordable and relatively easy way of getting timecode into a Nikon Z9, but you need to understand that timecode jamming different devices isn’t going to result in frame-accurate synchronization. You also need to be aware of the caveats that I listed in the review and the display discrepancies that currently exist. Hopefully, this gets fixed soon. It is great to see manufacturers adopting this technology and anything that allows you to have matching timecodes across multiple devices is a welcome addition.

