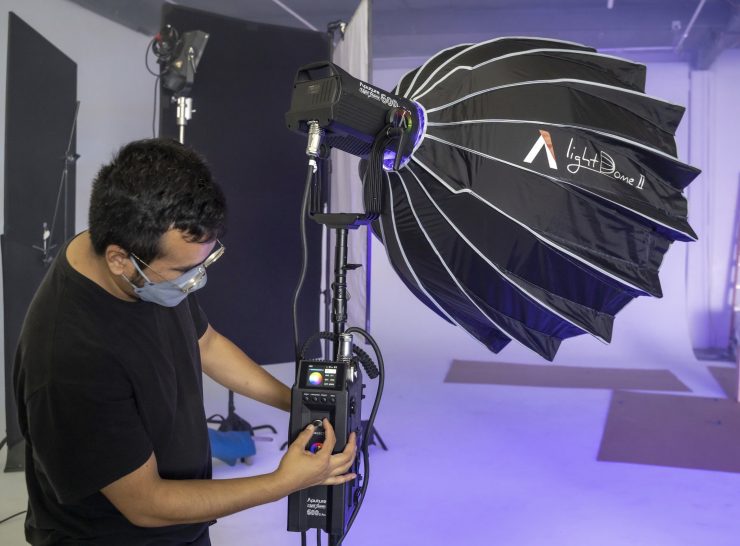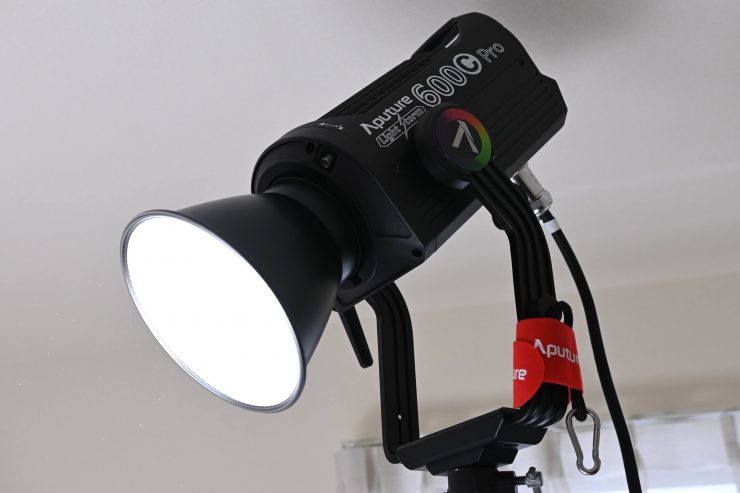
The Aputure LS 600c Pro is Aputure’s first full-color point-source light fixture. Essentially it is an RGBWW version of the 600d/600x Pro with a few improvements.
The LS 600c Pro looks to be in direct competition with Prolycht’s Orion 675 FS full spectrum RGBACL color spotlight which was announced around the same time.
The 600c Pro uses an RGBWW LED chipset and it is capable of producing 600W of output. The fixture draws 720W and it features custom color-blending optics, weather resistance, and professional-level connectivity.
Aputure claims that the LS 600c Pro is one of the brightest full-color point-source light fixtures on the market and as having the highest wattage RBGWW chipset in any point-source LED for filmmaking.
Lights in this form factor are becoming increasingly more popular because of their versatility. and we are now starting to see more full color options coming to market. So, let’s get on with the review and see how the LS 600c Pro stacks up.
Key features
- 600W Output Full Color Bowens Mount RGBWW Point Source LED
- 720W Maximum Power Draw
- Fully Tunable CCT from 2,300K to 10,000K
- Fully-Tunable Green-Magenta Adjustment
- 90% of Colors Within Rec.2020 Color Space
- Hue, Saturation & Intensity with CCT Control
- Industry-standard X,Y(CIE 1931)
- Light Source Presets
- 300+ Gel Presets
- 15 Built-in Lighting FX
- 2 Output Modes: Max & Constant
- 4 Dimming Curves:Linear, Exponential, Log, S-Curve
- 10 User-Programmable Presets
- Frequency Selection to Reduce Flicker
- 4-Fan Modes: Smart/Medium/High/Silent
- Multiple Control Methods: SidusLink Bluetooth App Control, LumenRadioCRMX, Art-net & sACNvia etherCON
- Multi-Voltage Battery Plates (V/Gold Mount): Half Power (14.4V/15A, 26V/8.5A, 28.8V/7.5A)
- V-Mount/Gold Mount Battery Charging
- Supports 48V/15A DC Input (3-pin XLR): Battery Power Stations & Block Batteries
- 16-bit 5-Pin DMX512 In & Out
- 360°Rotation, Curved Dual Disk-brake Yoke
- UtilizesUniversal Bowens Mount Standard
- Dual Junior / BabyPin(16mm/28mm)
- Lightning Clamp Quick Release Plate
- 7.5m Weatherproof Head Cable
- 6m Locking NeutrikpowerCONTRUE1 TOP AC Power Cord
- Rolling Case included
- 4,150+ lux @ 3m with LS 600 Series Hyper Reflector
- 17,480+ lux @ 3m with BM1215 Hyper Reflector (Narrow)
- 5,300+ lux @ 3m with BM 1230 Hyper Reflector (Medium)
- 2,694+ lux @ 3m with BM1245 Hyper Reflector (Wide)
What’s new?
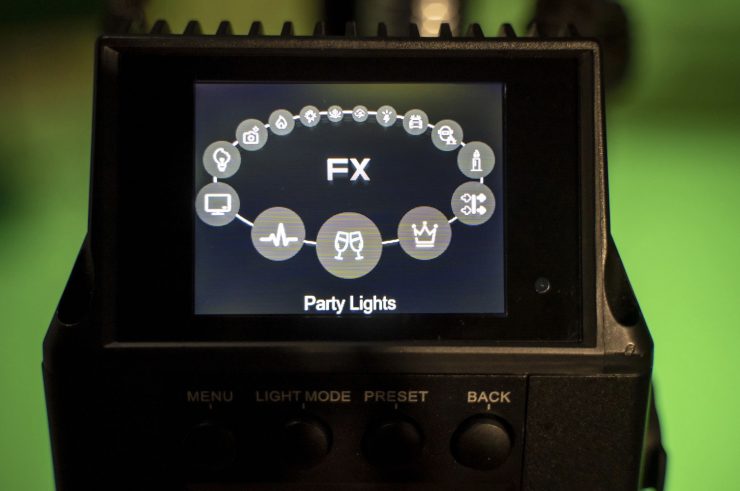
The LS 600c Pro features a brand-new UX, which makes it easy to access different light modes. There are also 10 user-programmable presets, and other features, such as Max & Constant Output Modes, Frequency Selection, 4 Fan Modes, 4 Dimming Curves, and 15 Lighting FX.
Concept
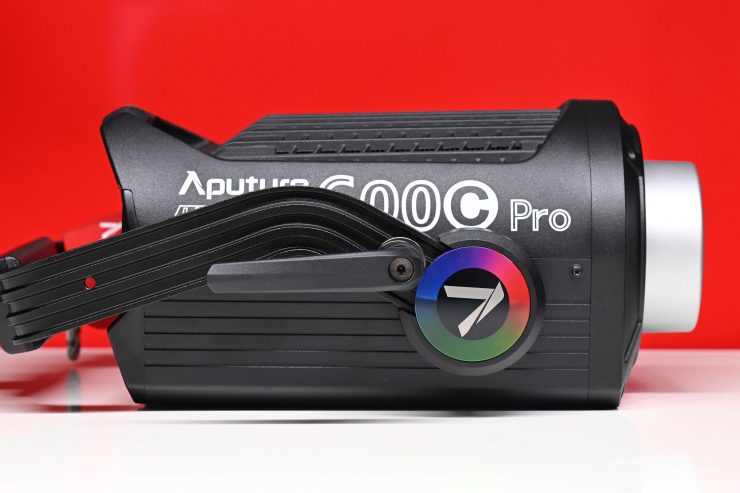
The concept behind the LS 600c Pro was to follow the same principles that made the LS 600d and 600x so popular. Give users, a very flexible, fully-featured lighting source that could be run off camera batteries and controlled via an app. Only this time, add RGBWW capabilities.
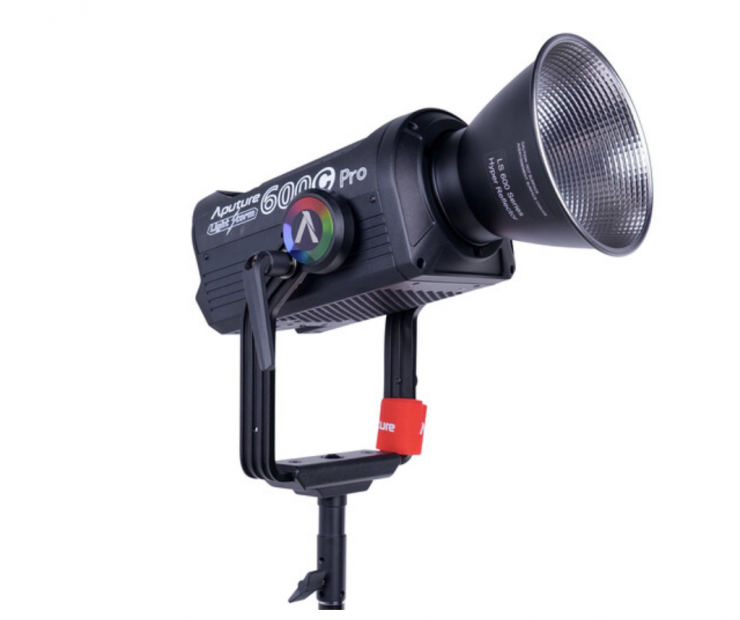

LS 600c Pro 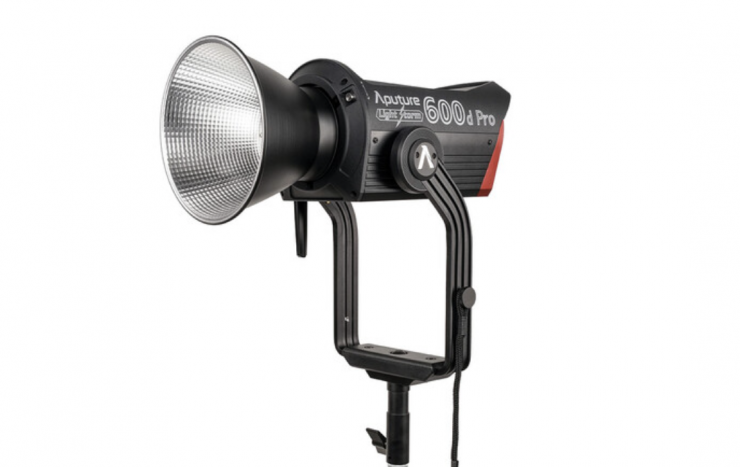
LS 600d Pro 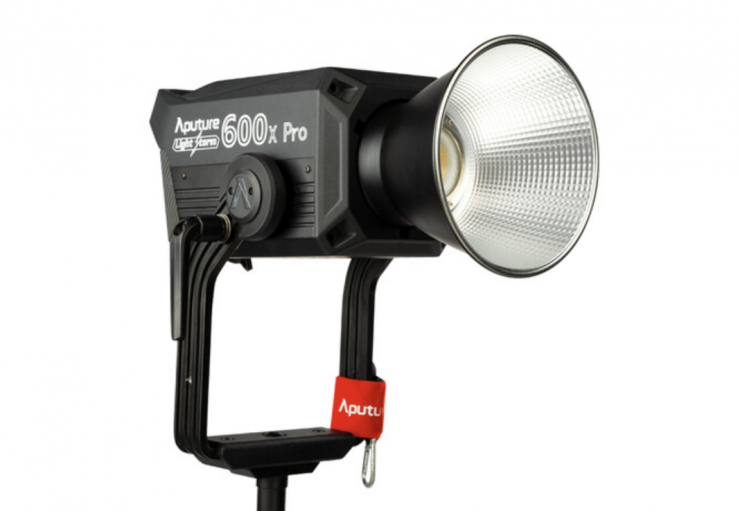
LS 600x Pro
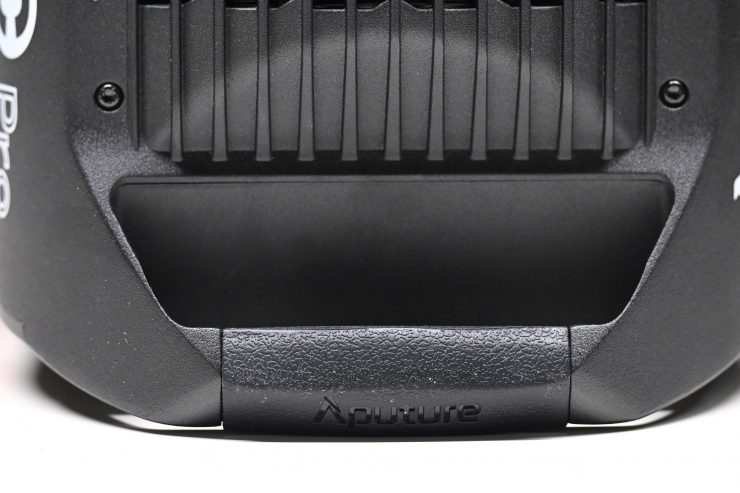
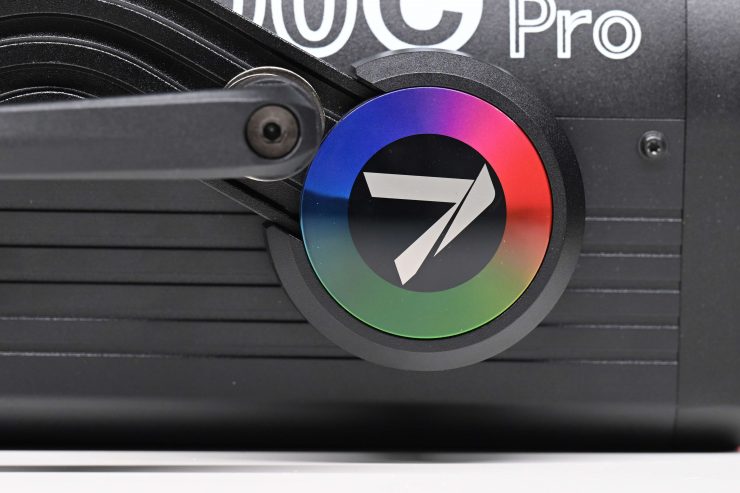
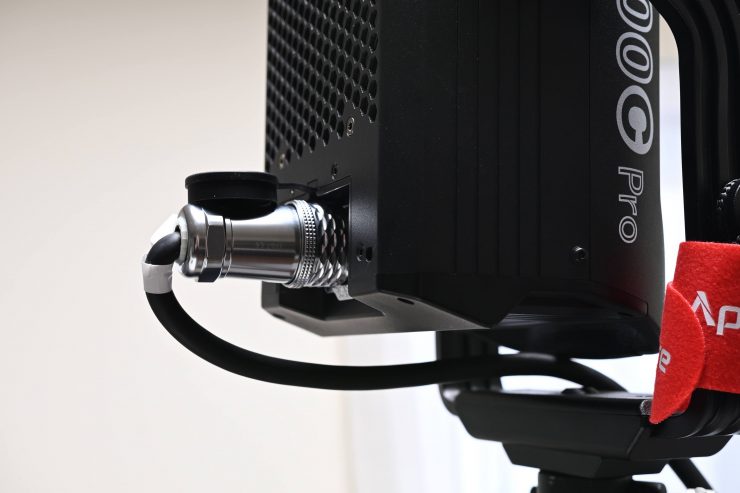
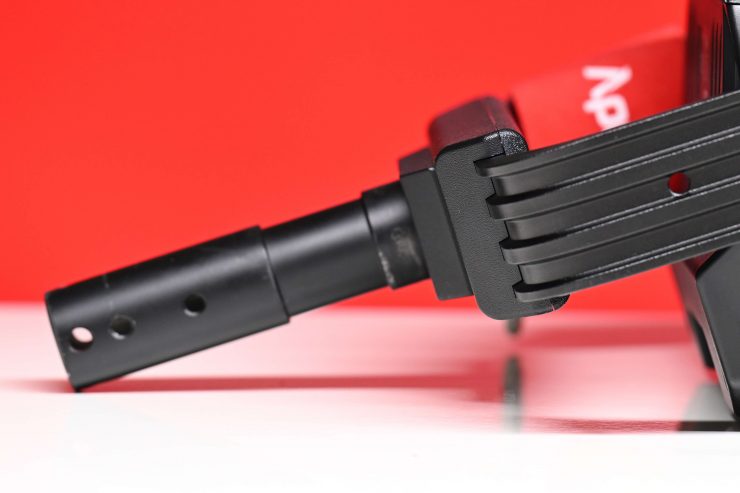
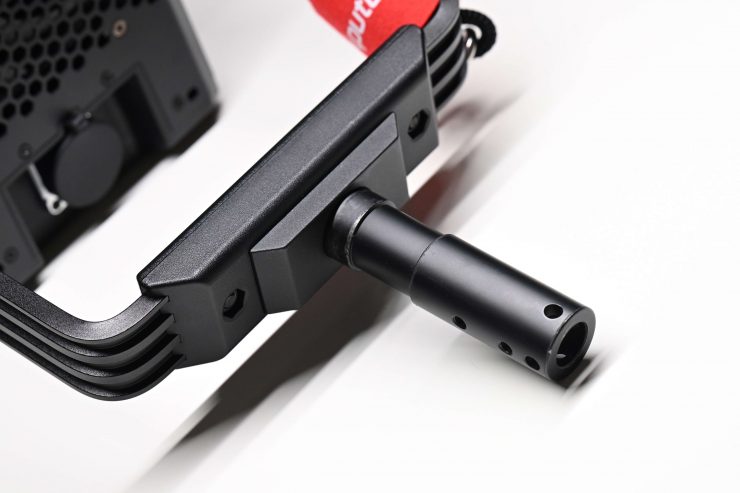
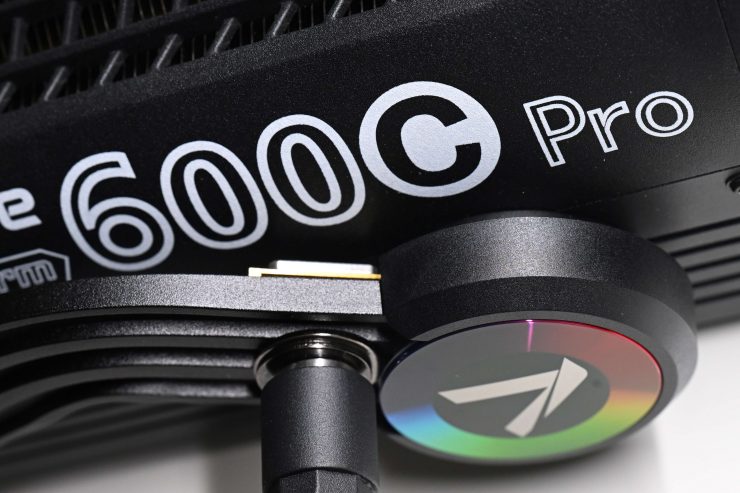
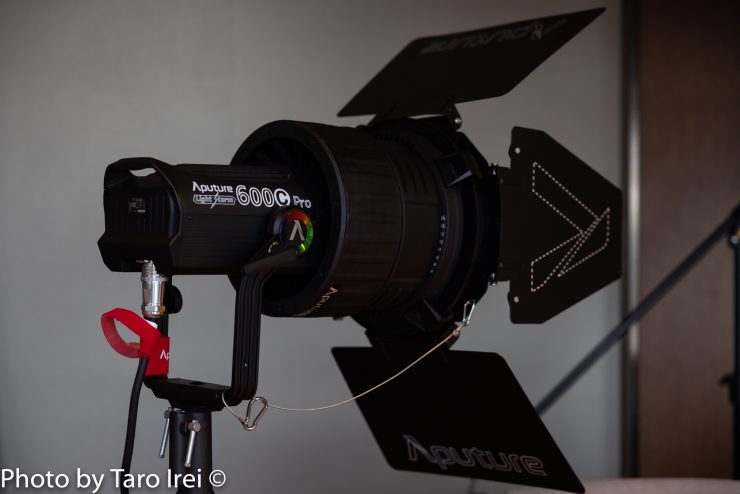
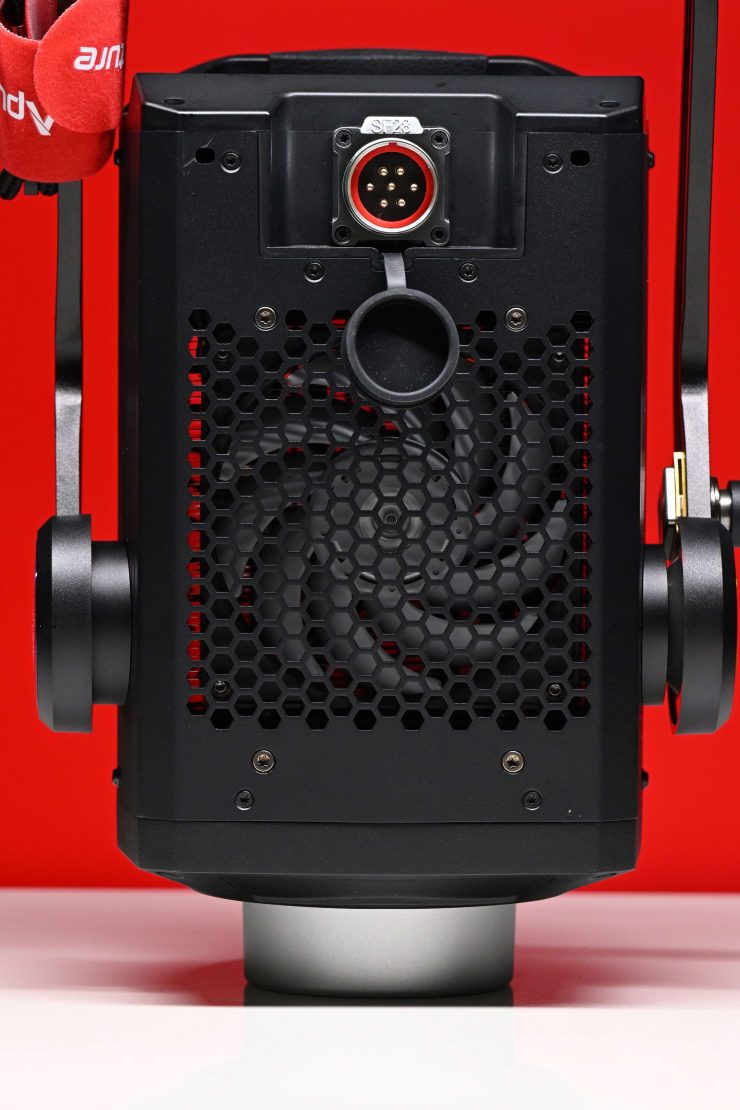
The LS 600c Pro looks very similar to the 600d and 600x. There are a few small changes, such as moving the connection for the cable that goes to the power supply/controller box from the back to underneath the light and a multi-colored ident on the yoke adjustment, but generally, everything is almost the same.
RGBWW
Aputure states that the LS 600c Pro utilizes the same RGBWW technology found in the Nova series. They claim that the light can achieve an SSI (D56) score of 74 and SSI (Tungsten) score of 85. These are good numbers, but very similar to what a lot of other lights I have tested score. I will test these claims further down in the review.
The LS 600c Pro has a Kelvin color temperature range of 2300K to 10,000K, full green-magenta adjustment, and it is claimed to have the ability to reproduce >90% of colors within the Rec.2020 Color Space.
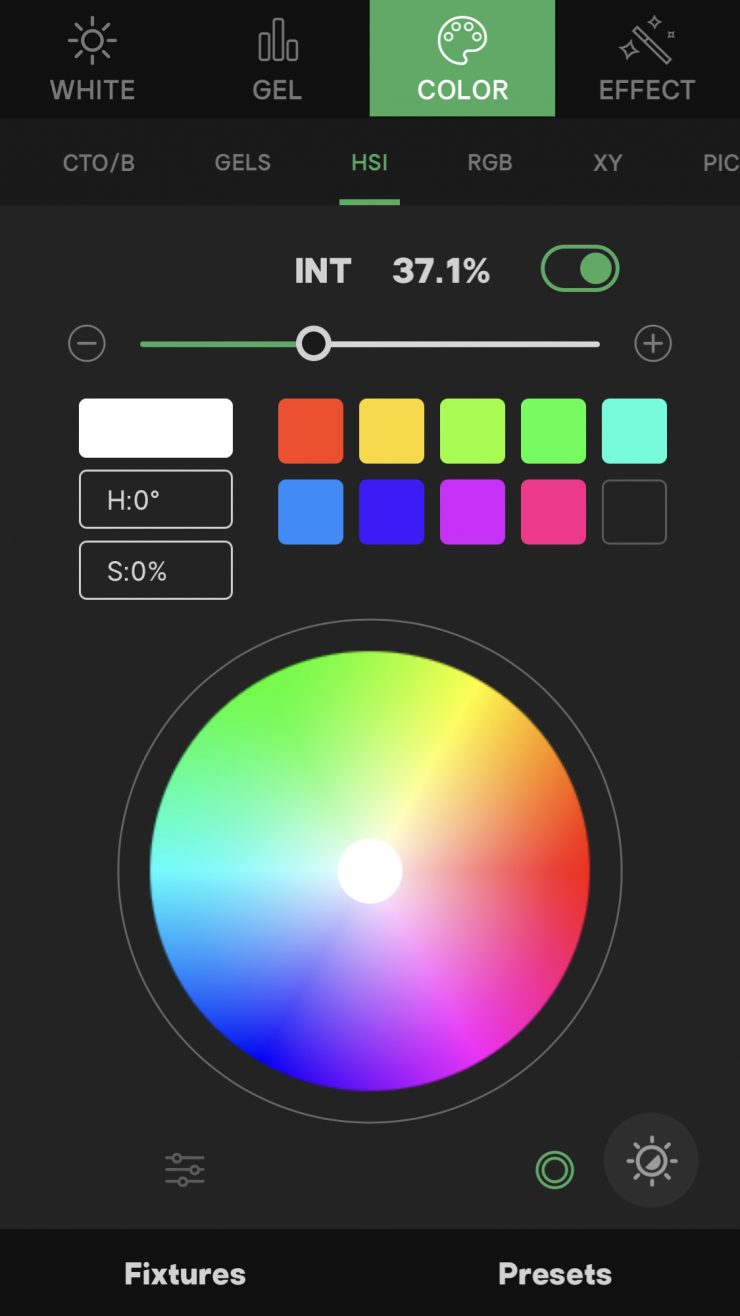
Just like the Nova series, the LS 600 Pro features color controls including XY, RGB, Source & Gel Presets, as well as advanced HSI with white-point adjustability.
We are seeing a lot of lighting companies now using RGBWW technology. RGBWW stands for Red, Green, Blue & Warm White. There are, however, other types of RGB such as RGBAW and RGBACL.
The competing Orion 675 FS uses RGBACL, just like the ARRI Orbiter. The Orion 675FS and Oribiter don’t use any white LEDs, instead, they are mixing all of those different color LEDs to produce white light. Hive Lighting has also been using 7 LED-chip blending. Instead of the traditional 3 colors, Hive uses red, amber, lime, cyan, green, blue, and sapphire. The advantage RGBACL has over RGBWW is that it is capable of giving you a larger CCT range and it can produce more saturated colors with more output. RGBWW lights tend to struggle to create saturated colors like yellow and they don’t always have as much output when generating saturated colors. They can also have a large drop-off in output at different CCT settings.
There is a lot of debate and argument over what is better. Aputure will tell you that RGBWW is better, while Prolycht will tell you that RGBACL is better. I don’t have any horse in this race, so I am not influenced by what lighting companies say. All my reviews are based on data and facts, and every light gets the same unbiased treatment regardless of who makes it or how much it costs.
I am not an Aputure or Prolycht fanboy who is going to give you a biased assessment of a light. I have seen, used, and reviewed hundreds of lights over the years so I think I have a pretty solid background in giving you a professional opinion that isn’t influenced by marketing hype.
Build Quality
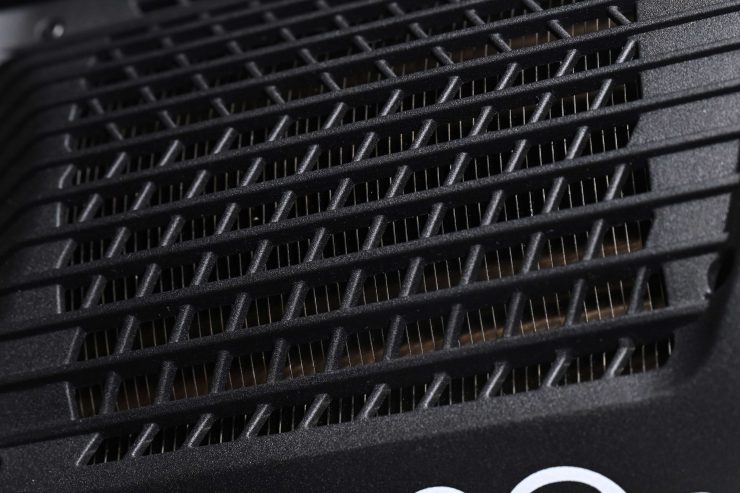
The build quality of the Aputure LS Pro fixtures has always been pretty good. Aputure has come a long way from its original offerings where the build quality was pretty ordinary. The new LS 600c Pro has a very similar build quality to the other LS 600 fixtures.
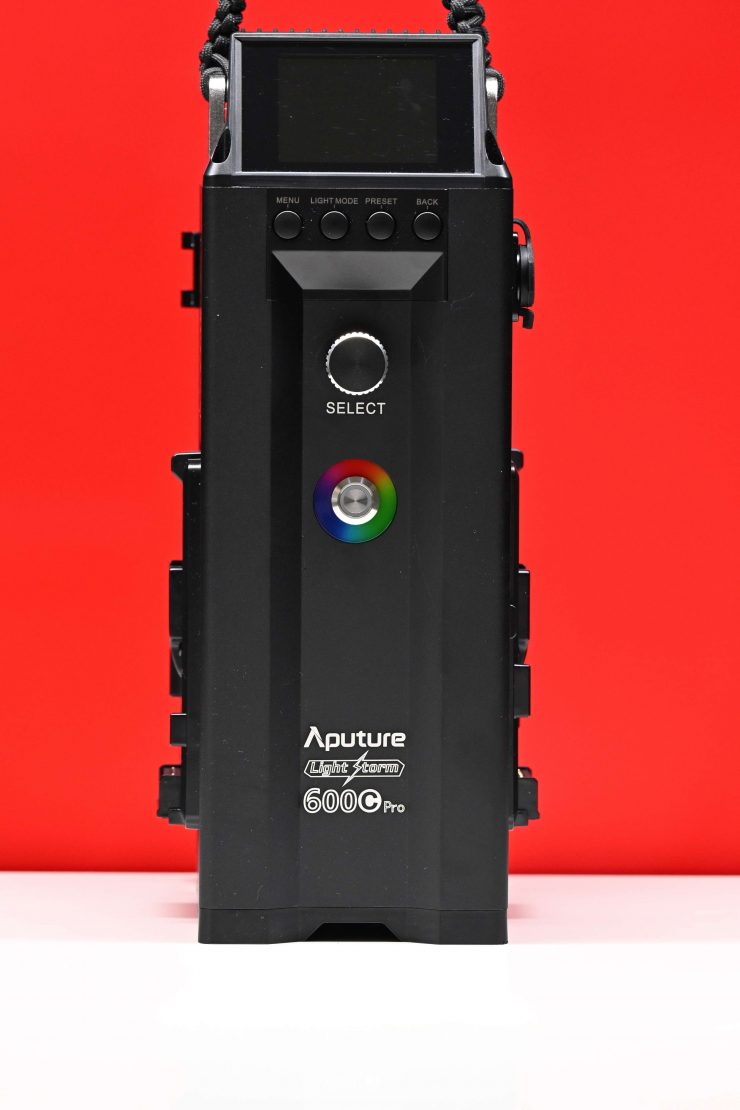
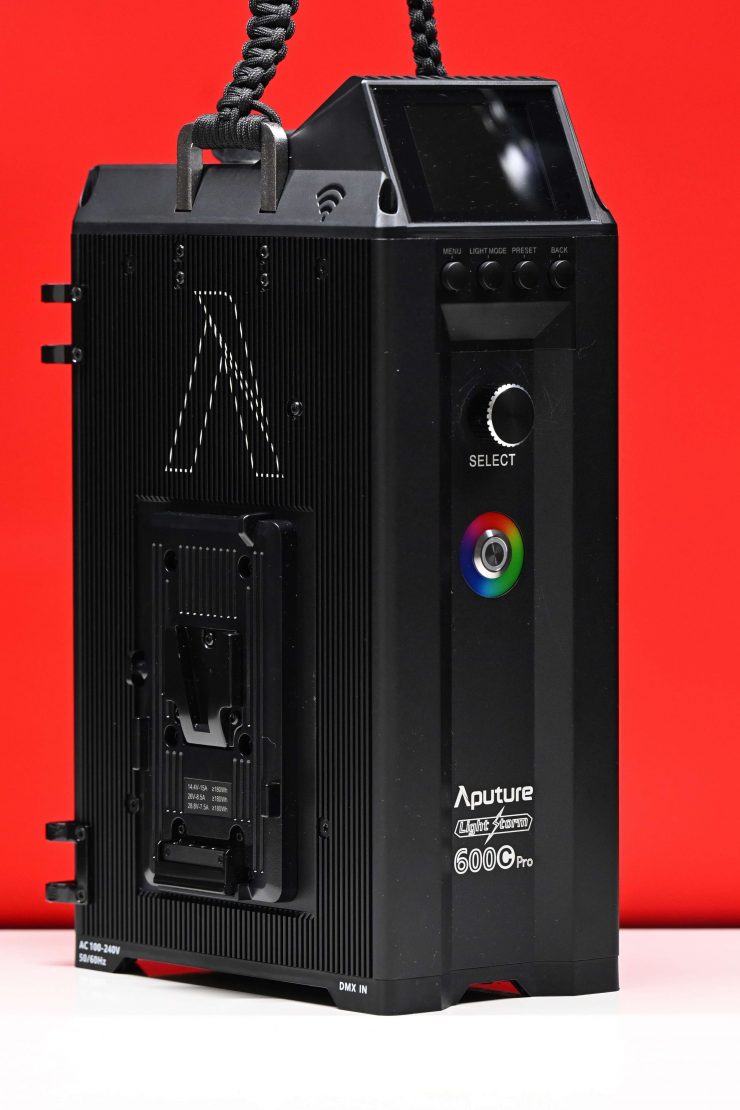
If it ain’t broke don’t fix it. Aputure has stuck with a tried and tested design and they are using a very similar controller/power supply that was supplied with the 600d and 600x.
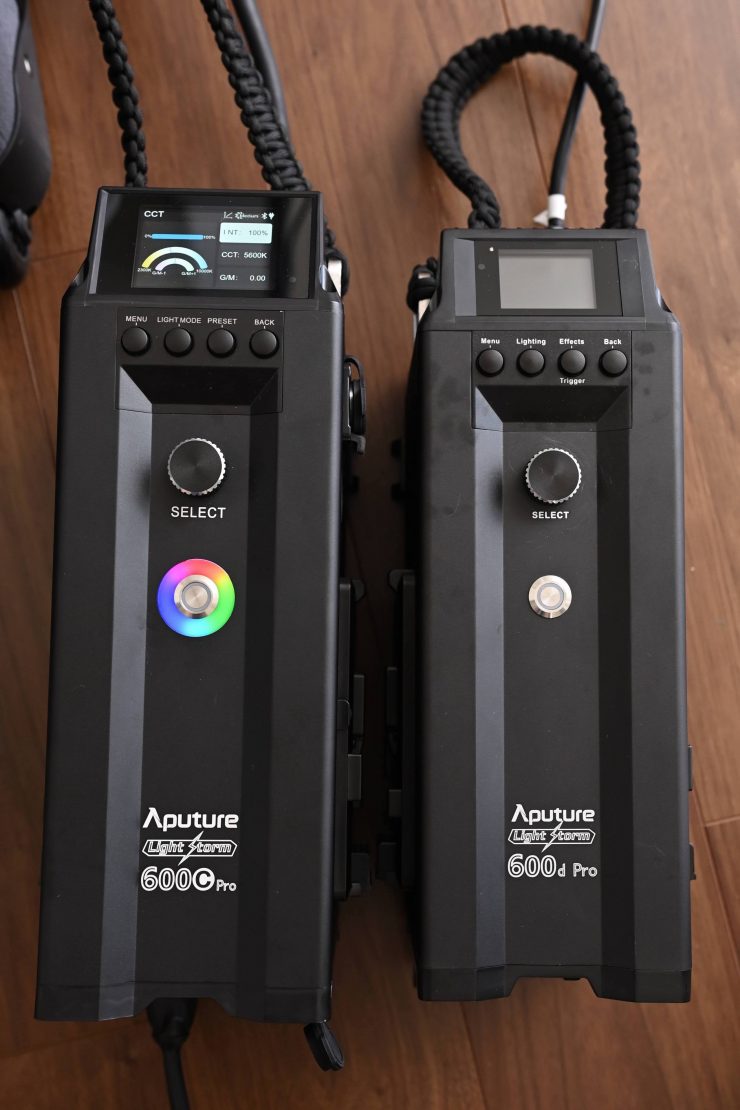
However, it isn’t identical to the ones that come with the 600d and 600x. It is slightly larger and higher and it has a different LCD screen.
The controller/power supply is well made and robust, however, the cable inputs and outputs are not on the side, and instead, they are located on the bottom and top of the controller/power supply. Because of where they are located you can’t stand the controller/power supply up, you have to lay it flat on the ground. In some ways, this makes sense because of where the display screen and controls are located. There is never going to be any perfect solution when you have an integrated controller/power supply with battery plates on it.
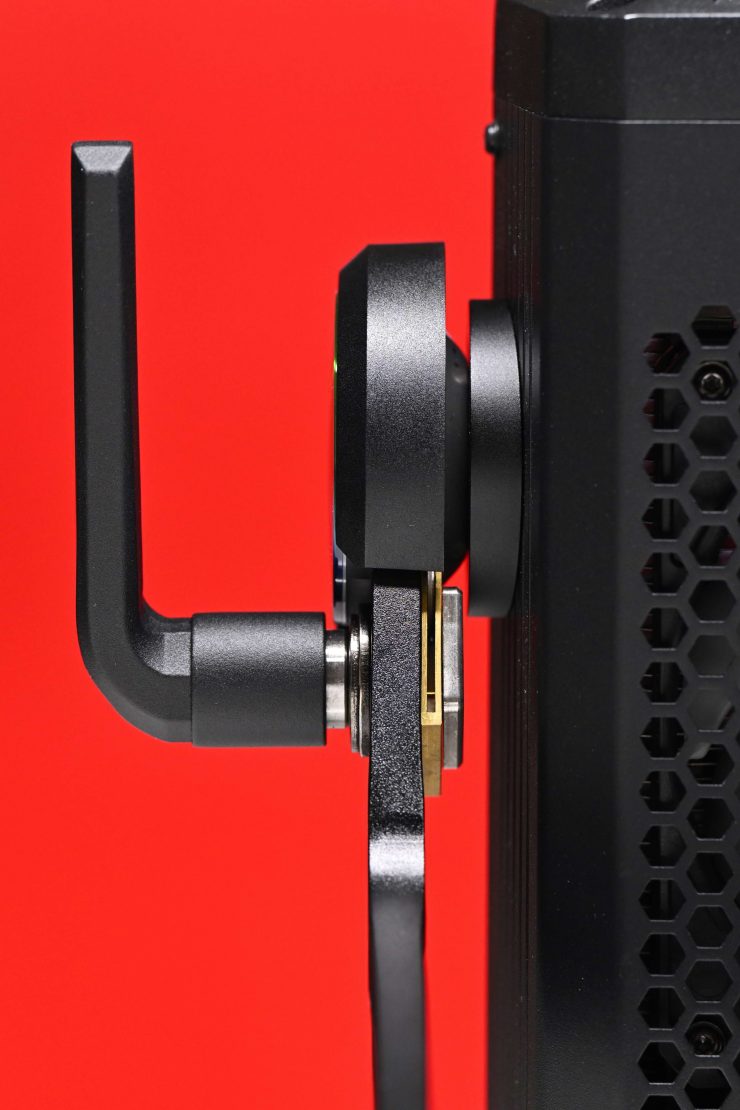
The locking mechanism on the 600c Pro is pretty decent and it solidly locks the light down.
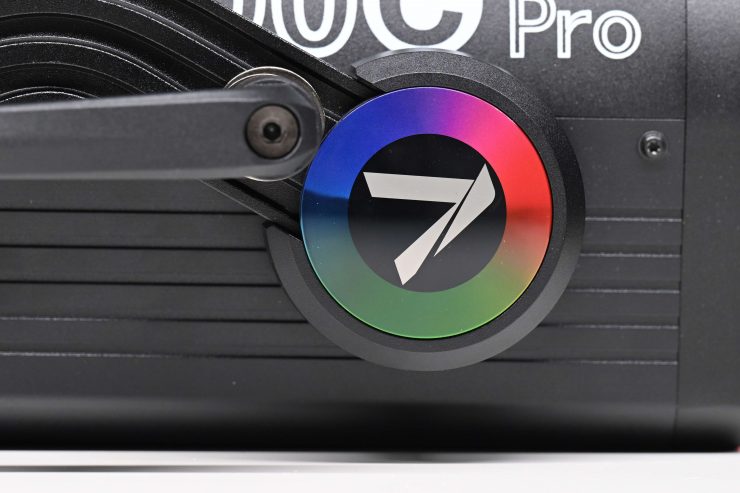
If you do use the light with the optional F10 Fresnel, all of the weight gets transferred to the front, and even though the yoke lock down mechanism does hold it in place without it moving you need to use a heavy-duty light stand with a junior pin mount. It would be nice if companies making lights like this with large Fresnel attachments had a yoke frame on a sliding mechanism that could be attached to the light or the Fresnel so you could better balance the weight.
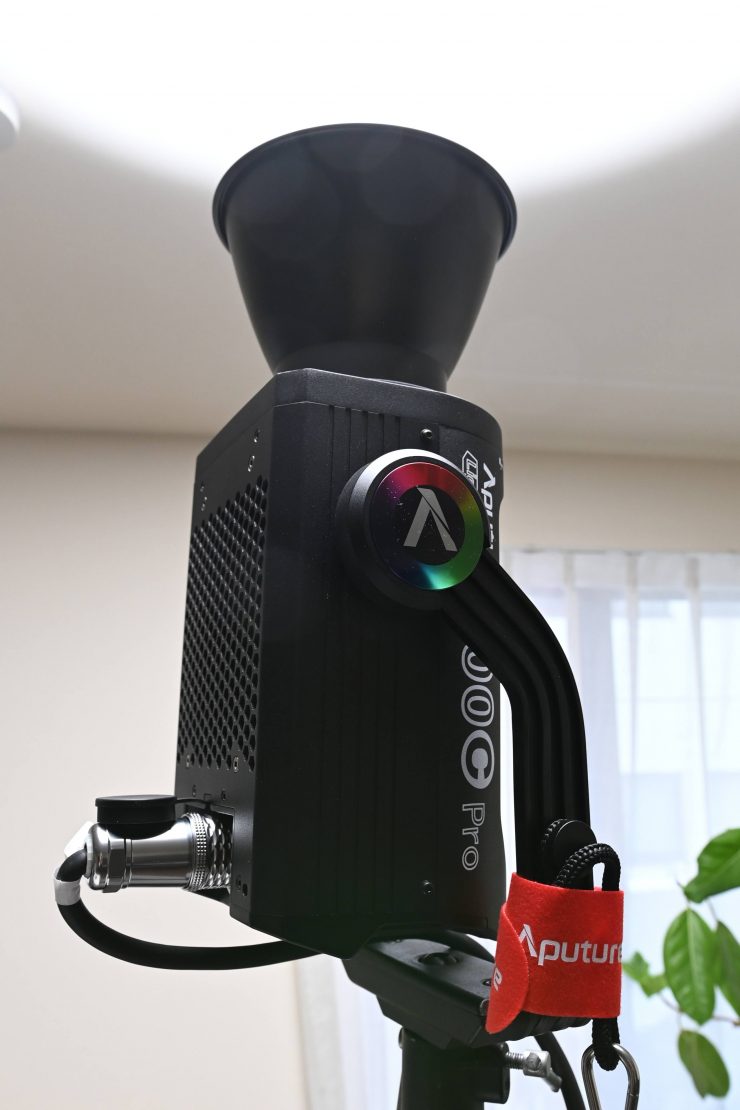
I ould point the light directly up without having the cable or the light hit the yoke frame.
Aputure gives you a nice long, thick, and robust power connection cable that allows you to place the light up very high or move the power supply/controller further away from where audio may need to be recorded. It is really nice to see such a long cable included with a light as standard.
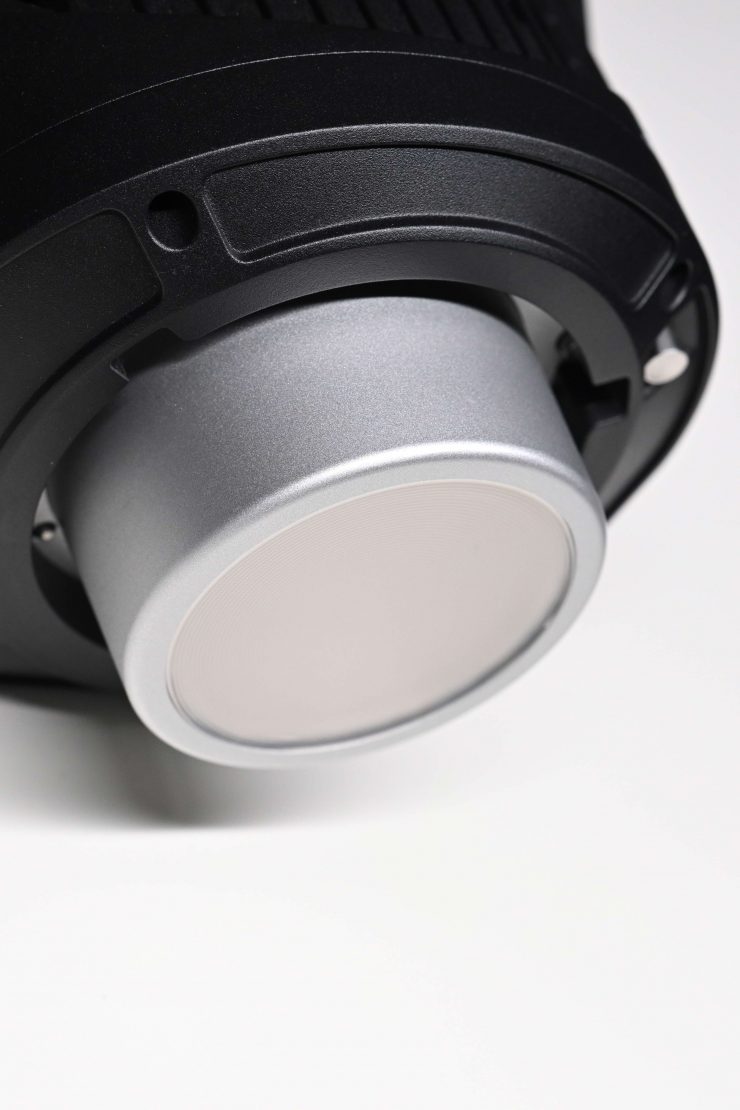
The Bowens mount is nice and robust and I didn’t think it had any issues handling the large size and weight of the F10 Fresnel. It is a little tricky putting the F10 Fresnel on and taking it off, but this is a minor complaint.
Design
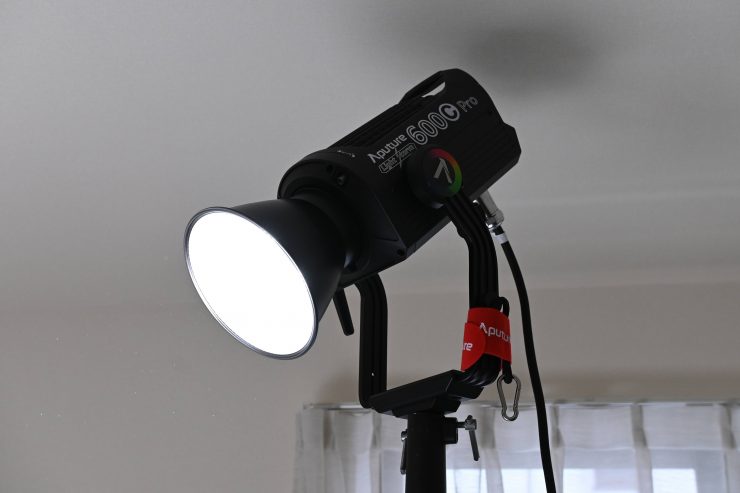
As far as the design goes, as I already mentioned, it does look very similar to the other Aputure LS 600 fixture. There are only so many ways you can design a COB spotlight in this form factor and most of these types of fixtures are all going to look fairly similar.
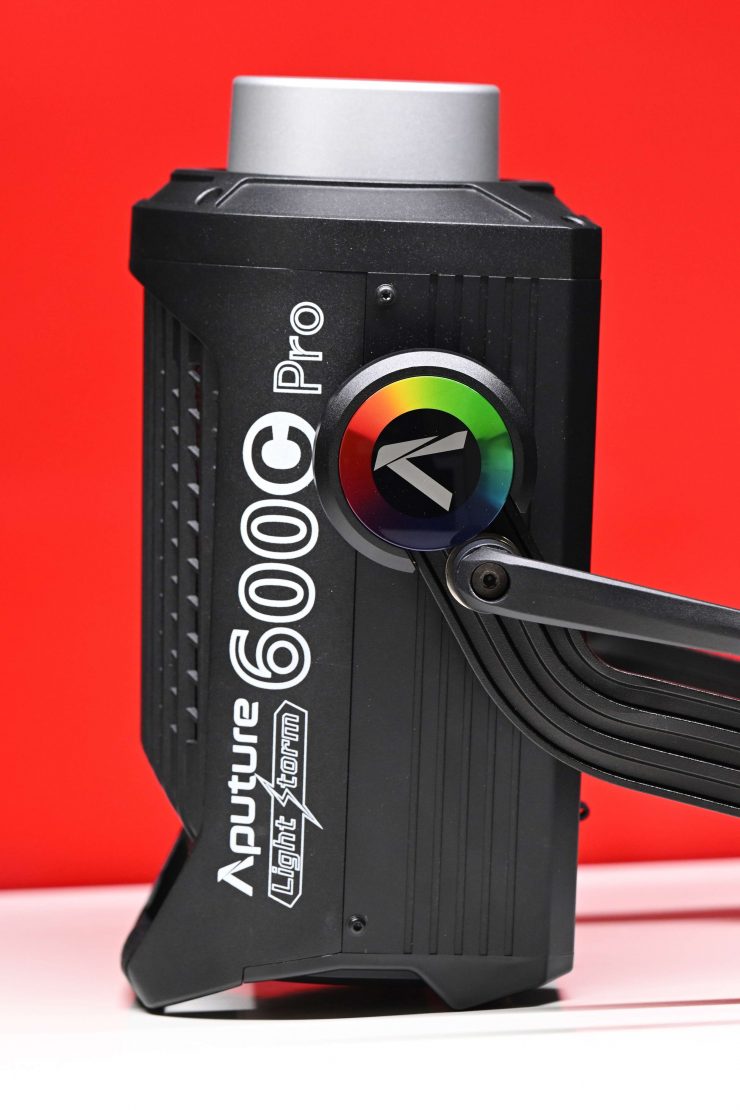
The design of the 600c Pro consists of the lamp head and a separate power supply/controller. This is fairly common with lights such as these. Having multiple components can be a pain, but it does allow you to use the light on slightly smaller-sized light stands (if you are not using the F10 Fresnel or a large lighting modifier) because you don’t have all the weight sitting just on the fixture itself.
A lot of today’s modern lights are now a seamless blend of hardware and firmware. The 600c Pro, like so many of the new lights coming to market, is an example of blending software and hardware. With software playing such a big role, lighting companies can continue to improve and update fixtures over time via firmware updates. This should give them somewhat of an advantage over older fixtures, however, you don’t actually see too many firmware updates getting released for lights.
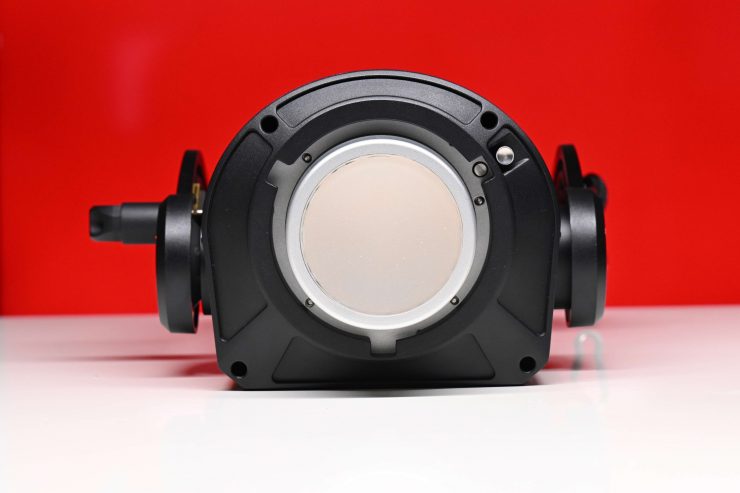
Quite a few LED lights on the market, including the Aputure 600c Pro, are using COB technology. COB stands for “Chip On Board” where multiple LED chips are packaged together as one lighting module. The advantage of COB LEDs being multi-chip packaged is that the light-emitting area of a COB LED can contain many times more light sources in the same area that standard LEDs could occupy. This results in a greatly increased lumen output per square inch.
The first caveat with COB LEDs is that they produce a ton of heat and that heat needs to be effectively dispersed. The second caveat is that you will usually need to diffuse them as they are very bright to look at and unsuitable for directly lighting talent. The trouble is if you use them with diffusion, such as a softbox, you are going to lose a ton of output because that output is coming from a small-sized source. With a lot larger source, say a 2×1 panel, you don’t lose as much output.
Weight & Size
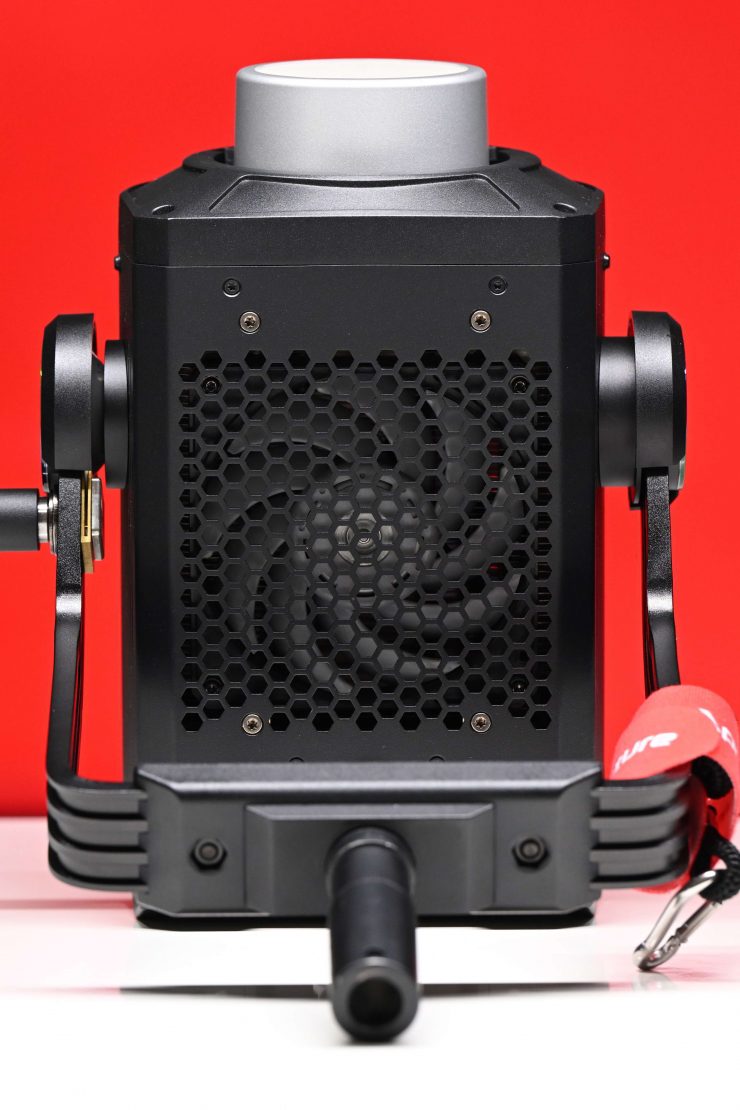
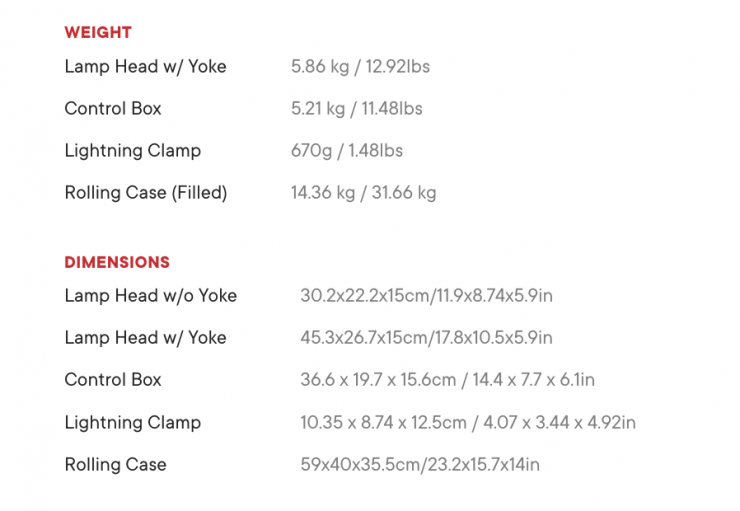
The LS 600c Pro weighs in at 24.4 lb / 11.07 kg including the power supply/controller. This makes it marginally heavier than the LS 600d and 600x.
So how does this weight compare to other COB spotlights such as the Prolycht Orion 675 FS, ARRI Orbiter, Aputure LS 600x Pro, Aputure LS 600d, and Nanlite Forza 720 and 720B? Below you can see:
| TOTAL WEIGHT | |
| Aputure LS 600c Pro | 24.4 lb / 11.07 kg |
| Prolycht Orion 675 FS | 21 lb / 9.45 kg |
| ARRI Orbiter | 25.8 lbs / 11.7 kg* |
| Aputure LS 600x Pro | 22.62 lb / 10.26 kg |
| Aputure LS 600d Pro | 22.62 lb / 10.26 kg |
| Nanlite Forza 720 | 21 lb / 9.45 kg |
| Nanlite Forza 720B | 21 lb / 9.45 kg |
* Doesn’t include the weight of the yoke frame
Essentially if you look at the weight comparison above, there isn’t a massive difference between the weight of any of these fixtures.
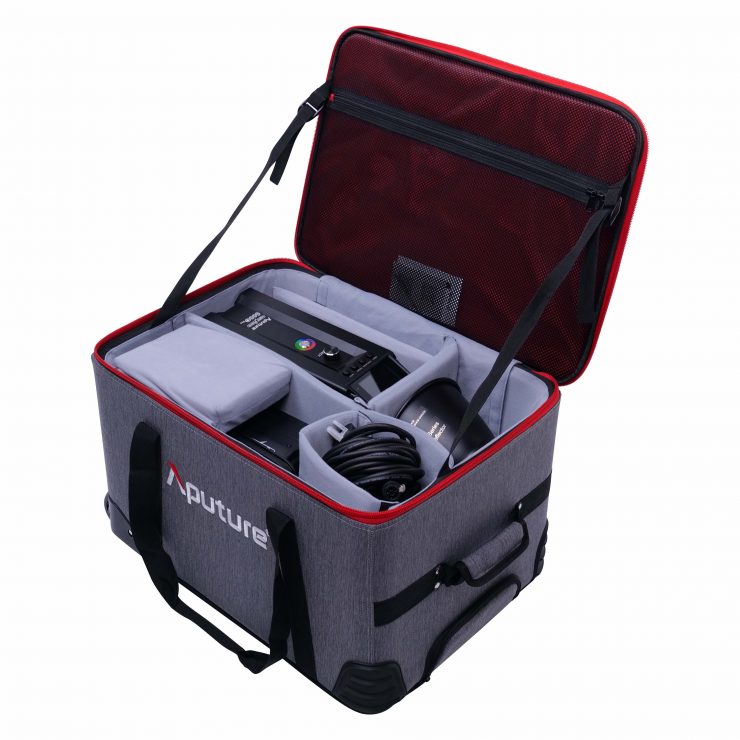
If you are curious the Aputure LS 600c Pro in its rolling case weighs in at 14.36 kg / 31.66 lb.
Just to be crystal clear, some of these lights don’t have RGBWW capabilities. I am simply giving you a reference as to how it compares weight-wise to other similar styled fixtures.
Mounting
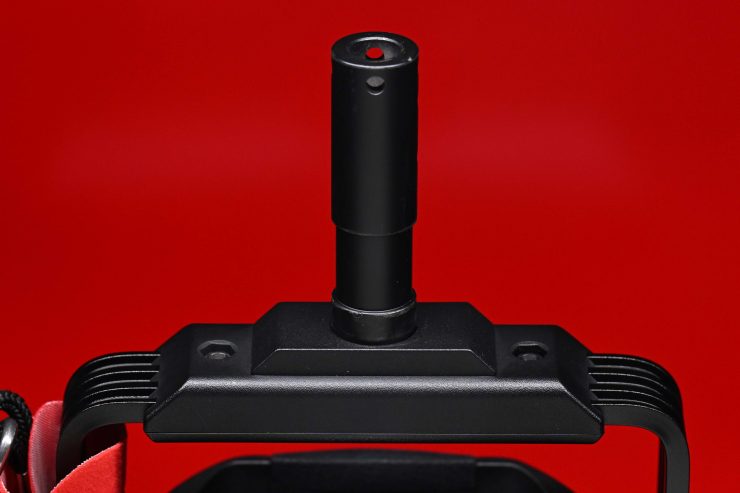
The 600c Pro comes with a reasonably robust yoke frame.
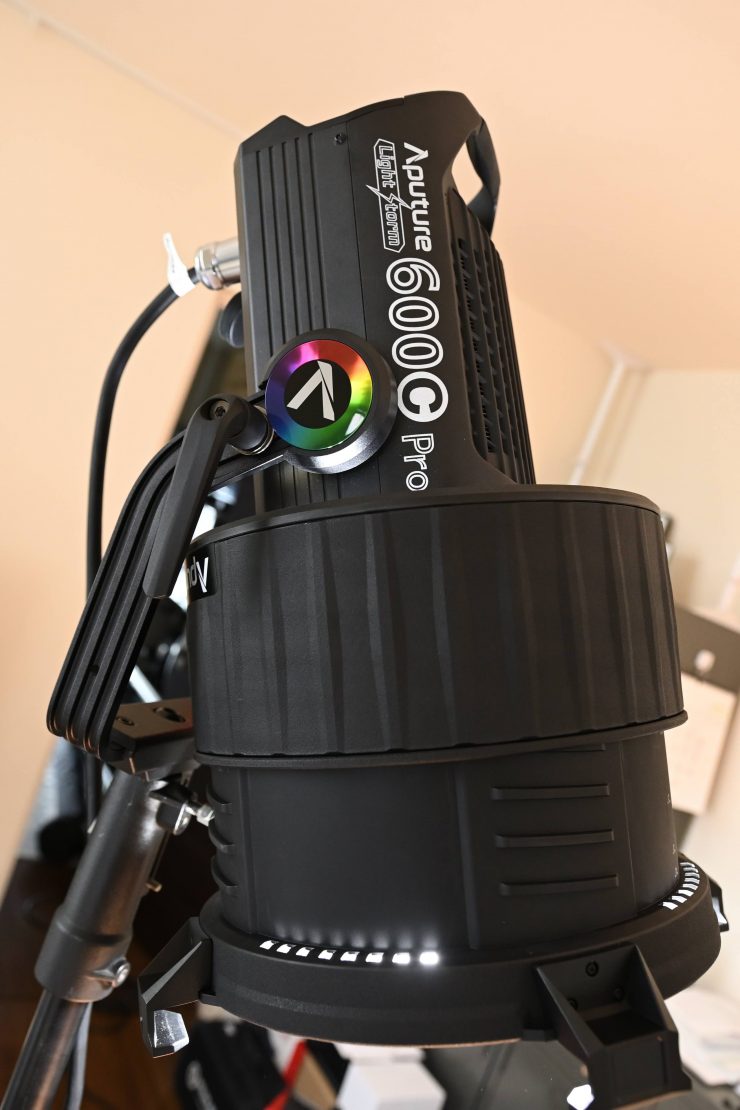
It is strong enough to hold the 600c Pro and the F10 Fresnel.
Power Draw
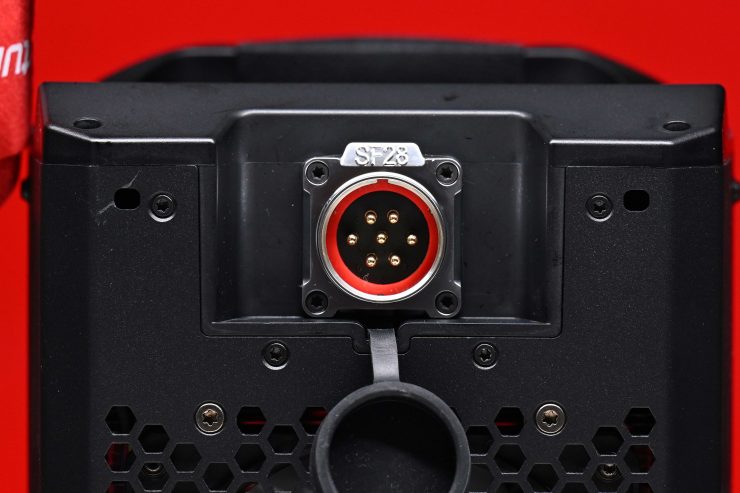
The LS 600c Pro draws 720W. Below you can see how that compares against the Prolycht Orion 675 FS, ARRI Orbiter, Aputure LS 600x Pro, Aputure LS 600d, and Nanlite Forza 720 and 720B. Please remember that some of these lights don’t feature RGBWW capabilities.
| POWER DRAW | |
| Aputure LS 600c Pro | 720W |
| Prolycht Orion 675 FS | 675W |
| ARRI Orbiter | 500W |
| Aputure LS 600x Pro | 720W |
| Aputure LS 600d Pro | 720W |
| Nanlite Forza 720 | 800W |
| Nanlite Forza 720B | 800W |
As you can see, the Aputure draws 45W more than the Prolycht Orion 675 FS.
The Aputure LS 600c Pro can be powered from AC power or a 48V battery, with AC pass-through power for ease of use. The light does have an in-built fan that can be set to Silent, Low Noise, Medium Speed, High Speed, or Auto.
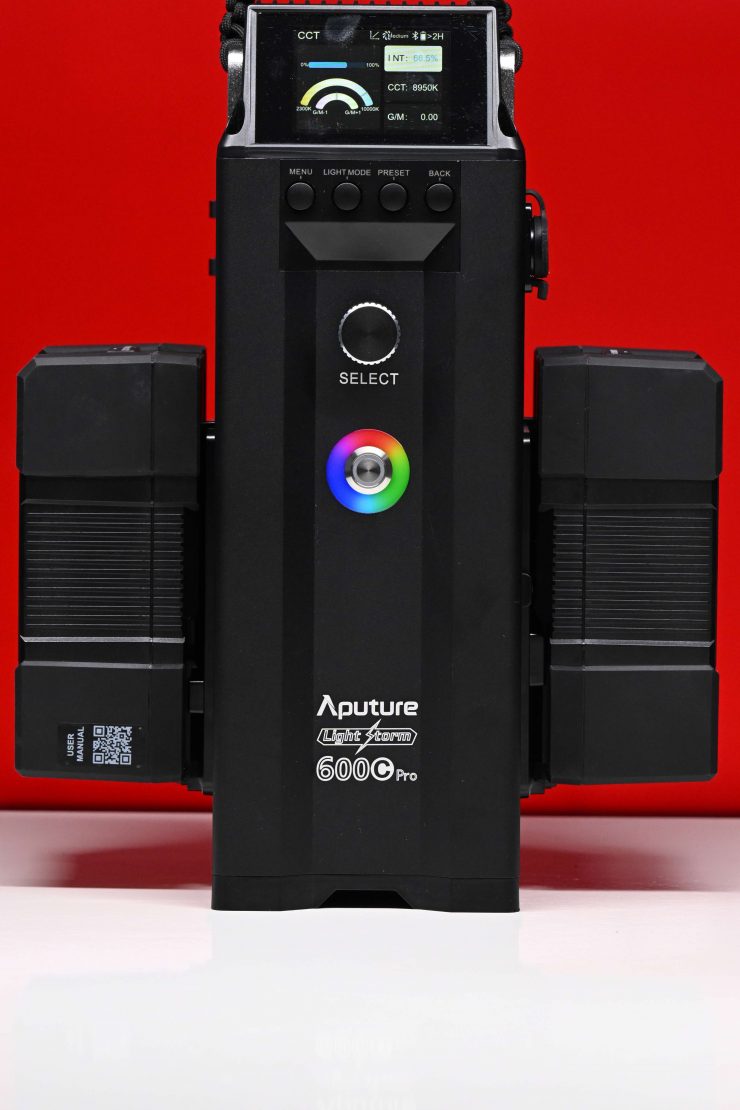
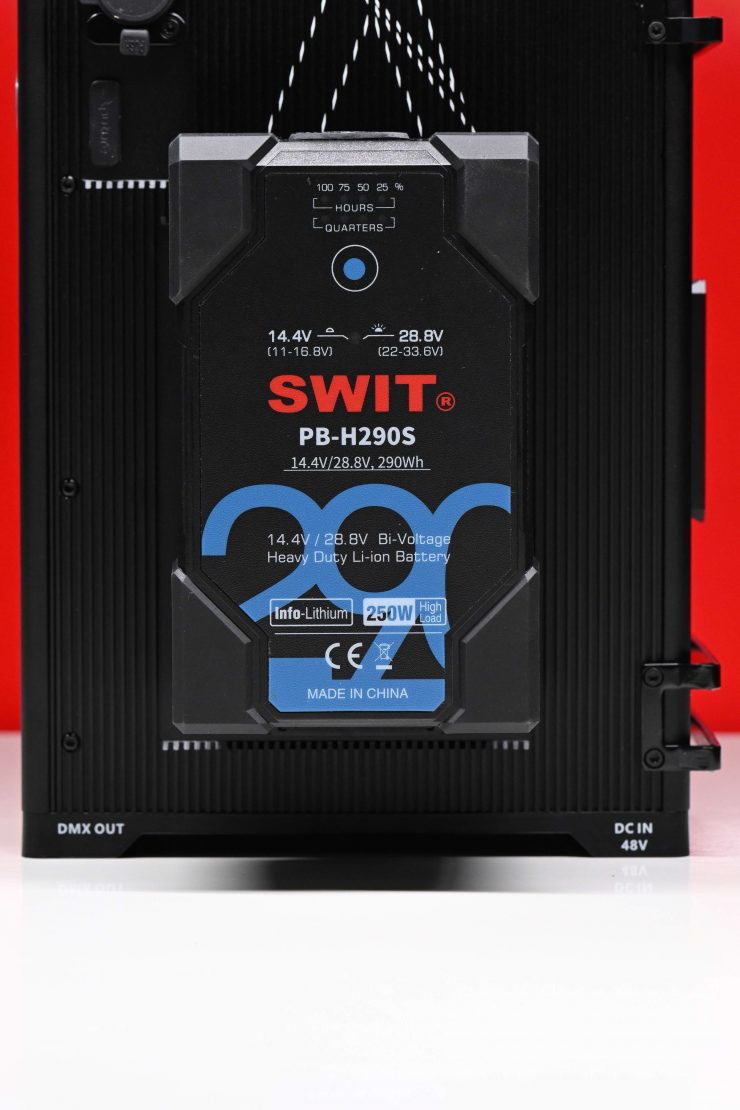
The light can also be run off V-lock batteries as the controller/power supply features dual V-mount (or AB Gold Mount depending on the version you purchase) battery plates.
| Operating Voltage (Battery) – V-Mount / Gold Mount (Two Batteries) – Half Output | 12.5V-16.8V (14.4V/15A) 22V-33.6V (26V/8.5A, 28.8V/7.5A) |
| Operating Voltage (Battery) – V-Mount / Gold Mount (Two Batteries) – Full Output | 22V-33.6V (26V/18A, 28.8V/16A) |
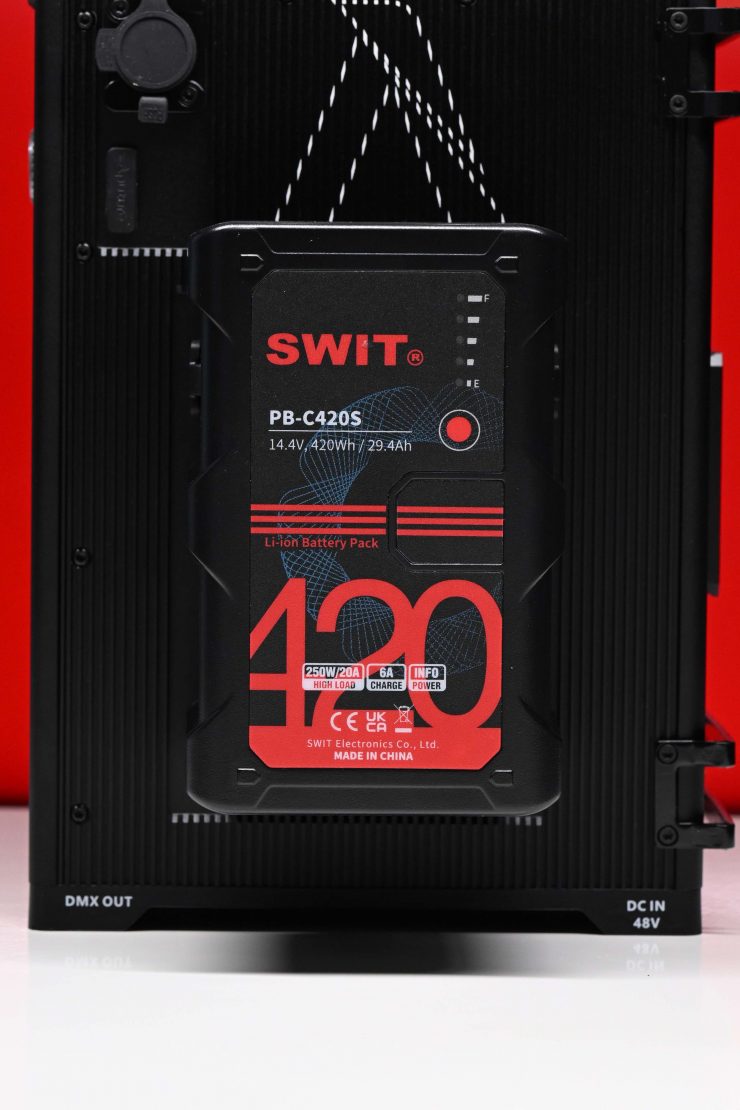
What you need to clearly know is that if you want to run the LS 600c Pro at full output remotely then you will need to use 26V 18A batteries. 14.4V 15A or 26V 8.5A batteries will only allow you to run the light at 50% output.
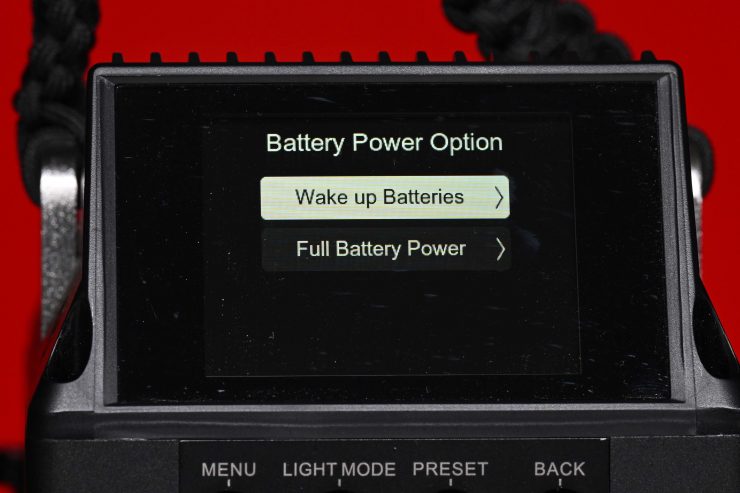
In the menu, there is a section called Battery Power Option. There is also the option to Activate or Cancel Wake Up Batteries as well as the ability to turn on Full Battery Power.
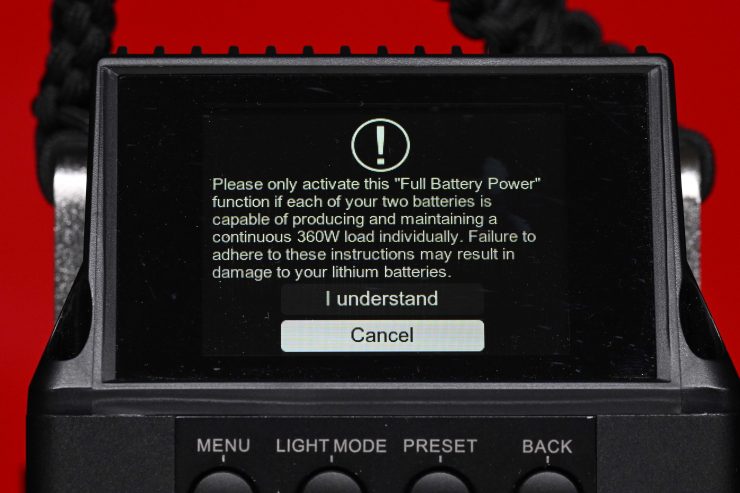
If you select Full Battery Power you will get a warning on the LCD display that states that you need to use two batteries that both have a continuous 360W load. If you don’t you can end up damaging your batteries if you do not use the correct ones. It is nice to have a warning so that someone who isn’t familiar with the light doesn’t make the mistake of trying to run it in Full battery Mode from the wrong type of battery.
The control box can also accept 48V/15A DC power via 3-pin XLR, allowing it to be powered via external battery power stations or block batteries.
Aputure also includes a nice mounting bracket for the power supply so you can attach it directly to a lighting stand if you wish.
What you clearly need to be aware of with high power draw lights such as this one is that you are not going to be able to power it from two flight-safe camera batteries. This can be a disadvantage for traveling shooters and you need to factor this in when deciding what to buy.
Beam Angle
The LS 600c Pro comes standard with an LS 600 Series Hyper Reflector. Now, because the design of the COB element is different, the Hyper reflector will actually give you a beam angle of 62° and not 55° like the ones found on the LS 600d/600x Pro. You can also purchase optional BM12 15°, 30°, and 45° Hyper Reflectors.
Controls & Menu System
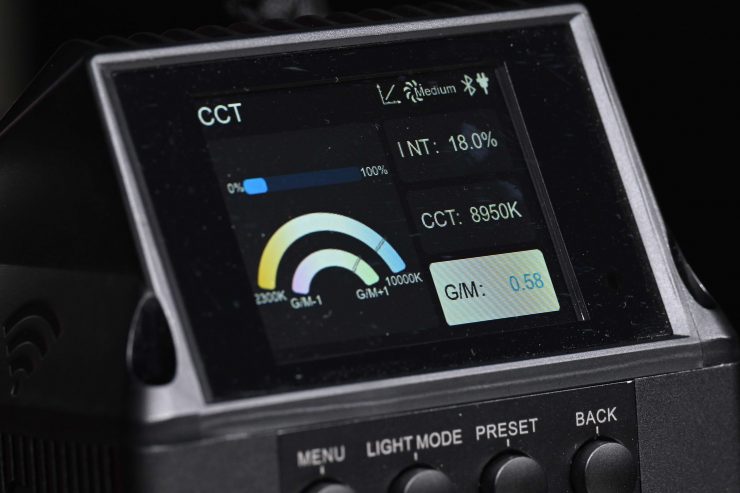
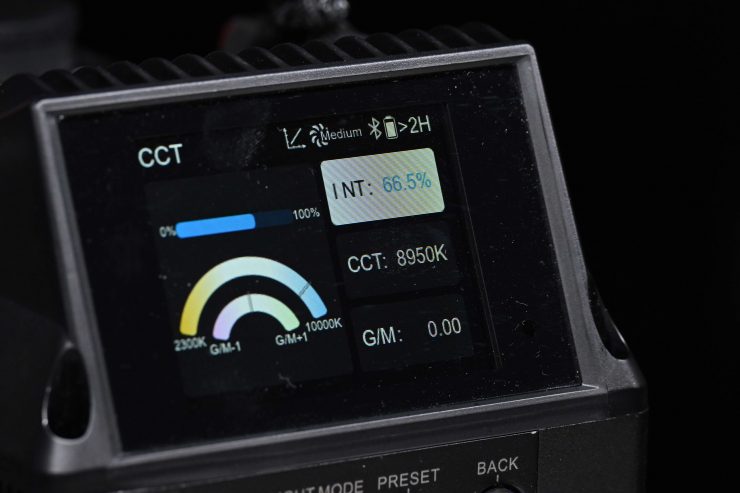
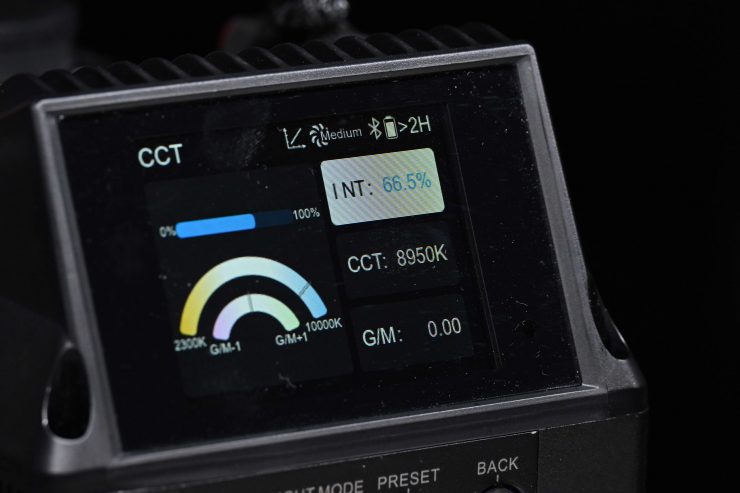
The 600c Pro controller/power supply uses a nice-sized LCD screen that clearly shows you information about the light. While it is not a touchscreen, it is still pretty quick to access all of the available lighting modes and make changes. It is an easy and intuitive interface to use.
With a good light, you shouldn’t have to read a manual to work out how to operate it. You should be able to turn it on and use it straight away. You won’t find any deep sub-menus or complicated ways of making changes on the 600c Pro. You can literally turn this light on and use it straight away.
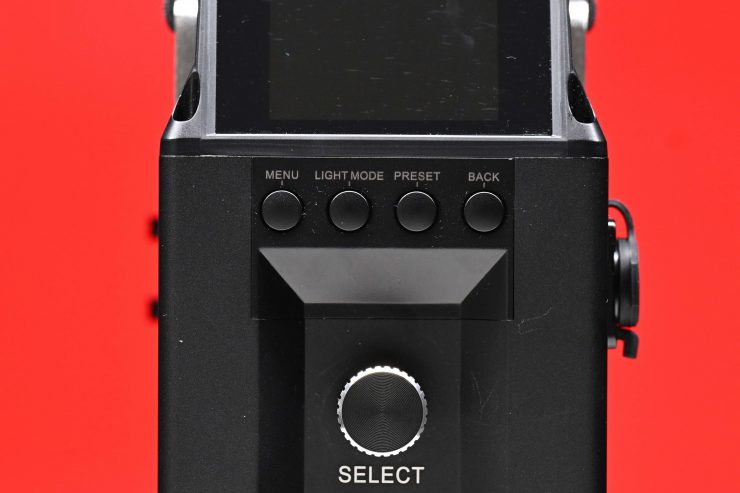
Making changes to the light requires the use of just one button. Here you can select and then make adjustments as need be. Perhaps it would have been nice to have separate dials for the output and the Kelvin color temperature adjustment, but I am guessing that Aputure didn’t want users accidentally bumping dials and making changes by accident.
There are also four buttons above the select dial for bringing up the menu, Light Mode, Presets, and for going back.
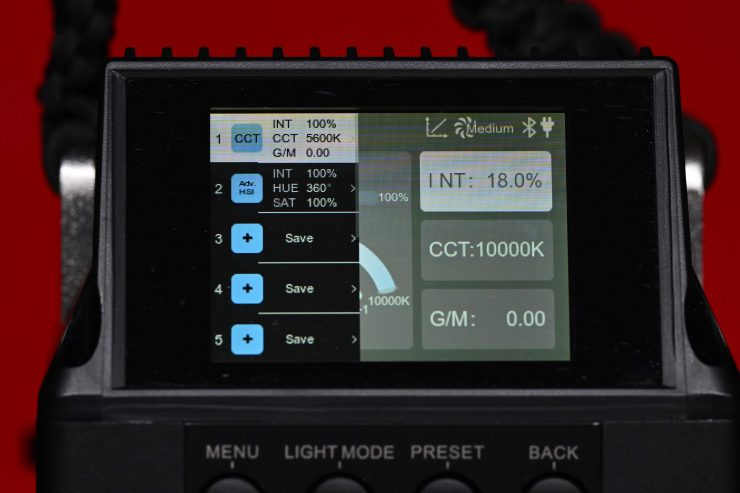
Aputure has made it very easy to save and recall 10 user-programmable presets. This is really well implemented and it allows you to jump between saved settings very quickly. I also like how it shows you what the saved preset is instead of just having it as a number.
The menu also gives you the ability to access and view the following:
- Output Mode
- DMX Mode
- Custom FX
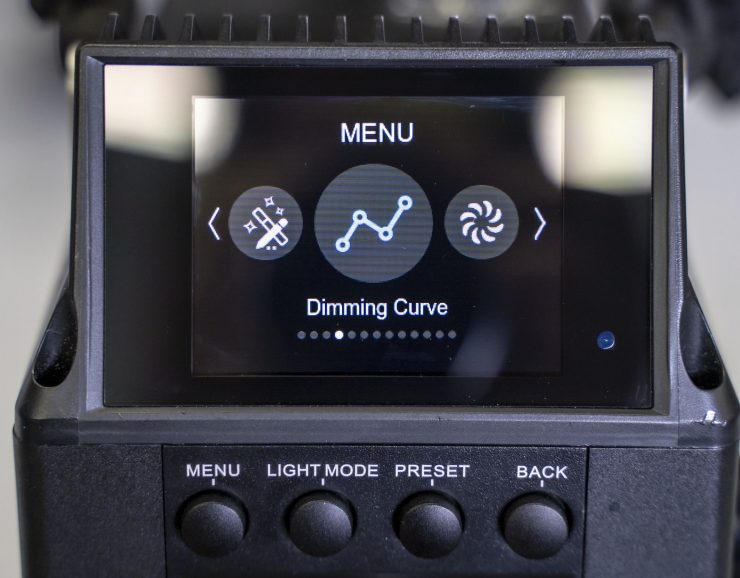
- Dimming Curve
- Fan Mode
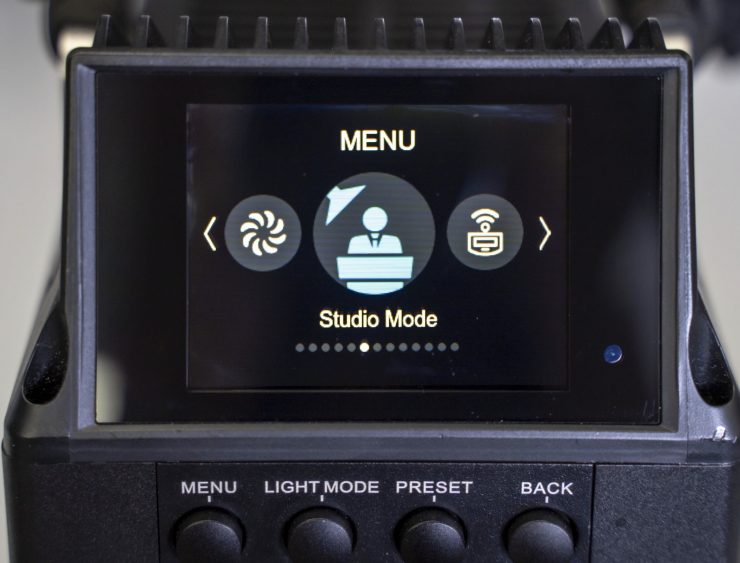
- Studio Mode
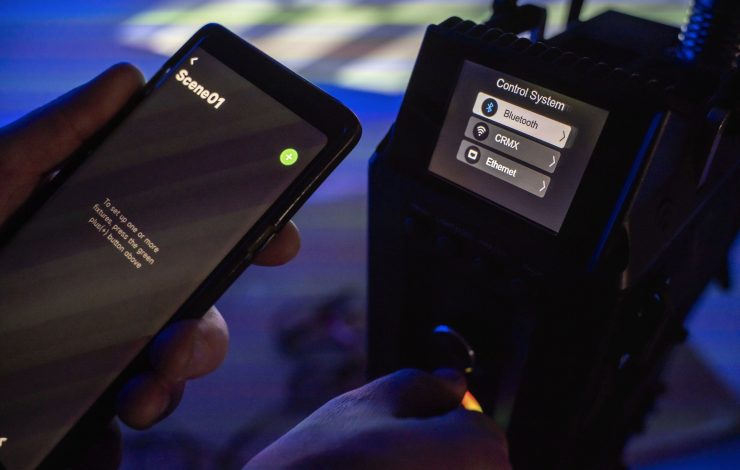
- Control System
- Language
- Frequency Selection
- Product Information
- Update
- Factory Reset
- Battery Power Option
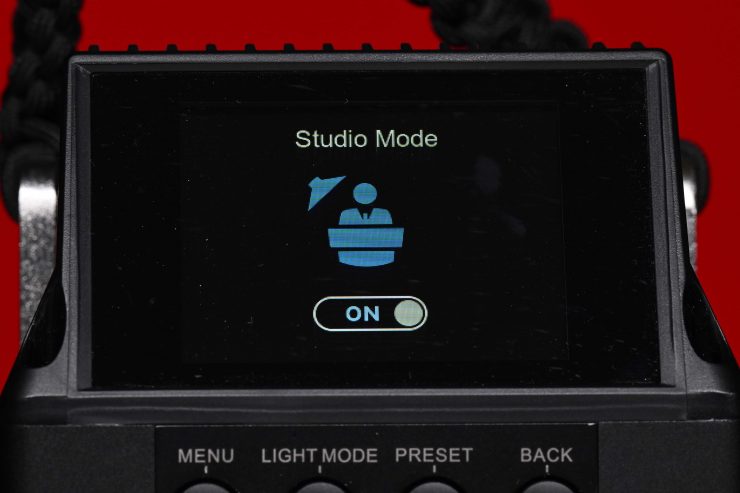
The Studio Mode is simply a setting so that if it is activated in the menu, the light will strike as soon as power is turned on an outlet (or as soon as it’s plugged in if it’s plugged into something that’s already running).
Turning studio mode “off” makes the light not turn on automatically when power is distributed, and instead, you will have to turn it on physically on the ballast.
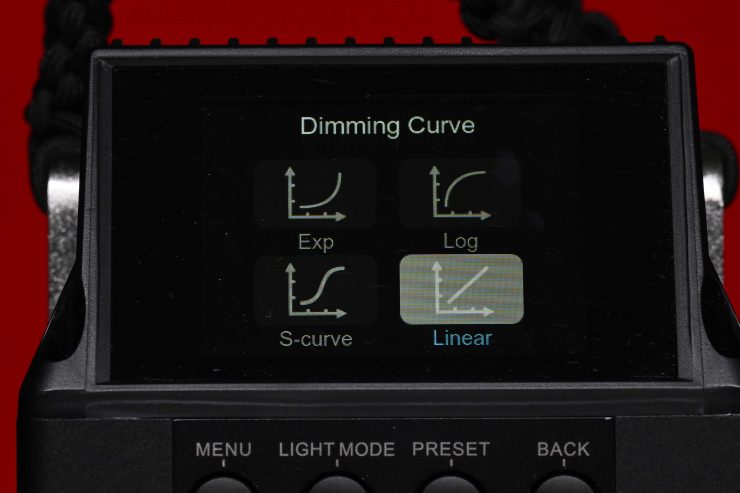
The Dimming Curve allows you to set the dimming response curve between linear, exponential, S-curve, and Log.
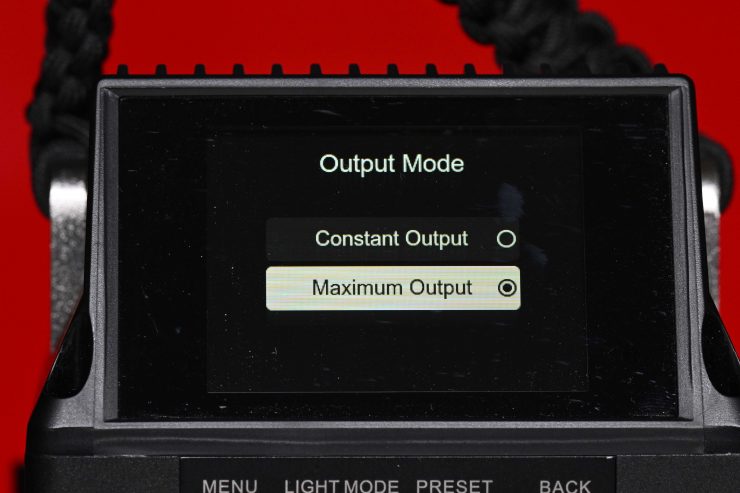
The Output Mode allows you to set the 600c Pro to either Max. Output which provides the maximum output regardless of Kelvin color temperature selection, or Constant Output which will limit the output so that it is the same for all Kelvin color temperature settings. I will test this further down in the review.
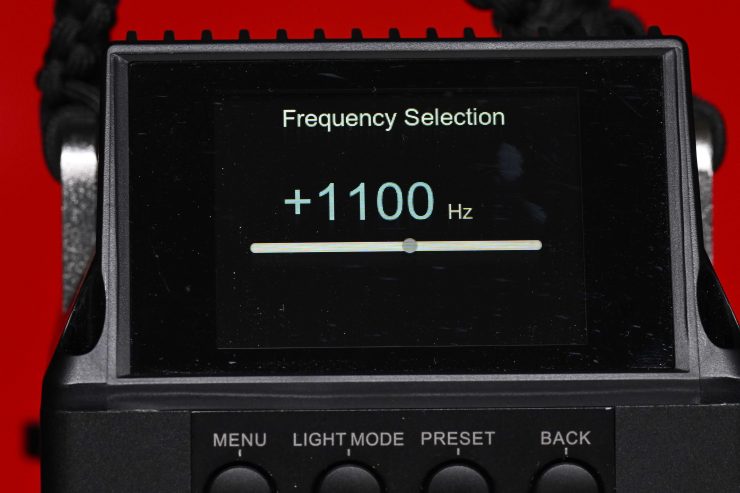
Frequency Selection allows you to change the frequency in Hz from 0-2000 Hz.
Connectivity
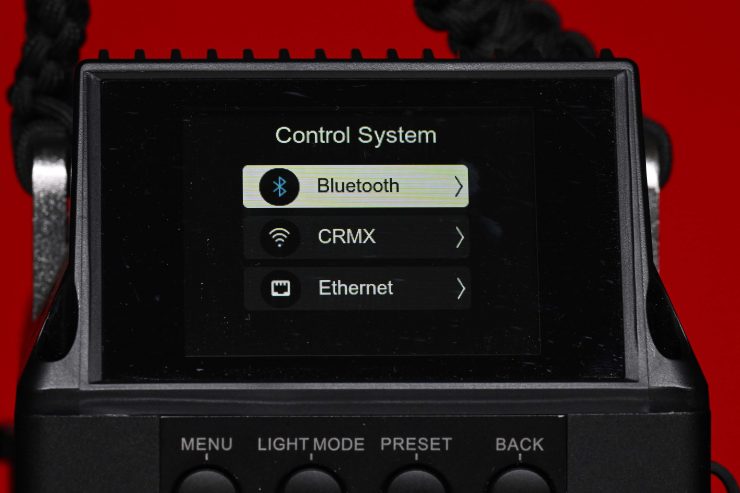
Professional connectivity options including LumenRadioCRMX, 16-bit DMX512, and Art-net and sACN via etherCON are also available.
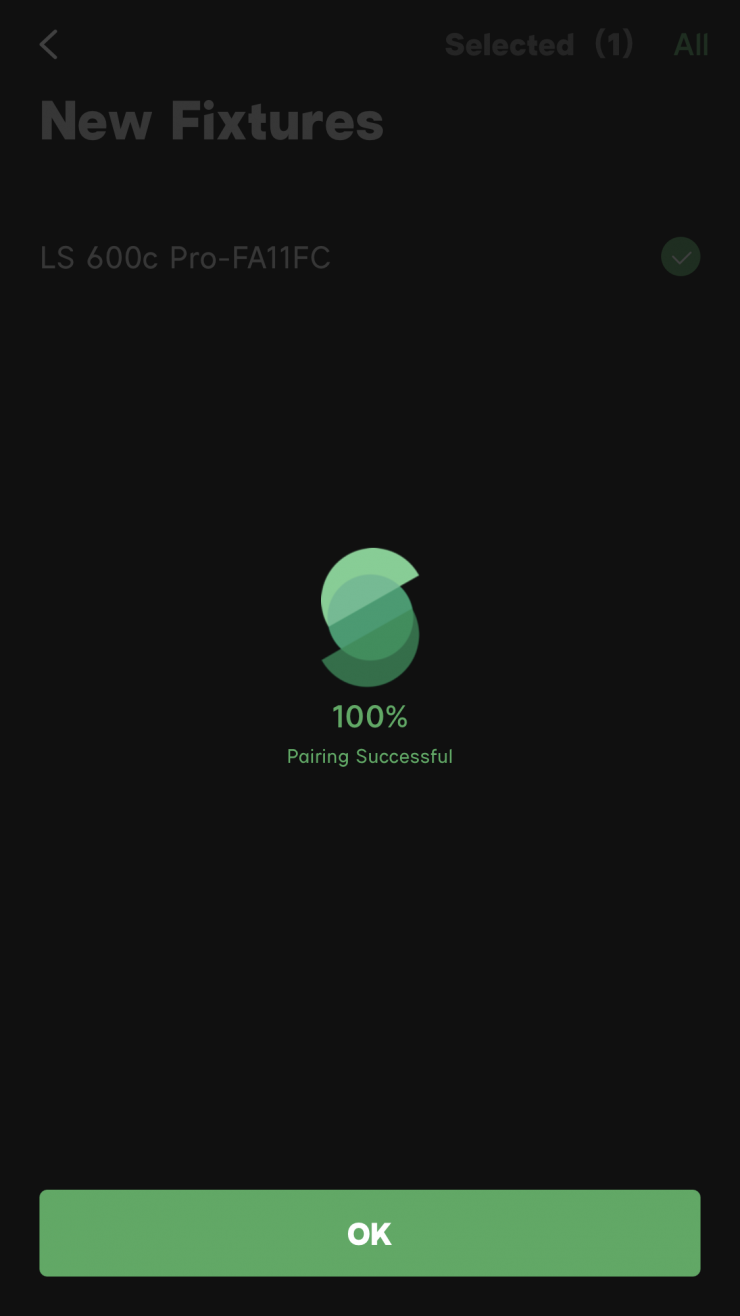
SidusLink
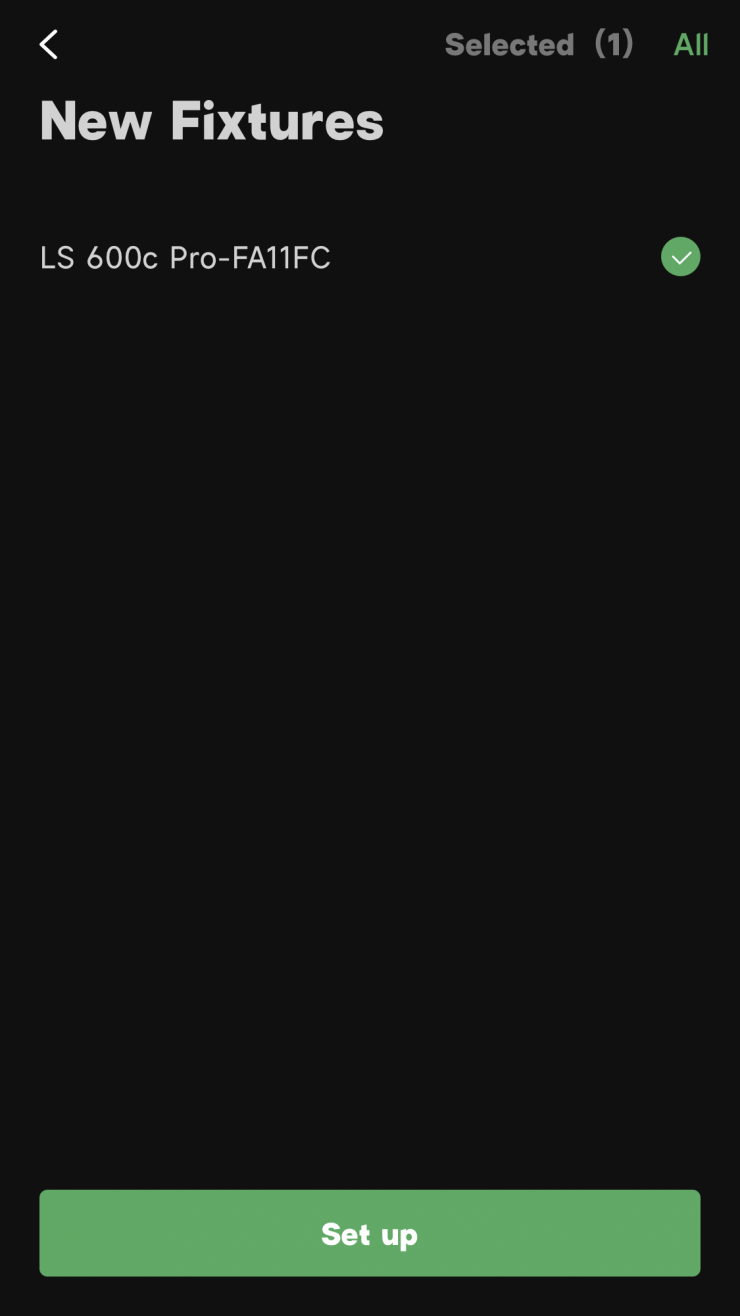
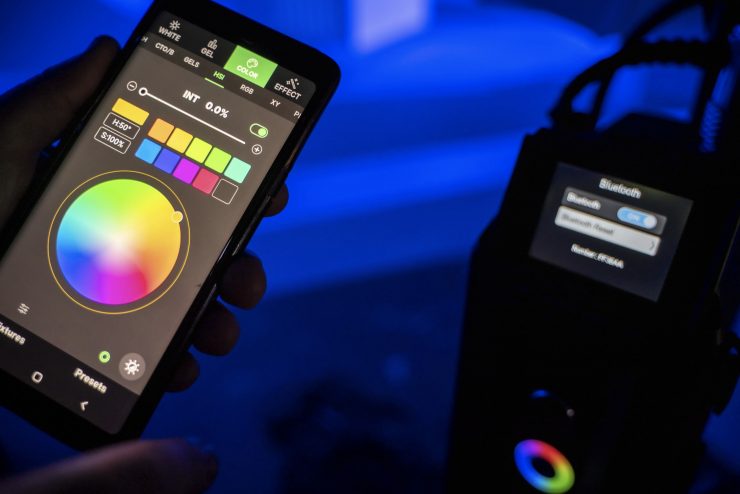
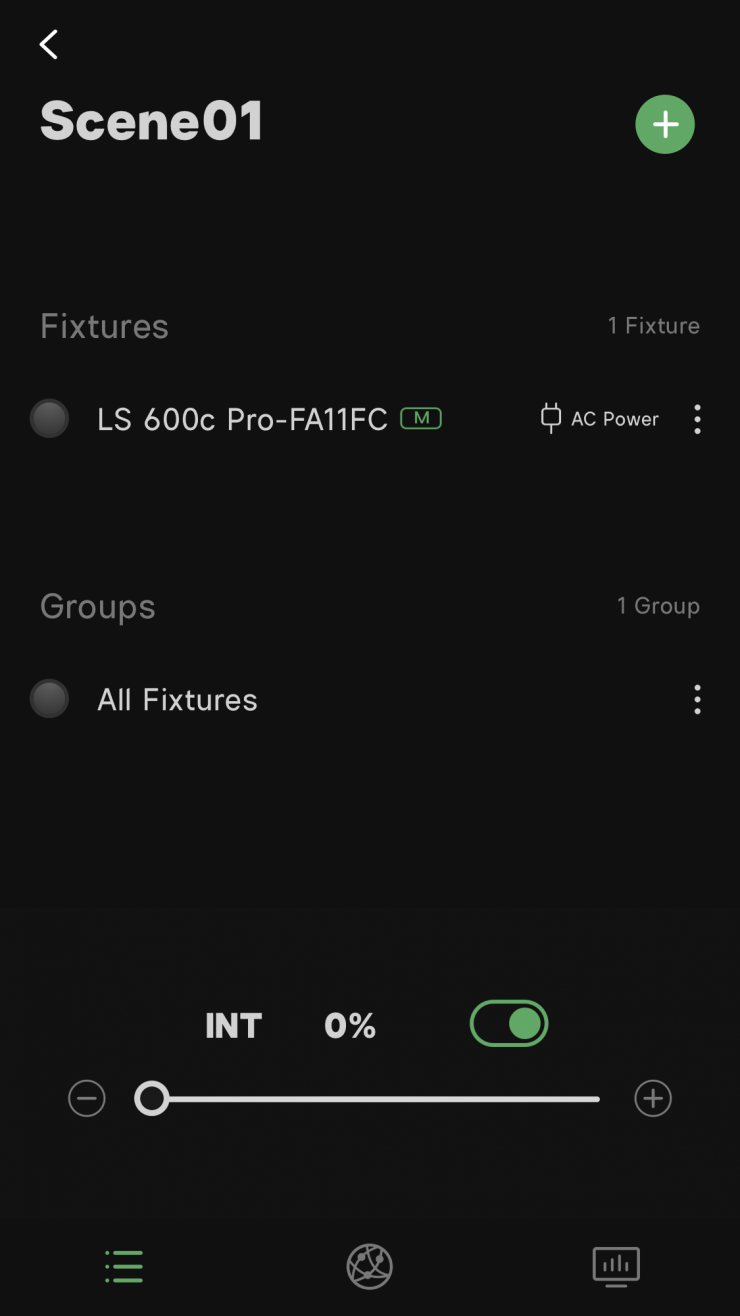
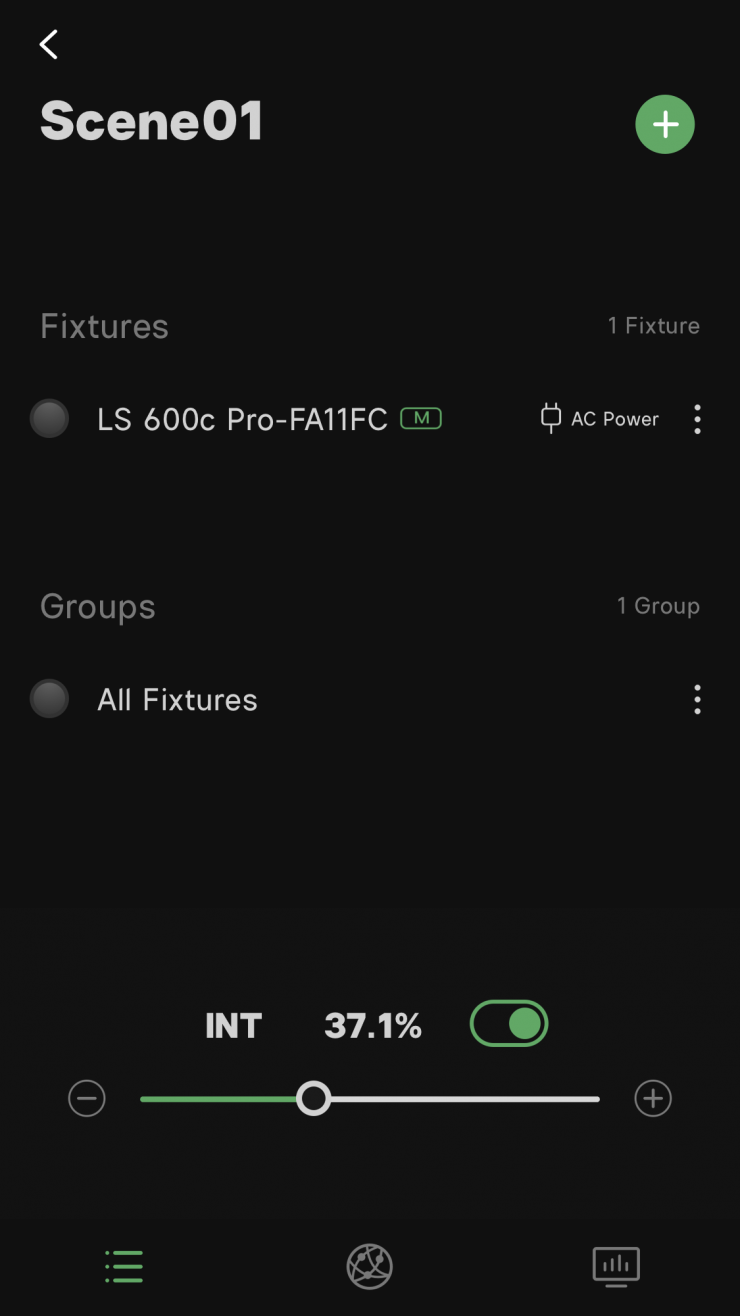
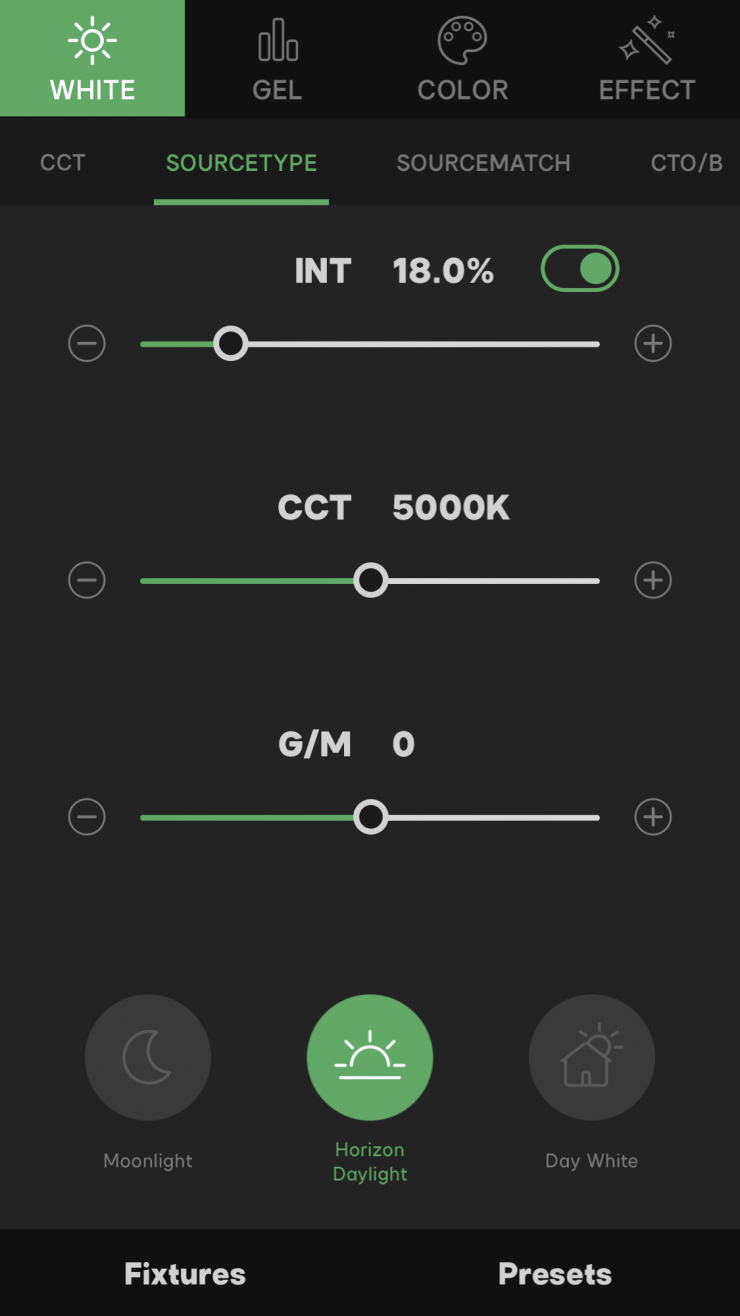
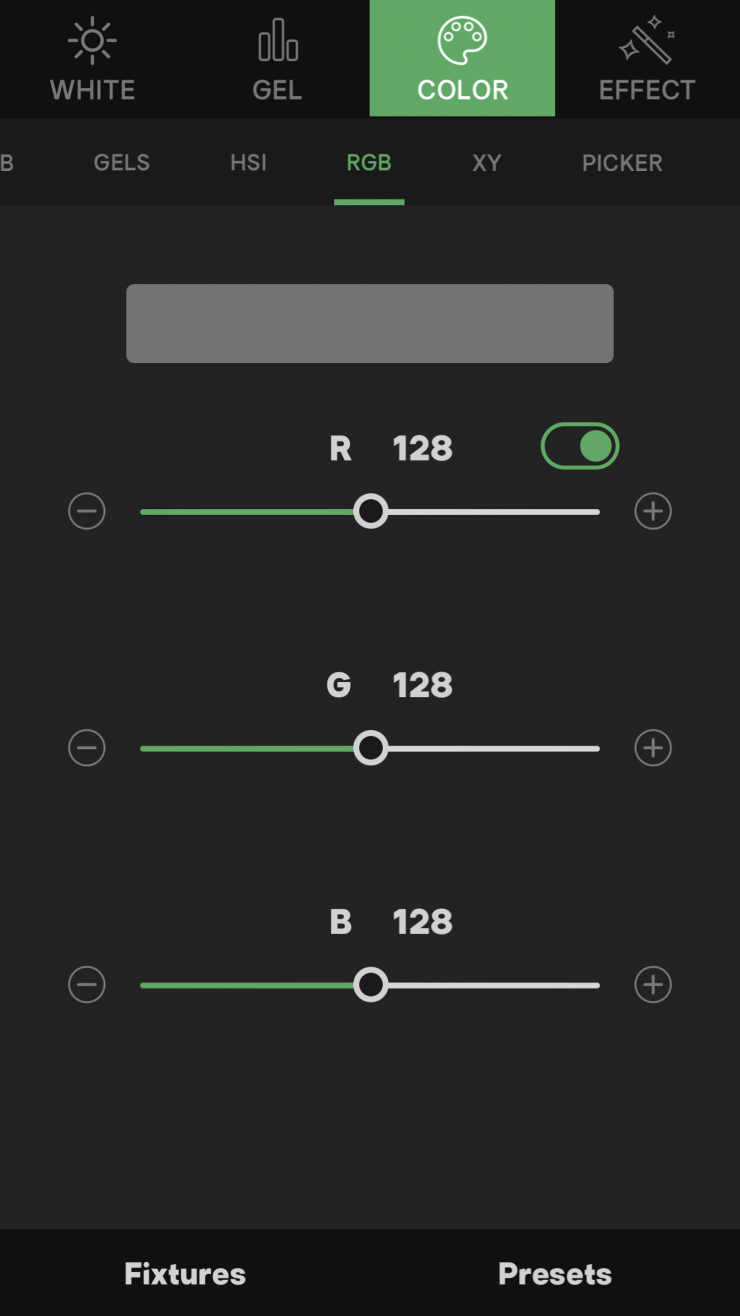
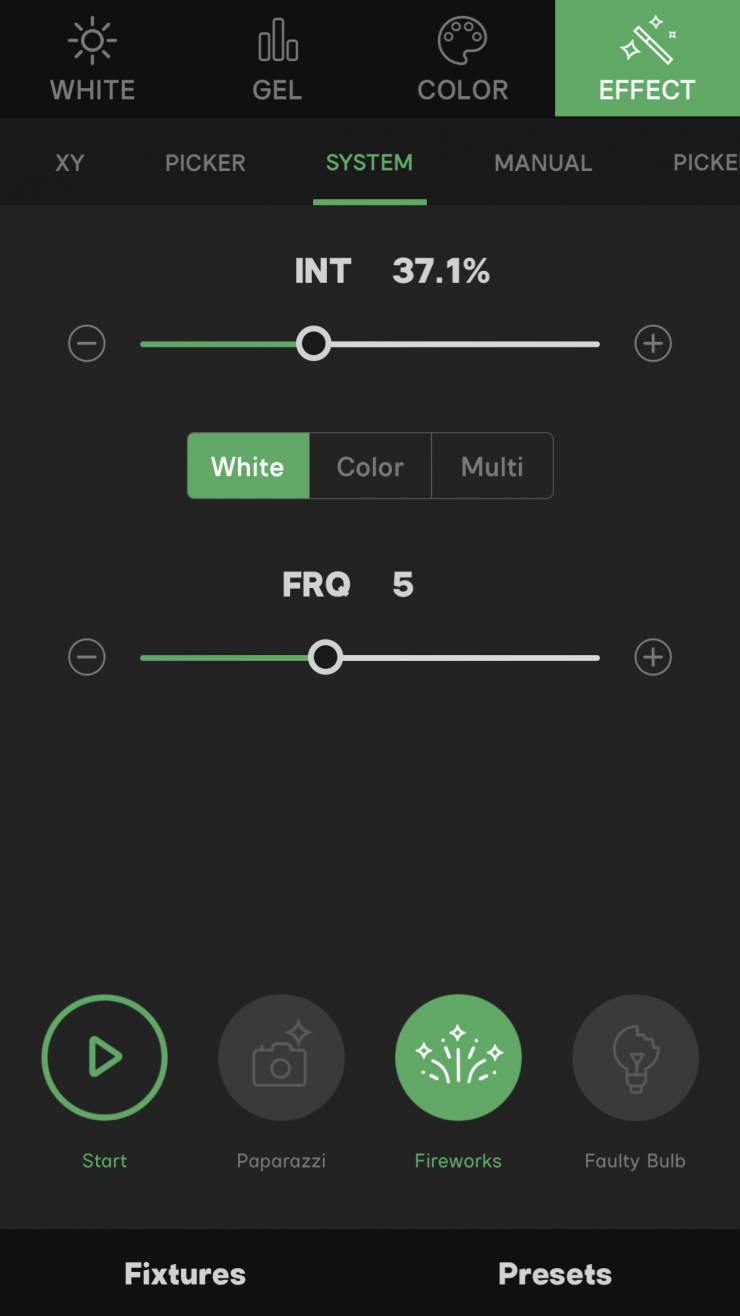
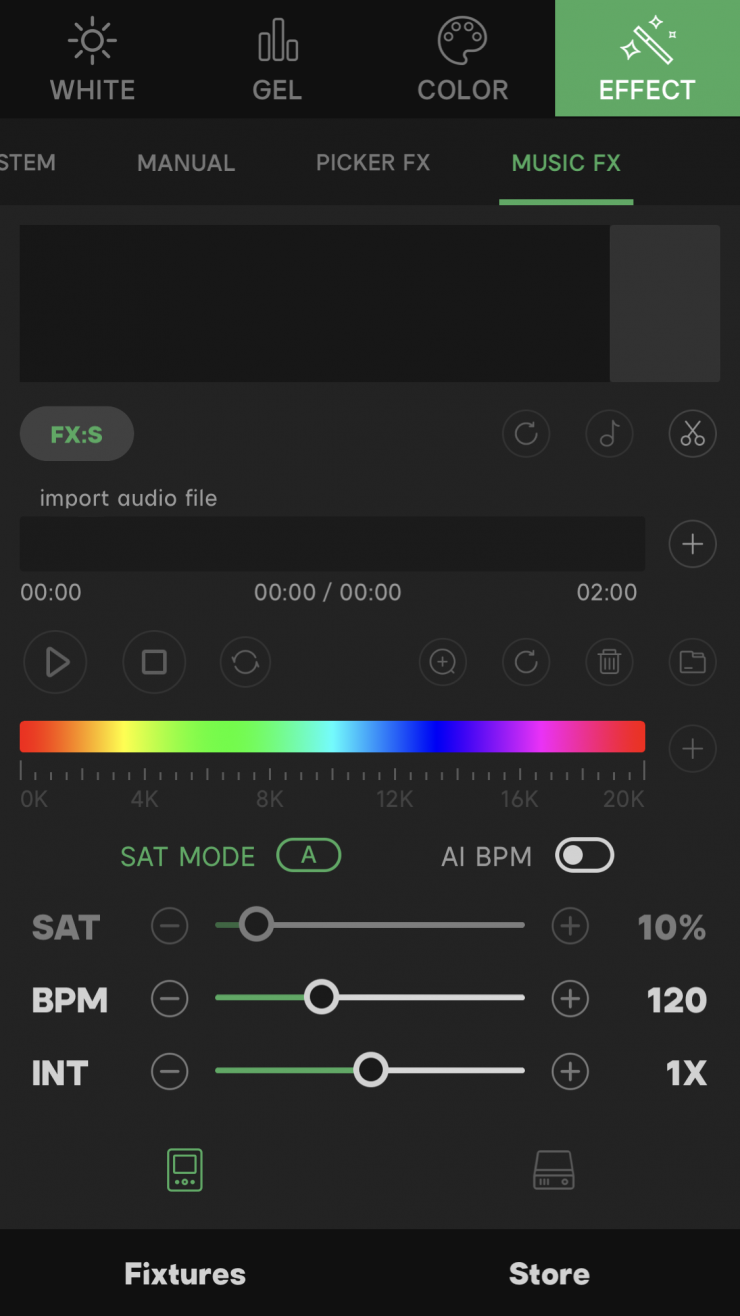
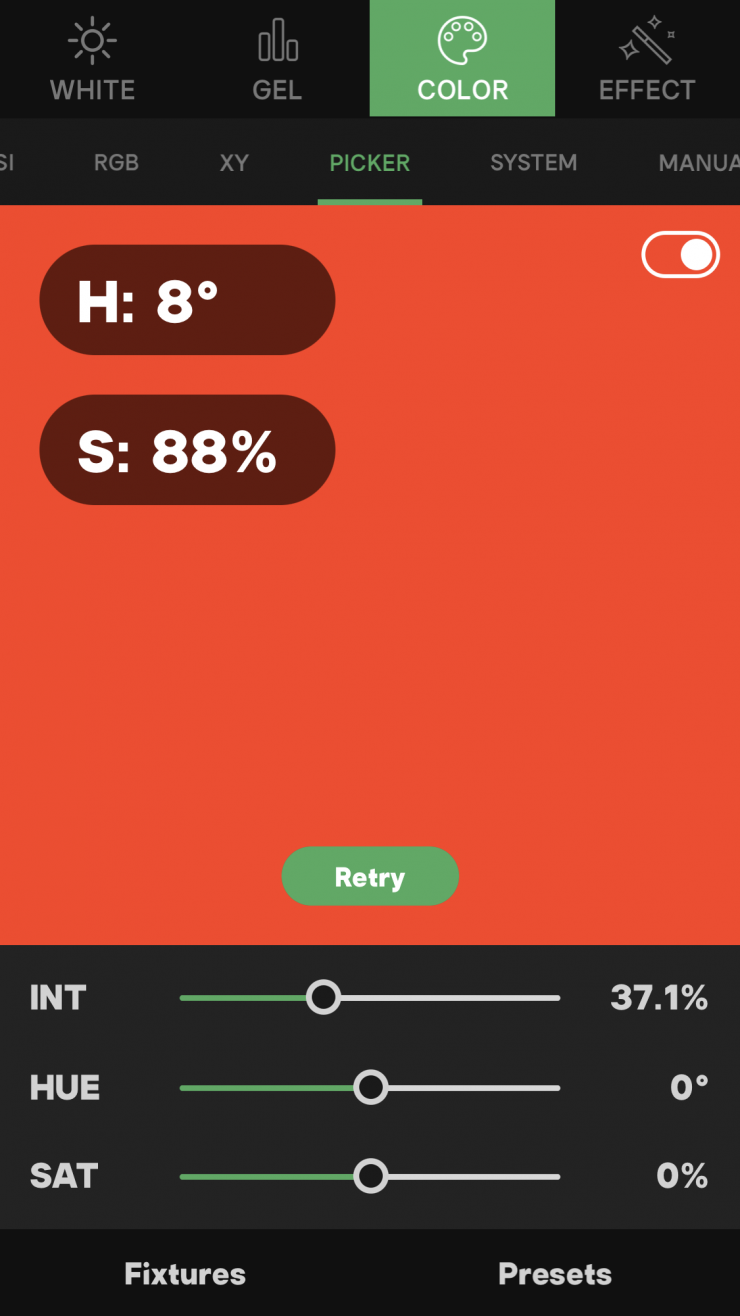
The light can be controlled via Bluetooth using the SidusLink App. SidusLink is a nice way of controlling Aputure fixtures.
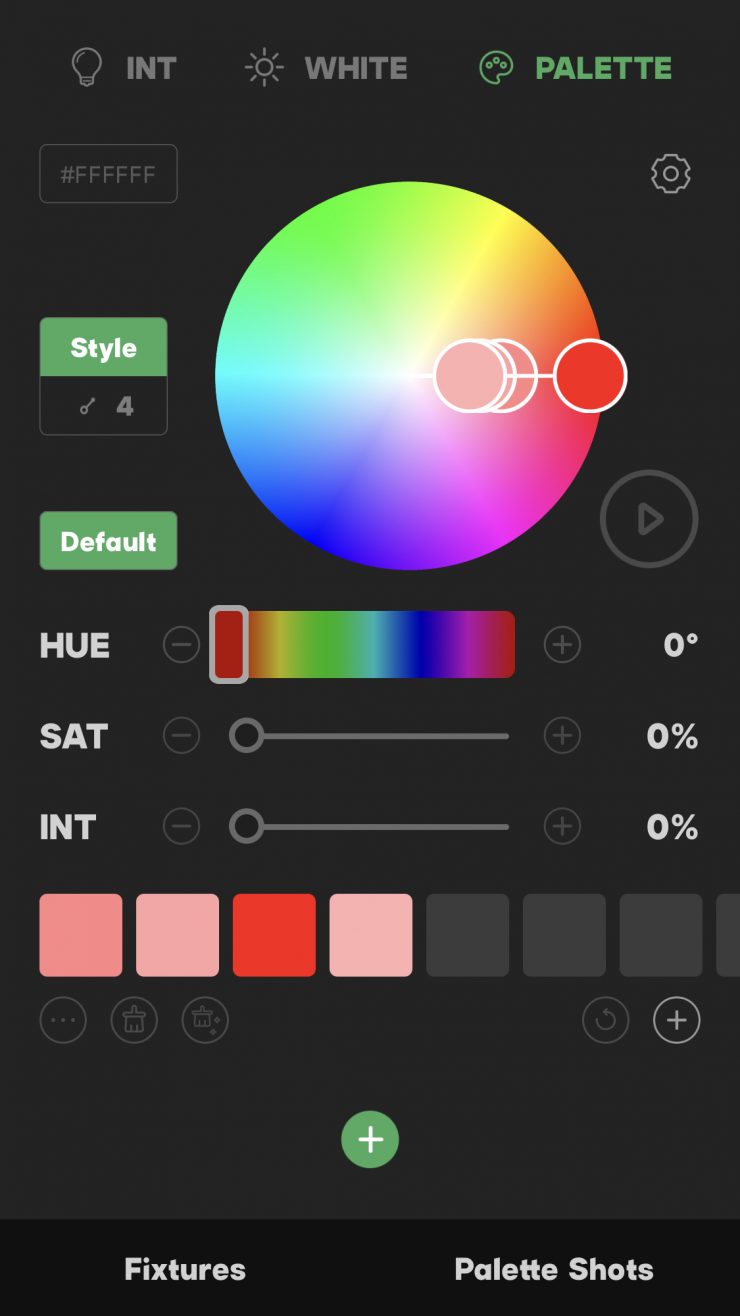
Within the SidusLink app, you can change multiple parameters of the light and set it to different modes, etc.
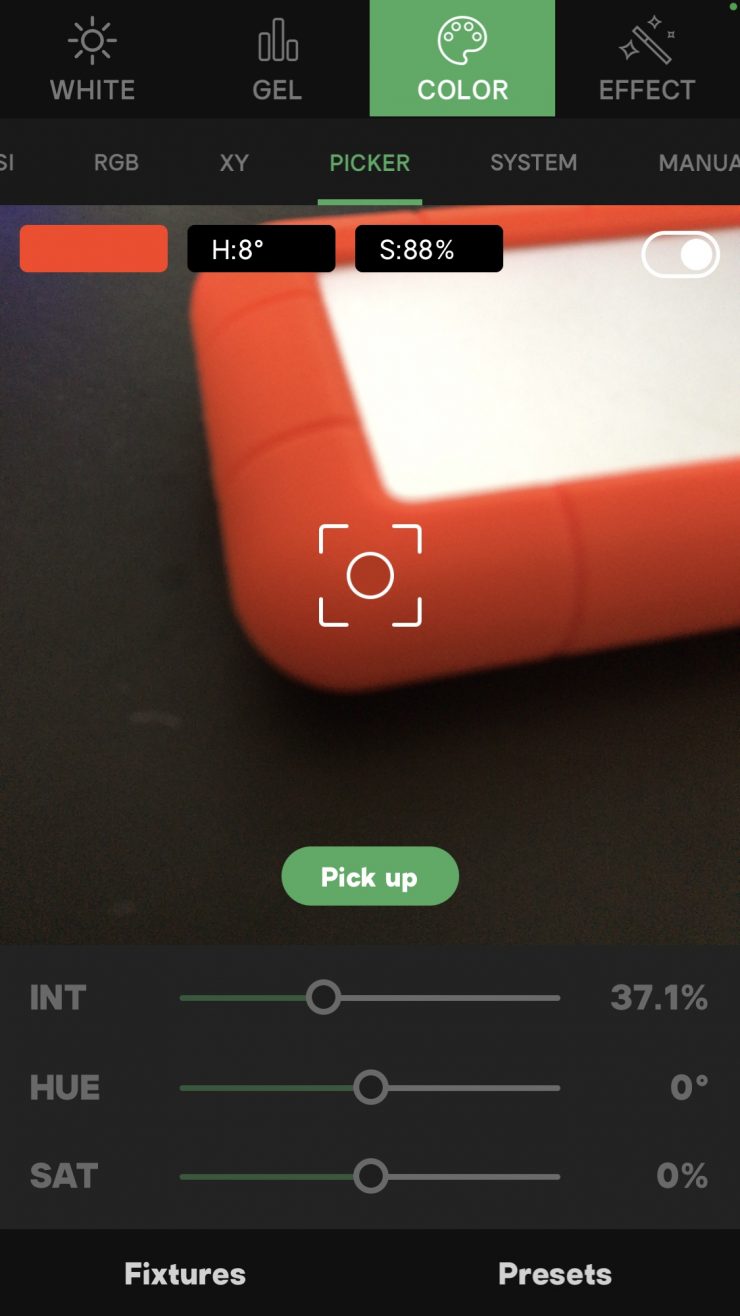
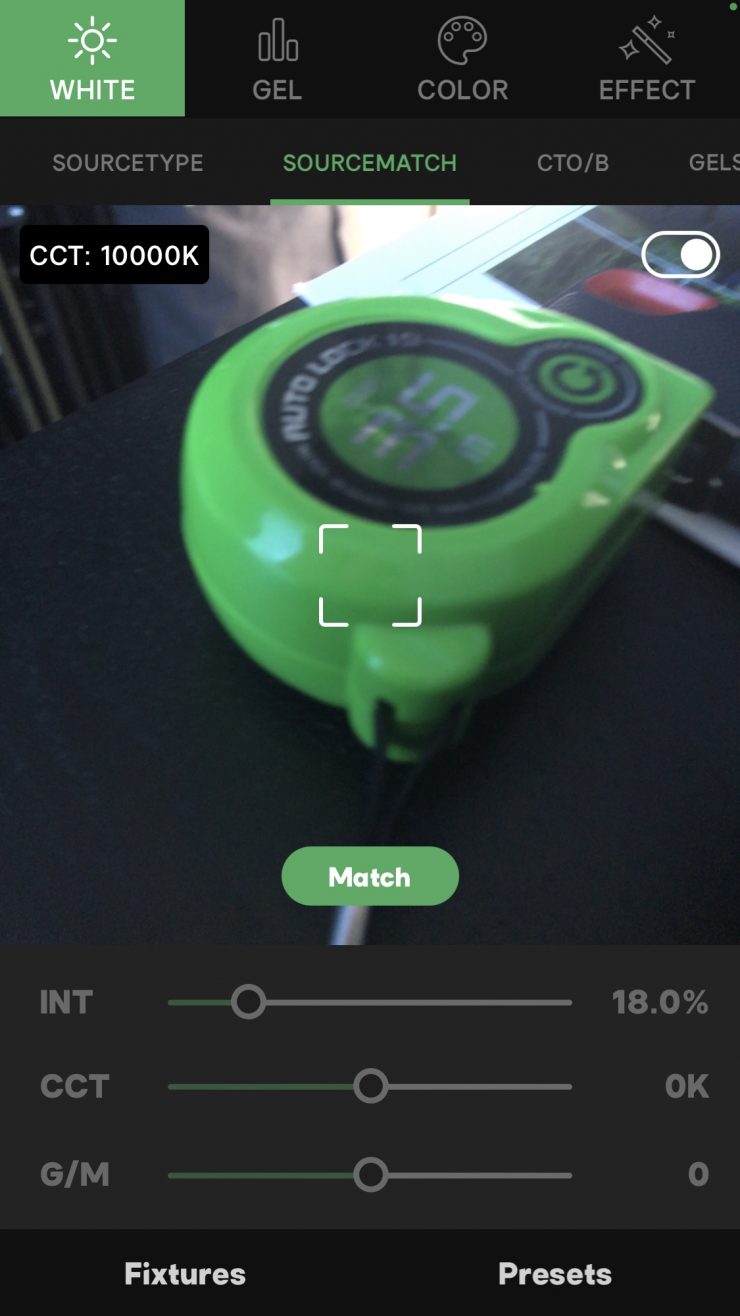
The color picker function within the app allows you to use your camera to capture certain colors that the 600c Pro will then attempt to replicate. Aputure also gives you the added ability to alter those colors that you have selected.
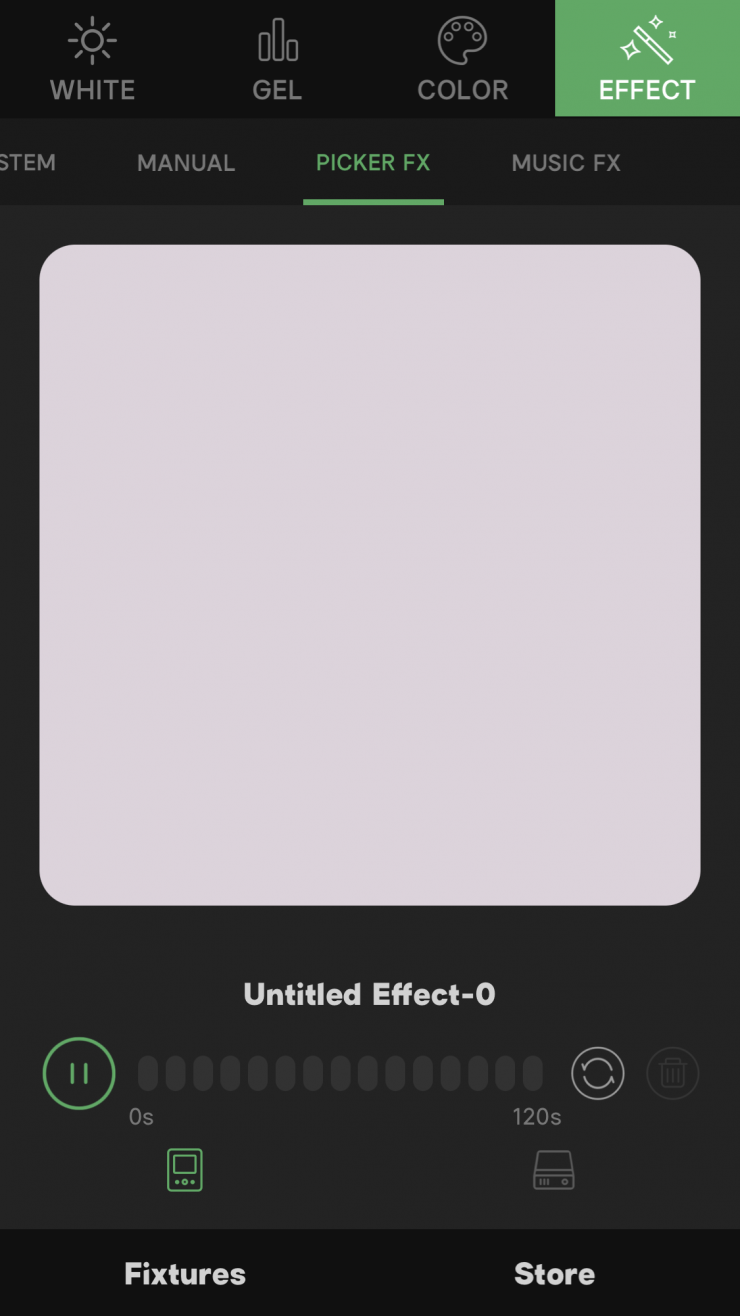
There is also a video record mode so that you can use your phone to capture a scene and then play it back. When you play it back the fixture will try and replicate those colors it is seeing in real-time. This is nothing new and quite a few lighting companies have been using this exact same functionality for a while.
It is certainly one of the better lighting control apps I have seen or used, although there are quite a few lighting control apps out there from different manufacturers that are also very good.
Operating Modes
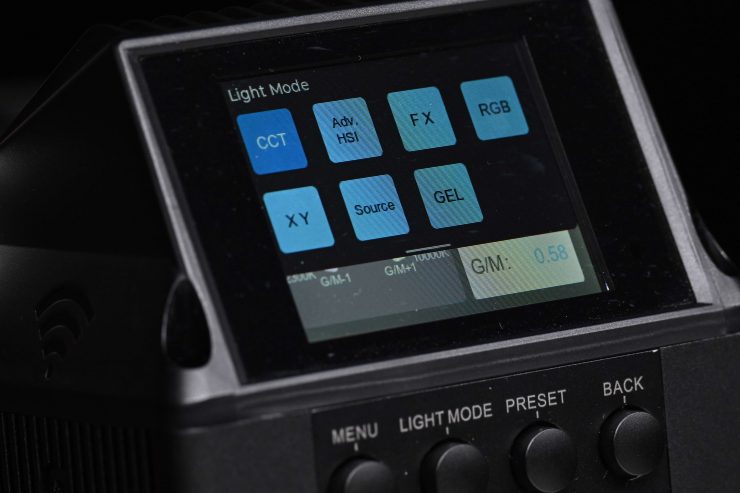
The light has 7 key lighting modes:
- CCT
- Adv. HSI
- FX
- RGB
- XY
- Source
- GEL
Correlated Color Temperature (CCT)
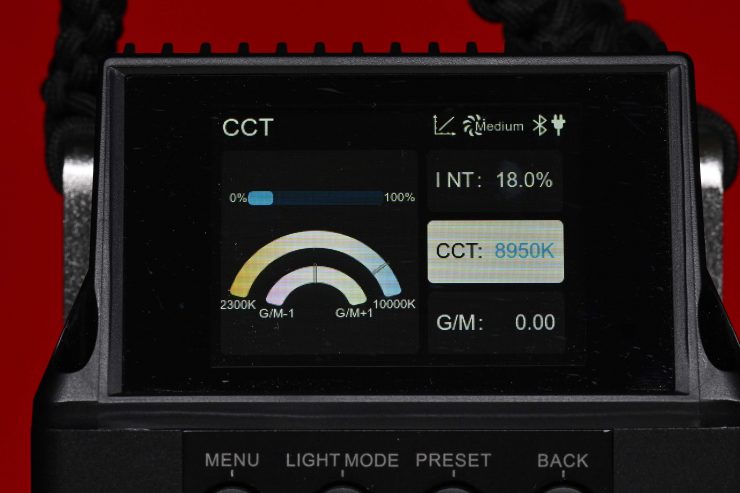
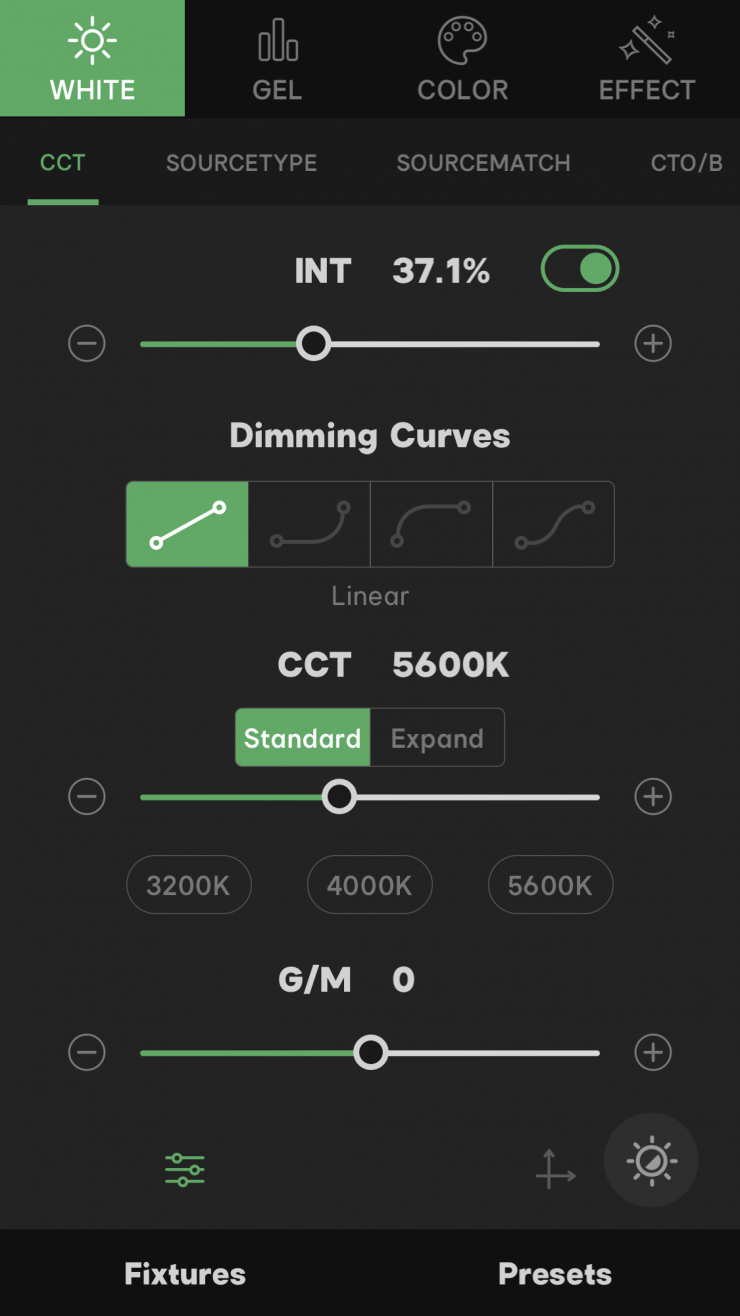
This is the mode most people are going to use the light in. In the CCT Mode, you have full access to making Kelvin color temperature adjustments between 2300-10,000K.
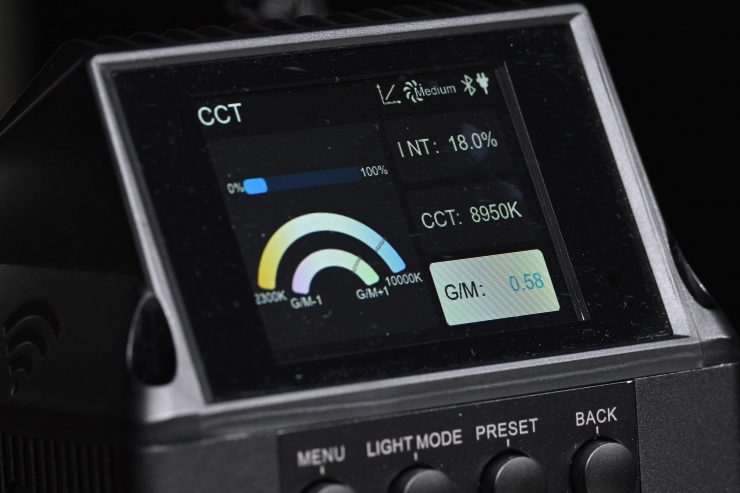
The fixture also has continuously variable (full minus green to full plus green) correction.
Being able to dial in more or reduce the amount of green coming from your lighting source can make a huge difference. Different camera companies use different sensors in their cameras and they all react differently to light. Some camera sensors may lean towards magenta, and some, more towards green. By making CCT adjustments you can dial in the light so that it looks better for whatever camera system you are using. CCT adjustment also helps when you are trying to match lights from different manufacturers.
The Kelvin color temperature range is reasonably good for an RGBWW light and it should suit most people’s needs.
Adv. HSI
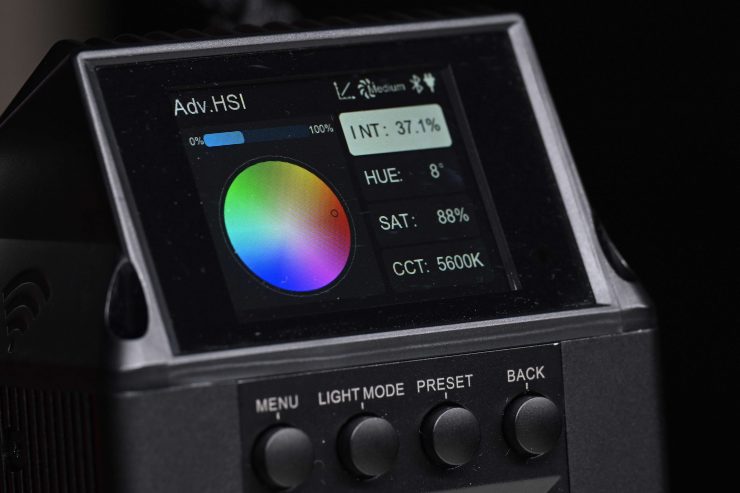
The Adv. HSI mode lets you create just about any color you can think of. It gives you full hue and saturation control as well as intensity. You can also change the base Kelvin color temperature setting anywhere from 2300-5600K.
By manipulating, the hue and saturation you can create some really interesting colors that depending on the project you are working on can really add some creative flair. I quite like using this mode to create a lot of color separation between the foreground and background, or for recreating a really cold or warm-looking image.
The colors are represented as degrees from 0-360 and they are nicely displayed in a clear and concise way so you can see exactly what color you are creating.
Because the interface has really good visual aids it is so much easier to dial in the exact color you want to create. On some lights, you have to use dials with no visual reference.
FX
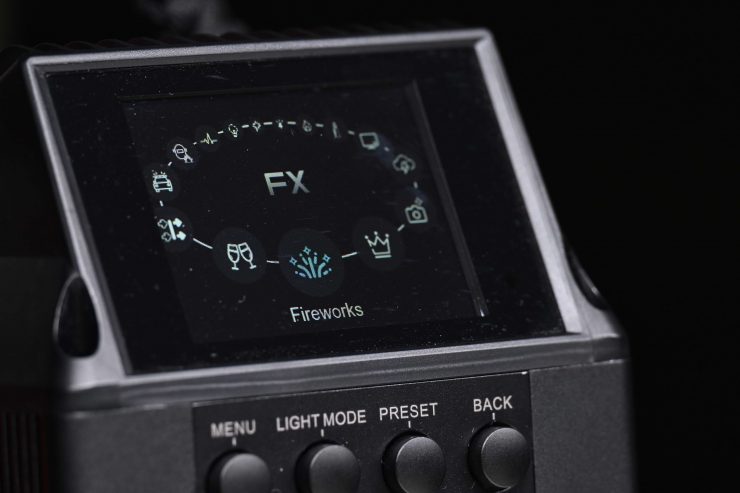
The RGBWW capabilities allow the fixture to deliver a lot of very realistic full-color lighting effects.
Effects mode lets you recreate a wide range of lighting effects that can be handy for certain scenarios. The effects include:
- Fireworks
- Club Lights
- Paparazzi
- Lightning
- TV
- Candle
- Fire
- Strobe
- Explosion
- Faulty Bulb
- Pulsing
- Welding
- Cop Car
- Color Chase
- Party Lights
All the effects modes can be individually adjusted and tailored to your lighting needs. You can change intensity, frequency, CCT, Hue, and CCT+HUE.
RGB
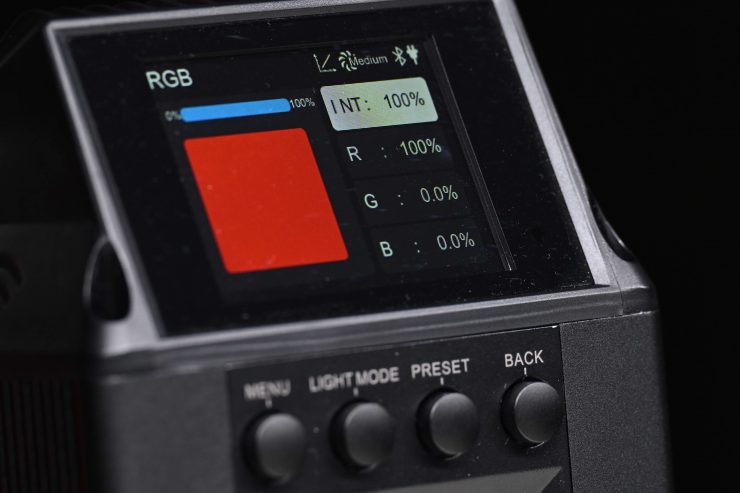
In this mode, you can individually adjust red, green, and blue. This allows you to easily and quickly dial in super saturated red, blue or green or mix the individual channels to create different colors.
XY
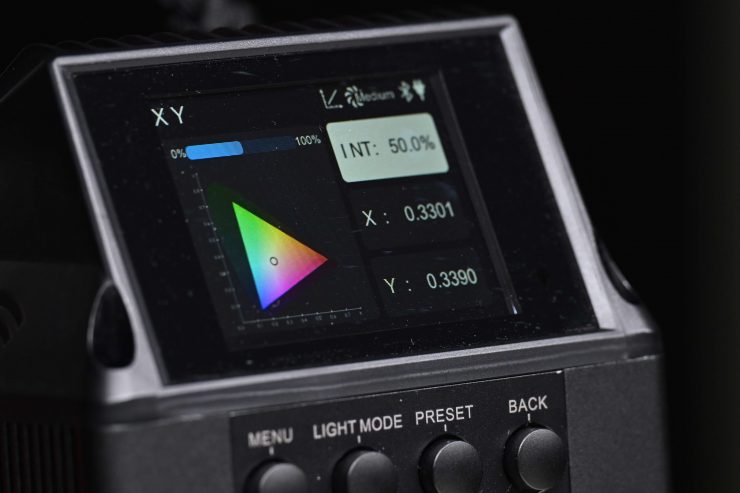
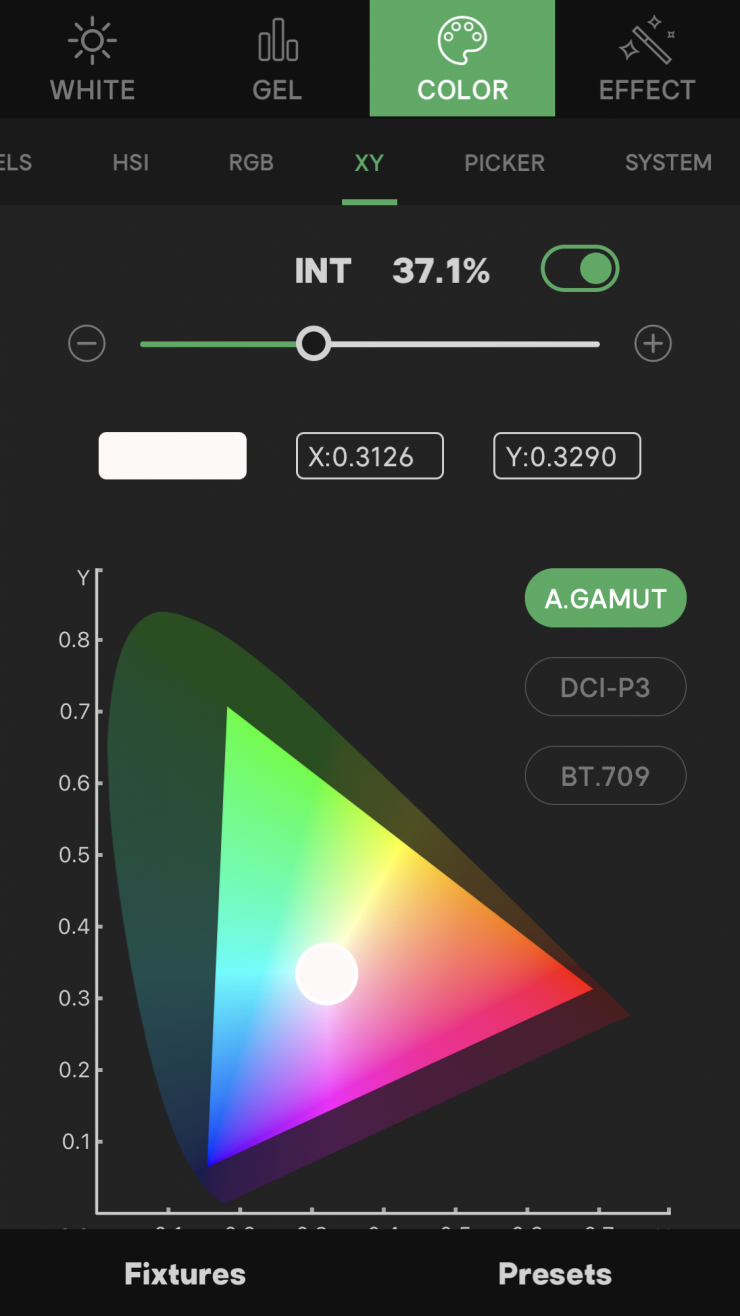
In the XY mode, you can dial in x and y values that can help you match other fixtures.
Source
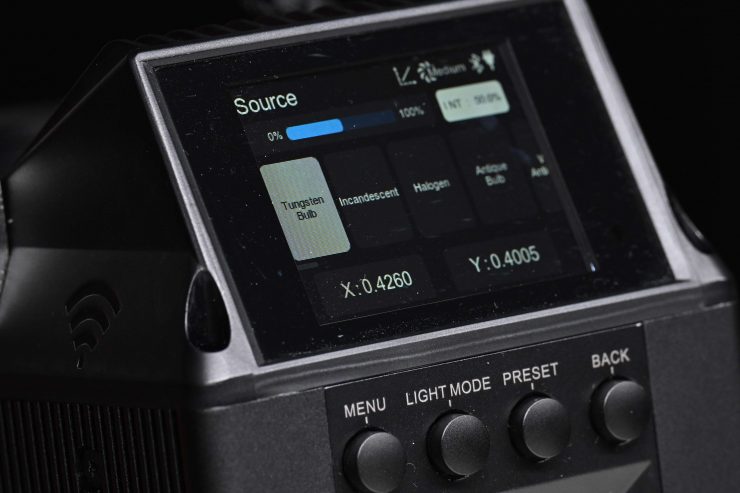
Source mode gives you access to a huge range of pre-mapped lighting sources.
Whether you want to replicate a computer monitor, a green traffic light, a mercury vapor bulb, or a warm antique bulb, this light has you covered.
These are incredibly handy when trying to match other ambient lighting sources. You can also alter the x and y values in this mode as well which is also nice.
Gel
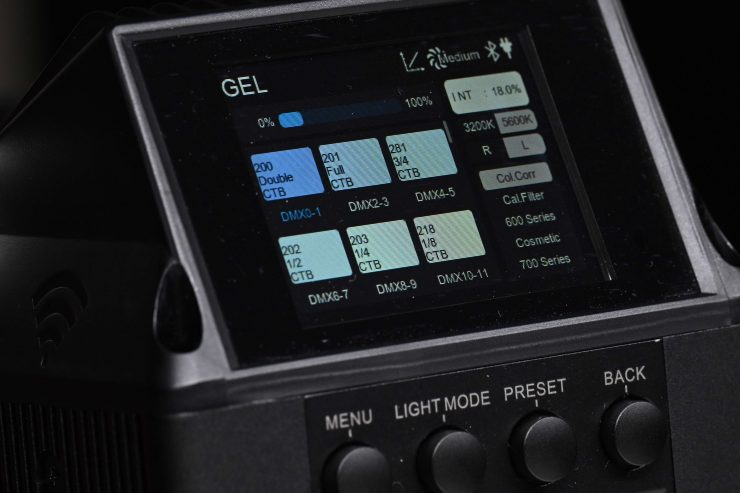
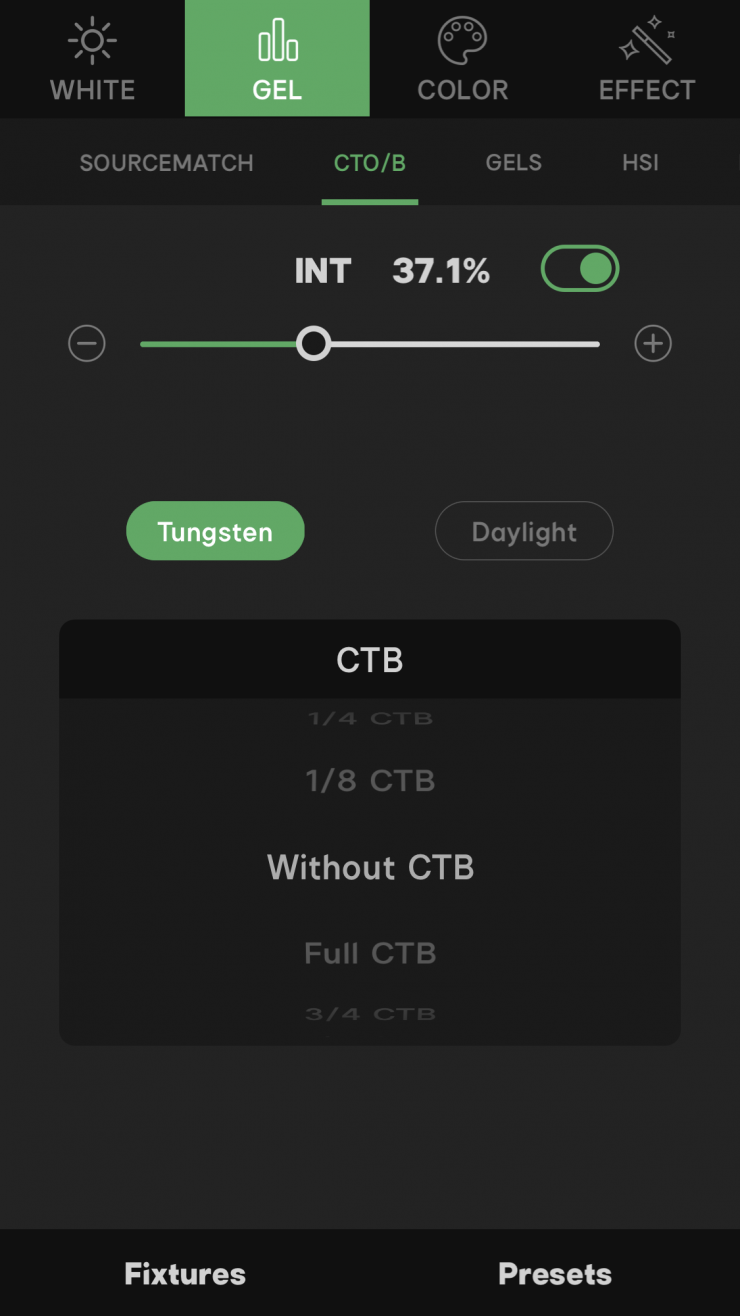
Inside the fixture, there is a huge assortment gels from Cal Color, Cinelux, and Storaro, as well as Color correction gels.
Having built-in Digital Gels not only means that you don’t have to physically carry gels around, but you can also quickly and easily replicate popular gels. Using the gel mode can help you match other lighting sources, especially if you are working with other lights with physical gels.
You can select 5600K or 3200K and then the selection of gels you see will change.
How does the Aputure LS 600c Pro compare to the Prolycht Orion 675 FS?
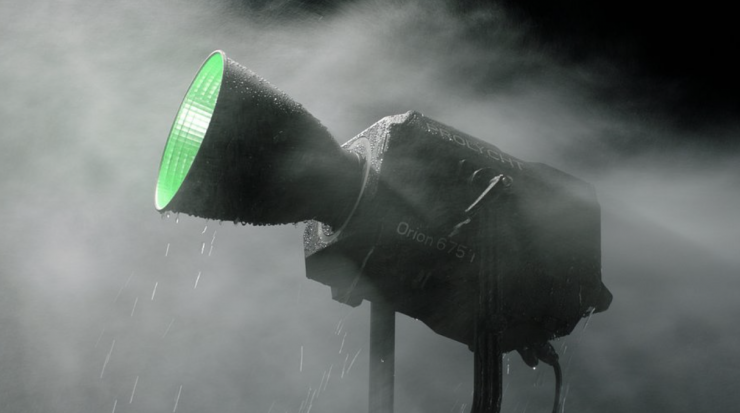
At the moment I can only tell you how they compare on paper as I haven’t had a chance yet to get hold of the Prolycht Orion 675 FS. Comparing products based on specification sheets never tells you the full story.
| Prolycht Orion 675 FS | Aputure LS 600c Pro | |
| CCT Range | 2000-20,000K | 2300-10,000K |
| +/- GM | Yes | Yes |
| HSI | Yes | Yes |
| Gels | Yes | Yes |
| Source Mode | Yes | Yes |
| Effects | Yes | Yes |
| Mount | Bowens-S Mount | Bowens-S Mount |
| Power Draw | 675W | 720W |
| App Control | Yes | Yes |
| Battery Plate | Yes, 2x V-Lock (or AB Gold Mount) | Yes, 2x V-Lock (or AB Gold Mount) |
| Weight | 21 lb / 9.45 kg | 24.4 lb / 11.07 kg |
On paper, there is not a huge differnce between the two fixtures in terms of the feature set, power, and physical size and weight.
How does it stay cool?
Large, high-powered COB lights get very hot, and keeping them cool is not an easy task. Using fans is the best solution, but the caveat with fans is that they can create noise.
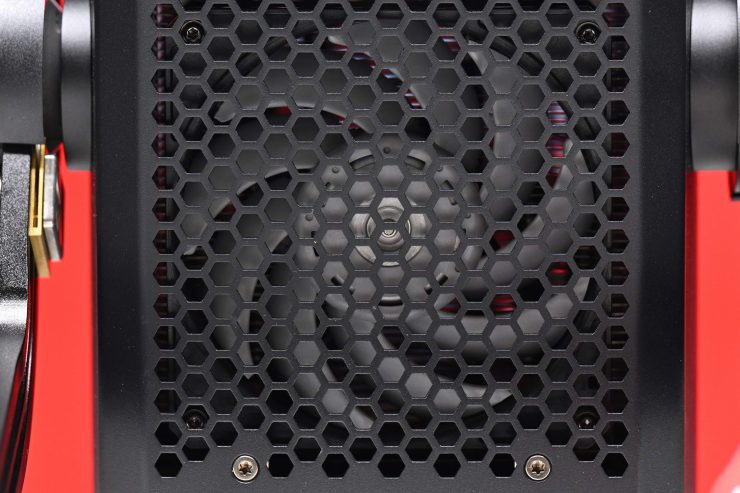
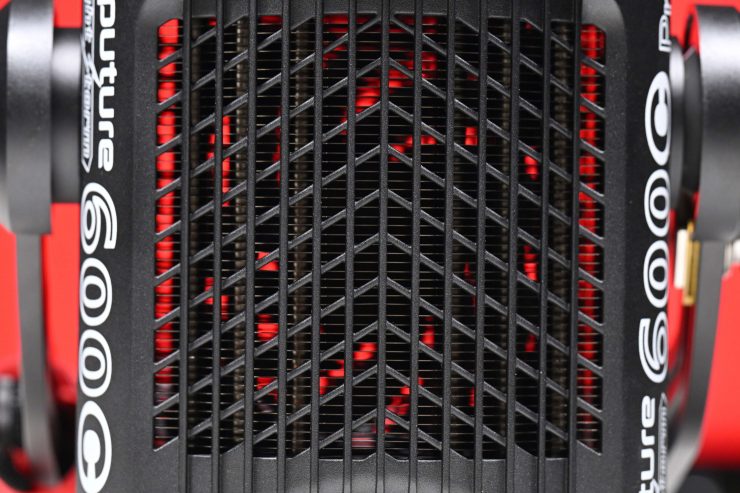
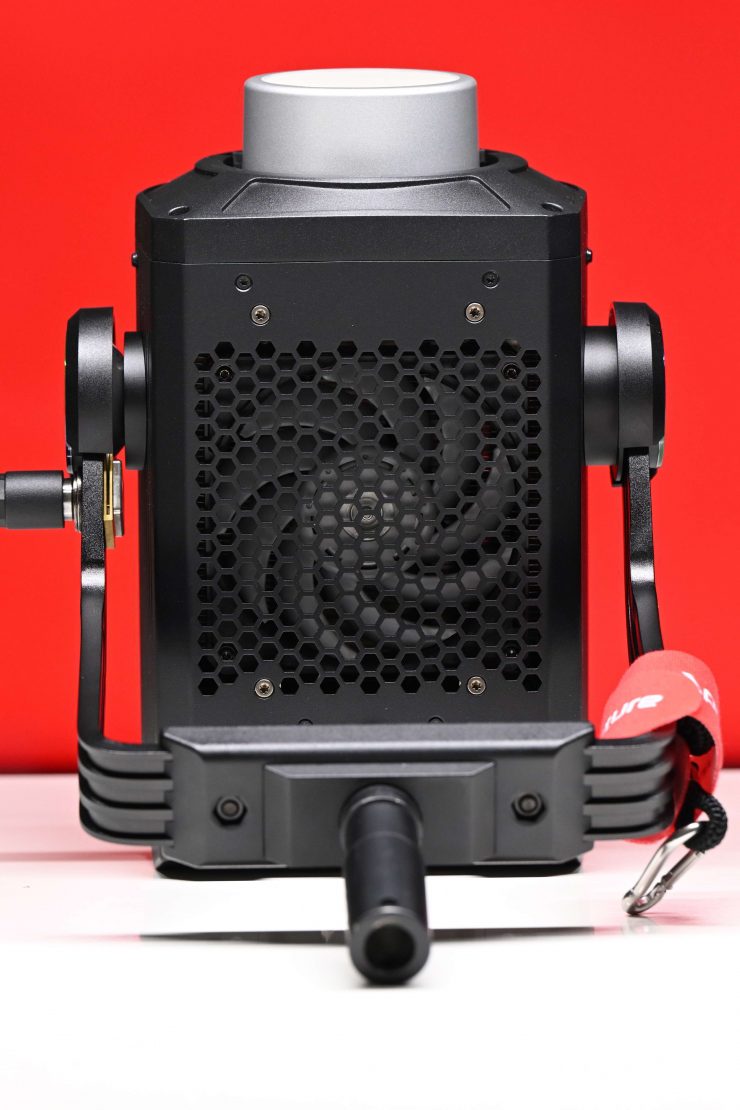
The 600c Pro has a large fan and some heatsinks to deal with the heat.
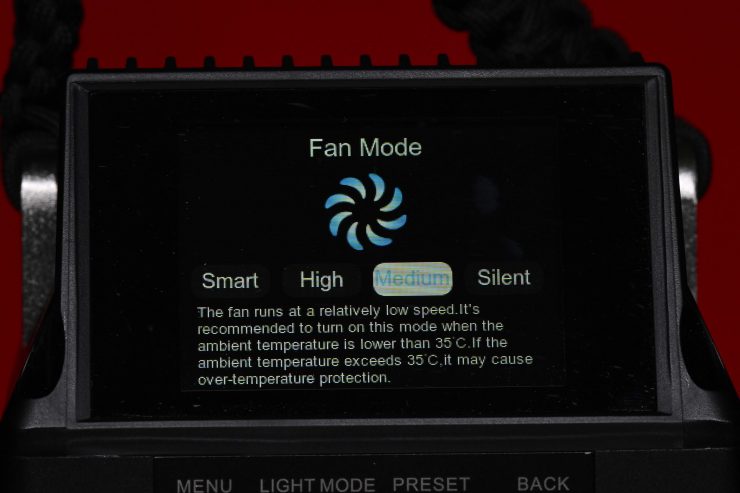
The light gives you the option of changing the fan speed. You can set it to:
- Smart
- High
- Medium
- Silent
In the Smart setting, the fan speed will change automatically depending on the temperature of the light.
In the High setting, the fan will stay at its maximum speed all of the time. Aputure recommends that you set the light to this mode if you are working in conditions above 40 °C / 104 °F.
In the Medium setting, the fan speed is reduced, however, if the ambient temperature exceeds 35°C / 95 °F it may cause the light’s over-temperature protection to kick in.
In the Silent mode, the fan is turned off completely but this does come with a big caveat. If you activate Silent Mode the total output of the fixture gets reduced to just 60W. What is rather odd is that the intensity can still be set at 100%, even though the output is massively reduced. You should expect to see 12x less output in this mode than when the fan is running.
The fan in the 600c Pro light head does produce quite a lot of noise and this could potentially be an issue if you were recording audio close by. In a lot of scenarios, I don’t think it will be a huge deal as you are not likely to have a high-powered light like this too close to the talent. In saying that, if you were using the 600c Pro with a large softbox, then a sound recordist may complain about the noise in a quiet room. I couldn’t tell much of a difference in noise between Smart and Medium. In the High mode, the pitch of the sound the fan makes does change and this is not a mode I would want to be using if you were recording audio within around 3-4 meters of the lamp head.
While the Smart mode works well, I personally wouldn’t use this in an interview situation because the fan noise can change halfway through your recording which is never ideal. I would personally set it to Medium instead because at least that way you have a constant level of fan noise where you won’t get any nasty surprises.
Photometrics
So now let’s get to the photometric results. I always test lights in this way so that I get a reference to how they compare to other fixtures. Results only tell part of the story and should never be used alone to judge a light. I have found from extensive testing over the years that certain lights that have good photometric results don’t always look good, and lights that have worse photometric scores can sometimes look better than their results indicate.
You can’t judge a light from one set of photometric results. You have to look at all of the different results to be able to come to a conclusion.
Different lights can also look different depending on what camera you happen to be using.
Output & Color Temperature Accuracy
I tested the Aputure LS 600c Pro at a variety of Kelvin color temperatures with a Sekonic C-800 Spectrometer to find out how much output the light had and how accurate the Kelvin color temperature reproduction was. All readings are taken at a distance of 1m (3.28ft) in a controlled environment. The readings were also taken directly from the lighting source. In the case of using the light with the Reflector and Fresnel, they were taken from the edge of those attachments.
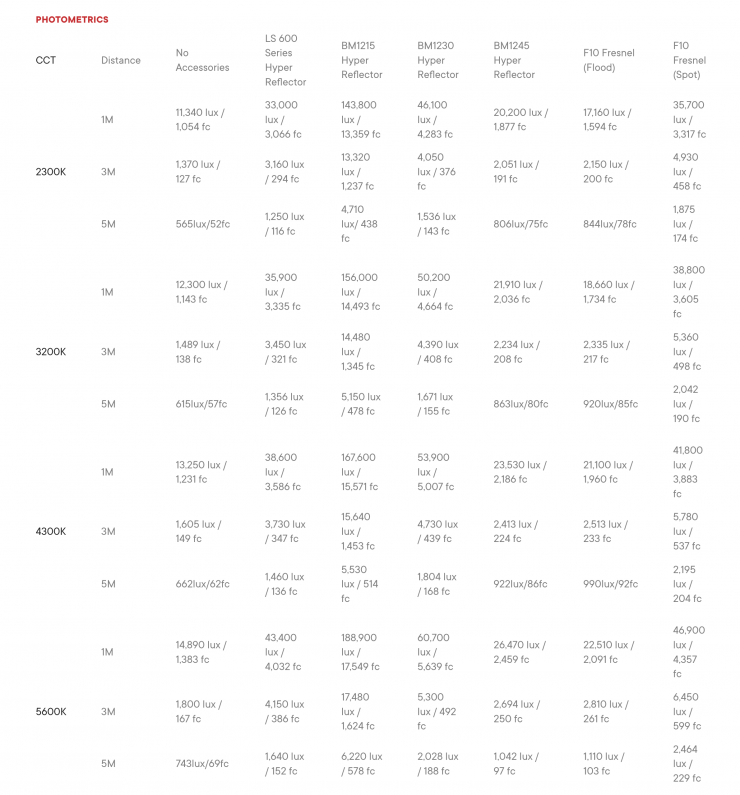
Above are the claimed photometric data that Aputure has on its website.
5600K (open face)
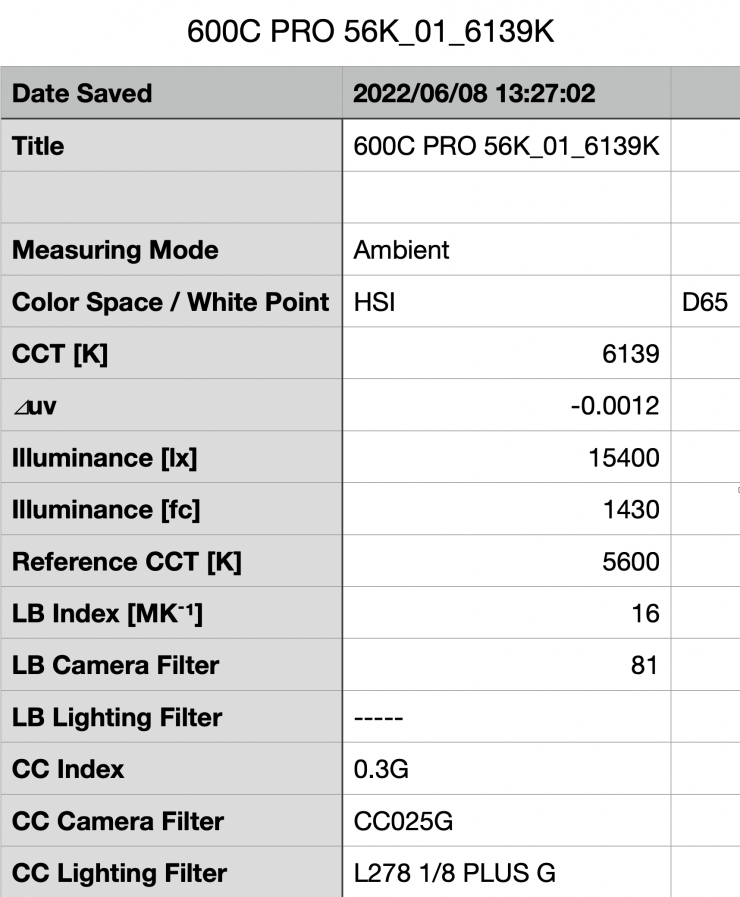
Above you can see the LS 600c Pro recorded an output of 15,400 lx (1430 fc) when set at 5600K and used open face. Please note that these tests were done in the max. output mode.
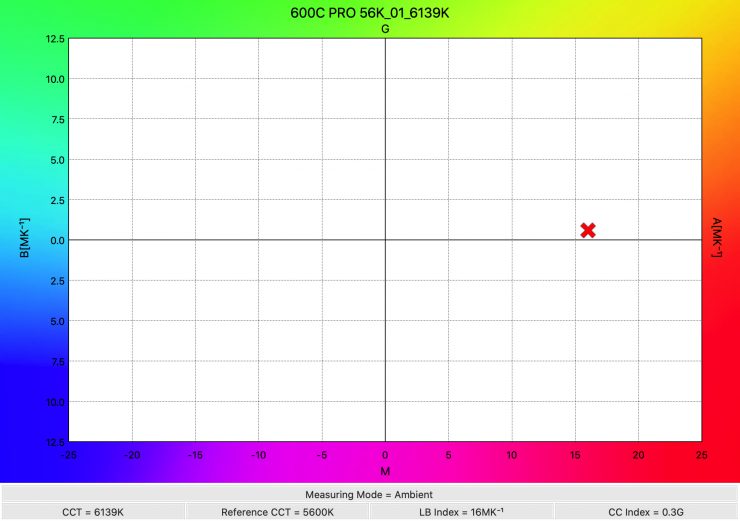
The light recorded a Kelvin color temperature reading of 6134K which was more than 500K off being correct.
3200K (open face)
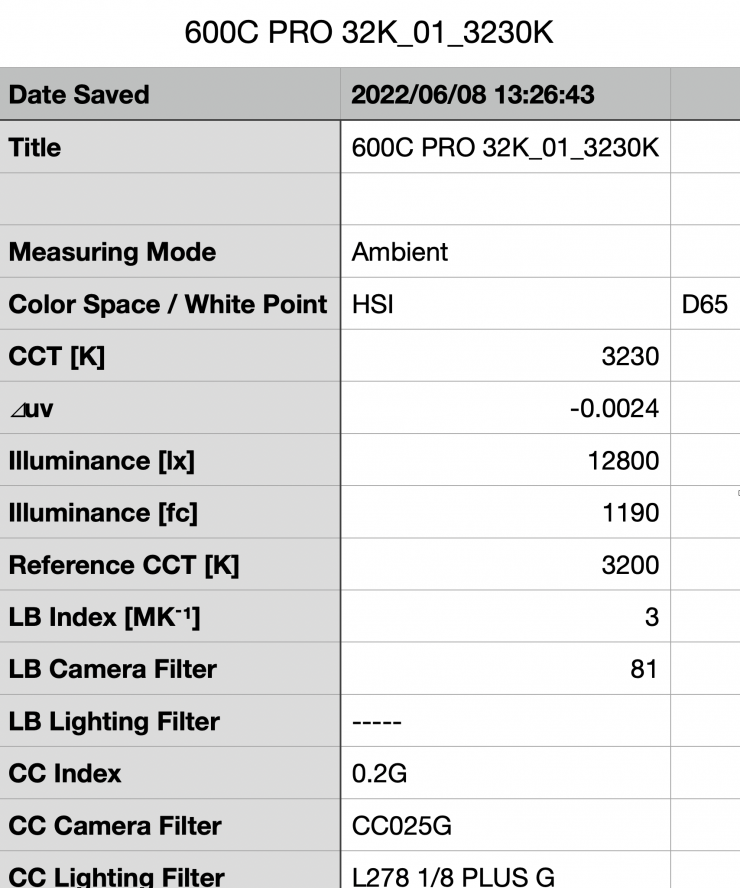
Above you can see the lights output when it was set at 3200K in the open face configuration was 12800 lx (1190 fc), which is 16.88% less than the 15400 lx it produced at 5600K. Please note that these tests were done in the max. output mode. Aputure lists a figure of 13,250 lx, so the result I got was fairly close to their claimed figure.
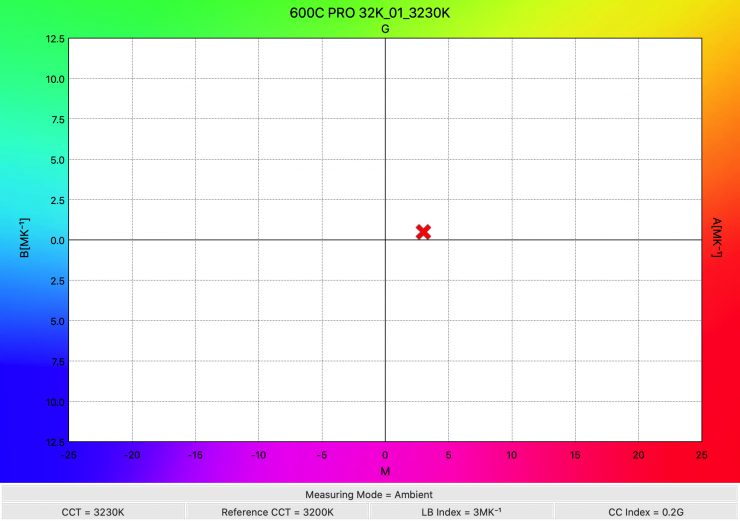
As far as Kelvin color temperature accuracy goes, it recorded a very accurate reading of 3230K.
Hyper Reflector
So, now let’s see how much output the light has when used with its 62° Hyper reflector.
5600K (Hyper reflector 62°)
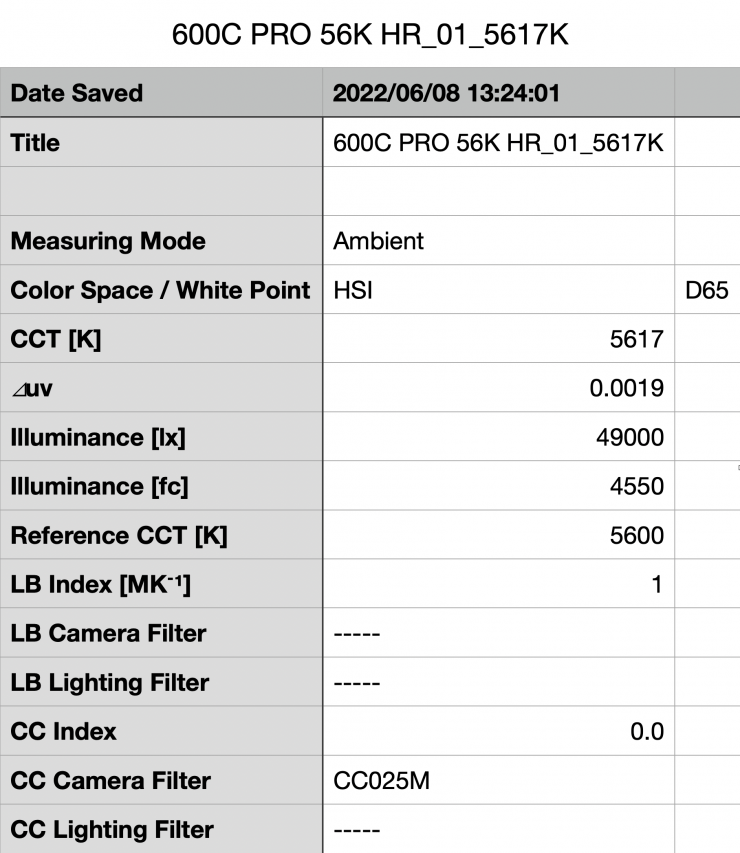
Above you can see the lights output when it was set at 5600K with the Hyper reflector was 49,000 lx (4550 fc). This was 68.57% more than the 15,400 lx it produced at 5600K when used open face. It is important to note that this measurement was made from the edge of the reflector. Aputure claims an output of 49,995 lx on its website, so my result was very close to that figure.
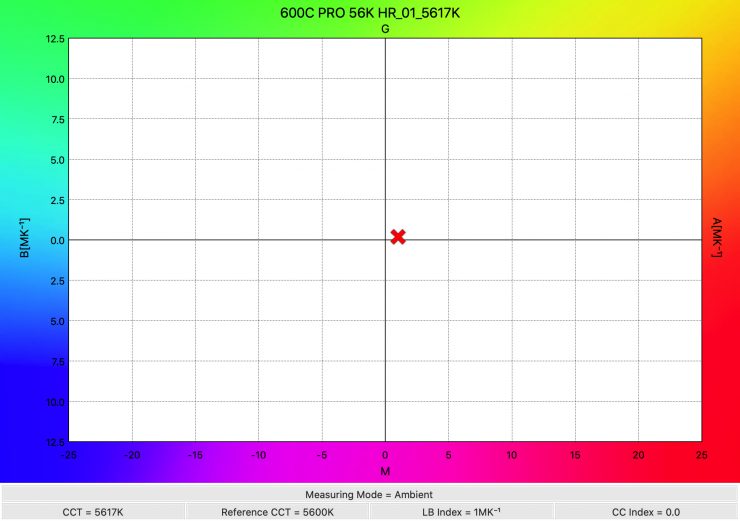
As far as Kelvin color temperature accuracy goes, it recorded a very accurate reading of 5616K. The Kelvin color temperature accuracy when using the Hyper reflector was a lot better than when the light is used open face. In some ways, this is a little odd, because you would expect with a light like this that it would be optimized more for open face use.
3200K (Hyper reflector 62°)
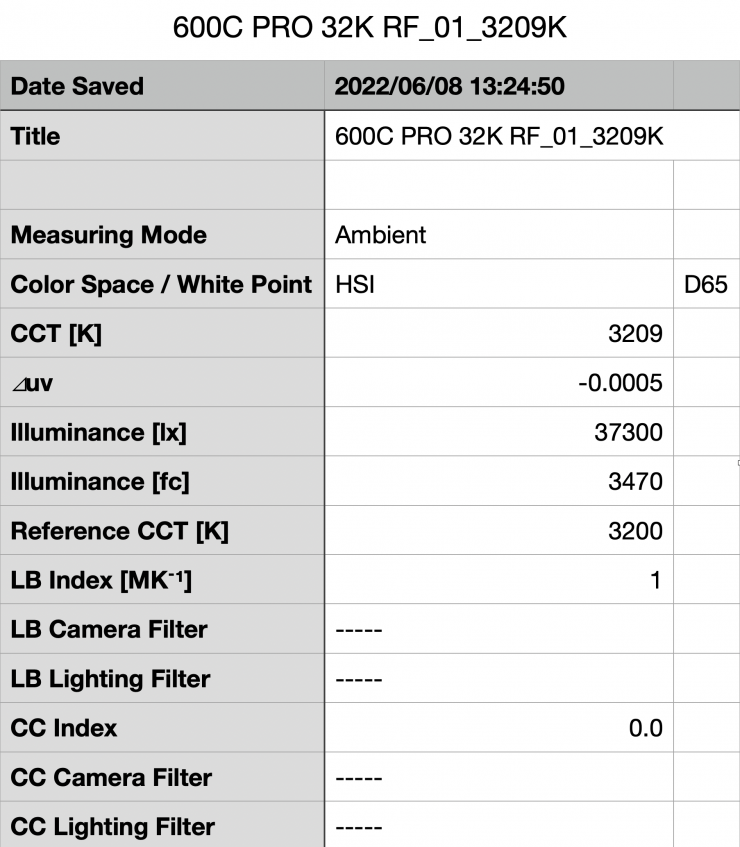
Above you can see the lights output when it was set at 3200K with the standard reflector was 37,300 lx (3470 fc), which was 23.87% less than what it output at 5600K. Aputure quotes a figure of 38,600 lx on their website, so my result was pretty close to the claimed amount.
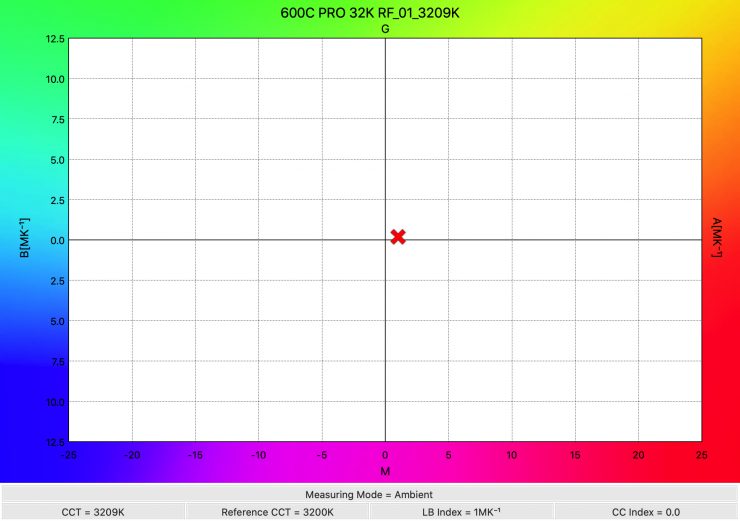
As far as Kelvin color temperature accuracy goes, it recorded an exceptionally good reading of 3209K which was a very good score. It is a little strange that the Kelvin color temperature accuracy when using the light at 3200K with and without the Hyper Reflector is almost identical, yet, there is a large discrepancy when using the light at 5600K.
How does this compare to the Prolycht Orion 675 FS? Well, that is a good question. I haven’t been able to test the Prolycht Orion 675 FS so I can only currently provide you with claimed figures from that light.
| Output at 5600K | CCT (K) | |
| Aputure LS 600c Pro | 49,000 lx (Hyper reflector 62°) | 5617K |
| Prolycht Orion 675 FS | 91,530 lx* (standard reflector 55°) | NA |
| Output at 3200K | CCT (K) | |
| Aputure LS 600c Pro | 37,300 lx (Hyper reflector 62°) | 3209K |
| Prolycht Orion 675 FS | 91,530 lx* (standard reflector 55°) | NA |
*Claimed output. Not independently tested.
If you want to see how it compares to other similar COB fixtures when used at 5600K, below you can see:
| OUTPUT | |
| Aputure LS 600c Pro (62°) | 49,000 lx* |
| Prolycht Orion 675 FS (55°) | 91,530 lx** |
| ARRI Orbiter (60° Optic) | 18,800 lx* |
| Aputure LS 600x Pro (55°) | 68,400 lx |
| Aputure LS 600d Pro (55°) | 97,100 lx* |
| Nanlite Forza 720 (55°) | 91,800 lx** |
| Nanlite Forza 720B (55°) | 73,000 lx* |
* Independently tested
** Not tested (claimed output)
As you can see the 600c Pro has significantly less output when used at 5600K with its Hyper reflector than the 600d. It has 49.53% less output than the 600d Pro and 28.36% less than the 600x Pro.
What you clearly need to know is that the Aputure 600d Pro and 600x Pro Hyper reflectors produce a slightly tighter 55° beam angle. Using the Hyper reflectors with the 600d Pro and 600x Pro does also result in a massive hot spot, so the output figures you see for them are very deceiving. The new 600c Pro when used with that same reflector Hyper doesn’t appear to have the same type of hot spot.
How does it perform at various Kelvin color temperatures?
Summary of results (Hyper reflector Max. Output Mode)
| SETTING | OUTPUT | CCT READING |
| 2500K | 35,300 lx | 2533K |
| 3200K | 37,300 lx | 3209K |
| 4500K | 41,700 lx | 4542K |
| 5600K | 49,000 lx | 5617K |
| 6500K | 43,700 lx | 6626K |
| 8000K | 42,600 lx | 8157K |
| 10000K | 38,500 lx | 10289K |
These results show me that the light’s output varies by 27.95% depending on what Kelvin color temperature you are using. This is a pretty large difference that you need to be aware of if you are using the light in its Max. Output mode.
The Kelvin color temperature accuracy across the range is exceptionally good from 2500K to 5600K. Even at 6500K and above it is still very good, although it does start to fall off slightly at 10000K, but that is the same with most LED lights.
Now, the light does have a Constant Output mode that you can use, so I decided to test the 600c Pro again to see what the results were like.
Summary of results (Hyper reflector Constant Output Mode)
| SETTING | OUTPUT | CCT READING |
| 2500K | 28,800 lx | 2526K |
| 3200K | 28,400 lx | 3203K |
| 4500K | 28,300 lx | 4563K |
| 5600K | 28,600 lx | 5698K |
| 6500K | 28,600 lx | 6645K |
| 8000K | 28,800 lx | 8133K |
| 10000K | 28,700 lx | 10259K |
In the Constant Output mode you can see that the lights output at all Kelvin color temperature settings is almost identical. The Kelvin color temperature readings also remain almost the same as they do when using the light in its Max. Output mode.
As you can see, in this mode, the output when using the light at 5600K is reduced by 41.6%.
Kelvin color consistency & linear output when dimming the light
Now, what you should always do when testing lights is to see if the Kelvin color temperature remains consistent when dimming the light. Just because you set a light at say 5600K, that doesn’t mean that the Kelvin color temperature will remain stable as you start dimming the fixture down. I also wanted to see how linear the dimming curve was.
I decided to do a series of tests at 100%/75%/50%/25%10% to see if the Kelvin color temperature being recorded changed. This was done at a distance of 1m using a Sekonic C-800. These tests were done at 5600K with the Hyper reflector and the light set in the Max. Output mode and Linear Dimming selected.
| CCT READING | OUTPUT | INTENSITY % |
| 5617K | 49,000 lx | 100 |
| 5708K | 31,800 lx | 75 |
| 5701K | 21,500 lx | 50 |
| 5660K | 11,100 lx | 25 |
| 5614K | 5,130 lx | 10 |
The Aputure 600c Pro is able to maintain very good Kelvin color consistency as you start dimming the fixture. My testing showed that the Kelvin color temperature only varied by 94K. These are good results and it shows me that you can dim this fixture down without having to worry about big changes in Kelvin color temperature.
As far as how linear the output is when you start dimming the light, at 50% output it had 56.12% less output than when used at 100%. At 25% it had 77.36% less output than when used at 100%. At 10% output, it had 99.98% less output than when used at 100%. This shows me that the light’s dimming curve is very linear.
Output when creating a super saturated red
I also wanted to test the light to see how much output it could produce when making a super saturated HSI 360° red.
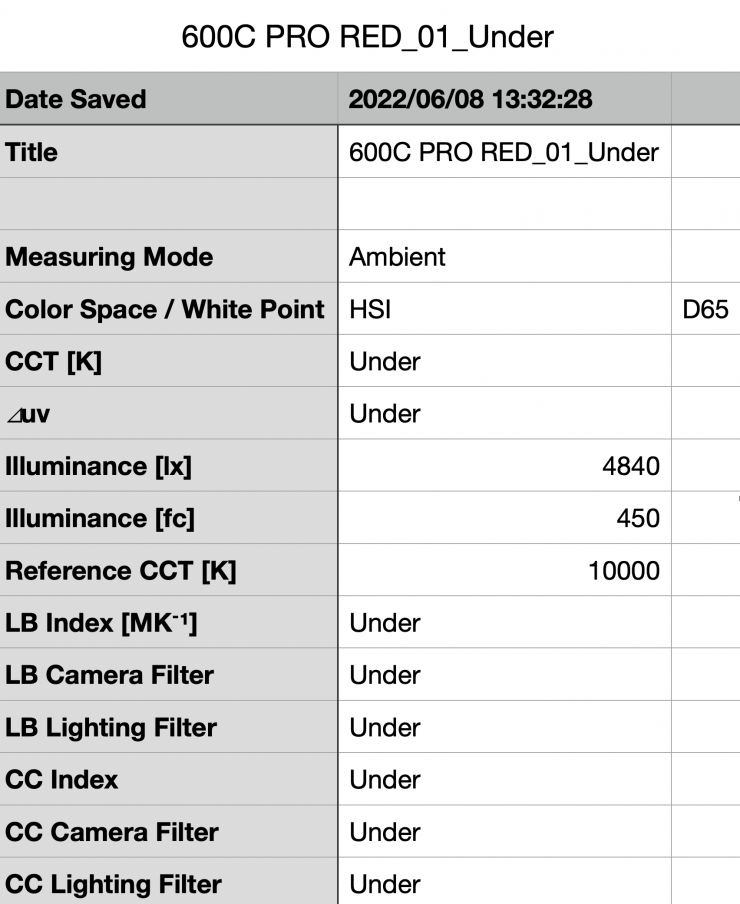
Above you can see that the light when using its Hyper reflector recorded an output of 4840 lx (450 fc). What you clearly need to know when using RGBWW lights like this is that the output levels you can produce when creating super saturated colors are a lot less than when using the light in a CCT mode.
Output when using the F10 Fresnel
I also wanted to test the light when using the optional F10 Fresnel at 5600K to see how much output it had, and if the Kelvin color temperature gets altered in any way.
5600K (F10 Fresnel 45°)
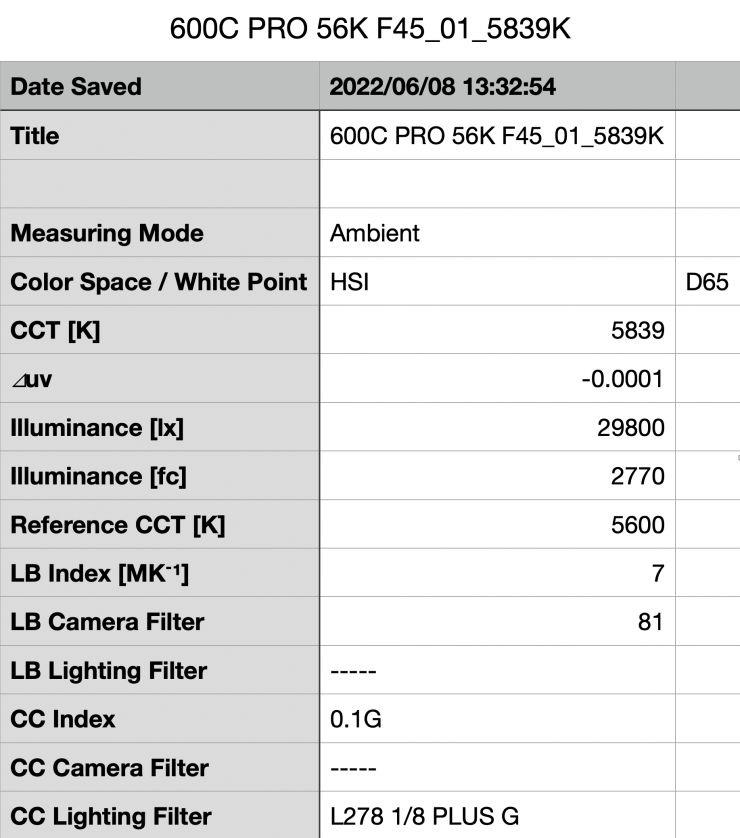
Above you can see the light output when it was set at 5600K with the F10 Fresnel set at 45° was 29,800 lx (2770 fc). This was 95.3% more than the 15,400 lx it produced at 5600K when used open face and 32.27% less than the 44,000 lx it produced when using the Hyper Reflector. It is important to note that this measurement was made from the edge of the Fresnel.
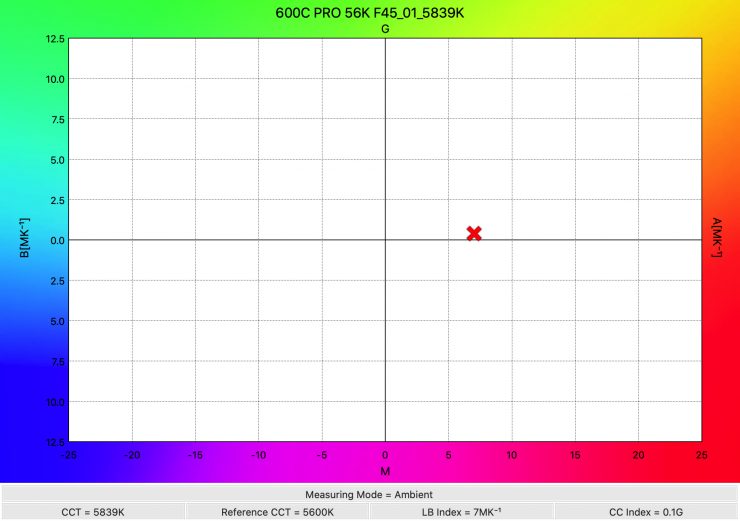
As far as Kelvin color temperature accuracy goes, it recorded a reading of 5839K which was not nearly as good as the reading of 5616K that it recorded when using the Hyper reflector. The Kelvin color temperature accuracy when using the F10 Fresnel is slightly better than when using the light open face.
5600K (F10 Fresnel 15°)
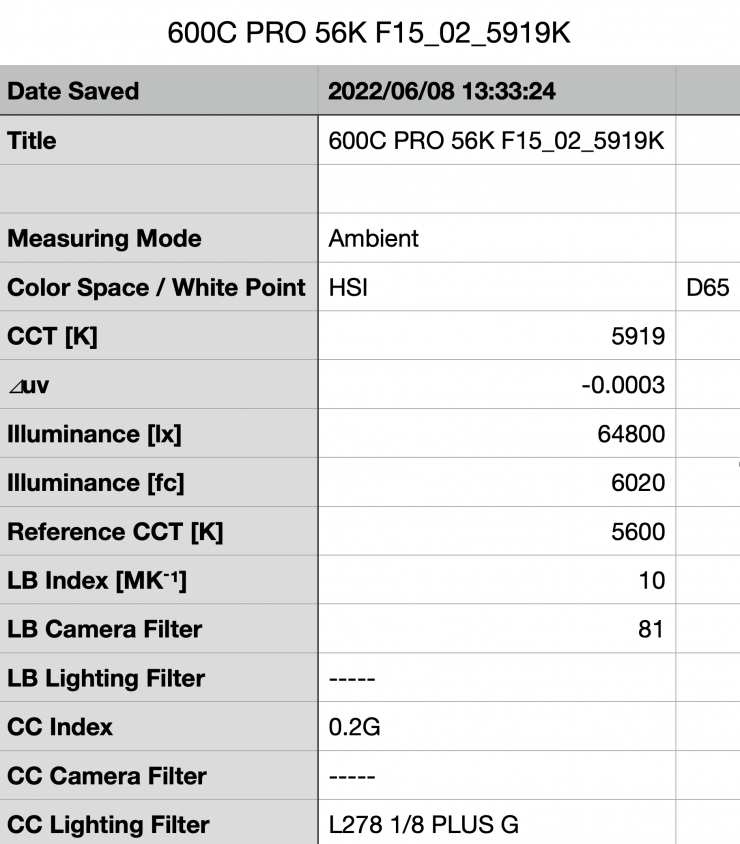
Above you can see the light output when it was set at 5600K with the F10 Fresnel set at 15° was 64,800 lx (6020 fc). This was 320.79% more than the 15,400 lx it produced at 5600K when used open face and 47.27% more than the 44,000 lx it produced when using the Hyper Reflector. It is important to note that this measurement was made from the edge of the Fresnel.
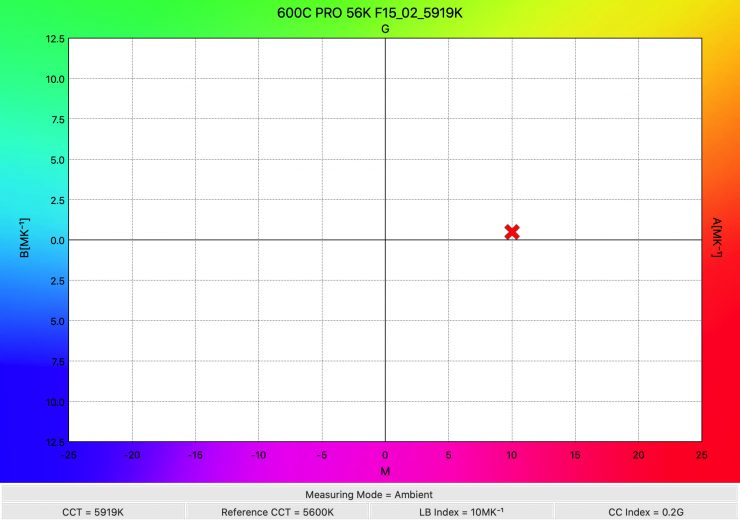
As far as Kelvin color temperature accuracy goes, it recorded a reading of 5919K which was not nearly as good as the reading of 5616K that it recorded when using the Hyper reflector. The Kelvin color temperature accuracy when using the F10 Fresnel is similar to when using the light open face.
You are not going to get anywhere near the same amount of output when using the F10 Fresnel and the 600c Pro as you would if you used it with the 600d Pro. If you want lots of output, the 600d Pro and F10 Fresnel is the combination you would need to use. This is primarily also because the F10 Fresnel isn’t optimized to work correctly with the 600c Pro.
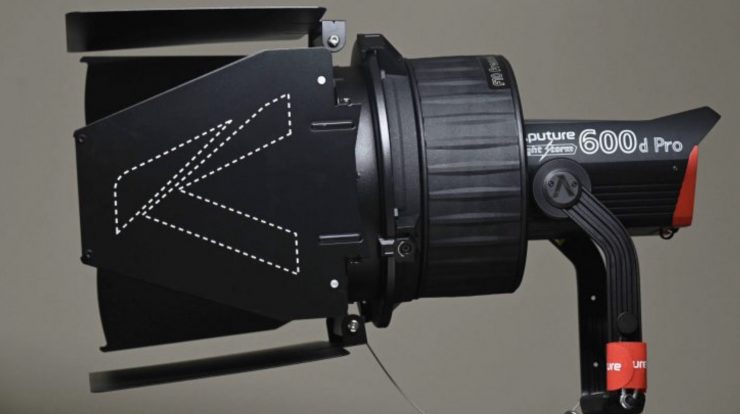
If you are interested in finding out more about the F10 Fresnel, I did a whole review on it that you can see here.
+/- Green adjustment
As the fixture includes +/- Green adjustment you can quite easily correct any tint. While there is no exact science to this, and it really depends on what camera you are using as well, it’s just a matter of trial and error to see what setting actually works the best. The nice thing is, that any light with +/- Green adjustment can be fine-tuned to deliver better results.
Color Rendering
5600K (Hyper reflector)
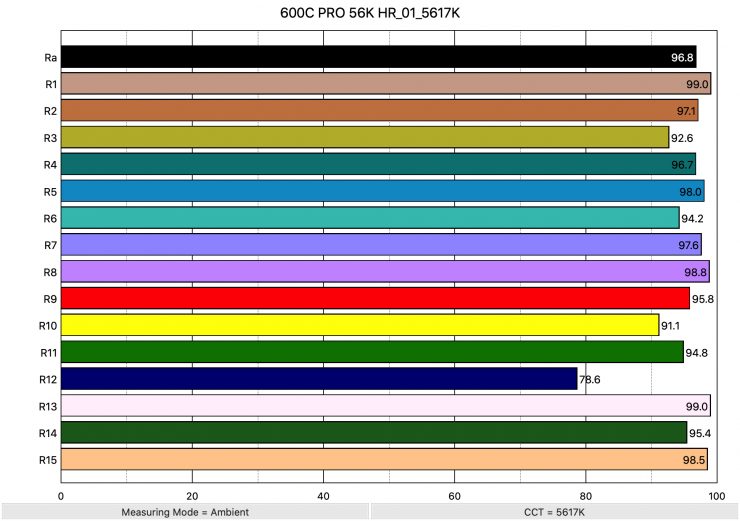
So now that we have seen how much output the 600c Pro produces, how does it perform when it comes to replicating accurate colors. Above you can see that when the light was set at 5600K using the standard reflector it recorded an average CRI (R1-R8) of 96.8 and an extended CRI (R1-R15) of 95.14. For replicating accurate skin tones it recorded for R9 95.8 (red), 99 for R13 (closest to caucasian skin tones), and 98.5 for R15 (closest to Asian skin tones). These are good results, although the light struggles to produce R12 (Blue) with a score of just 78.6.
| CRI | EXTENDED CRI | R9 | R13 | R15 | |
| 600c Pro | 96.8 | 95.14 | 95.8 | 99 | 98.5 |
| 600d Pro | 96.5 | 95.32 | 93.9 | 98.9 | 96.2 |
As a comparison, the 600d Pro recorded an average CRI (R1-R8) of 96.5 and an extended CRI (R1-R15) of 95.32. For replicating accurate skin tones it recorded 93.9 R9 (red), 98.9 for R13 (closest to caucasian skin tones), and 96.2 for R15 (closest to Asian skin tones). The Aputure 600d Pro and 600c Pro have very similar color rendering scores, but the 600c Pro has slightly better scores for R9, and R15.
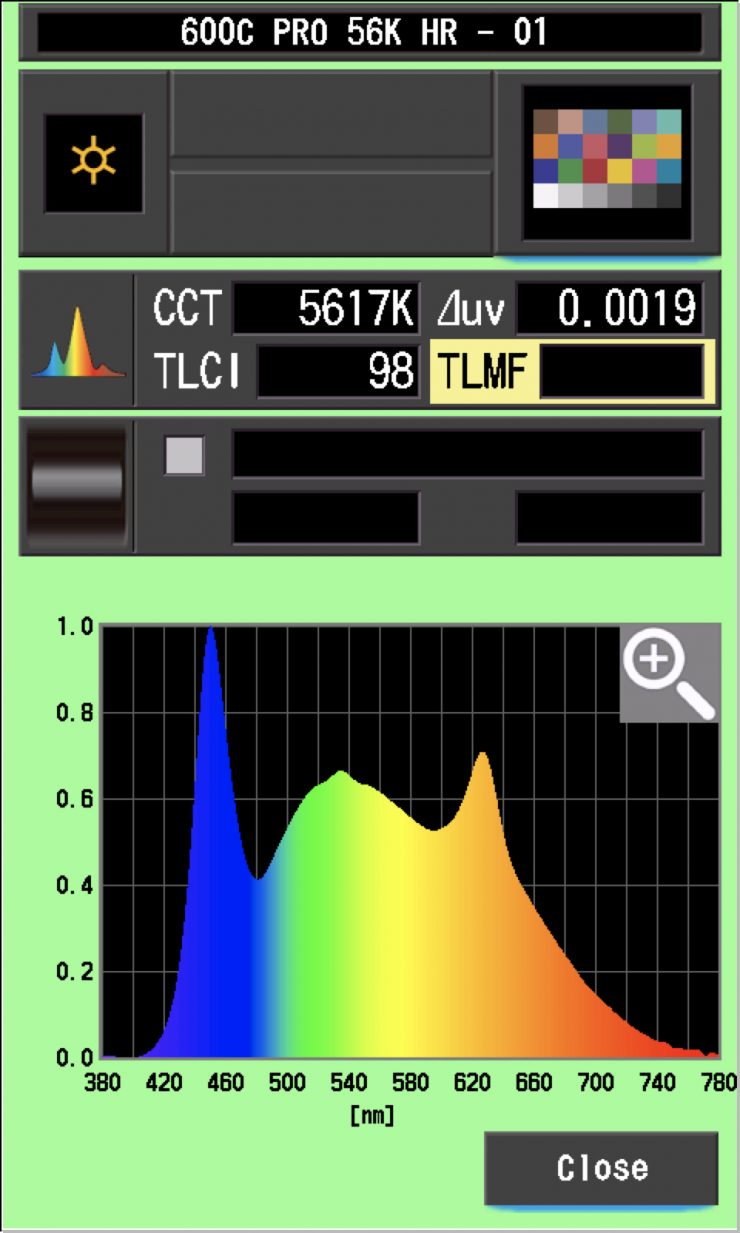
The600c Pro, when set at 5600K, recorded a TLCI score of 98.
3200K (Hyper reflector)
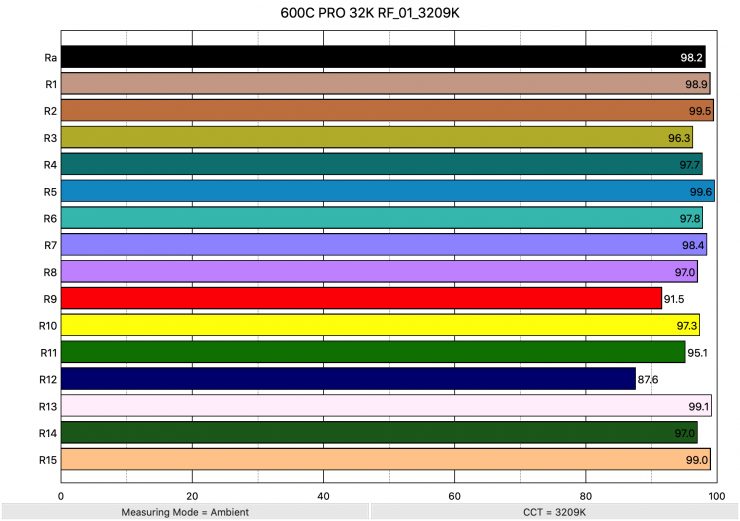
Above you can see the scores for when the light was used at 3200K. It recorded an average CRI (R1-R8) of 98.2 and an extended CRI (R1-R15) of 96.78. For replicating accurate skin tones it recorded 91.5 for R9 (red), 99.1 for R13 (closest to caucasian skin tones), and 99 for R15 (closest to Asian skin tones). These were outstanding results and some of the best I have seen from a LED light used at 3200K.
These results were slightly better than when the light is used at 5600K.
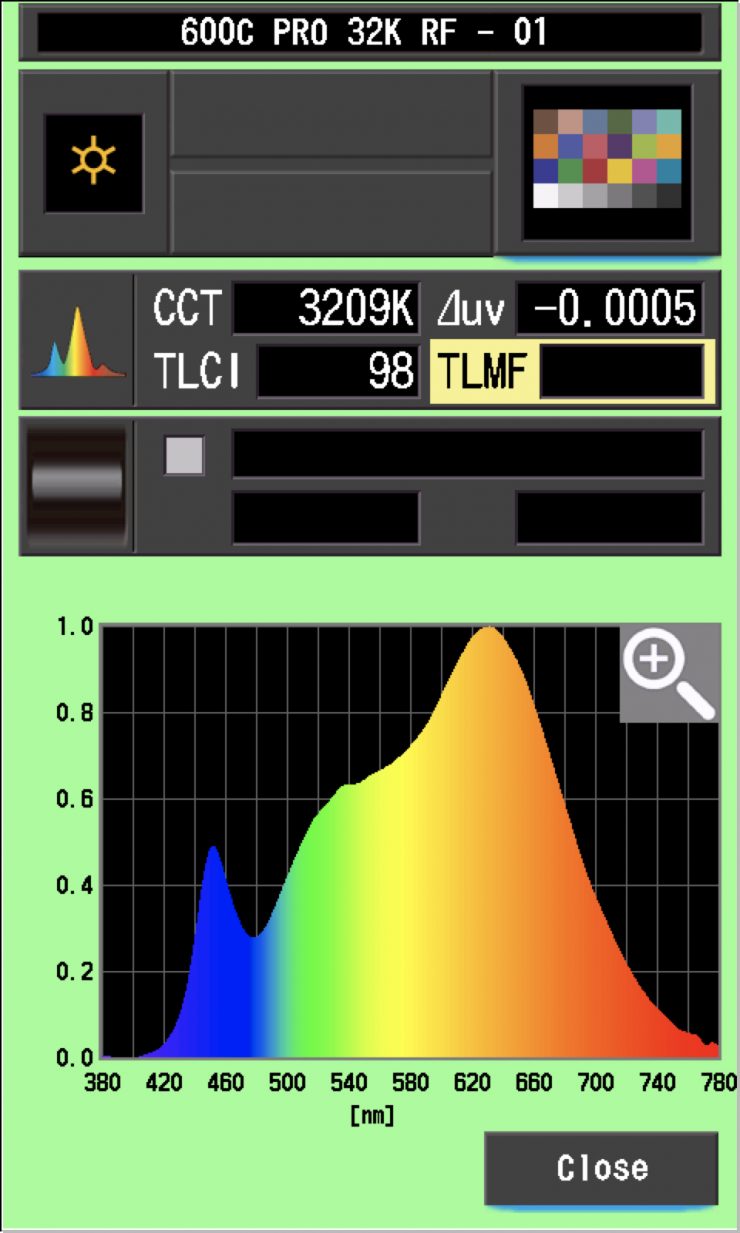
The light, when set at 3200K, recorded a TLCI score of 98.
CC Index & ⊿uv
The CC Index displays the CC correction value and whether any magenta or green need to be added or subtracted. 1 CC corresponds to 035 Kodak CC values or 1/8 Rosco filter values. Any reading less than +1.00 or -1.00 and you’re probably not going to need to make any kind of adjustment. The ⊿uv is the value to show how much this light is away from being an ideal light source (black body radiation = incandescent lamp). As with the CC Index you want this number to theoretically be zero. Kelvin is not a linear value, so we need to convert from Kelvin to MK-1 to compare the values of color temperature. To calculate from Kelvin to Mired is MK-1= 1*1000000/Kelvin. While this may sound confusing, it is the only way of measuring if the Kelvin shift is significant enough to warrant having to use a filter for correction. Below are the results for the LS 600c Pro:
Kelvin Vs MK-1
| Kelvin | Difference in K | MK-1 | Difference in MK-1 | |
| SET VALUE | 2500K | 0 | 400 | 0 |
| ACTUAL READING | 2533K | 33 | 394.78 | 5.22 MK-1 |
| SET VALUE | 3200K | 0 | 312.5 | 0 |
| ACTUAL READING | 3209K | 9 | 311.62 | 0.88 MK-1 |
| SET VALUE | 4500K | 0 | 222.22 | 0 |
| ACTUAL READING | 4542K | 58 | 220.16 | -2.06 MK-1 |
| SET VALUE | 5600K | 0 | 178.57 | 0 |
| ACTUAL READING | 5617K | 17 | 178.03 | 0.54 MK-1 |
| SET VALUE | 6500K | 0 | 153.84 | 0 |
| ACTUAL READING | 6626K | 46 | 150.92 | 2.92 MK-1 |
| SET VALUE | 8000K | 0 | 125 | 0 |
| ACTUAL READING | 8157K | 157 | 122.59 | 2.41 MK-1 |
| SET VALUE | 10000K | 0 | 100 | 0 |
| ACTUAL READING | 10289K | 289 | 97.19 | 2.81 MK-1 |
These figures might look confusing, but what it tells me is that the light is very Kelvin color accurate at all temperatures. Any MK-1 score that is under -9/9 means you wouldn’t have to use any color correction gels. The MK-1 scores for this light were extremely good, especially at 3200K and 5600K. Any MK-1 score that is under -6/6 is a very good result.
CC INDEX & ⊿uv
| CC INDEX | ⊿uv | |
| 2500K | 0.1G | 0.0000 |
| 3200K | 0 | -0.0005 |
| 4500K | 0 | -0.0008 |
| 5600K | 0 | 0.0019 |
| 6500K | 0.4G | -0.0007 |
| 8000K | 0.6G | -0.0001 |
| 10000K | 0.9G | 0.0002 |
Again, these were excellent results across the board., although the light does start to push a little green once you get above 5600K, however, that is nothing you couldn’t dial out using the +/- G/M.
The ⊿uv at 3200K was a perfect 0.0000. There have only been a handful of lights that I have ever reviewed that have had a perfect ⊿uv score at any Kelvin color temperature setting.
TM-30
TM-30 is a relatively new color rendering standard that was developed to deal with the limitations of CRI. TM-30 looks at 99 individual colors. These 99 colors are categorized into seven groups: nature, skin color, textiles, paints, plastics, printed material, and color systems.
TM-30 scores go from 0 – 100. The higher the score, the more accurate a light is at producing colors. Any TM-30 Rf score in the ’90s is considered to be good. What is interesting and something that you need to be very aware of is that two separate light sources with the exact same CRI scores can render colors very differently. A light with a high CRI rating could have a low TM-30 score. Conversely, a light with a good TM-30 score could have a bad CRI score.
Now, there are two measurements associated with TM-30, Rf and Rg.
Rf (Color Fidelity)
Rg (Color Gamut)
With Rf value, ideally, you want a score in the 90’s.
With Rg value, a score below 100 indicates that the light source renders colors with less saturation than the reference source. So ideally you want this score to be above 100.
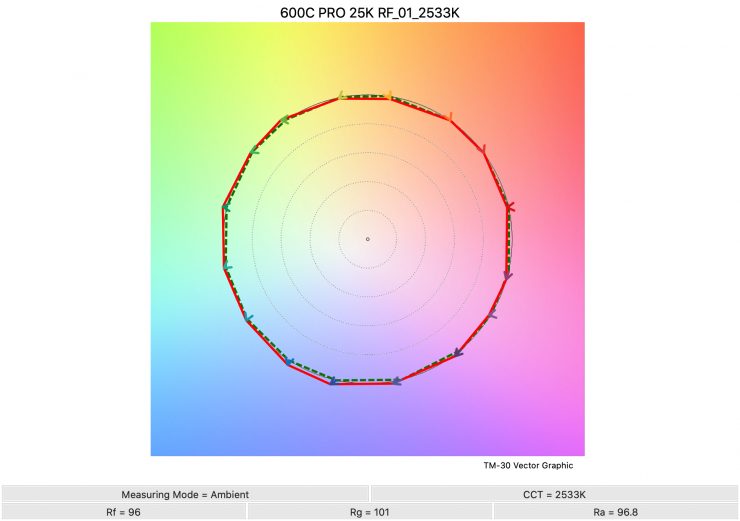

2500K 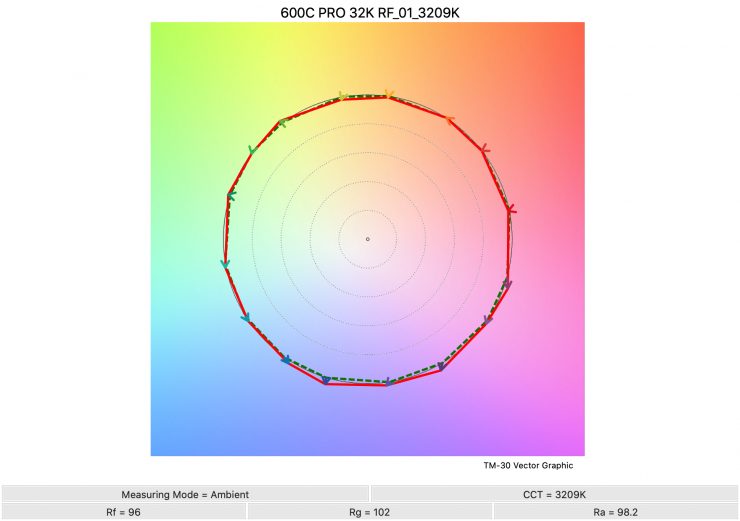
3200K 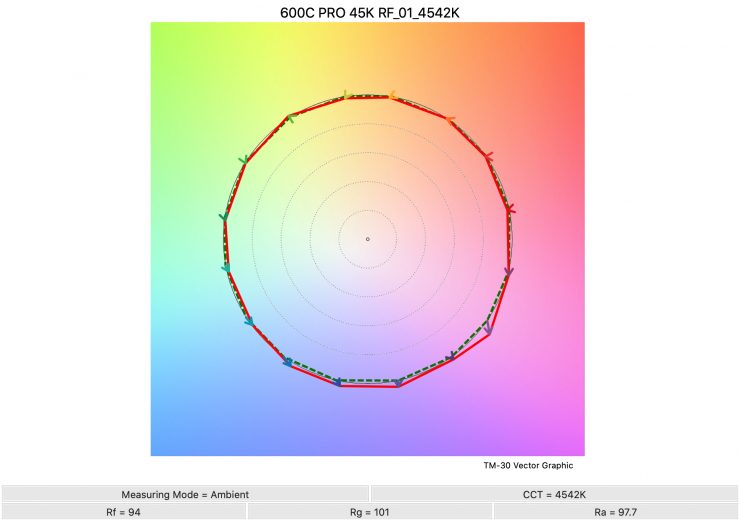
4500K 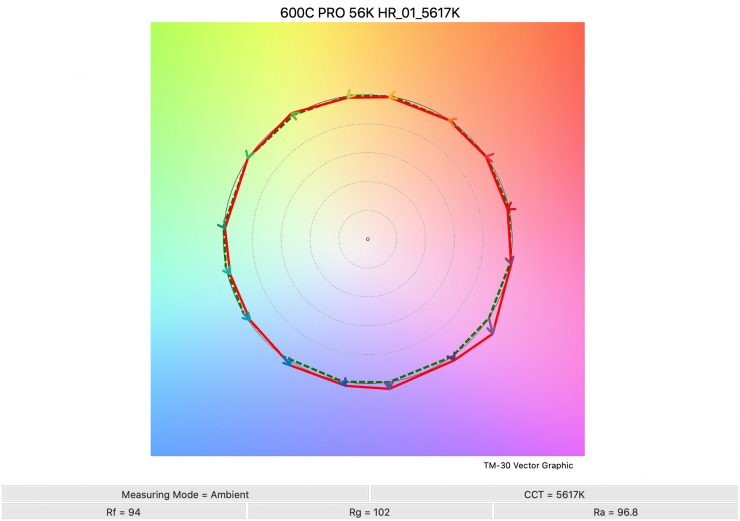
5600K 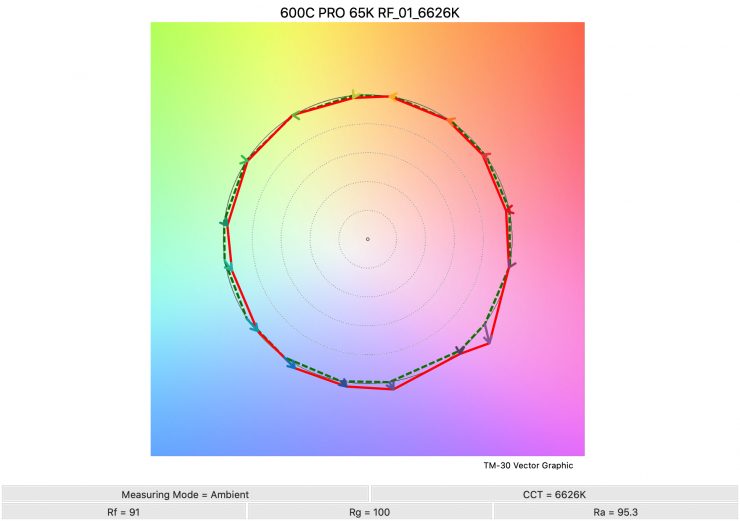
6500K 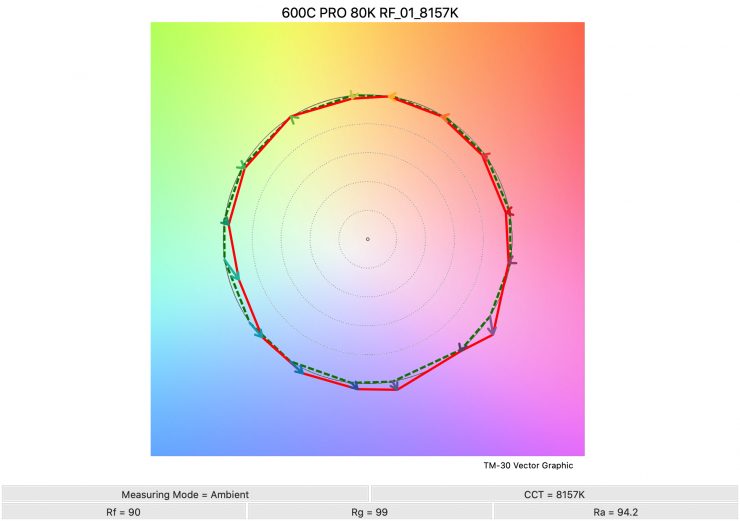
8000K 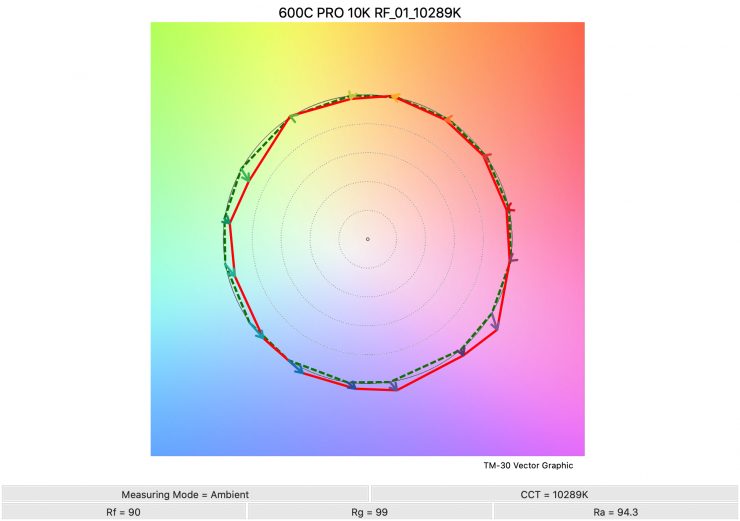
10,000K
Above you can see the scores for the LS 600c Pro at various Kelvin color temperatures. Below I have listed the figures as well.
Here are the results:
| Rf | Rg | |
| 2500K | 96 | 101 |
| 3200K | 96 | 102 |
| 4500K | 94 | 101 |
| 5600K | 94 | 102 |
| 6500K | 91 | 100 |
| 8000K | 90 | 99 |
| 10000K | 90 | 98 |
The TM-30 scores are all good and it shows me that the light is pretty consistent at replicating accurate colors with full saturation.
SSI
SSI (Spectral Similarity Index) was developed by the Sci-Tech Council of the Academy. SSI gives me the ability to set any light as a standard, or use predefined standards (such as CIE D55), and then give other lights an SSI score based upon how well they will match standards such as CIE D55. This way I can measure spectral response and compare it directly against an ideal light source. This is actually a much better test than recording CRI scores.
3200K
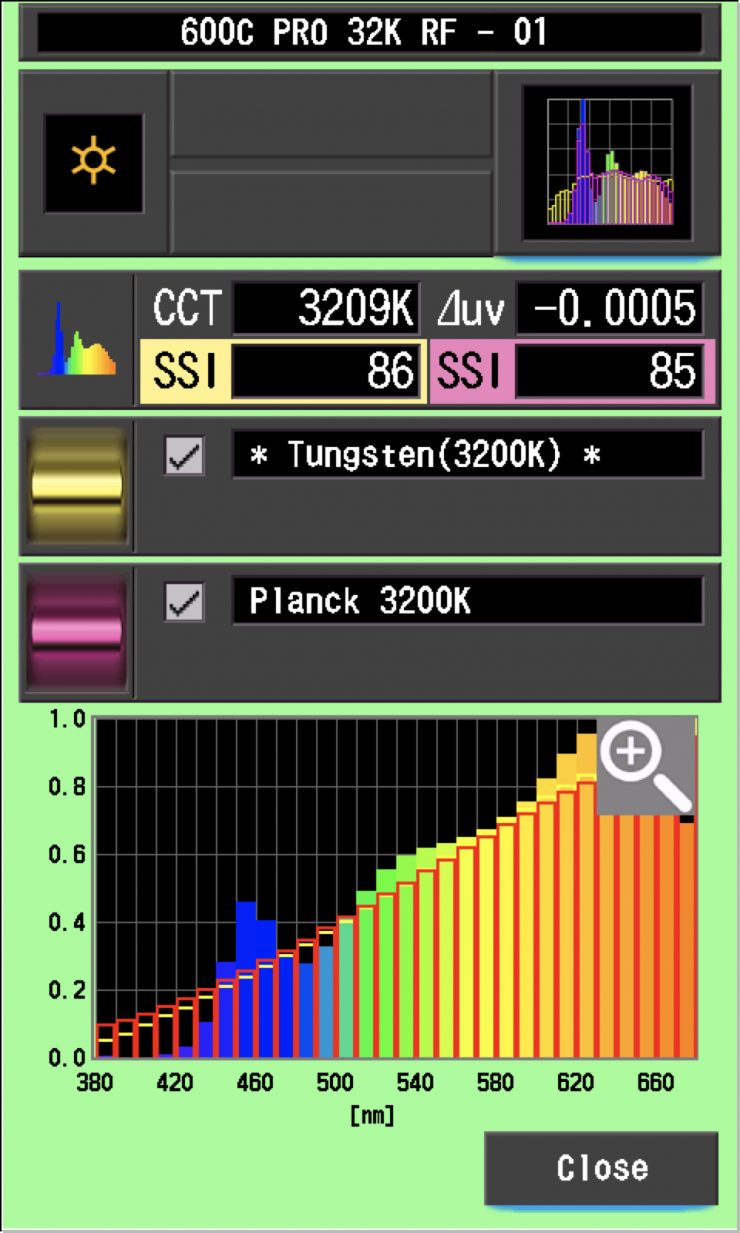
In this graph, the red bars indicate a perfect Planck 3200K source. The gold bars indicate a perfect 3200K Tungsten source. This lets us compare how close to a perfect 3200K lighting source the LS 600c Pro is. Any SSI score in the high 70’s, low ’80s is very good for a 3200K LED light. The results for the 600c Pro were excellent when used at 3200K. As you can see, LED lights have a hard time replicating colors below about 450nm.
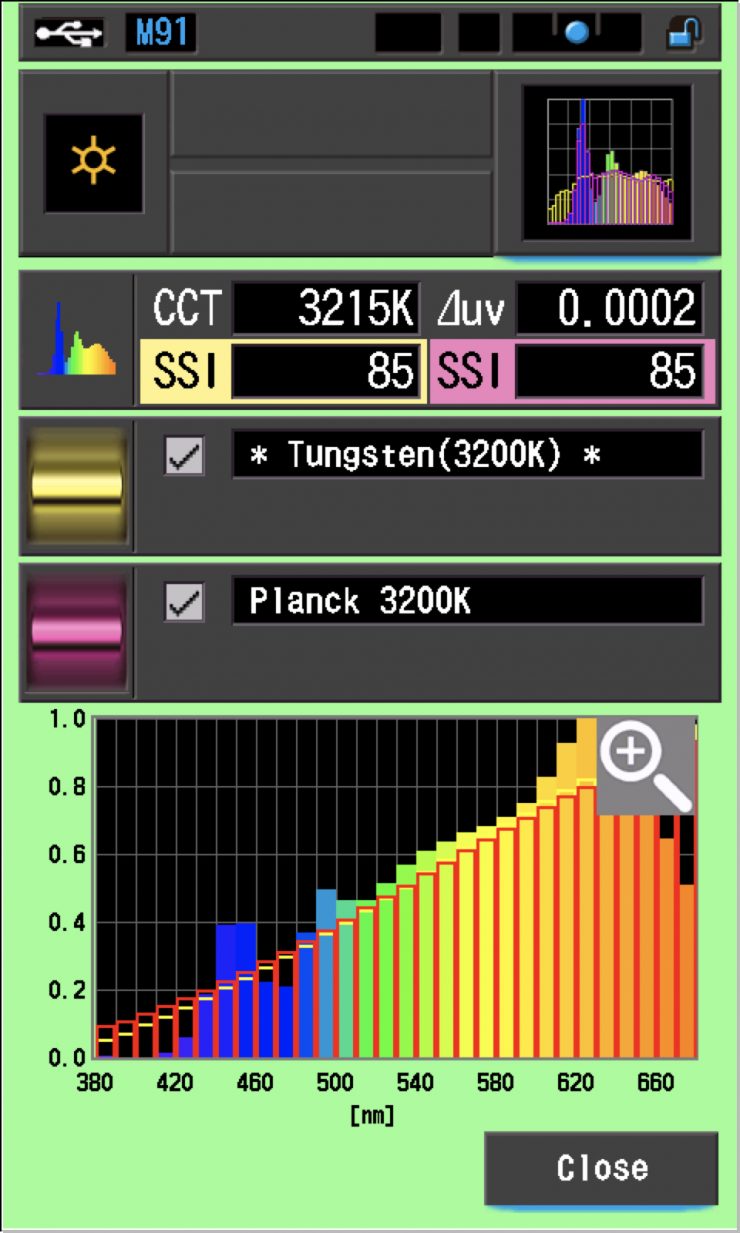
As a comparison, above is the results for the ARRI Orbiter.
5600K
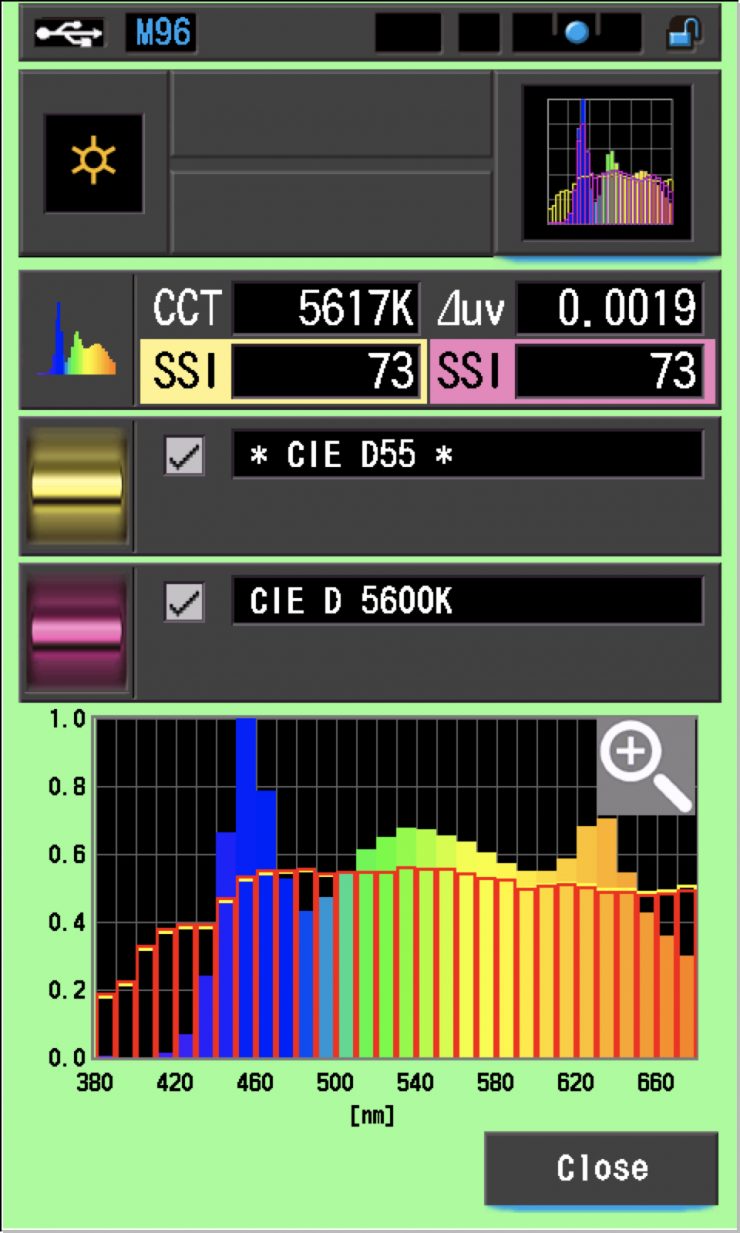
In the graph above the gold bars indicate a perfect CIE D55 source. The red bars indicate a perfect CIE D 5600K source. This lets us compare how close to a perfect 5600K lighting source the LS 600c Pro is. A score in the low 70’s is typical for a 5600K LED source.
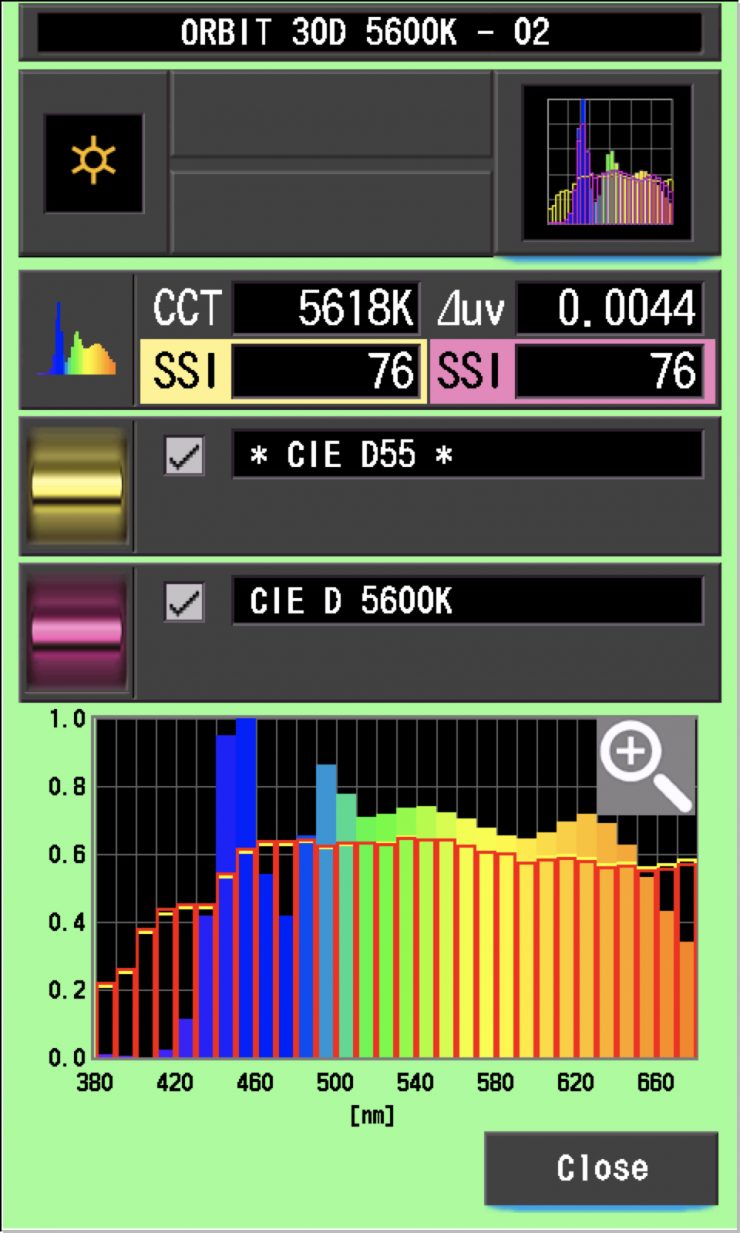
As a comparison, above is the results for the ARRI Orbiter.
The main reason we want to record SSI scores is so we can see how well they match with other lights. As an example, I wanted to see how well the Aputure LS 600c Pro matched the ARRI Orbiter and Luxli Timpani 2. Below you can see the results.
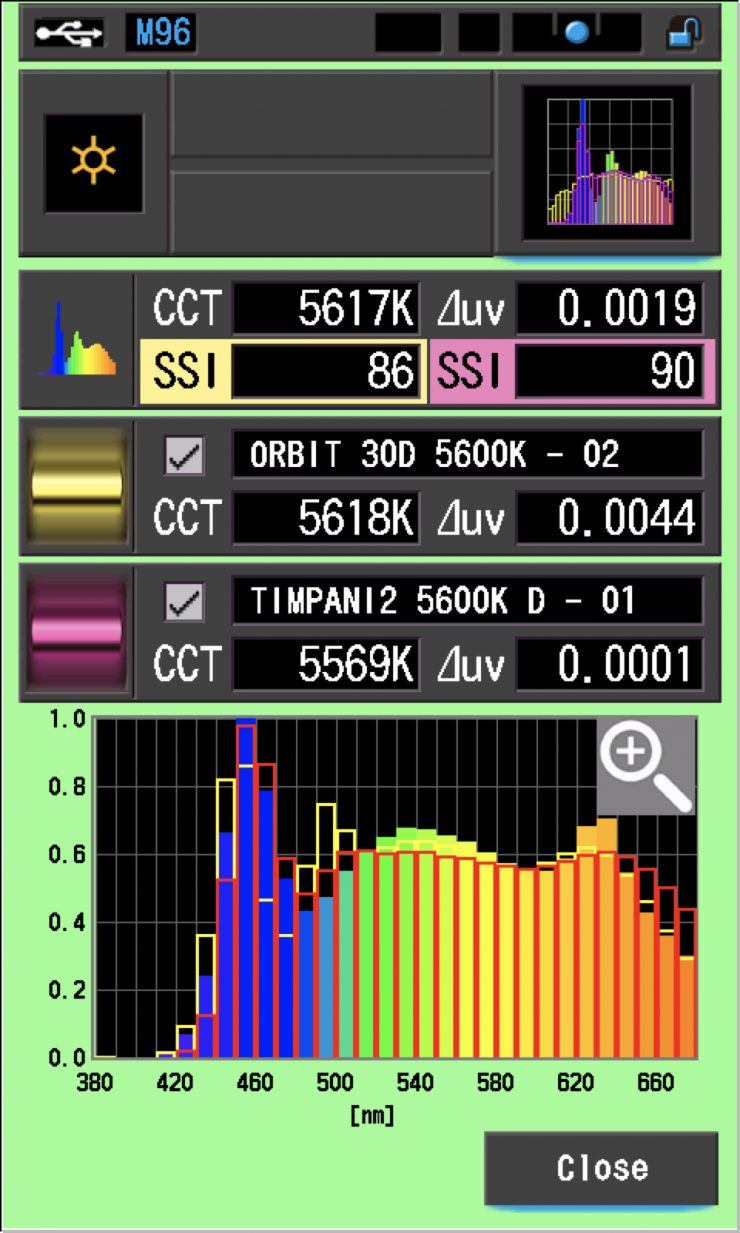
As you can see neither lights are a perfect match to the Aputure LS 600c Pro, but you could potentially fine-tune the lights to try and get them to match more closely. In saying that, a score in the high ’80s and low 90s is still reasonably good and the Aputure would work well with both of these lights.
As another test, I thought I would compare those same lights against the Aputure LS 600c Pro at 3200K. Below you can see the results.
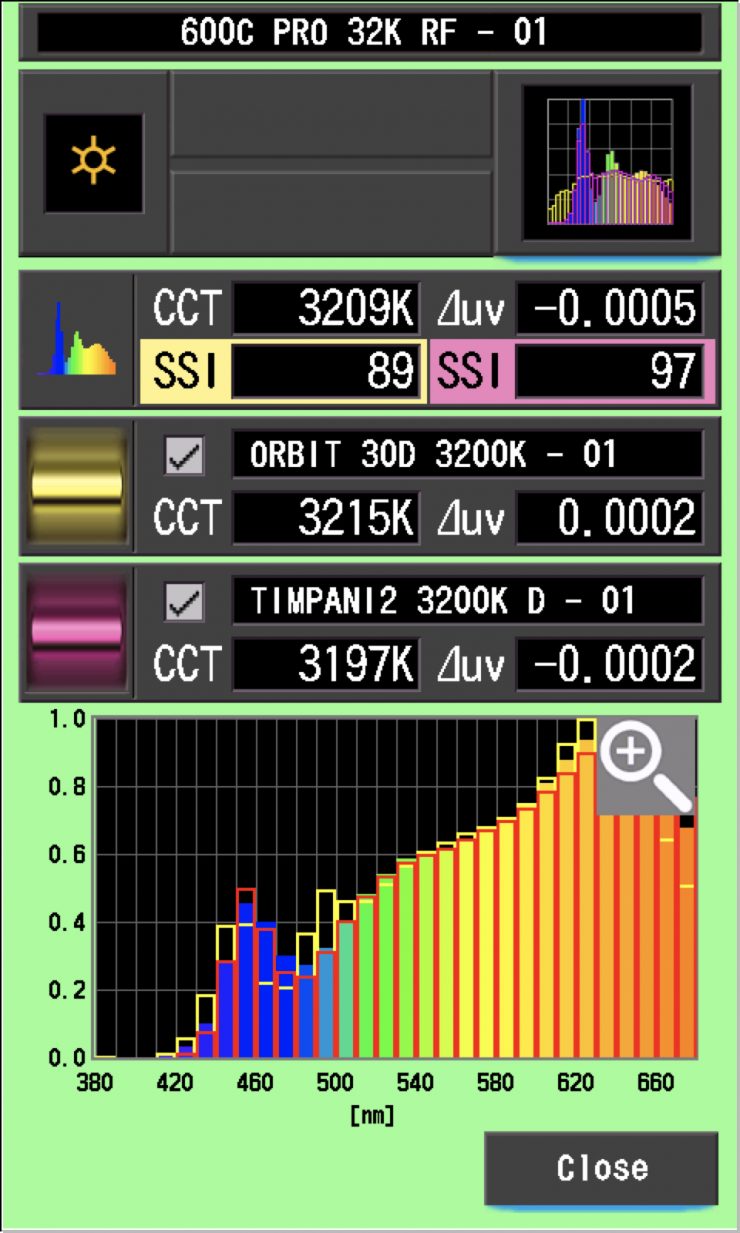
As you can see, the 600c Pro was still a reasonably close match to the Orbiter and almost a perfect match with the Luxli Timpani. Very few lights from different manufacturers are ever going to be an exact match.
SSI tests are a great way of telling you what lights you own or use will work well together.
Spectral Distribution
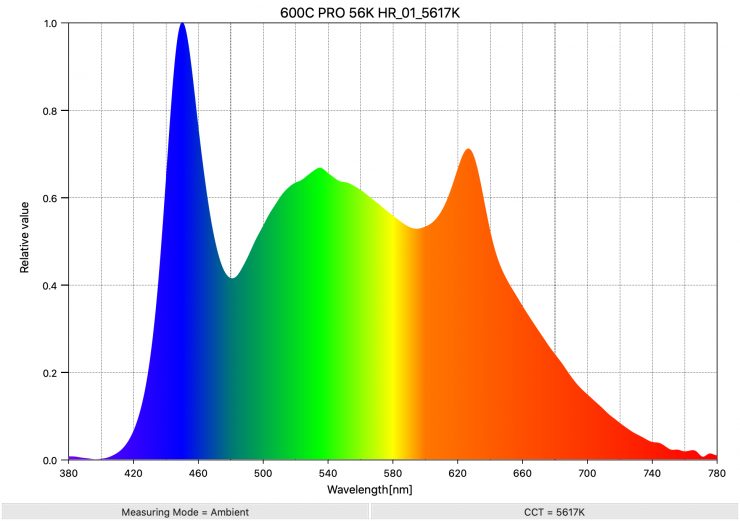
Above you can see the spectral distribution of the 600c Pro when it is set at 5600K. The spectral distribution is reasonably full, but you can see quite a large orange spike.
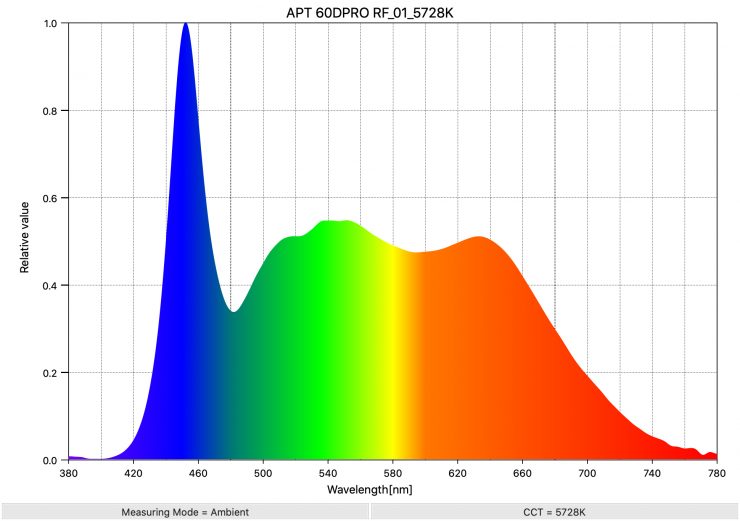
As a comparison, above you can see the spectral distribution of the Aputure 600d Pro.
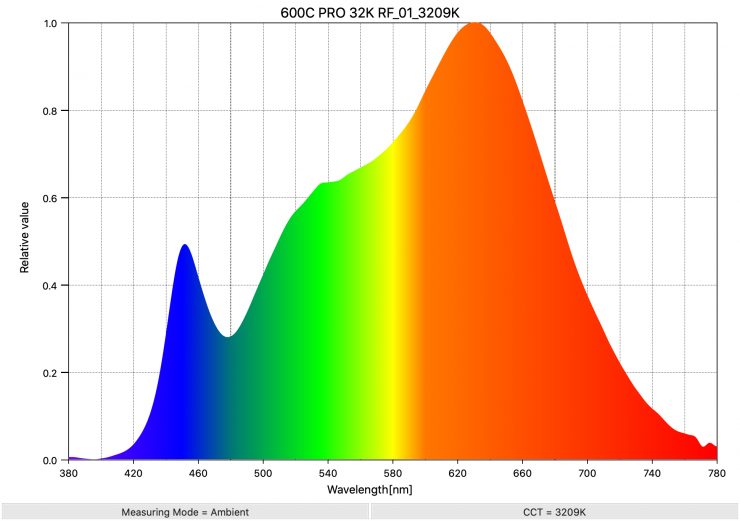
Above you can see the spectral distribution of the 600c Pro when it is set at 3200K. The spectral distribution only has a very marginal push towards green, but overall it is very good.
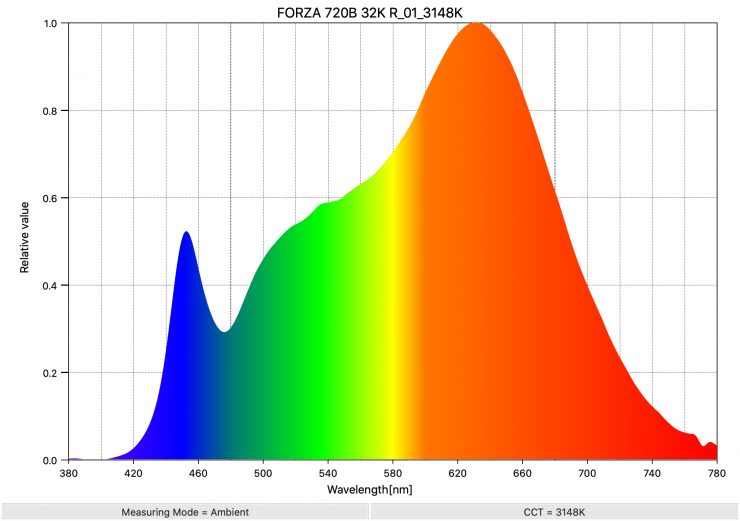
As a comparison, above you can see the spectral distribution of the Nanlite Forza 720B.
Real-World Performance & Quality of Light
As I always say, photometric scores only tell you part of the story. So let’s find out if the scores from the Aputure LS 600c Pro translate into good real-world performance.
The photometric results can only give me scientific data and it is much more important for me to see how the light looks and performs.
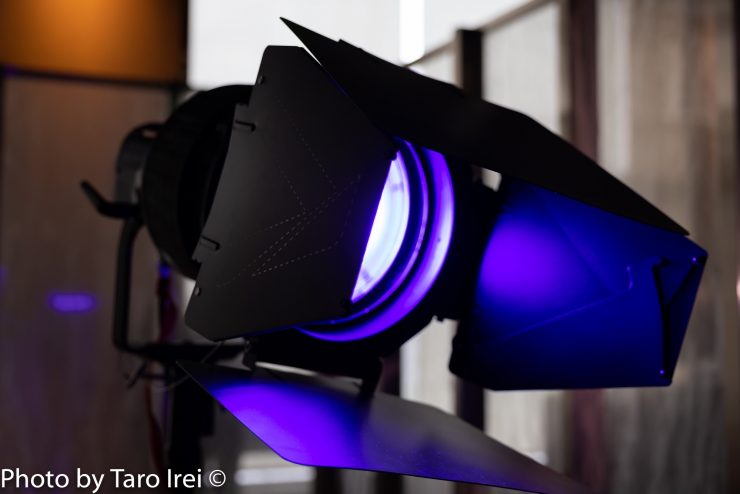
I used the light on a recent project although I can’t show any of that material because it is yet to go to air.
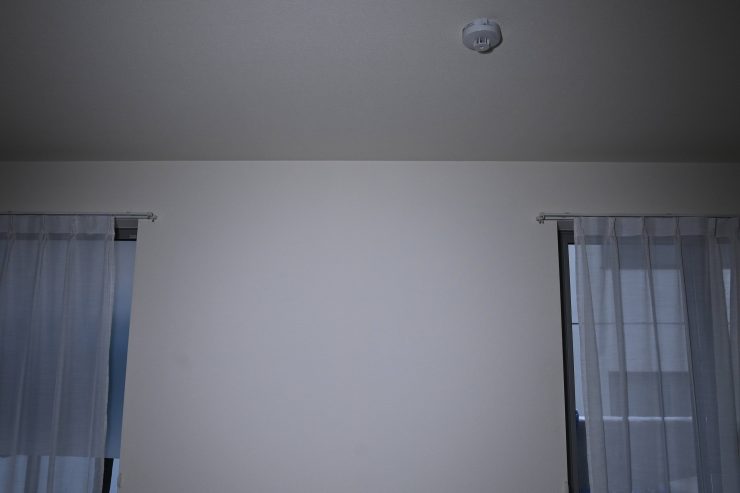

600c Pro 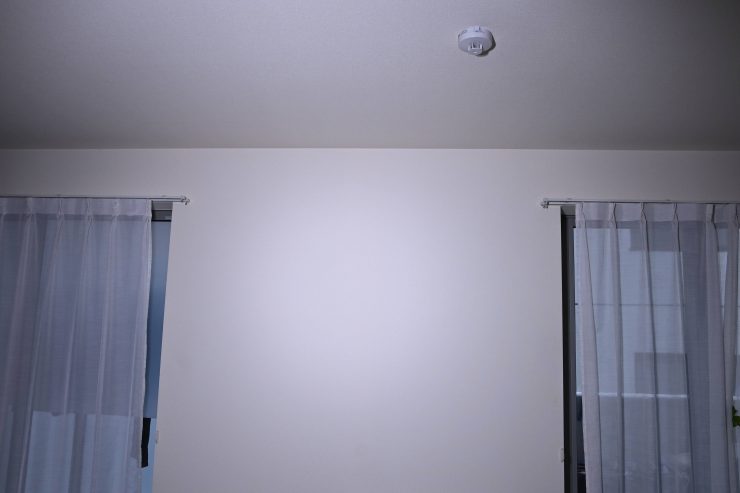
600d Pro
Above you can see a comparison of the output difference between the 600c Pro and the 600d Pro. Both lights were set at 100% and used at 5600K with their Hyper reflectors. The same exposure was used for both shots.
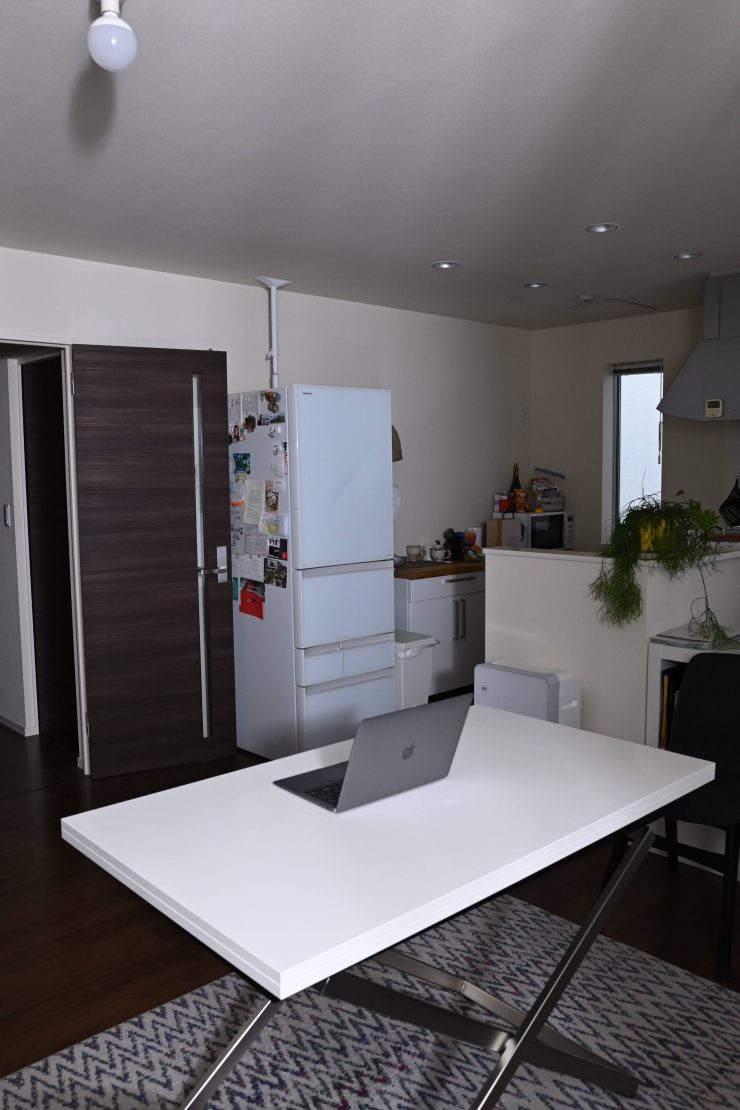

with Hyper reflector 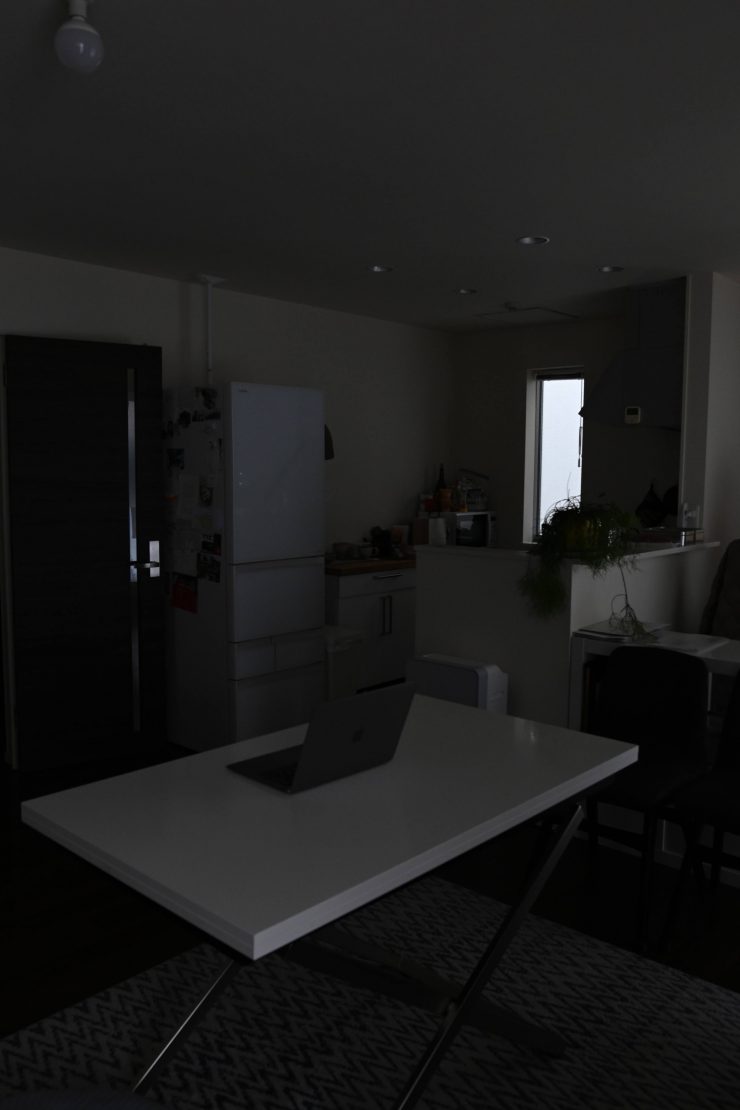
light off 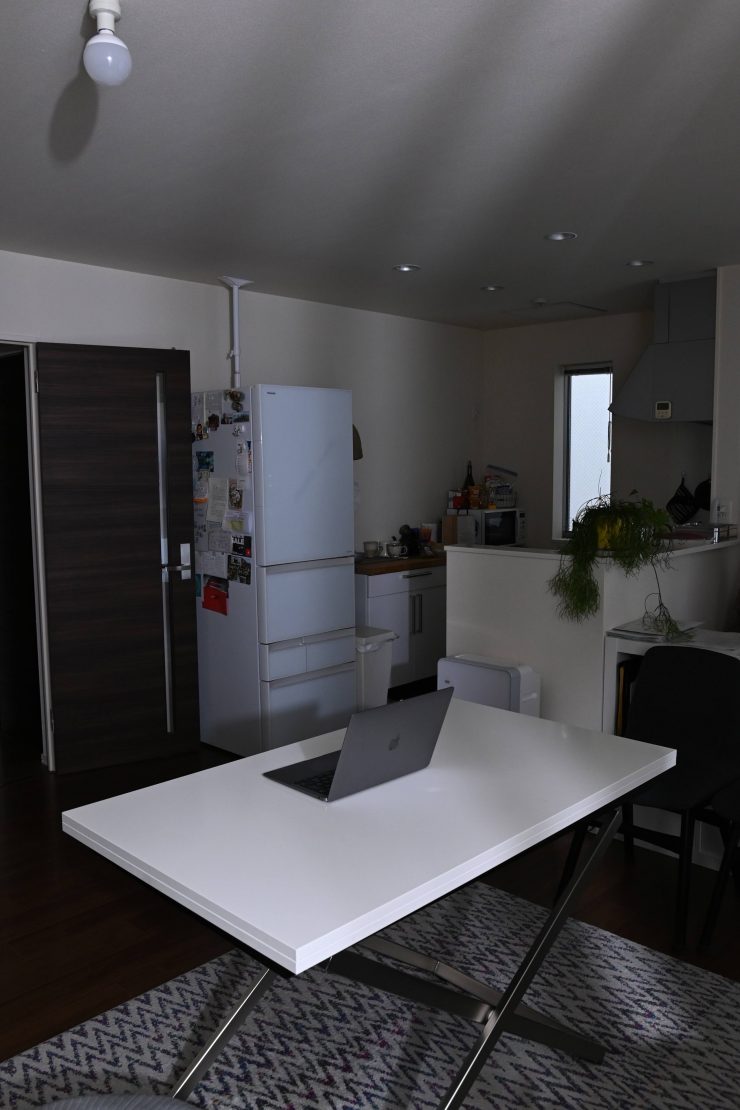
open face 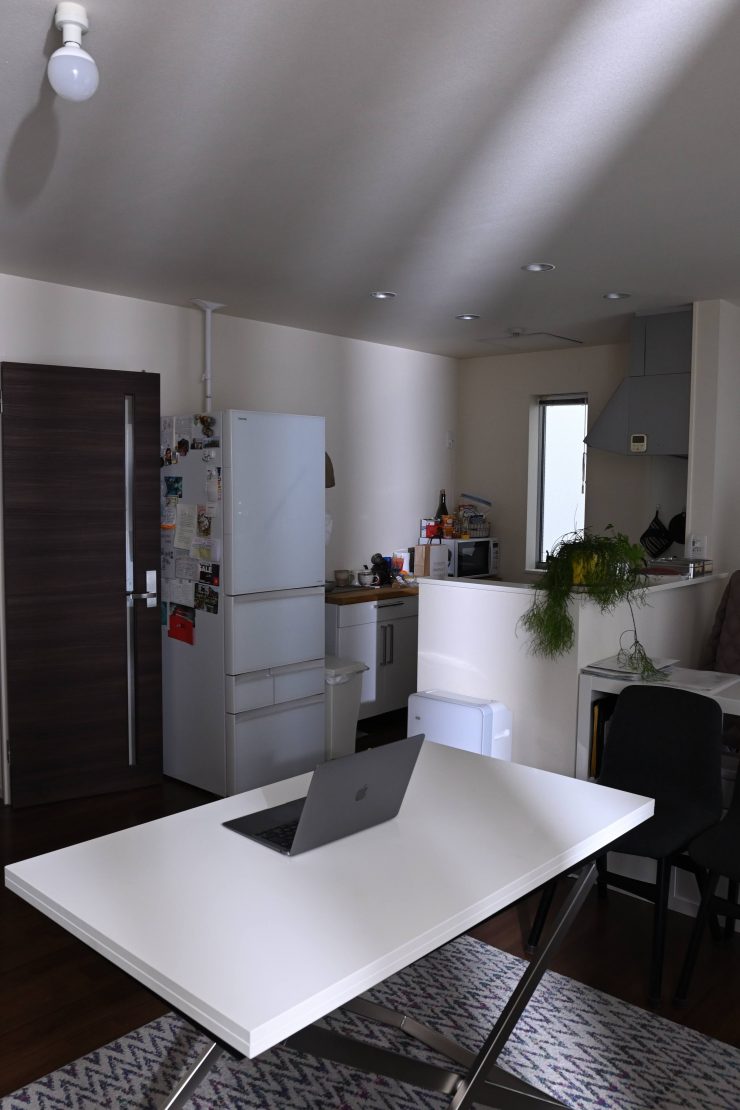
open face 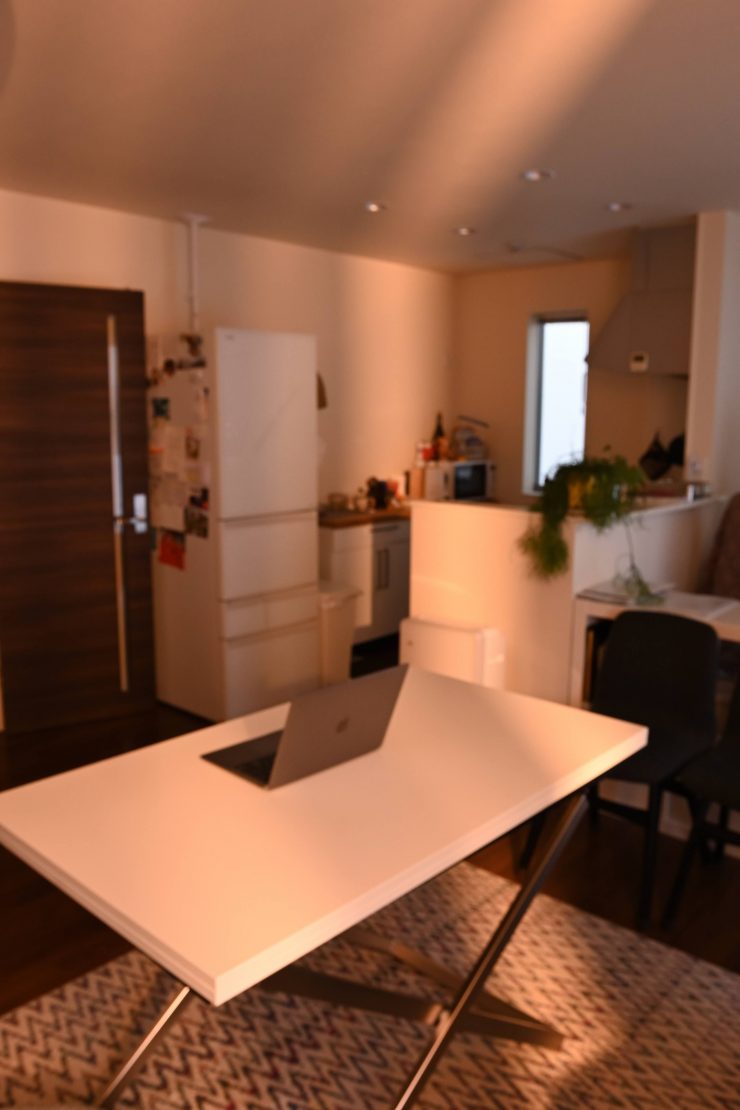
open face 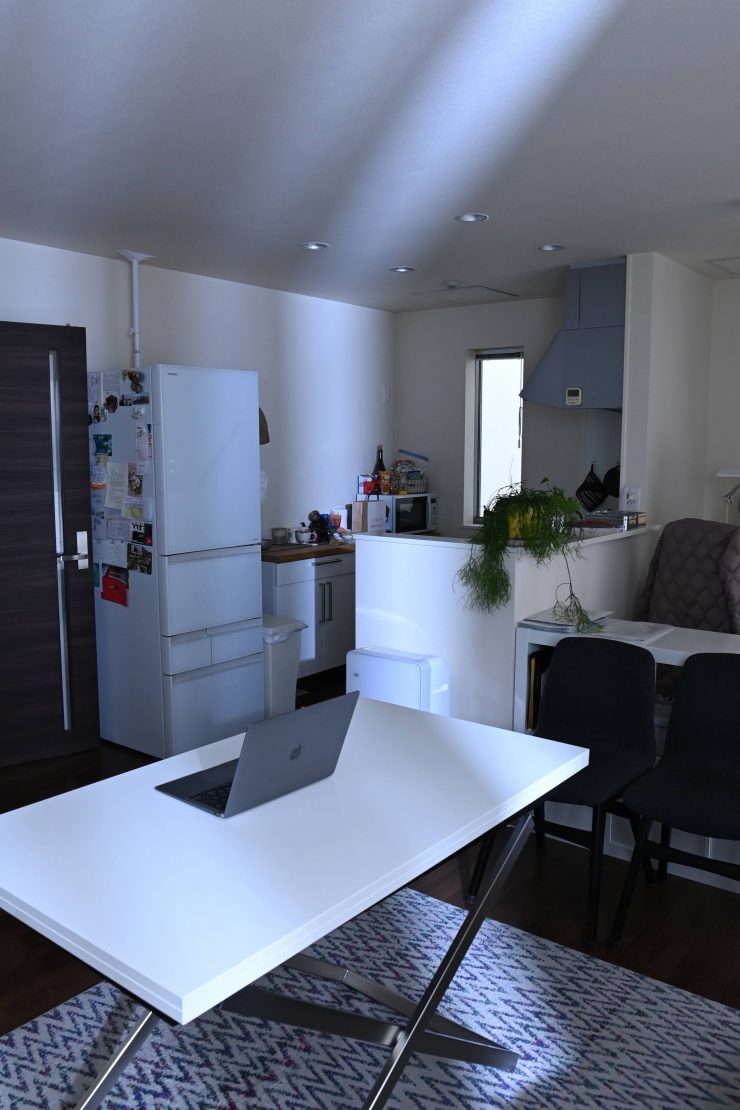
open face 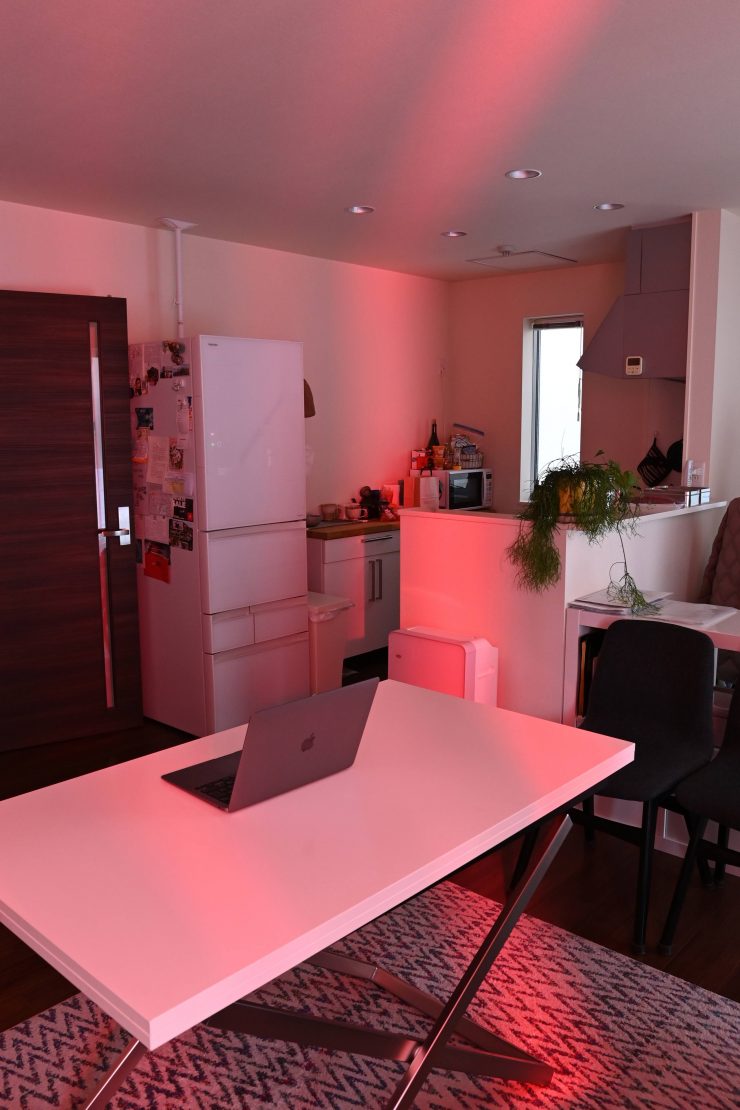
open face 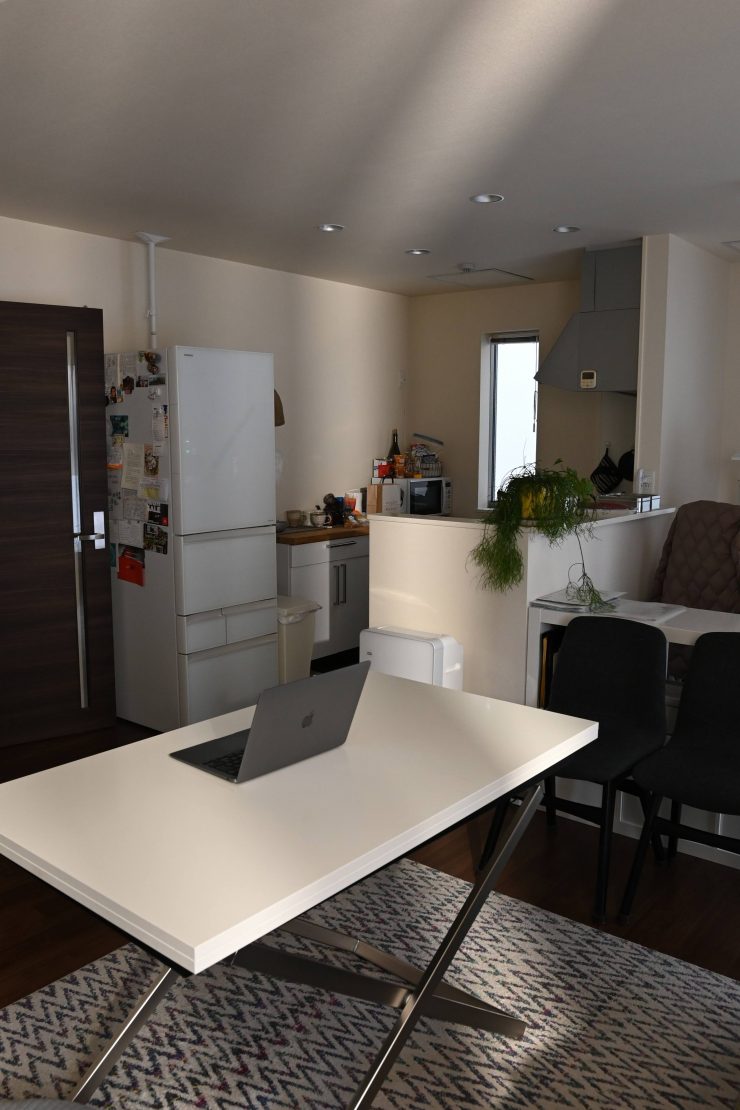
open face 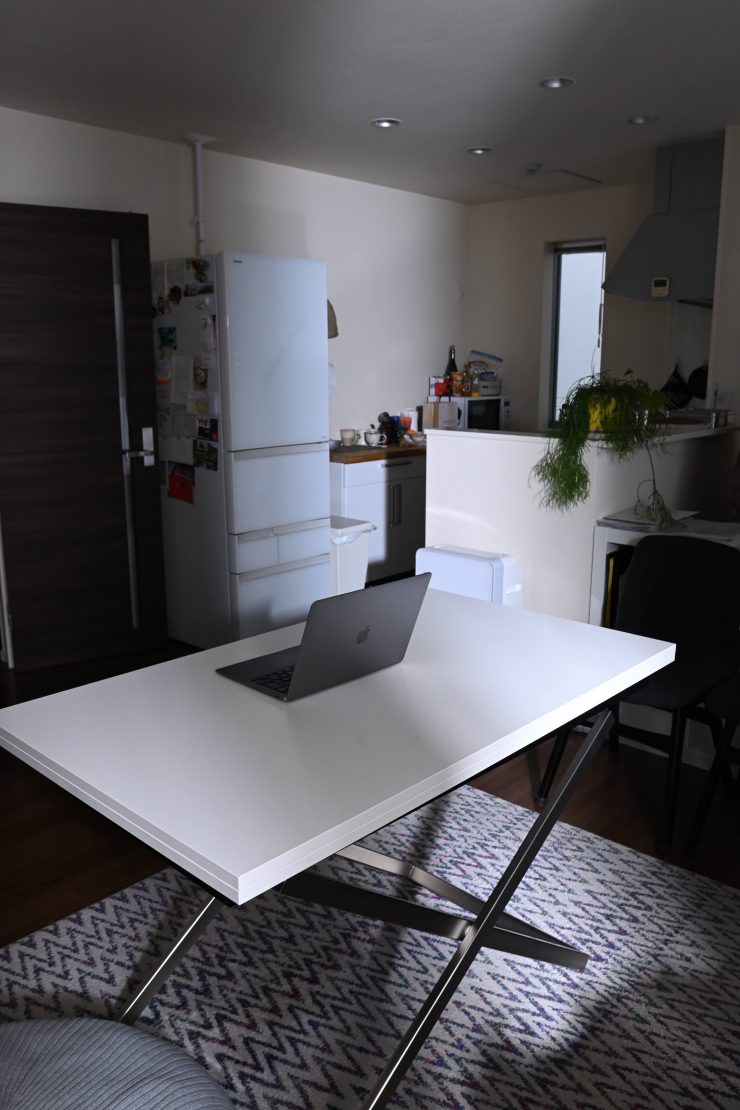
with Hyper reflector 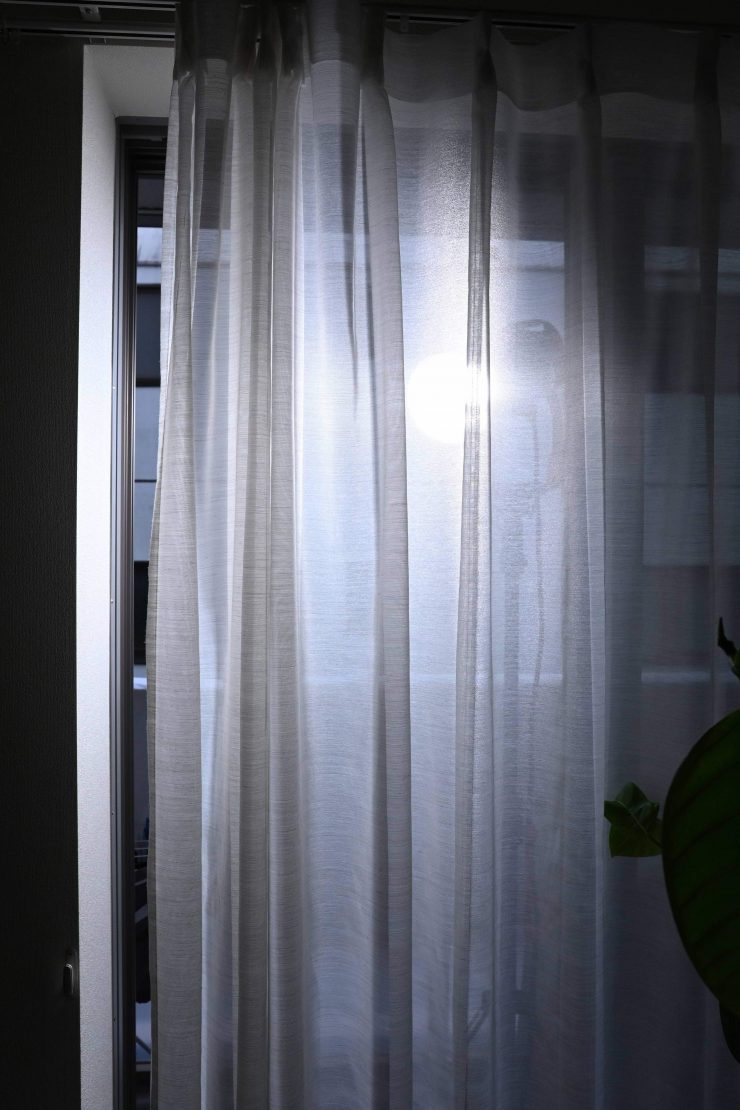
position of the light
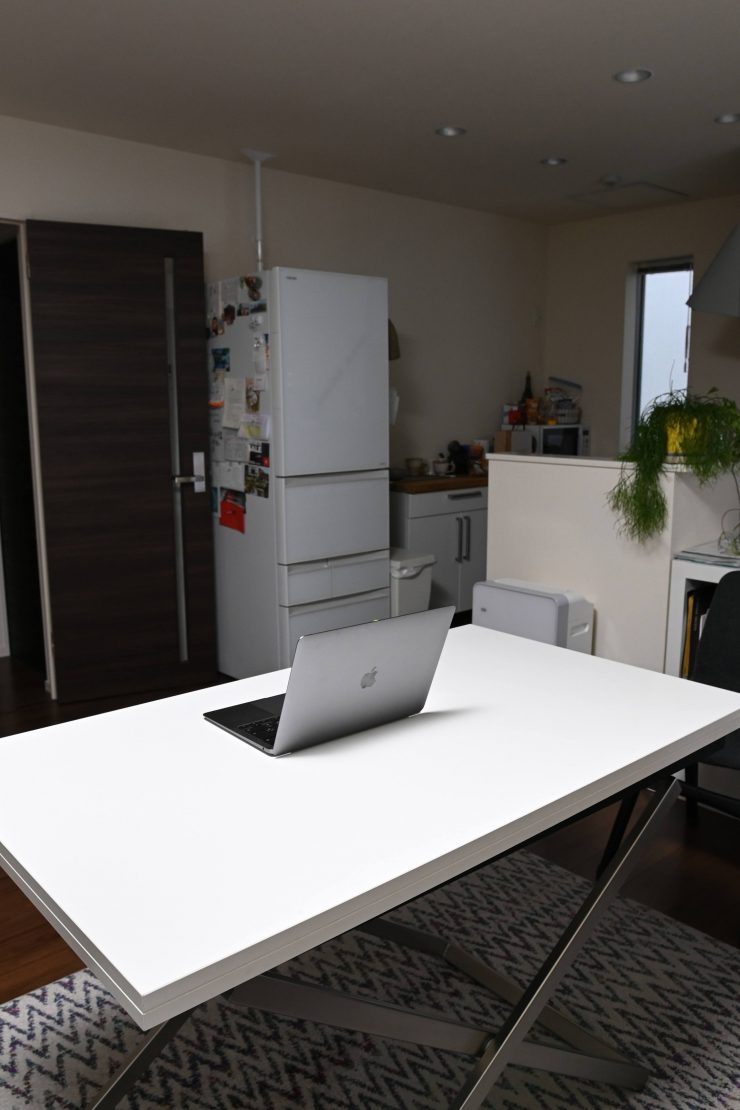
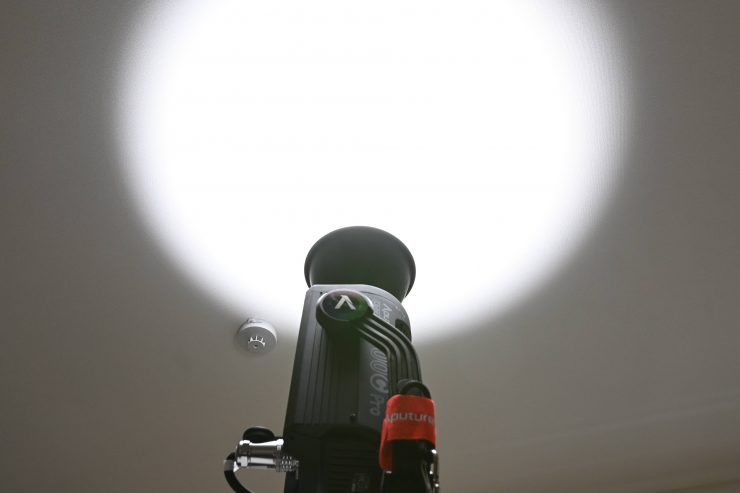
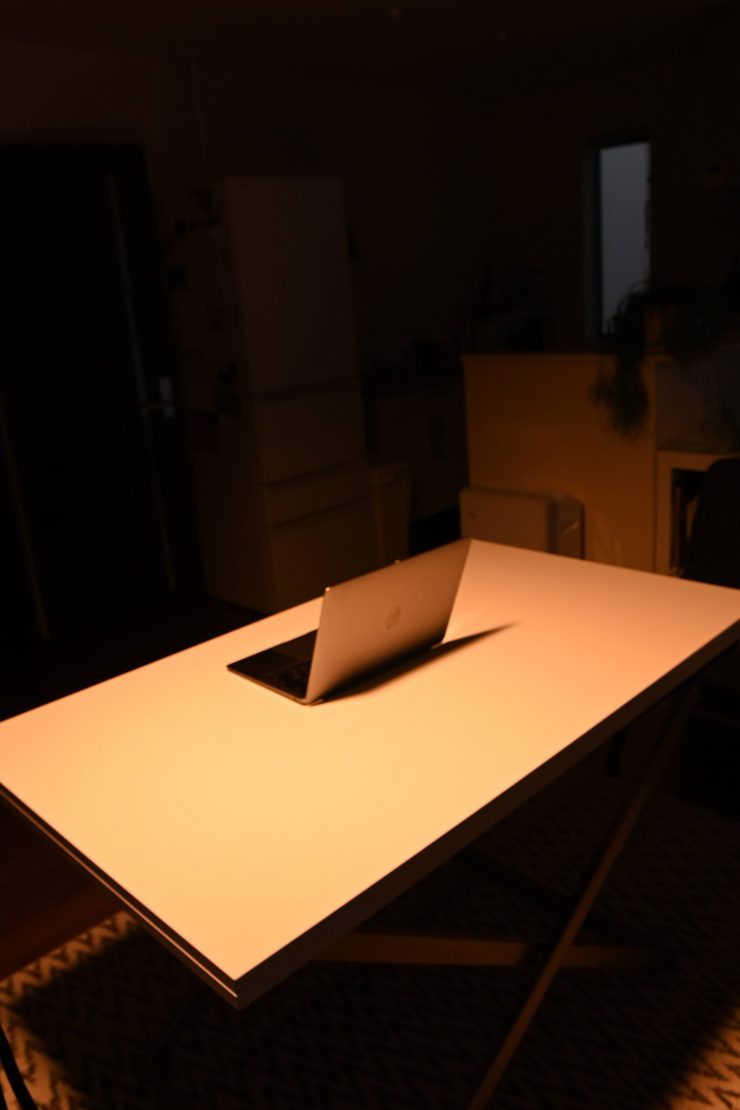
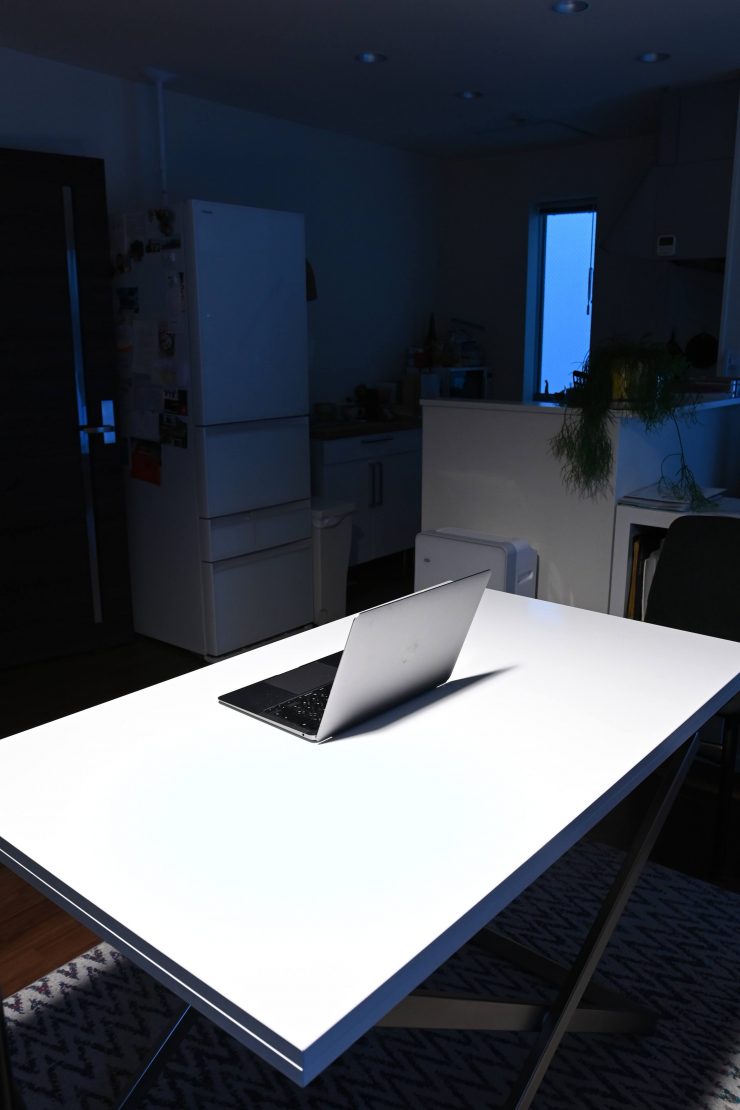
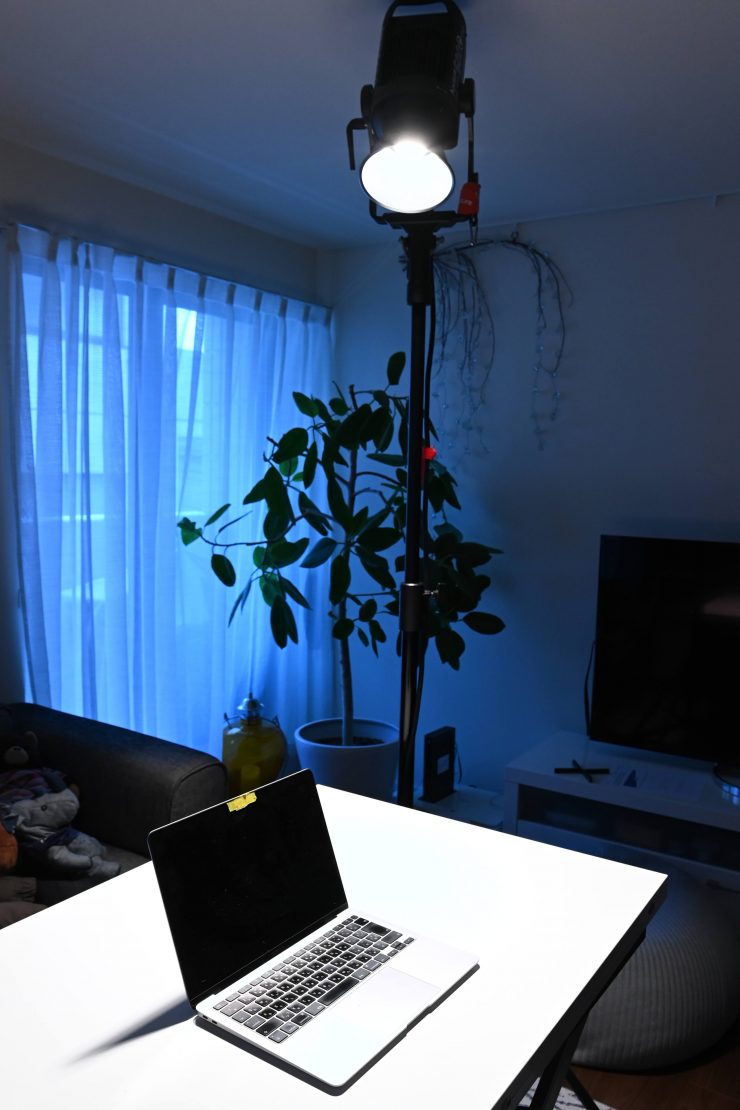
Above you can see some photos I took when placing the light outside and punching it through a sheer curtain into a room. As the light is RGBWW you can create numerous different lighting looks.
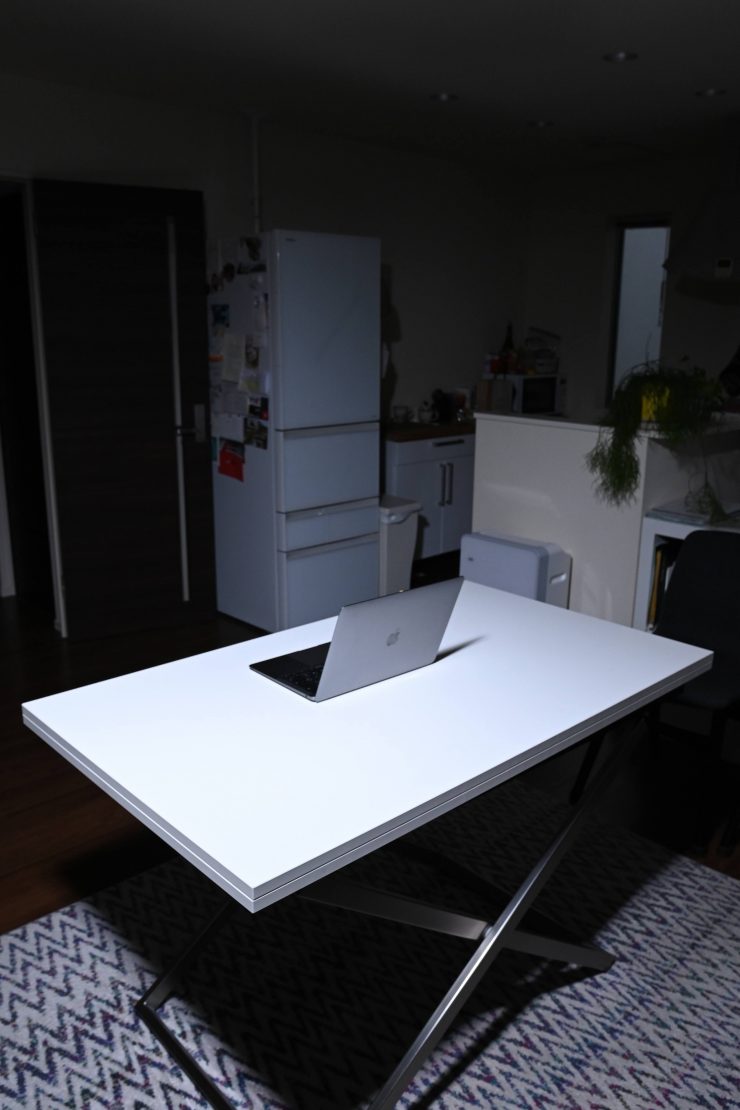
Above you can see some more example shots of the light being used.
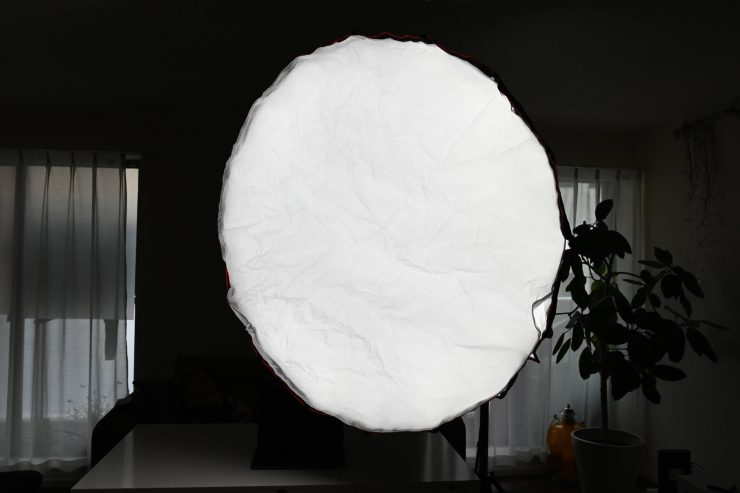
Like most modern-day, high-output spot lights, it is very easy to create a very soft, flattering light source using a softbox or other lighting modifier. I found that by using a softbox you could create a very soft lighting source without needing to punch it through a diffusion screen. This makes it a very quick and easy light to use for interview situations or for any scenario where you need soft light. You very rarely need to run these lights at 100% in interview situations in controlled environments, but it is nice to have that extra punch when required. While an Aputure 300d/300x Pro will certainly get the job done, I would personally rather have a higher output light that I can dial down.
What you clearly need to remember with point source lights such as this one is that they can generate a lot of output when not used with diffusion, but once you add diffusion they lose a ton of output because that output is coming from a very small source.
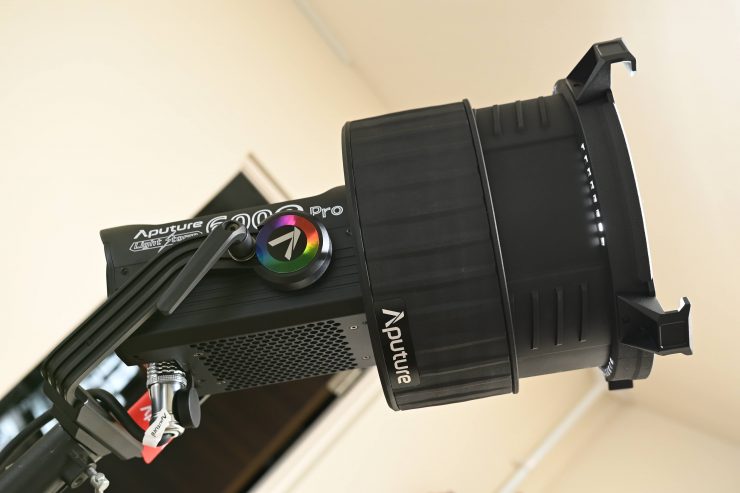
The light also works well when used with bounce boards or the CRLS reflector system when you combine it with the F10 Fresnel.
The light is very easy to use and although it isn’t as bright as the 600d or 600x, there is still enough output to use it for most lighting applications. What you lose in output you gain in versatility.
Who is the Aputure 600c Pro aimed at?
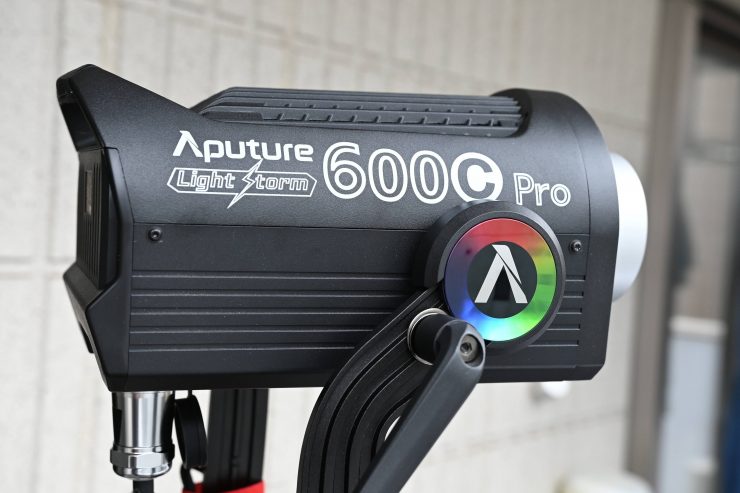
I don’t think that this light is being pigeonholed into being targeted at any specific audience because it could be used for lots of different applications, by lots of different people. However, as it is part of Aputure’s Pro line-up, it is a fixture that will get a lot of attention from professionals in the TV and film industry. Aputure has come a long way and their new Pro fixtures continue to improve there is no reason why this light couldn’t be used on the highest level of production.
It is still priced to appeal to owner-operators who are looking for a jack-of-all-trades lighting solution. The versatility of the 600c Pro allows it to be used as a hard light source, a soft source, a fresnel, a gobo, a Source 4, or just about anything else you want it to be with the correct modifier.
The 600c Pro is also likely to appeal to anyone looking for a similar light to an Aputure 300x/300d, but who wants more output and RGBWW capabilities.
I personally think this is certainly one of the most versatile lighting fixtures that are currently on the market, especially when you consider the large range of accessories that you can use with it.
Price & Availability
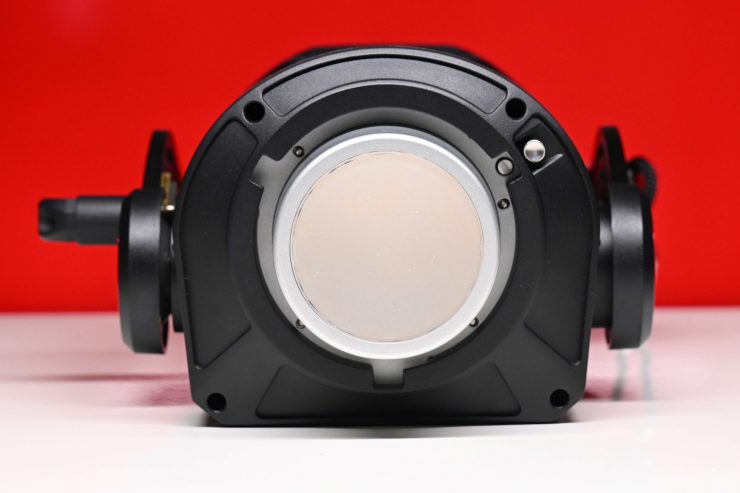
The Aputure LS 600c Pro retails for $2,490 USD and it is available to pre-order. This makes it a very appealing prospect for those shooters who are looking for a light that offers features and functionality that are usually only found in much more expensive fixtures.
I don’t currently know when the 600c will actually start shipping. Aputure does have a history of releasing some lights that take an awfully long time to actually ship or once they become available are not in stock.
Below you can see how the price compares to some of the competition:
| Price | |
| Aputure LS 600c Pro Light Storm | $2,490 USD |
| Prolycht Orion 675 FS | $3,495 USD |
| Nanlite Forza 720 | $1,649 USD |
| Aputure LS 600d Pro Light Storm | $1,890 USD |
| Aputure LS 600d | $1,390 USD |
| Nanlite Forza 720B | $1,849 USD |
| Aputure LS 600x Pro Light Storm | $1,990 USD |
The only real competition comes from the Prolycht Orion 675 FS which costs just over $1,000 USD more.
What do you get?
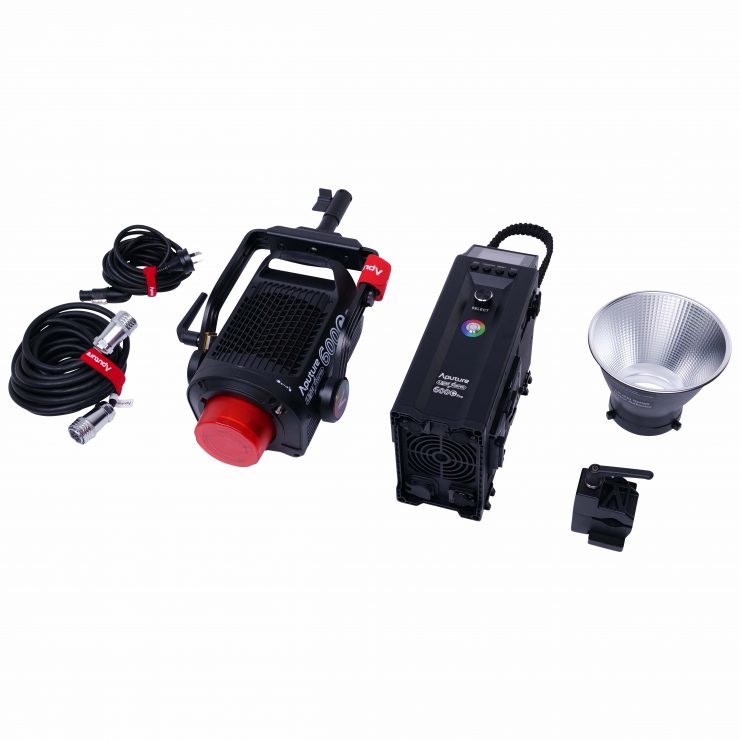
- LS 600c Pro Lamp Head
- LS 600c Pro Control Box
- LS 600 Series Hyper Reflector
- LS Series 7-Pin Weatherproof Head Cable (7.5m)
- NeutrikpowerCONTRUE1 TOP AC Power Cable (6m)
- Lightning Clamp
- LS 600c Pro Rolling Case
Please note that none of the BM Hyper reflectors are included. These are all optional extras.
Optional Extras
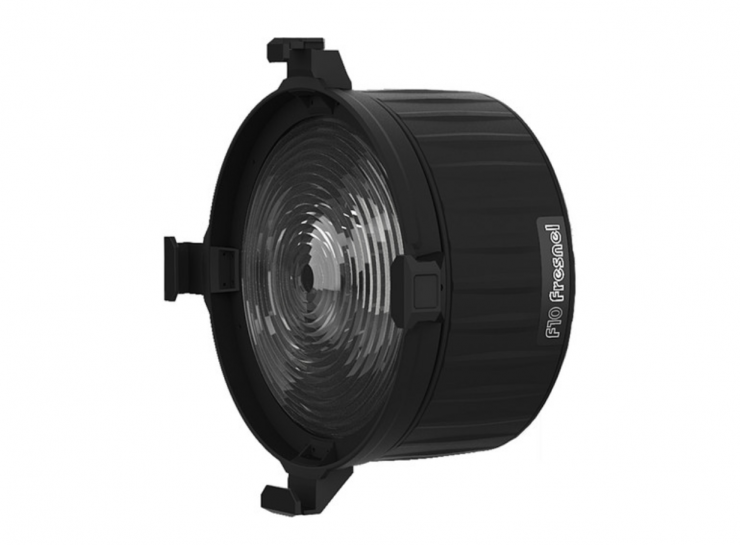
The Aputure LS 600c Pro can be used with a ton of affordable accessories due to having a Bowens-S mount. However, Aputure also makes its own accessories. Below you can see how much they cost:
- Aputure F10 Fresnel Attachment for LS 600d LED Light $219 USD
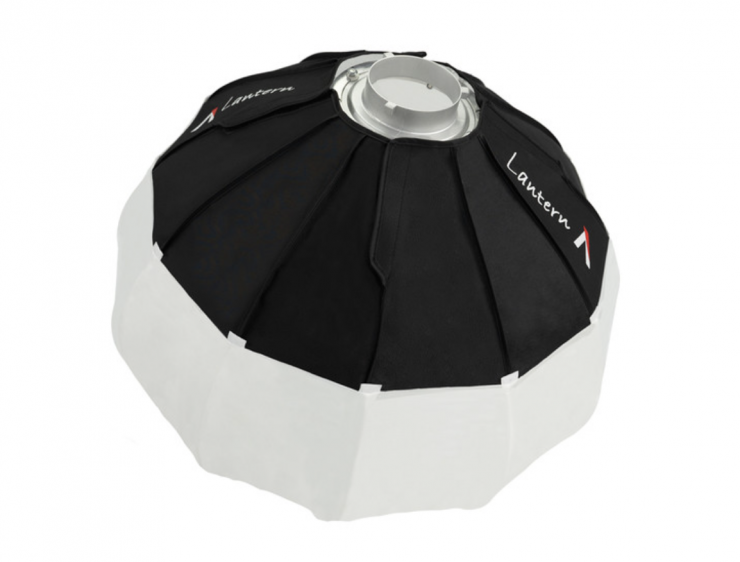
- Aputure Lantern Softbox (2.2′) $89 USD
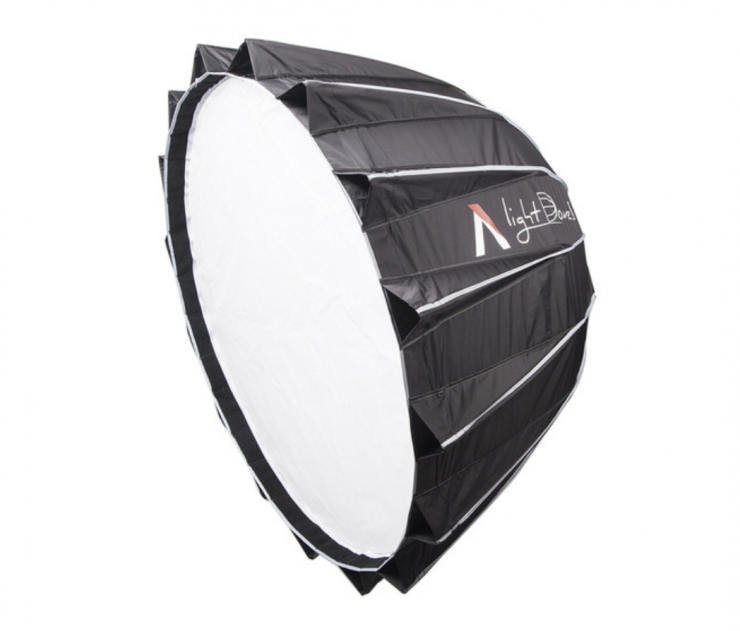
- Aputure Light Dome II (34.8″) $219 USD
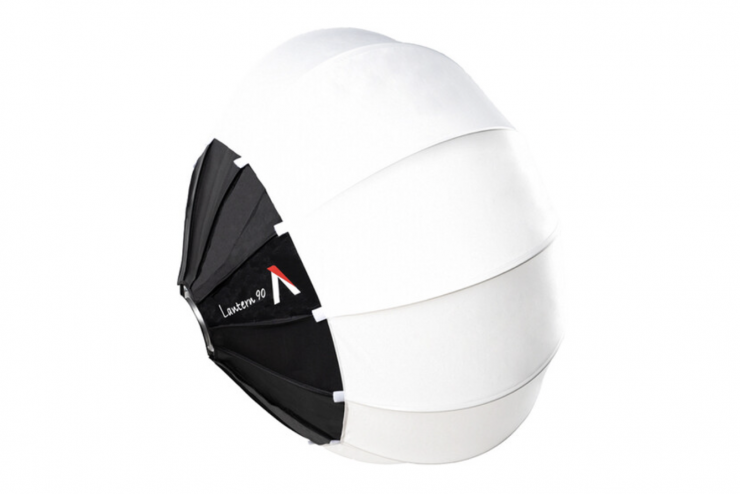
- Aputure Lantern 90 (3′) $139 USD
Conclusion
It took a long time for Aputure to announce an RGBWW spot light, but it has been worth the wait. The 600c Pro is well made, fully featured, color-accurate, and easy to use. Its versatility makes it a fixture you can use for so many different applications.
The output isn’t as bright as some people may have expected, and if you still want brute force then the 600d Pro is going to be a better option. It is nice to have an RGBWW fixture even if you have no intention of using features such as HSI. The ability to dial in a reasonably wide array of Kelvin color temperatures and have +/- G/M adjustment are features I personally look for and not necessarily the ability to generate saturated colors or create effects. In saying that, I have found myself using HSI and X/Y on more jobs lately and it is nice to be able to generate super-saturated colors.
Having the ability to use the 600c Pro with the F10 Fresnel and a wide array of lighting modifiers gives the light a lot of versatility.
The interface and operating system are super easy to use, as is the app. By utilizing a Bowens Mount you can utilize a large array of lighting modifiers without having to spend a ton of money.
The fan noise isn’t too bad for a light of this size, but it is something you need to be aware of. I like that Aputure provides you with a nice, long cable that goes from the power supply/controller to the light head. This allows you to move it further away from any microphone or place it closer to you so you can make quick changes without having to resort to using the app. The locking mechanism and yoke frame are decent enough, but because of the design of the light and the size of the F10 Fresnel, the entire combination becomes extremely front-heavy. You need to use the light and the Fresnel with a decent-sized light stand and I would recommend one that features a junior pin mount because you don’t want to be placing this combo on a spigot.
Now, what you clearly need to take into account is that F10 Fresnel was not designed to work on the 600c because it has a different sized COB than the other 600 series lights. Aputure is in the process of making a projection mount that will be optimized to work on the 600c and 1200d.
In my opinion, the light is well priced given its feature set, output, and capabilities, but how it compares to a similar light using RGBACL will be interesting to see.
If you don’t need all of the bells and whistles that come with a light like this then you may well find that the Aputure 600d or 600x makes more sense for you. In saying that, there is very little reason, at least in my opinion, to get a 600x over a 600c.
The 600c Pro is an impressive fixture and it does a lot of things really well, but you do need to be very aware of the reduced output compared to a 600d or 600x. I have reviewed a lot of lights over the years and the 600c Pro is a very solid offering, and it is certainly one of the best lights Aputure has ever made.
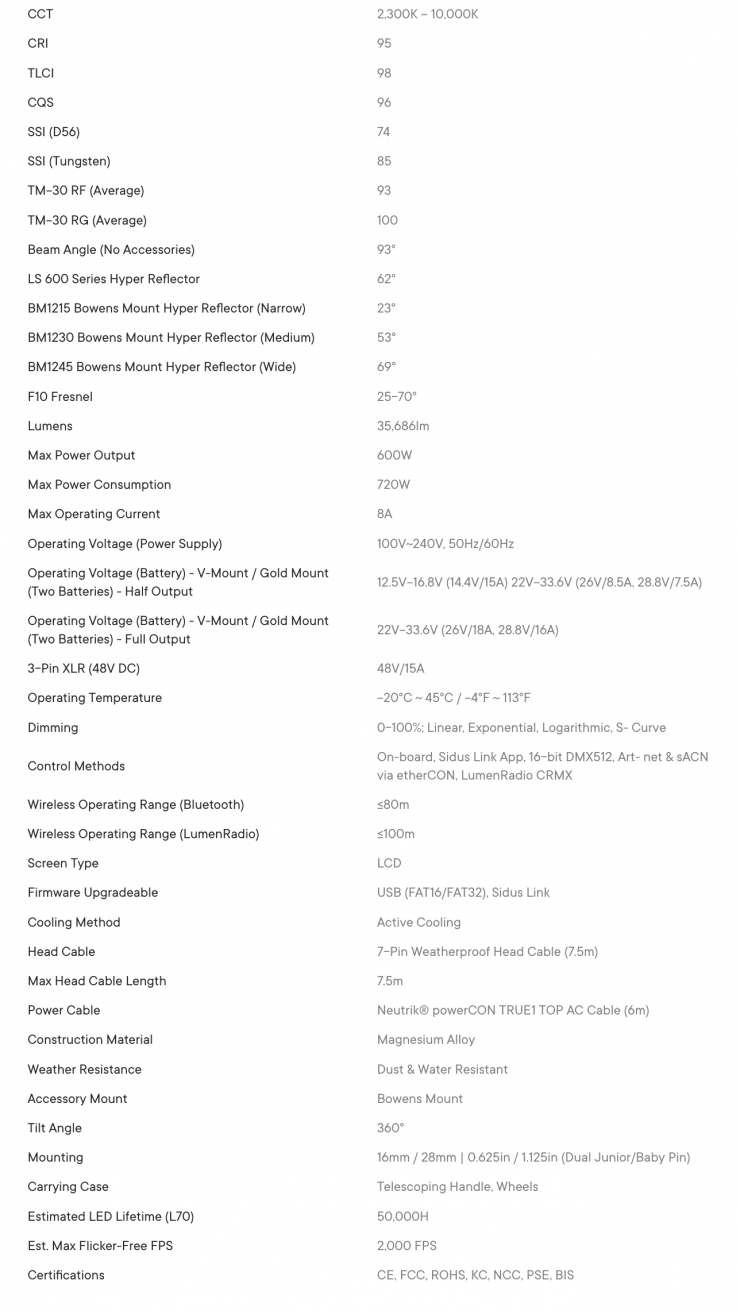
Technical Specifications
Like what we do and want to support Newsshooter? Consider becoming a Patreon supporter and help us to continue being the best source of news and reviews for professional tools for the independent filmmaker.

