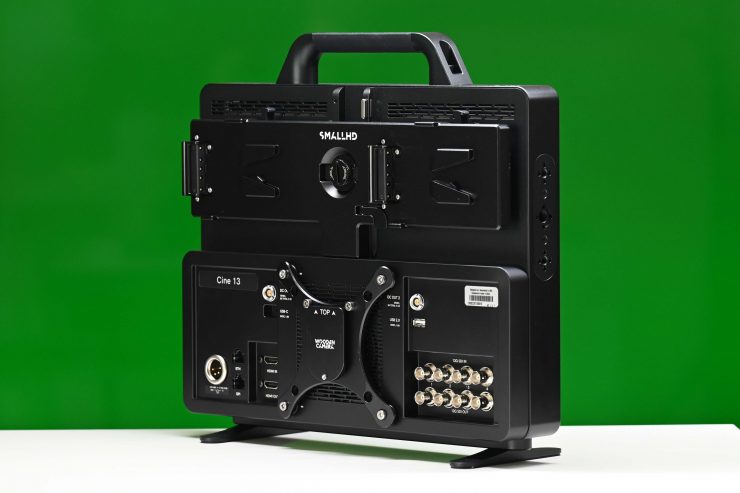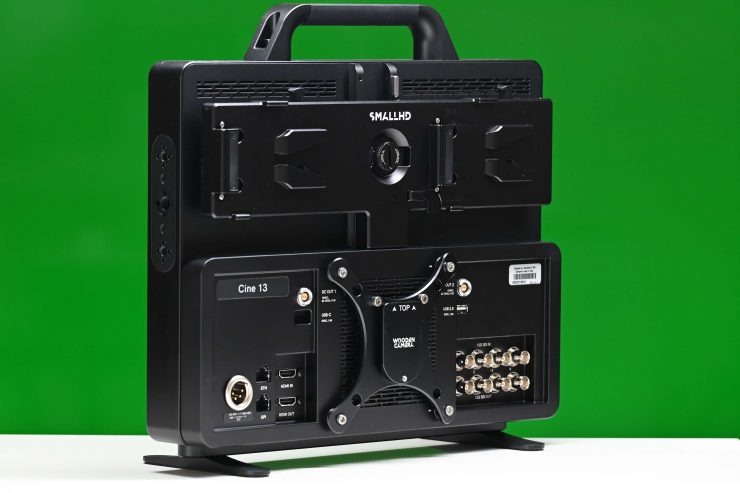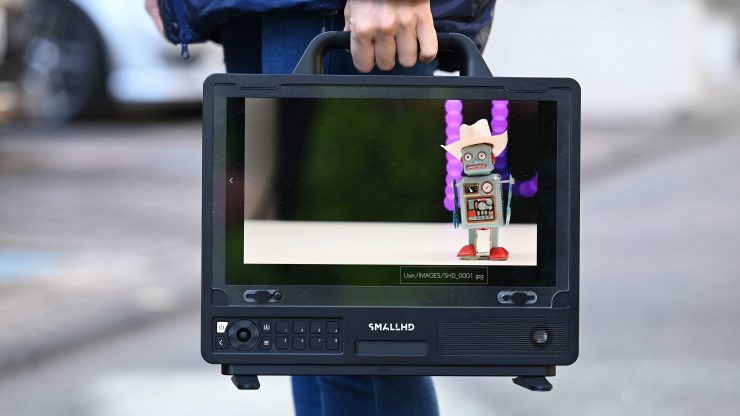
The Cine 13 UHD 4K 13-inch high-bright monitor is SmallHD’s first 13″ 4K monitor and it joins the Cine 24 24″ 4K monitor that was was first announced in late 2019.
The whole concept behind the Cine 13 is that it allows users to view both HD and 4K video and it provides a portable, lightweight, daylight viewable solution.
Key features
- 13.3″ UHD 4K monitor
- 1300:1 contrast ratio
- 1500 cd/m² brightness
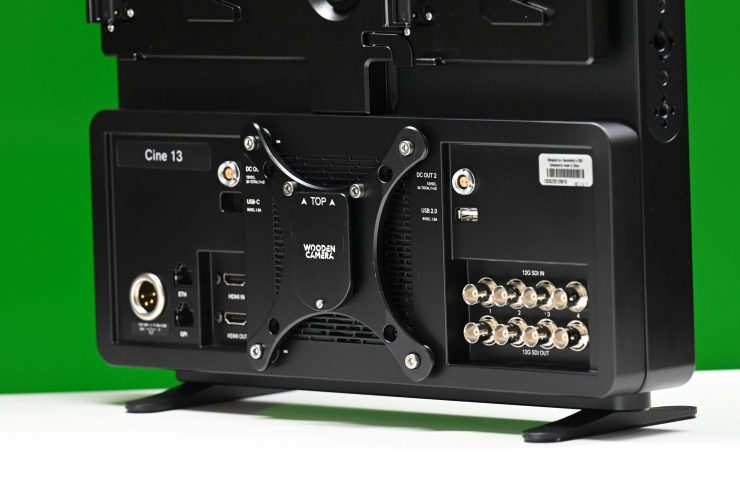
- Four 12G/6G/3G/HD-SDI inputs and four 12G/6G/3G/HD-SDI outputs
- One HDMI 2.0 input and one HDMI 2.0 output
- SD card slot for 3D LUTs
- One RJ45 Ethernet port
- One RJ45 GPI port
- Monitor feet set included
- Optional dual V-mount or Gold mount battery plates are available
Who is it aimed at?
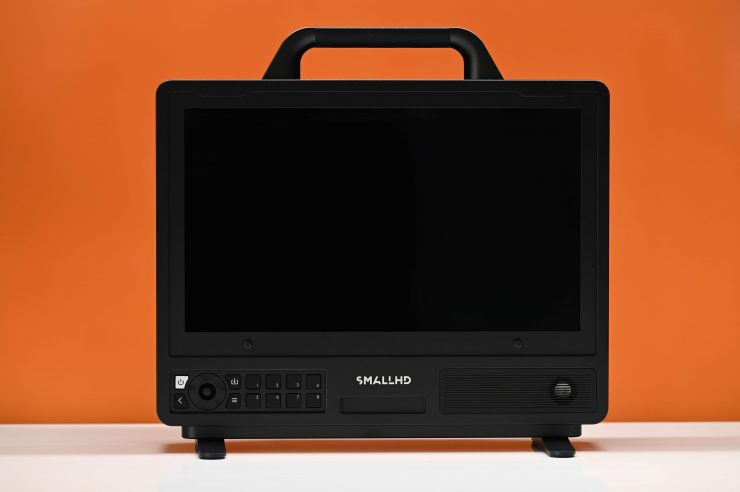
The SmallHD Cine 13 UHD 4K High-Bright Monitor is being aimed primarily at productions that need a solidly made, daylight viewable UHD display that is portable, easy to use, and that provides an accurate image.
When I asked SmallHD directly who the Cine 13 is aimed at they told me:
‘The Cine 13 is aimed at primarily at focus Pullers, first AC’s and secondary DOPs / Directors.’
SmallHD
What does it come with?
The Cine 13 ships with the following items:
- SmallHD Cine 13 UHD 4K High-Bright Monitor
- SmallHD CBL-SGL-HDMI-4K-120 HDMI Cable (10′)
- SmallHD Microfiber Cleaning Cloth
- SmallHD Basic Acrylic Locking Screen Protector for Cine 13 Monitor
- SmallHD Power Supply for Cine 13 Monitor
- Monitor Feet Set
- 8GB SD Card
- Limited 1-Year Warranty
You get most items that you need in the kit, however, you need to be aware that battery plates, stand mounts, etc. are optional accessories and you need to factor that into the price.
Screen
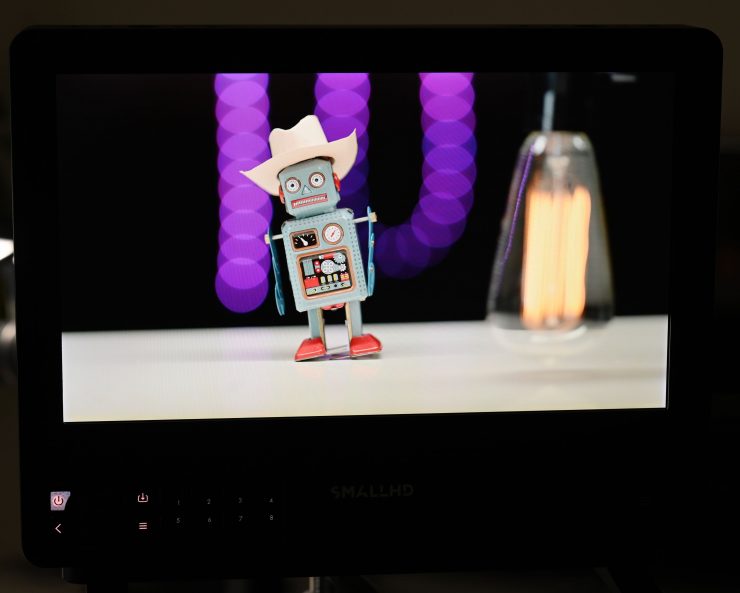
The monitor features a 13-inch 3840 x 2160 IPS Edge-Lit LCD Display screen with a claimed brightness of over 1500nits. It covers 100% REC.709. The screen isn’t a true 10-bit display, instead, it features the commonly used 10-bit (8+2). Some potential buyers may find this a little disappointing given the high cost of the monitor. However, what you should clearly know is that no panels with true 10-bit color exist in this size, everyone just uses dithering to achieve the 10-bit target. 10-bit (8+2) is pretty much imperceptible to 99% of people
A lot of companies list their monitors as 10-bit even though they are really using a 10-bit (8+2 FRC) panel. FRC stands for Frame Rate Control Technology and an 8+2 FRC panel is basically a way of trying to approximate the color reproduction of a true 10-bit panel. A true 10-bit monitor can display 1024 shades of color, whereas a 10-bit (8+2 FRC) panel can only truly display 256 shades. So what a 10-bit (8+2 FRC) panel does is artificially create in-between shades of color by quickly shifting the pixels to go between certain shades of colors.
For example, you would show the main shade of one color for 75% of the time and then another one for 25% of the time. This creates an illusion for the viewer that they are actually seeing more colors than what can actually be displayed.
8+2 FRC can be very hard to distinguish from an actual 10-bit panel. As I already mentioned, most people couldn’t tell the difference between an 8+2 or a true 10-bit display.
The monitor has 338 ppi (pixels per square inch) which is a lot for a 13″ sized display. The contrast ratio is 1300:1. If you want to put that ppi figure into perspective, the latest 12.9″ iPad Pro has 264 ppi and the latest MacBook Pro with a Liquid Retina XDR display has 254 ppi.
Build Quality

Cine 13 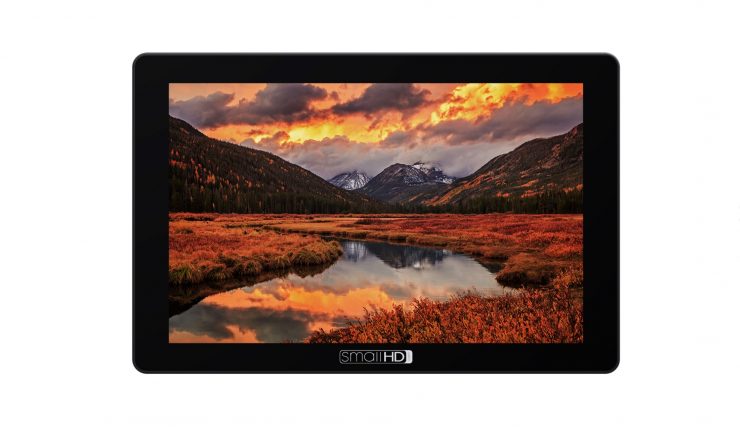
Cine 7 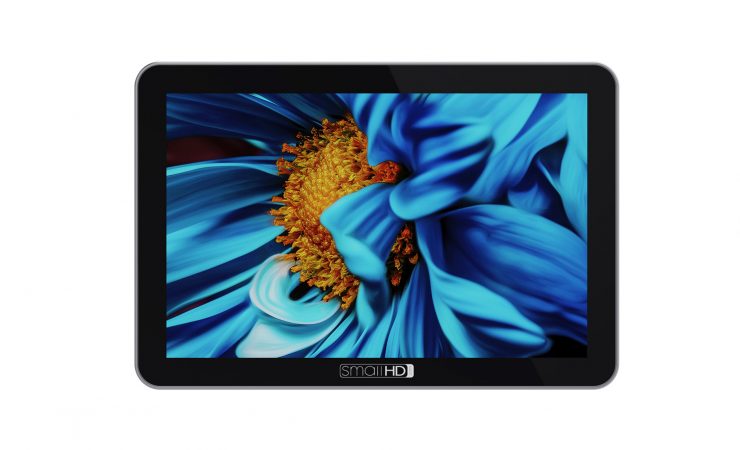
Focus 7
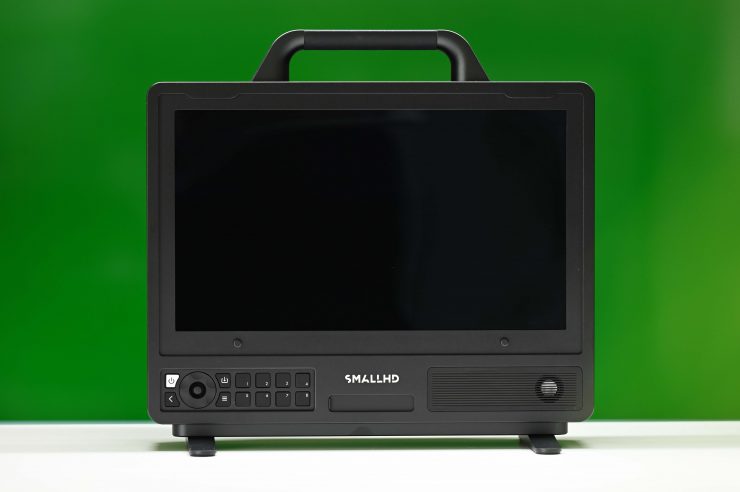
Appearance-wise the Cine 13 series isn’t going to have the same sleek look as a monitor that has a thin bezel like a SmallHD Cine 7 or an Apple device. The black finish and understated design again point to the philosophy of keeping things clean and simple. Professional monitoring solutions need to be well made and stand up to the rigors of field use.
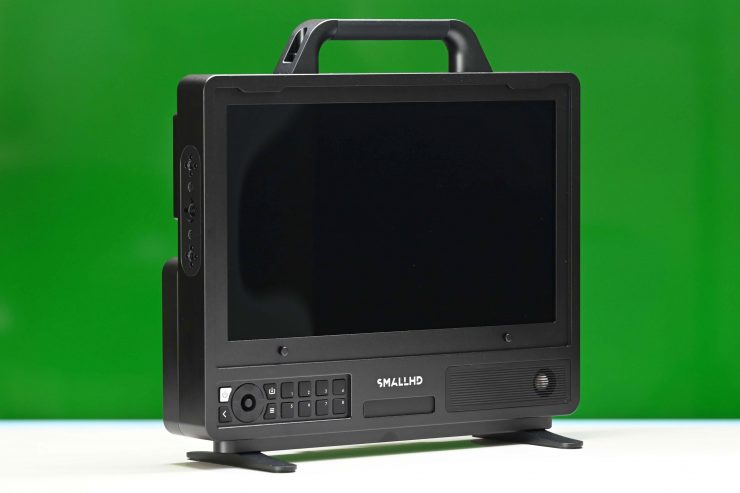
The external housing of the Cine 13 is made out of milled aluminum. The overall build quality of the Cine 13 is excellent. Everything has been well thought out and it certainly looks like it is able to stand up to the rigors of field use.
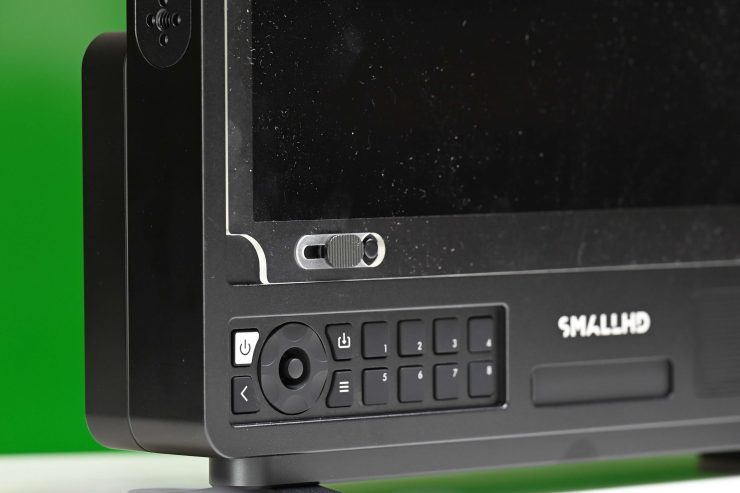
What is nice is that SmallHD includes an acrylic locking screen protector that you can place on the monitor during transportation and when it is not in use.
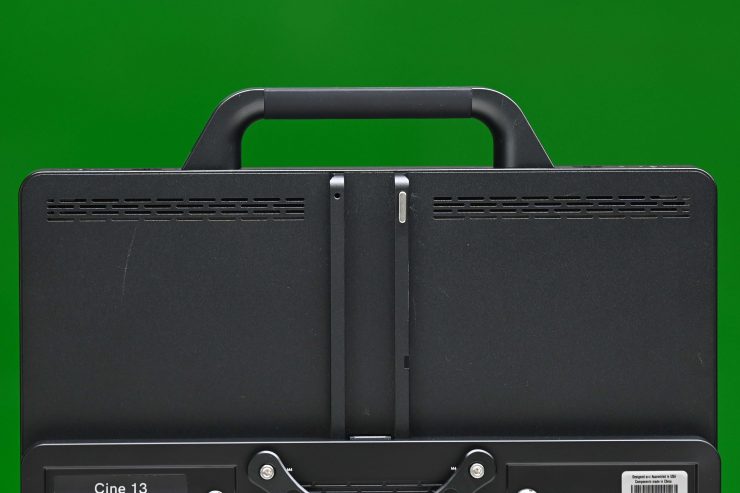
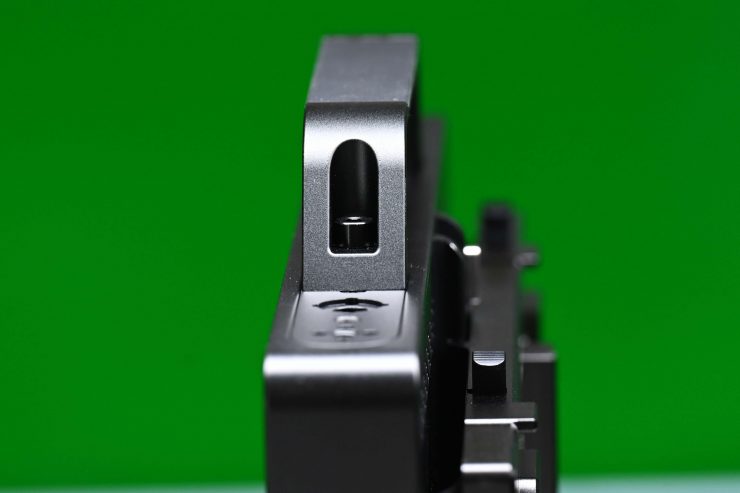
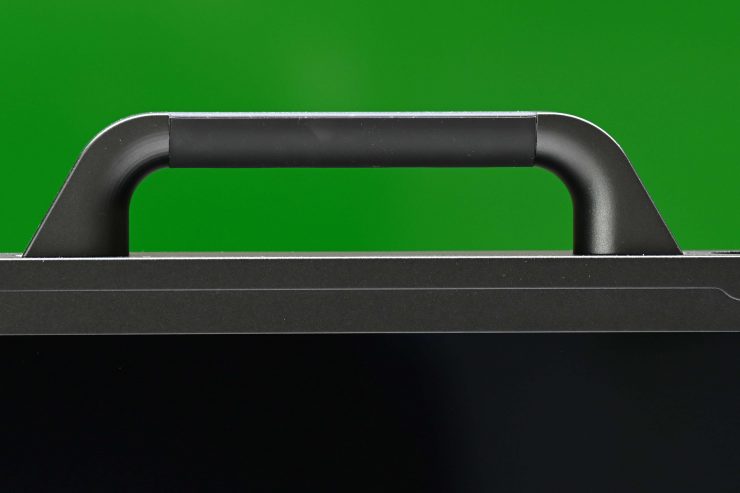
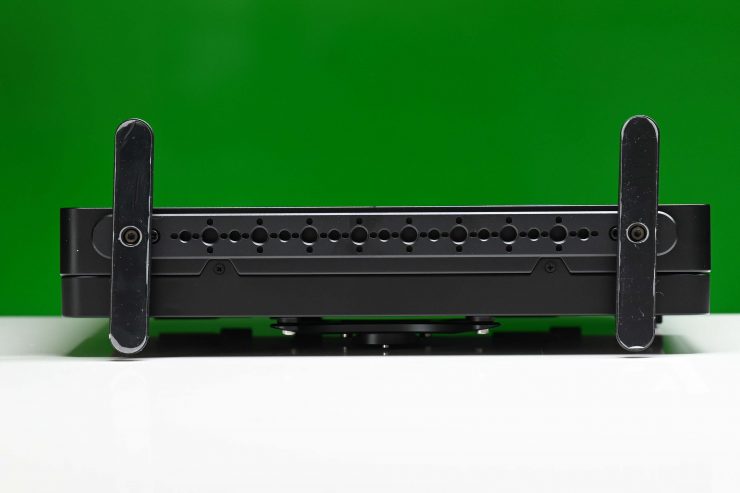
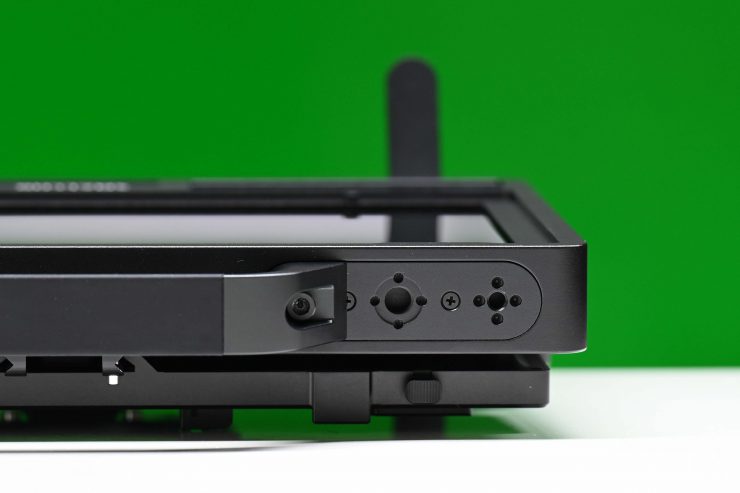
I like the feet, carry handle and the dovetail mounting rail that you attach accessories to.
Mounting Points
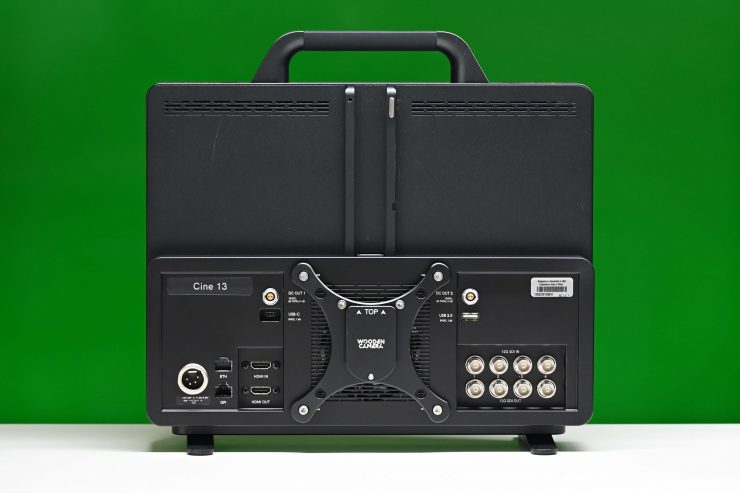
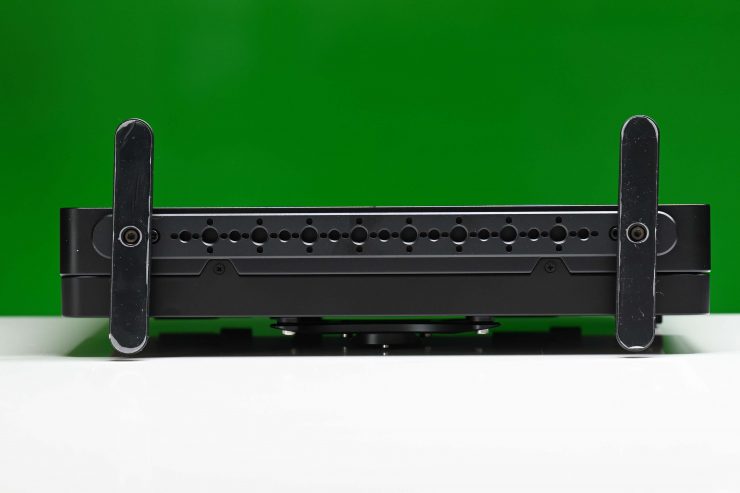
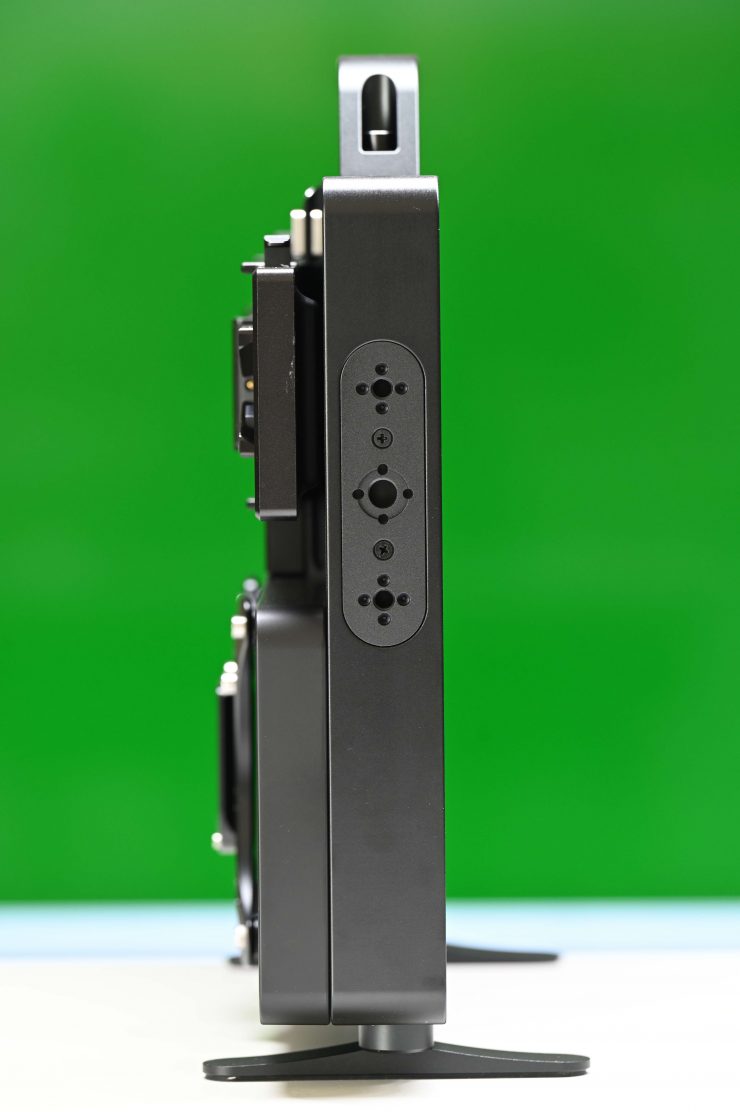
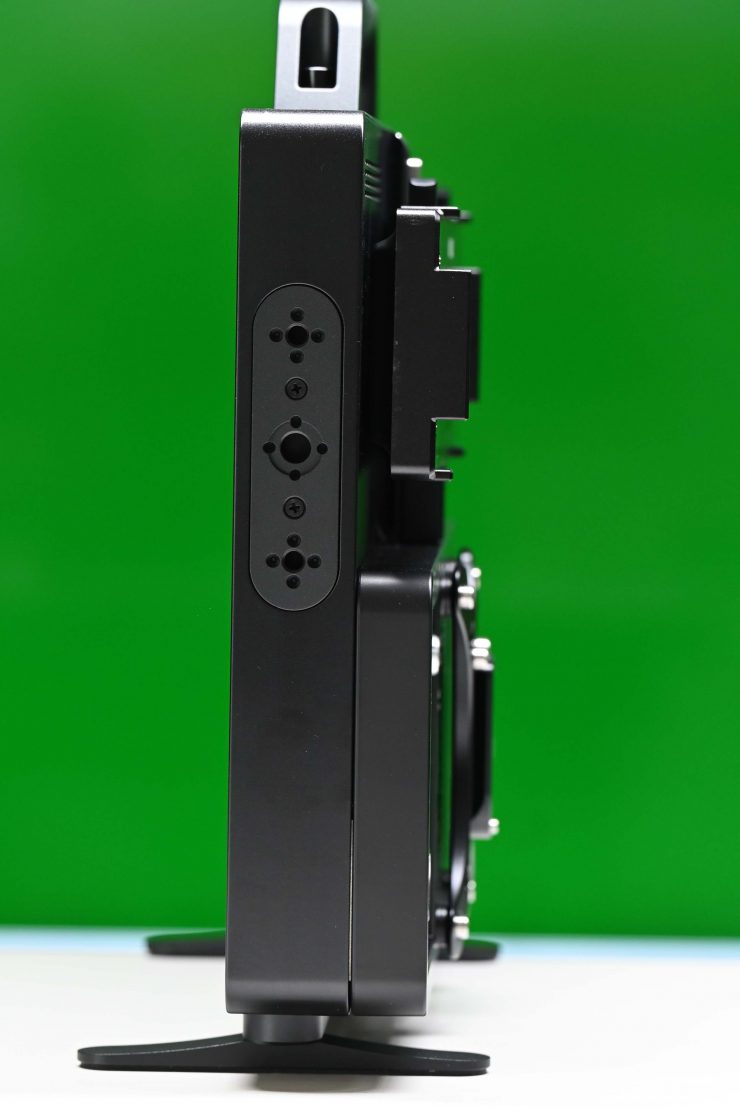
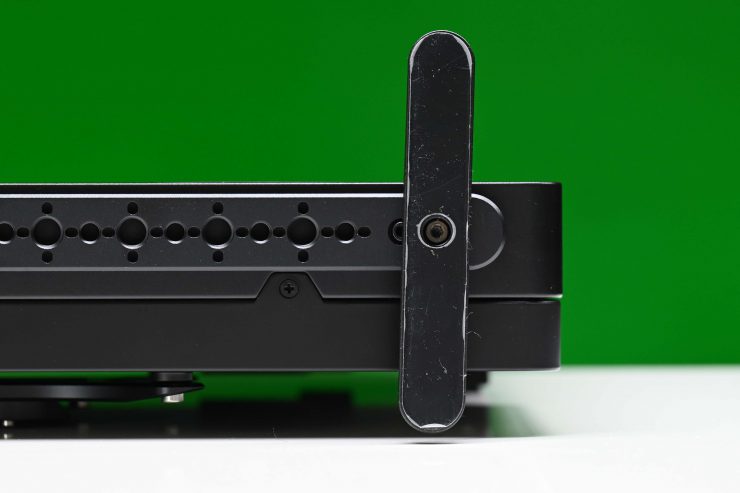
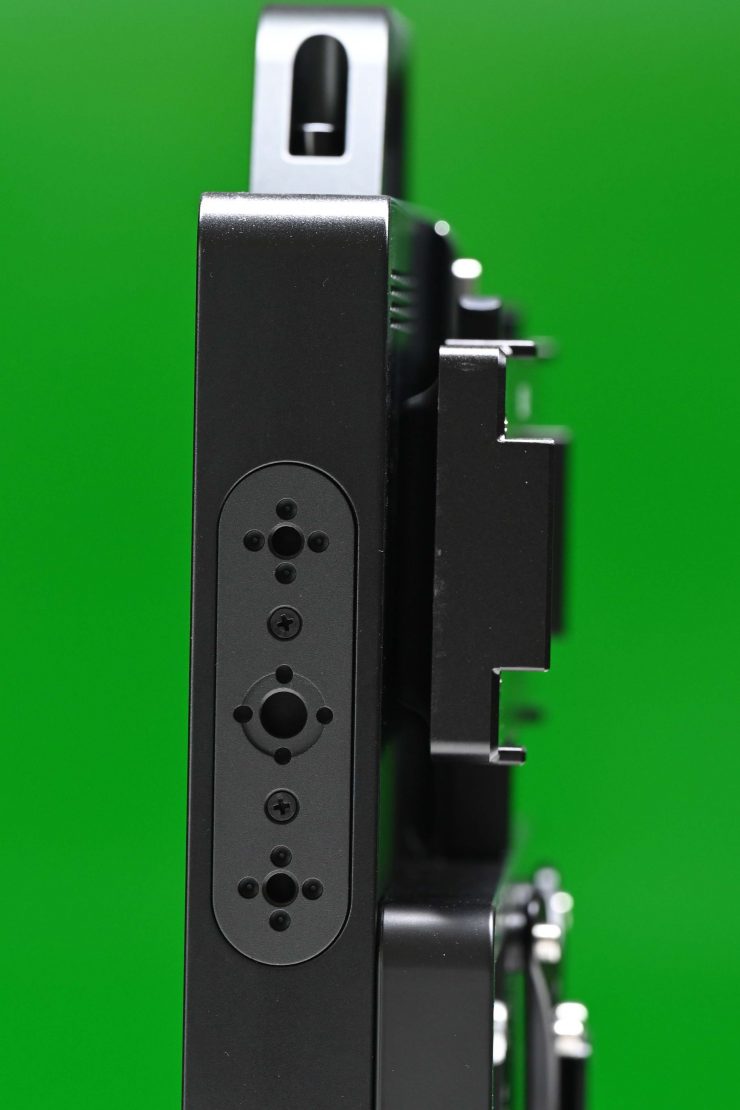
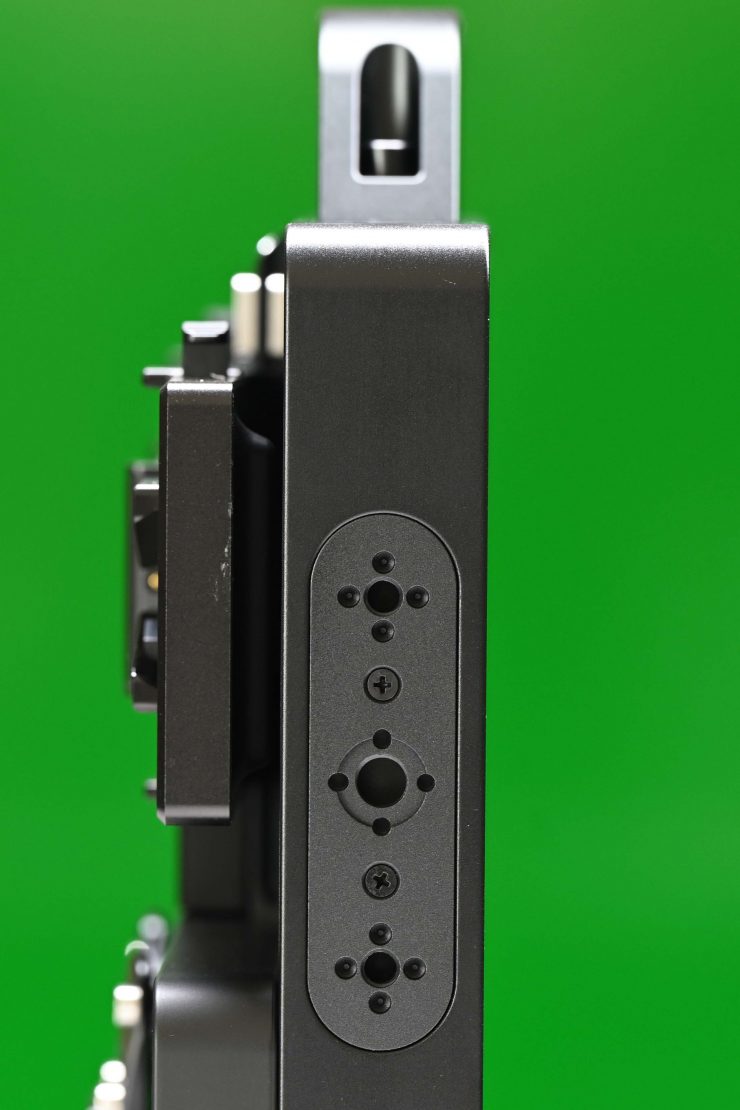
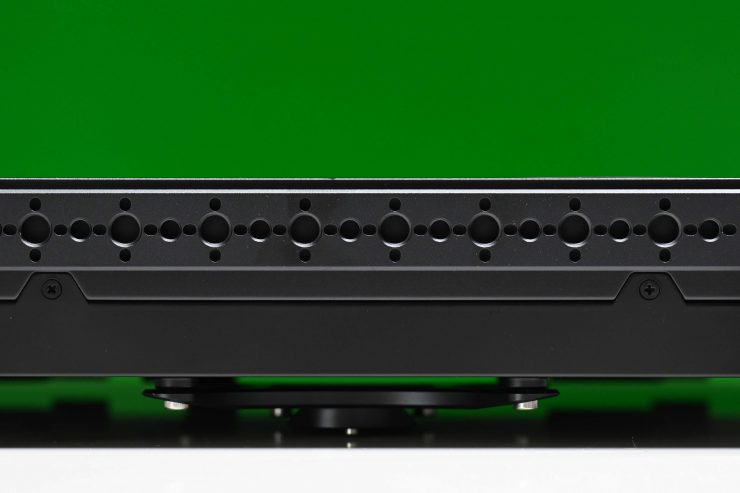
The Cine 13 features a dovetail mounting rail for battery plate or accessory mounting, and a removable bottom Cheese Rail for additional mounting flexibility.
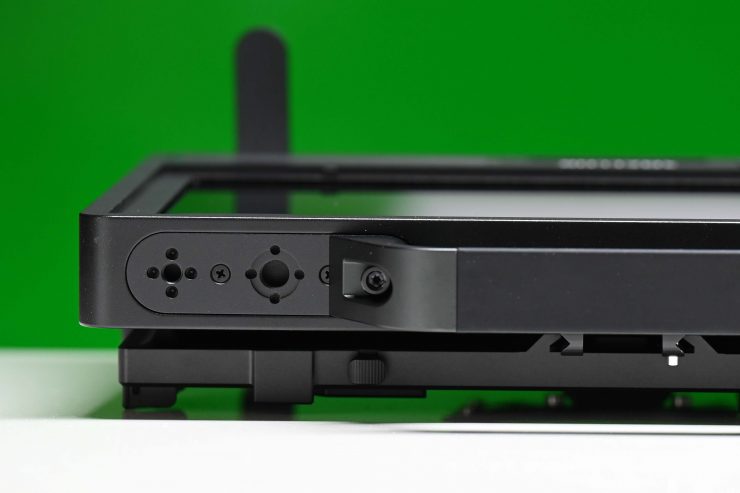
I like how SmallHD has placed multiple mounting points on the top, bottom, and sides of the Cine 13. A lot of larger-sized field monitors that aren’t designed to be used on cameras don’t tend to have many mounting points at all.
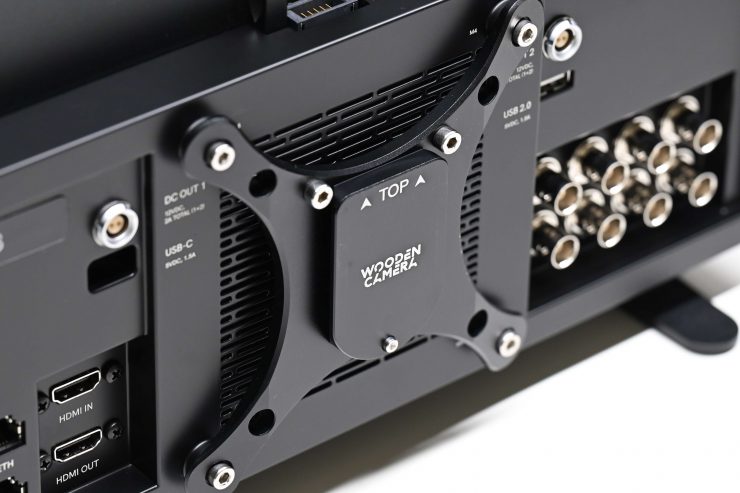
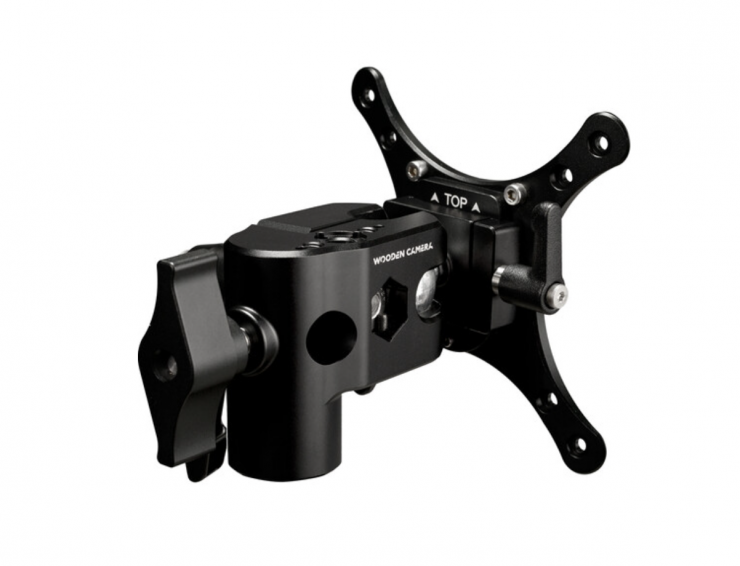
You can also attach the optional Wooden Camera Ultra Quick Release Articulating Monitor Mount (Baby Pin/C-Stand).
Size & weight
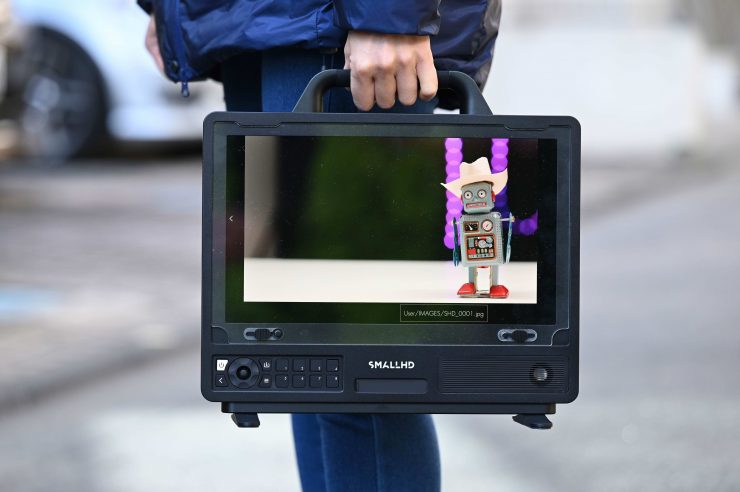
The Cine 13 weighs 6.8 lbs / 3.08kg. According to SmallHD, this makes it one of the lightest 4K monitors on the market.
I found that the weight, or lack of, makes it easy to transport and move around on set. Even if you start adding a camera battery and other accessories to the Cine 13 then the weight is still very manageable.
The whole appeal of the Cine 13 to me is that it is easy enough to transport and move around on set. I find that once you start getting up to around 19″ and bigger monitors you run into issues with transportation and weight.
The trade-off with the Cine 13 is that this lower weight means you end up with a smaller-sized display.
Physical Buttons
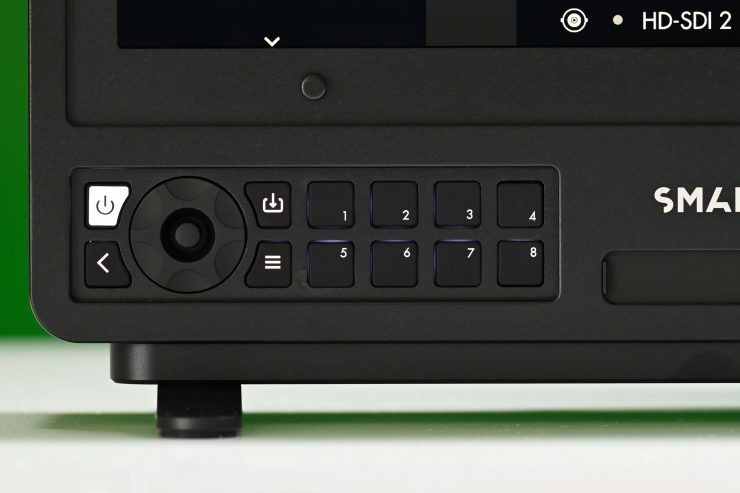
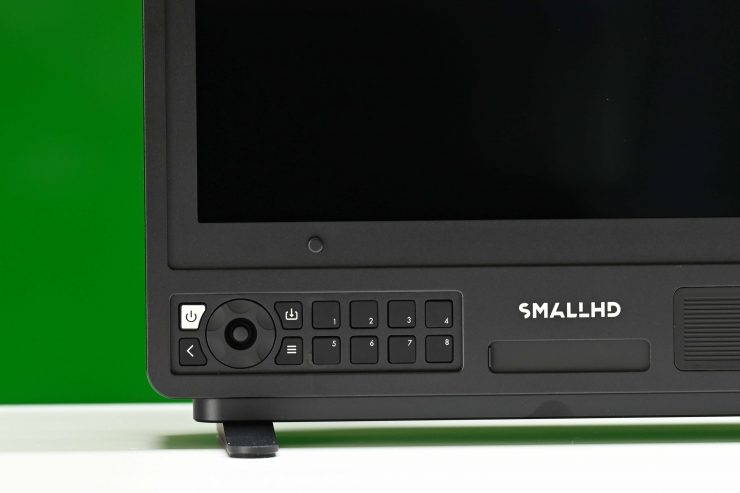
The Cine 13 can only be operated via a series of buttons, it doesn’t feature any touchscreen functionality.
Most of the main operation is done via a small joystick style button. This is nice and tactile and fairly easy to use. There is also a back button, an input selection button that lets you quickly toggle through which input you want to use, a direct menu button, and 8 preset buttons that you can set as shortcuts.
While using the physical controls is still reasonably quick to do, I did find myself missing the touchscreen functionality that I have been accustomed to with most SmallHD monitors. Would I have liked to have seen the Cine 13 incorporate touchscreen functionality? That is a good question. Personally, I am not sure I would want to have touchscreen functionality on a monitor of this size, especially when it is going to be primarily for clients, directors, producers, etc. The biggest trouble with touchscreen devices is that you end up getting fingerprints and smudges all over the screen. This is something a client or director doesn’t want to see.
Main Menu
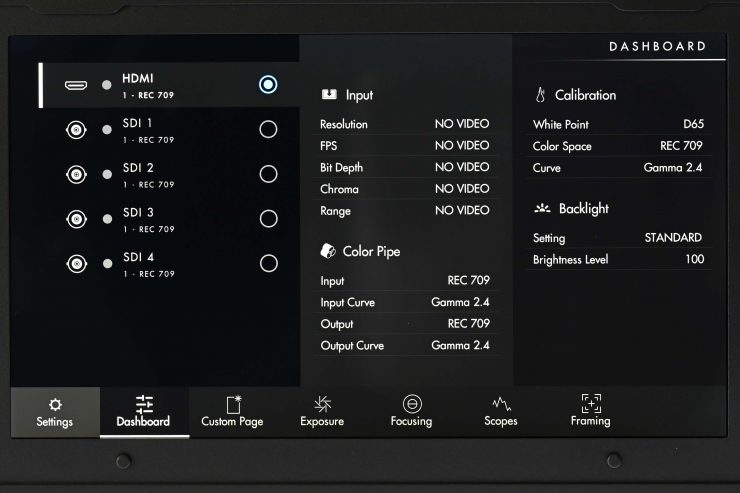
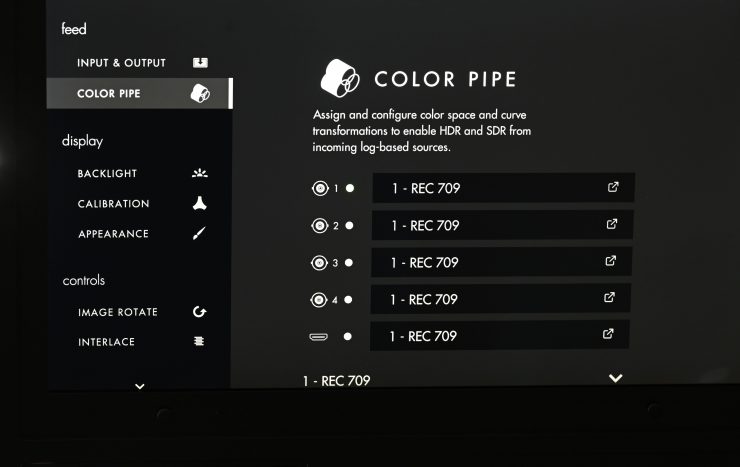
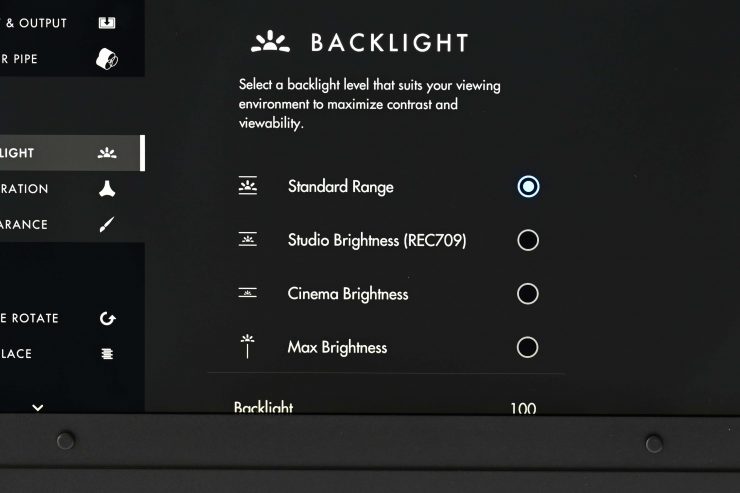
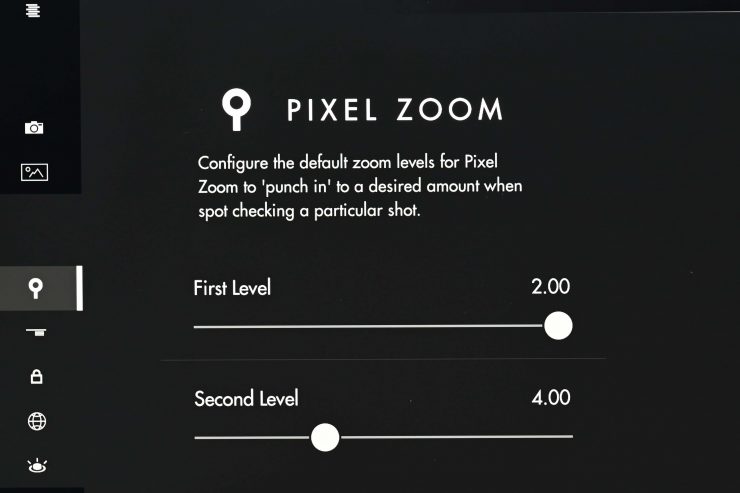
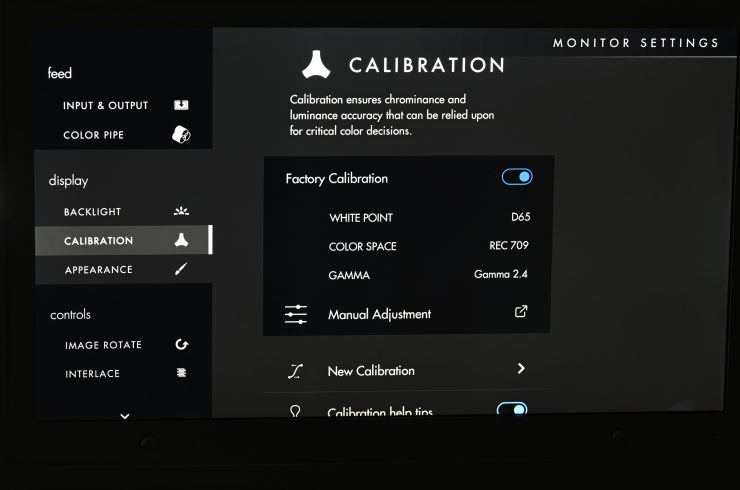
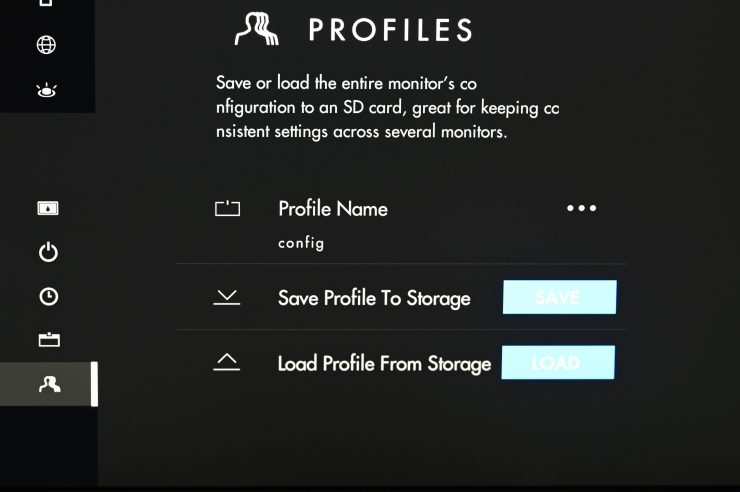
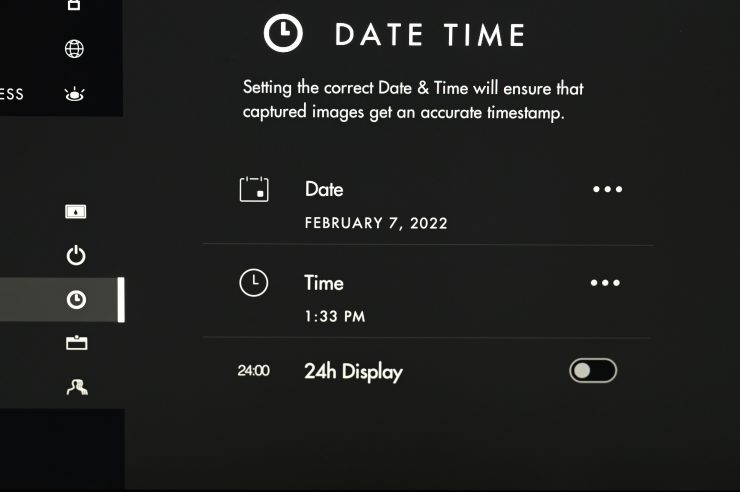
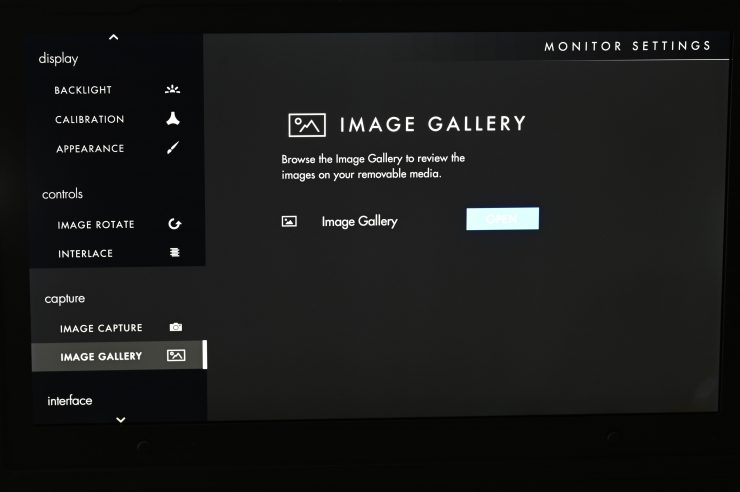
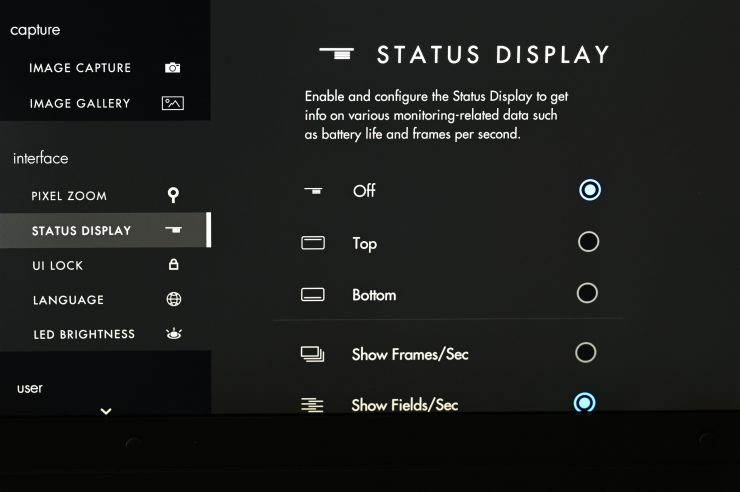
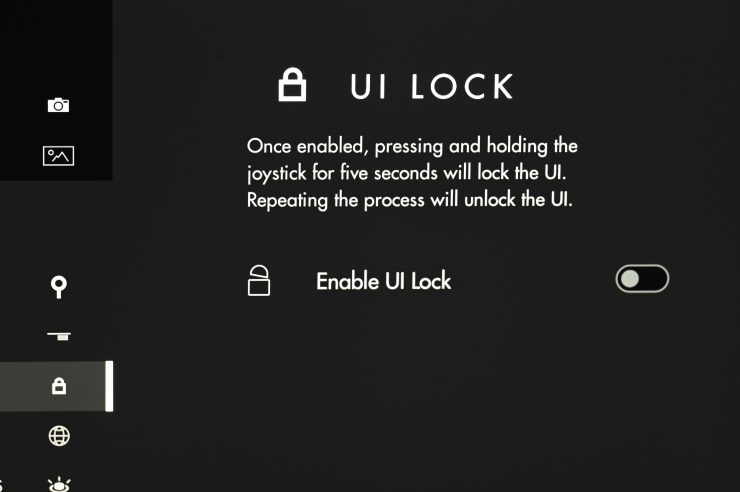
The main menu settings page allows for a lot of customization. You make changes to the inputs and outputs, the level of pixel zoom, the backlight, save and recall profiles, change the date & time, calibrate the display, and much more.
What sets SmallHD displays apart from most other options on the market is the ability to totally customize just about every element of your display.
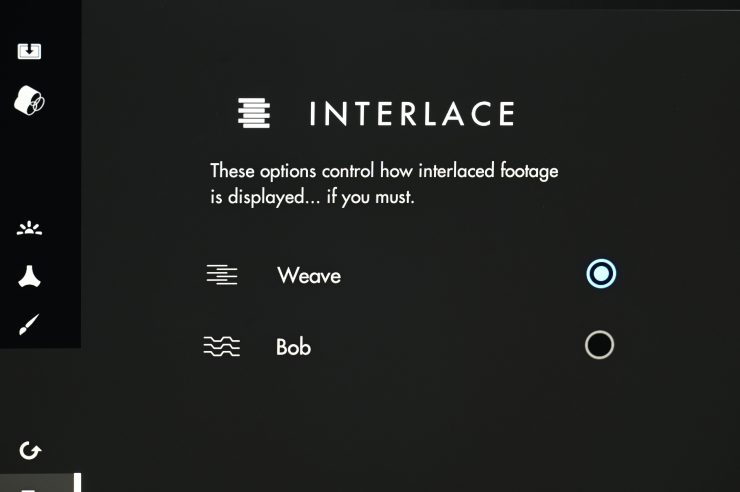
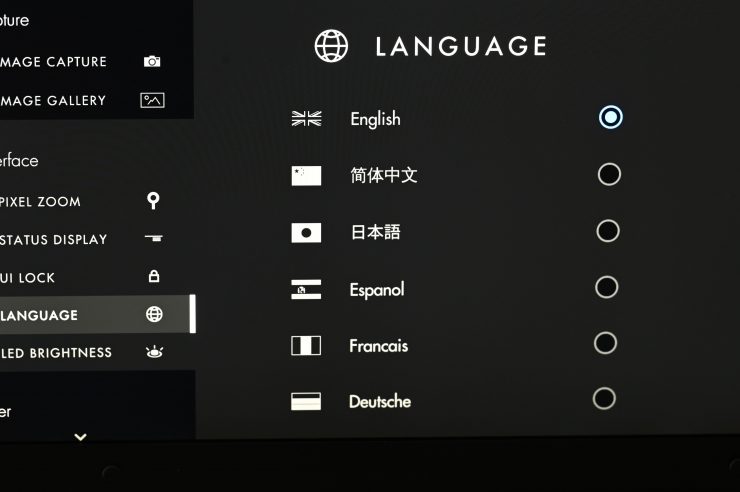
I personally liked the tongue-in-cheek humor shown on the Interlace menu.
Operating System
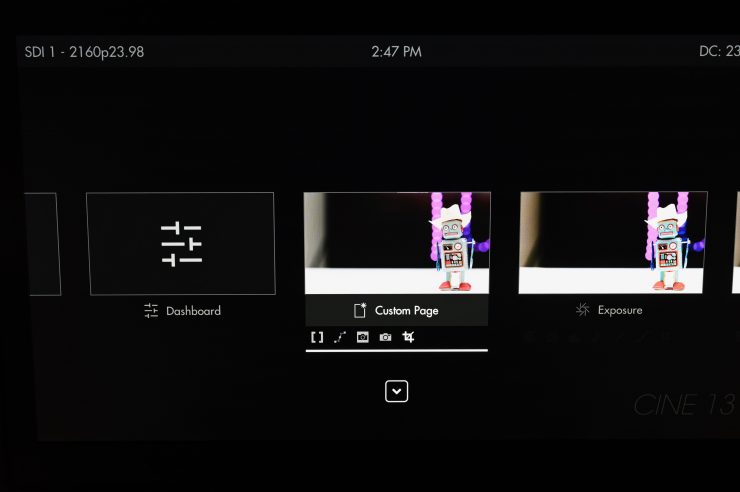
In my opinion, SmallHD monitors have the easiest OS system to use and operate. There is so much more to a monitor than just image quality, and a good operating system is what often sets monitors apart. Usability and operability sometimes get overlooked by people looking at monitors, but to me, they are right up there with image quality.
Lots of monitors have pretty good-looking images, but a lot of them are let down by poorly designed operating systems and monitoring assist tools that are not in any way accurate.
Like all SmallHD monitors, the Cine 13 uses the same PageBuilder OS graphical user interface (GUI). SmallHD built the PageBuilder OS to make menus less confusing. PageBuilder is a very customizable system as it allows you to selectively apply monitoring tools such as waveform, vectorscope, multiview, LUTs, and focusing aids on different “pages”. These pages can be easily flipped by using the buttons and controls on the front of the Cine 13.
PageOS 4 Display Tools
- Pixel zoom: 2x and 4x with pinch-zoom
- Aspect ratios: Preset and customizable
- DSLR scale: Canon 5D Mk II and Canon 7D
- Custom scale: Underscan only
- Anamorphic de-squeeze: 1.33x, 1.5x, 1.66x, 2.0x
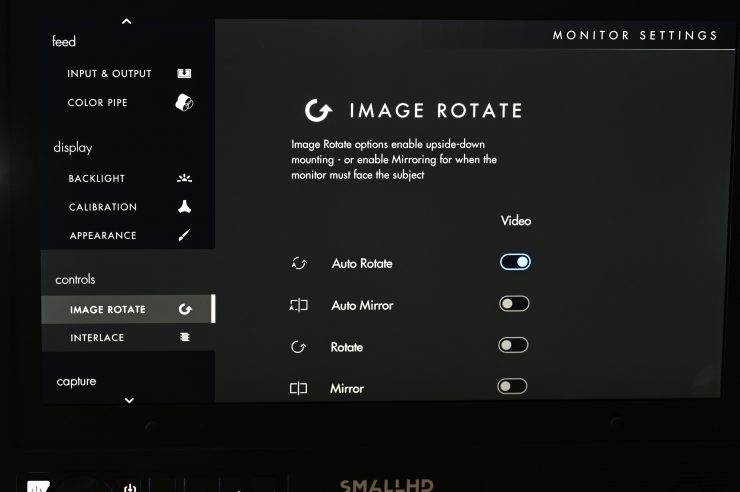
- Image flip: Auto and manual
- Image rotation: Auto and manual
- Cross conversion: HDMI to SDI, SDI to HDMI
- Color focus assist: Adjustable style and intensity
- Peaking: Adjustable intensity
- False color: Spectrum, ARRI-style, and customizable
- Zebra: Dual, customizable
- Waveform: Luma and RGB, customizable with region-of-interest highlighting
- Vectorscope
- RGB parade, customizable
- Histogram: Luma & RGB
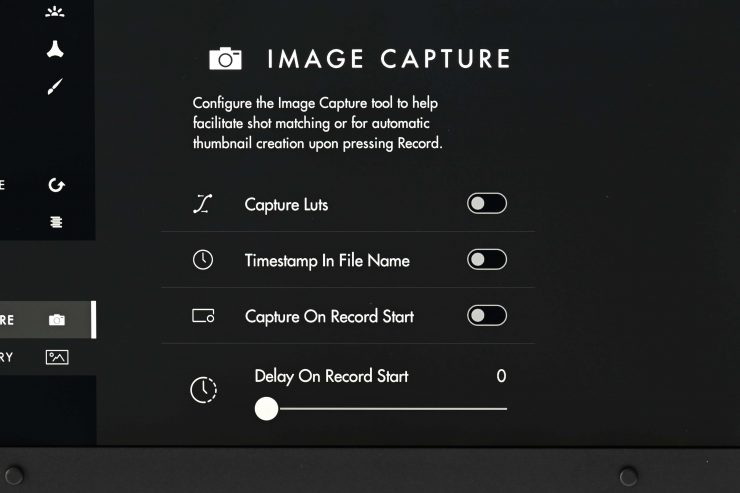
- Image capture, with dedicated button and image gallery
- Custom LUTs: Load as looks on pages or as system-wide calibration via the settings menu
- LUT import: Via SD card or USB storage device
- Image overlay: Opacity slider and blink setting
- Image capture
- Audio meters: Up to 8 channels
If you haven’t used a S
Having the ability to assign just one, or many tools to a single page makes it very quick to access a monitoring assist tool or make a change. It also allows you to customize what you actually need instead of being forced to use what a manufacturer gives you.
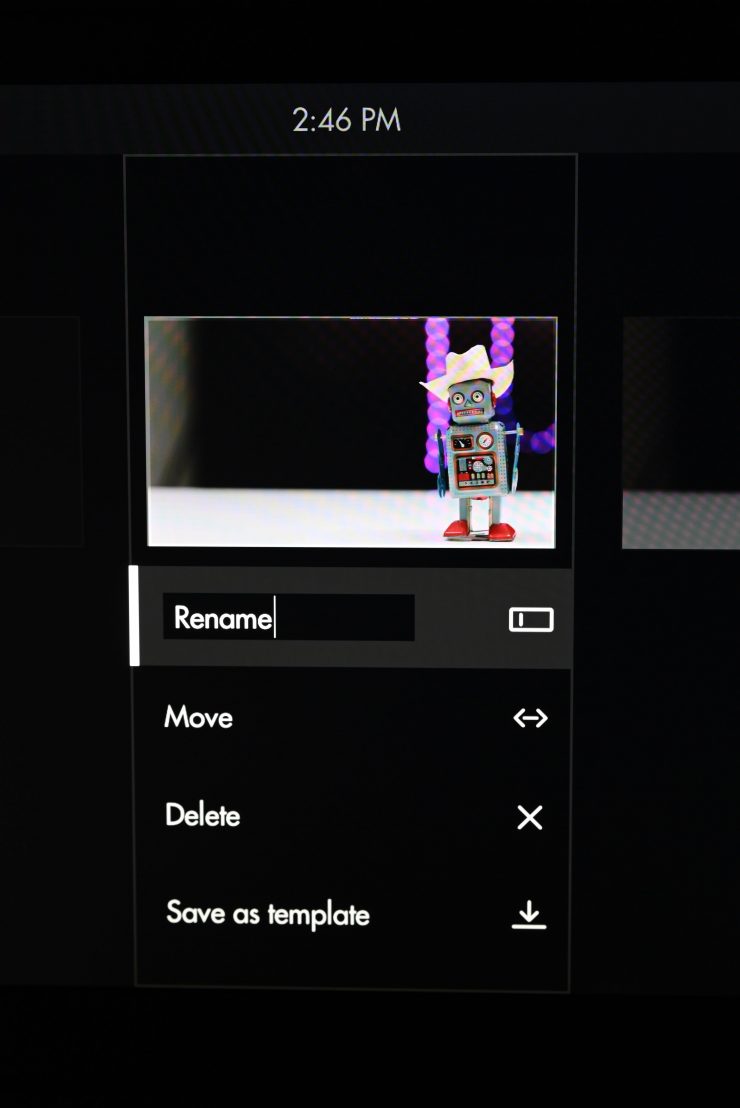
You can also rename and customize the individual pages you create.
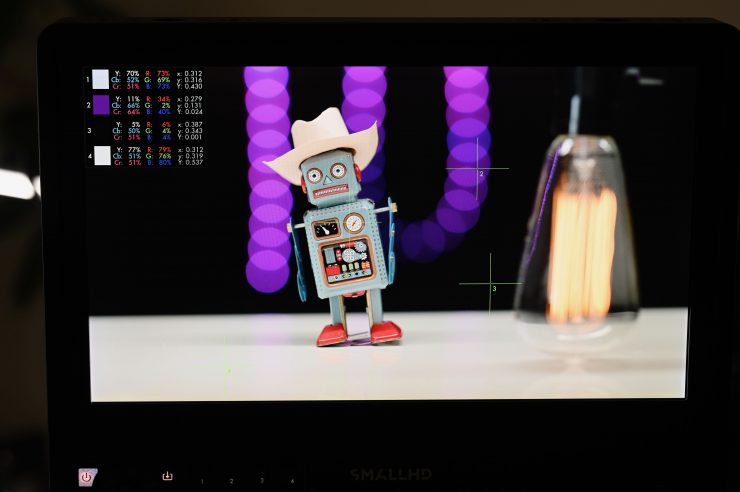
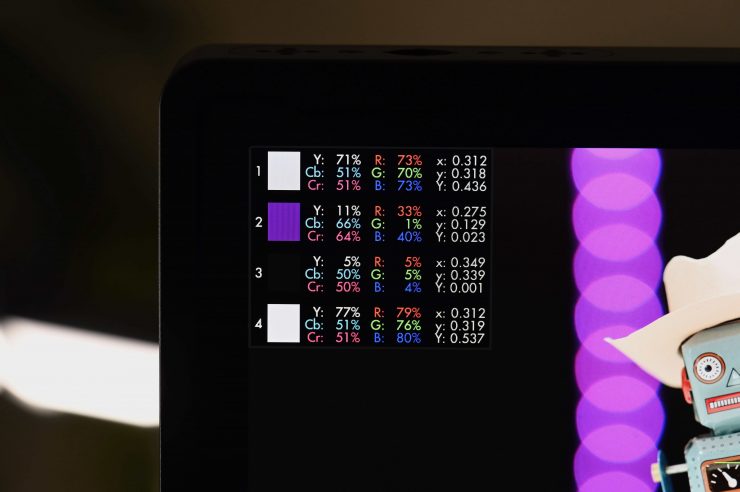
I especially like the Color Picker function where you can move a target icon around and it will display color values for you. On the Cine 13, you can set up to four different reference points which are extremely handy for making sure you get accurate exposure and colors.
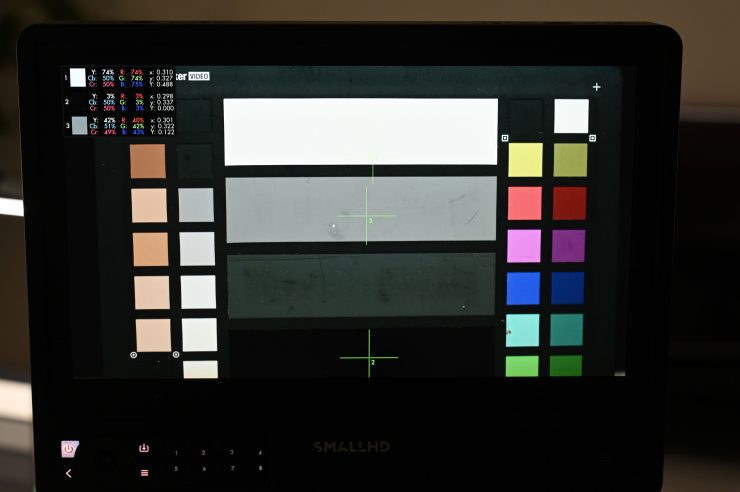
By setting multiple color picker points on a color checker chart you can make sure that your colors and exposure are as accurate as possible.
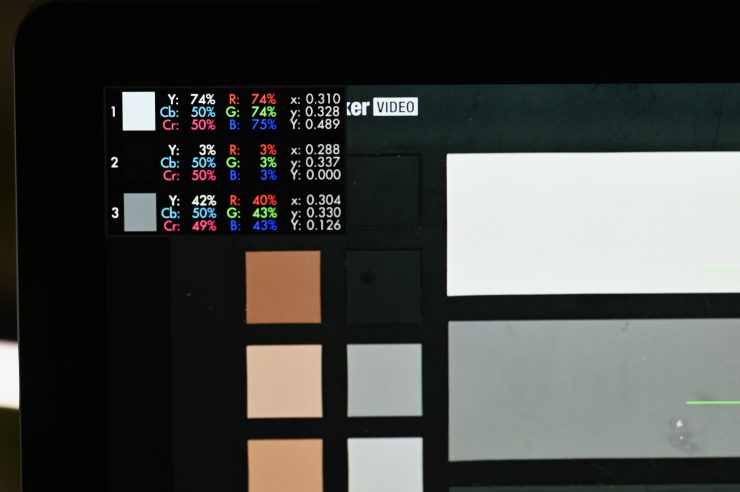
As the color picker gives you representations for Y, Cb, Cr, and R, G, B you can clearly see exposure levels and RGB values.
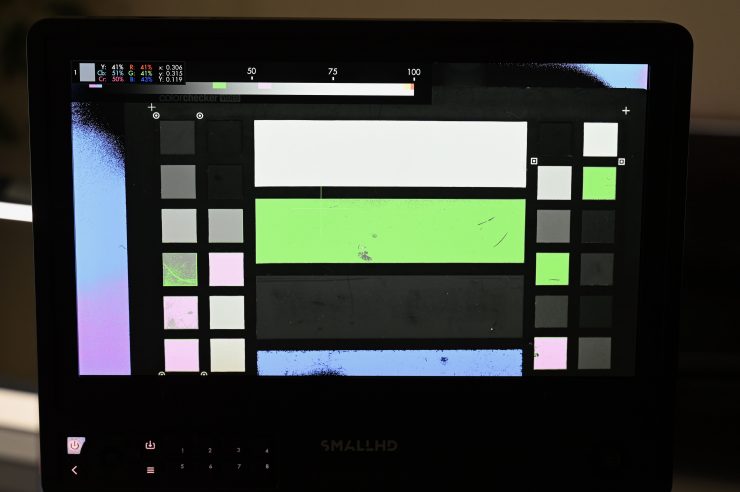
You can also use the color picker in conjunction with false color for making sure middle grey exposure is accurate.
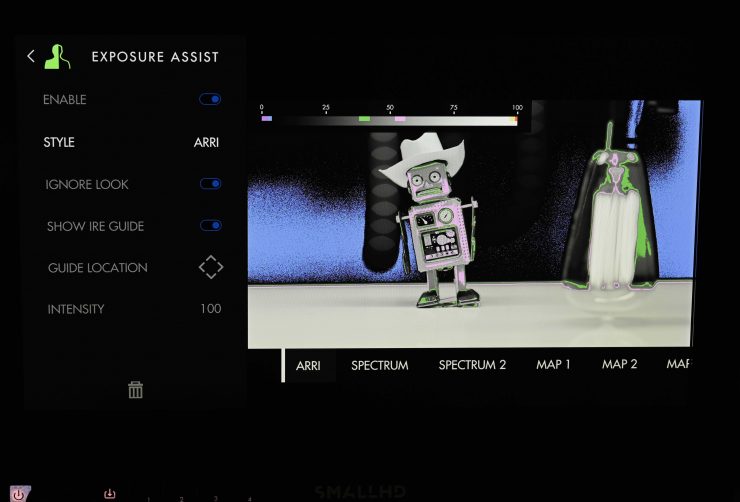
One of the other nice aspects of PageBuilder OS is that SmallHD has actually bothered to standardize the false-color functionality. As a default, the false colors are mapped directly to ARRI cameras, but you can also customize them to whatever camera you are using. This is a big deal. A lot of other monitors just have false color with no scale or markings and you have no idea what you are actually seeing. As the false color indicators on the SmallHD accurately reflect what I am seeing in my EVF I know I can rely on them.
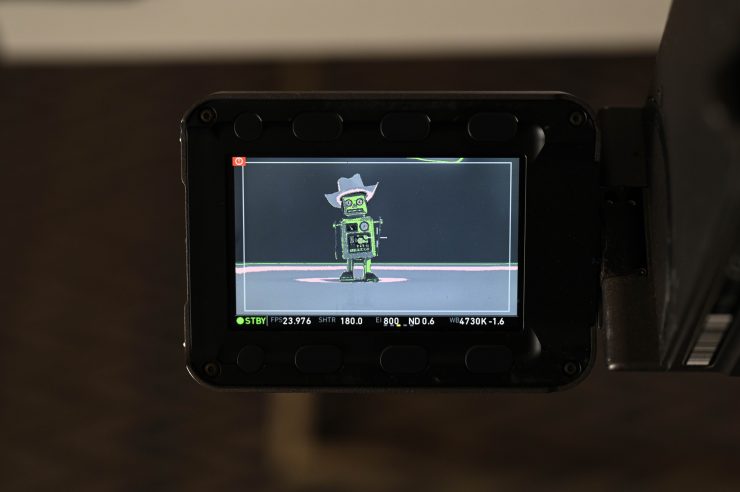

ARRI AMira EVF 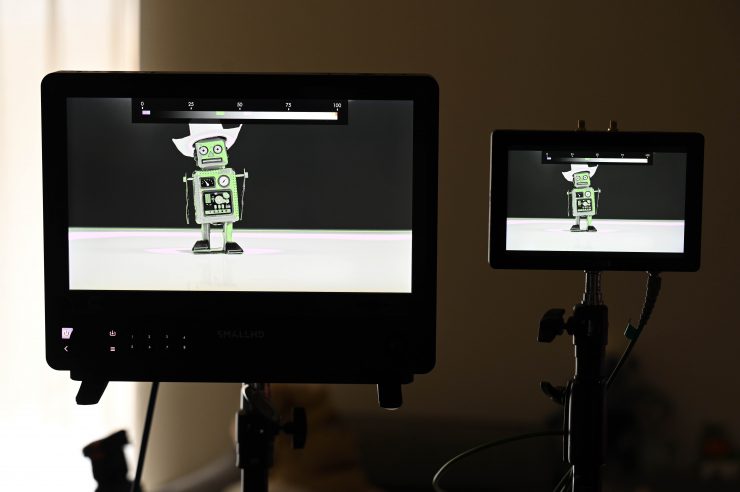
SmallHd Cine 13 on the left. SmallHD Cine 7 on the right
Above you can see that the main false color values look exactly the same on my EVF, and on the Cine 13 and the Cine 7. This is exactly the consistency you want.
As I use a SmallHD Cine 7 as my on-camera monitor it is nice to be able to go to the Cine 13 and have the OS system be exactly the same.
SmallHD doesn’t just release an operating system and then never change it. The PageOS system is constantly being updated and improved.
Inputs & outputs
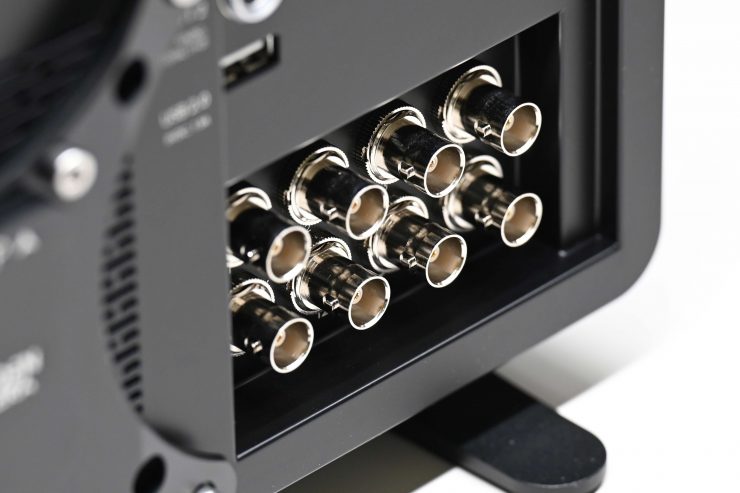
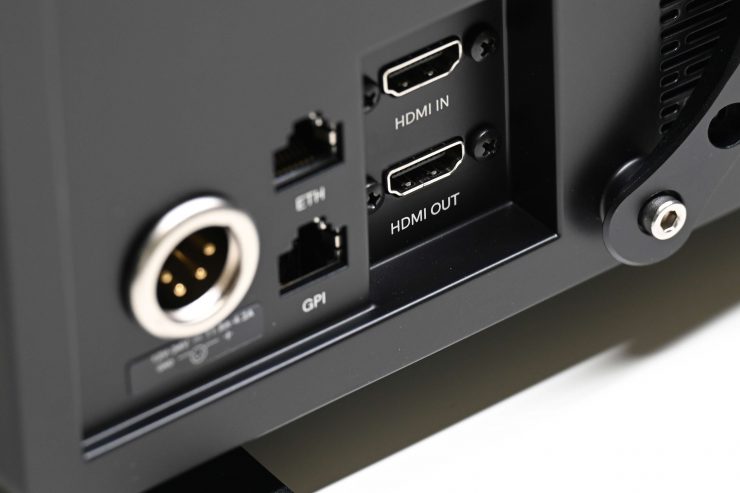
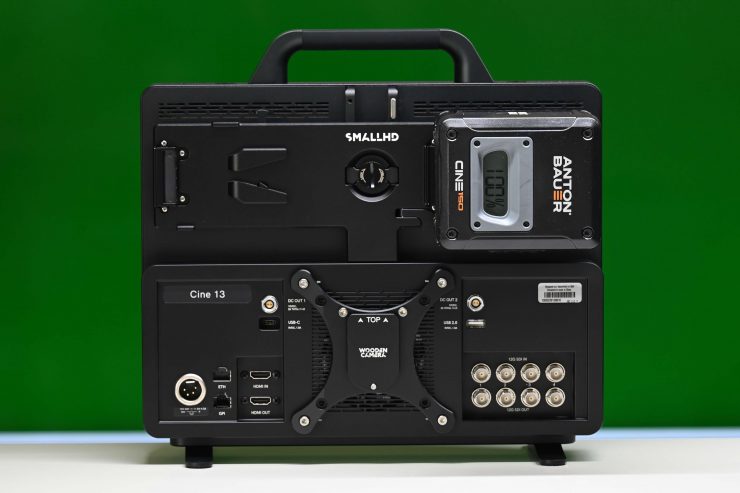
The monitor includes four independent 12G-SDI inputs and four independent 12G-SD outputs. It also has a ⅛” headphone jack, 1W Speaker, 1x 4-pin XLR, and a power port for a battery plate (this is sold separately).
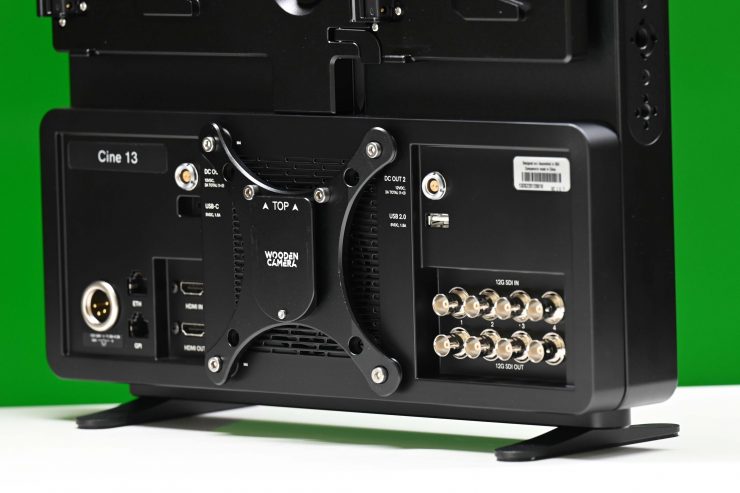
The full list of inputs and outputs is:
- 1 x HDMI Type A (HDMI 2.0) Input
- 4 x BNC (12G-SDI/6G-SDI/3G-SDI/HD-SDI) Input
- 1 x HDMI Type A (HDMI 2.0) Output
- 4 x BNC (12G-SDI/6G-SDI/3G-SDI/HD-SDI) Output
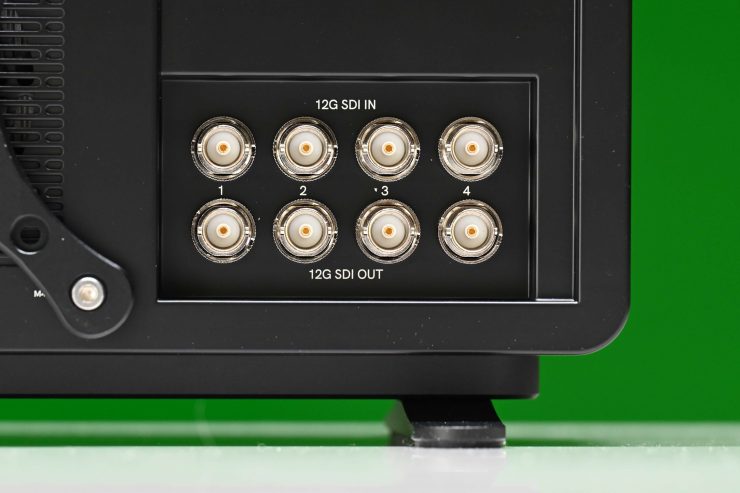
The Cine 13 certainly offers you a vast array of inputs and outputs, which is impressive for a monitor of this size.
Cross conversion?
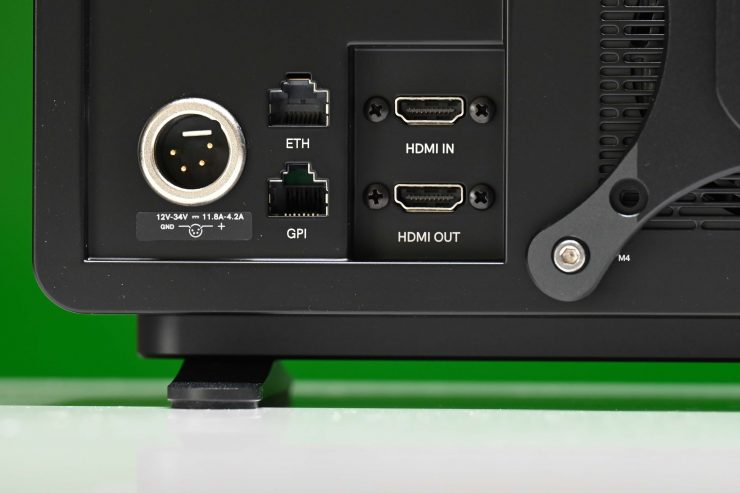
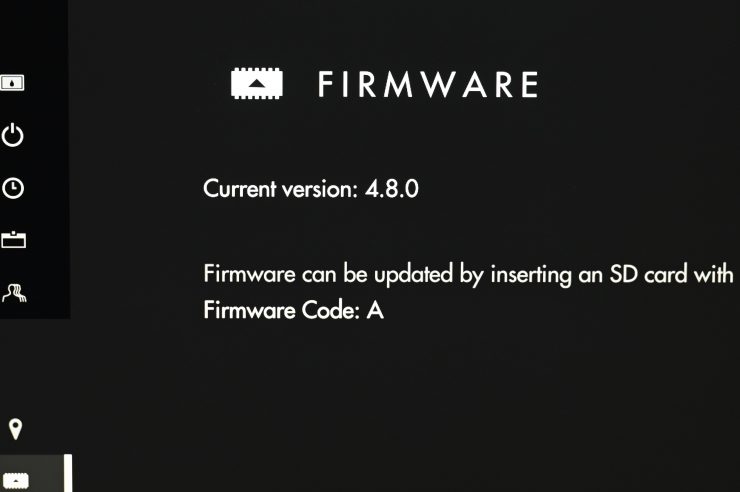
When I fed an HDMI signal into the Cine 13 and then tried to output a signal over SDI it didn’t work. I was curious as to why so I reached out to SmallHD. They told me that the cross-conversion capabilities haven’t been activated yet and they will be in a future firmware update.
The HDMI out is currently not functional, but I have been told that it will also be activated in a future firmware update.
Power
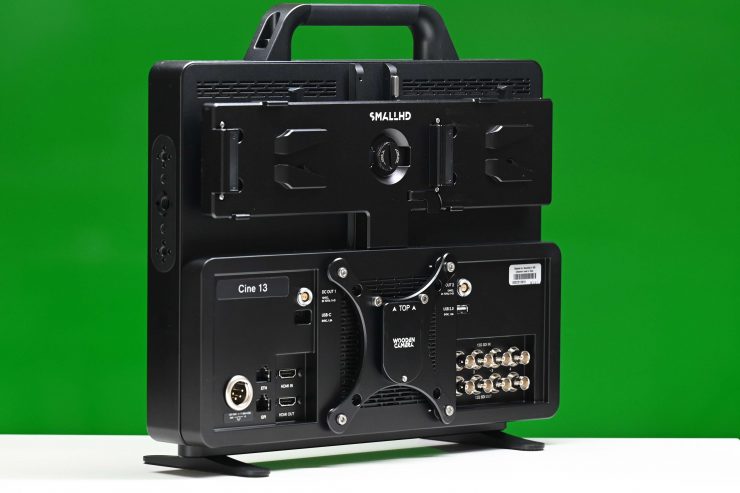
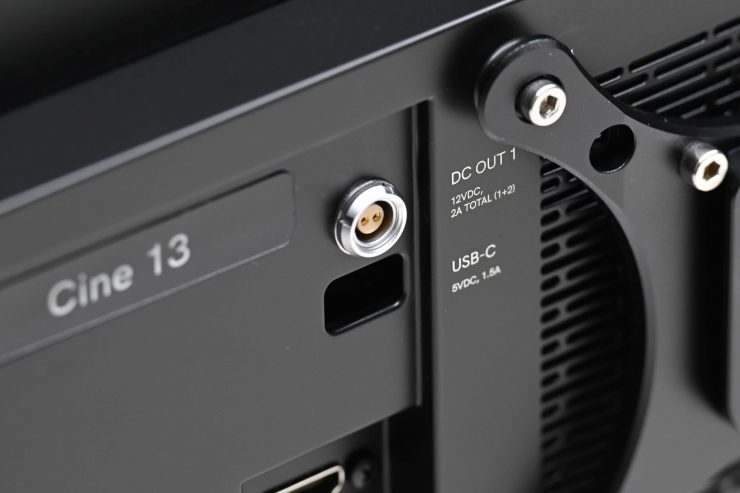
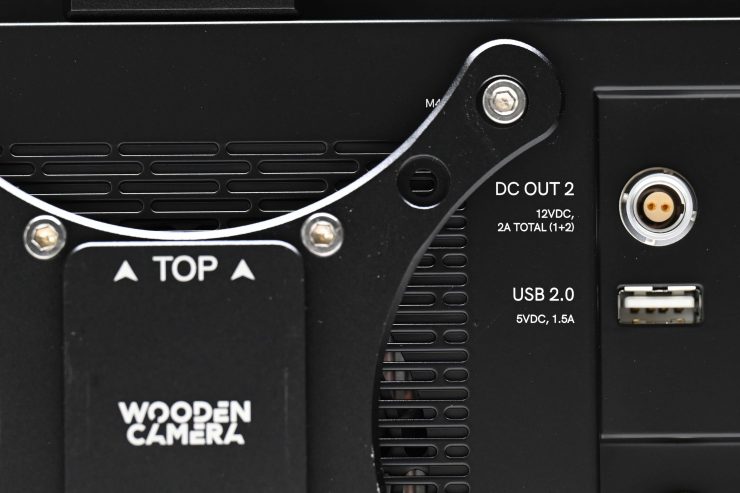
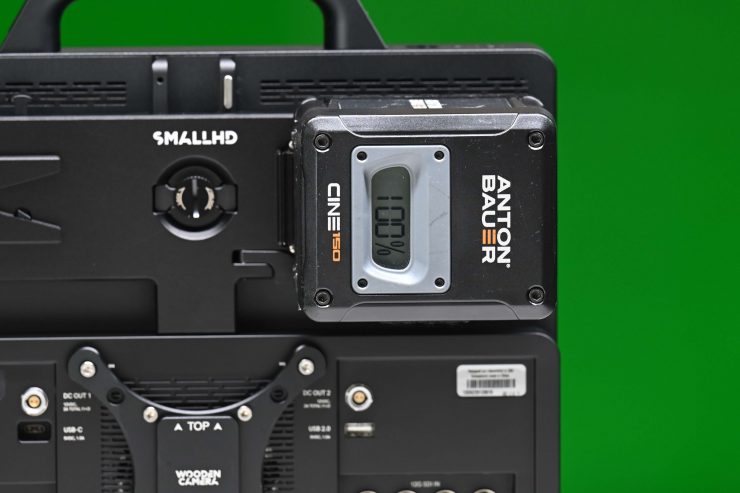
You can power the Cine 13 using its 4-pin XLR input or via a separately available dual V-mount or Gold mount battery plate. This option lets you hot-swap between the XLR and optional battery power. You can also simultaneously power peripherals from the monitor using the two 2-pin LEMO-type outputs, the two USB Type-A outputs, or the one USB Type-C output.
Again, usability has been well thought through. Having the ability to power accessories such as wireless RX units directly from the monitor is very handy.
The monitor requires 12 to 34 VDC at 18 A. The monitor draws 36.7W (monitor only) 117.9W (w/max access. power draw).
Below you can see the powering options that are available.
- 1 x 4-Pin XLR (12 A / 34 VDC) Input
- 2 x 2-Pin LEMO (2 A / 12 VDC) Output
- 1 x USB Type-A (2.4 A / 5 VDC) Output
- 1 x USB Type-A (1.5 A / 5 VDC) Output
- 1 x USB Type-C (1.5 A / 5 VDC) Output
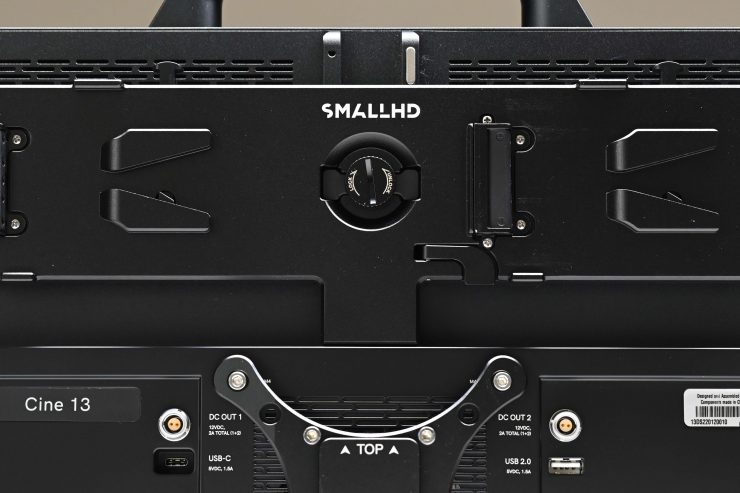
The optional SmallHD 14V/26V Dual Battery Bracket (V-Mount) is expensive, but it is well made. It doesn’t require any tools to install it as it simply slides down onto the dovetail mounting rail and then you tighten it down by hand.
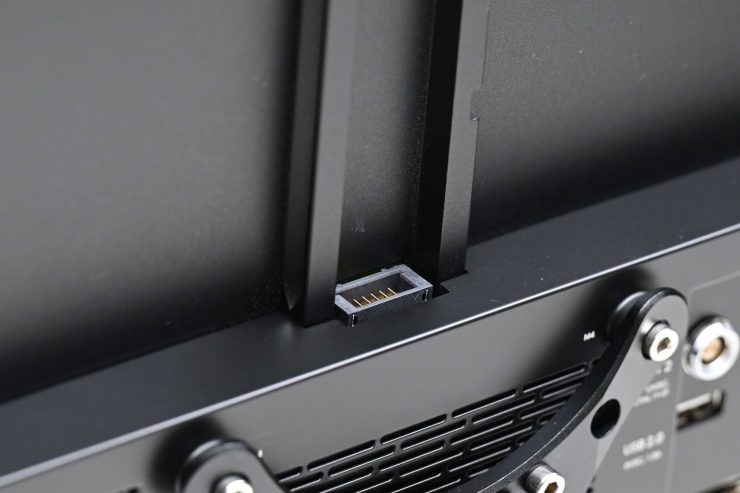
Part of the reason for it costing $399 USD is that it features a smart pin connector that interfaces directly with the Cine 13.
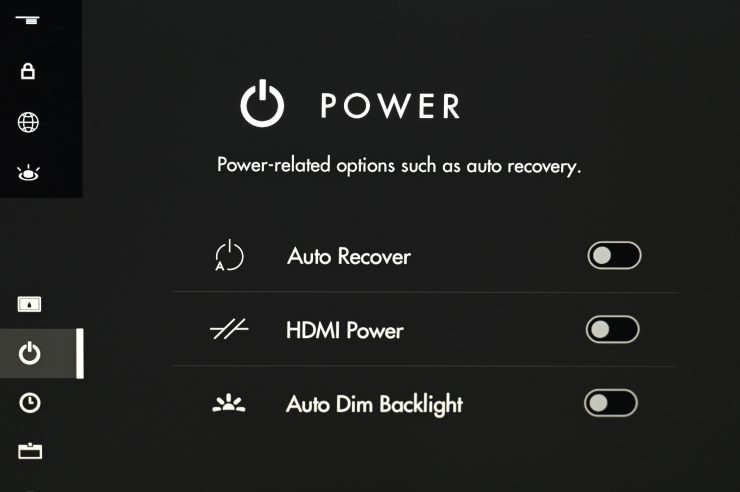
SmallHD also gives you several power options in the main menu.
Heat
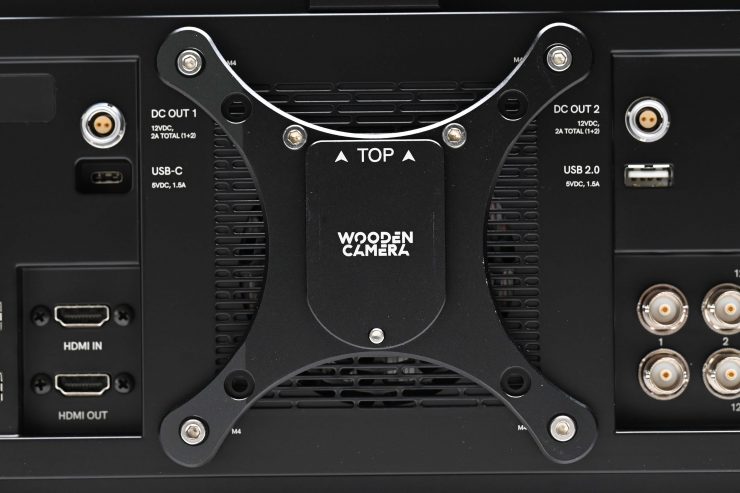
The Cine 13 features an inbuilt fan, but the fan is incredibly quiet and you can barely tell that it is on. The fan does get partly obscured if you are using the optional Wooden Camera Ultra Quick Release Articulating Monitor Mount (Baby Pin/C-Stand).
The monitor does get slightly warm if you leave it on for long periods of time. It is currently winter here in Japan so I haven’t been able to see how it performs in hotter environments yet.
Power up time
I hate monitors or products that take too long to boot up before you can use them. The Cine 13 boots up very quickly. I timed it at about 4-5 seconds from the time I turned it on till I got a picture up on the screen.
Image Zoom
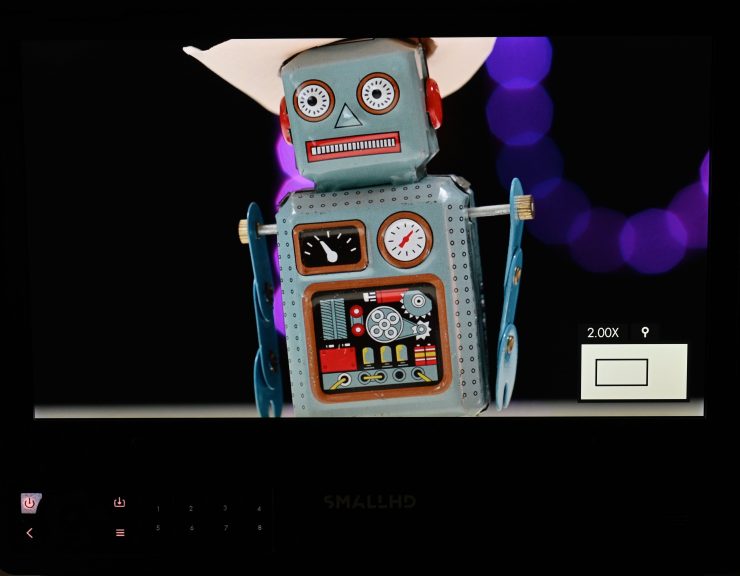
Getting critical focus when working at higher resolutions can be tricky, especially if you are using fast lenses. One of the big benefits of having a 4K display with such a high number of PPI is that it makes it a lot easier to check critical focus.
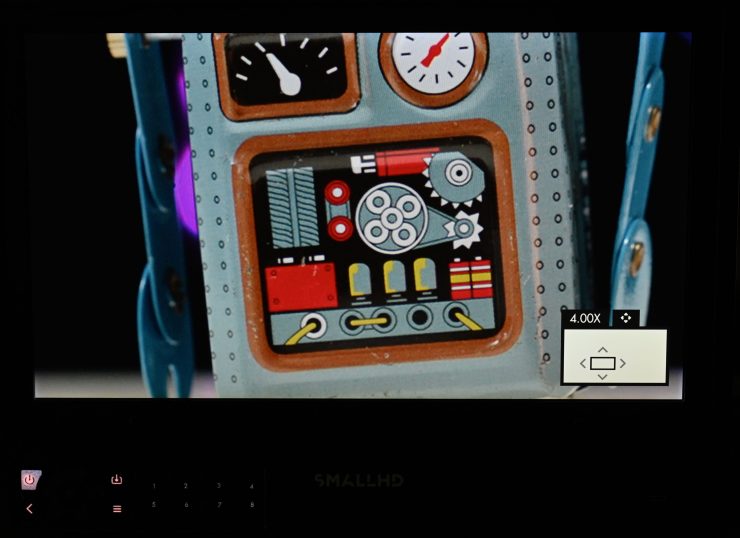
Even if you zoom in 4x on a UHD image you can see very clearly if something is sharp or not. This is something you can’t easily do on an HD monitor at this level of magnification.
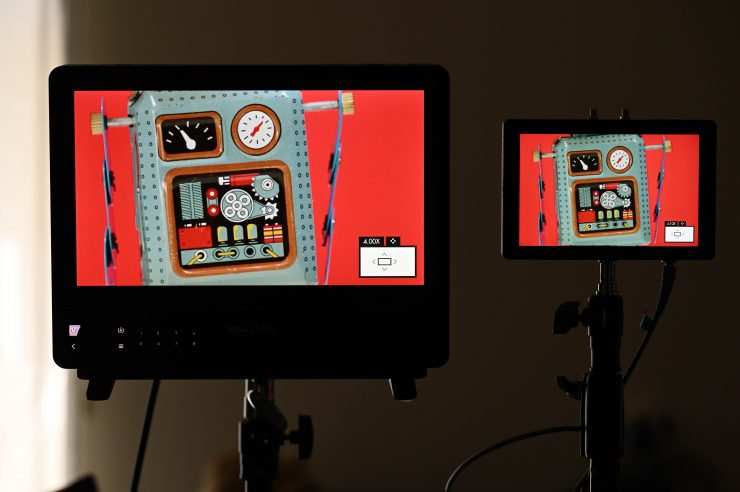
I did numerous tests comparing the same image at 4x magnification on both the SmallHD Cine 13 and the SmallHD Cine 7. The difference is very apparent at this level of magnification. Photos just don’t do the difference justice in terms of how much more detail the Cine 13 has.
Peaking
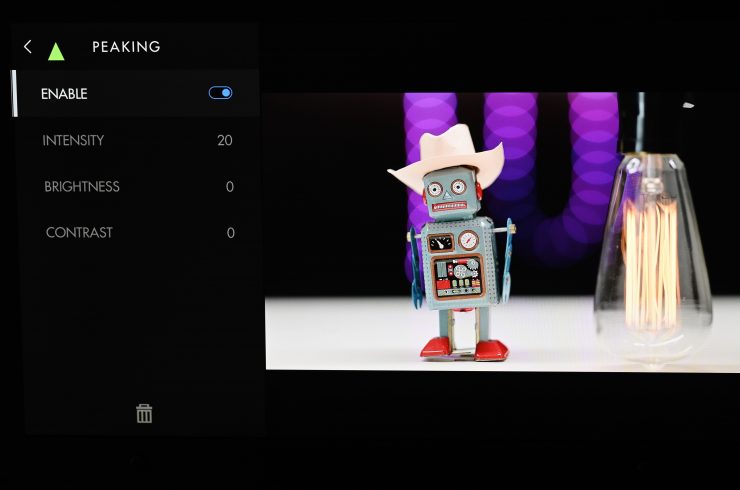
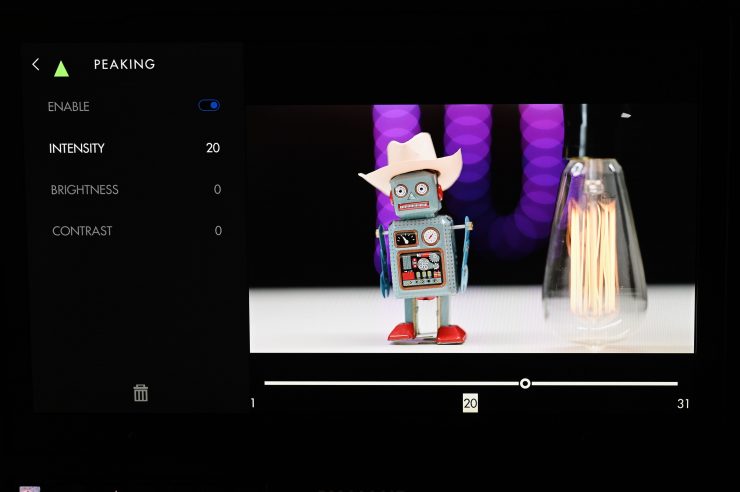
You can change the intensity, brightness, and contrast when peaking is enabled.
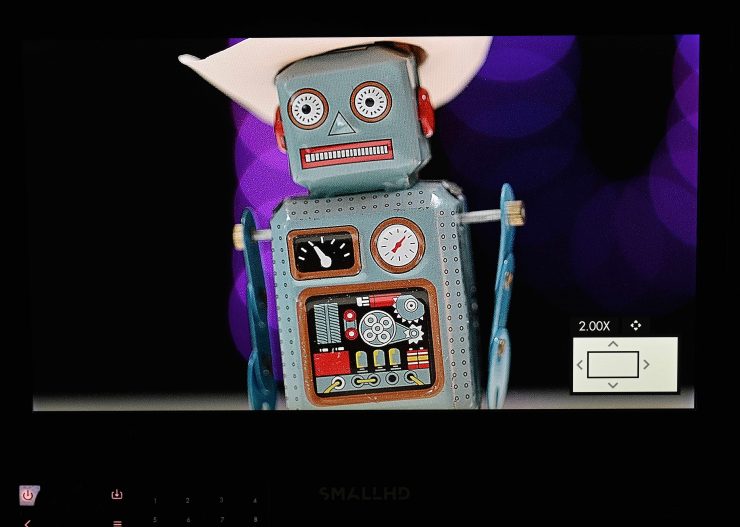
By utilizing peaking and image zoom you can make sure that you absolutely have focus nailed.
Focus Assist
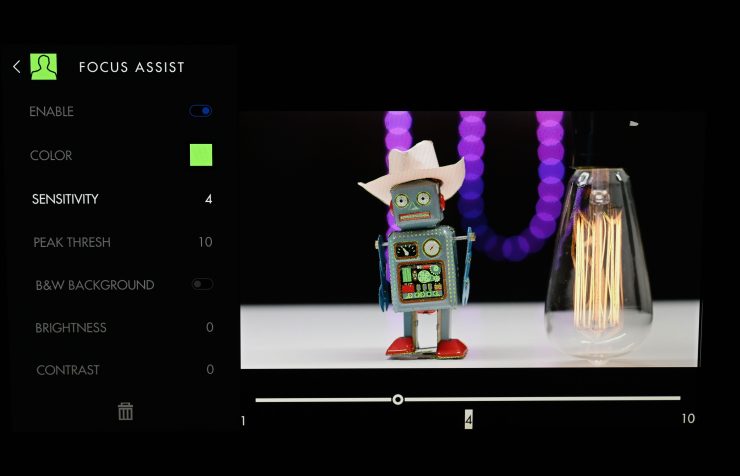
On the Cine 13 you can change the color, intensity, brightness, and contrast of the Focus Assist.
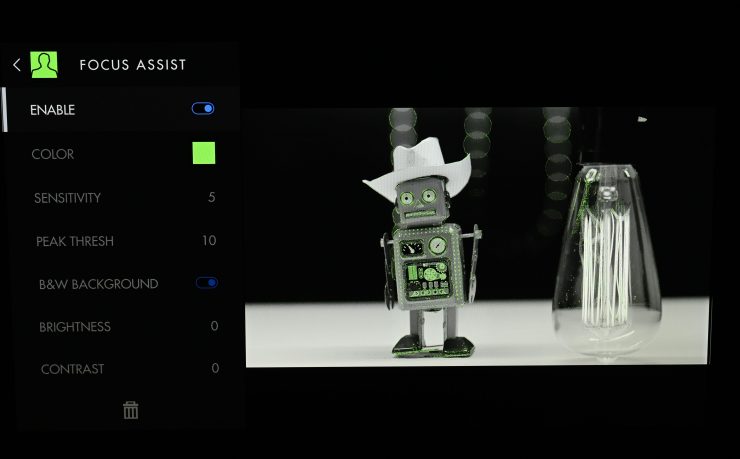
You can also select a B&W option that lets you clearly see what you are focusing on.
LUTS
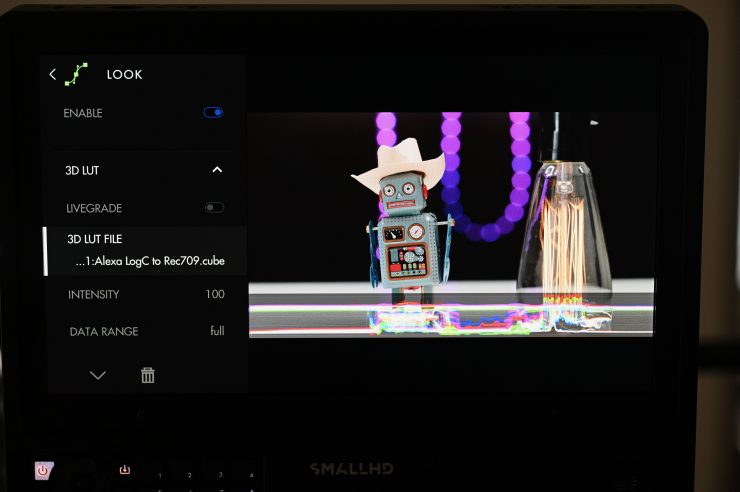
The Cine 13 doesn’t come with a range of pre-configured LUTS already installed, but you can load up your own LUTs to use. This is a fairly easy process and you just need to load them up onto an SD card.
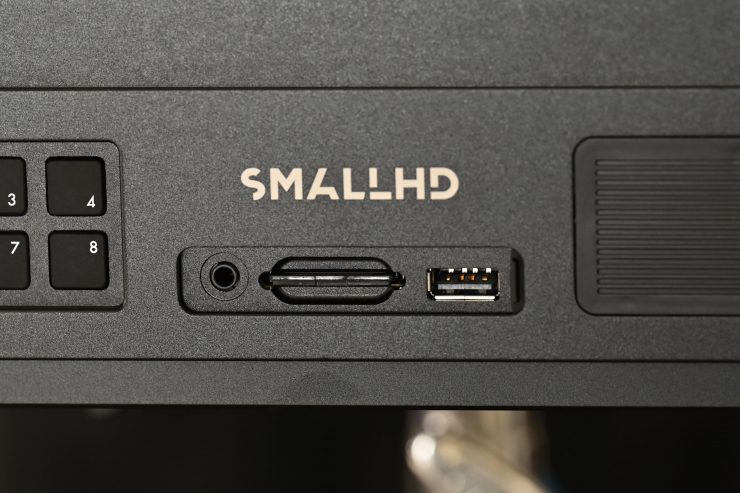
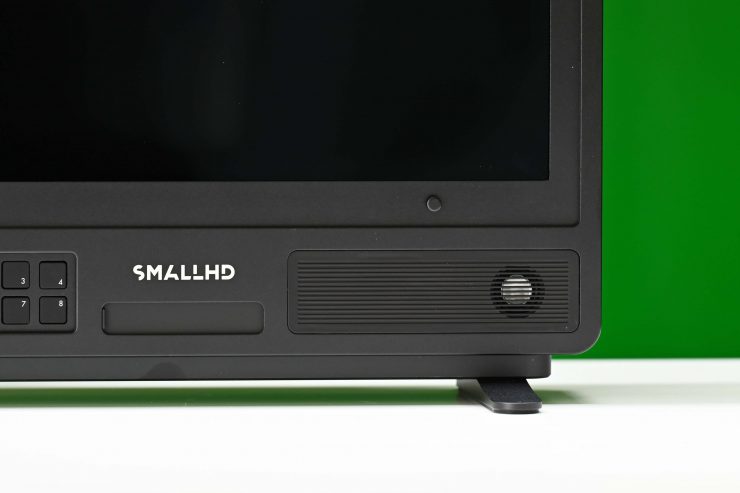
The SD card slot is located behind a sliding rubber panel below the SmallHD logo on the front of the unit.
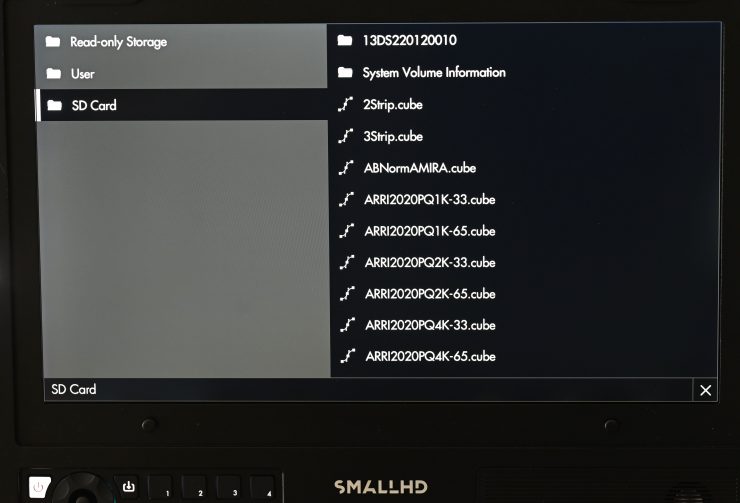
What I like is that you aren’t just limited to being able to load up a handful of LUTs. You can load up and store as many as you like. I tested his out and loaded up 142 different LUTs with no problem at all.
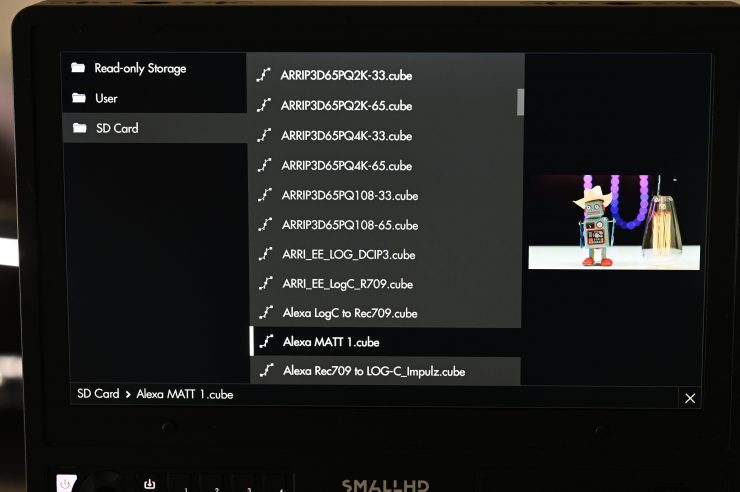
What I like is when you select a LUT you get a small preview version of what it will look like on the right-hand side.
Scopes
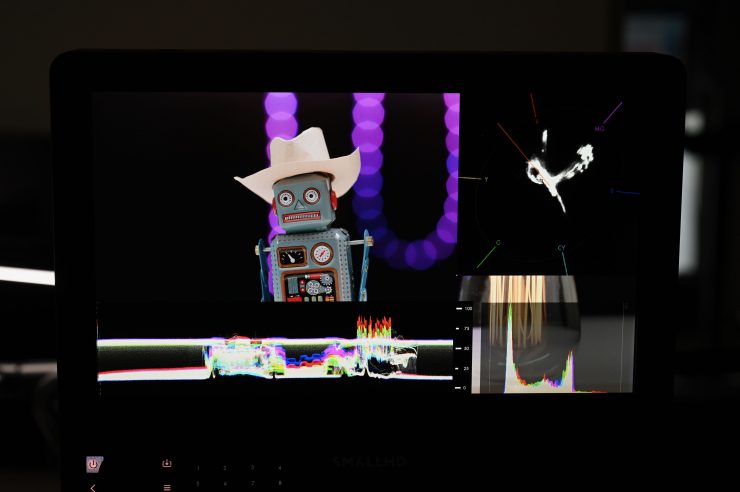
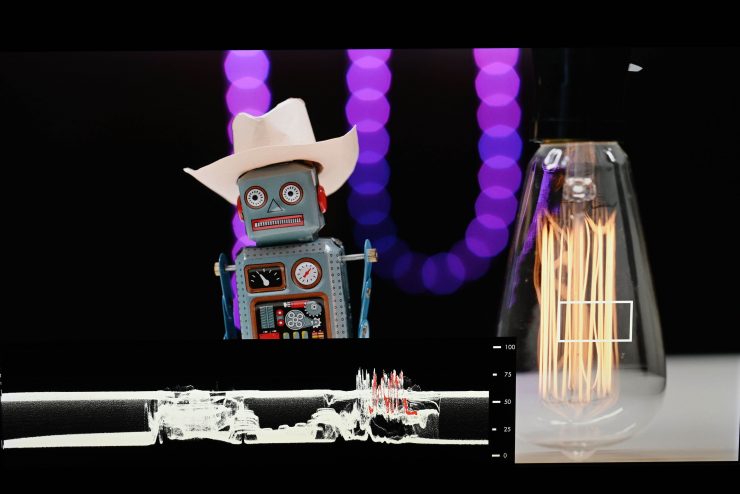
SmallHD gives you a lot of customization options when using scopes.
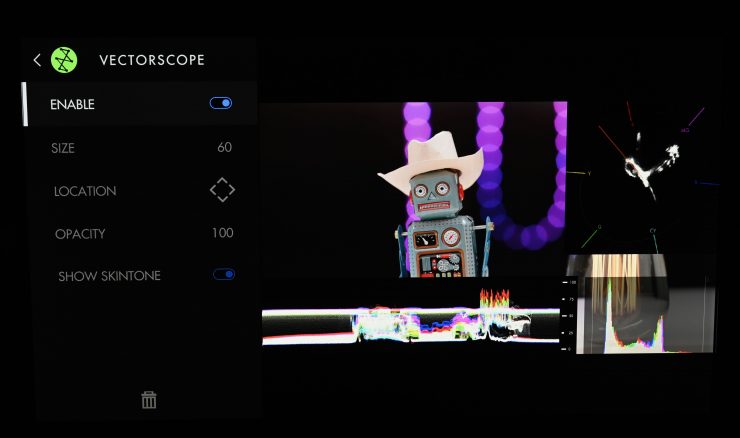
You can change their size, position, and opacity.
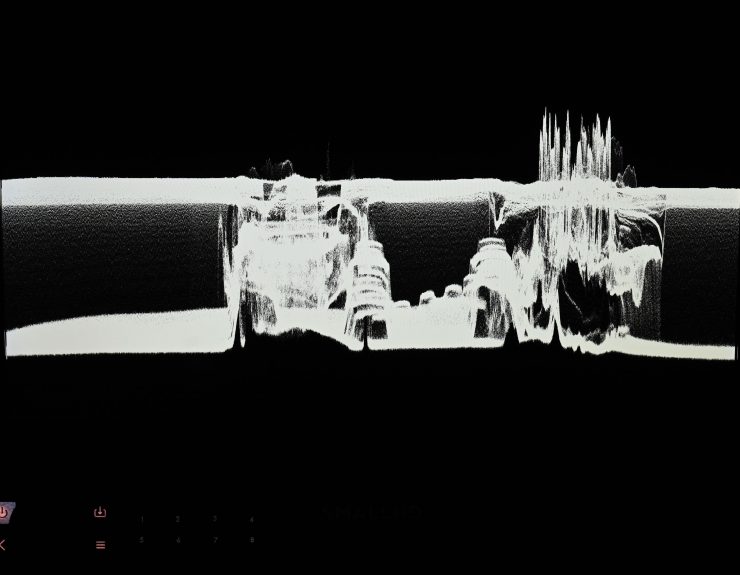
You can even make any one of the scopes full screen if you want to.
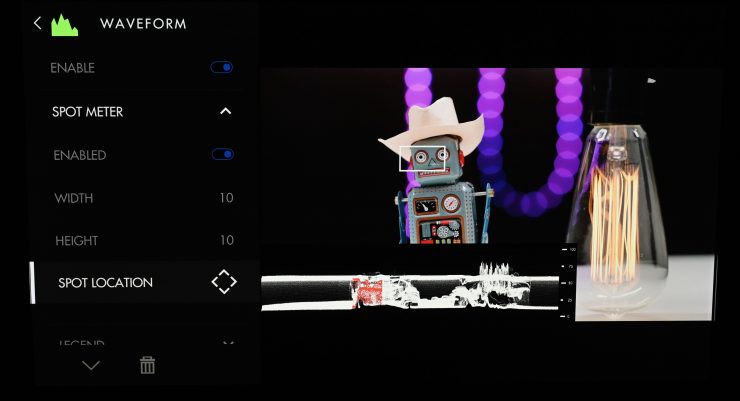
With the waveform, you can choose to display a spot location on your image, and that area is then highlighted on the waveform itself. This is an incredibly useful feature because looking at a waveform can sometimes be confusing. You can also change the size of the spot meter depending on what you want to look at.
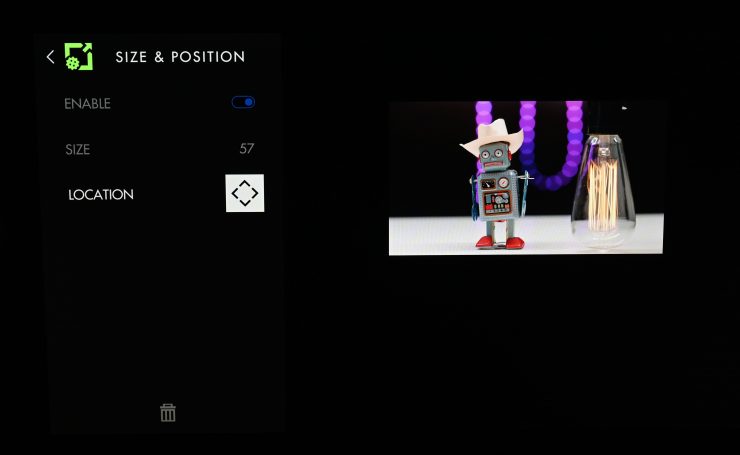
SmallHD also lets you customize the size of your main image so you can then add scopes that aren’t being overlayed over the top.
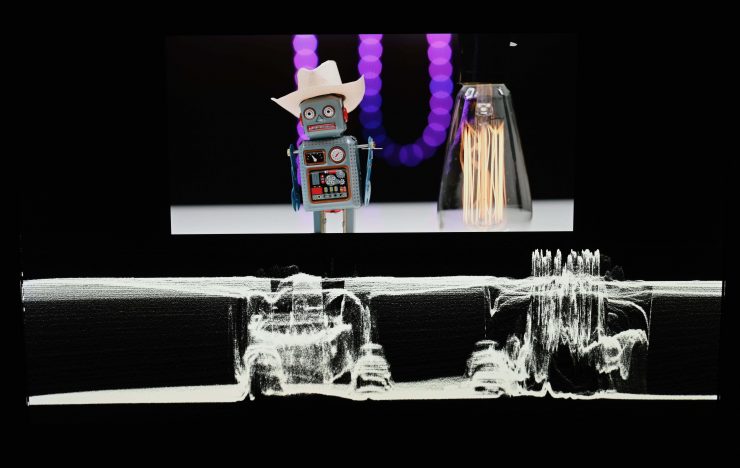
You can then customize the position and size of your scopes to suit your requirements.
Zebras
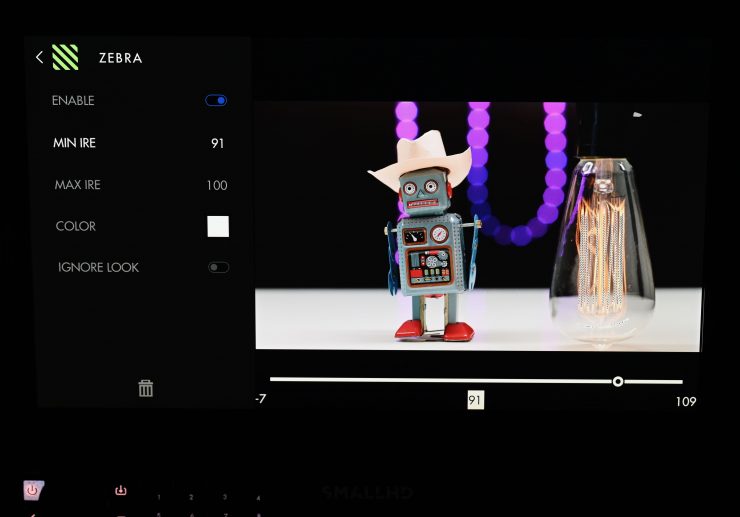
On the Cine 13 you have a lot of customization when it comes to using zebras.
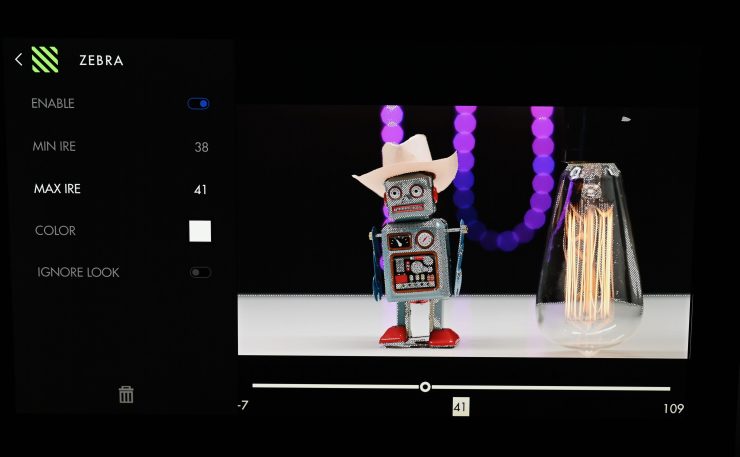
You change the color as well as set minimum and maximum IRE levels. Setting IRE levels lets you use zebras for a range of different exposure levels. For example, above I have set the IRE levels to 38-41 which are the middle grey values on an ARRI.
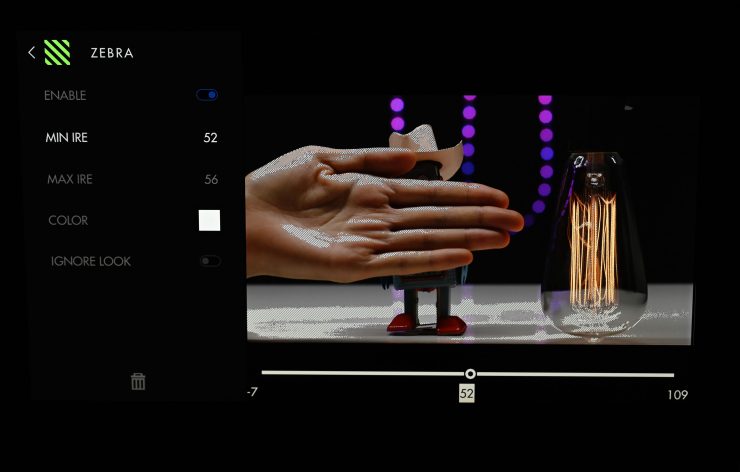
I could also set them to 52-56 IRE which is basically one-stop above middle gray and what you would use for caucasian skin tones.
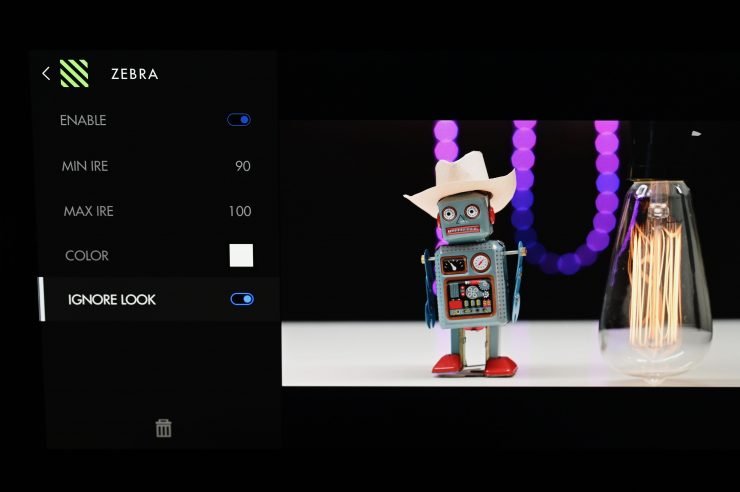
What I love is that you can also choose to ignore the Look (LUT) that you are using so it will show you the zebra levels based on your Log image. This is incredibly useful.
Aspect Ratio & Markers
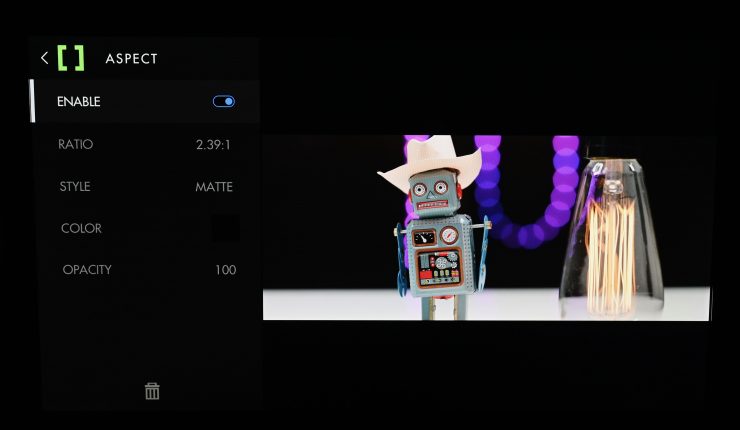
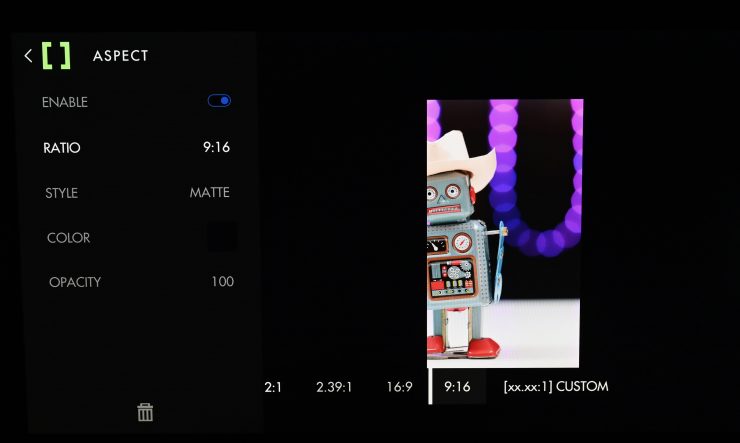
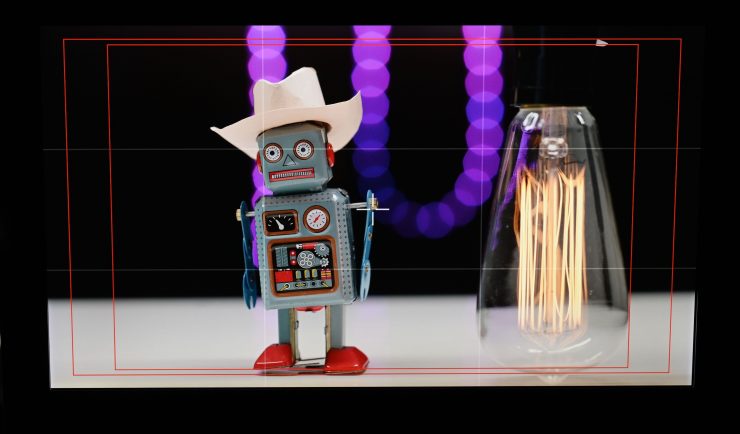
On the Cine 13 you can choose from a range of aspect ratios depending on your needs.
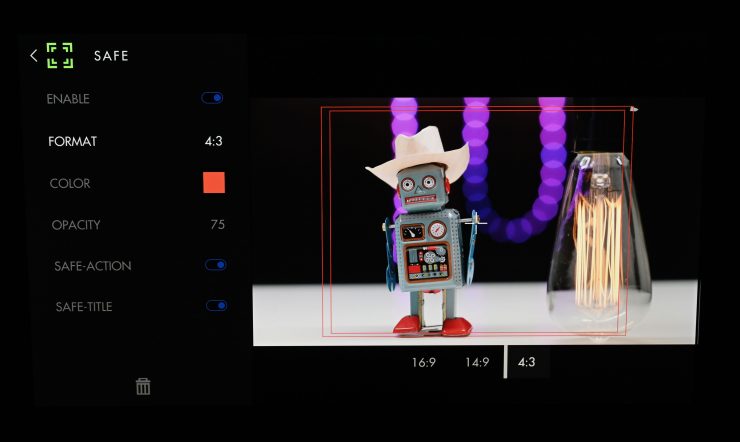
You can also set up markers for various formats and safe areas.
Image Capture & Image Overlay
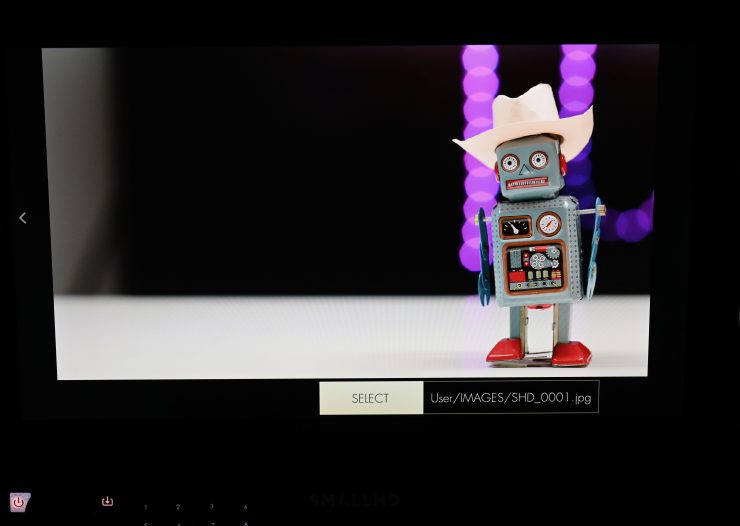
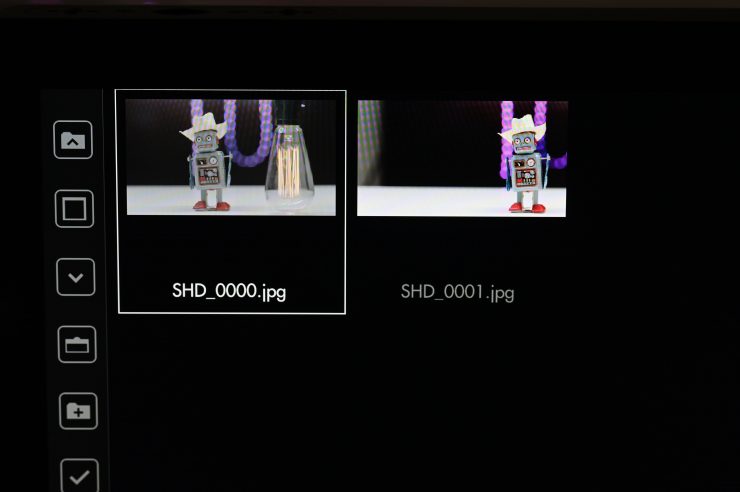
SmallHD gives you the ability to capture screen images which you can then save.
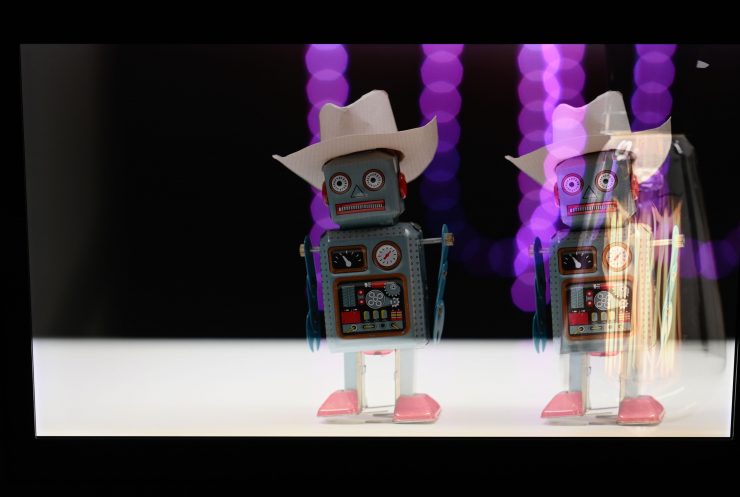
These are useful, especially when combined with the Image Overlay function so you can set up the exact framing from a previous shot.
Headphone Jack & Speaker
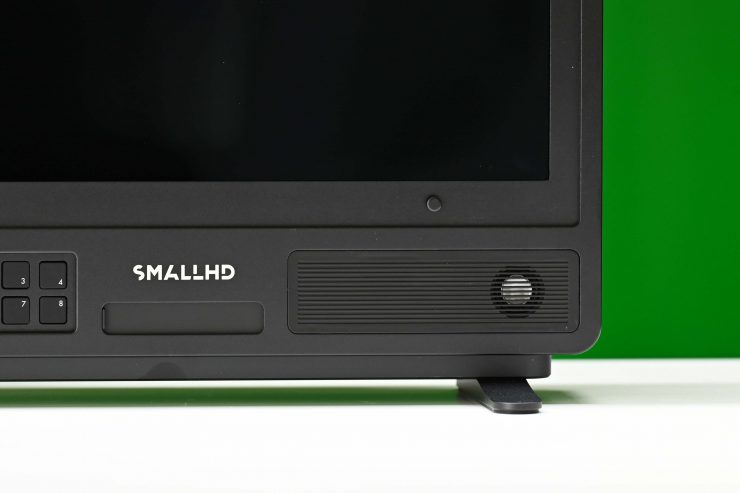
The Cine 13 does have a headphone jack that is located behind a sliding rubber panel below the SmallHD logo on the front of the unit. This is a slightly strange place to put a headphone jack and I would have preferred to have seen it located underneath the speaker.
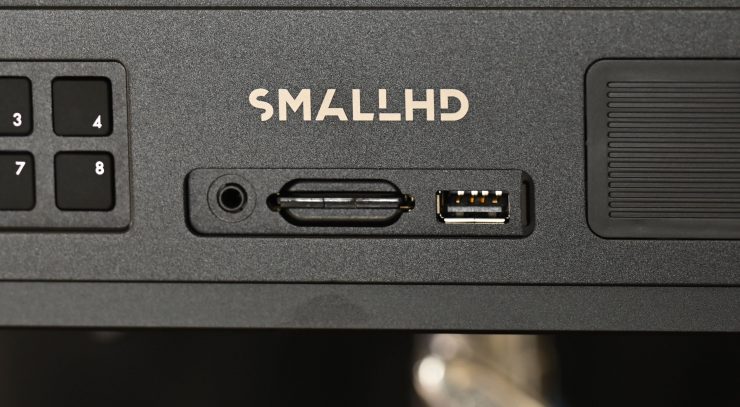
As far as what you can monitor from the headphone jack I am not currently sure because it isn’t enabled yet. I would imagine that just like on other SmallHD monitors if you are recording two or more channels of audio that audio is mixed and sent through both the right and left headphones. This makes it impossible to monitor or just listen to just one channel of audio if you are using it for playback.
This may seem like a trivial thing, but it’s something you need to take into consideration if you are going to use headphones with the Cine 13.
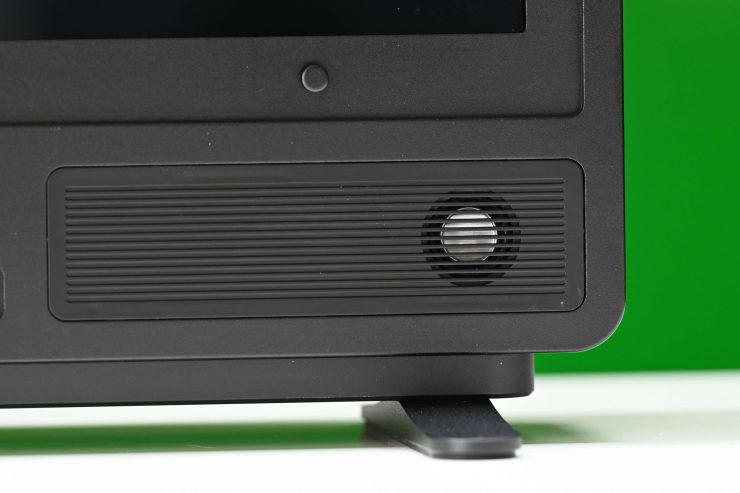
The speaker currently doesn’t work and isn’t enabled. I believe that it will be activated in a firmware update. It is a little strange that something like a speaker and a headphone output has to be enabled in an update.
Is the screen bright enough?
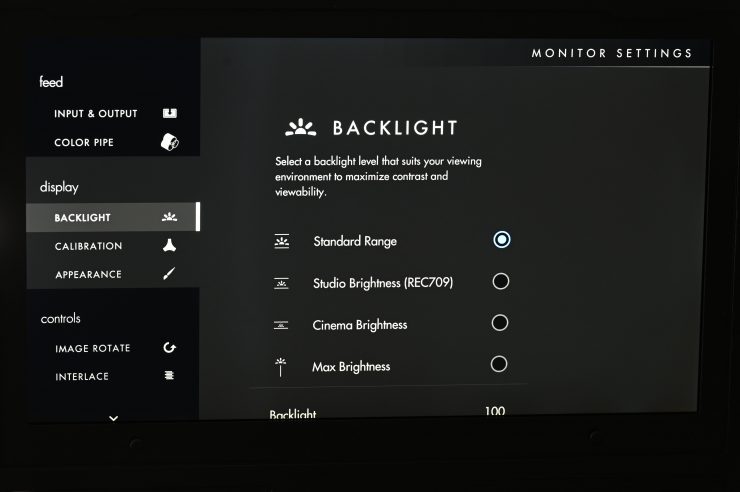
One of the biggest selling points of the Cine 13 is its 1,500 nit, 3840 x 2160 IPS LCD screen. The Cine 13 uses an optically bonded anti-reflective screen. Optically-bonded Gorilla Glass has been used because of its transparency and toughness. The optical bonding process is supposed to reduce the harshness of reflections and make sure that blacks are not washed out.
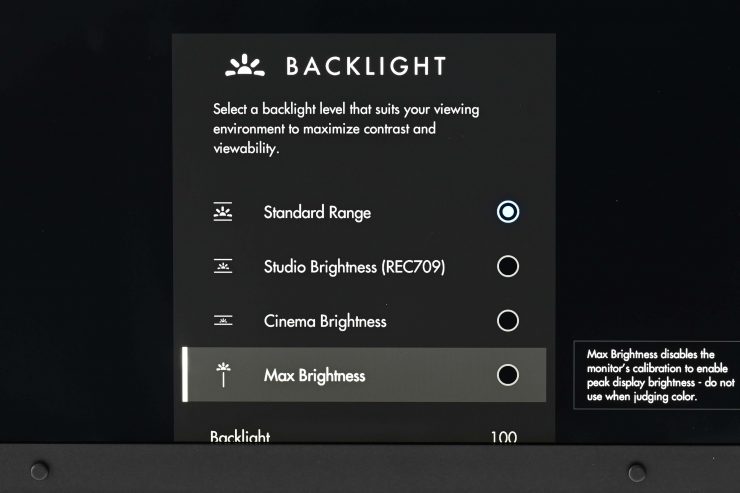
I personally think that 1,500 nits
I actually found that in real-world use the screen was bright enough to be used outdoors, even in direct sunlight. It certainly helps that the screen isn’t super reflective.
Just like higher resolution doesn’t always equate to a better camera, higher nits don’t always equate to a better monitor.
Is 13″ too small?
Whether or not there is a real benefit in having a 4K display over an HD display in this size is debatable. It really depends on what your intended use is. For focus pullers, the ability to zoom in to a 4K image (as long as the image being received is 4K) would certainly be beneficial, but then again, most focus pullers would probably prefer to be using a larger screen.
I found that 13″ was good for portability and that the size and weight made it a good solution for smaller-sized crews. As a client monitor, I also found that it was a decent enough size as long as you don’t have too many people wanting to crowd around and view the image. A lot of people are so used to viewing material on smartphones, tablets, and laptops, so in a strange way 13″ doesn’t actually feel as small as its size would suggest.
There actually aren’t any other 13″ 4K UHD monitors with 12G SDI inputs and the brightness of the Cine 13 on the market. Lilliput has the A12 12.5″ 4K Monitor, but you can only view a 4K UHD signal over HDMI and that monitor only has 400nits of brightness.
Image quality
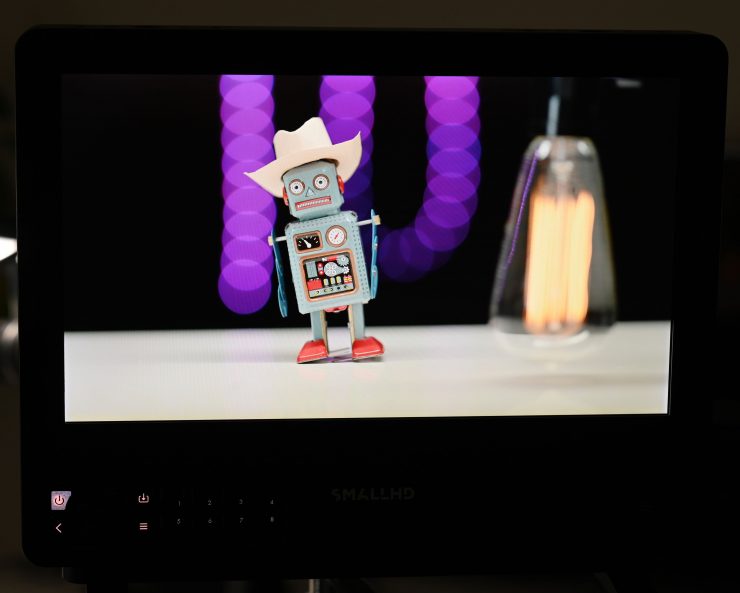
At the end of the day if a monitor can’t display accurate images then it doesn’t matter how many bells and whistles it has. If you are going to pay good money for a monitor then you want that monitor to display an excellent image.
Specialized TV & Film monitors are exceptionally expensive compared to consumer TV sets. You can buy an 85″ 4K HDR TV for around half the price of the Cine 13. You could also buy a fast 85mm stills lens for significantly less than a high-end cine prime. Everything is relative.
The picture quality is excellent on the Cine 13 and I think most people will be very impressed with the image. I haven’t used every monitor SmallHD has made, but personally, I found the image quality on the Cine 13 to be the best I have seen from any of their monitors with 1,500 nits.
Quite often I have found that most high bright monitors are a compromise between brightness and image quality. I found this to be the case with the 3,000 nit 703 Bolt. The Cine 13 strikes an excellent balance between image quality and brightness.
The colors are nice and vivid and most importantly the blacks look nice and black. Even at 1,500 nits the Cine 13 retains good contrast and color rendition. Most importantly the colors I was seeing on the Cine 13 looked almost identical to those of my EVF. A lot of monitors tend to be overly saturated and at first glance, they look great, but a good-looking image doesn’t mean that it is accurate.
The trouble with trying to evaluate any monitor’s image quality is that it is very subjective. What one person may think looks good, another may think it looks terrible. For me personally, I want the monitor to match as closely to what I am seeing in my camera’s EVF.
Does accuracy really matter?
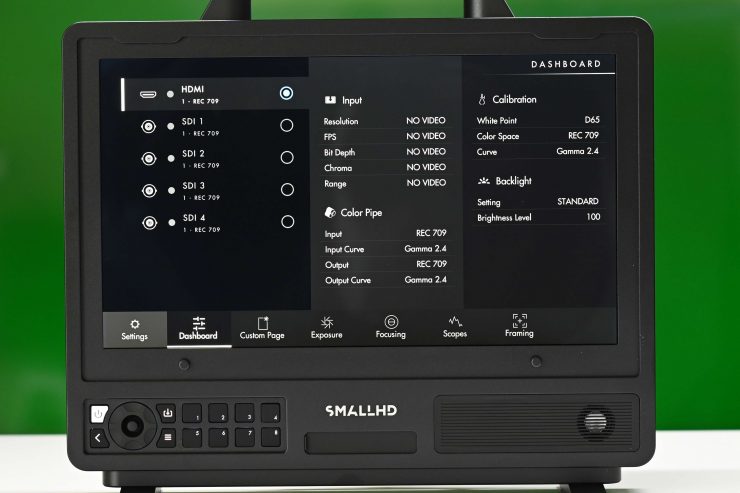
This may sound like a ridiculous question to ask, but with everyone watching content on different screens and types of screens, it’s a legitimate question.
Just because you are basing color accuracy, brightness, and contrast off whatever monitoring or grading monitor you are using there is very little chance that it is going to be seen by someone as intended unless it happens to be shown in a movie theatre (and even then there is still variables).
In the case of giving a monitor to a director, producer, or client, does it really need to be super accurate? That answer is really going to depend on the level of production. For me personally, I would rather try and provide the best image possible so that a director, producer, or client knows exactly what they are getting. I found that the image from the Cine 13 enabled me to show producers, directors or clients a very accurate indication of what they were getting.
Do you really need a 4K monitor?
This is a very legitimate question. Can you actually see a difference between 4K and HD resolution on a monitor of this size? Honestly, if you are just viewing it from a few meters away, no, I don’t think so. On smaller monitors with a high PPI, telling the difference between a 4K image an HD image is extremely difficult.
When I asked SmallHD what are the benefits of having a 4K display that is only 13” were they told me that having a higher pixel density means a sharper image and more crisp focus pulling.
The Cine 13 isn’t supposed to look drastically different from an HD display for normal viewing. Hold on, then why would you even bother buying a 4K display then? Well, where there is quite a noticeable difference is when it comes to focus magnification. You can clearly see way more detail and it is a lot easier to make sure you get accurate focus when working at higher resolutions, especially if you happen to be shooting at lower T or F stops.
Real world use outdoors
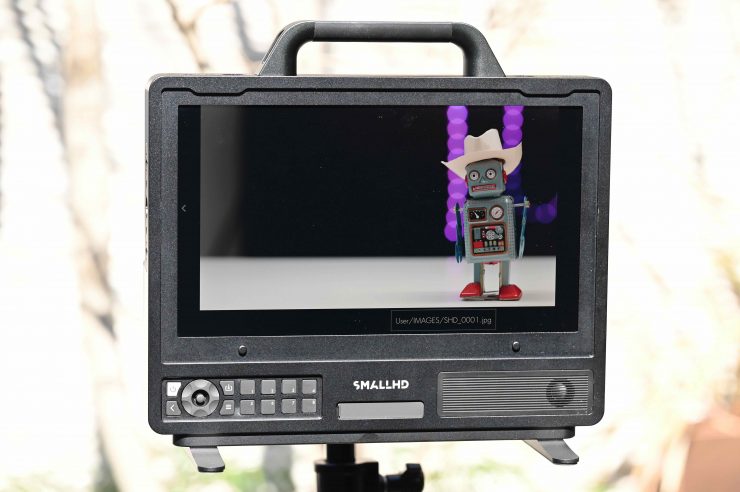
Most monitors will look good indoors, but outdoor usability is what separates a great monitor from a good monitor. Too often I have tested so-called “Daylight viewable” monitors only to find out they can’t be used outdoors.
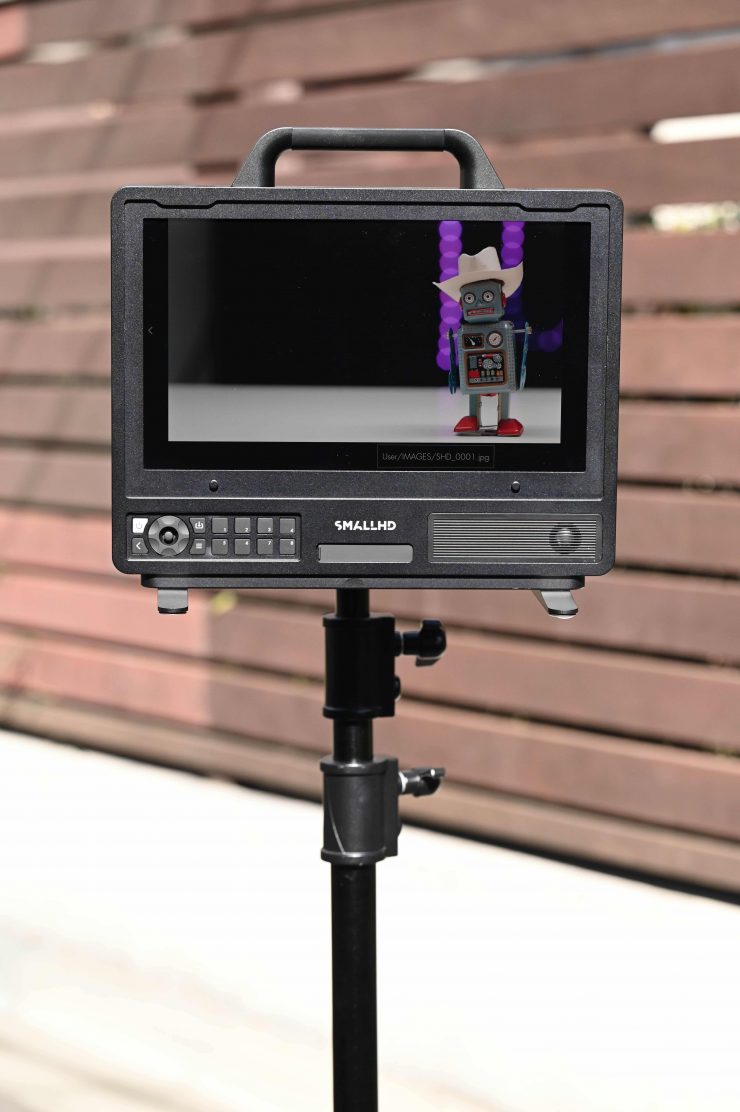
So how does the Cine 13 perform outdoors in sunny conditions? As I previously mentioned, I had no problem using the Cine 13 outdoors, even in direct sunlight.
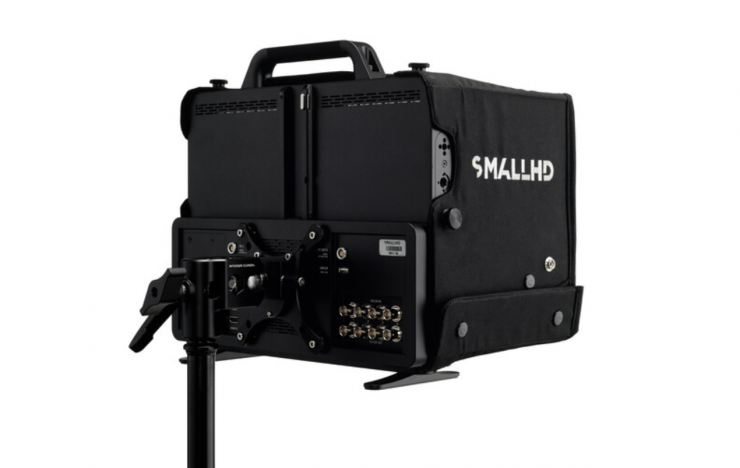
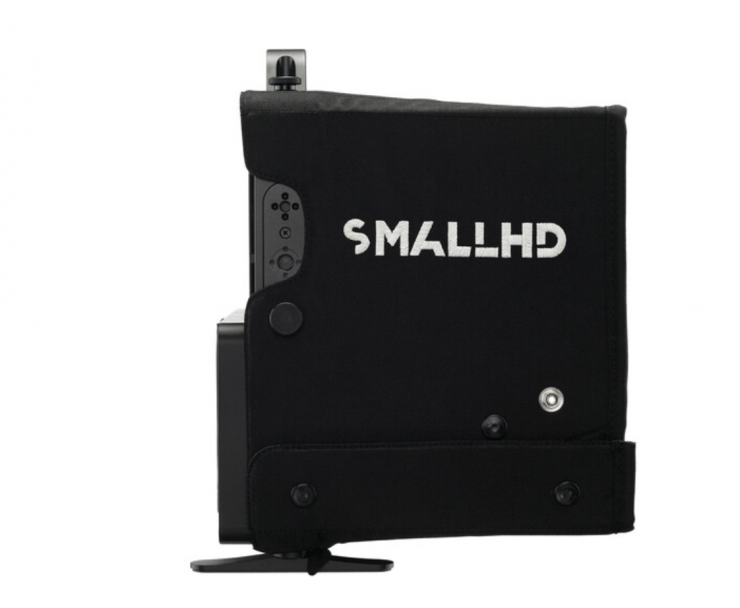
SmallHD does sell an optional sun hood that you could use, but I personally didn’t see the need for one.
Is it actually 1,500 nits?
To check the claimed brightness of the Cine 13, I shot a white card with a light set at 6500K, and then exposed the image so it was just below 100% so there was no clipping. I then took a reading from the Cine 13 using a Sekonic C-800. The Cine 13 has a claimed maximum brightness of 1,500 nits so does it produce 1,500 nits?
There are a few different brightness modes on the Cine 13. The first one I tested was the Standard Range mode.
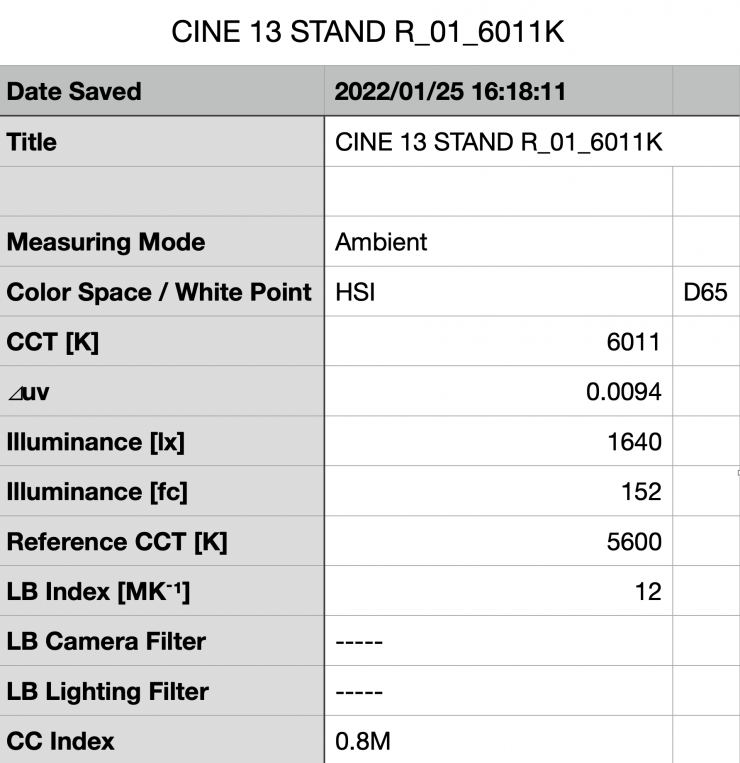
The Cine 13 gave me a reading of 1,640 lux and a Kelvin color temperature reading of 6011K. Just for reference, it had a CC score of 0.8M. The reading of 1,640 lux exceeds SmallHD’s figure of 1,500 lux.
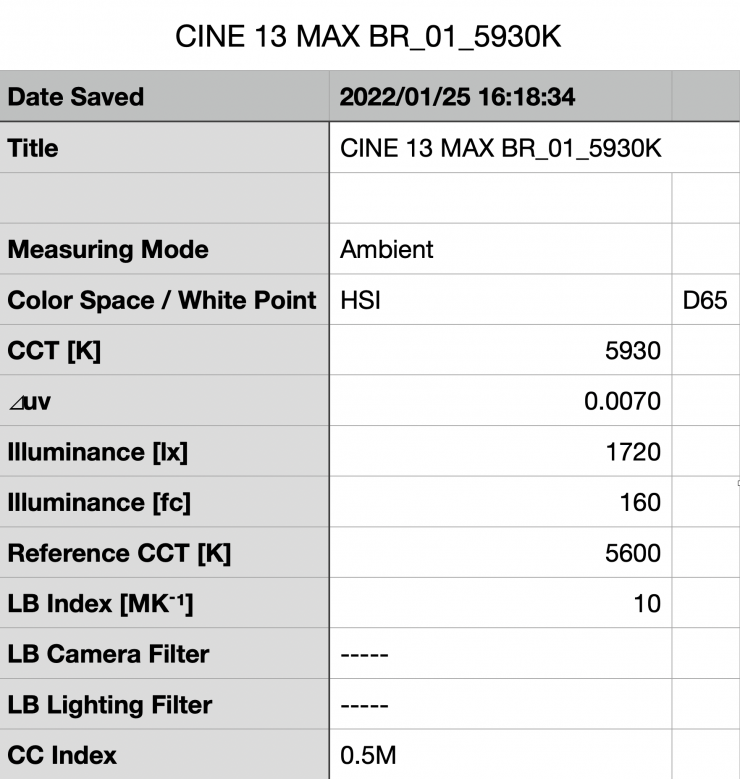
Above you can see the results for when I set the Cine 13 in its Max Brightness mode. It recorded an output of 1,720 lux and a Kelvin color temperature reading of 5930K. 1,720 lux was 80 lx higher than the Standard Range mode. Just for reference, it had a CC score of 0.5M.
Now, SmallHD states that in Max Brightness mode the monitor’s calibration is disabled and you shouldn’t use it when judging colors. I personally found that the Max Brightness mode didn’t seem to alter the colors in any noticeable way.
Just to be absolutely crystal clear these tests were just meant to measure the brightness. You shouldn’t read too much into the Kelvin color temperature readings and CC scores.
How does the picture quality compare to a SmallHD Cine 7?
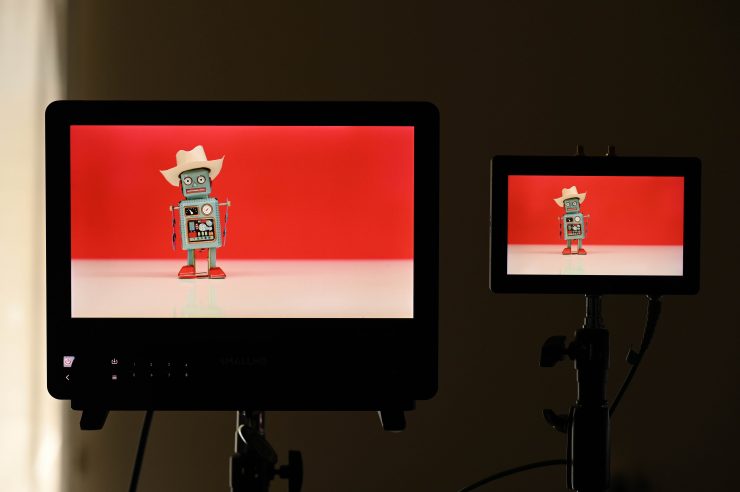
I personally use a SmallHD Cine 7 as my on-camera monitor when one is required, so I wanted to see how well that matched with the Cine 13.
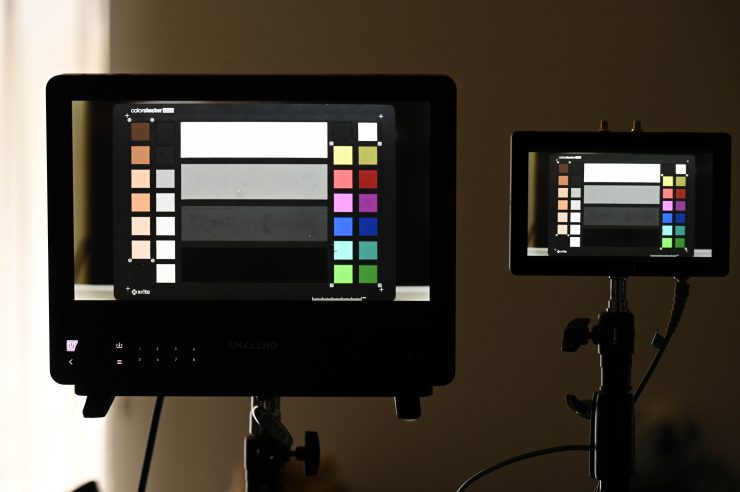
To my eye, the colors are very, very close between the two monitors. They are so well matched that it is hard to tell the difference.
Even though the Cine 13 has fewer nits than the Cine 7 it actually appears to be brighter because of its size.
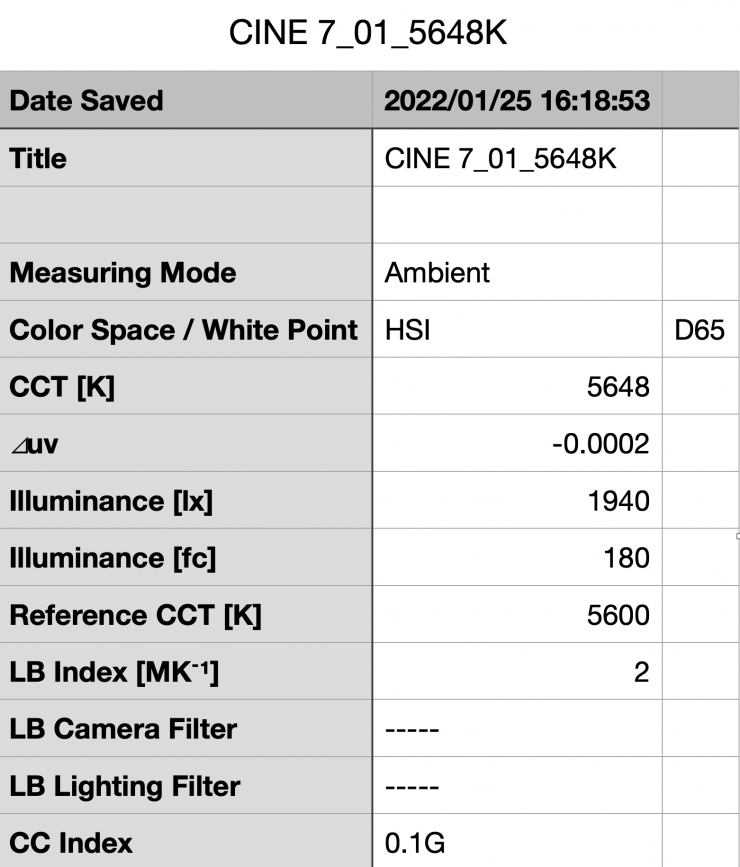
To check the claimed brightness of the Cine 7 I measured it under the exact same conditions as I did with the Cine 13. I shot a white card with a light set at 6500K, and then exposed the image so it was just below 100% so there was no clipping. I then took a reading from the Cine 7 with a Sekonic C-800. The Cine 7 gave me a reading of 1,940 nits and a Kelvin color temperature reading of 5648K. It had a CC score of 0.1G.
In summary here is how the Cine 7 and Cine 13 compare when you look at brightness, Kelvin color temperature, and CC score under the exact same conditions.
| SmallHD Cine 13 | 1,640 lux | 6011K | CC 0.8M |
| SmallHD Cine 7 | 1,940 lux | 5648K | CC 0.1G |
On the SmallHD monitors, you can set the white point to various Kelvin color temperatures. For the above readings, the SmallHD monitors were set at D65 (6500K).
The great aspect about using SmallHD monitors is that all of the OS is exactly the same and all of the monitoring assist tools work in exactly the same way.
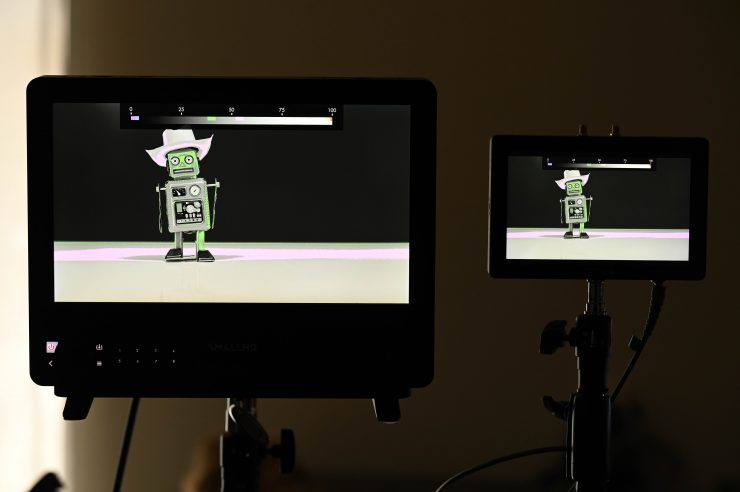
Above you can see an example where false color is being applied to the same image coming out of the camera to both the Cine 13 and the Cine 7. Both monitors are showing me the exact same thing, which is exactly what you want them to do.
No HDR
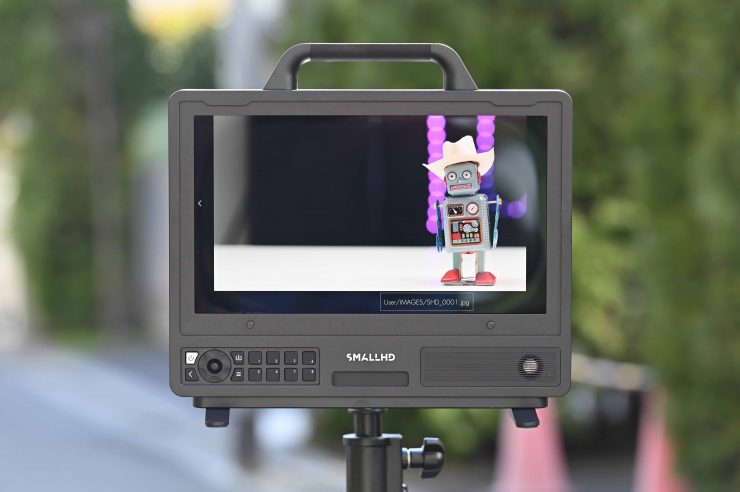
The Cine 13 4K isn’t an HDR-capable monitor. While the Cine 13 reaches 1,500 Nits, it doesn’t do so dynamically as to technically meet the HDR spec (for contrast ratio). However, it can still be used to monitor HDR.
According to SmallHD, their view is that on the monitoring side, relying on the picture alone, even a true HDR picture in anything other than a studio environment is not ideal and would result in improper exposure adjustments since the perceptions of what is on screen changes so drastically along with the viewing environment. For example, if monitoring on a bright sunny day, any subtleties in the darkest areas of an HDR picture will be completely lost to the eye and may not be accounted for – in this case, you actually would want a boosted black point so that issues can be spotted due to the environmental constraints.
In this methodology, reliance on exposure tools and scopes is even more important than before when speaking of HDR because, in a proper viewing environment, any issues at the extremes of a camera’s dynamic range get magnified much further than with SDR.
When people ask how to best shoot for HDR, SmallHD normally recommends using a waveform set to RGB or parade (so if one individual color channel gets clipped you can pick it up before the luma waveform would see the same issue) or to set a custom exposure assist (false color) to the points in the image where clipping occurs. If shooting in log and at least 10-bit (12 bit+ preferred) and the extremes of the exposure range are managed, you’ll be capturing future-proof HDR-ready material. Now what to do with that footage next is a whole new issue with all the competing standards, and a surge of HDR10+ across manufacturers, etc. help demystify for the shooter while treading carefully not to further complicate this already complicated world.
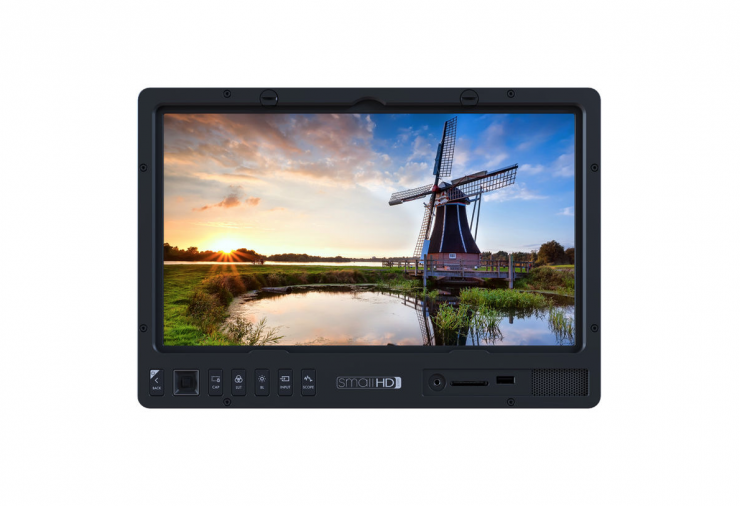
SmallHD has employed some HDR previewing tools into their production monitors which apply the PQ curve to Log signals but they intend to make it even more user-friendly going forward.
HDR is far from any sort of fad, the benefits are tremendous when it comes to giving creative control back to the filmmakers
Could you use it as a grading monitor?
I was curious, so I reached out to ask SmallHD. They told me that is not its intended use but if you are on a budget you may be moderately successful. I do not think anyone grading as a full-time job would want to use this for that.
Upcoming new features
The Cine 13 will get the following features enabled in a future firmware update:
- HDMI 2.0 Output
- Dual & Quad-View
- Dual link SDI
- Quad Link SDI
- Audio – Headphone / Speaker
I am looking forward to having dual and quad link display options.
Price
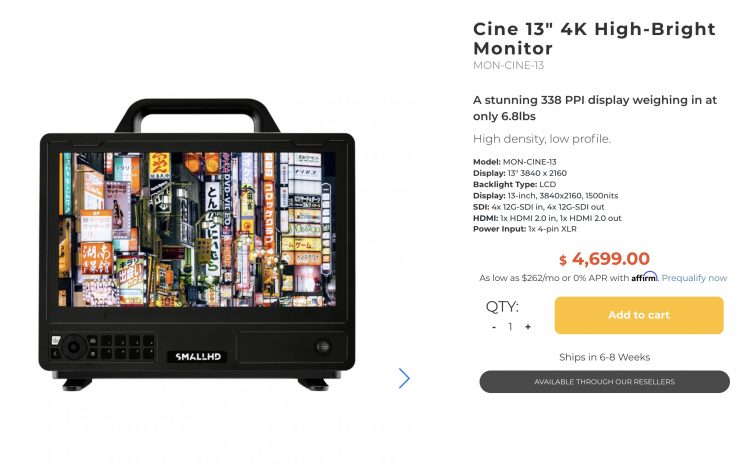
The SmallHD Cine 13 4K UHD monitor is certainly not cheap and it will set you back $4,699.00 USD. No matter which way you look at it, that is an awful lot of money for a 13″ display.
Even though it is not what I would classify as affordable, you are getting a lot of functionality and features for your money. However, it really comes down to what type of work you do and what your requirements are. It isn’t a monitor that will be suitable for everyone, and in a lot of ways, it has a fairly small target audience.
For me personally, I like to use the best possible monitoring tools I can afford. It is how I judge everything from exposure to color, to focus.
What you also need to take into account is that the Cine 13 doesn’t come with much. You are still going to need a case or bag to put it in, a battery plate if you want to power it remotely, and mounting accessories if you want to attach other gear to it.
You can also purchase the Cine 13 and Cine24 directly from SmallHD:
Competition
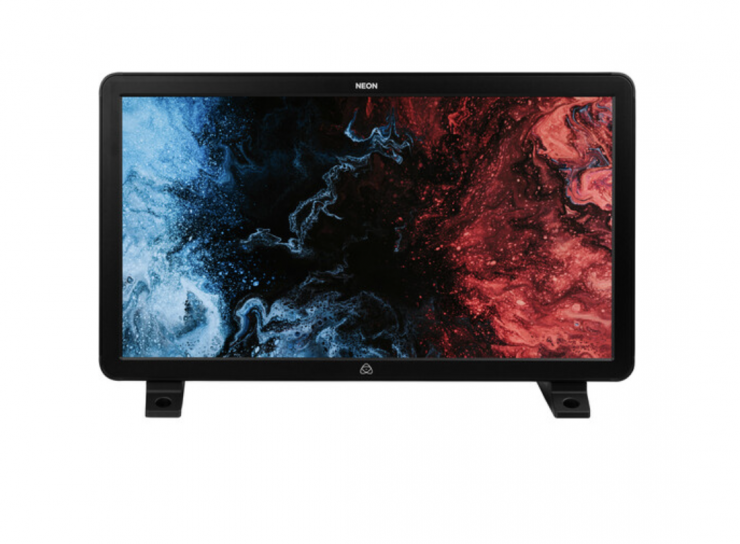
As far as I am aware, there isn’t another 13″ 4K UHD monitor that has the same feature set as the Cine 13. Atomos has the 17″ NEON, but that is an HD-only display, to get 4K UHD you need to buy the 24″ model which retails for $6,499.00 USD.
Flanders Scientific doesn’t make any smaller sized 4K UHD monitors. The smallest size they have available is the upcoming 31″ XM312U.
What does it come with?
The Cine 13 ships with the following items:
- SmallHD Cine 13 UHD 4K High-Bright Monitor
- SmallHD CBL-SGL-HDMI-4K-120 HDMI Cable (10′)
- SmallHD Microfiber Cleaning Cloth
- SmallHD Basic Acrylic Locking Screen Protector for Cine 13 Monitor
- SmallHD Power Supply for Cine 13 Monitor
- Monitor Feet Set
- 8GB SD Card
- Limited 1-Year Warranty
Below are the optional accessories that are available:
- SmallHD Mounting Rail for Cine 13 4K Monitor $129 USD
- Wooden Camera Ultra Quick Release Articulating Monitor Mount (Baby Pin/C-Stand) $250 USD
- SmallHD 14V/26V Dual Battery Bracket (V-Mount) $399 USD
- SmallHD Sun Hood for Cine 13 Monitor $249 USD
- Innerspace Cases Case for SmallHD Cine 13 4K High-Bright Monitor with Foam Insert in Pelican Air $599 USD
Conclusion
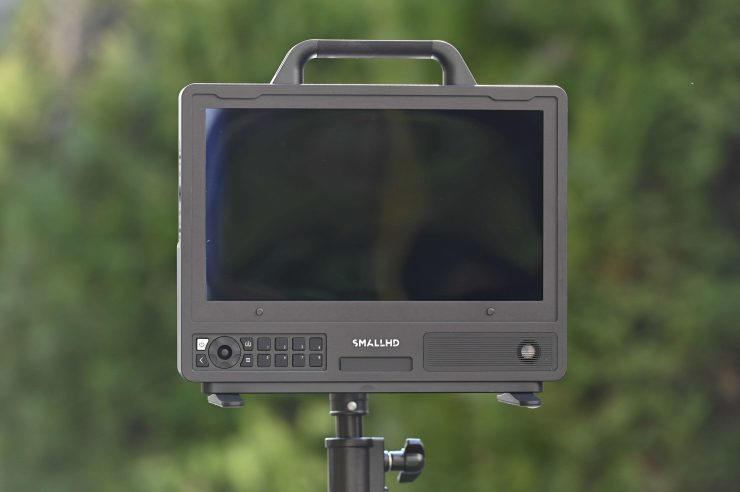
It’s not that hard to come up with a reasonably good-looking smaller-sized screen these days and be able to sell it for not a lot of money. The problem is there is a lot more to a monitor than just the display. It’s the software, inputs and outputs, build quality, and the OS that separates the good and great monitors from the ok ones.
The SmallHD Cine 13 ticks so many boxes when it comes to build quality, customization, inputs and outputs, OS, power options, and most importantly image quality.
The SmallHD Cine 13 UHD 4K High-Bright Monitor certainly isn’t cheap and $4,699 USD is an awful lot of money to spend on a 13″ display. This monitor is reasonably niche and it was designed for certain applications and it isn’t a product that is being targeted at a wide audience.
I am a stickler for good monitoring and that is why I personally have no problem investing a lot of money in a good monitor or EVF. An accurate representation of what I am shooting is important to me.
At the end of the day, a monitor or an EVF is how we judge everything we shoot. Why on earth would you not want to use the best possible option you can afford. A good chef isn’t going to buy an expensive oven and then throw a frozen pizza in there and expect it to taste like a freshly made one using quality ingredients. Do you really want to use the equivalent of a frozen pizza as your sole monitoring option?
The Cine 13 is well made, easy to use, and the image quality is superb.

