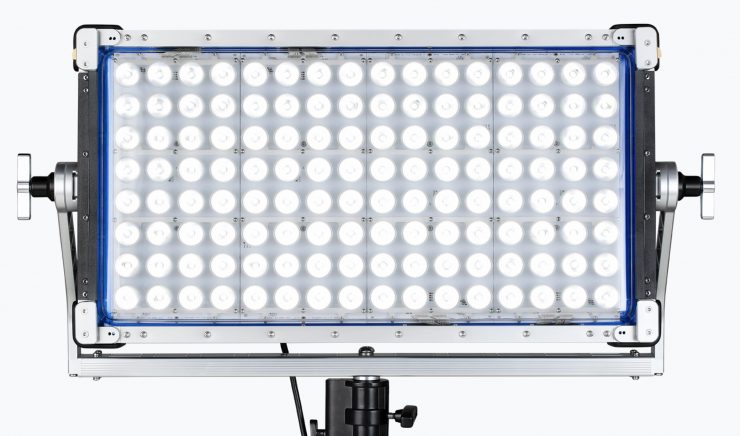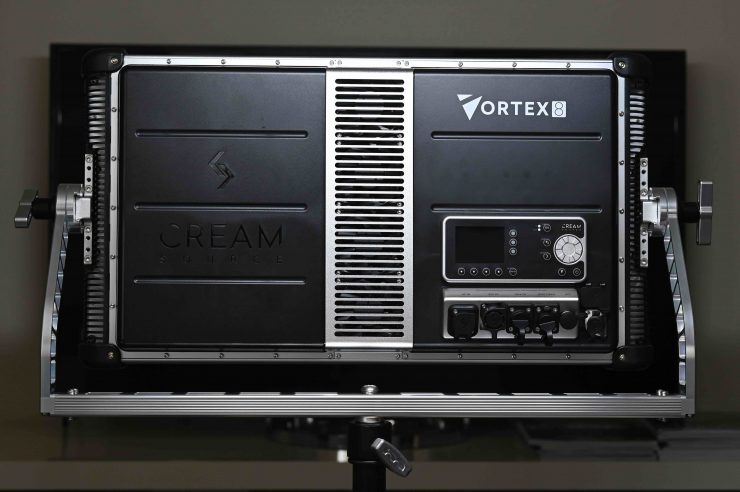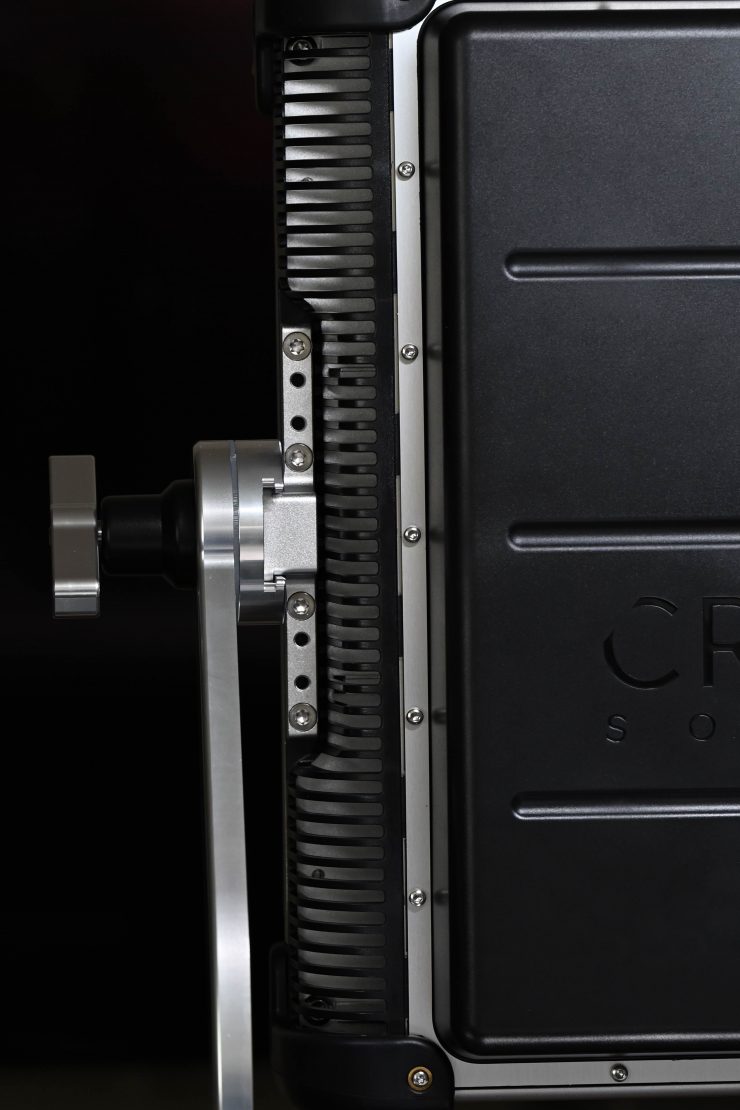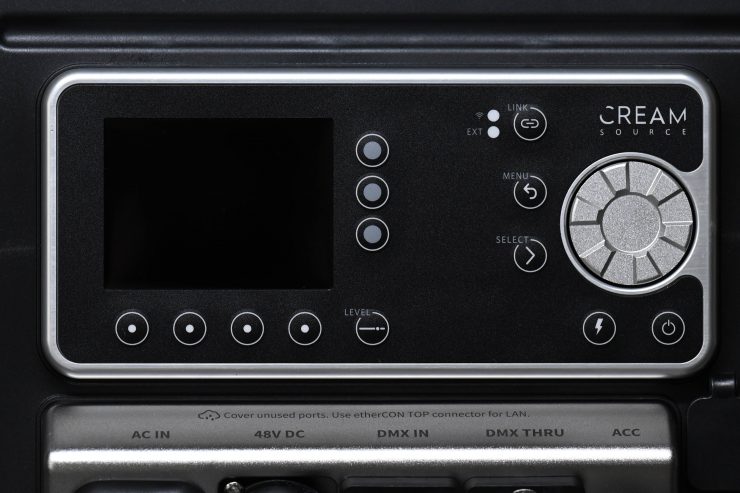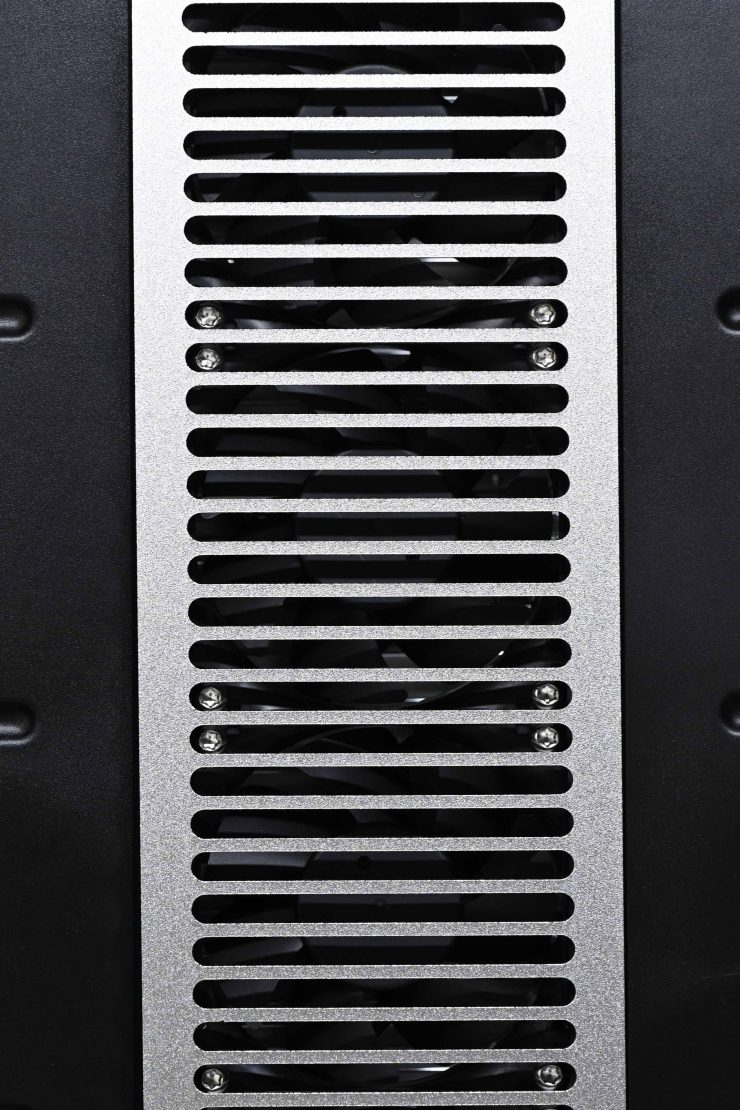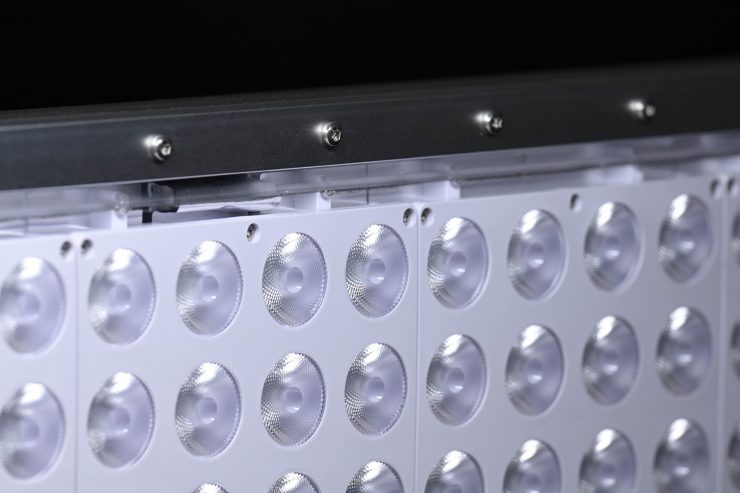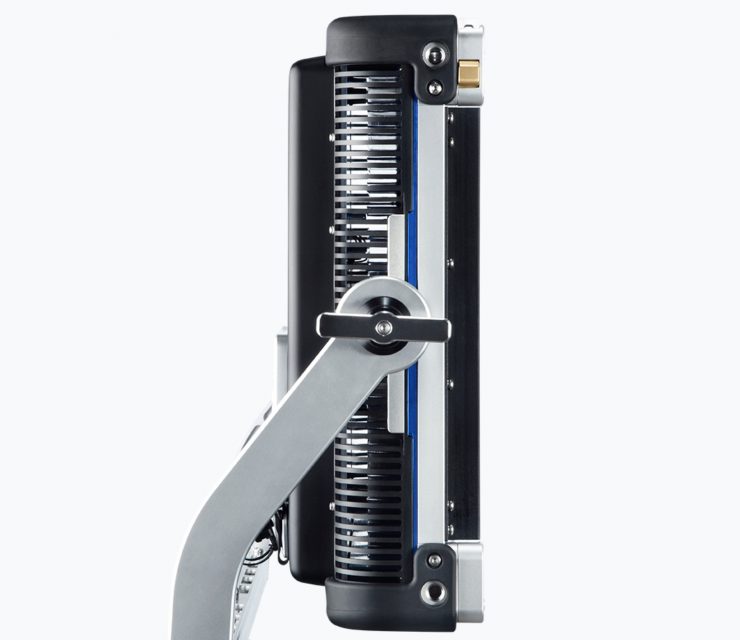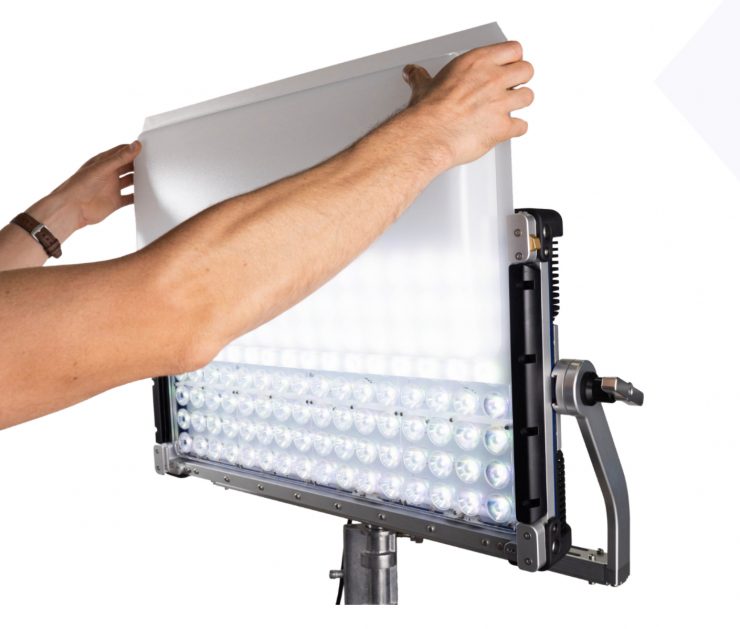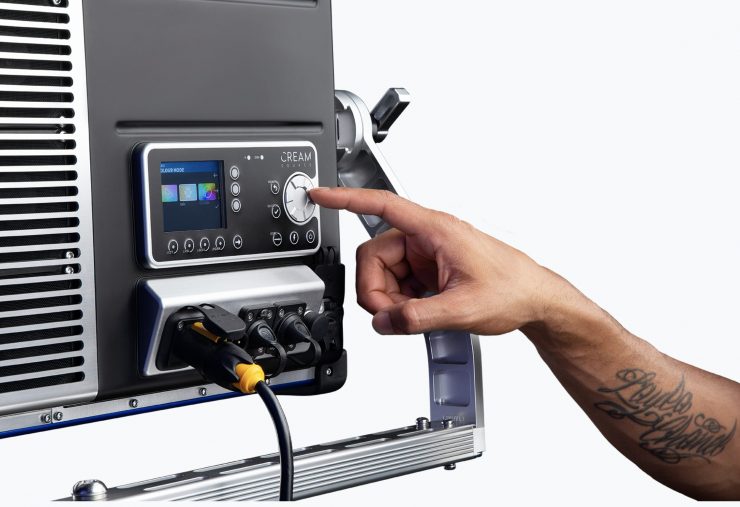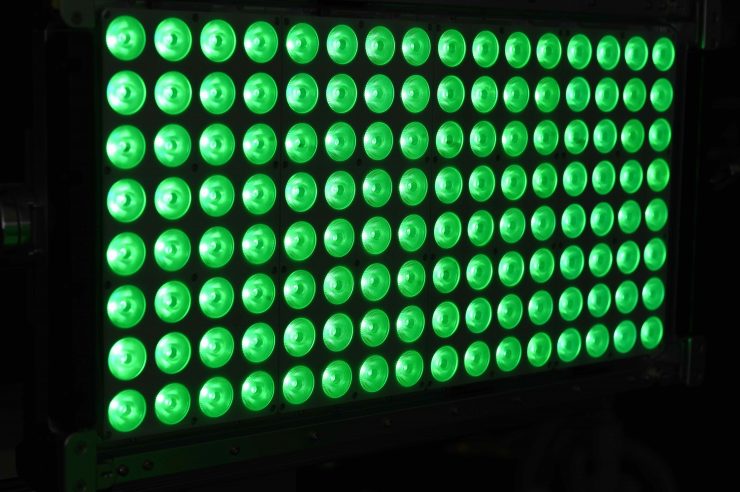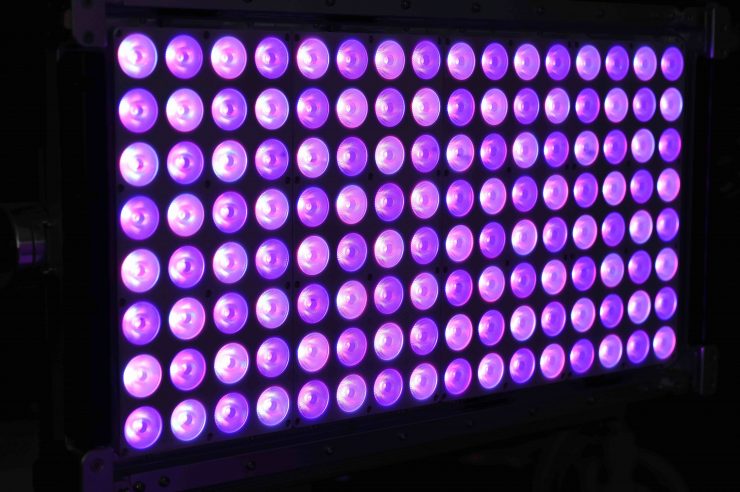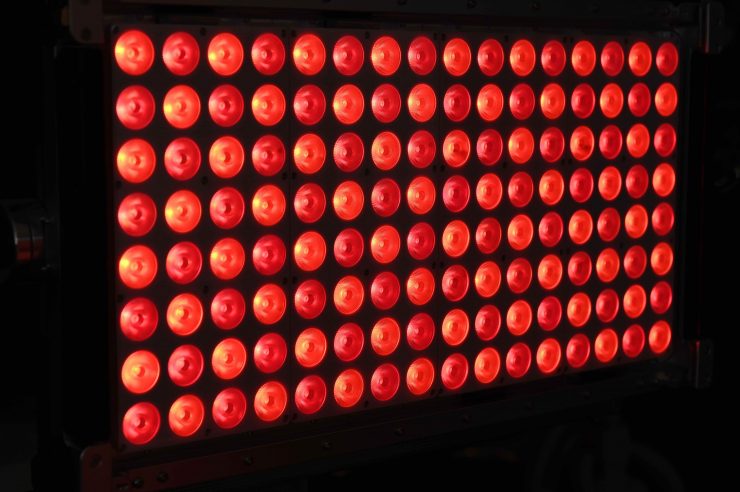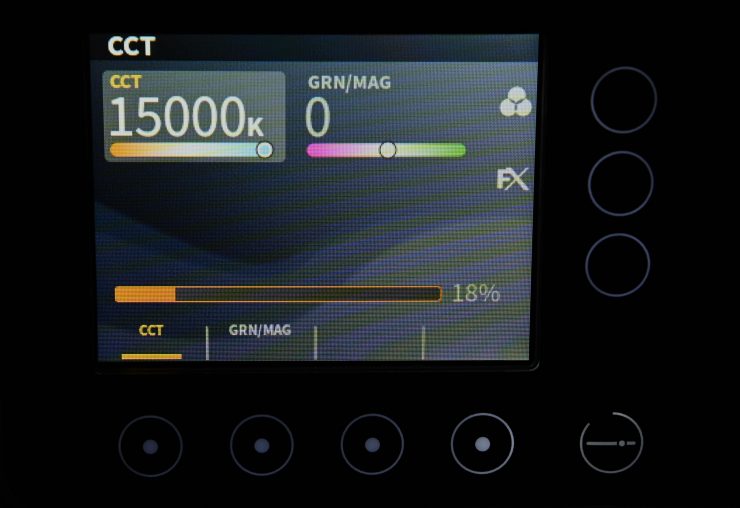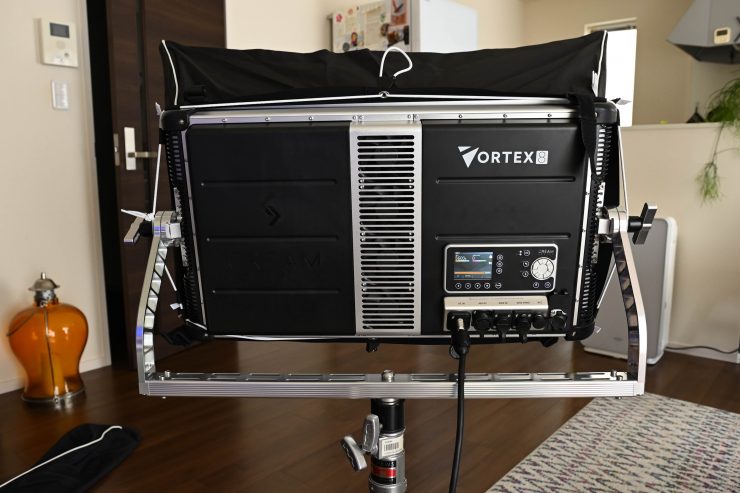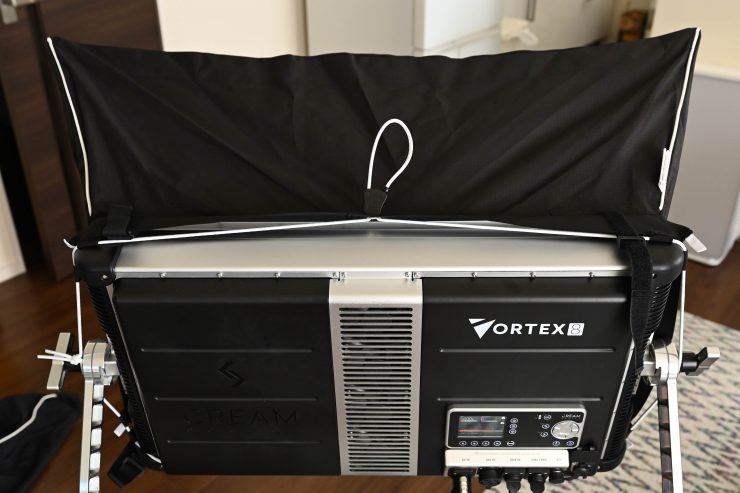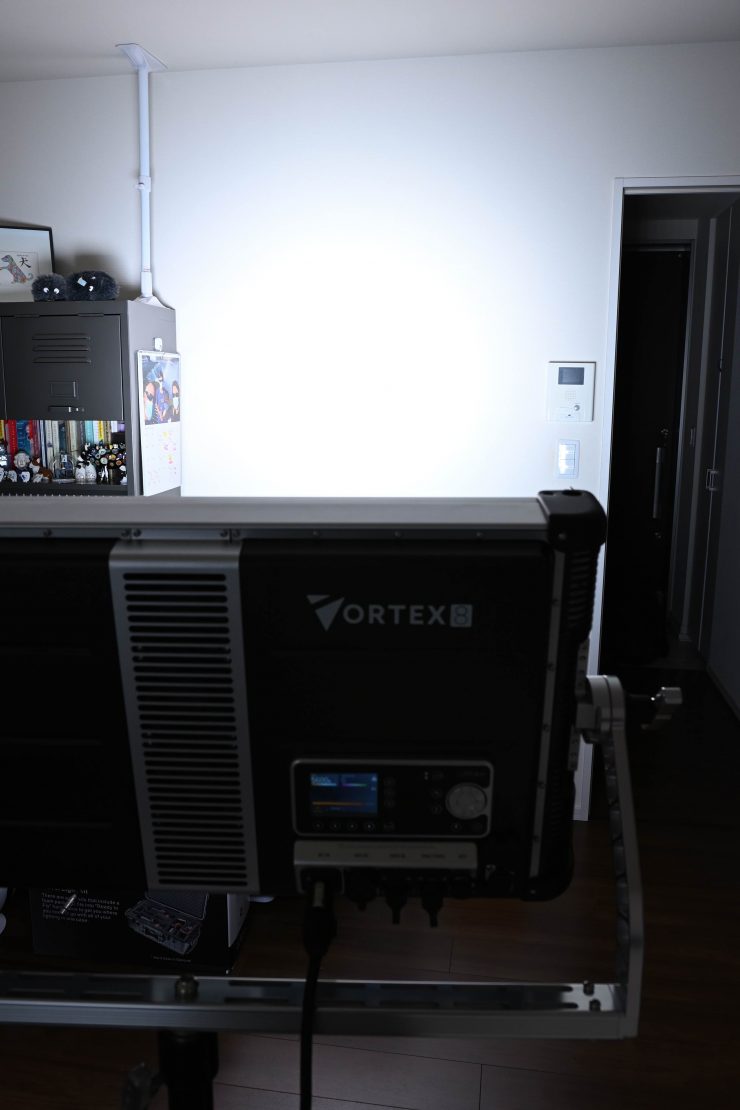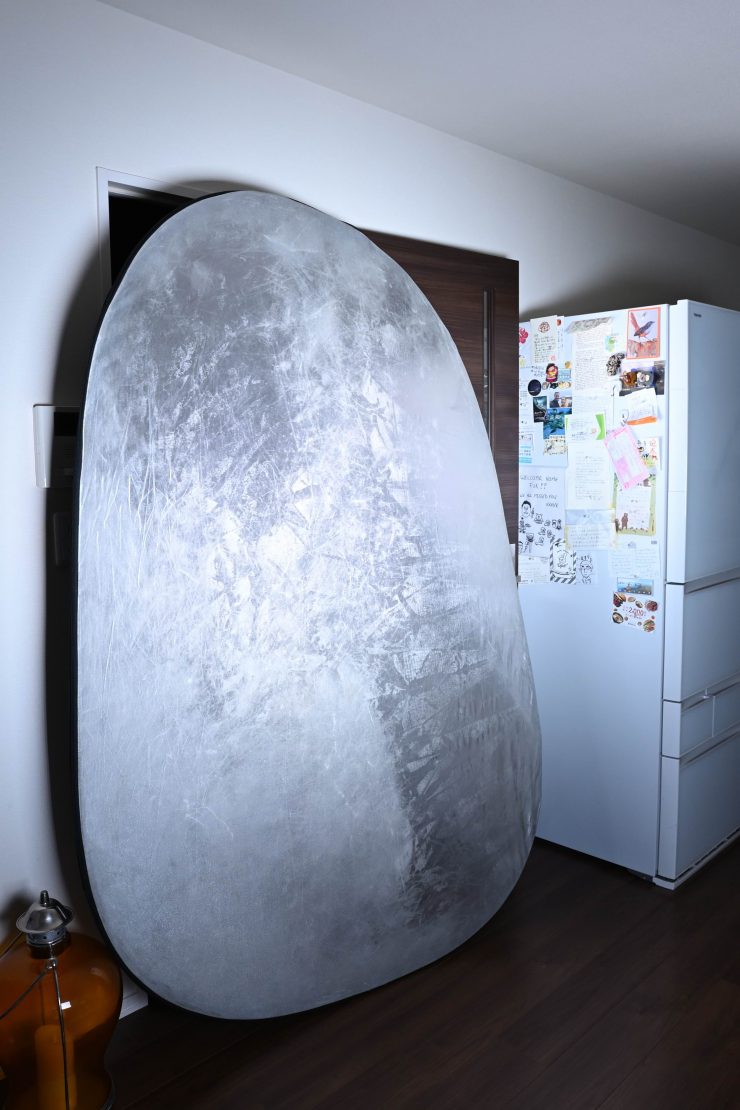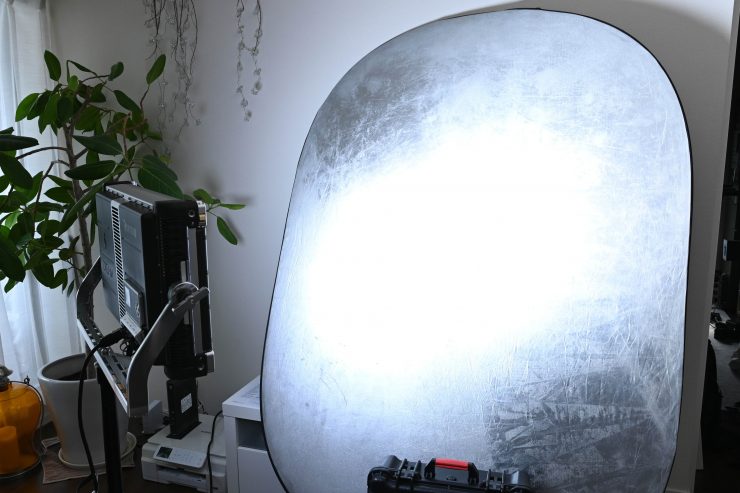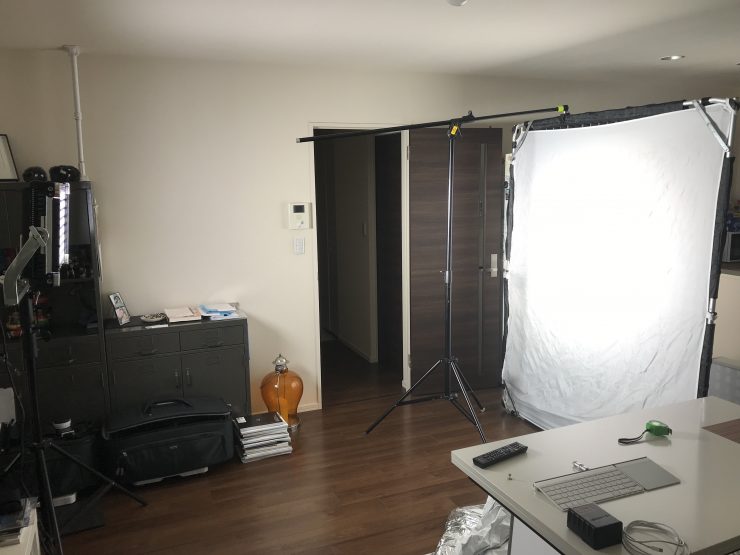
Creamsource’s Vortex8 is light I have been wanting to review for quite some time. The Vortex8 is a 650W high power 2×1 RGBW panel fixture with a CCT range of 2200K to 15000K.
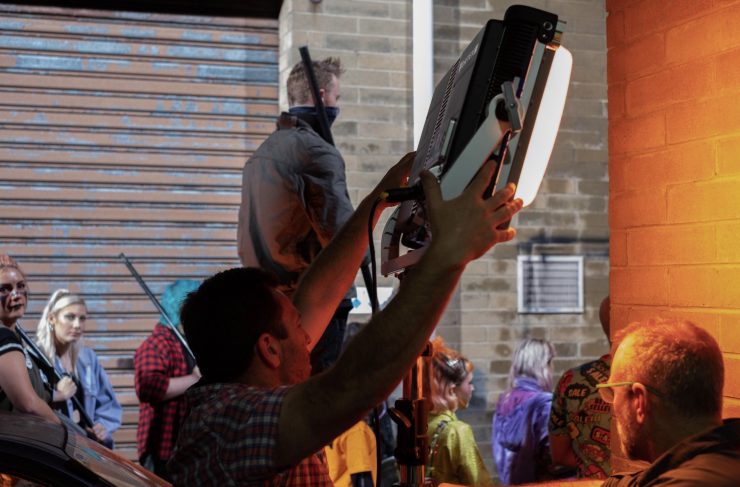
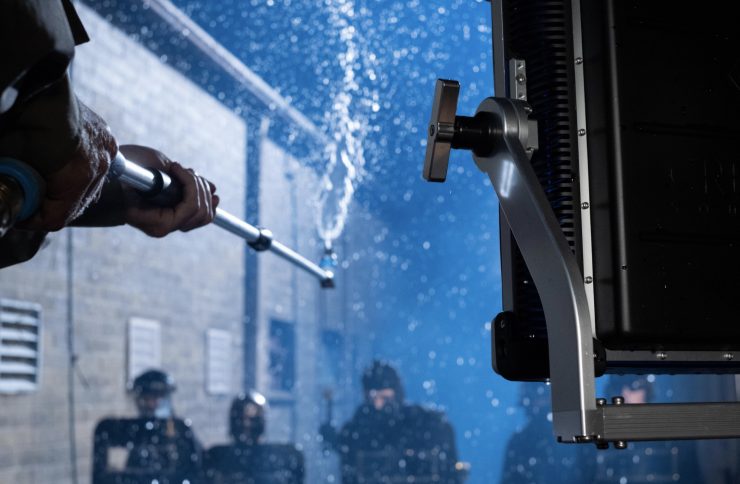
Above you can watch the light’s official launch video, and below the BTS of that shoot.
Hard & Soft Light Source
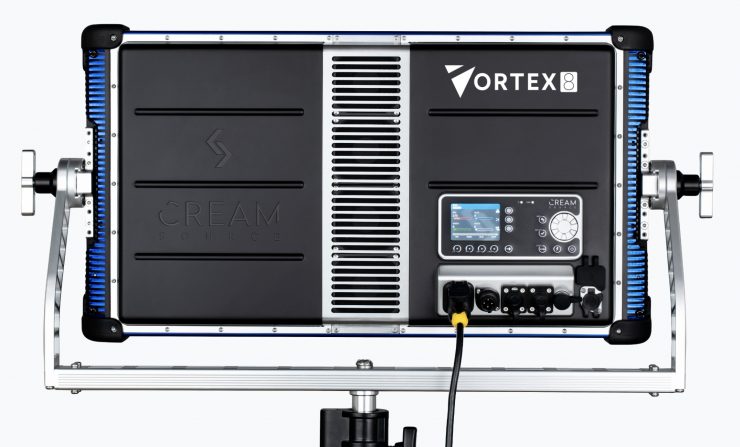
The Vortex8 has been crafted to produce a narrow beam angle and high light output while its color science is claimed to enable real-to-life reproduction of skin tones and colors.
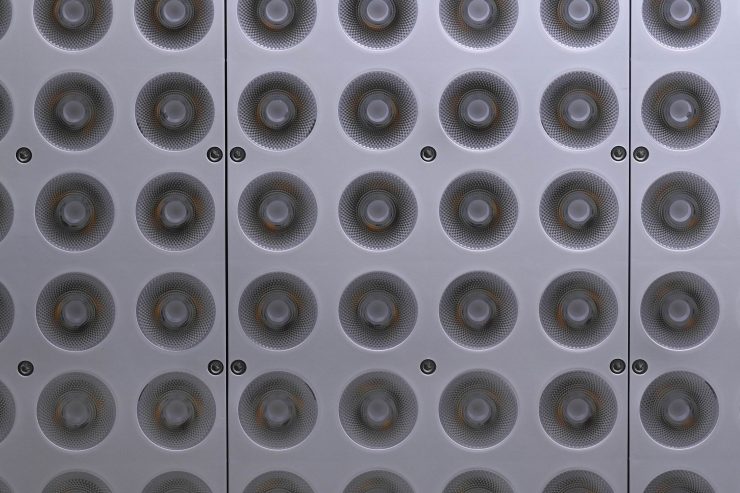
The fixture features calibrated red, green, blue, and white LEDs (RGBW) which allows it to produce white light in any CCT from 2200K to 15000K. It also has green/magenta adjustment and it is claimed to produce vivid, saturated colors.
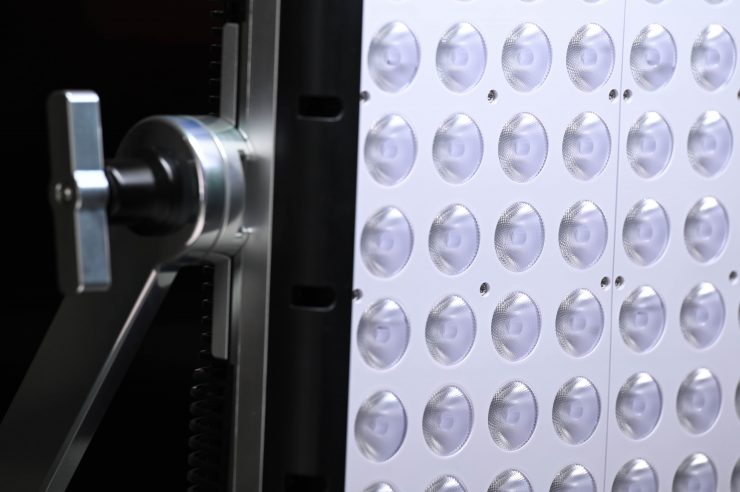
The light is made up of 512 clusters of RGBW LEDs in 8 zones. Each zone consists of 128 clusters of four LEDs (Red, Green, Blue, and White)
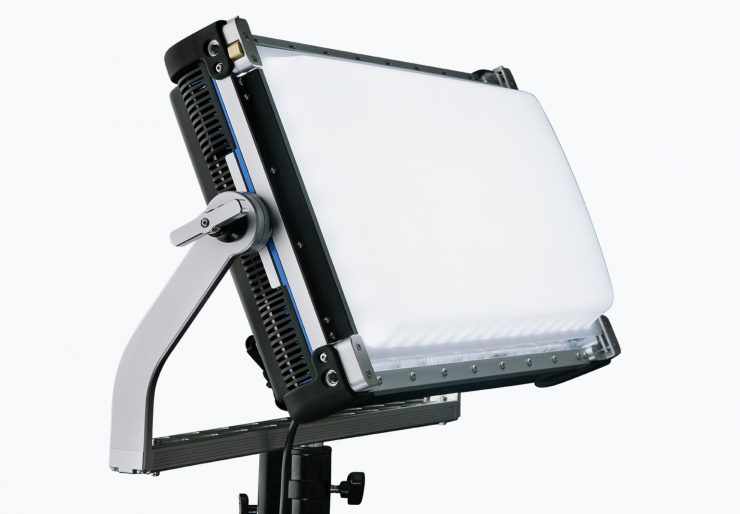
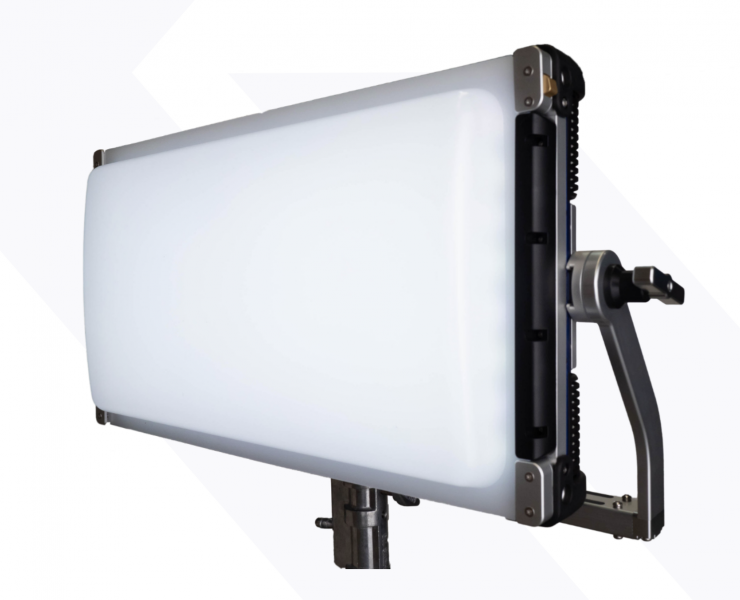
It can be used as a hard punch light to bounce or push through diffusion, or as a soft light with the Creamsource Dome, included diffusion panel, or light modifiers such as a DoP Choice Snapbag.
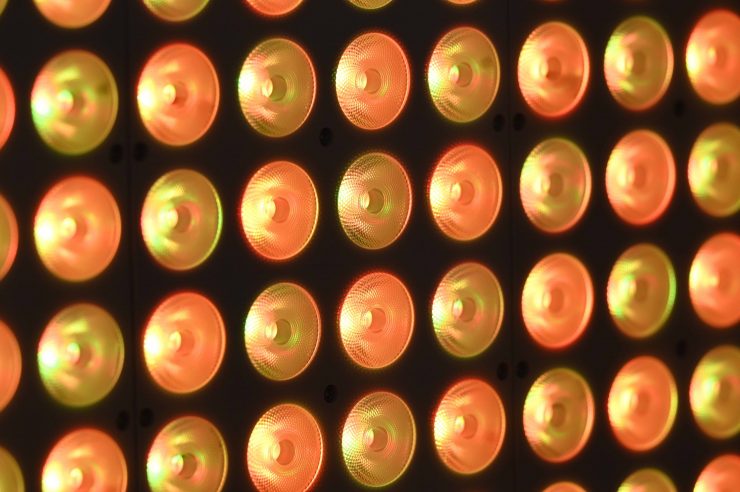
In its default configuration, the Vortex8 has a 20-degree beam angle. You can use the included Diffusion panel to soften the light and increase the beam angle. You can also use the optional Creamsource Dome and which will spread the light out to around 60 degrees.
The Vortex8 panel design allows you to go quickly from a punchy source to soft light, allowing users to bring the fixture closer to the subject without the loss of space. Point sources are great but they require more room for diffusion, whereas a panel design like Vortex8 is already spread out so you can get it closer to your subject and diffuse it right there and still use it in tight spots where other fixtures would have an overly deep footprint. Conversely, the Vortex8 can be used where more throw is required than a traditional soft source alone could provide.
In some ways, the Vortex8 is like a panel version of an RGBW COB-style fixture. Its narrow beam angle allows it to produce a hard light source, but it can then be diffused to create a softer source. Most LED panel lights are designed to be a soft source and you can’t turn them into a hard lighting source.
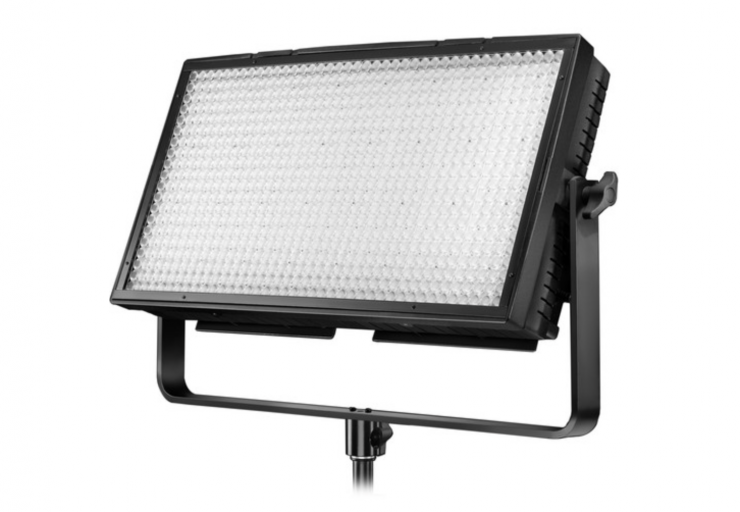
The only other 2×1 sized panel light that I can think of that can be used as a hard and a soft source would be the Lupo Superpanel Dual Color and Full Color 60 1×2 fixtures. The Dual Color version of this light features a 40-degree beam angle.
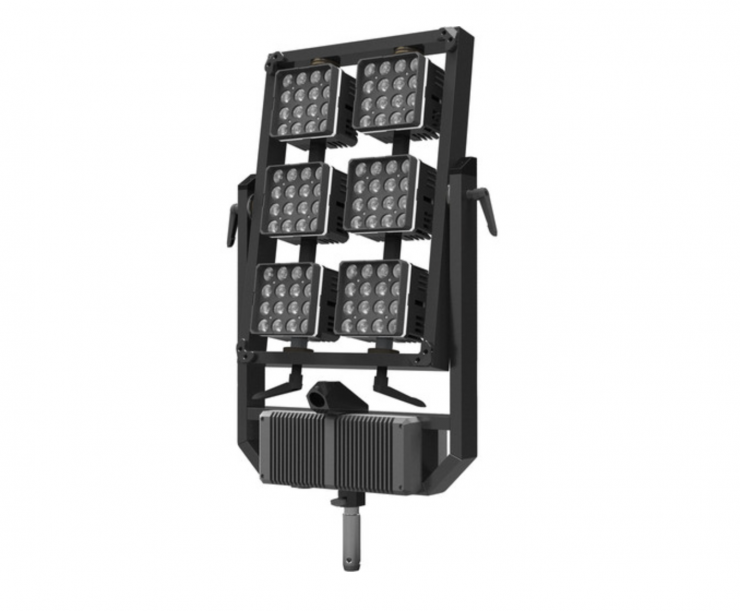
The Vortex8 could literally be used as an alternative to something such as an array of Digital Sputnik DS fixtures. Creamsourceis developing a range of frames where you can put in multiple Vortex8’s to create very large and powerful arrays.
High Output
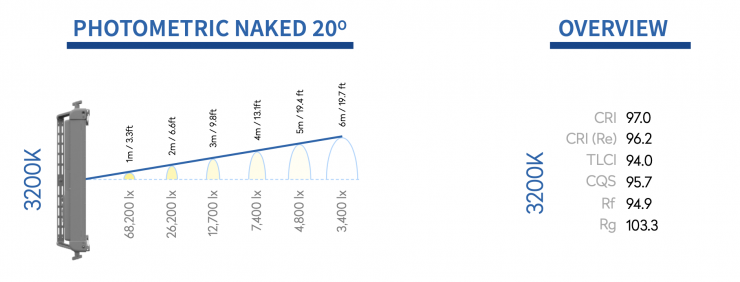
According to Creamsource when used at 5600K the Vortex8 puts out a whopping 73,500 lux at a distance of 1m (3ft). At 3 meters (9.8ft) you are still getting an output of 13,900 lux. What you do need to remember when you are using this light open face is that it has a very narrow beam angle.
“When you need to light large areas, you may have tens to hundreds of fixtures and costs can quickly climb as higher illumination levels or larger coverages are required. In terms of dollars per watt, the narrow beam angle of the Vortex8 and the high wattage design is able to cover more area with fewer units. Its narrow source is concentrated with a precision lens array natively providing a 20° beam angle. This yields a blistering 13,900lux at 3m/9ft in 5600K and a dollar per watt ratio of $7.69 per watt making it a high value, extremely versatile lighting system, and accessible addition to the creative tools of gaffers and cinematographers.”
Creamsource CEO, Tama Berkeljon
The light offers the ability to shoot at over 5000fps Flicker Free in the High-Speed Mode.
I will test the output claims later in the review.
Size & Weight
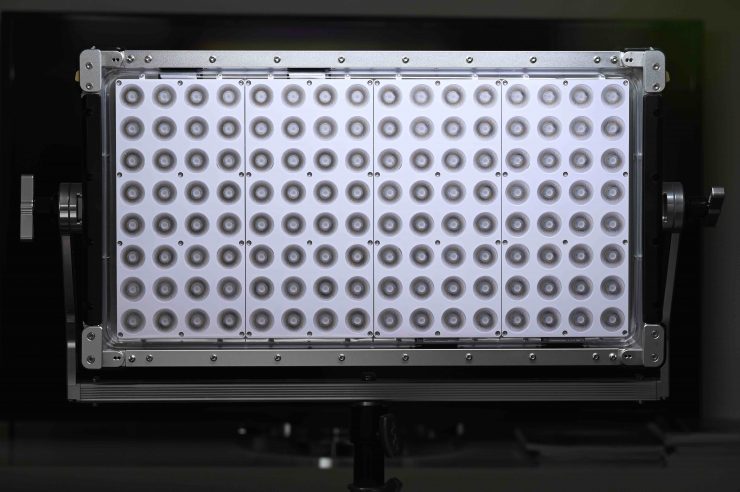
There is no way of sugar-coating the fact that this is a very heavy light. The fixture itself weighs in at 13.7kg / 30lb (Excluding Yoke). From what I have been told, the yoke weighs around 1.9kg / 4.18lb.
The power supply is incorporated into the light so there is no additional power supply that you need to attach. While I like panel lights with built-in power supplies, it does make the actual light a lot heavier and you, therefore, need to make sure that you use heavy-duty light stands.
The other slight issue I found with the fixture is that because the light is offset from the yoke frame, the weight can make it difficult to carry. It also can make it a little tricky when you are putting the fixture on a light stand. or taking it off. This is just something you need to be aware of.
How does this weight compare to some other high-end 2×1 RGBW lights?
| WEIGHT* | |
| Creamsource Vortex8 | 15.6 kg (34.39 lb)* |
| ARRI S60-C Skypanel | 17 kg (37.47 lb) |
| Rotolight Titan X2 | 14.3 kg (31.52 lb)** |
| Litepanels Gemini 2×1 | 10.1 kg (22.26 lb) |
| Luxli Taiko | 8.96 kg (19.75 lb) |
| Velvet EVO 2 | 7.57 kg (16.7 lb)** |
| Nanlux Dyno 650C | 15.8 kg (34.8 lb) |
*Weight includes power supply and yolk frame.
** With standard yoke
As you can see, the Vortex8 is slightly heavier than a Rotolight Titan X2 and lighter than an ARRI S60-C Skypanel.
Build Quality
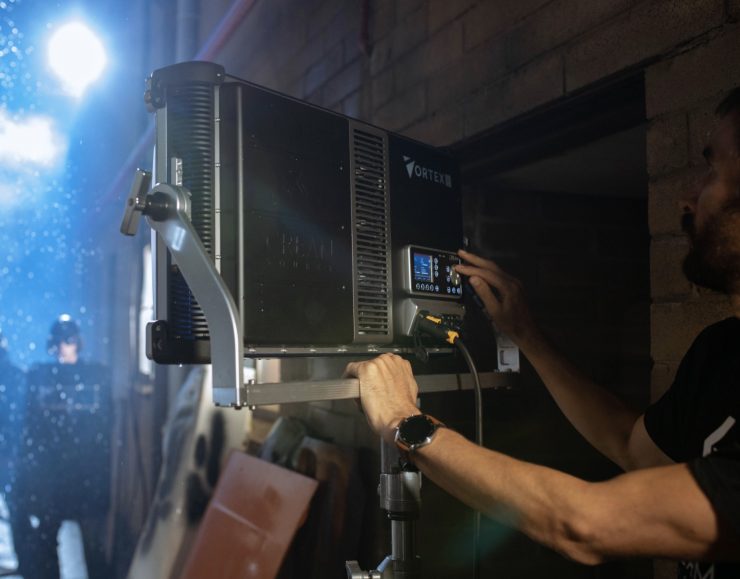
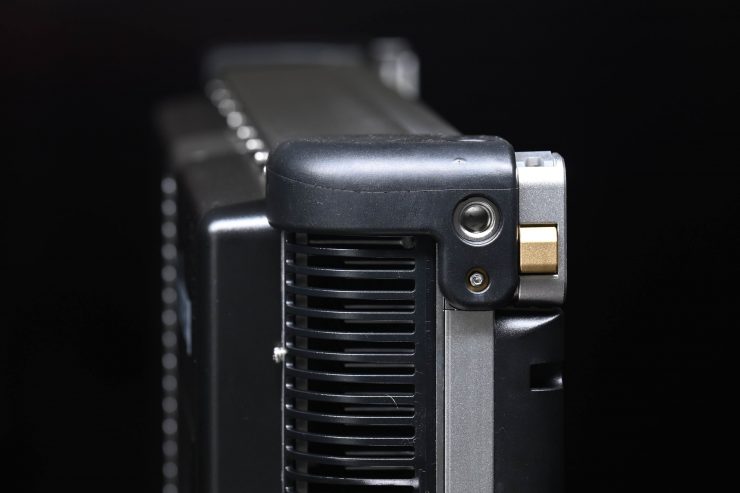
I don’t think I have come across many lights that are as well built as Creamsource fixtures. They almost appear to be over-engineered. The design of the fixture is beautiful and in a lot of ways, it has a very industrial feel to it.
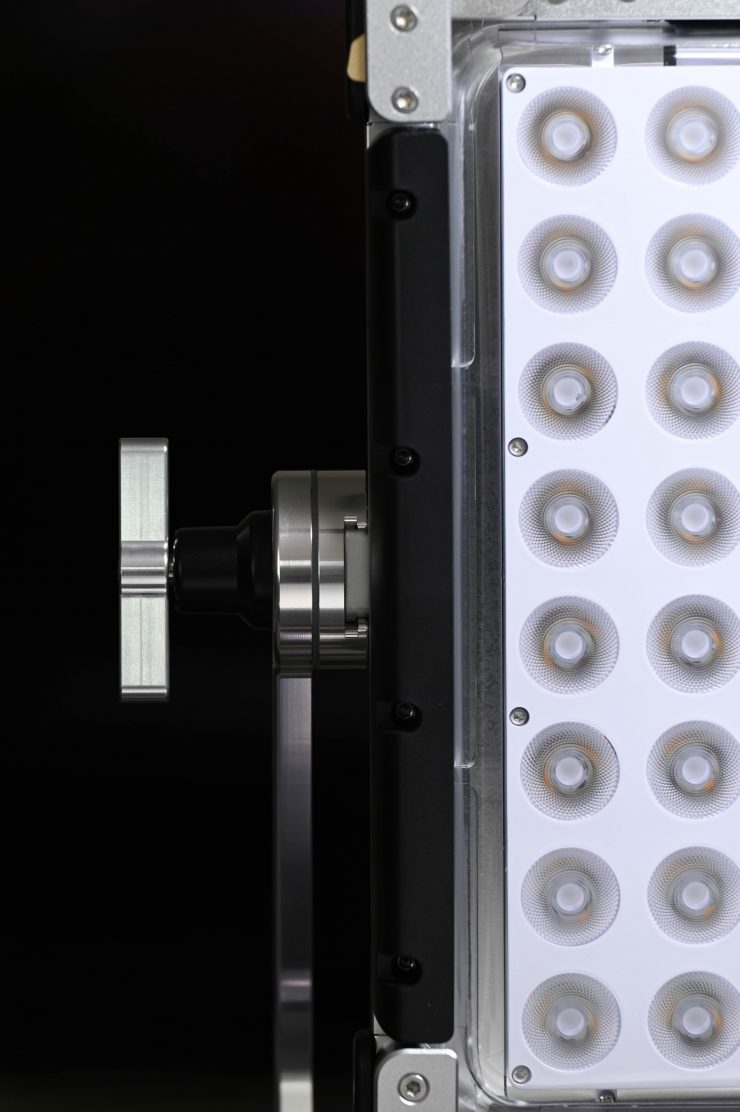
To say they are built like a tank is probably an understatement. On the Vortex8 the whole fixture is made out of Aluminium/Technopolymer and all of the connectors, dials, and switches are exceptionally well made.
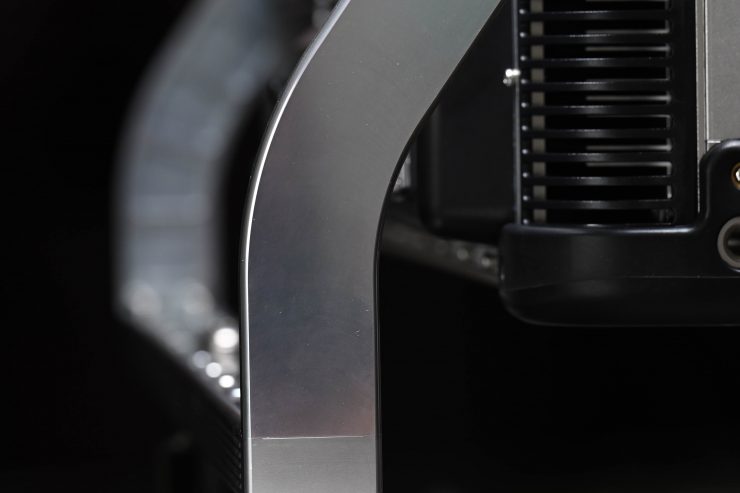
The attention to detail is very evident once you start looking closely at the Vortex8.
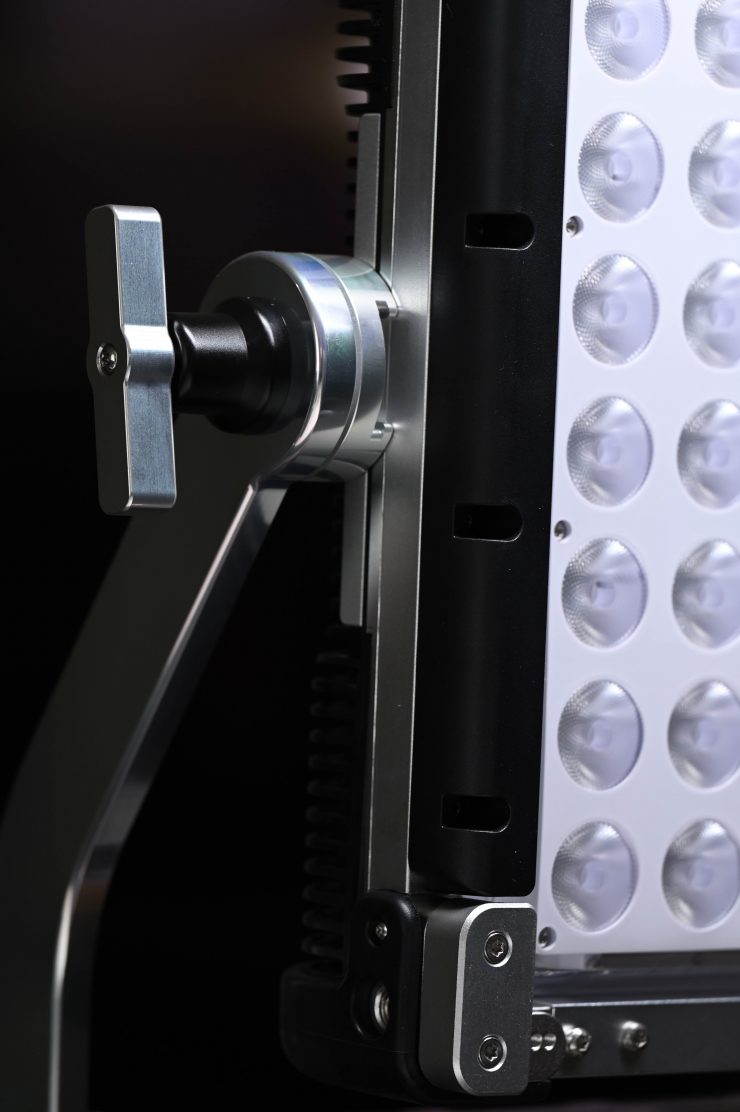
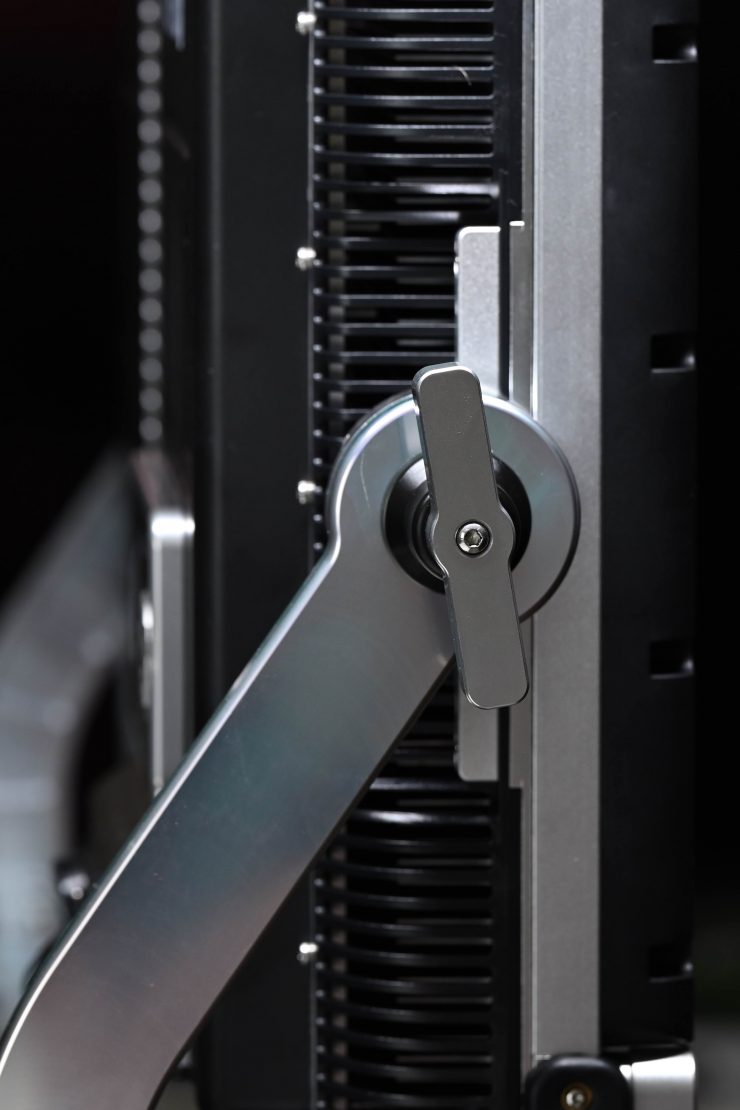
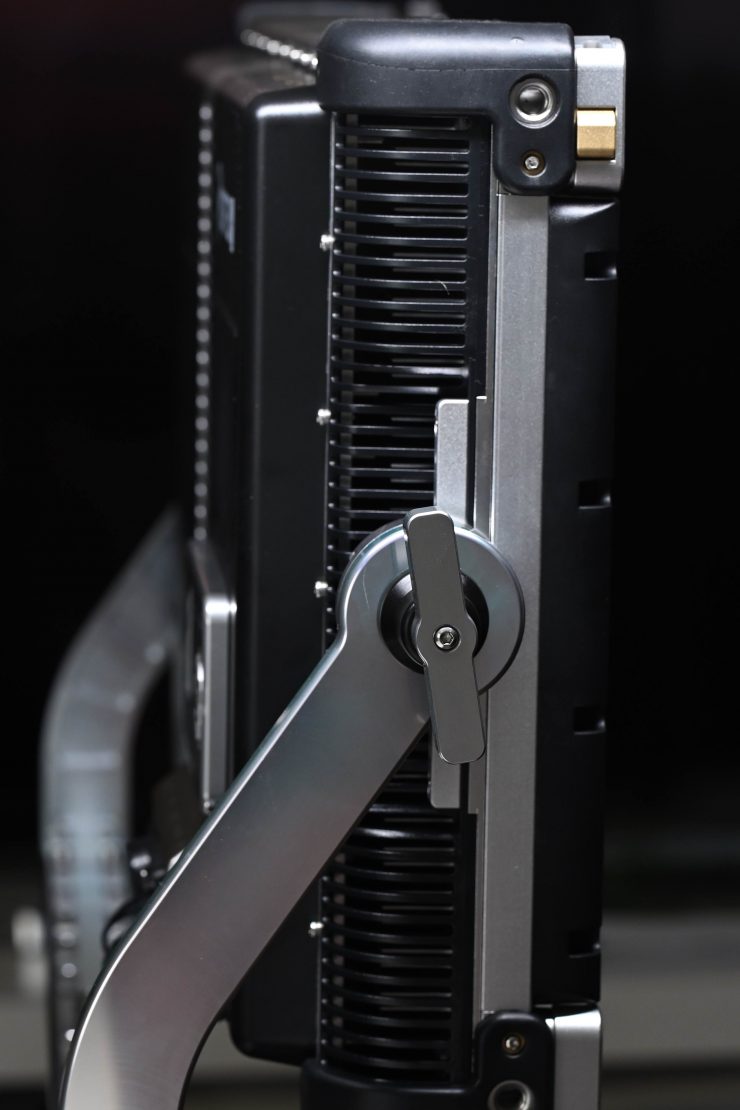
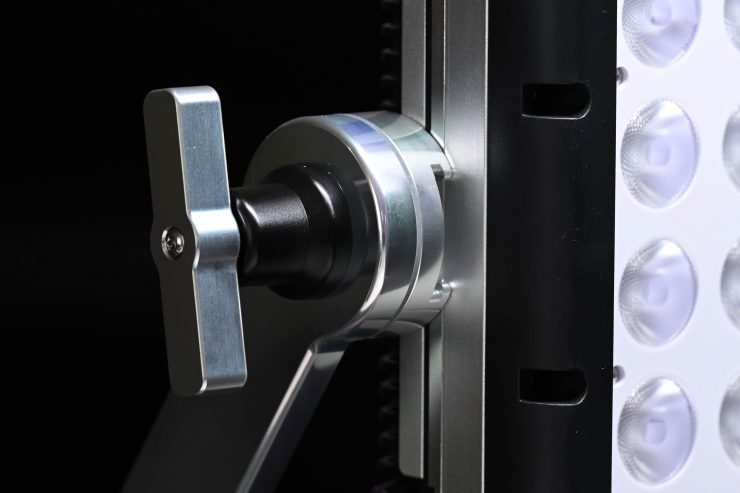
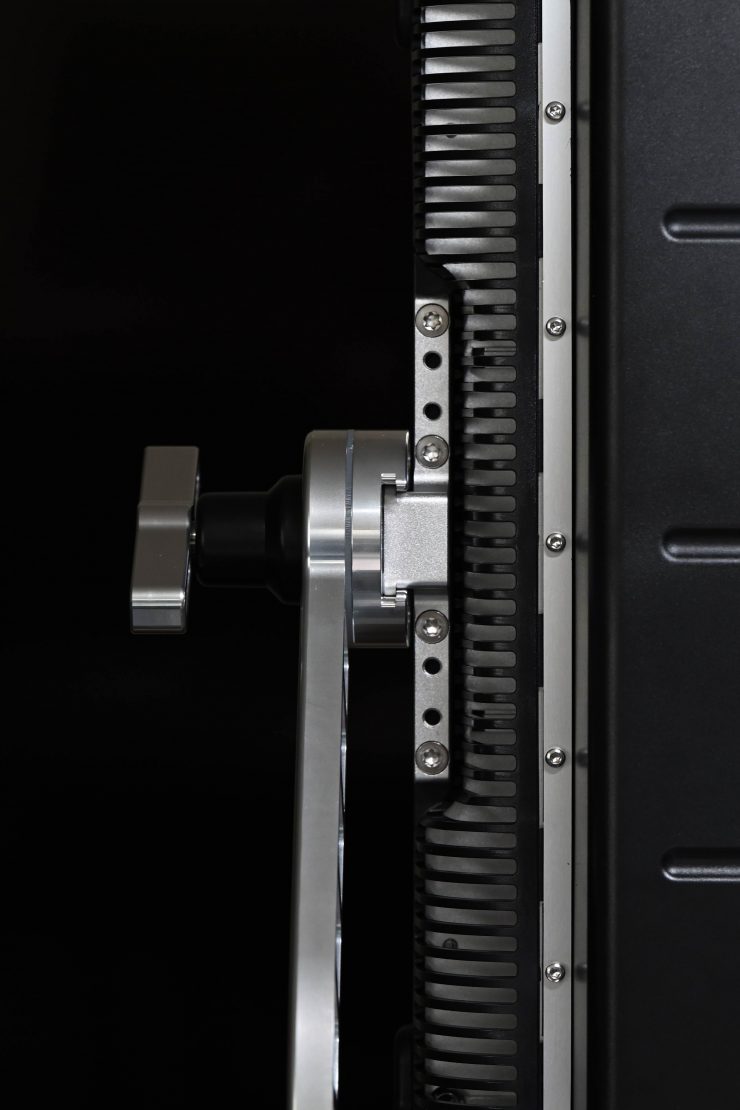
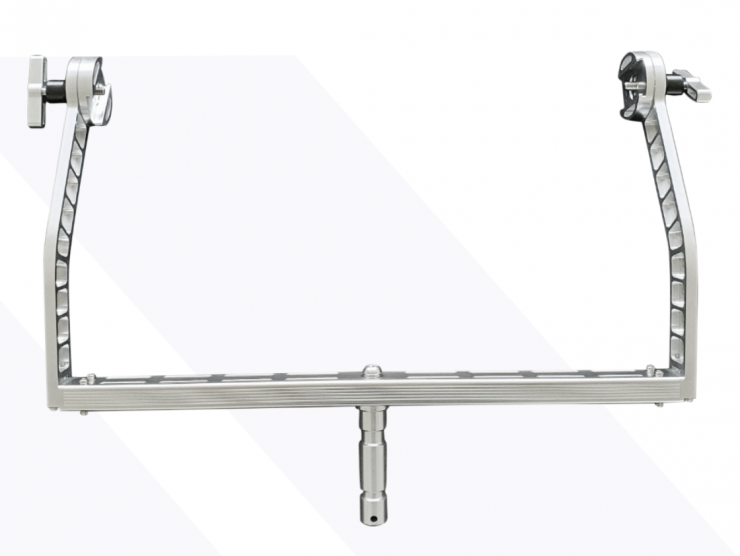
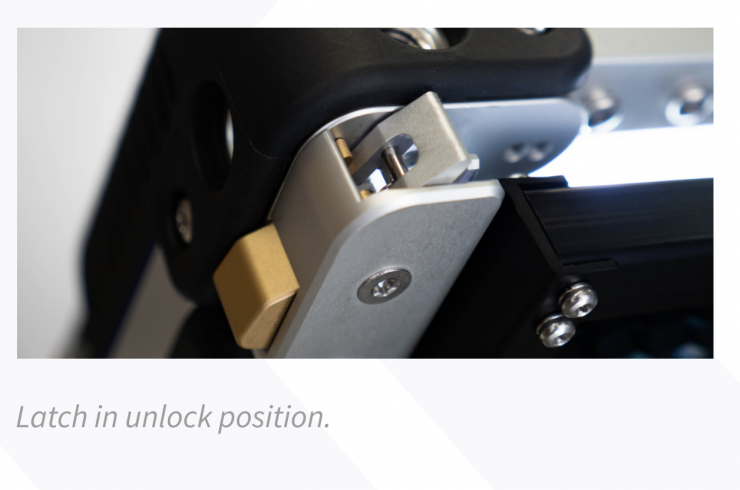
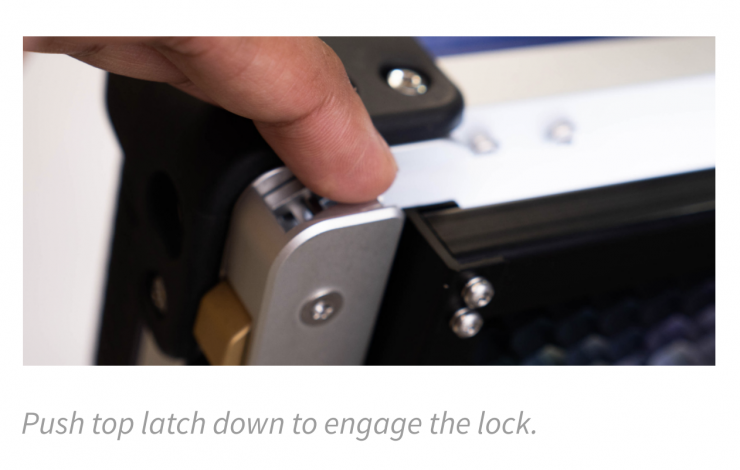
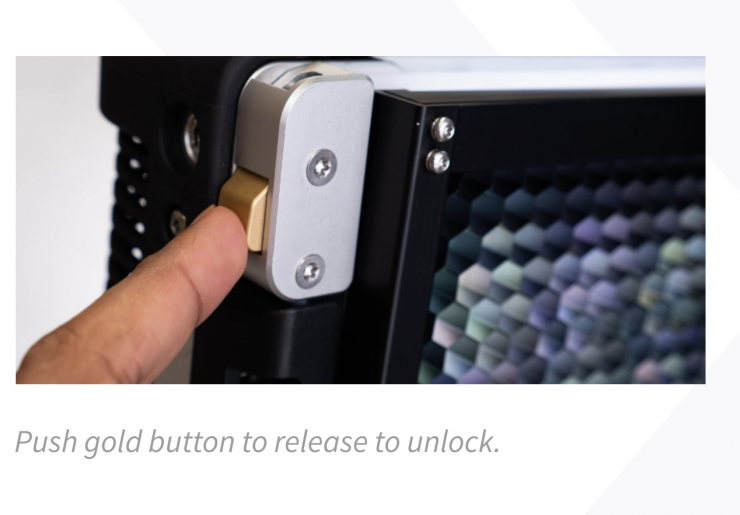
The Vortex8 uses a removable quick-release yolk. This is a great feature and one I wish more lights would have.
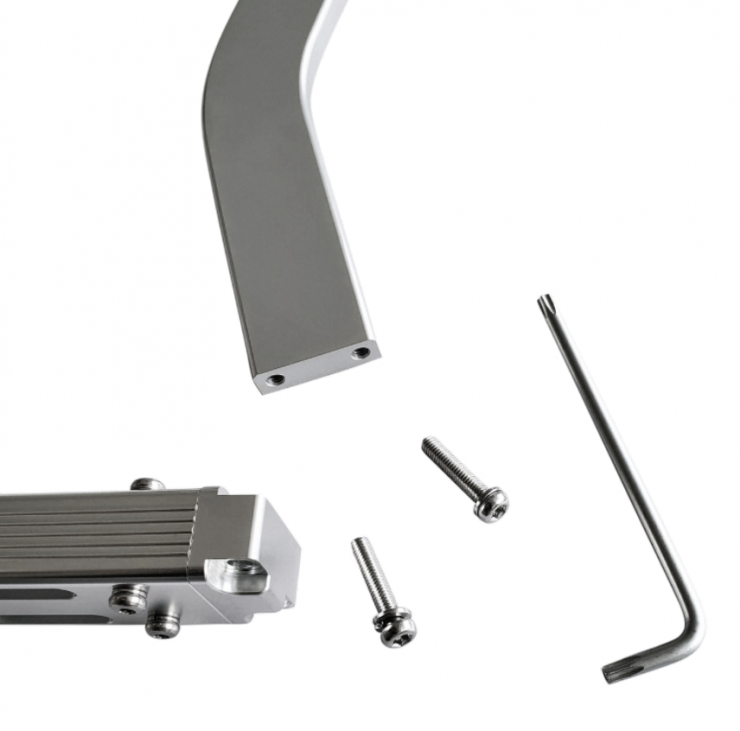
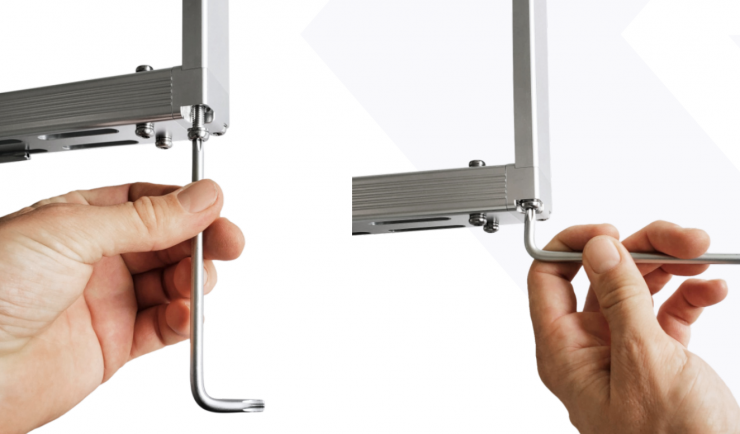
The Vortex8 quick-release yoke system needs to be assembled when you first get the light using a T30 Torx tool that is provided.
The standard yoke allows for mounting to a combo stand with a standard baby pin receiver. Above you can the rotation of the yoke frame.
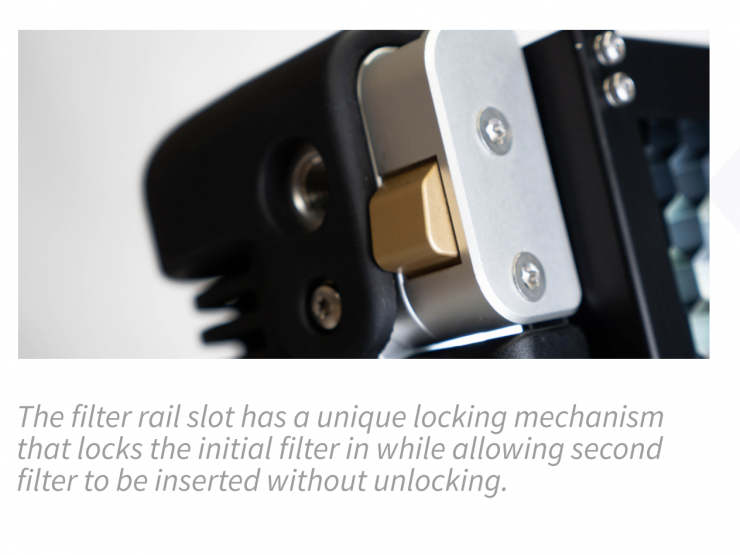
The light also has really well-made and designed filter slots on the front of the fixture.
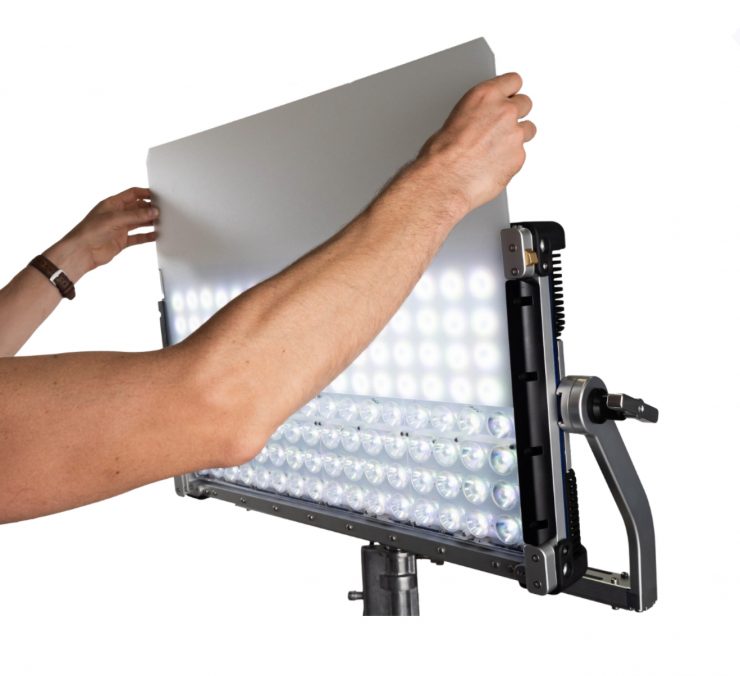
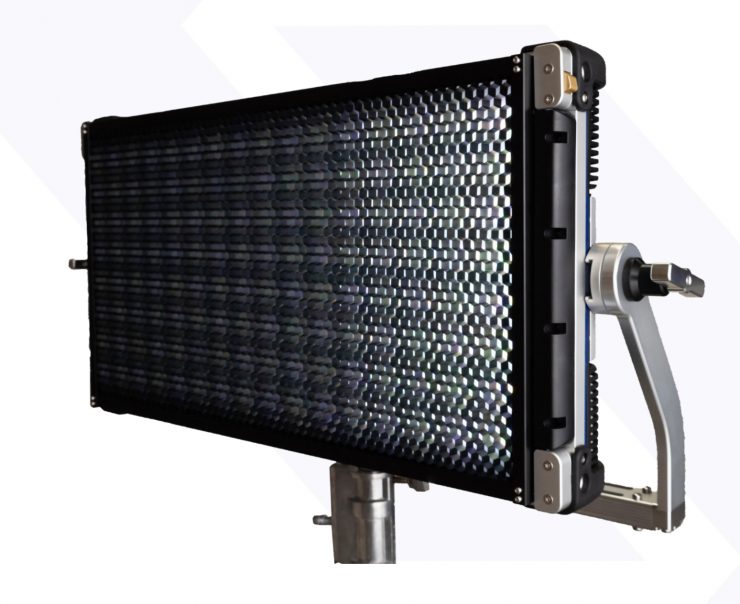
This is where you can place in the included diffusion filter and optional Diffusion Dome, etc. The standard diffuser softens the native hard light and widens the beam angle. This modifier works well in conjunction with the dome and the honeycomb.
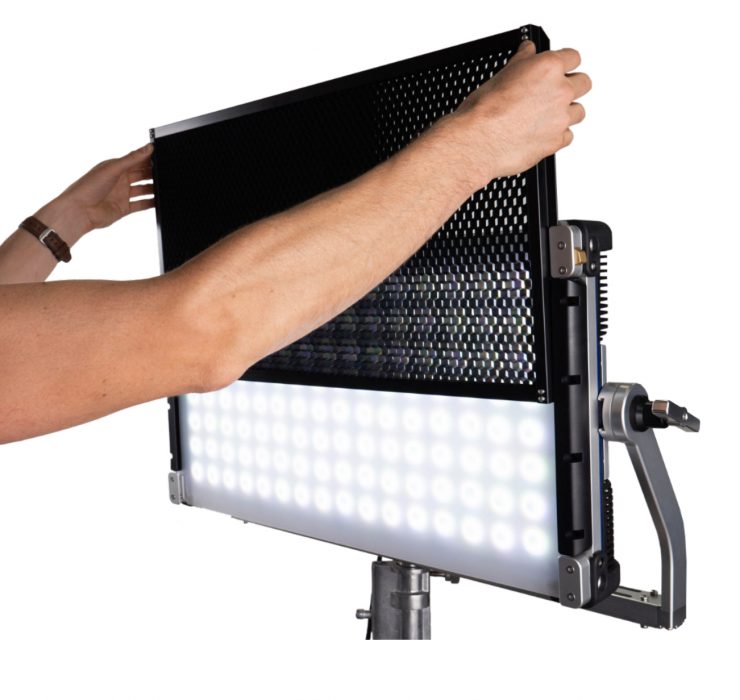
You can also slide in optional honeycomb grids as well.
Now, the only small issue I encountered with the included Diffusion Filter is that it doesn’t always slide down to the very bottom of the rail. Sometimes you need to lift it up slightly from the bottom so it slides all the way down. Above you can see what I mean.
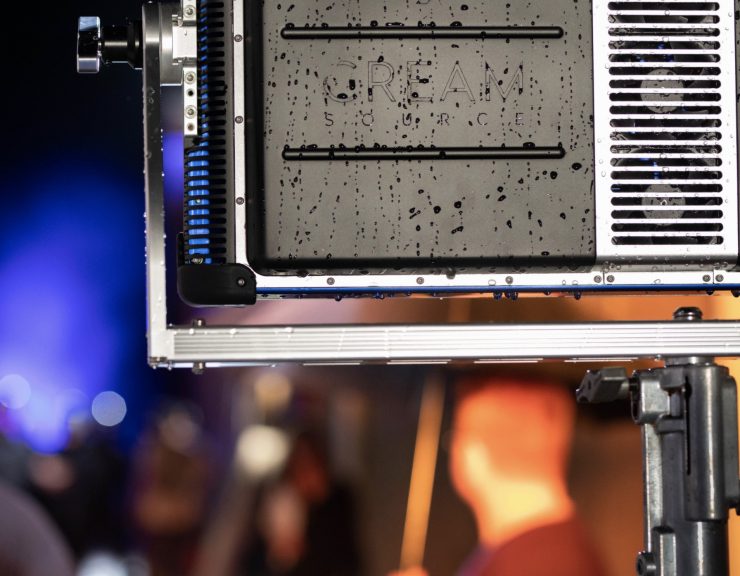
These lights are designed for the rigors of field use and for rental houses that need reliable and robust lights. The Creamsource lights come with a whopping 5-year warranty. That is very rare in our industry.
IP65 Water-Resistant
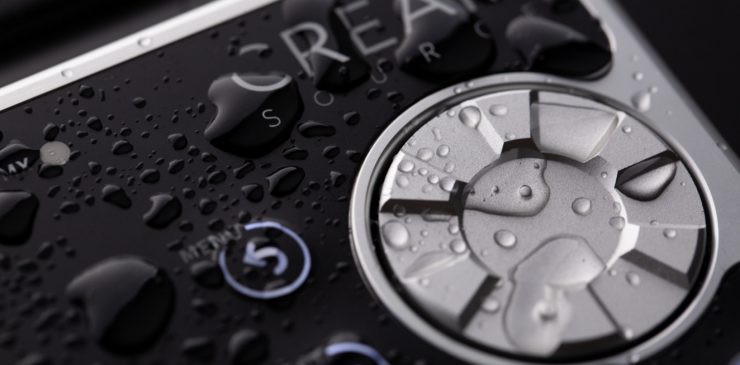
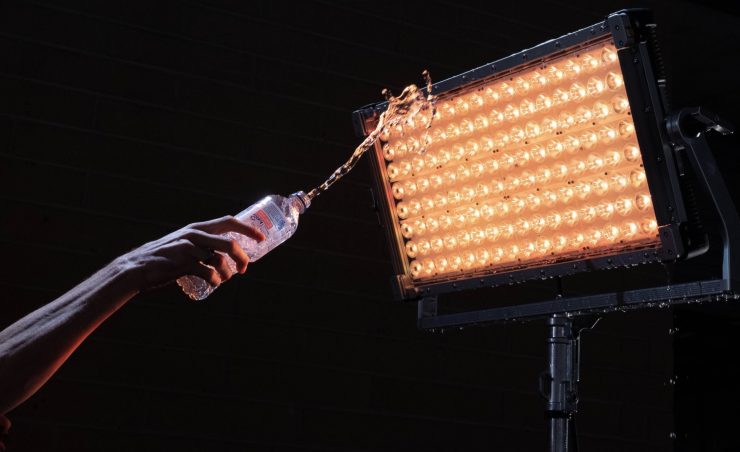
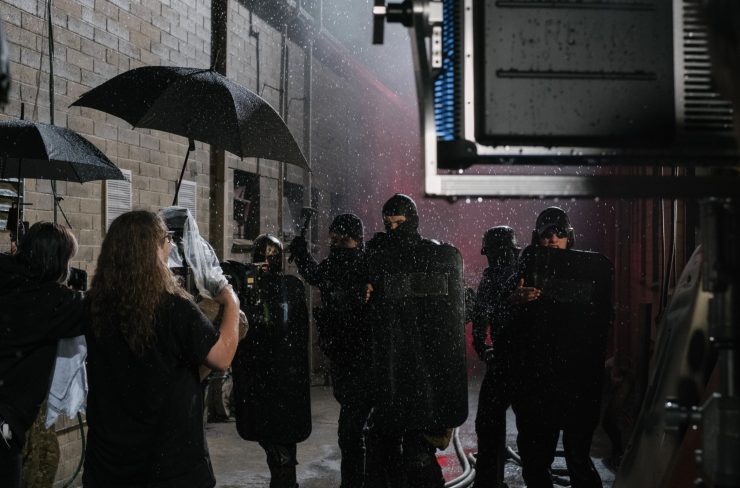
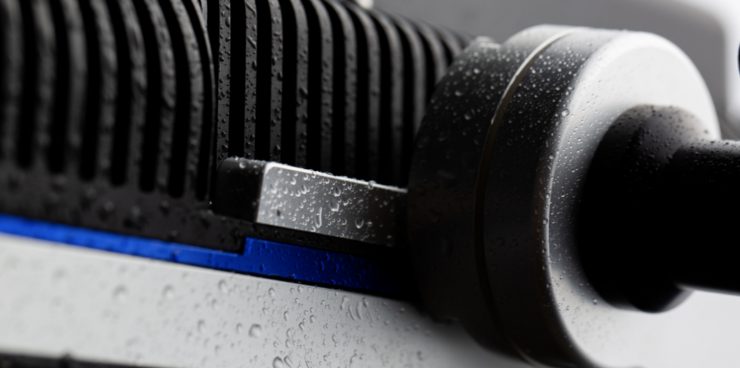
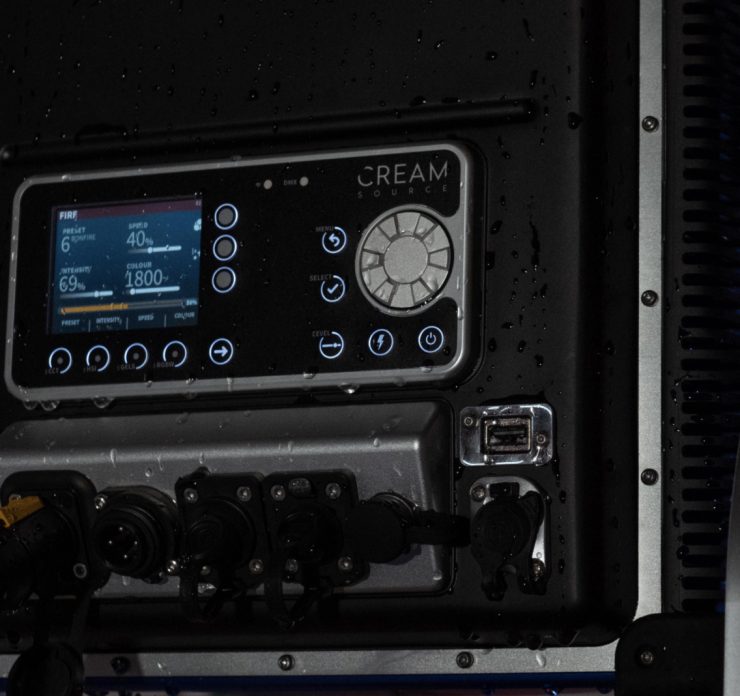
The Vortex8 is IP65-rated water-resistant fixture that has eliminated external power supplies to simplify rigging and cabling. This is a nice feature because it allows you to use the fixture out in the elements without needing to cover or protect it.
Cooling & Power
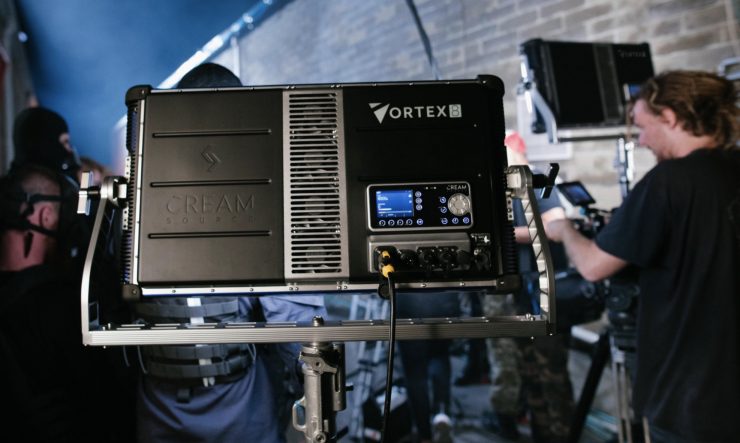
High power draw, high output RGBW lights create an awful lot of heat and that heat needs to be dispersed. The Vortex8 draws 650W.
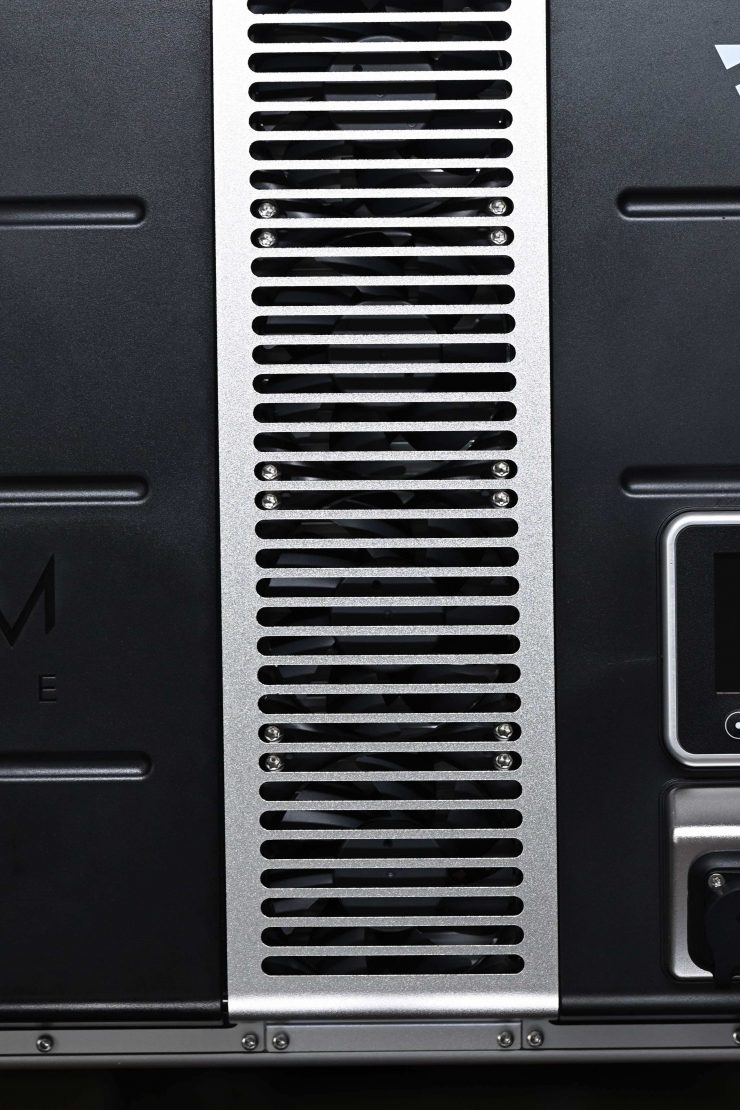
The Vortex8 uses what Creamsourse states as low noise variable speed fans.
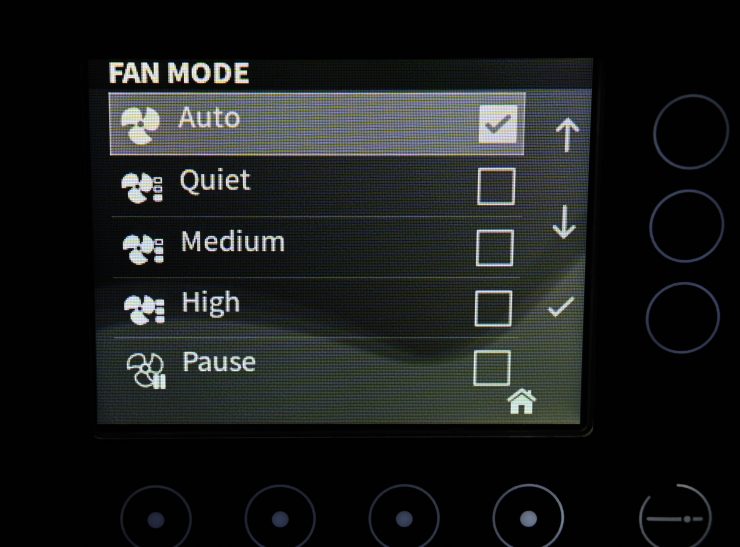
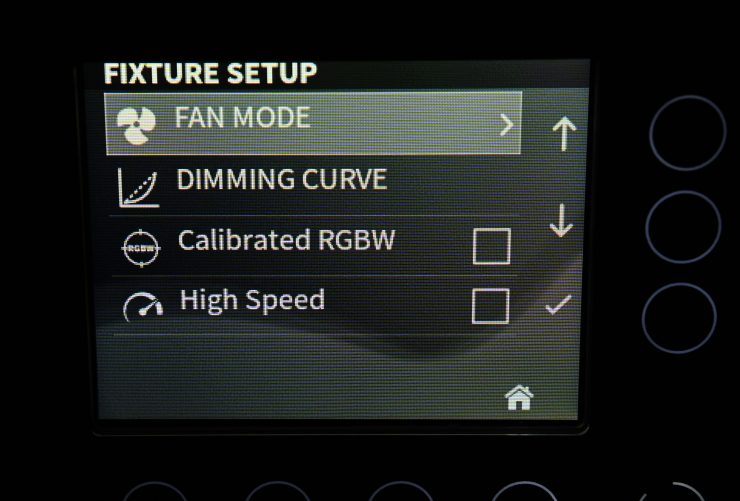
There are four fans inside of the unit and you can set the fan to the following settings:
- Auto
- Quiet
- Medium
- High
- Pause
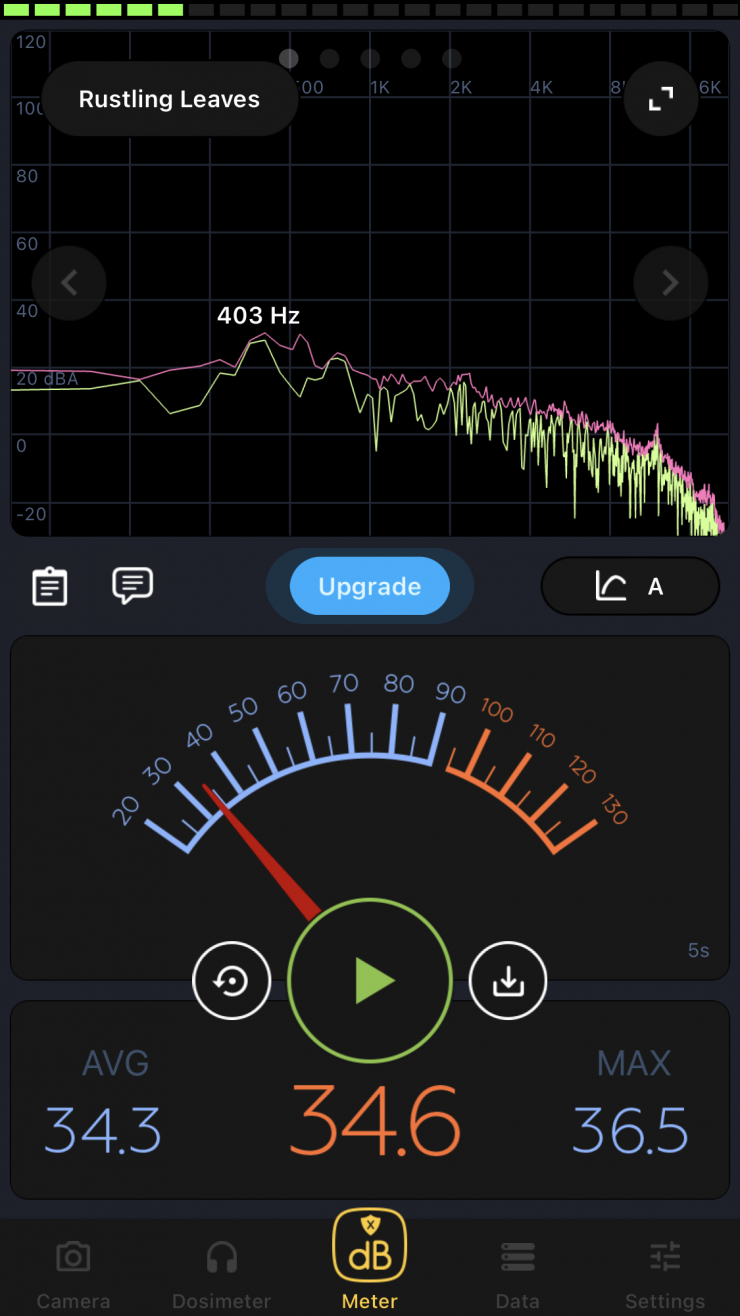
The fans do make noise when they are running. In Quiet mode, it isn’t too bad, but once you set it in the Medium fan mode it is reasonably loud. In High fan mode, it is very noisy and it would not be suitable for audio capture nearby. In the Auto mode, the fan is almost always on, and it pretty much stays at the level of Quiet/ Medium even when it is used for long periods of time at 100% output.

Auto 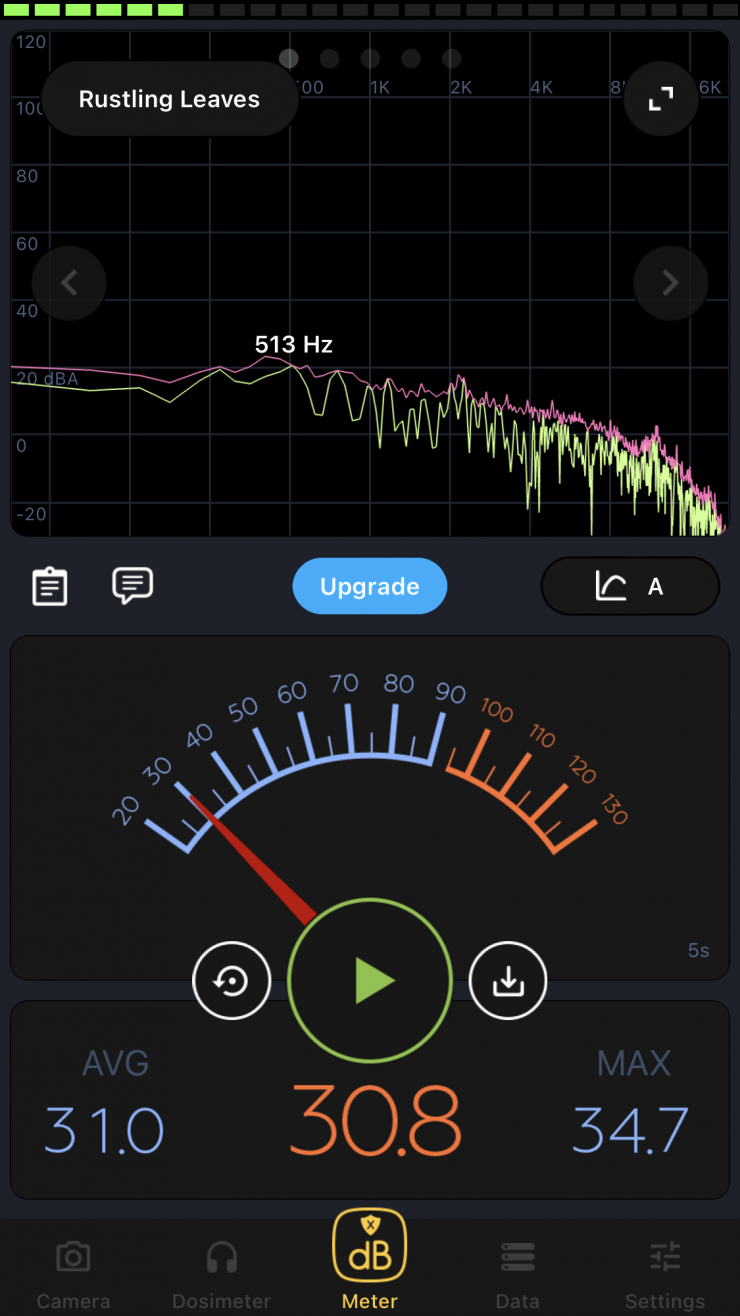
Quiet 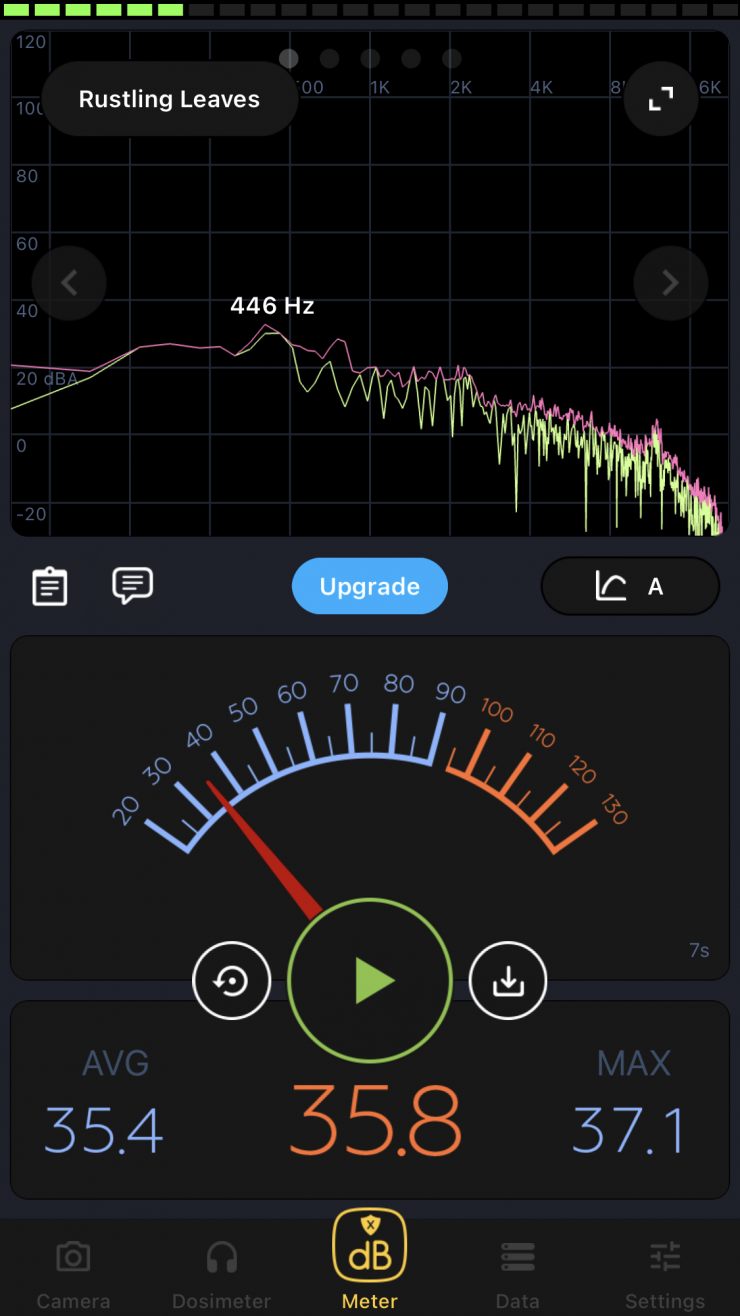
Medium 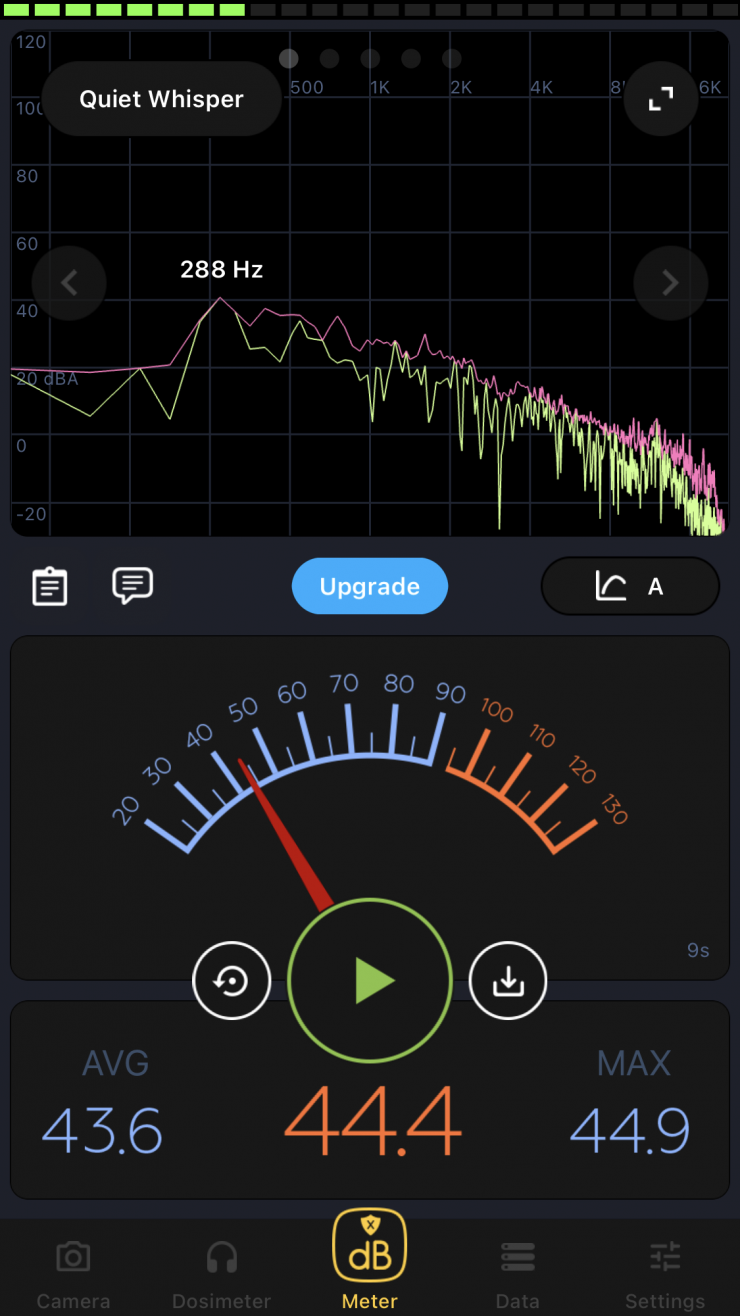
High 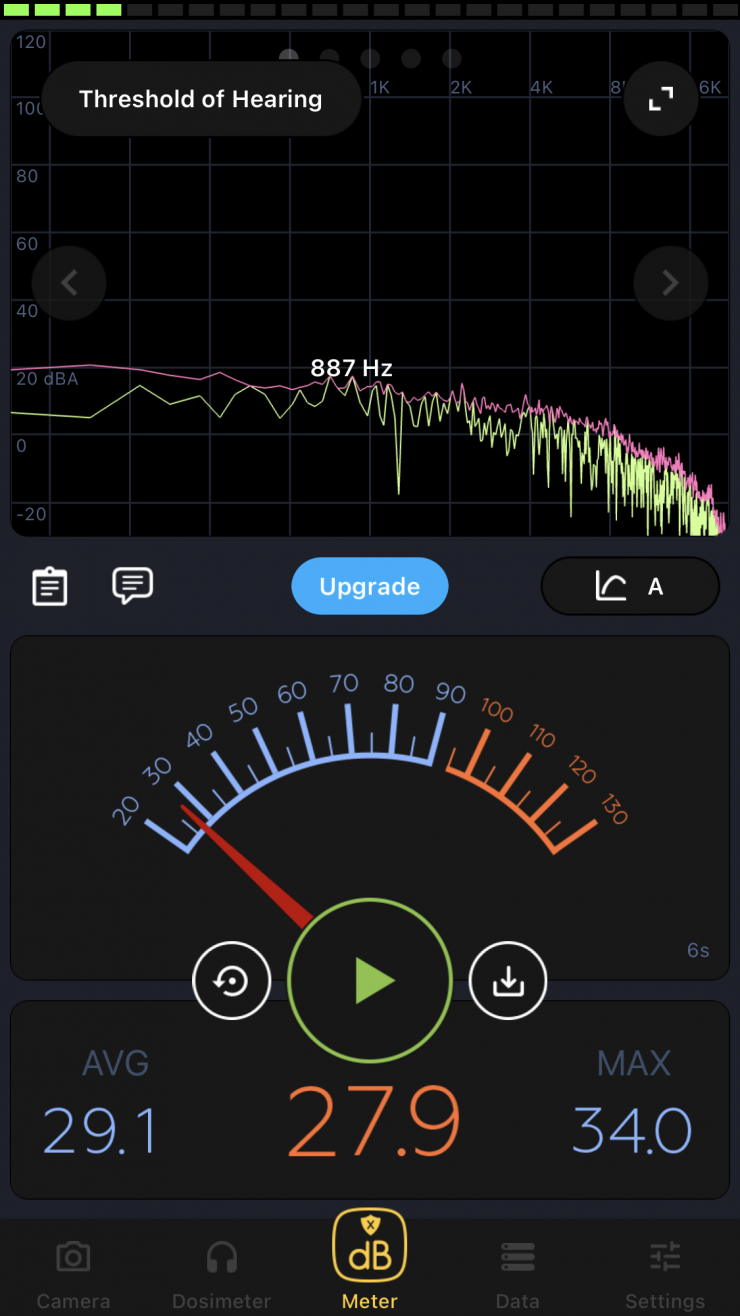
Pause
Above you can see measurements taken at a distance of 30cm / 0.98′. Please note that these are not scientific measurements that were just taken on my phone, but they will give you a good guideline as to how much noise the fan makes. These tests were done in a normal room with the light set at 100% output.
Just as a reference for you, common items that are around 40db are a Library, bird calls (44 dB), the lowest limit of urban ambient sound.
Depending on what you are doing and how close the light is to where audio is being recorded you may find the fan noise to be an issue. Quiet mode is perfectly fine for recording interviews indoors in a quiet room.
I was interested to see what would happen if I left the light on at 100% with the fan in the Pause mode. While it will stay silent for around 5 minutes (depending on how long you have been using the light and the ambient temp. you are using it in), the fans will kick in automatically once the light detects that it is getting too hot.
Please note that in the Pause fan mode, the fans are stopped temporarily until the fixture heats up. You should not use this mode for long periods of time.
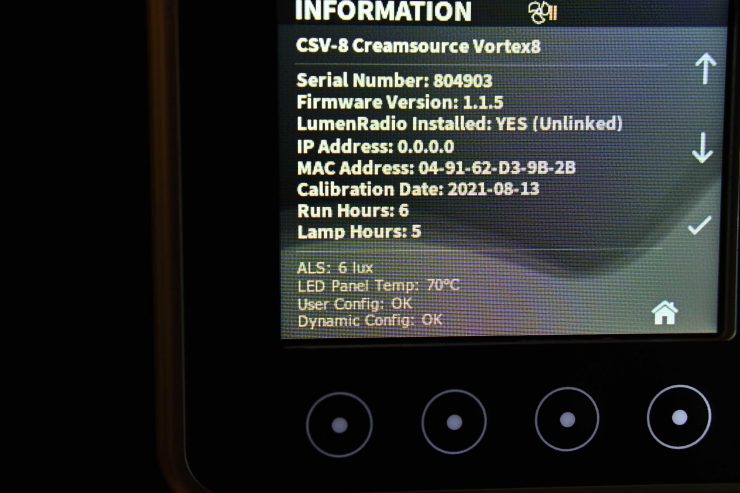
On the Information page, I found that the fan kicked in once the LED panel temp. reached 70°C. When the fan kicked in it seemed to stay at the Quiet mode level. If you then set it back to Auto the fan comes on at the High level to cool the fixture down. It stays on Auto for a very long time, even though the LED panel temp goes under 60°C. This was slightly odd, but it is something you need to be aware of if you are using the light.
According to Creamsource, the maximum surface temperature of the lamp head will be 60° C / 140°F, when operated in an ambient temperature of 25° C/77° F. The Maximum ambient temperature for normal operation is 40°C/104°F. 40°C is not that high, so you need to be aware of this if you are using the light remotely outdoors in hot weather. You would probably be well advised to make sure it is shaded if you do plan on using it in those type of conditions.
Metal parts on the Vortex 8 will get very hot to touch, especially after the light has been on for a considerable amount of time. Creamsource states that ‘The fixture may become hot during operation. Maximum Surface Temperature Tc = 70°C.’ They go onto say ‘The Vortex8 is a high-powered lighting fixture and will get quite hot during operation, especially on the aluminum chassis due to heat dissipation. Care must be taken when handling the Vortex8.’
You really need to be careful about this because you could end up burning your hands if you grab hold of certain areas of the light.
As far as power is concerned, the light can handle any 48V DC, Max 13A input and it can run at 100% brightness from that DC input. It can also utilize 100-240V AC, 50/60Hz, Max 8A. The light features a Neutrik PowerCon connector.
Vortex8’s fan-based system has been designed with optimum thermal efficiency in mind. The fan system and heatsink placement allow for the core electronics to be sealed and isolated. What is also nice is that the way Creamsource has developed the thermal system, it works just as well no matter how you rig the light. It can be upside down, side-on, etc. and it still works at the same efficiency. Again, this tells me that attention to the little details was paramount when Creamsource was designing this light.
As I mentioned earlier the light draws 650W, this does make it a lot more power-hungry than some other high-end 2×1 RGBW fixtures:
| POWER DRAW | |
| Creamsource Vortex8 | 650W |
| ARRI S60-C Skypanel | 450W |
| Rotolight Titan X2 | 420W |
| Litepanels Gemini 2×1 | 325W |
| Luxli Taiko | 250W |
| Velvet EVO 2 | 200W |
| Nanlux Dyno 650C | 650W |
Can you run it via a battery?
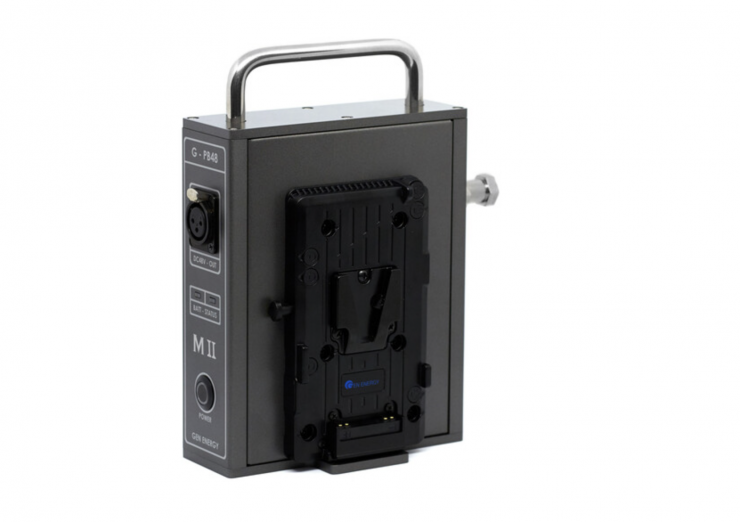
Yes, you can. The Vortex8 can be run directly from a 48V regulated DC battery source without the need for additional hardware. The fixture is
also able to hot-swap between AC and DC power sources and is capable of running at 100% brightness while being powered by a battery. The battery must have sufficient capacity to continuously power the fixture with a current draw of 13.5A. You need to be careful that you do not exceed 50v otherwise your Vortex8 may be damaged.
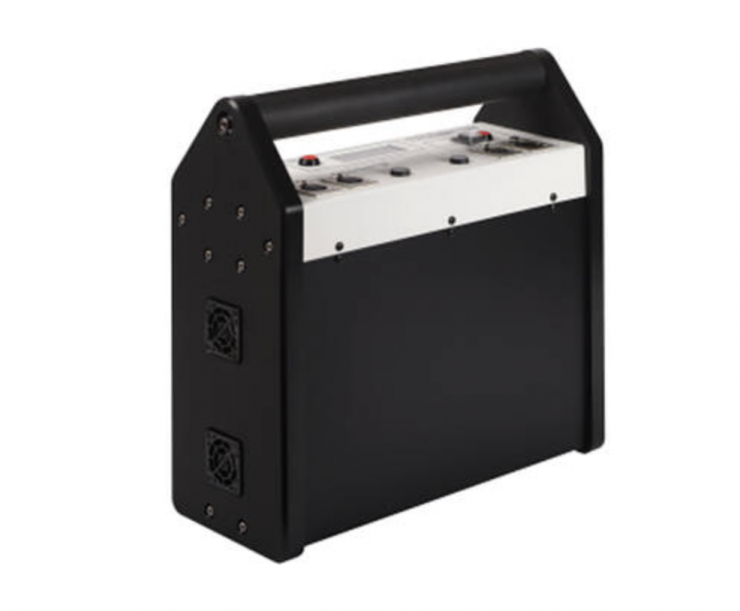
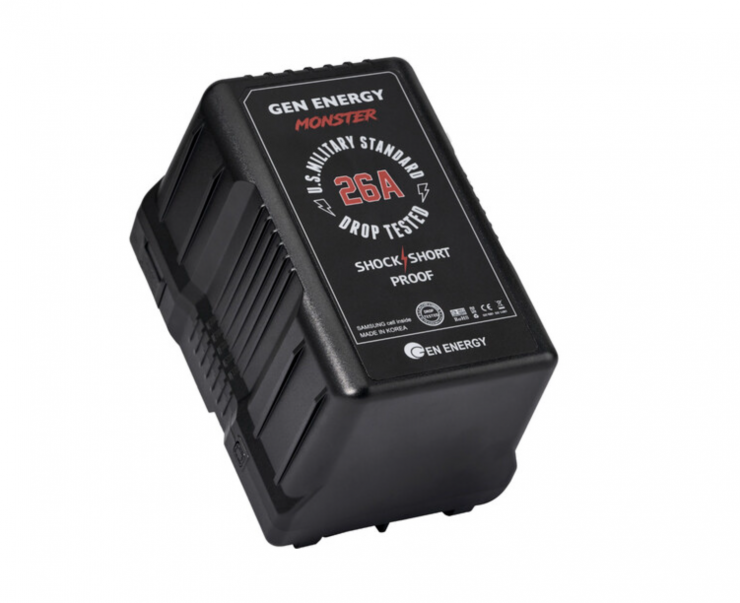
Solutions such as the Gen Energy 48v Monster kit work well and BlockBattery also has some great options like the D800.
Creasource will also be adding a feature in an upcoming firmware update that allows you to limit the power of the light to match your battery system. This will open it up to a far wider range of battery solutions.
Controls (CreamOS)
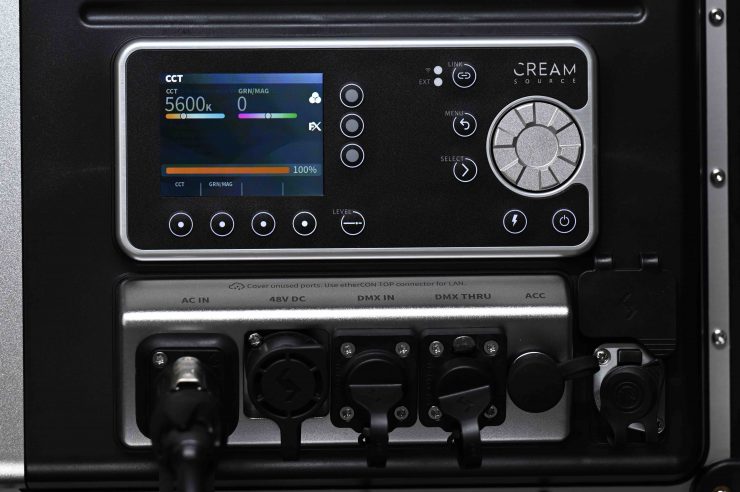
The Vortex8 features macro-level controls that let users manipulate up to 8 individual zones. Effects and color gels are built into the latest CreamOS architecture in addition to a range of new features wrapped into a brand new, user interface.
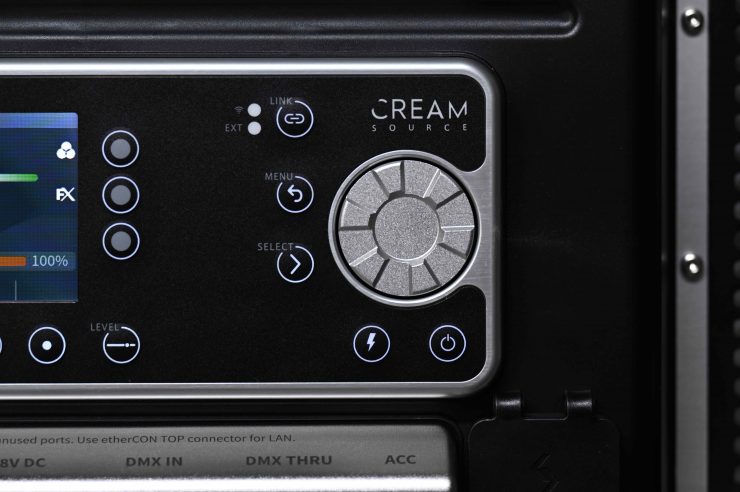
The screen display is fairly straight forward and it only shows you what you need to see. You navigate the menus and make changes by using a combination of buttons and dials.
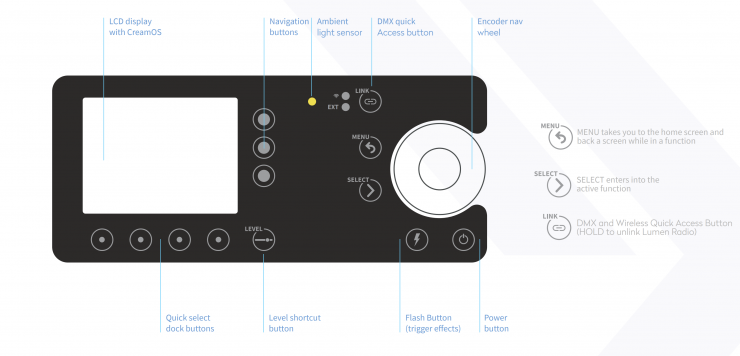
Above you can see what the various buttons and dials are for.
Above you can see how the operating system works.
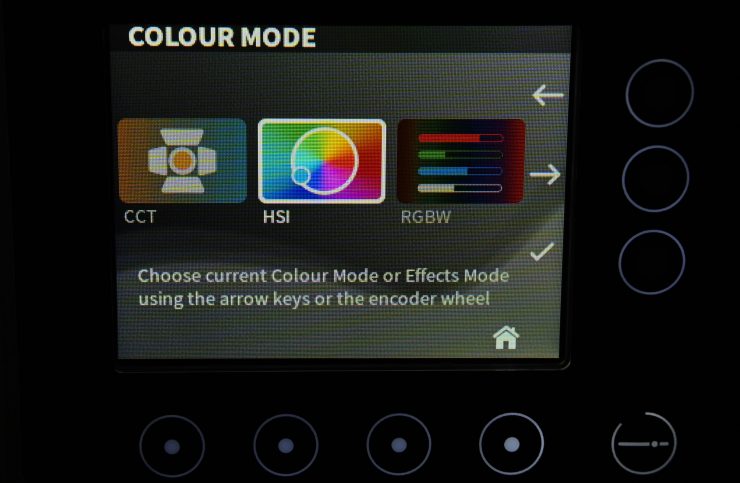
I like how you can scroll through the various operating modes and they are represented by easy-to-understand graphic illustrations.
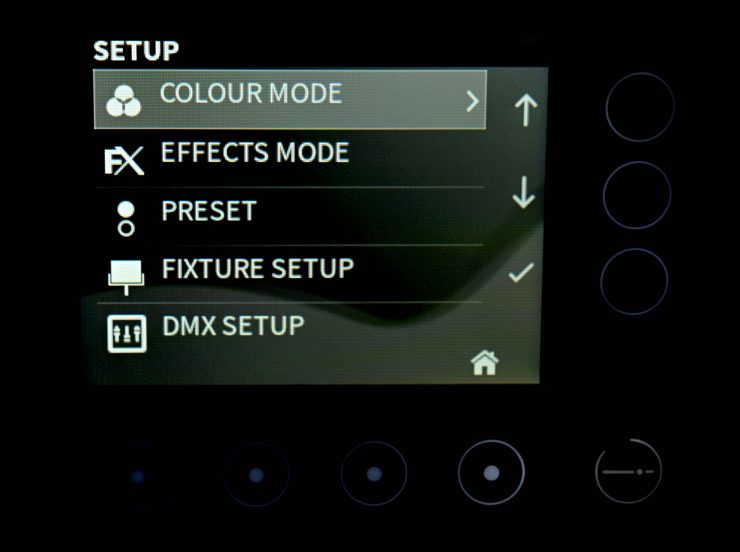
The main menu isn’t overly complicated and it allows you to change various operational aspects of the fixture quickly and easily.
All the buttons and dials are well made and tactile to use.
Like most lighting interfaces it does take a little bit of time to get familiar with it.
While I don’t mind the user interface, It isn’t nearly as intuitive and easy to use as the Rotolight Titan X2.
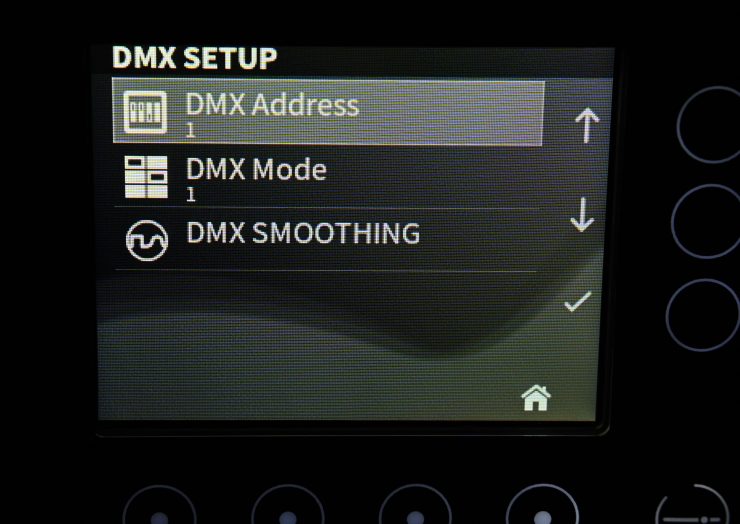
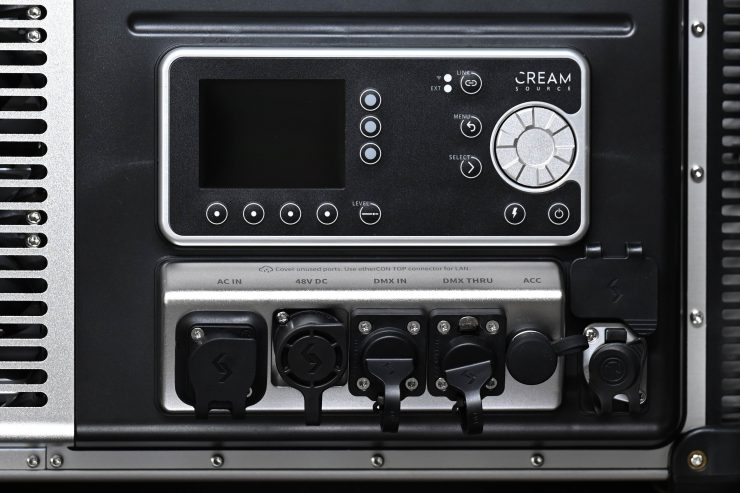
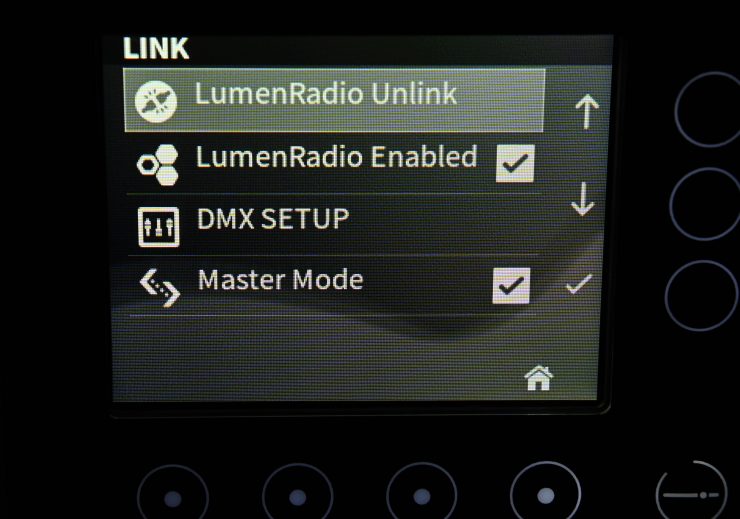
The Vortex8 has a built-in LumenRadio and it has both a DMX In and a DMX Thru. There is also an etherCON TOP connector and a Creamsource Accessory Port.
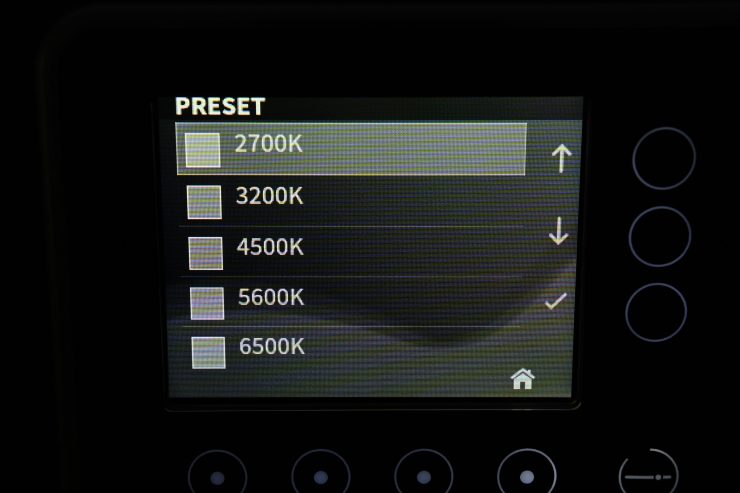
You can also go to a Preset page where you can choose various preset Kelvin color temperatures. While this is nice to have, I personally found it quicker to just dial in the Kelvin color temperature yourself rather than going into a menu to do it.
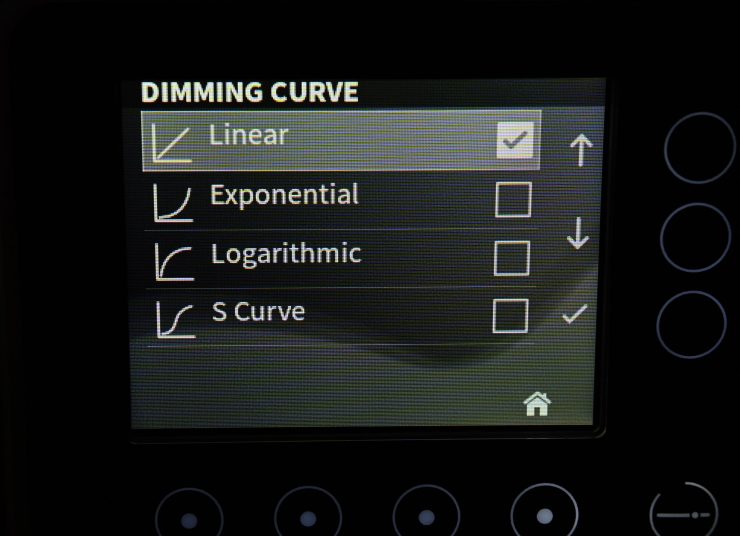
The light also gives you options for changing the dimming curve.
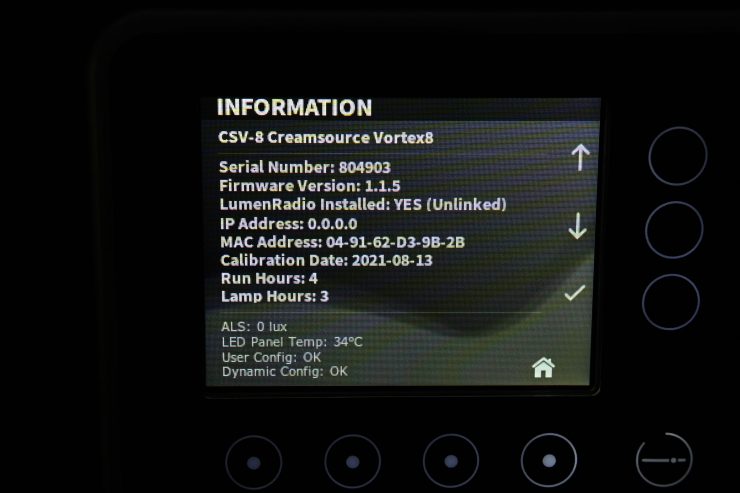
An information page also lets you see all of the relevant information about the fixture, including how many hours it has been used for.
RGBW
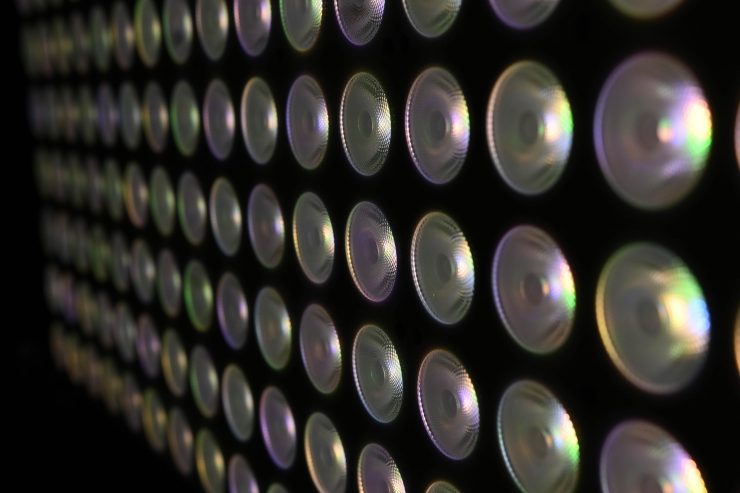
We are seeing a lot of lighting companies now using RGBW technology. RGBW stands for Red, Green, Blue & Warm White. There are, however, other types of RGB such as RGBWW, RGBAW, and RGBACL. The Vortex8 is only RGBW. This is the same as the ARRI SkyPanel. The Litepanels Gemini and the Rotolight Titan X2 uses RGBWW.
Operating Modes
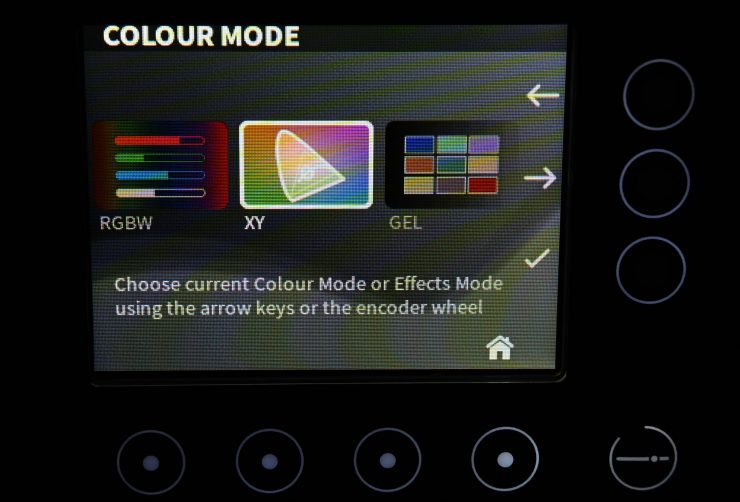
The Vortex8 has the following operating modes:
- CCT
- HSI
- RGBW
- XY
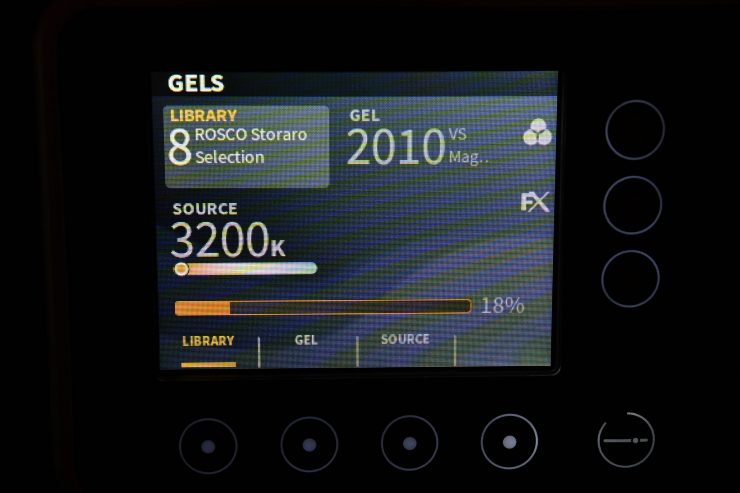
- Gel
- CCT-HSI
- CCT-RGBW
- CCT-XY
- CCT-Gel
- FX Mode
Correlated Color Temperature (CCT) MODE
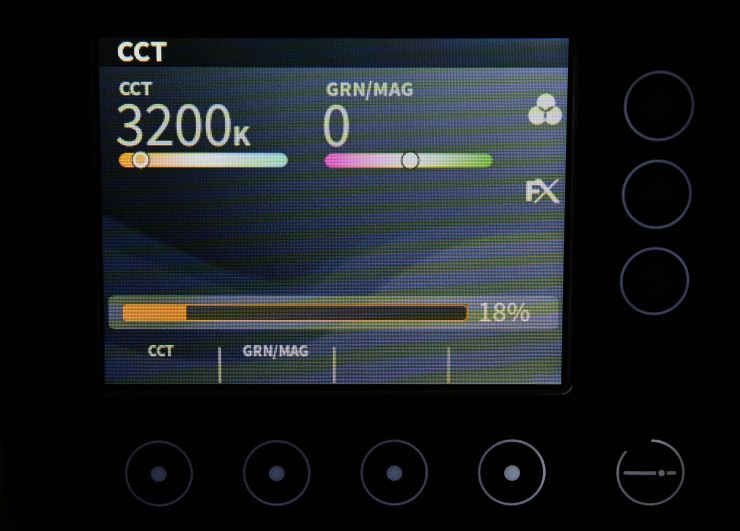
This is the mode most people are going to use the light in.
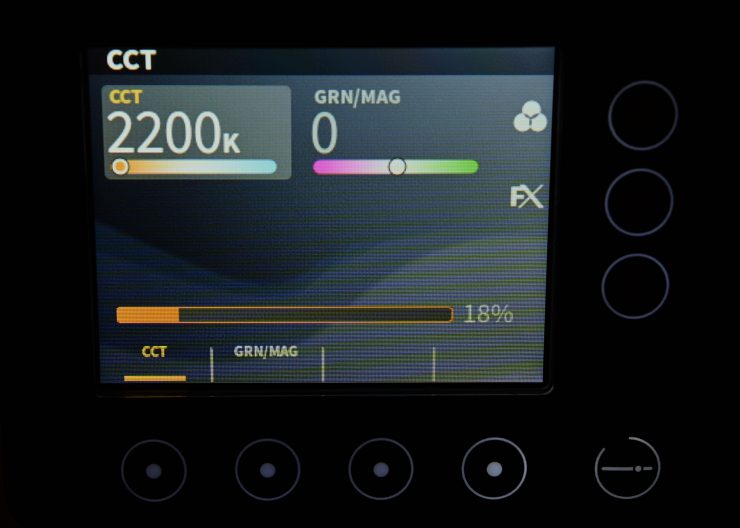
In the CCT Mode, you have full access to making Kelvin color temperature adjustments between 2200K-15,000K. These adjustments can be made in increments of 100K. I would have liked to have seen more finite control when making Kelvin color temperature adjustments.
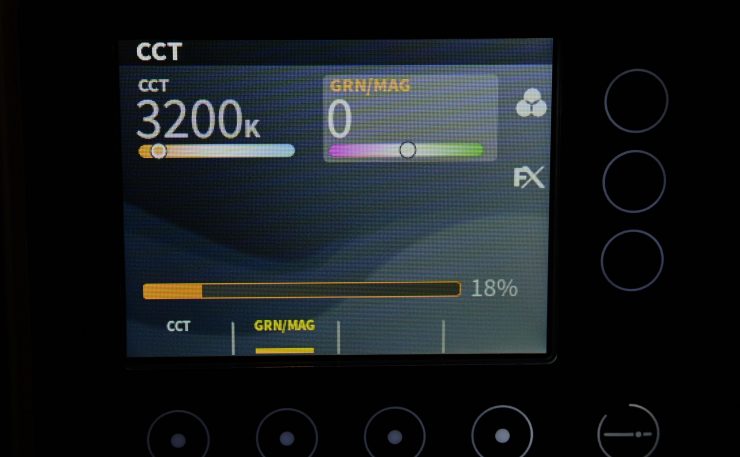
The fixture also has continuously variable full minus green to full plus green correction.
Being able to dial in more or reduce the amount of green coming from your lighting source can make a huge difference. Different camera companies use different sensors in their cameras and they all react differently to light. Some camera sensors may lean towards magenta, and some, more towards green. By making CCT adjustments you can dial in the light so that it looks better for whatever camera system you are using. CCT adjustment also helps when you are trying to match lights from different manufacturers.
The Kelvin color temperature range is impressive and it should suit most people’s needs.
HSI Mode
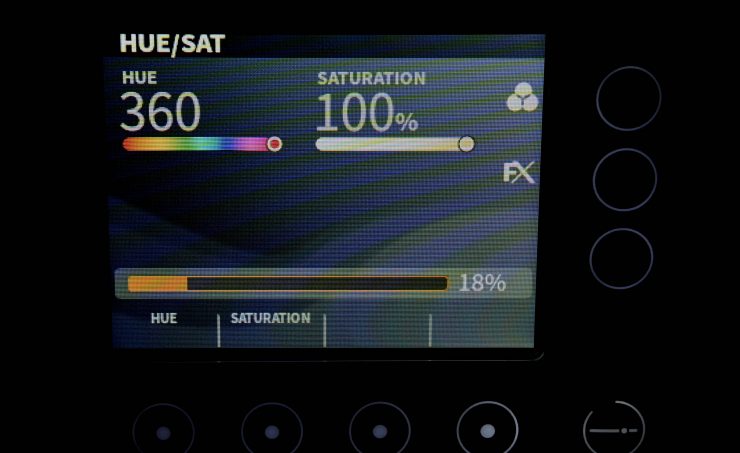
The HSI mode lets you create just about any color you can think of. It gives you full hue and saturation control as well as intensity. By manipulating, the hue and saturation you can create some really interesting colors that depending on the project you are working on can really add some creative flair. I quite like using this mode to create a lot of color separation between the foreground and background, or for recreating a really cold or warm-looking image.
There is a small color display underneath the Hue setting to help you with selecting the color you want. Colors are represented as degrees from 0-360 and you can mix from red (0 degrees) to green (120 degrees) through to blue (at 240) degrees and back to red (at 360 degrees).
RGBW Mode
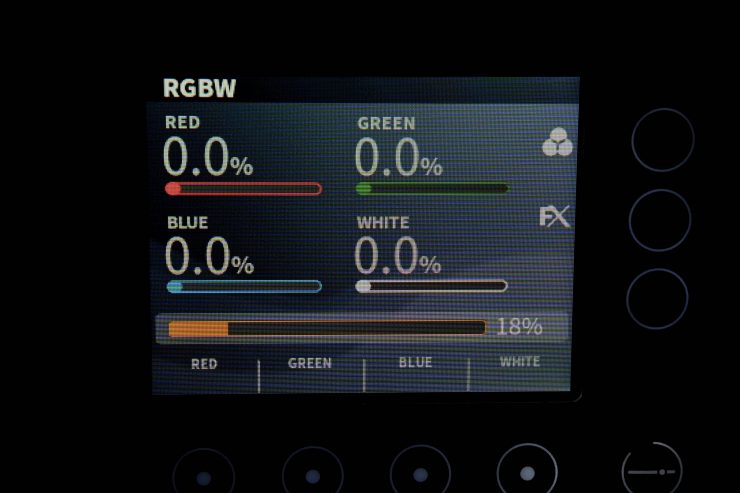
In his mode, you have full control over how much Red, Green, Blue, and White are being used. This way you can mix various color combinations to achieve a certain color you are after.
XY Mode
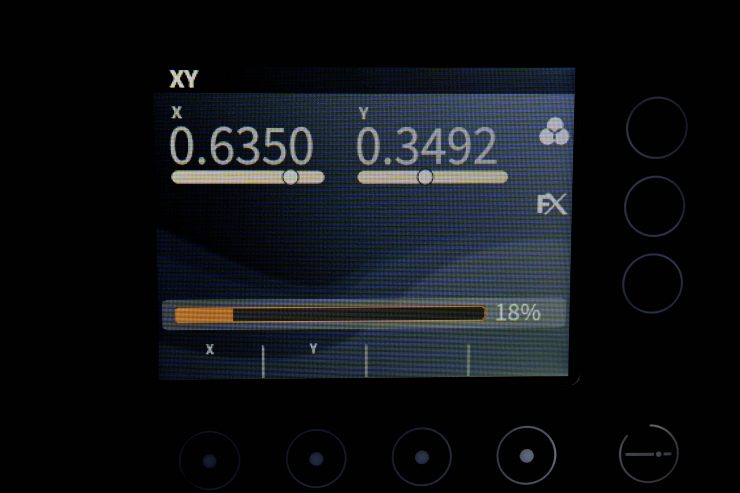
In this mode, you can create colors by changing the X and Y coordinate axis. This gives you more finite control for creating colors than using the HSI Mode.
The only trouble with the way this is being displayed on the Vortex8 is that there is no visual color reference when you are adjusting the X and Y axis separately with dials.
Filter Mode
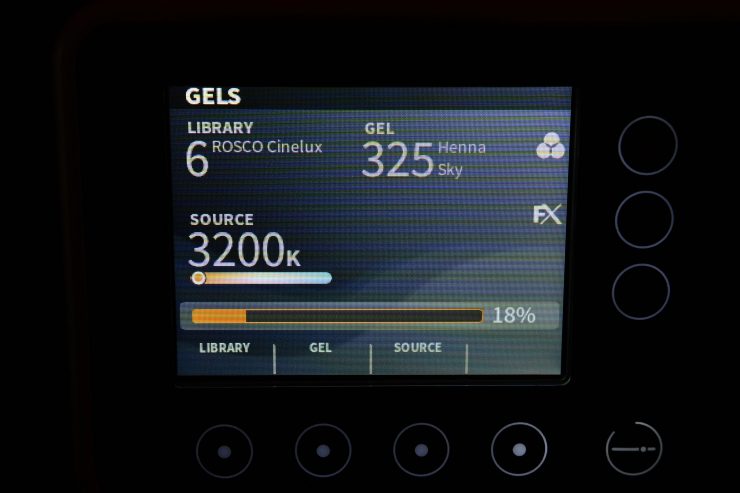
Inside the fixture, there is a large array of standard gels from companies such as Lee and Rosco.
Having built-in Digital Gels not only means that you don’t have to physically carry gels around, but you can also quickly and easily replicate popular gels. Using the gel mode can help you match other lighting sources, especially if you are working with other lights with physical gels.
You can adjust the CCT to 3200K or 5600K when using the gels.
Unlike some other 2×1 RGBW lights from Litepanels and Gemini, the Vortex8 doesn’t feature source modes such as tungsten, candlelight, HMI, sodium vapor, fluorescent, etc. In some regards, I personally find these more useful than the gels.
CCT-HSI
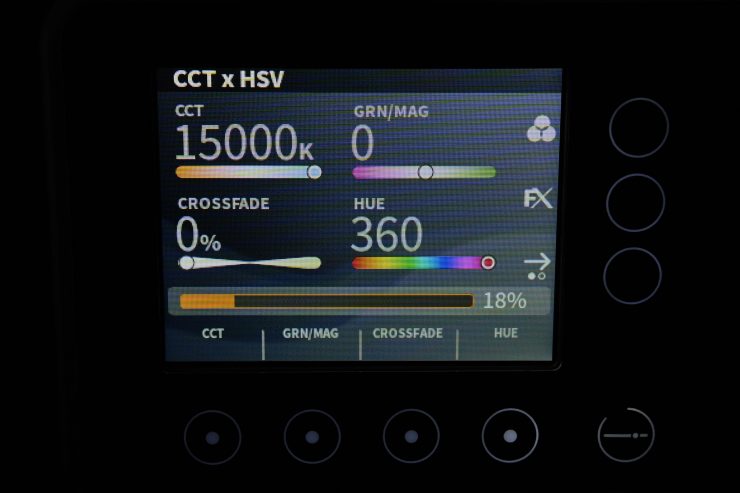
The CCT-HSI mode allows you to adjust Hue, intensity, G/M offset, and CCT. You can also adjust what is called Crossfade, which allows you to crossfade between CCT and HSI modes
CCT-RGBW
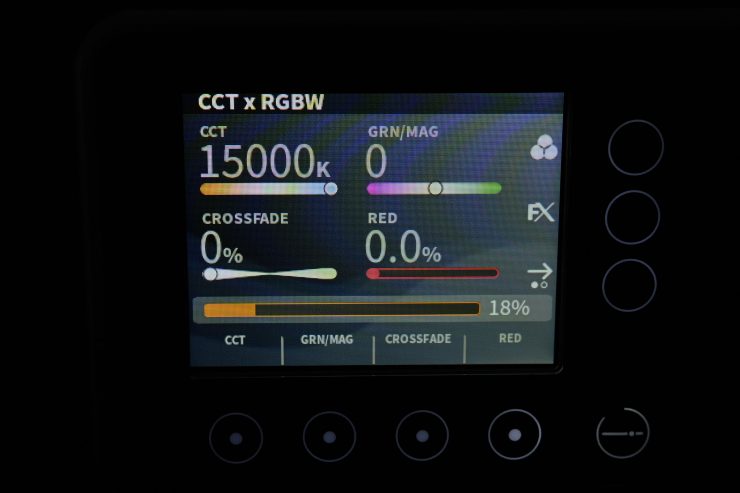
The CCT-RGBW mode allows you to adjust Red, Green, Blue, White, G/M offset, and CCT. You can also adjust Crossfade, which allows you to crossfade between CCT and RGBW modes.
CCT-XY
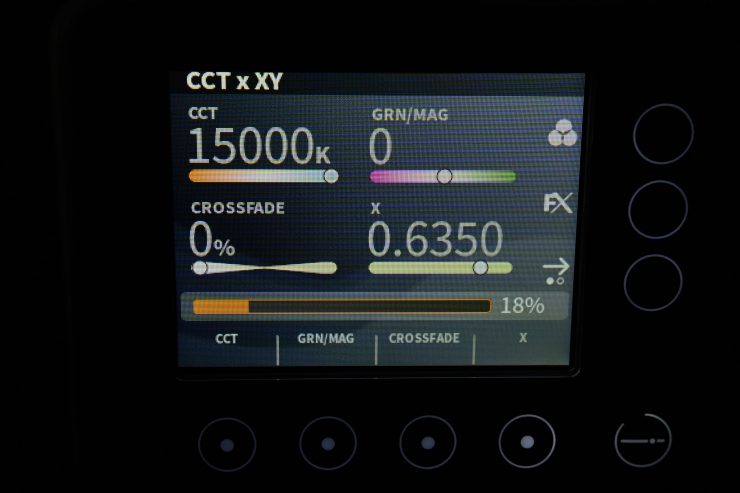
The CCT-RGBW mode allows you to adjust the X and Y axis, G/M offset, and CCT. You can also adjust Crossfade, which allows you to crossfade between CCT and XY modes.
CCT-Gel
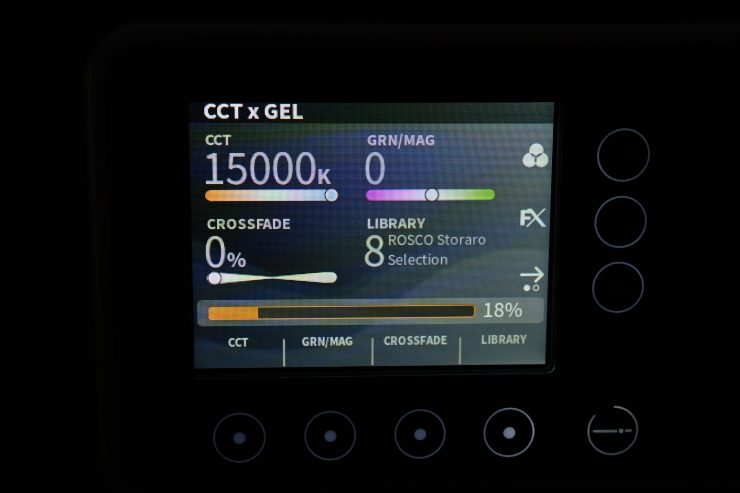
The CCT-Gel mode allows you to select Gels, adjust G/M offset, and CCT (3200K or 5600K). You can also adjust Crossfade, which allows you to crossfade between CCT and Gel modes.
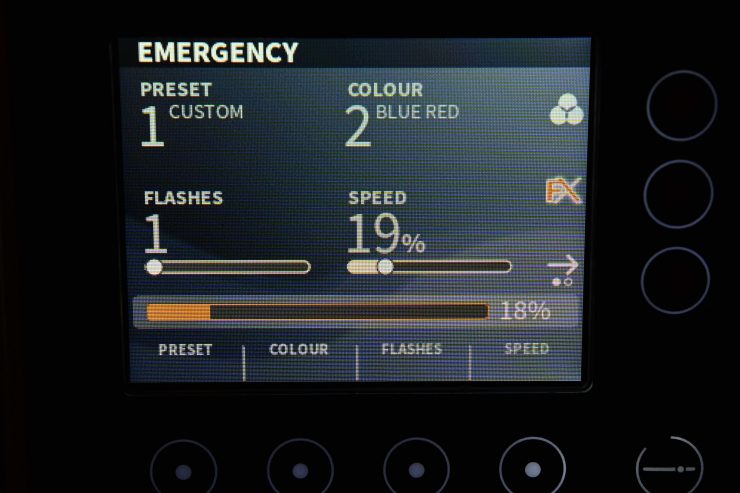
FX Mode
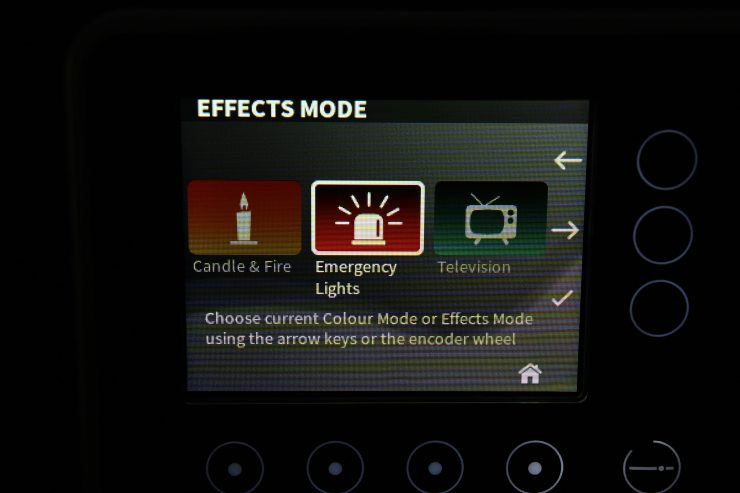
The FX mode does not appear along with the other modes, however, you can access it directly by pressing the button next to the FX marking on the LCD display. Why it isn’t just accessible along with the other modes is a little strange.
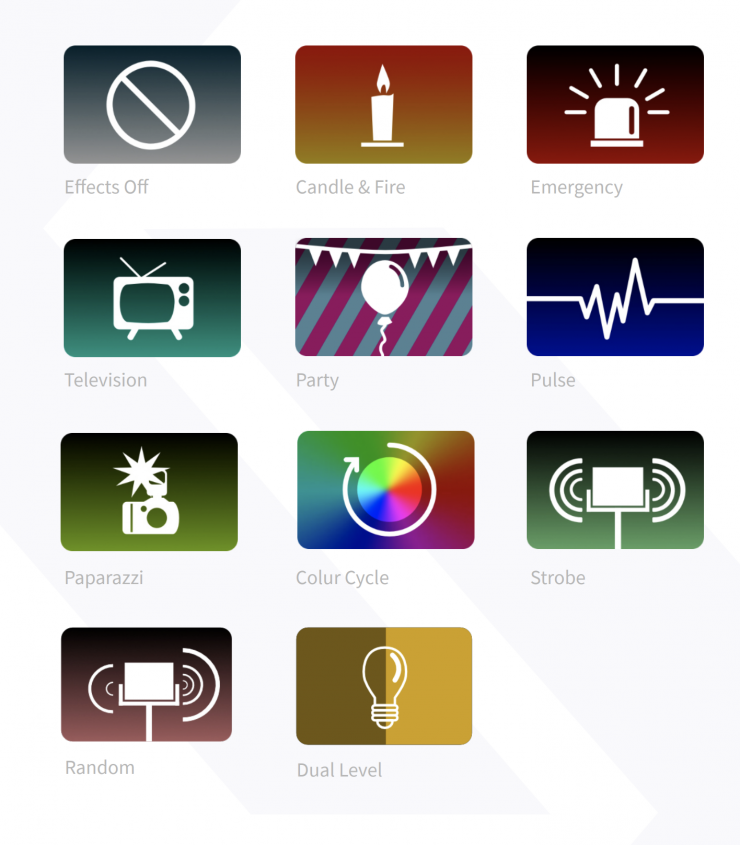
Above are the options you have.
Presets
You can also save up to 50 different presets from any of the available operating modes and recall them quickly for future use.
What does the Vortex8 offer that its competition doesn’t?
Most of today’s RGBW lights all seem to have the same or very similar feature sets. In fairness there is probably only so much you can do with current technology. We have arguably almost reached a point where LED lights have started to plateau out. Even the really cheap LED lights now produce pretty accurate colors. What ultimately separates LED lights is build quality, usability, and versatility.
Creamsource didn’t just want to make another RGBW panel light that was the same as everyone else’s. If you are going to compete in what is arguably a 2×1 ARRI-dominated market, you need to come up with something that people have been requesting. So that is what Ceamsource did. They listened to gaffers and came up with the Vortex8. A large, very bright, concentrated beam angle RGBW LED panel light is not something we have seen before.
The versatility of having a large RGBW panel light that can be used as both a hard source and a soft source makes a lot of sense. One of the biggest advantages the Vortex8 has is that its output and tight beam angle means it can through light over much further distances than other RGBW 2×1 fixtures.
The main points of difference between the Vortex8 and its direct competition are:
- Power output along with the native narrow beam angle
- The IP65 rating and the all-in-one design, i.e built-in PSU and built-in wireless antenna.
- The build quality and design elements have been crafted to the highest standards, made to withstand heavy everyday use in rental. (5 year registered warranty to support that).
Connectivity
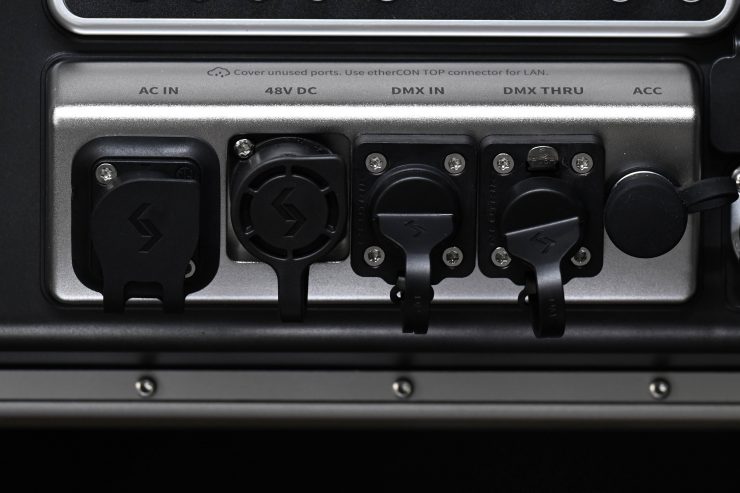
The Vortex8 is equipped with extensive expandable wireless options, and ships with a LumenRadio built-in. It also supports Ethernet, Bluetooth, TimoTwo, 5 Pin DMX, Wifi, USB type A and it has a Creamsource Accessory port.
Beam Angle
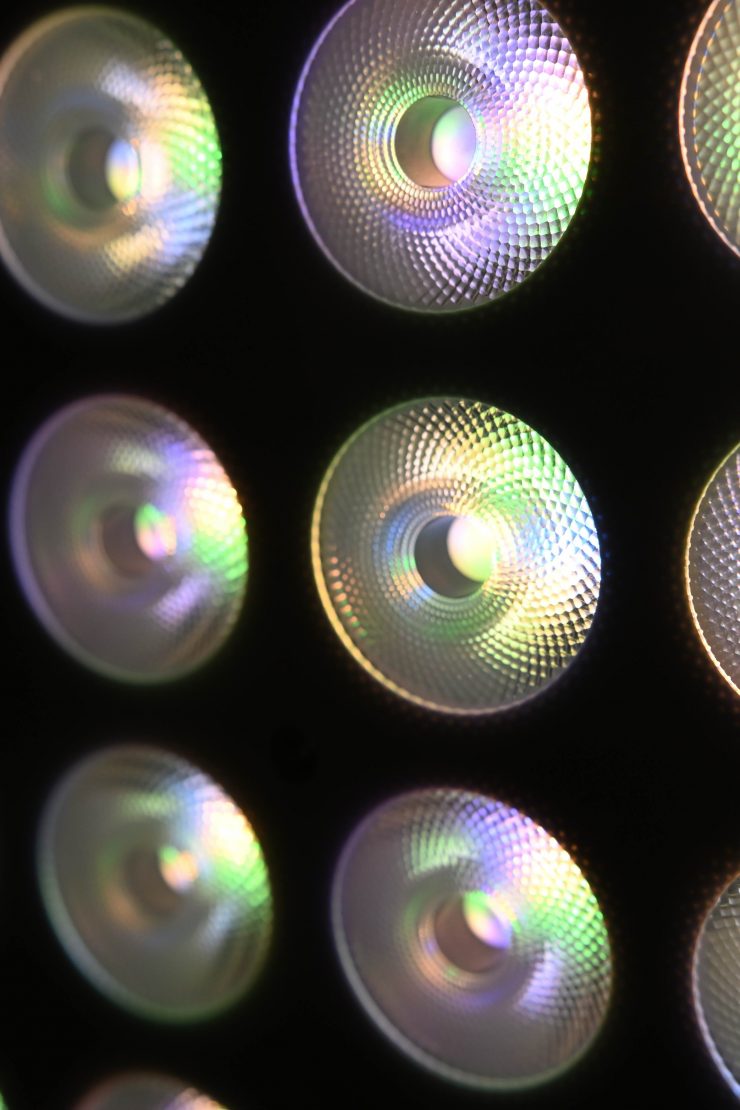
As I mentioned earlier the Vortex8 has a very narrow beam angle of 20 degrees. Unlike the Rotolight Titan X2 that uses SmartSoft technology so the beam angle can be changed from 68 degrees to 150 degrees, with the Vortex8, you need to use the included Creamsource Diffusion panel, or optional Dome to change the beam angle to 60 degrees.
I actually thought that the beam angle you get with the Diffusion Filter looked slightly wider than 60 degrees. Above you can see the difference between the Diffusion Filter and when the light is used open face.
Below you can see what the standard beam angle is of other competing lights:
| Beam Angle | |
| Creamsource Vortex8 | 20 degrees |
| Rotolight Titan X2 | 68 degrees to 150 degrees |
| ARRI SkyPanel S60-C | 115 degrees |
| Litepanels Gemini 2×1 | 93 degrees |
| Razyr MC MAX 400 | 120 degrees |
| Lupo Superpanel 60 Full Color | 115 degrees |
| Luxli Taiko 2×1 RGBAW | 76 degrees |
| Velvet EVO 2 | 115 degrees |
| Nanlux Dyno 650C | 160 degrees |
As you can see, the Creamsource Vortex8 has a much narrower beam angle than any of the other 2×1 style RGBW lights that are on the market, but just like a lot of fixtures you can change that with various lighting modifiers.
20-degrees does sound a little wrong for a 2×1, but I actually think that Creamsource has done the right thing by making the Vortex8 with such a narrow beam angle. As the fixture has so much output, you can throw a powerful beam of light a long way. Yes, you can’t adjust it as easily as a Fresnel, but you need to clearly remember that this 20-degree beam spread is coming from a much larger source than a Fresnel.
Rigging
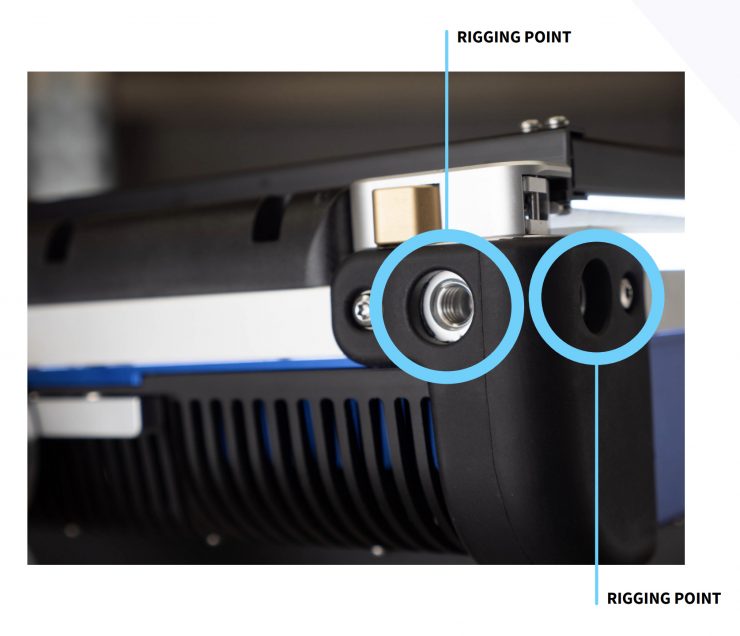
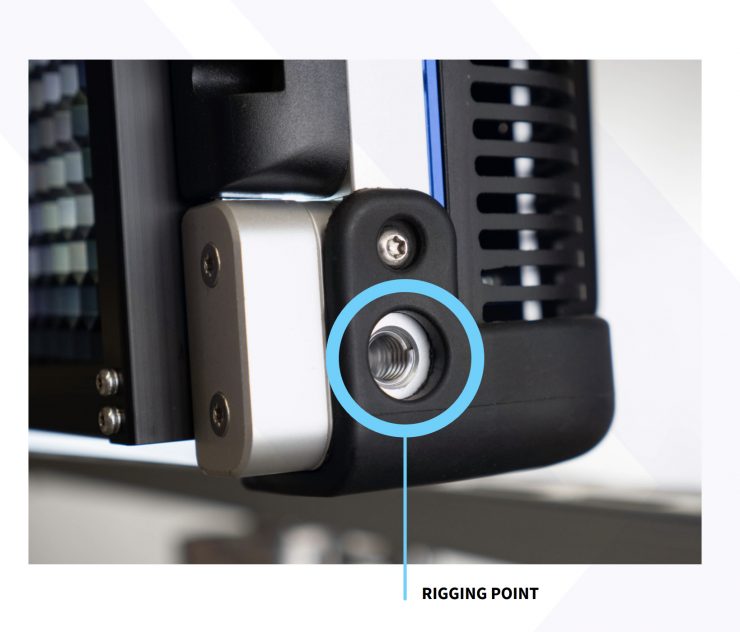
The rigging of the Vortex8 consists of a clever eight-point attachment system, 2 points on every corner. This creates a lot of versatility for rigging options, configuration, and safety. It also means you will be able to create larger arrays by combining multiple Vortex8 fixtures.
Creamsource is in the process of making a quad Vortex8 frame as well as other sized frames for different sized arrays.
Who is it aimed at?
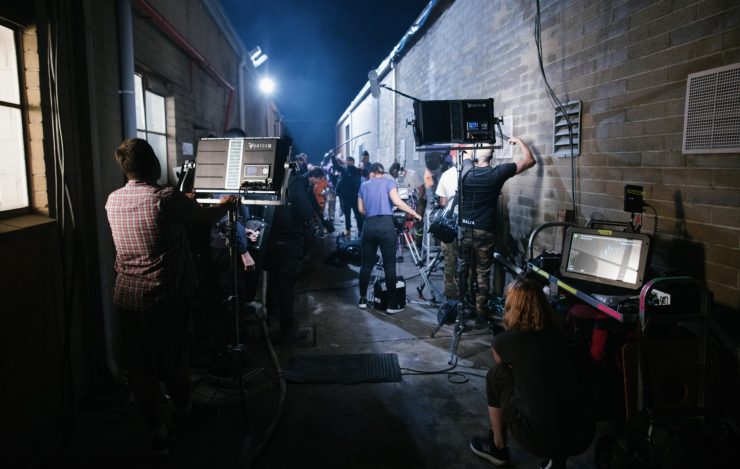
The Vortex8 is primarily being targeted at rental houses, studios, and large productions, however, there is no reason it wouldn’t make for a versatile high-end lighting solution for smaller production houses and even some owner/operators.
Above you watch a very interesting chat with Greig Fraser ASC, ACS, Hollywood gaffers Mike Bauman, Jamie Mills, Andrew Korner and Mike Ambrose. They are also joined by Co-Founder of Maccam, Michael McDonald and Nicole McDonald along with Creamsource CEO Tama Berkeljon.
Photometrics

So now let’s get to the photometric results. I always test lights in this way so that I get a reference to how they compare to other fixtures. Results only tell part of the story and should never be used alone to judge a light. I have found from extensive testing over the years that certain lights that have good photometric results don’t always look good, and lights that have worse photometric scores can sometimes look better than their results indicate.
You should never judge a light based on one particular set of tests. You need to look at all of the data to get a comprehensive idea of how a light performs.
Different lights can also look different depending on what camera you happen to be using. You should never judge a light based on one particular test. You need to look at all of the data to come up with an accurate conclusion.
Output & Color Temperature Accuracy
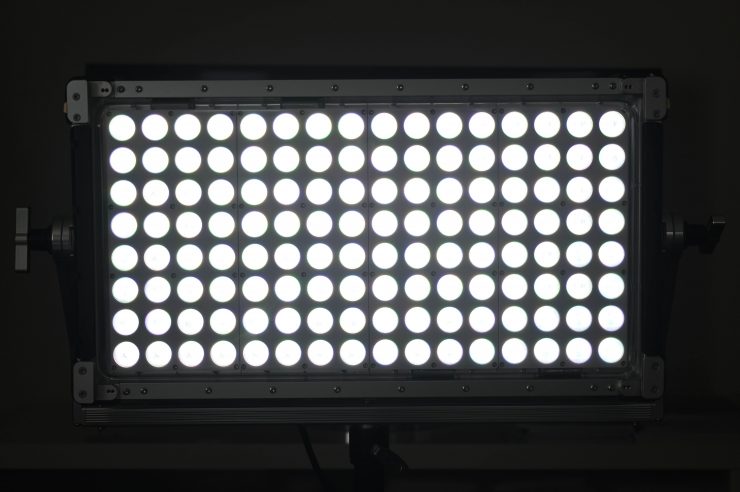
I tested the Vortex8 at a variety of Kelvin color temperatures with a Sekonic C-800 Spectrometer to find out how much output the light had and how accurate the Kelvin color temperature reproduction was. All readings are taken at a distance of 1m (3.28ft) in a controlled environment.
5600K
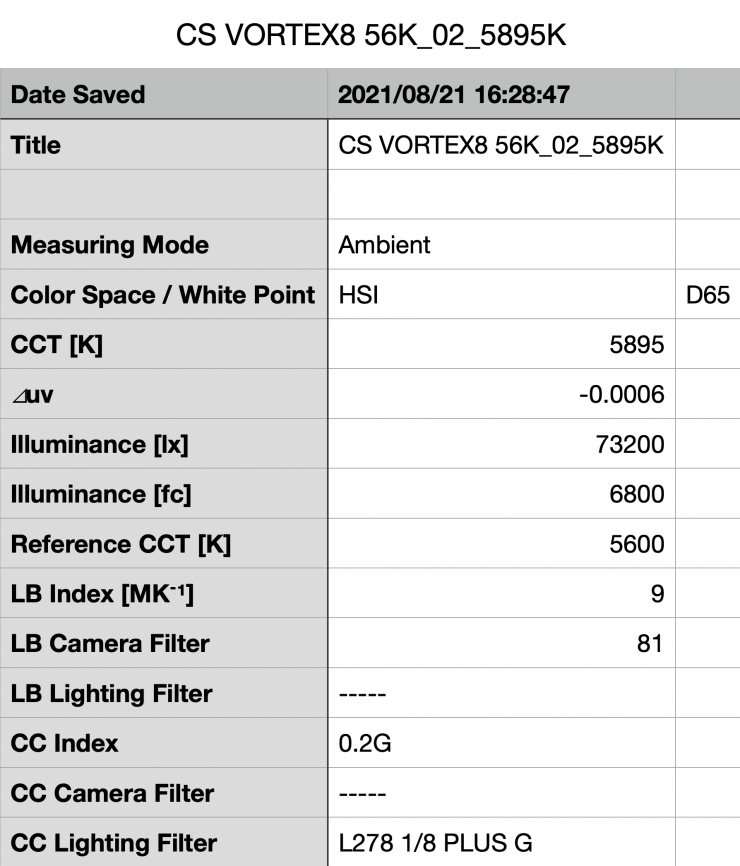
Above you can see the Vortex8 recorded an output of 73200 lx (6800 fc) when set at 5600K and run off mains power. This is basically almost exactly the same as the 73500 lx that is quoted by Creamsorece.
This is a ton of output from a 2×1 RGBW fixture, but you do clearly need to remember that this is coming from a 20-degree beam angle. On a light of this size, a 20-degree beam angle is not actually as tight as you may think.
The only other 2×1 light I have ever tested that gets remotely close to this output is the Lupo Superpanel Dual Color 60 which put out 67000 lx at 5600K. That light uses a wider 60-degree beam angle, but it only draws 220W.

What you clearly need to remember is that you can’t point this light without diffusion being used directly at a subject. Creamsource even issues a warning in the user manual.
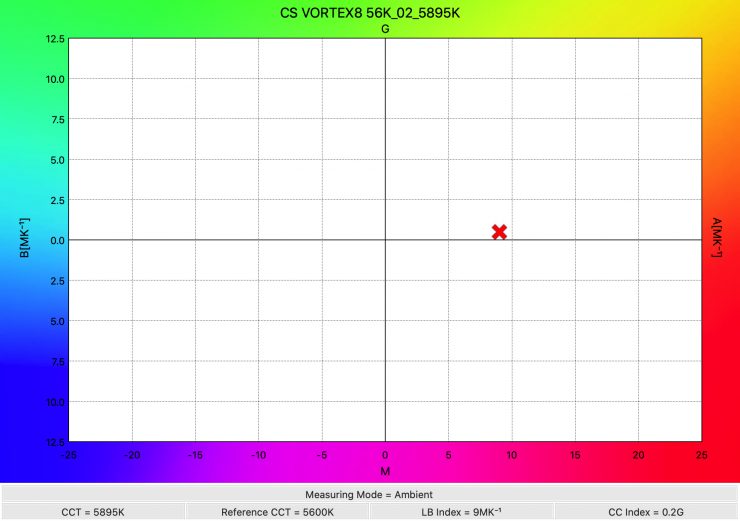
The light recorded a Kelvin color temperature reading of 5895K which was almost 300K off being correct.
5600K (Diffusion)
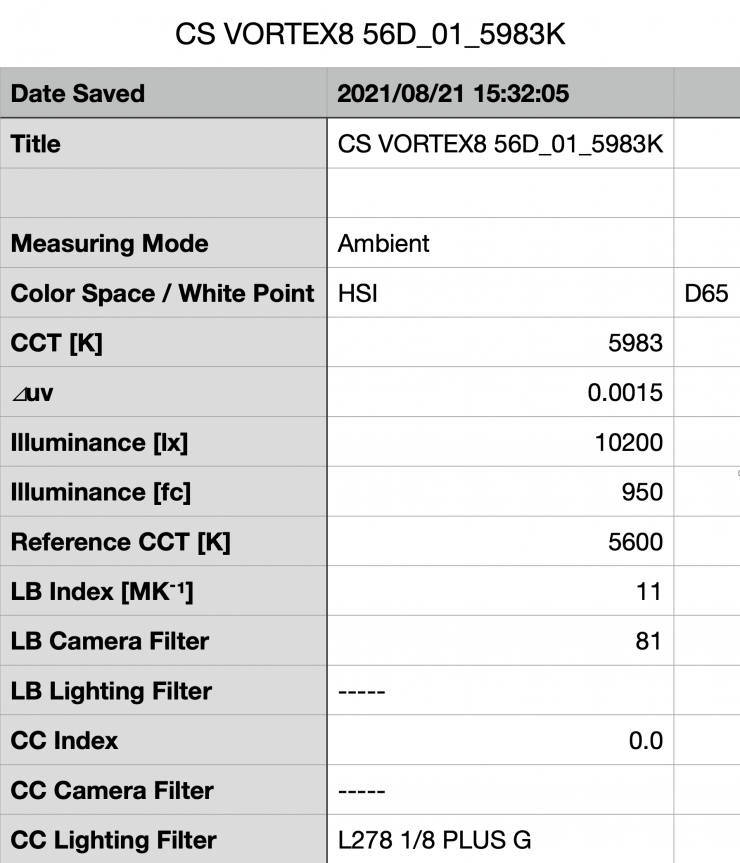
Above you can see the Vortex8 recorded an output of 10200 lx (950 fc) when set at 5600K and used with its included diffusion panel. This is 86% less output than when it is used without the diffusion panel.
The included Diffusion panel certainly softens the light up and it changes the fixtures beam angle to 60-degrees.
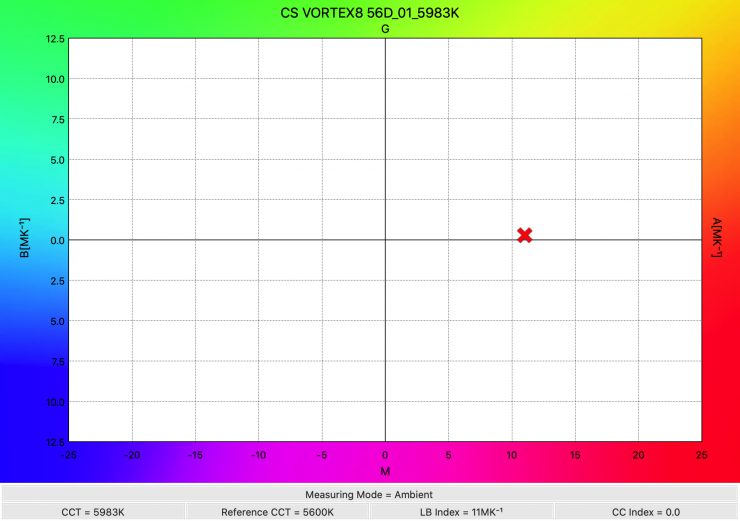
The light recorded a Kelvin color temperature reading of 5983K which was almost 400K off being correct. This is also showing me that the included diffusion panel is slightly altering the Kelvin color temperature.
I found that if I set the light to 5300K I got a reading of 5648K. This is the benefit of owning something like the Sekonic C-800. You can get measurements and then make adjustments to your light.
How does this compare to some other 2×1 RGBW lights that we have previously reviewed? Now, I am comparing all of these lights with diffusion panels being used. This is the only way to get some type of accurate comparison based on beam angles.
| Output at 5600K | |
| Creamsource Vortex8 | 10200 lx* |
| Rotolight Titan X2 | 10500 lx (50% SmartSoft diffusion) |
| ARRI S60-C SkyPanel | 10900 lx |
| Litepanels Gemini 2×1 | 9970 lx |
| Luxli Taiko | 7880 lx (medium diffusion) |
| Rayzr MC MAX 400 | 10400 lx |
* Using the included 60-degree Diffusion panel.
As you can see, even with the included diffusion panel, the Vortex8 still has a decent amount of output, although you do have to factor in that it has a much higher power draw than these other lights and the beam angle is narrower.
With the Rotolight Titan X2, I worked out that if you use 50% SmartSoft Diffusion the beam angle is around 110 degrees.
Ok, so to get an even more accurate head to head let’s compare the Rotolight Titan X2 with its SmartSoft Diffusion set to 0%, which means it has a 68-degree beam angle, against the Vortex8 with its included diffusion panel that creates a 60-degree beam angle.
| Output at 5600K | |
| Creamsource Vortex8 | 10200 lx |
| Rotolight Titan X2 | 13300 lx |
Above you can see that the Rotolight Titan X2 has more output in this particular comparison, but you need to factor in that the Vortex8 is being more heavily diffused.
Just as another reference both the Kino Flo FreeStyle 21 and Kino Flo Diva-lite 20 both put out 2409 lx at 5600K.
None of these lights can be used as a hard source like the Vortex8 can and that is the difference.
As far as an accurate rendition of creating a 5600K source here is how some of the other 2×1 RGBW lights that we have previously reviewed fare:
| Kelvin Color Temperature (when set at 5600K) | |
| Creamsource Vortex8* | 5983K 0.0 |
| Rotolight Titan X2 | 5689K 0.1M |
| ARRI S60-C SkyPanel | 5708K 0.0 |
| Litepanels Gemini 2×1 | 5460K 0.0 |
| Luxli Taiko | 5510K 0.0 |
| Rayzr MC MAX 400 | 5621K 0.4M |
*Using the included diffusion panel
The Creamsource Vortex8 was not nearly as Kelvin color temperature accurate as other 2×1 RGBW lights I have reviewed. Please remember that one set of results doesn’t tell you the whole story about any light.
3200K
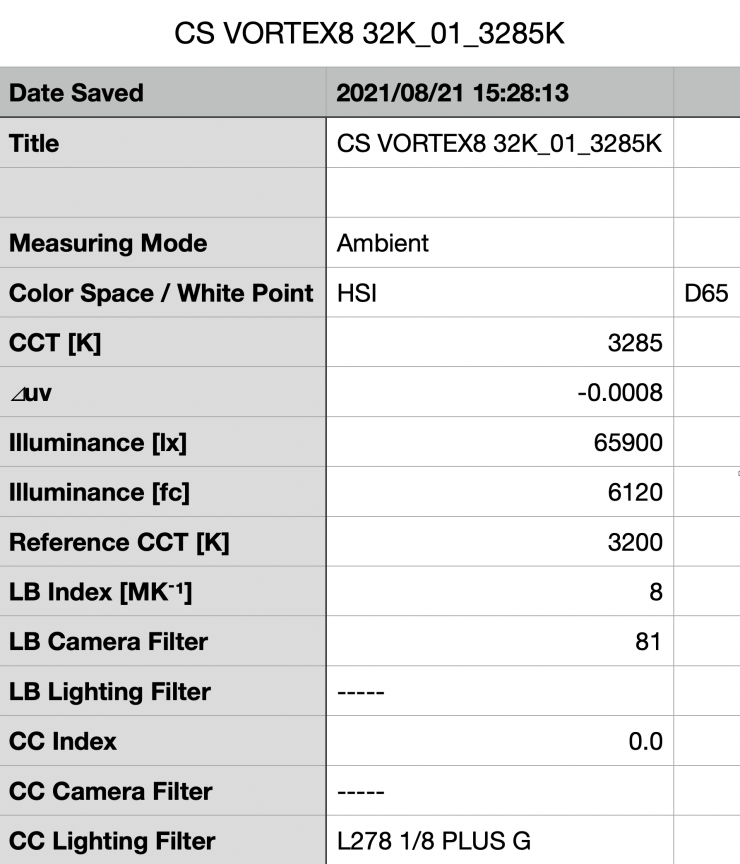
Above you can see the lights output when it was set at 3200K. It produced 65900 lx (6120 fc), which is 9.97% less than the 73200 lx it produced at 5600K.
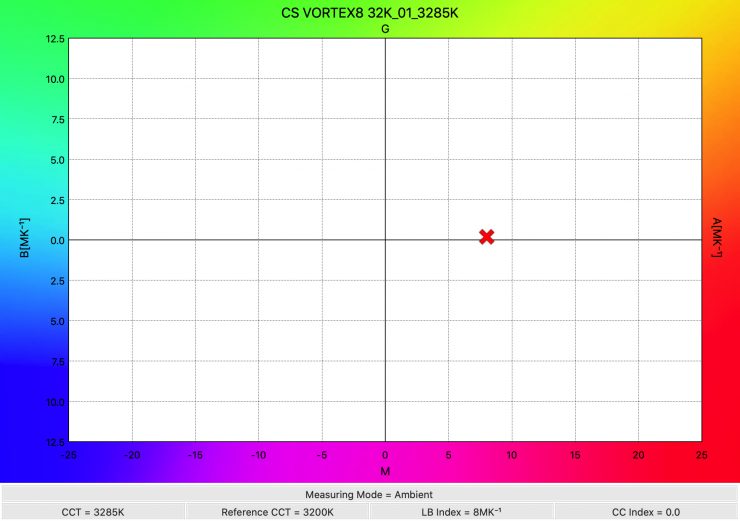
As far as Kelvin color temperature accuracy goes, it recorded a pretty accurate reading of 3285K.
3200K (Diffusion)
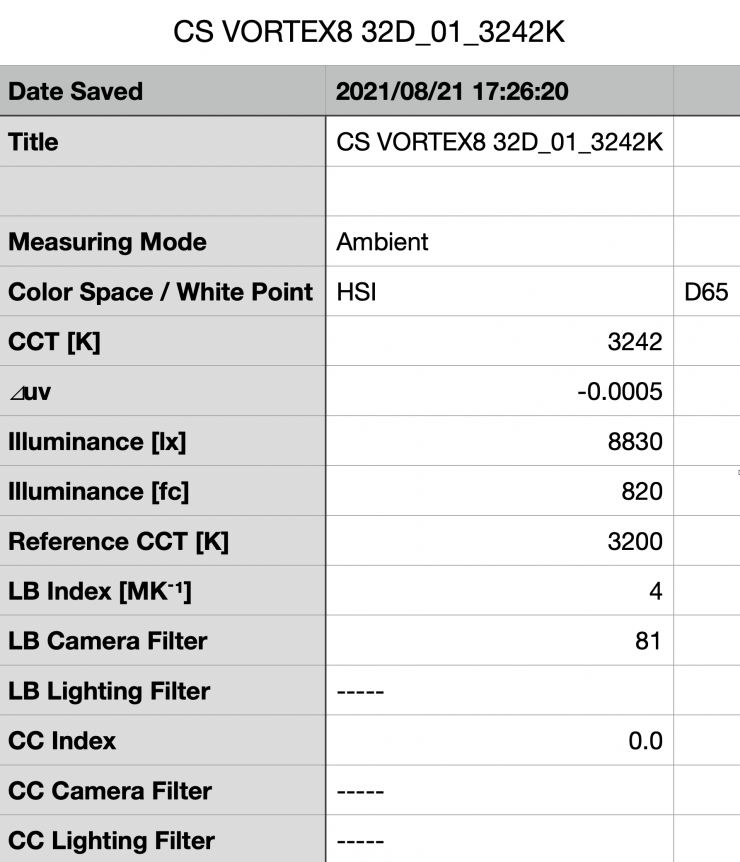
Above you can see the Vortex8 recorded an output of 8830 lx (820 fc) when set at 5600K and used with its included 60-degree diffusion panel. This is 86.6% less output than when it is used without the diffusion panel.
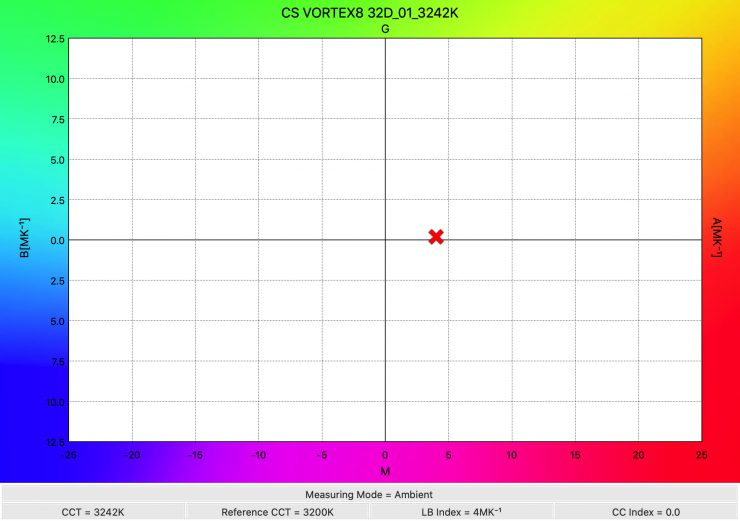
The light recorded a Kelvin color temperature reading of 3242K which was excellent. At 3200K the diffusion panel doesn’t alter the Kelvin color temperature as much as it does at 5600K.
Again, let’s compare it to some other 2×1 RGBW lights that we have previously reviewed:
| Output at 3200K | |
| Creamsource Vortex8 | 8830 lx* |
| Rotolight Titan X2 | 13500 lx (no diffusion) |
| ARRI S60-C SkyPanel | 10400 lx |
| Litepanels Gemini 2×1 | 8970 lx |
| Luxli Taiko | 7820 lx (medium diffusion) |
| Rayzr MC MAX 400 | 8540 lx |
*With 60-degree Diffusion panel being used
Just as another reference both the Kino Flo FreeStyle 21 and Kino Flo Diva-lite 20 both put out 2409 lx at 3200K.
As far as an accurate rendition of creating a 3200K source here is how some of the other 2×1 RGBW lights that we have previously reviewed fare:
| Kelvin Color Temperature (when set at 3200K) | |
| Creamsource Vortex8 | 3242K 0.0 |
| Rotolight Titan X2 | 3246K 0.0 |
| ARRI S60-C SkyPanel | 3225K 0.1M |
| Litepanels Gemini 2×1 | 3249K 0.4M |
| Luxli Taiko | 3171K 0.0 |
| Rayzr MC MAX 400 | 3300K 0.5M |
When the Kelvin color temperature is set at 3200K all of these lights are pretty accurate.
How does it perform at various Kelvin color temperatures?
Summary of results
| OUTPUT | CCT READING | |
| 2200K | 59200 lx | 2107K |
| 2500K | 70300 lx | 2547K |
| 3200K | 65900 lx | 3285K |
| 4500K | 74000 lx | 4698K |
| 5600K | 73200 lx | 5895K |
| 6500K | 70200 lx | 7093K |
| 8000K | 70900 lx | 8837K |
| 10000K | 62400 lx | 11952K |
| 12000K | 59500 lx | 14868K |
| 15000K | 60100 lx | 20559K |
These results show me that the lights output is fairly consistent at most Kelvin color temperatures, but it has the most output when used at 4500K. The light’s output varies by 18.5% across the 2500K to 10000K range.
The results also show me that the light is not as accurate as it could be when it comes to Kelvin color temperature reproduction once you get above 4500K. This is an area where the Rotolight Titan X2 excels in and it is extremely Kelvin color temperature accurate across its range.
In saying that, it is fairly easy to fine-tune the Vortex8 if you really do want to get more spot on Kelvin color temperatures.
RGBW Output
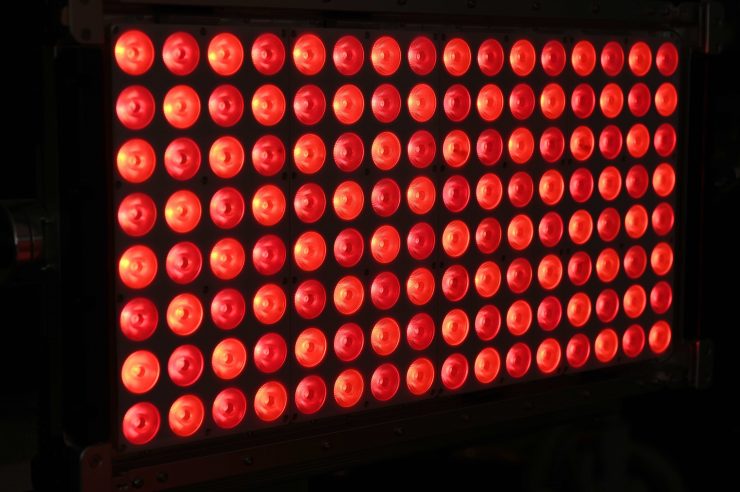
With most RGB lights if you use them to generate or create colors the output gets massively reduced. So how does the Vortex8 fare?
I decided to do a test to see how much output the light had when I created a super-saturated 360 degree Red.
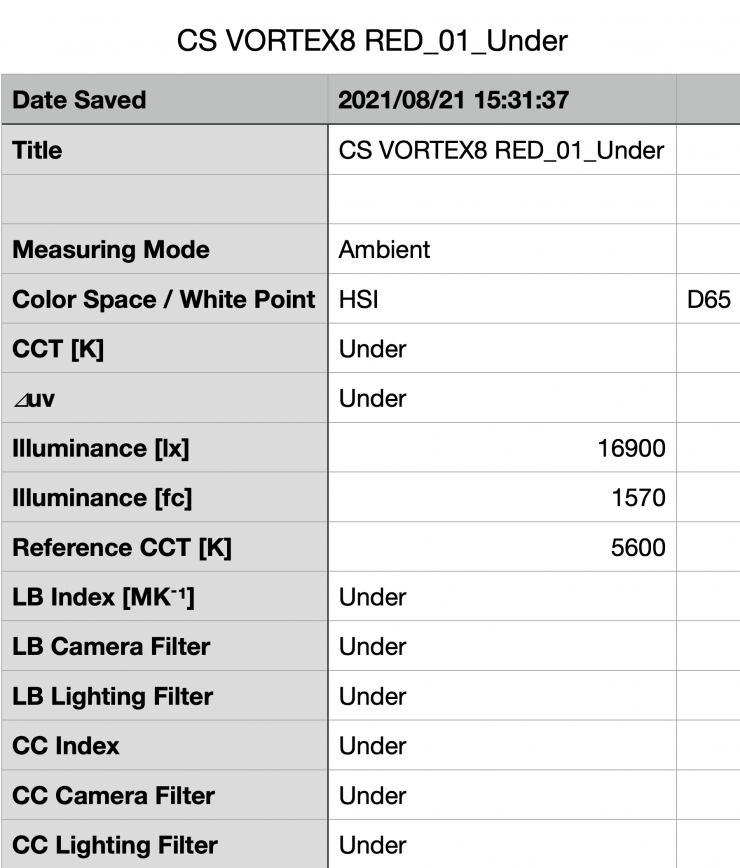
Above you can see that when it was in the HSI mode, choosing a 360 degree saturated red, and set to 100% output, the light recorded 16900 lx. This is something you need to be clearly aware of when using RGBW and HSI modes. The output is going to be significantly lower than when using the light in CCT mode.
Kelvin color consistency when dimming the light
Now, what you should always do when testing lights is to see if the Kelvin color temperature remains consistent when dimming the light. Just because you set a light at say 5600K, that doesn’t mean that the Kelvin color temperature will remain stable as you start dimming the fixture down.
I decided to do a series of tests at 100%/75%/50%/25%/10% to see if the Kelvin color temperature being recorded changed. This was done at a distance of 1m using a Sekonic C-800.
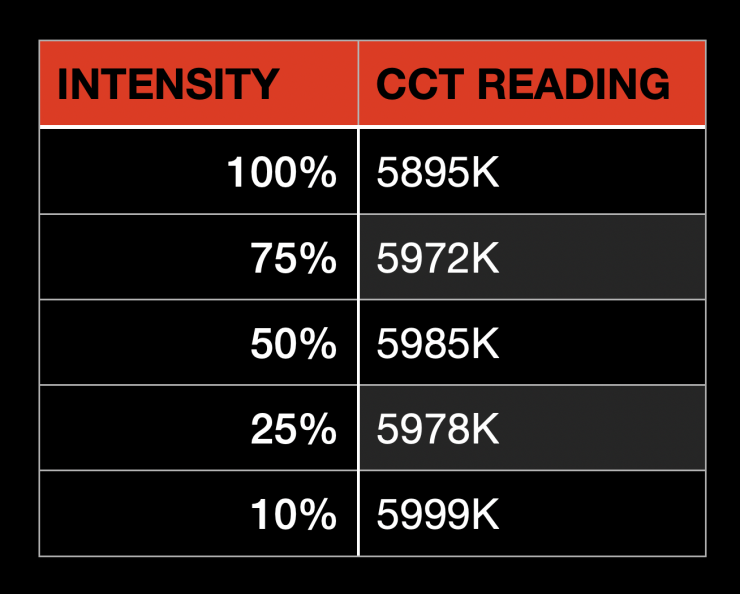
The Vortex8 is able to maintain excellent Kelvin color consistency as you start dimming the fixture. My testing showed that the Kelvin color temperature only varied by 104K. These are good results and it shows me that you can dim this fixture down without having to worry about any big noticeable changes in Kelvin color temperature.
How linear is the output?
With lights, it is important to check how linear the dimming curve is. So let’s check out how the Vortex8 performs when it is used in its Linear Dimming Curve mode.
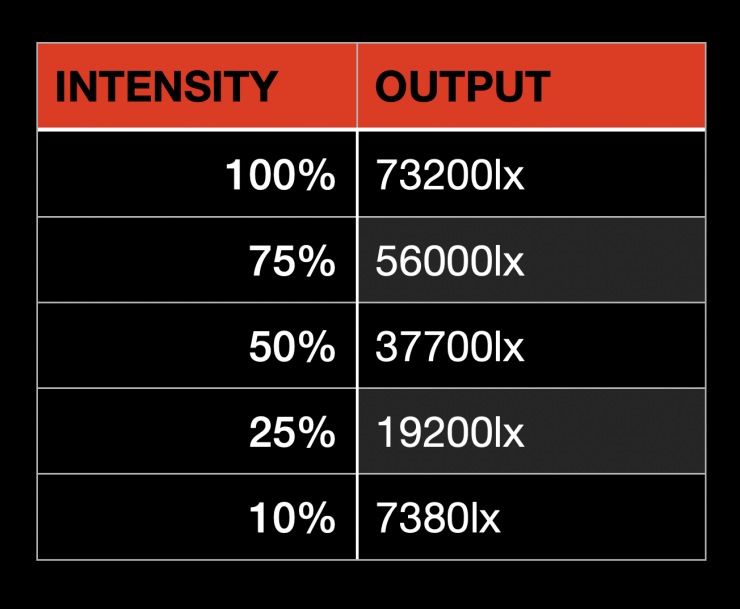
At 50%, the fixture produces 48.49% less output than when it was used at 100%. At 25% it has 73.8% less output than when it was used at 100%. This tells me that the light’s dimming curve is very linear.
Color Rendering
5600K
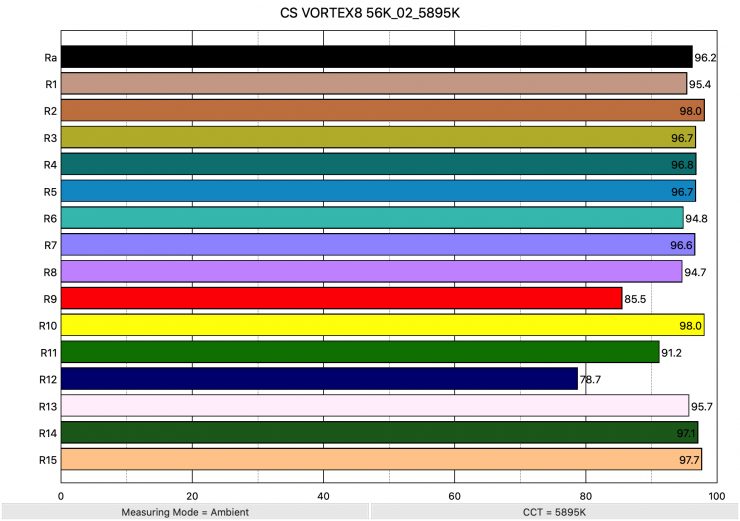
So now that we have seen how much output the Vortex8 produces, how does it perform when it comes to replicating accurate colors. Above you can see that when the light was set at 5600K it recorded an average CRI (R1-R8) of 96.2 and an extended CRI (R1-R15) of 94.24. For replicating accurate skin tones it recorded for R9 85.5 (red), 95.7 for R13 (closest to caucasian skin tones), and 97.7 for R15 (closest to Asian skin tones). These are very good results, however, R9 and R12 were both below 90.
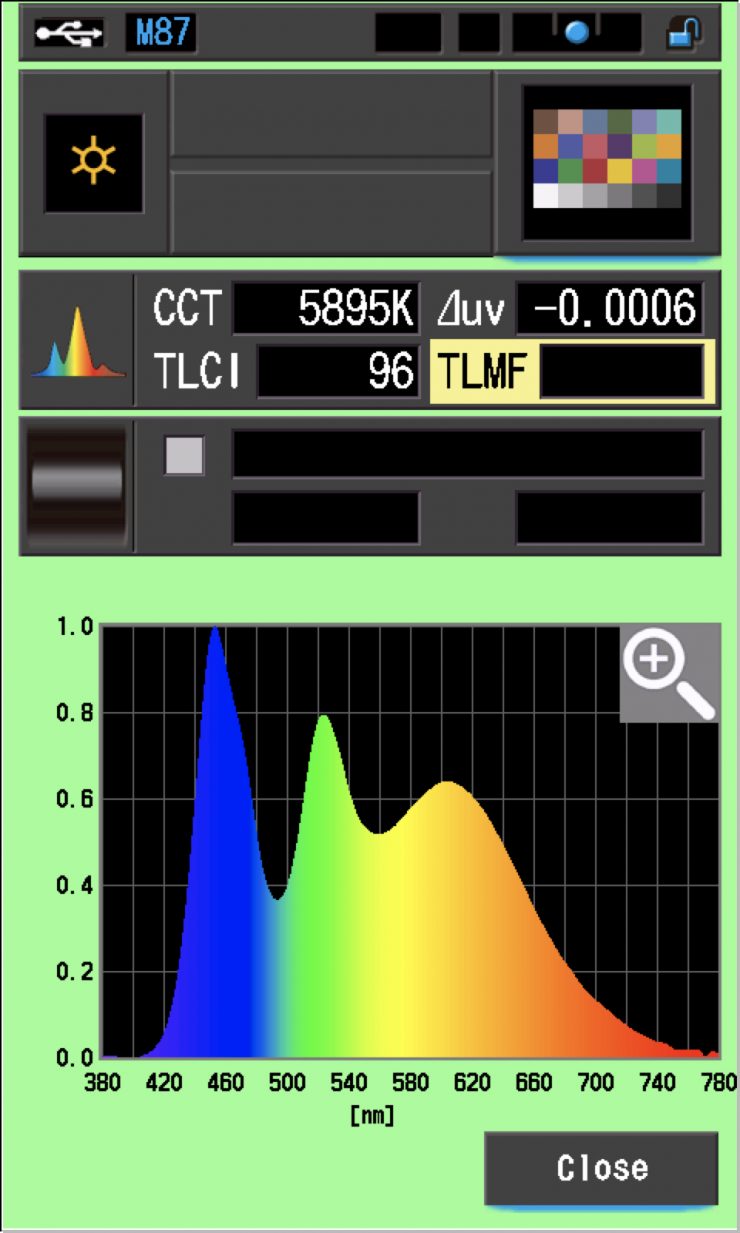
The light, when set at 5600K, recorded a TLCI score of 96.
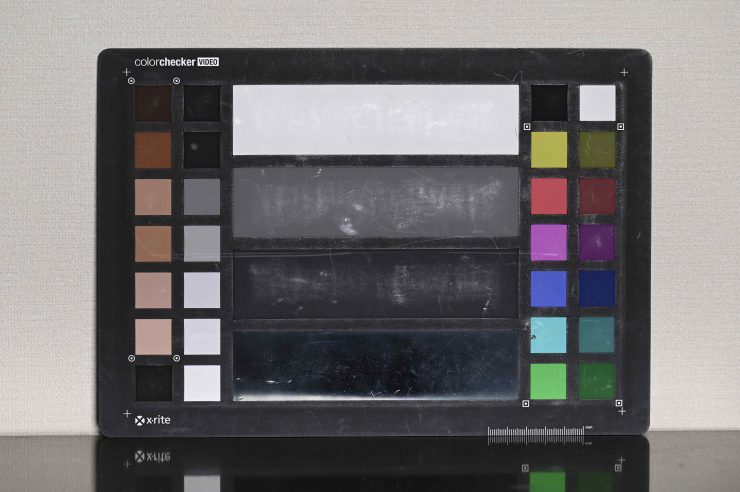

5600K Preset WB 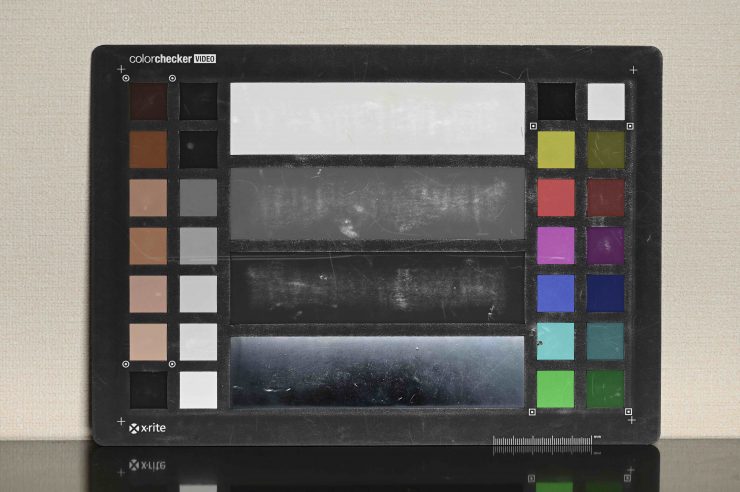
5600K WB
Above you can see a color checker chart (yes, it has seen some better days!) that has been shot with the light set 5600K. The first is with a preset 5600K WB being used, and the second is with a WB done. As you can see, in the real world, the Vortex8 produces a pretty accurate light at 5600K. If anything, it is a little cool, which is reflected by the 5983K it recorded when set at 5600K. Once I did a white balance and then shot the color checker chart you can see that the image is definitely a little warmer.
How does this compare to some other 2×1 RGBW lights that we have previously reviewed when used at 5600K? Below you can see:
| Average CRI | Extended CRI | |
| Creamsource Vortex8 | 96.2 | 94.24 |
| Rotolight Titan X2 | 96.8 | 95.21 |
| ARRI SkyPanel S60-C | 95.7 | 92.92 |
| Litepanels Gemini 2×1 | 95.2 | 93.24 |
| Luxli Taiko | 97.6 | 95.8 |
| Rayzr MC MAX 400 | 95.3 | 92.96 |
All of these lights perform well at 5600K.
3200K
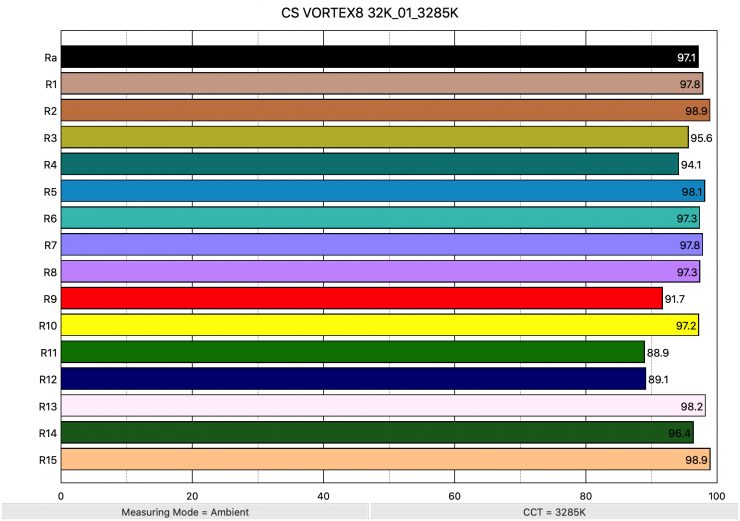
Above you can see the scores for when the light was used at 3200K. It recorded an average CRI (R1-R8) of 97.1 and an extended CRI (R1-R15) of 95.82. For replicating accurate skin tones it recorded 91.7 for R9 (red), 98.2 for R13 (closest to caucasian skin tones), and 98.9 for R15 (closest to Asian skin tones).
These results were better than when the light is used at 5600K, however, R11 and R12 were both below 90.
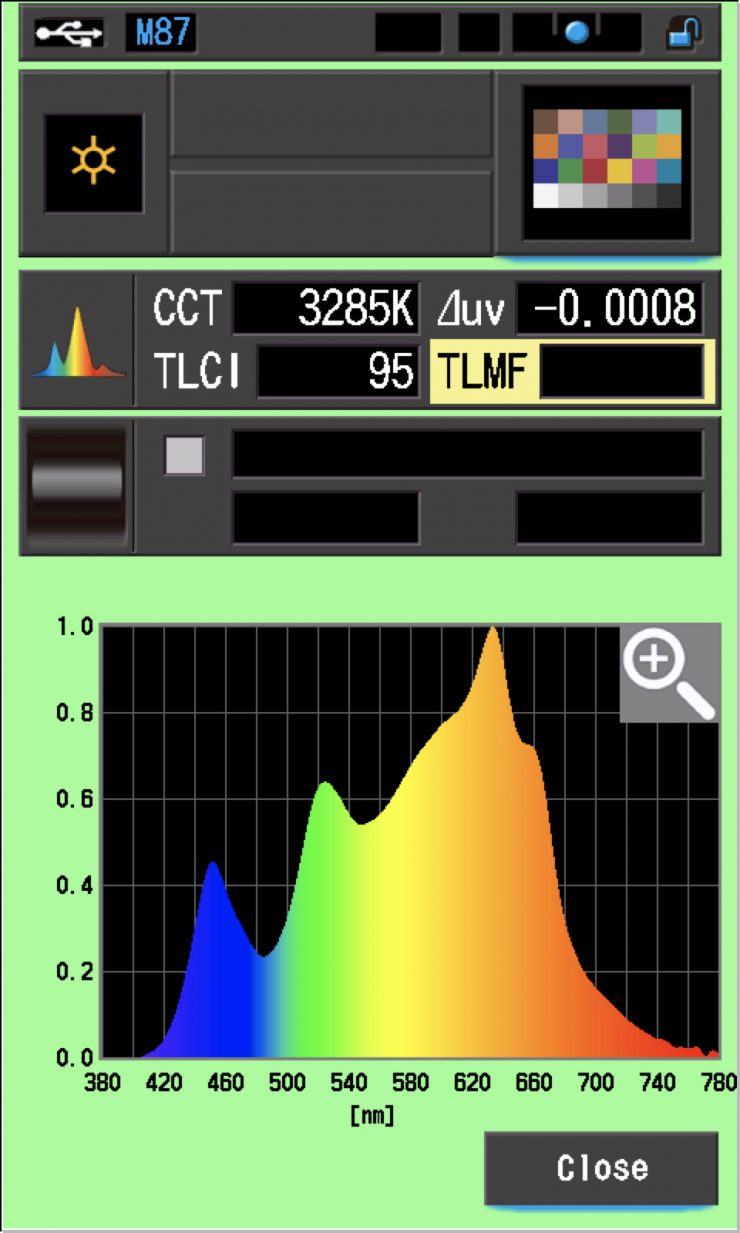
The light, when set at 3200K, recorded a TLCI score of 95.
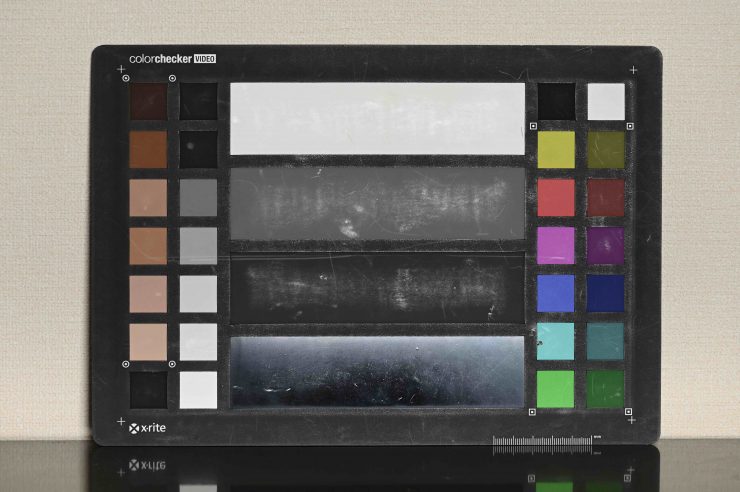

Preset 3200K WB 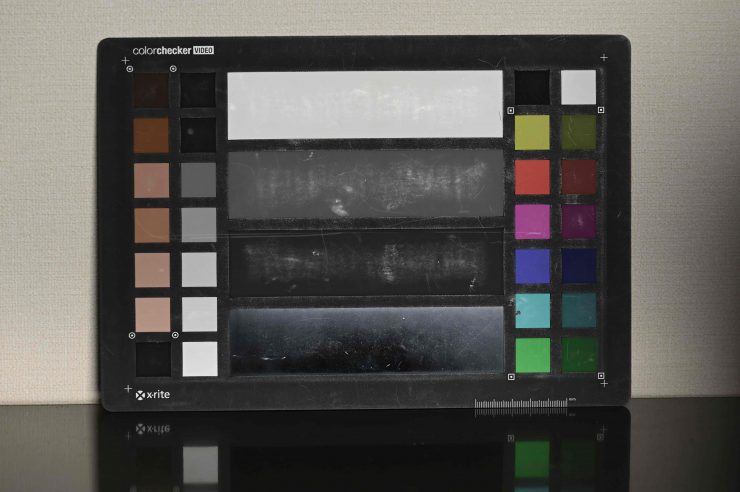
3200K WB
Above you can see a color checker chart (yes, it has seen some better days!) that has been shot with the light set 3200K. The first is with a preset 3200K WB being used, and the second is with a WB done. As you can see, in the real world, the Vortex8 produces a very accurate light at 3200K. Once I did a white balance and then shot the color checker chart you can see that the image is fairly similar.
How does this compare to some other 2×1 RGBW lights that we have previously reviewed when used at 3200K? Below you can see:
| Average CRI | Extended CRI | |
| Cteamsource Vortex8 | 97.1 | 95.82 |
| Rotolight Titan X2 | 95.9 | 94.27 |
| ARRI SkyPanel S60-C | 96.1 | 94.06 |
| Litepanels Gemini 2×1 | 97.2 | 95.3 |
| Luxli Taiko | 97.7 | 96.8 |
| Rayzr MC MAX 400 | 90.6 | 88.64 |
The Creamsource, Rotolight, Litepanels, and ARRI fixtures are all very close when it comes to color rendering scores. The Luxli Taiko has the highest extended CRI score at 3200K that I have recorded from a 2×1 RGBW light.
Thoughts
It wasn’t a huge surprise that the Vortex8 scored well in these color rendering tests as it is a brand new light, utilizing the latest technology. However, it is still impressive that the SkyPanel S60-C that was announced almost 5 years ago and the Litepanels Gemini 2×1 was announced back in September 2017 have color rendering scores that are fairly similar.
It is also important to note that the ARRI SkyPanels don’t score particularly well in photometric tests. So why do so many productions still use them? Well, one of the main reasons is that they are mapped to work well with ARRI cameras.
What you clearly need to understand, and I want to continue to stress this point, is that all lights react differently to different camera and sensor combinations. One particular light may look better with an ARRI camera, and another light may look better with a Canon camera, etc.
CC Index & ⊿uv
The CC Index displays the CC correction value and whether any magenta or green need to be added or subtracted. 1 CC corresponds to 035 Kodak CC values or 1/8 Rosco filter values. Any reading less than +1.00 or -1.00 and you’re probably not going to need to make any kind of adjustment. The ⊿uv is the value to show how much this light is away from being an ideal light source (black body radiation = incandescent lamp). As with the CC Index you want this number to theoretically be zero. Kelvin is not a linear value, so we need to convert from Kelvin to MK-1 to compare the values of color temperature. To calculate from Kelvin to Mired is MK-1= 1*1000000/Kelvin. While this may sound confusing, it is the only way of measuring if the Kelvin shift is significant enough to warrant having to use a filter for correction. Below are the results for the Vortex8.
Kelvin Vs MK-1
| Kelvin | Difference in K | MK-1 | Difference in MK-1 | |
| SET VALUE | 2500K | 0 | 400 | 0 |
| ACTUAL READING | 2547K | 47 | 392.61 | 7.39 MK-1 |
| SET VALUE | 3200K | 0 | 312.5 | 0 |
| ACTUAL READING | 3285K | 85 | 304.41 | 8.09 MK-1 |
| SET VALUE | 4500K | 0 | 222.22 | 0 |
| ACTUAL READING | 4698K | 198 | 212.85 | 9.37 MK-1 |
| SET VALUE | 5600K | 0 | 178.57 | 0 |
| ACTUAL READING | 5895K | 295 | 169.63 | 8.94 MK-1 |
| SET VALUE | 6500K | 0 | 153.84 | 0 |
| ACTUAL READING | 7093K | 593 | 140.98 | 12.86 MK-1 |
| SET VALUE | 8000K | 0 | 125 | 0 |
| ACTUAL READING | 8837K | 837 | 113.16 | 11.84 MK-1 |
| SET VALUE | 10000K | 0 | 100.00 | 0 |
| ACTUAL READING | 11952K | 1952 | 83.66 | 16.34 MK-1 |
These figures might look confusing, but what it tells me is that the light is not as Kelvin color accurate as it could be at most temperatures. Any MK-1 score that is under -9/9 means you wouldn’t have to use any color correction gels. The MK-1 scores for this light were not great. In saying that, these are just technical scores and technical data doesn’t always reflect real-world performance.
CC INDEX & ⊿uv
| CC INDEX | ⊿uv | |
| 2500K | 0.2G | -0.0005 |
| 3200K | 0 | -0.0008 |
| 4500K | 0 | -0.0007 |
| 5600K | 0.2G | -0.0006 |
| 6500K | 0.4G | -0.0005 |
| 8000K | 0.7G | 0.0000 |
| 10000K | 1.1G | -0.0003 |
The ⊿uv scores were exceptionally good for this light and the best I have seen from any LED light, period. Only the Rotolight Titan X2, Luxli Fiddle Pocket, and now the Vortex8 have ever recorded a perfect ⊿uv at any Kelvin color temperature.
TM-30
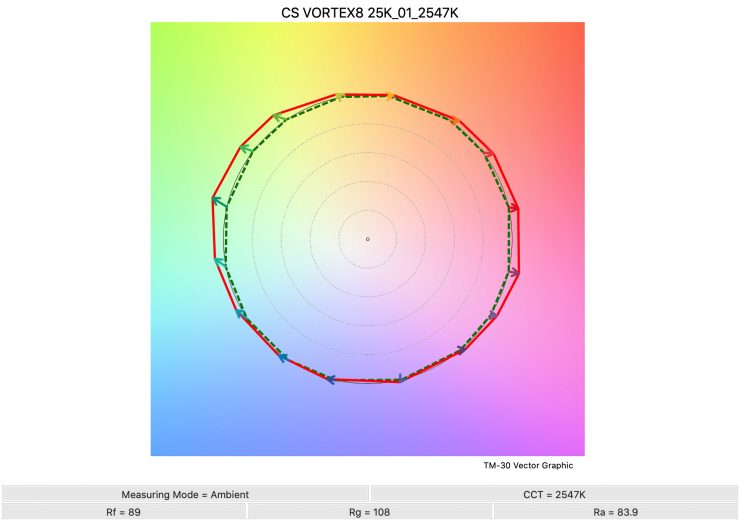
TM-30 is a relatively new color rendering standard that was developed to deal with the limitations of CRI. TM-30 looks at 99 individual colors. These 99 colors are categorized into seven groups: nature, skin color, textiles, paints, plastics, printed material, and color systems.
TM-30 scores go from 0 – 100. The higher the score, the more accurate a light is at producing colors. Any TM-30 Rf score in the ’90s is considered to be good. What is interesting and something that you need to be very aware of is that two separate light sources with the exact same CRI scores can render colors very differently. A light with a high CRI rating could have a low TM-30 score. Conversely, a light with a good TM-30 score could have a bad CRI score.
Now, there are two measurements associated with TM-30, Rf and Rg.
- Rf (Color Fidelity)
- Rg (Color Gamut)
With Rf value, ideally, you want a score in the 90’s.
With Rg value, a score below 100 indicates that the light source renders colors with less saturation than the reference source. So ideally you want this score to be above 100.

2500K 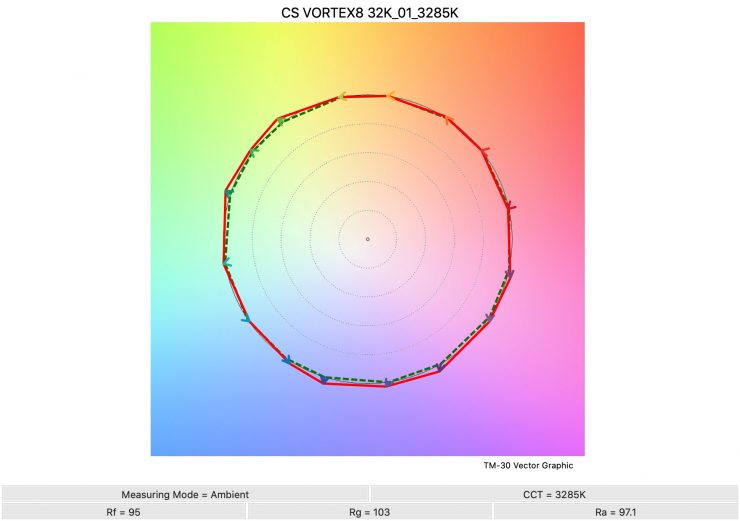
3200K 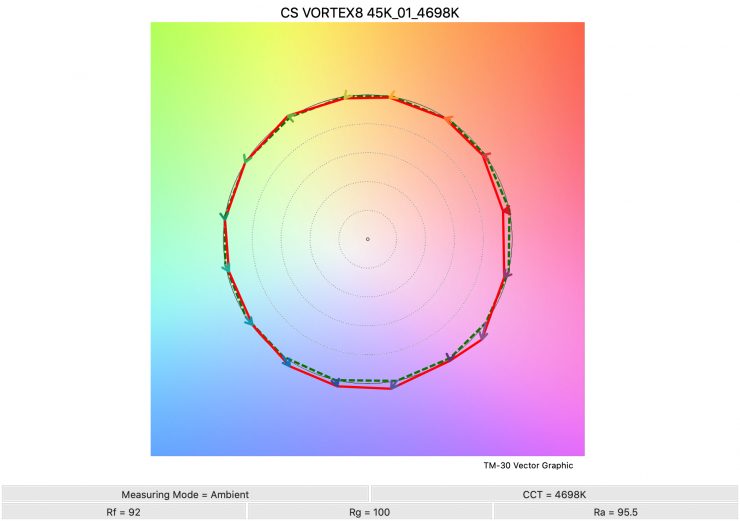
4500K 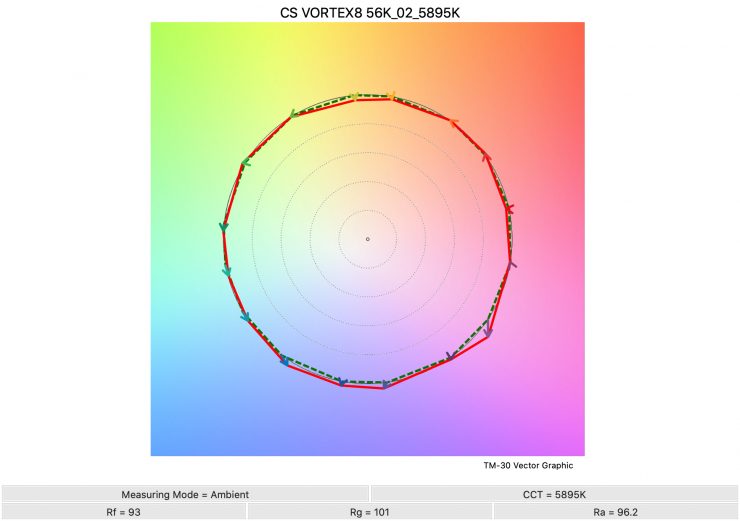
5600K 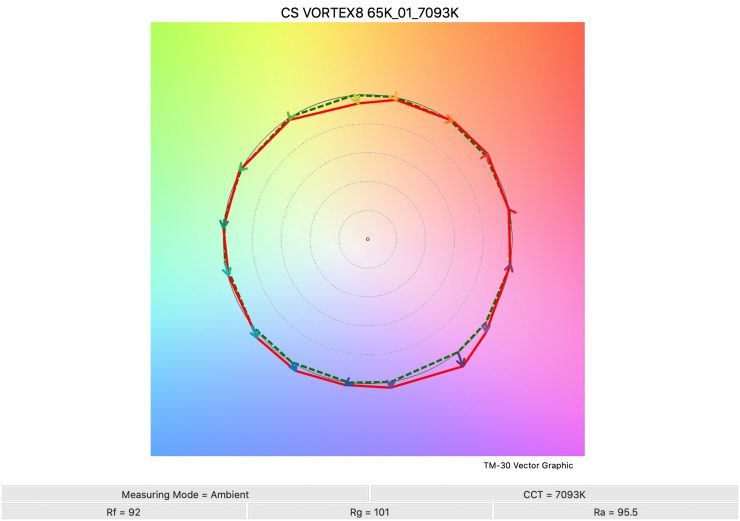
6500K 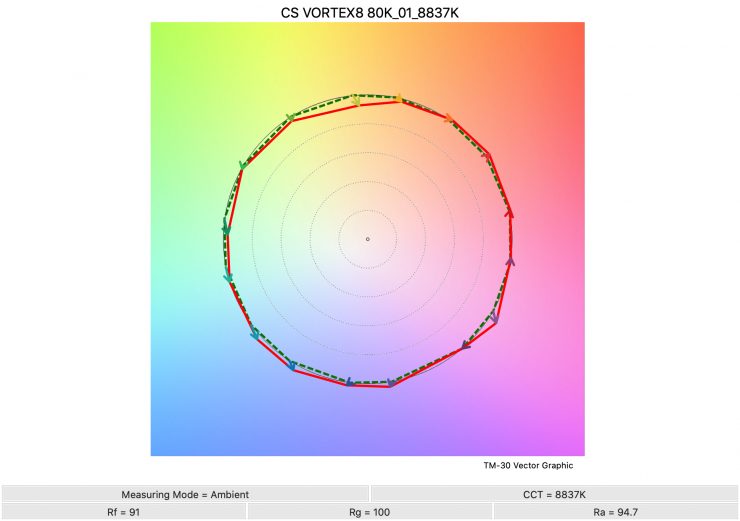
8000K 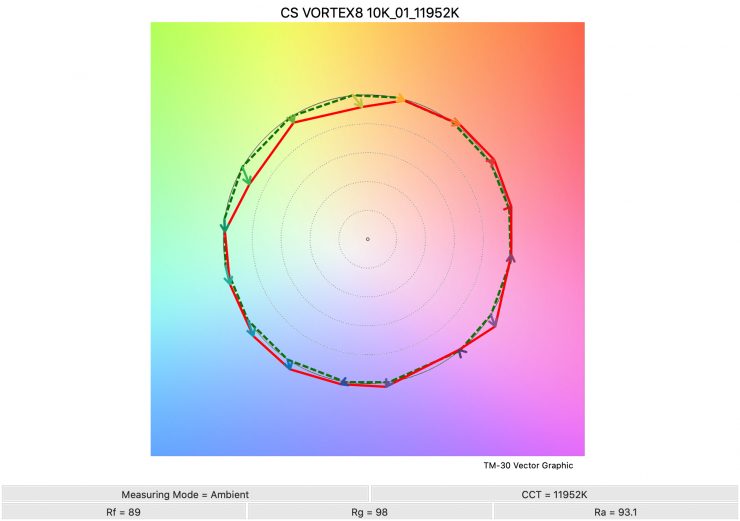
Above you can see the scores for the Vortex8 at various Kelvin color temperatures.
Here are the results:
| Rf | Rg | |
| 2500K | 89 | 108 |
| 3200K | 95 | 103 |
| 4500K | 92 | 100 |
| 5600K | 93 | 101 |
| 6500K | 92 | 101 |
| 8000K | 91 | 100 |
| 10000K | 89 | 98 |
The Rf and Rg scores are reasonably consistent from 3200K to 8000K.

If we look at how well the light replicates a fully saturated Red, you can see above that it is able to produce 100% saturation and the Hue stays at 0-degrees.
SSI
SSI (Spectral Similarity Index) was developed by the Sci-Tech Council of the Academy. SSI gives me the ability to set any light as a standard, or use predefined standards (such as CIE D55), and then give other lights an SSI score based upon how well they will match standards such as CIE D55. This way I can measure spectral response and compare it directly against an ideal light source. This is actually a much better test than recording CRI scores.
3200K
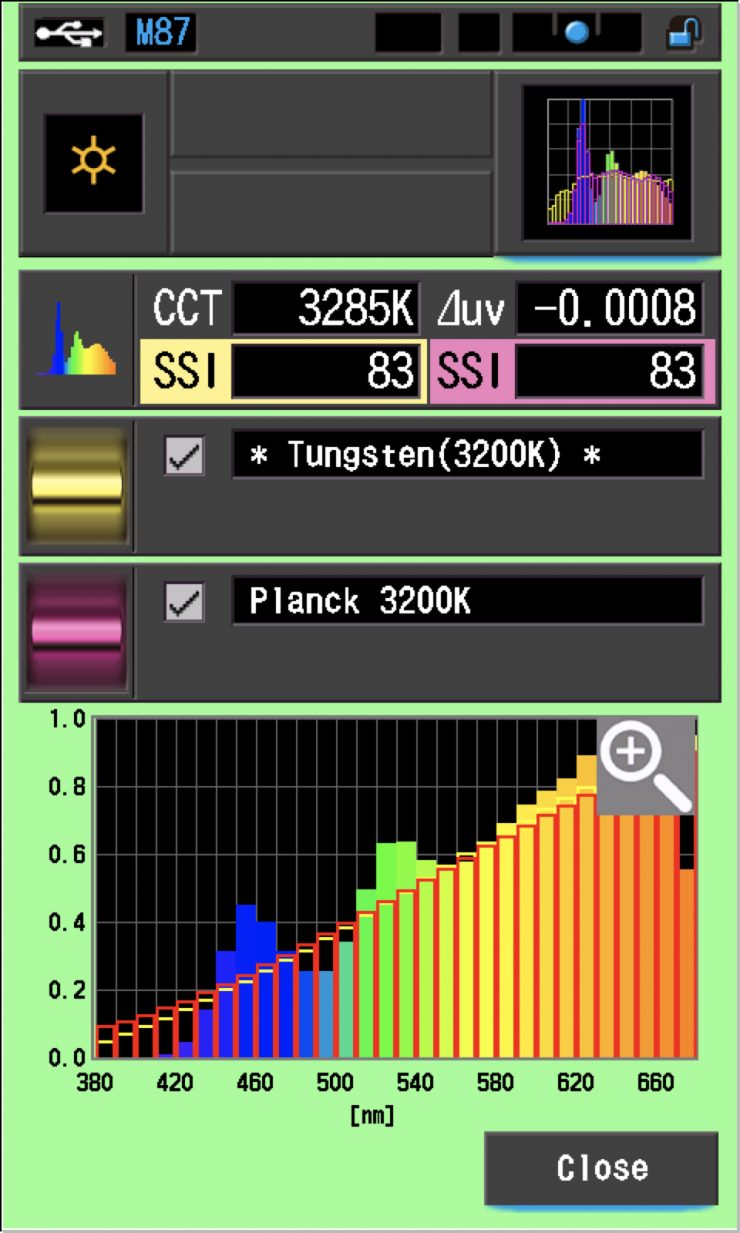
In this graph, the red bars indicate a perfect Planck 3200K source. The gold bars indicate a perfect 3200K Tungsten source. This lets us compare how close to a perfect 3200K lighting source the Vortex8 is. Any SSI score in the ’80s is very good for a 3200K LED light. As you can see, LED lights have a hard time replicating colors below about 450nm.
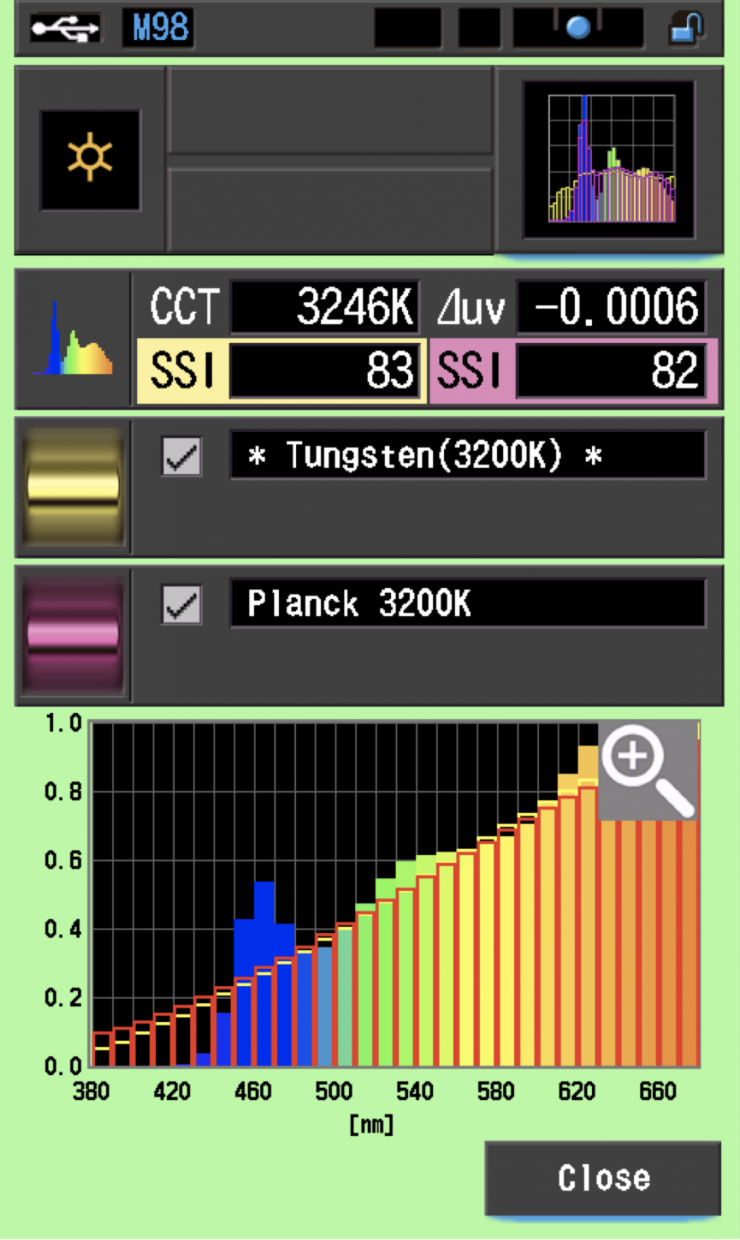
As a comparison, above you can see the same scores for the Rotolight Titan X2.
5600K
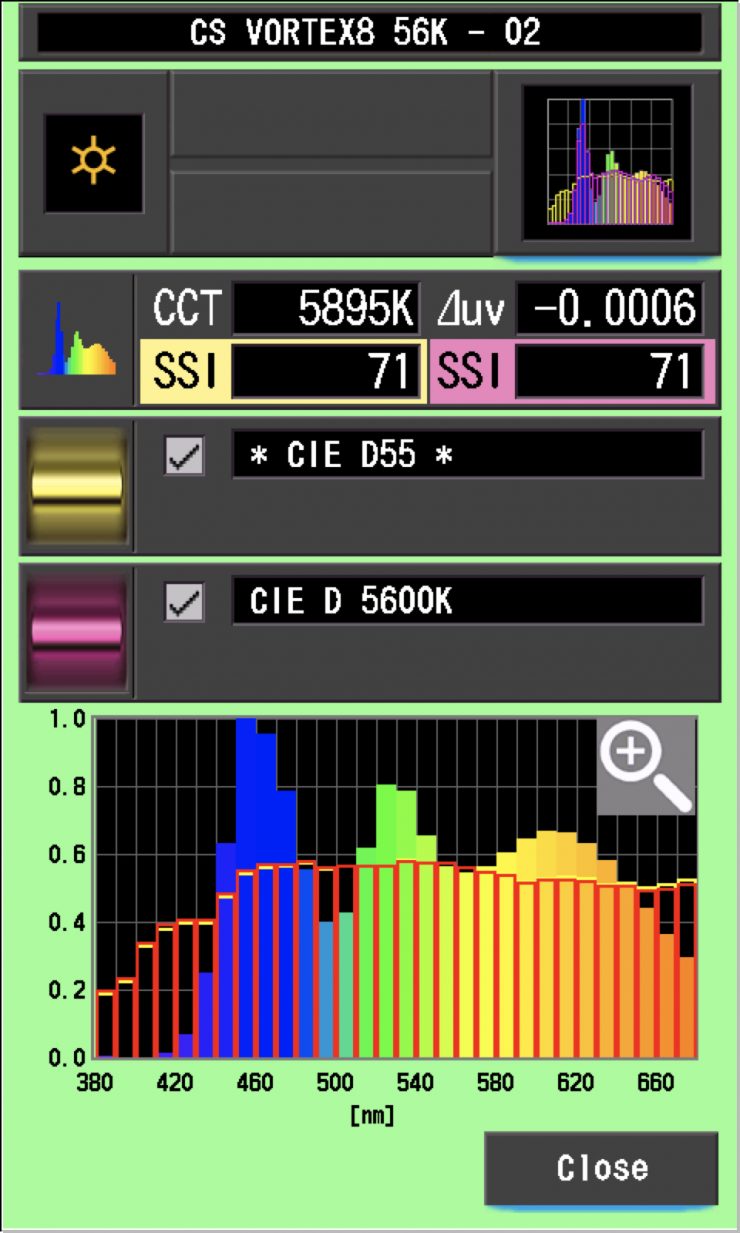
In the graph above the gold bars indicate a perfect CIE D55 source. The red bars indicate a perfect CIE D 5600K source. This lets us compare how close to a perfect 5600K lighting source the Creamsource Vortex8 is. A score in the low 70’s is typical for a 5600K LED source.
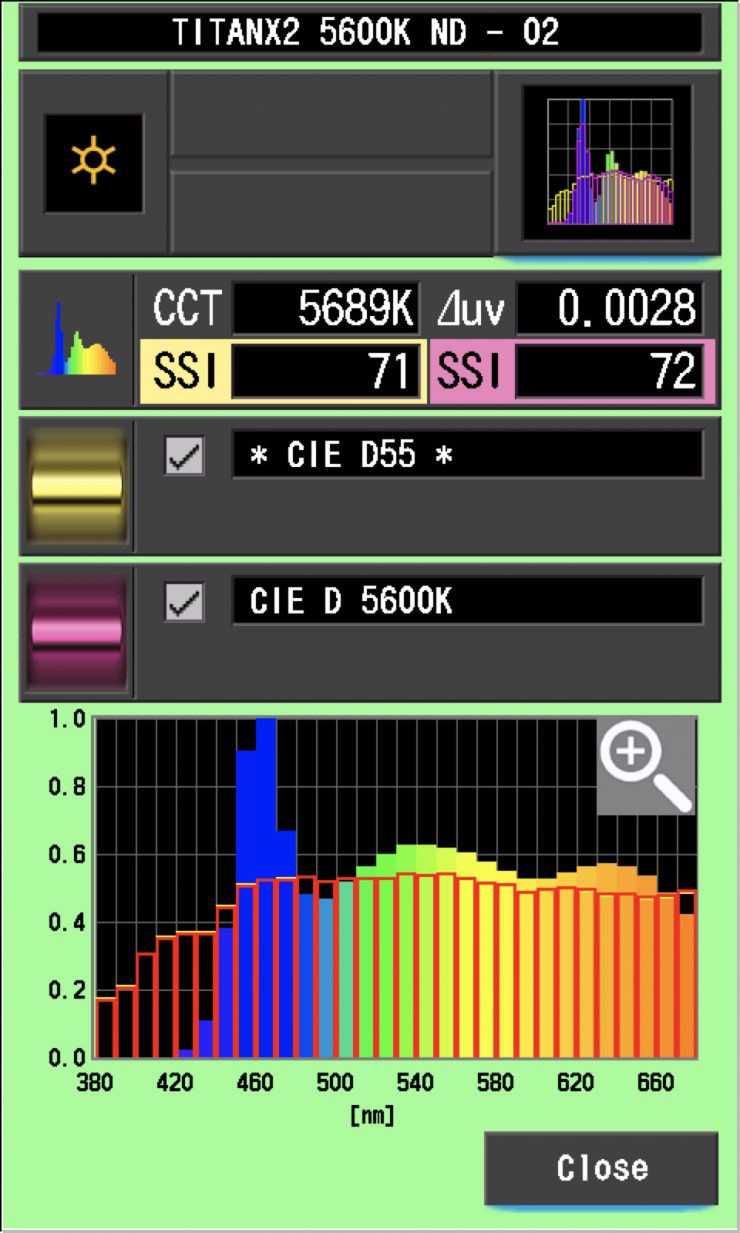
Again, as a comparison, above you can see the same scores for the Rotolight Titan X2.
The main reason we want to record SSI scores is so we can see how well they match with other lights. As a test, I was curious to see how well the Vortex8 matched an ARRI Orbiter and the Prolycht Orion 300 FS. Below you can see the results.
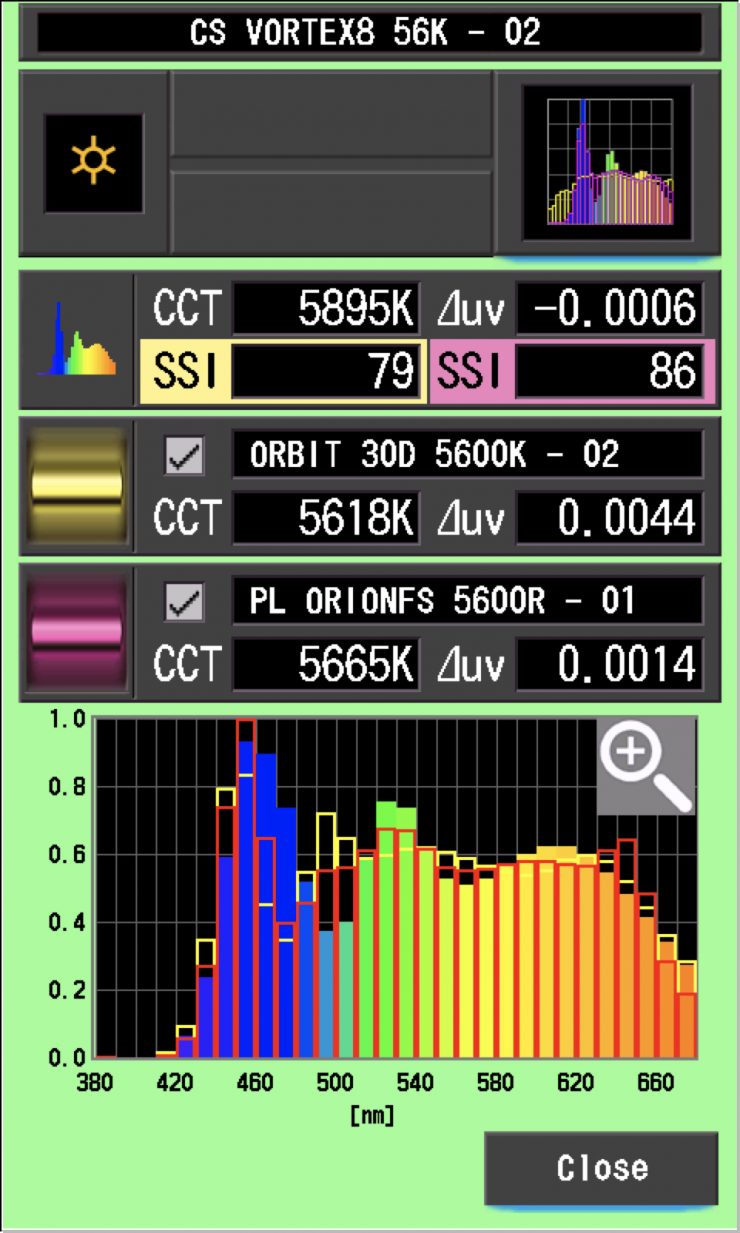
As you can see neither light is close to being a perfect match to the Vortex8 and you would need to fine-tune the lights to try and get them to match more closely. The Vortex8 was a closer match to the Prolycht Orion 300 FS than it was to the ARRI Orbiter.
Ok, so now let’s do that same comparison at 3200K.
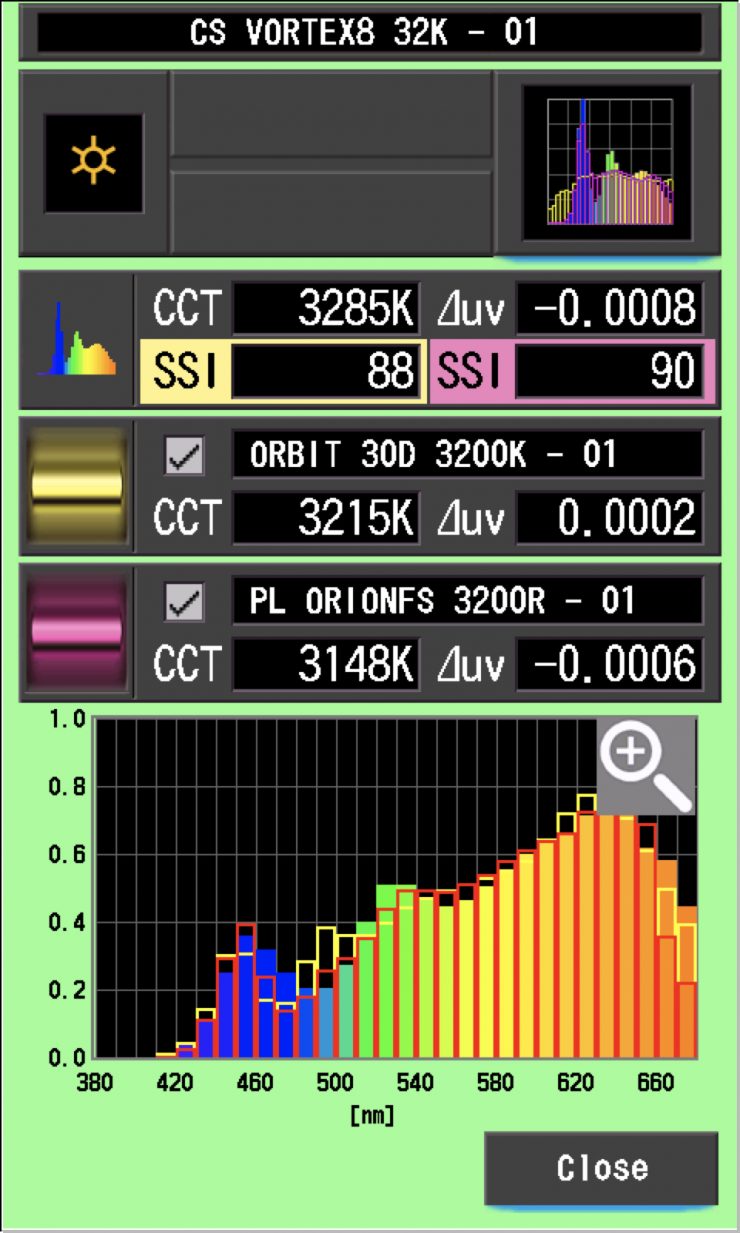
As you can see the light is a better match to the ARRI and Prolycht when used at 3200K.
SSI tests are a great way of telling you what lights you own or use will work well together. Having a device like the Sekonic C-800 lets you get the data you need to be able to fine-tune your lights to get them to more closely match.
Spectral Distribution
5600K
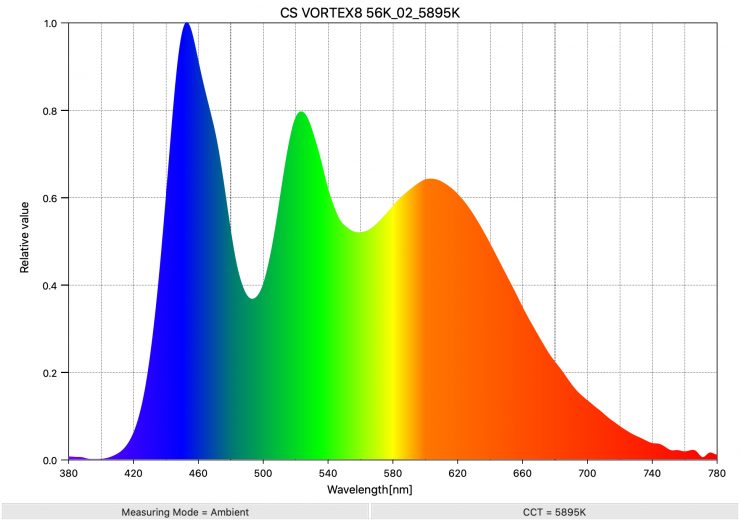
Above you can see the spectral distribution of the Vortex8 when it is set at 5600K. As you can clearly see the light has quite a full spectrum, however, there is a large green spike.
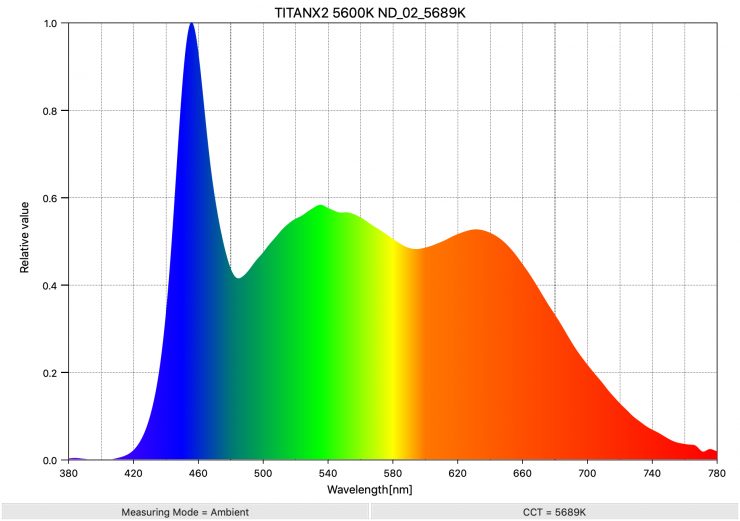
As a comparison, above you can see the spectral distribution of the Titan X2 when it is set at 5600K. The spectral distribution is reasonably full and there aren’t any big spikes.
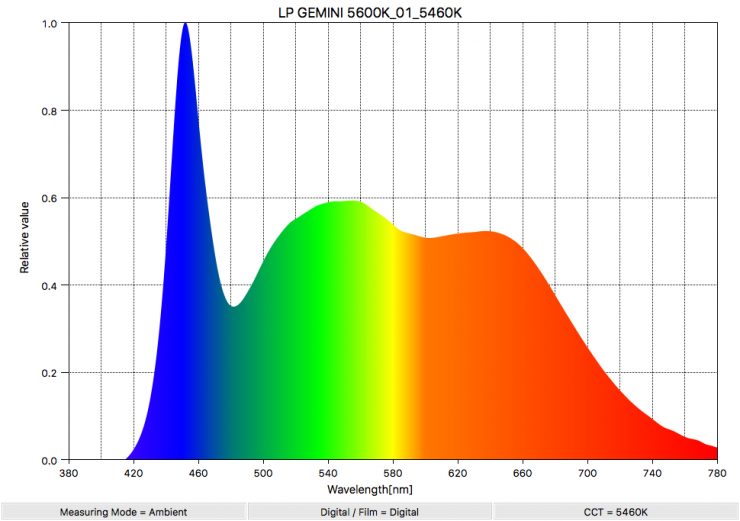
As another comparison, above you can see the spectral distribution of the Litepanels Gemini 2×1 when it is set at 5600K. The spectral distribution is very similar to the Rotolight Titan X2.
3200K
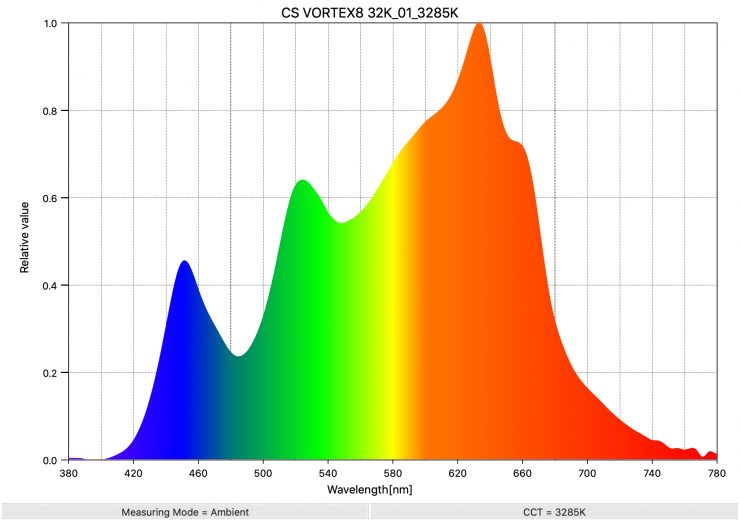
Above you can see the spectral distribution of the Vortex8 when it is set at 3200K. Again, there is a noticeable green spike.
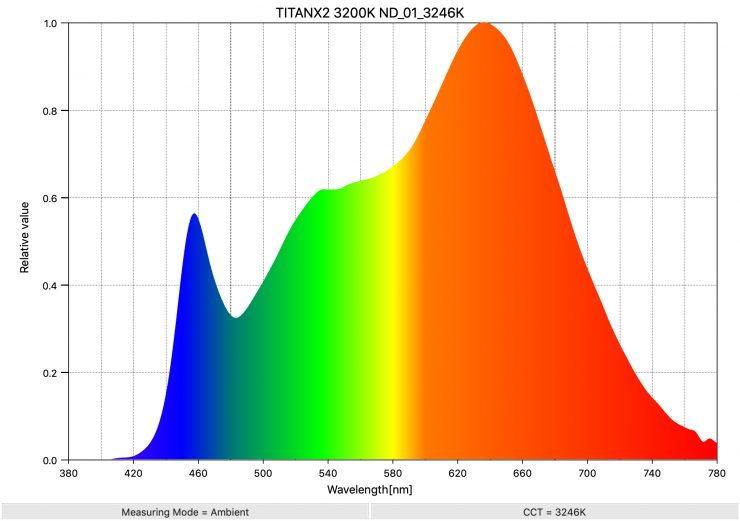
As a comparison, above you can see the spectral distribution of the Titan X2 when it is set at 3200K. The spectral distribution has a slight push towards green and it’s also missing some color information in parts of the spectrum. Although, with +/- Green adjustment you could easily correct this.
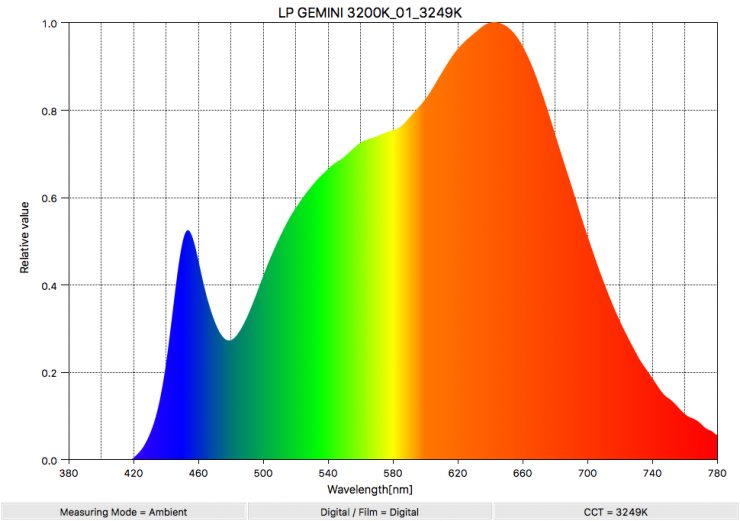
As another comparison, above you can see the spectral distribution of the Litepanels Gemini 2×1 when it is set at 3200K. As you can see, the Litepanels has a fuller spectrum when used at 3200K.
Real-World Performance & Quality of Light
As I always say, photometric scores only tell you part of the story. So do the scores from the Vortex8 translate into real-world performance? The photometric data can only give me scientific data and it is much more important for me to see how the light looks and performs.
Unfortunately, it is very hard at the moment with the Coronavirus at its worst levels in Japan for me to showcase the strengths of the light. I also live in an apartment so there isn’t a lot of space to do much with a large 2×1 fixture. I have still tried to do as much as possible, I apologize that I can’t do more!
What I like is that Creamsource doesn’t seem to have made much of a trade-off when t comes to color accuracy v’s output. It is often a fine line manufacturers have to walk when creating LED lights. It is all about give and take and creating the right balance. The Vortex8 offers every good blend of output and color accuracy.
As Corey Hart said, ‘I wear my sunglasses at night.’ The Vortex8 has a ton of output, but you can’t directly use that output if you want to light up anyone who needs to look in its direction.
This is really a light that has been designed to be indirectly used, punched through diffusion, or for the lighting of areas or objects that don’t have eyes!
As a hard lighting source is is certainly a very capable fixture. Having the ability to throw a strong, concentrated light source over longer distances is something that other 2×1 RGBW lights just can’t do.
What you clearly need to take into account is that this isn’t a Fresnel fixture, so you can’t adjust that beam angle without diffusing the light and losing a lot of output. The Vortex8 isn’t meant to be, nor should it be thought of, as an HMI or LED Fresnel replacement. In saying that, Creamsource will hopefully be bringing out drop-in holographic lenses that you can put in the filter rail that will be able to alter the beam spread of the Vortex8.
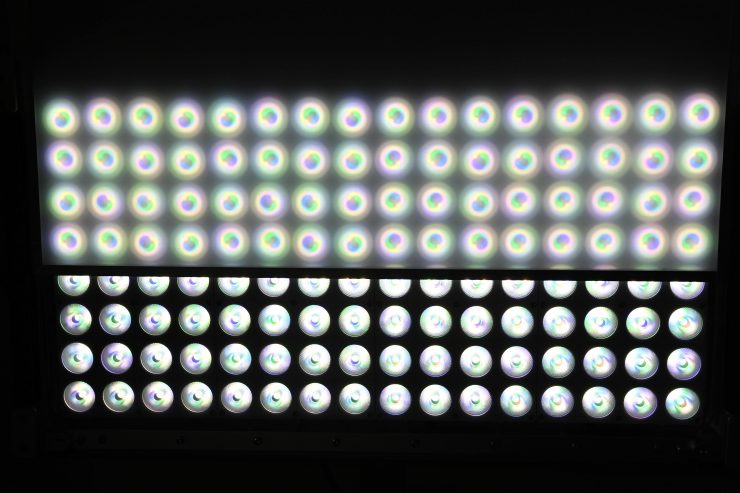
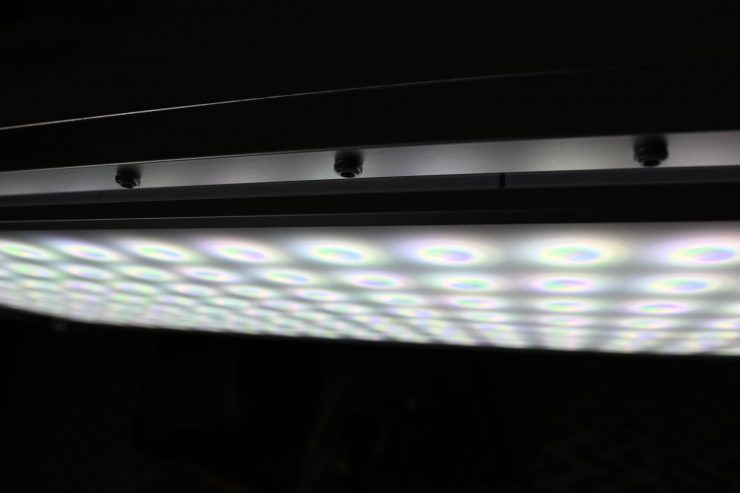
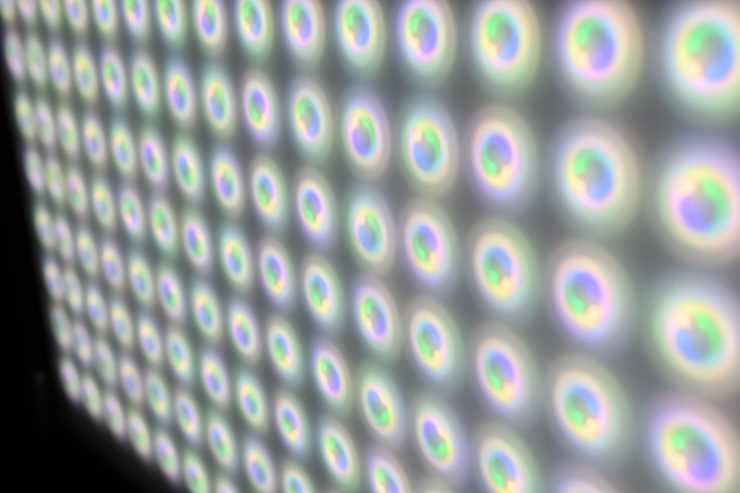
The included diffusion panel does a good job of softening the light. Even though it massively reduces the output you can see that because the light is so bright you can still see the clusters of LEDs behind the diffusion panel. The Diffusion Panel does do enough that you won’t get multiple point source shadows, however, if you are shooting reflective objects then you will still see the individual clusters of LEDs. This is just something you need to keep in mind.
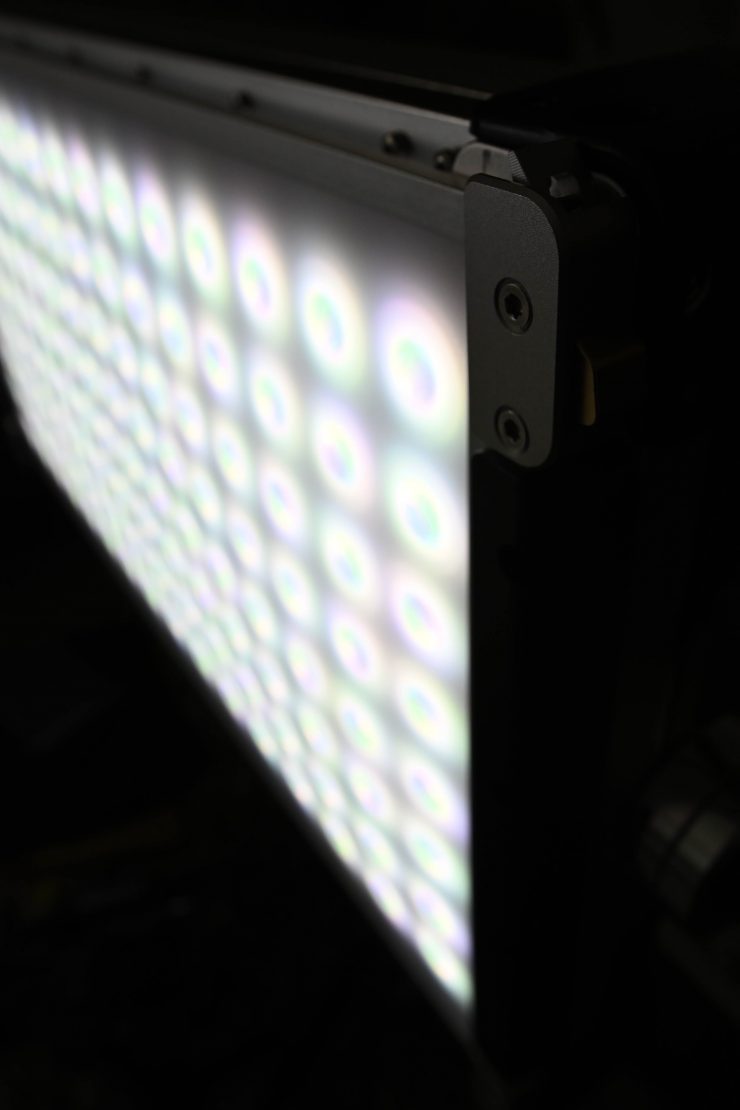
The included diffusion panel is super easy to use and by incorporating two drop-in filter slots, Creamsource allows you to modify the light source in various ways.
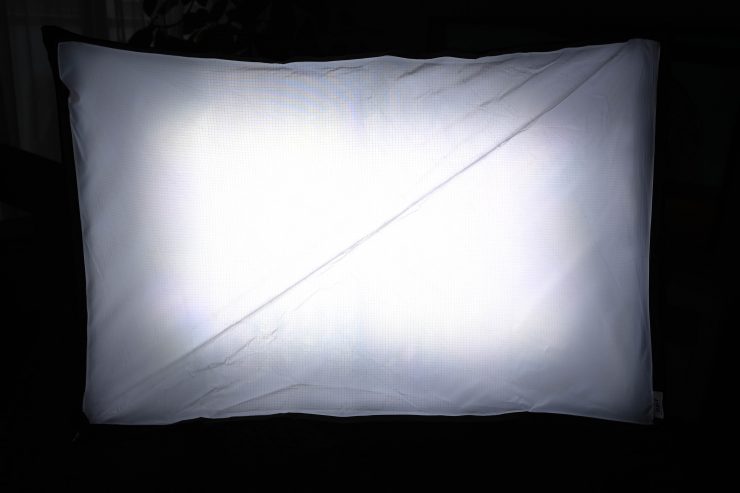
While I didn’t have access to any of the available softboxes or honeycomb grids, I did try the light out with softboxes I use with other 2×1 fixtures.
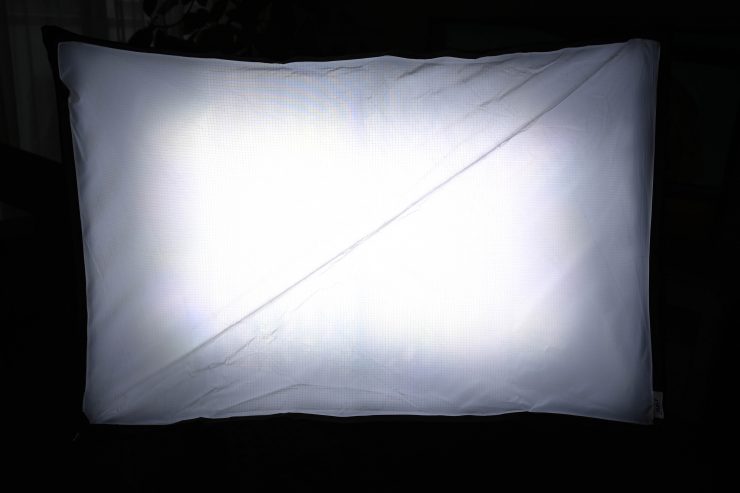
If you try and use a softbox without using the included diffusion panel you will find that because of the Vortex8’s tight beam angle it won’t full up the softbox.
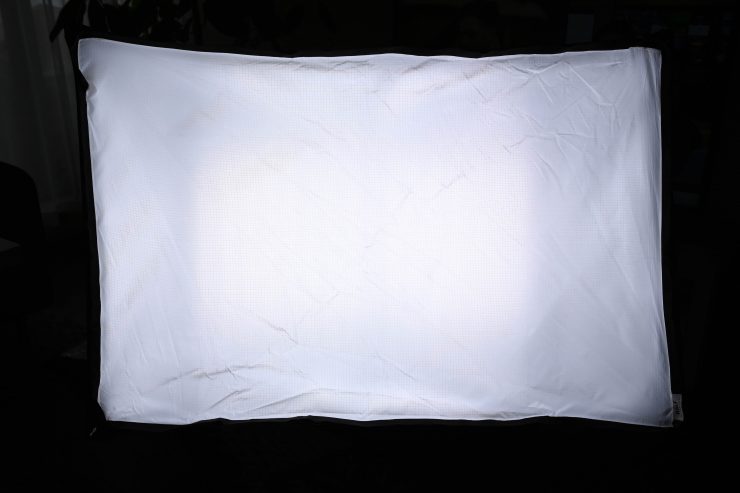
You really do need to use the softbox with the diffusion filter to get better results, however, even that combination won’t fully evenly light up a soft box. Please remember that I am using a softbox that wasn’t designed to be used with this fixture.
In saying that, the combination of a softbox and the diffusion filter does create a very flattering, soft lighting source with soft shadows.
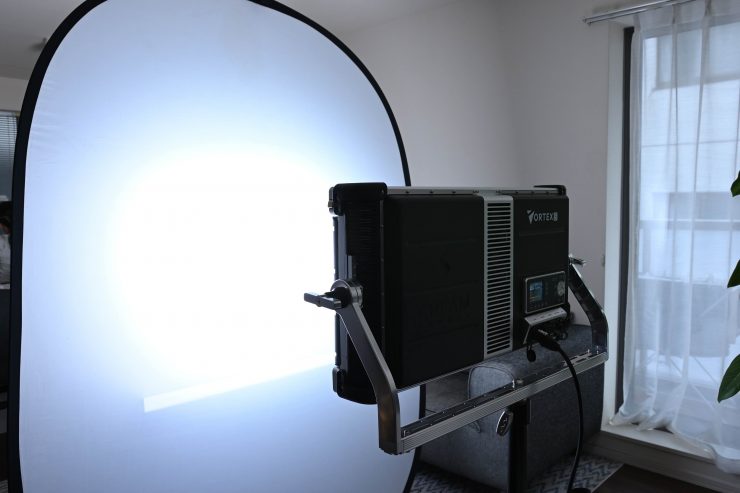
You can also just punch the Vortex8 through some diffusion to create a soft lighting source. You can either do this with or without using the included drop-in diffusion filter.
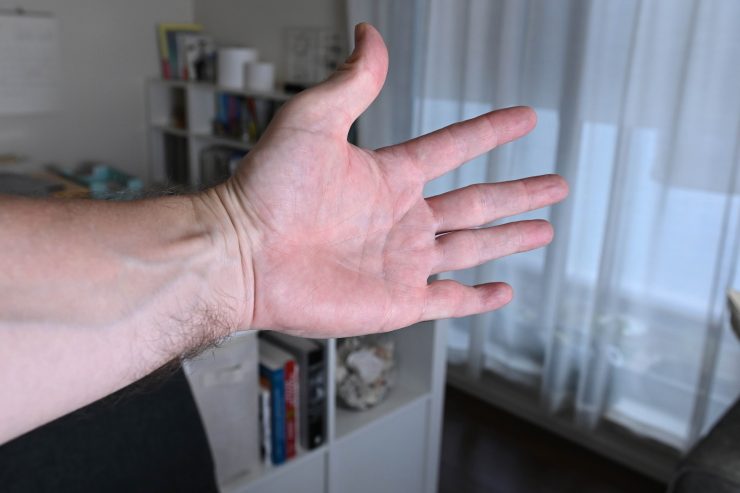
By using the drop-in diffusion filter and punching the Vortex8 through some diffusion you can get really nice, soft light.
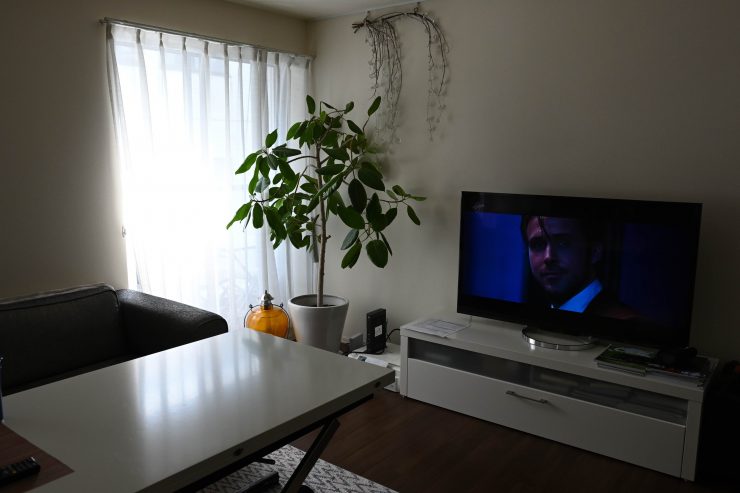
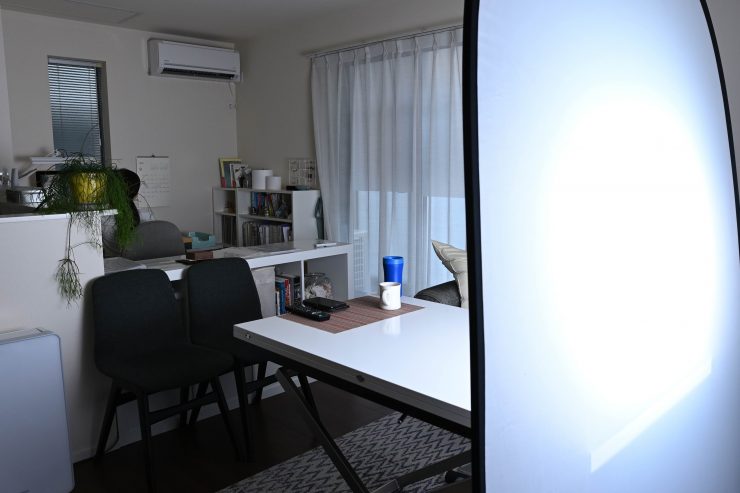
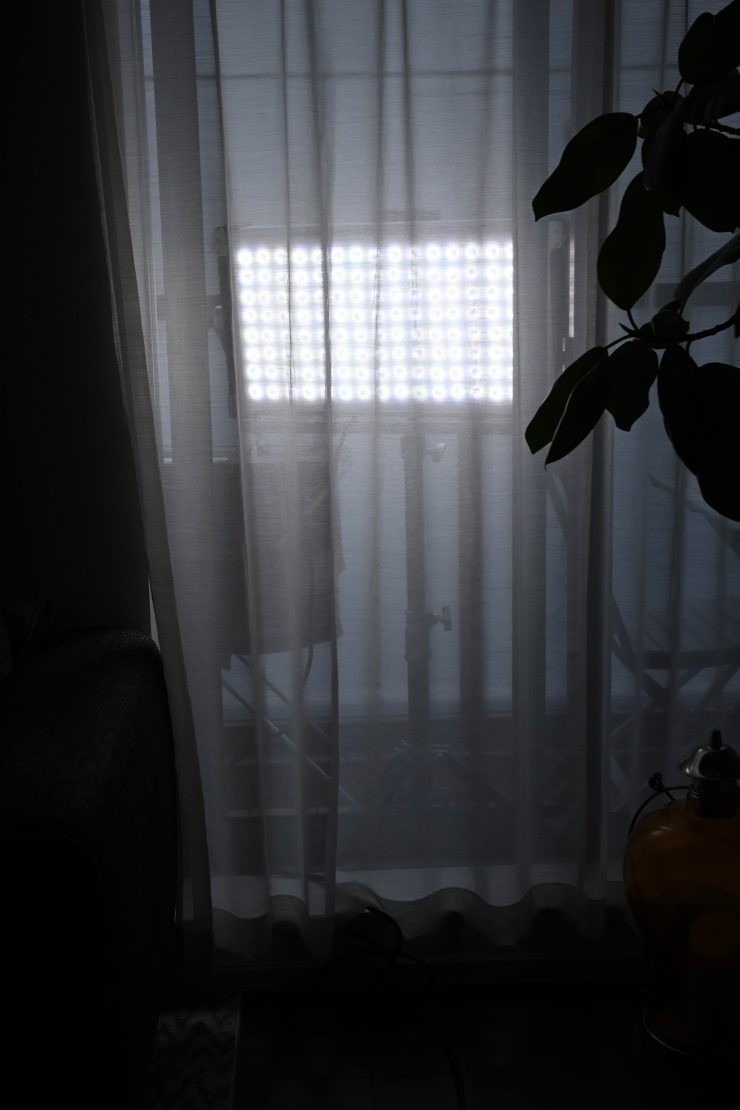
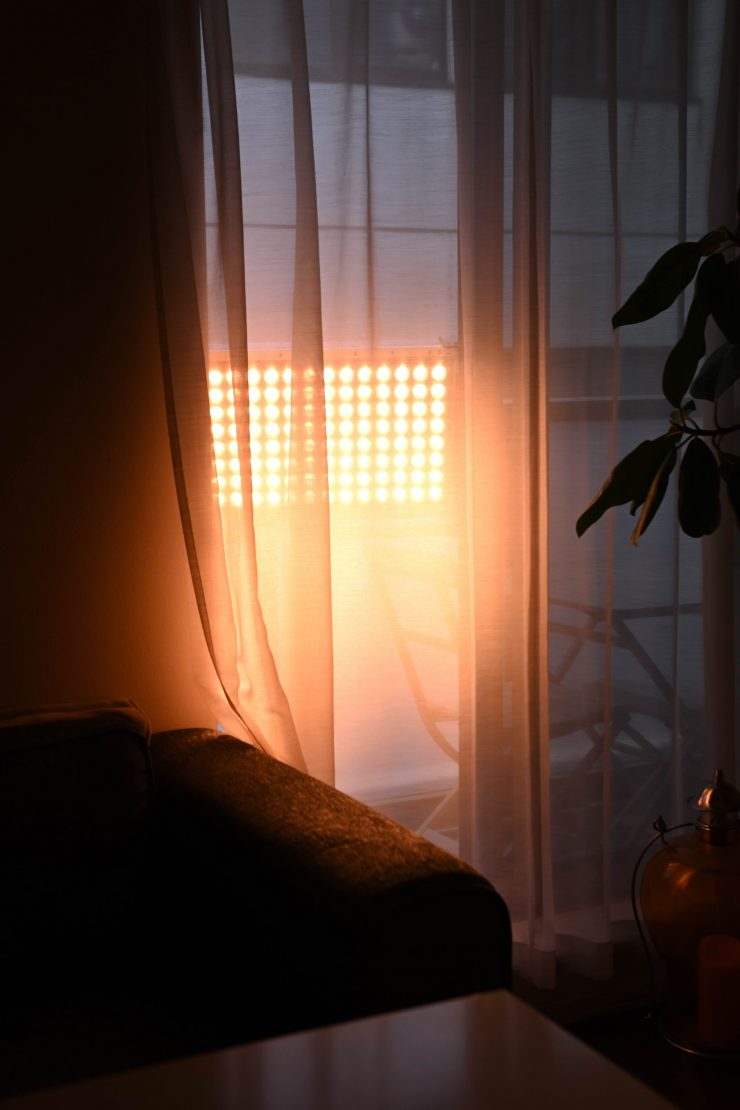
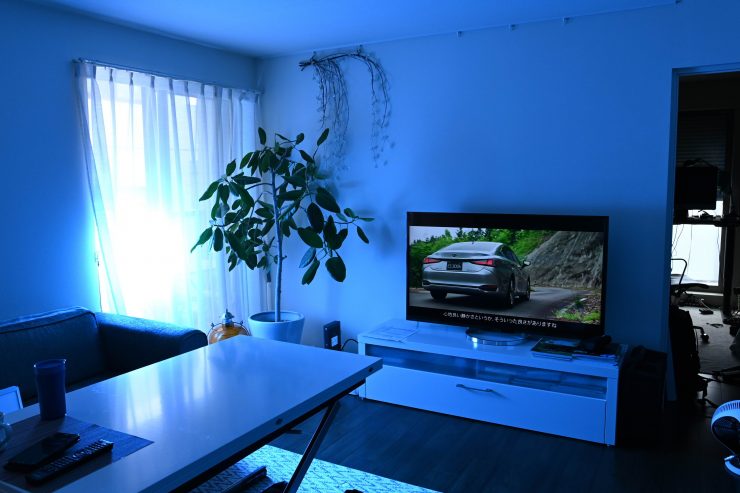
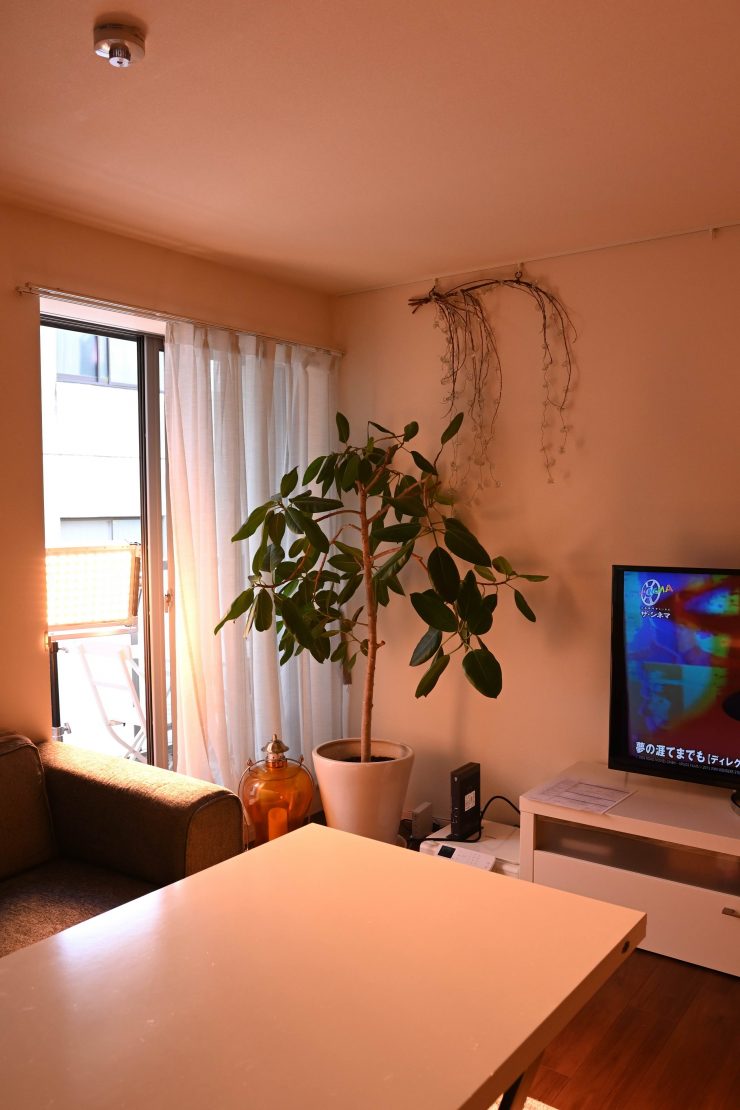
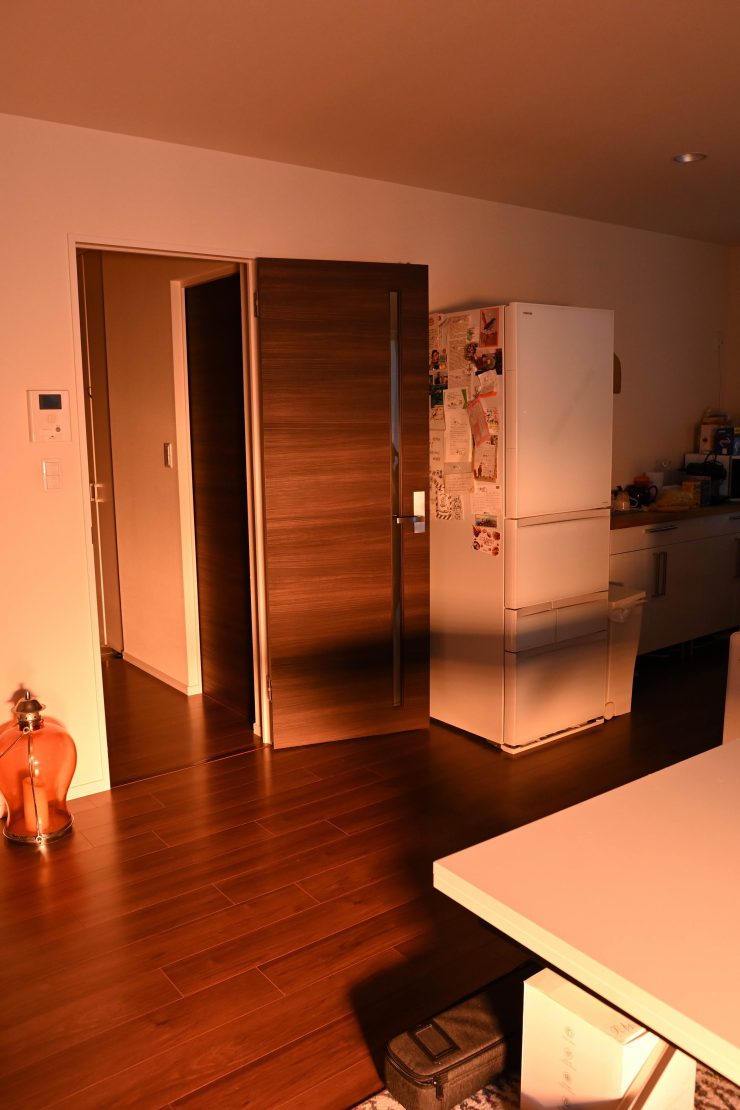
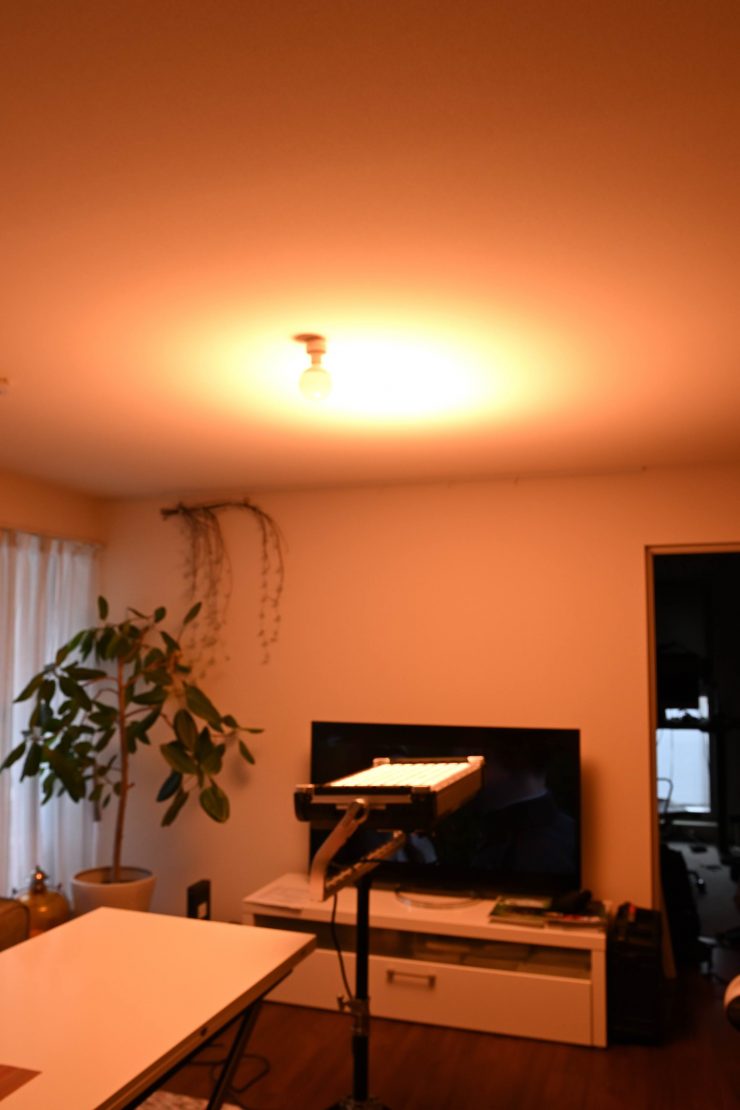
Above you can see a few quick examples of what the light looks like when I placed it outside a window and blasted it through a sheer curtain. As you can see, the light is certainly very capable of creating a lot of output.
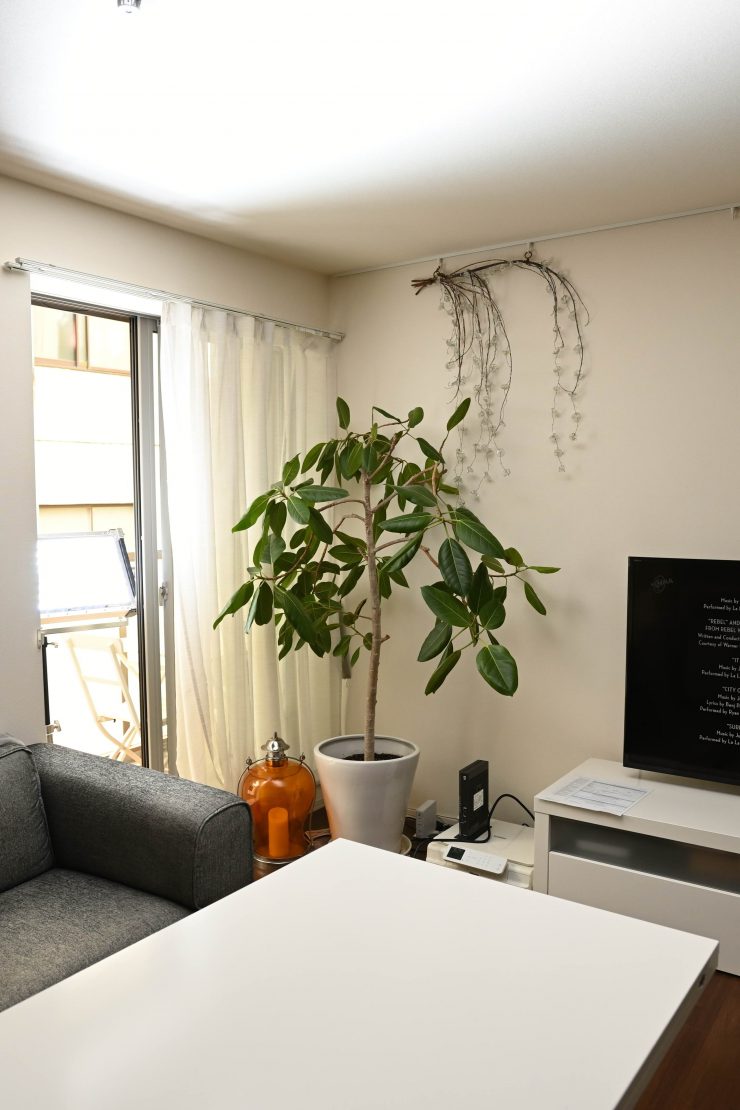
Above you can see some examples if I move the sheer curtain to the side and open the sliding glass door.
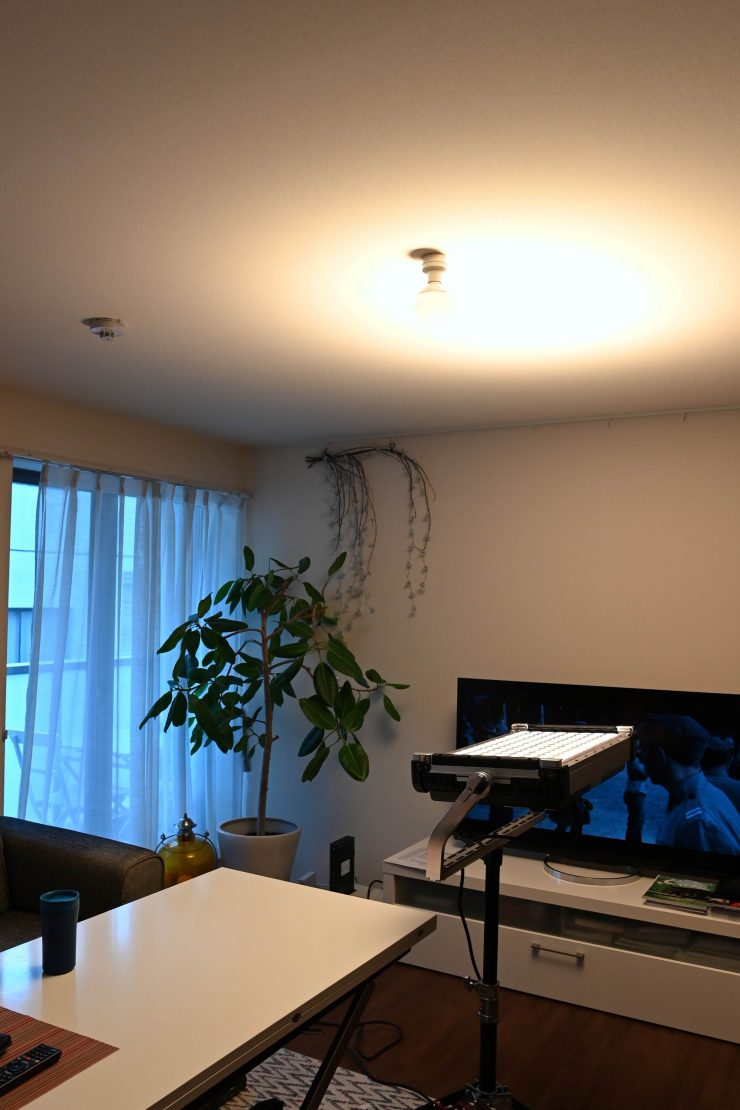
The Vortex8 also works well if you indirectly bounce it into a ceiling or bounce board, etc.
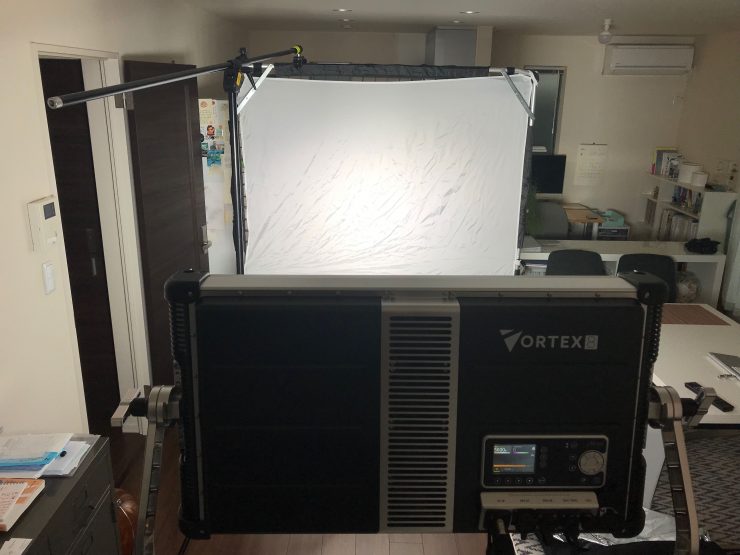
It also works well when you punch the light through a large diffusion screen, although because of the tight beam angle, you do have to back the light up quite a distance from your diffusion. This means you need to have a lot of space available if you want to do this.
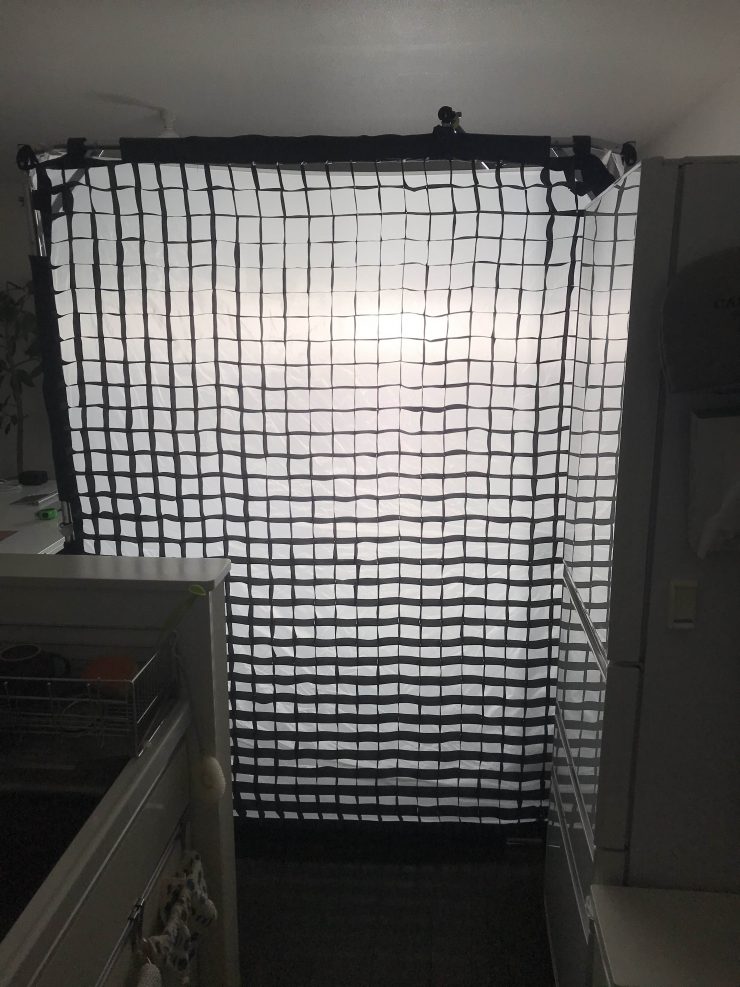
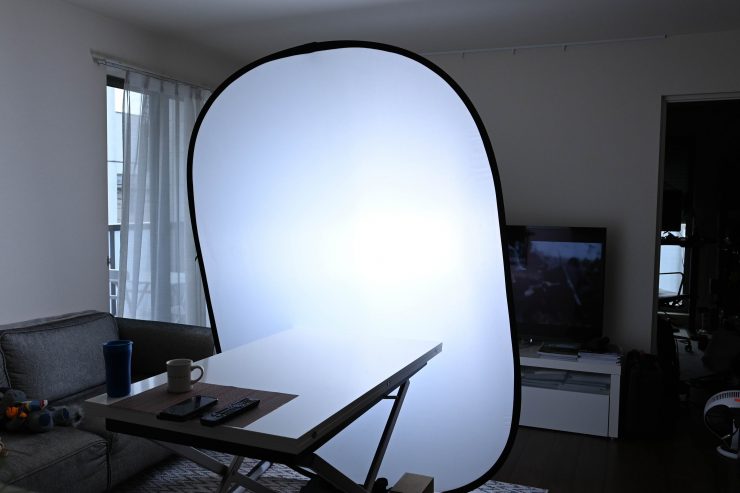
Above you can see what the light looks like coming through the other side of the diffusion.
If you don’t have the space you could simply just use the diffusion dome or included diffusion filter and move the light closer to your diffusion screen. However, this won’t provide as much illumination if you do this.
The Vortex8 combines functionality, useful features, relatively good usability, a ton of output, all without affecting color accuracy. Too often I have seen lights where they have concentrated too much on features and gimmicks which have come at the expense of the quality of light. With the Vortex8, Creamsource has managed to make a very versatile lighting tool without having to compromise on anything.
Look, this is not going to be a light for everyone, nor is it meant to be. The Vortex8 is a little niche and specialized, and that is because it was designed with certain applications in mind. In saying that, it is versatile enough that it can be used for a wide array of applications simply because of its ability to be used as both a hard and soft lighting source.
More features are coming
There are a few very exciting new features that are coming to the Vortex8, but I am not allowed to publically talk about those yet. The Vortex architecture gives Creamsource a lot of headroom for adding additional features over time.
This is the great aspect of modern LED lights is that manufacturers have the ability to implement new features and functionality through firmware updates.
Pricing & Availability
The Vortex8 retails for $4999 USD. This certainly isn’t cheap, but you do have to remember that this is a light that is be squarely targeted at a specific segment of the market.
Below you can see how the price compares to the competition. Please remember that the Vortex8 is quite a unique light, and personally, I don’t really think it has a direct competitor.
| Price | |
| Creamsource Vortex8 | $4,999 USD |
| Rotolight Titan X2 | $3,999 USD* |
| ARRI SkyPanel S60-C | $6,620 USD |
| Litepanels Gemini 2×1 | $3,795 USD |
| Lupo Superpanel Soft Full Color 60 | $2,295 USD |
| Rayzr MC MAX 400 | $1,799 USD |
| Luxli Taiko 2×1 RGBAW | $1,699 USD |
| LEDGO LG-G260 | $2,565 USD |
| Kino Flo Celeb 450Q DMX | $4,815.25 USD |
| Kino Flo FreeStyle 21 | $1,678.75 USD |
| Kino Flo Diva-lite 20 DMX | $2,188.75 USD |
| Velvet EVO 2 | $3,877.40 USD |
| Nanlux Dyno 650C | $3,770 USD |
*Is currently $1,000 USD off at B&H.
At $4999 USD it is cheaper than an ARRI S60-C Skypanel, but more expensive than the Rotolight Titan X2, Litepanels Gemini, and Velvet EVO 2.
Accessories
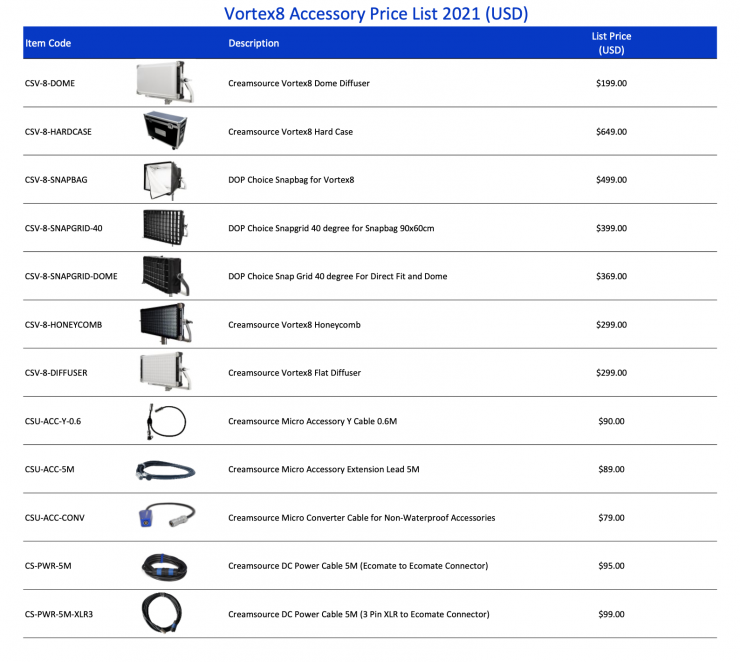
Creamsource sells quite a large array of accessories for the Vortex8. These range from lighting modifiers to flight cases. Above you can see what is available and how much they cost.
Conclusion

The Vortex8 is an exceptionally well-made and well-constructed light. It has IP65 certification and it has been designed for the rigors of field use. This fixture is going to last you a long, long time. This is definitely a light that will find its way into a lot of rental houses. Creamsource has paid a lot of attention to detail and this is reflected in the Vortex8.
Yes, the Vortex8 is a little niche in some ways, but it has the flexibility to be used for a wide array of lighting applications. Having the ability to use it as a hard lighting source and a soft lighting source is not something we usually see with 2×1 panel lights. The only other light that I can think of that operates in a similar way would be the Lupo Superpanel Dual Color 60 1×2. That features a 40-degree beam angle and just like the Vortex8, it can be used as both a hard and a soft lighting source.
The Vortex8 is one of the best lights I have ever reviewed and I have reviewed a lot of lights! The attention to detail and thought that has gone into this fixture is very apparent.
The Vortex8 has a ton of output and if you need 2×1 RGBW panel light that can be used for a wide array of lighting applications then it is certainly well worth considering.

