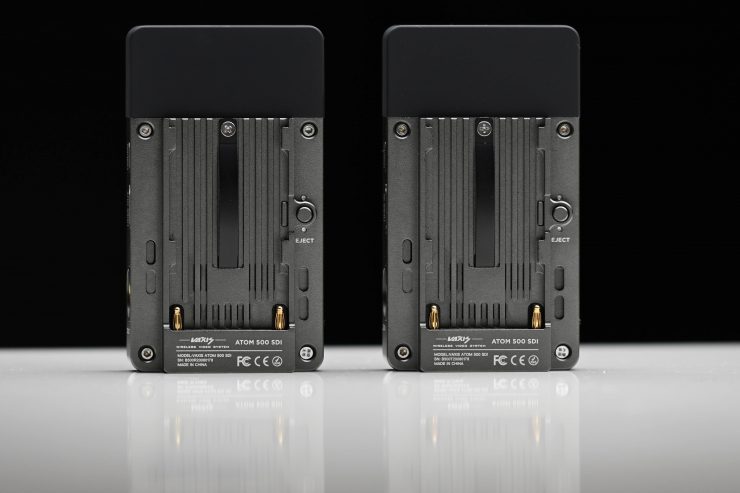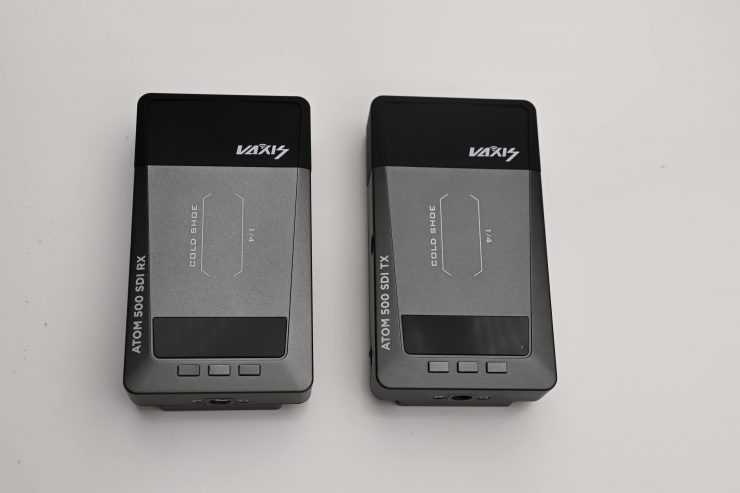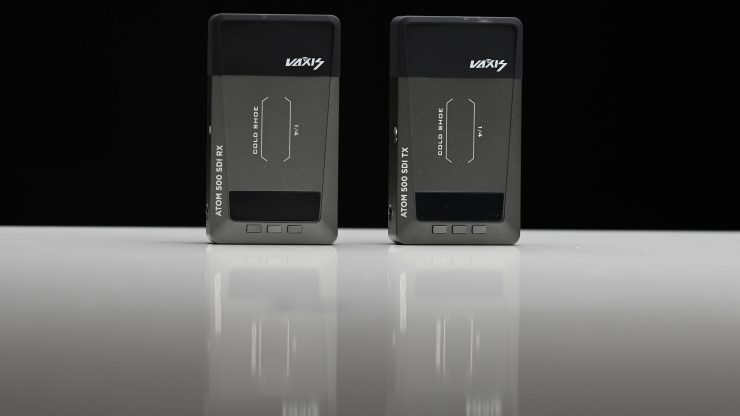
The Vaxis Atom 500 SDI is essentially an SDI version of the Atom 500 that I reviewed earlier in the year. The benefit of using an SDI wireless video system is that it makes it compatible with more cameras and you should be able to get a lot better latency than when using HDMI.
- Up to 500′ Line-of-Sight Range
- OLED Screen
- SDI In & HDMI In on TX unit, SDI Out & HDMI Out on the RX unit
- Dedicated iOS app where up to three iPhone or iPads can view the image at once
- Built-in antenna design
- Optional Battery Mounting Plates
- Support USB-C voltage input
- Future Firmware Upgrades via USB
- Smart fan
Concept
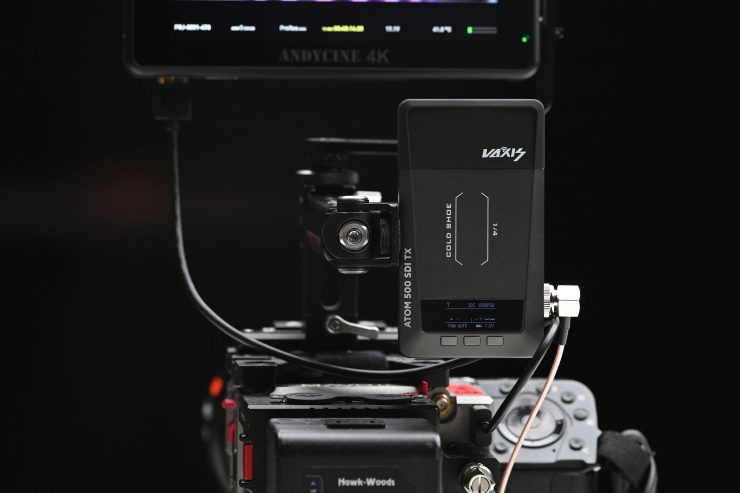
The Atom 500 SDI is being touted as an affordable SDI and HDMI wireless video system that can transmit video to both a receiver and an app from just about any camera. Affordable wireless video solutions have been popping up everywhere in the last year and their features and capabilities continue to improve.
The Atom 500 SDI is aimed at professional users, whereas the Atom 500 was being targeted at the Prosumer, YouTube, Vlogger market.
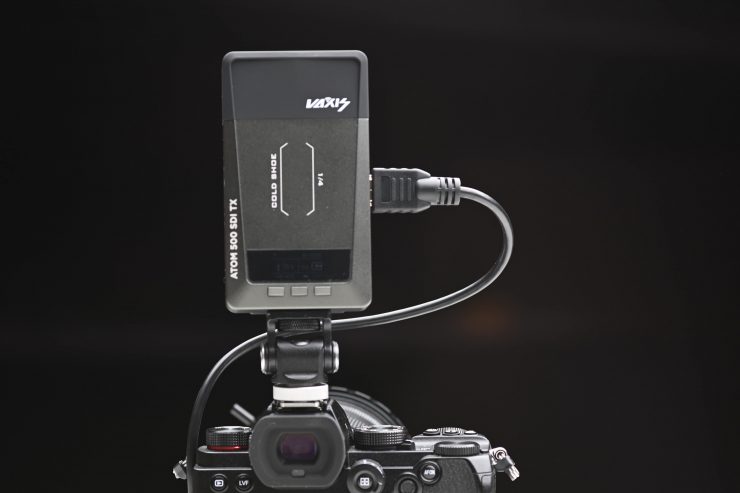
The Atom 500 consists of an SDI/HDMI TX and SDI/HDMI RX unit. Both work on the 5GHz frequency band.
Build Quality
I have reviewed quite a few Vaxis products over the years, and their build quality has always been good. The Atom 500 SDI housing is basically identical to that of the Atom 500. As I noted when reviewing the Atom 500, neither of these systems seems to be as robustly made as the company’s other offerings. Vaxis has had to keep the weight and size down, and undoubtedly that has required a compromise.
In saying that, I don’t have any concerns about the build quality of the Atom 500 SDI. It is still reasonably solidly made, however, as soon as you start targeting a professional user they expect a lot better quality than a casual user.
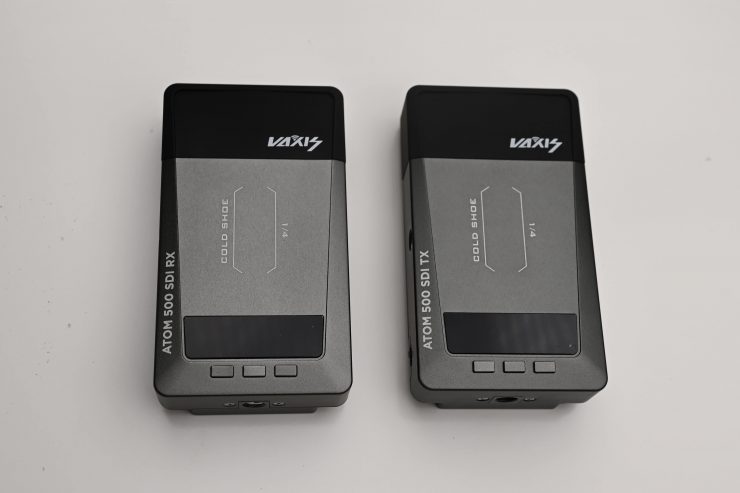
What is interesting to see is that Vaxis has changed the design of the three buttons on the front of the TX and RX units. They are no longer flush like they were on the Atom 500, and this makes them easier to use and operate.
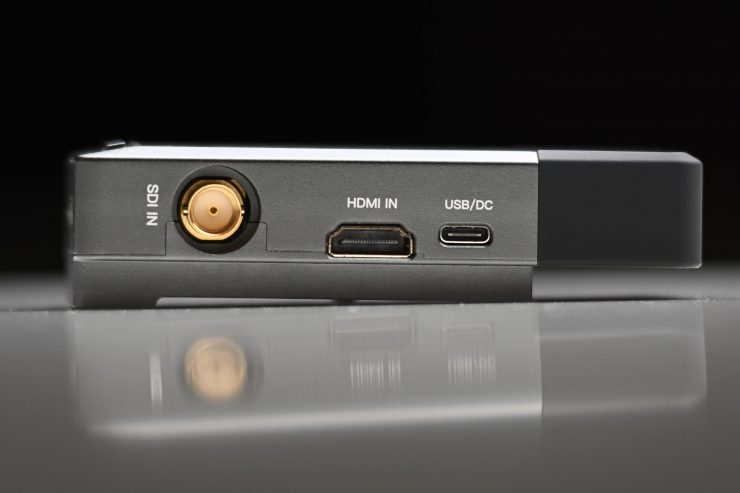
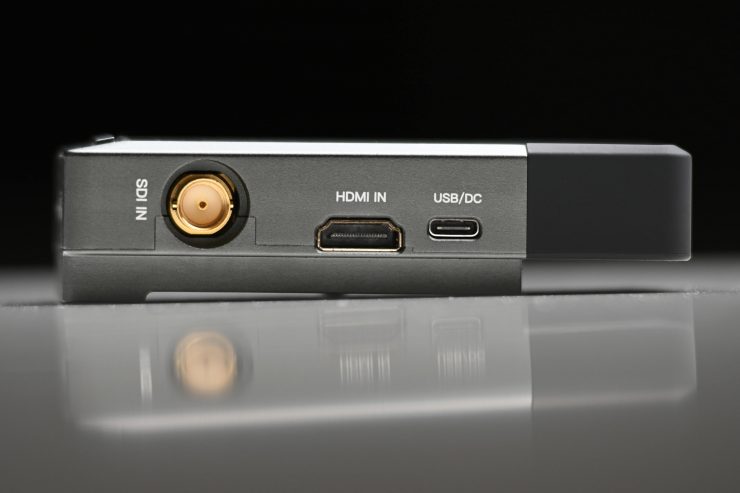
The Atom 500 SDI TX features dual inputs, but unlike the Atom 500, there is no loop through ability because the TX doesn’t feature any outputs. With no outputs on the TX unit, you can’t do things like looping a signal out through a monitor.
Size & Weight
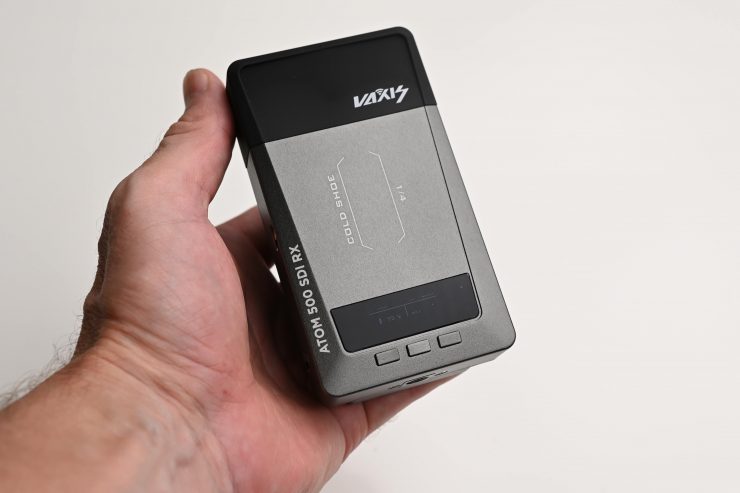
The Atom 500 SDI RX and TX units weigh 170g (5.99oz), which makes them just 12g heavier than the Atom 500 (158g). They have physical dimensions of 113mm x 63.5mm x 20mm. That makes them slightly larger than the Atom 500 (105mm x 60mm x 22mm).
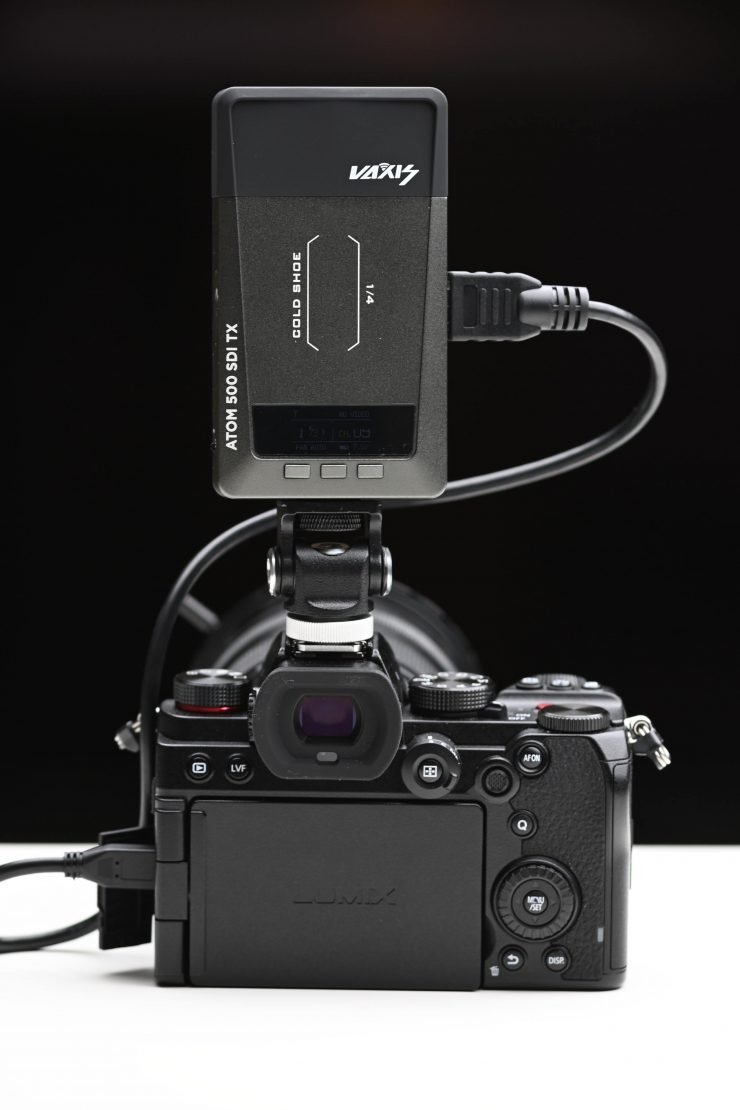
This weight and size do make them quite small and compact for a wireless video system with both SDI and HDMI capabilities.
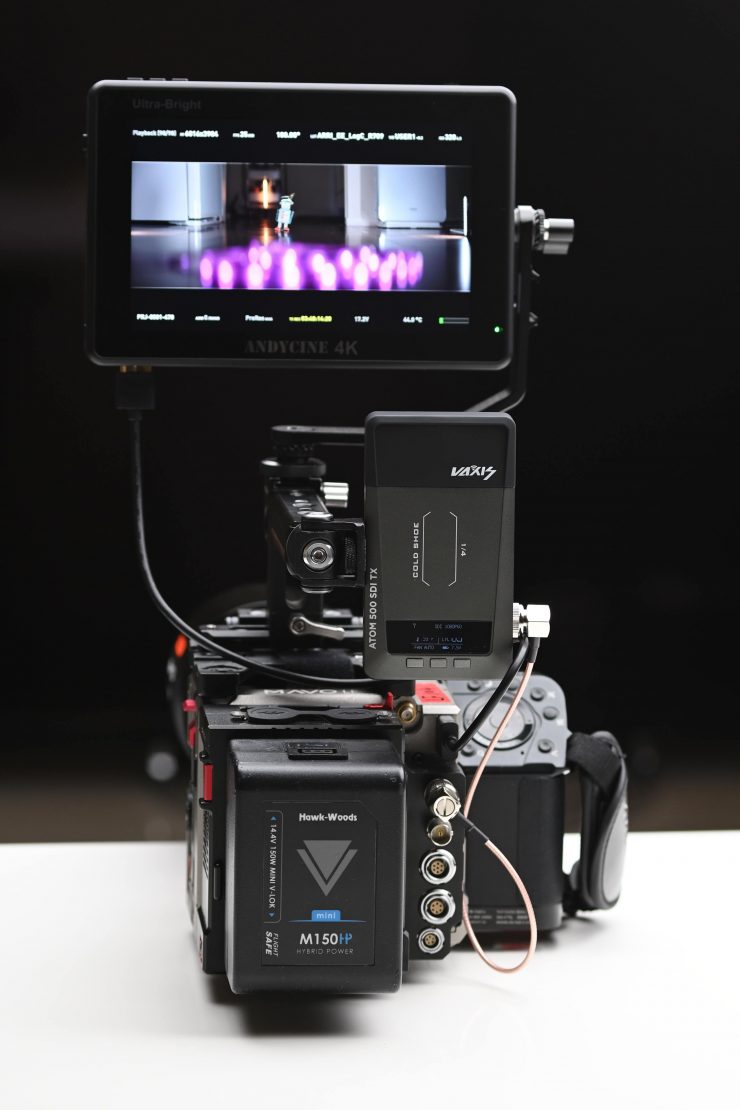
I personally think that the Atom 500 SDI system is a good size for using with small to mid-sized digital cinema cameras that have SDI capabilities.
What do you get?
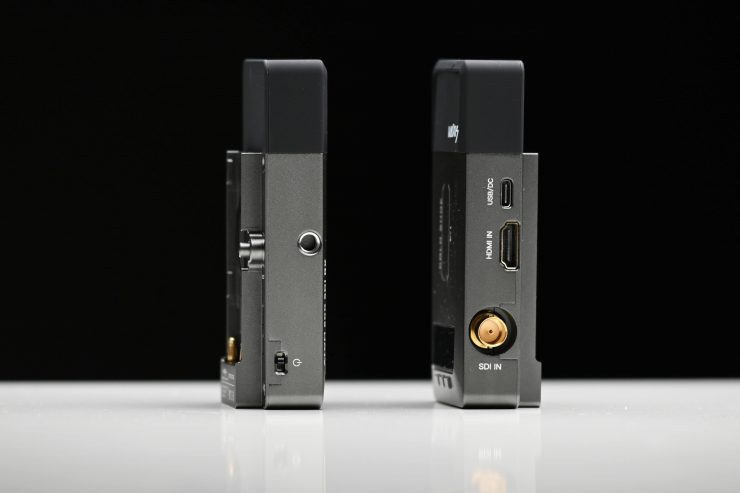
The Atom 500 SDI comes with the TX unit, RX unit, user manual, and a USB type C cable. Unlike with the Atom 500, you don’t get a cold shoe or a cold shoe platform.
Interface & Transmission
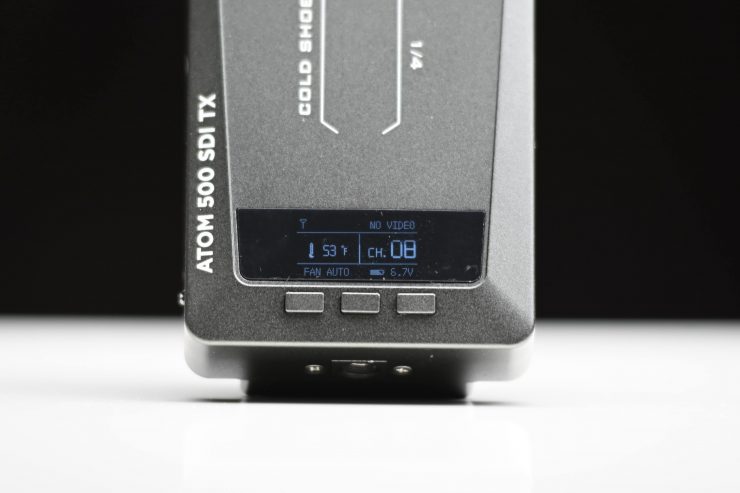
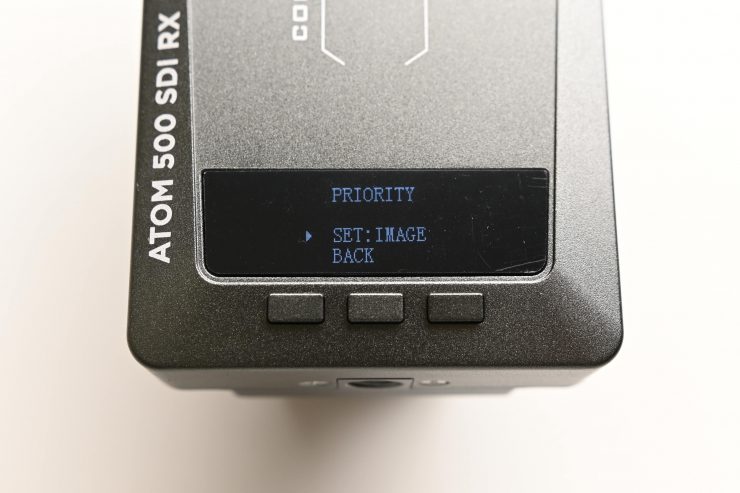
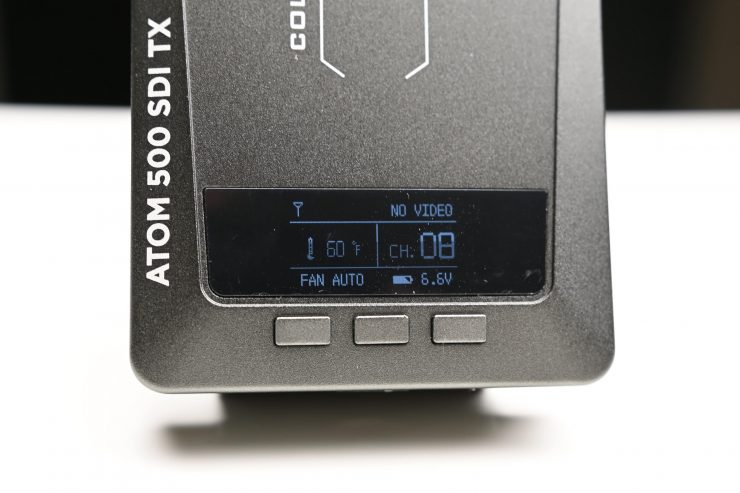
On the front side of the TX and the RX units is a small-sized OLED display where you can see crucial information and make changes. The only change I can see with the new Atom 500 SDI is that you can now display the temperature of the unit in either Fahrenheit or Celsius.
As the Atom 500 SDI is using the 5GHz frequency channel, Vaxis has introduced a new automatic channel selection by default. The RX and TX units will constantly scan their surroundings and use the best available channel without you needing to do anything.
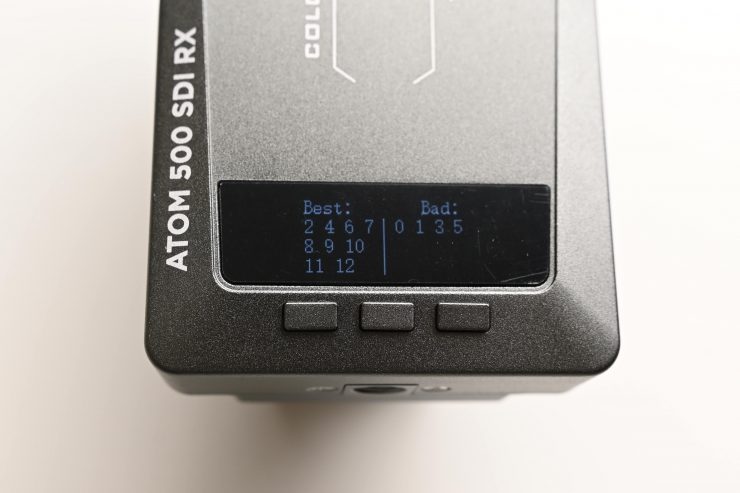
For those who want to select a channel manually, Vaxis gives you that ability as well. You can go into a channel scan mode where the system will look for the best available channels for you to use.
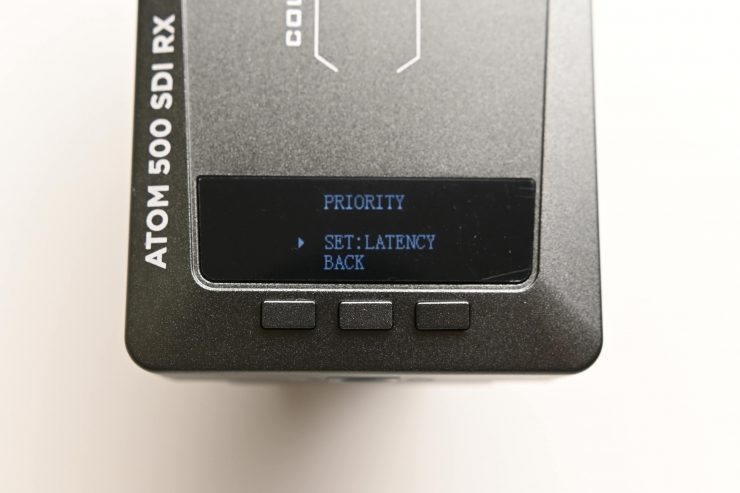
Another nice feature of the Atom 500 SDI is that you can prioritize Image quality or latency depending on what your needs are. If image quality is more important then the system with prioritize that, if the latency is more import then the quality will be reduced. Please bear in mind that you can only select these options on the RX unit. If you are using the Vaxis Vision App just with the TX unit then you can’t change these parameters.
Built-In Antennas
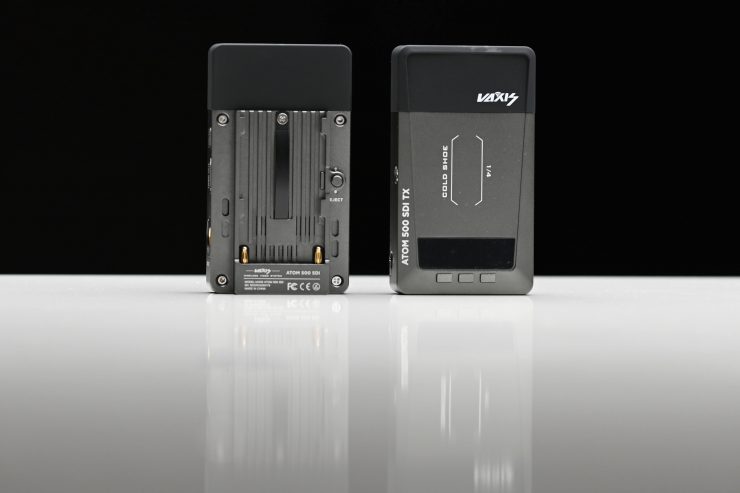
Both the TX and RX units feature internal antenna units. This does keep the footprint of the system to a minimum as often external antennas can be longer than the actual RX or TX units themselves.
Mounting Points
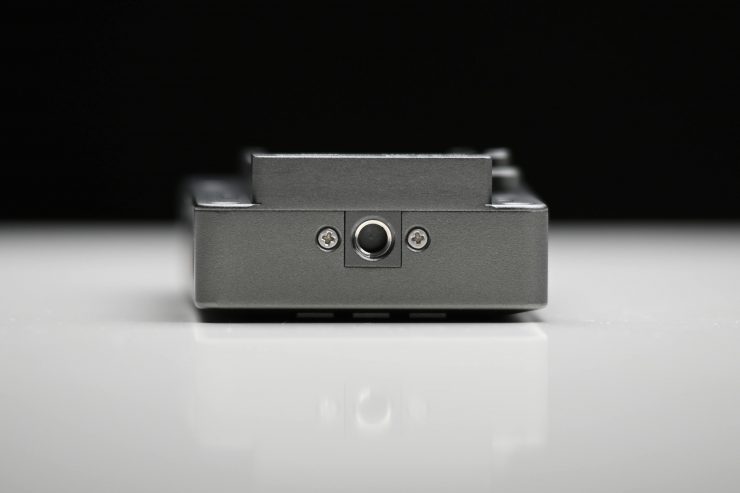
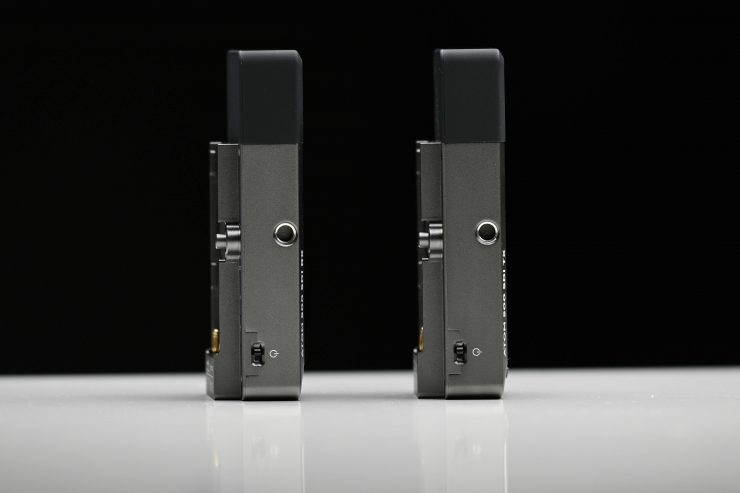
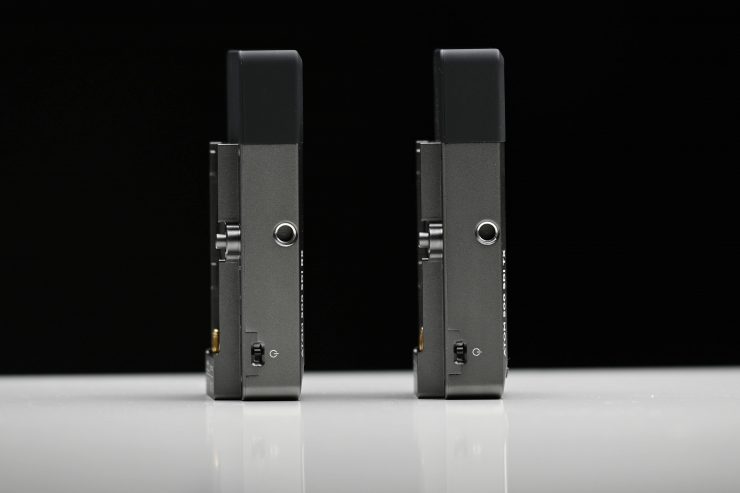
Vaxis has included two 1/4 20″ mounting holes on both the TX and RX units. One is on the side and one is on the bottom. Strangely there is a label for a cold shoe mount, but no actual holes to attach one.
H.265 Encoding
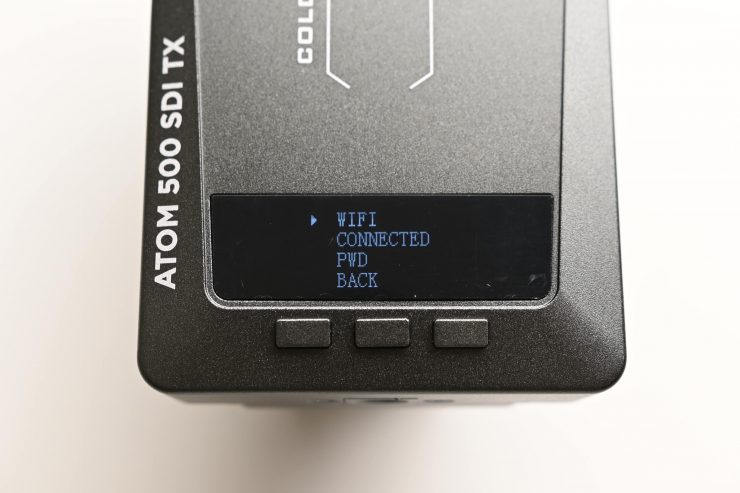
Vaxis is using H.265 encoding for the transmission signal that can be viewed via the app on smartphones and tablets. This is quite clever as it allows Vaxis to send a much better signal while using less bandwidth. This is something we are now seeing a lot of companies doing.
According to Vaxis, the latency is <0.08s (80ms). I will test the delay of the Atom 500 SDI using both the app and the output from the RX unit further down in the review.
Vaxis Vision App
Sending a wireless video signal that multiple people can view at once on a dedicated app is hardly new. Teradek has been doing this for years, and most recently we have seen very cost-effective systems from companies such as Hollyland, Accsoon, and Zhiyun.
The Vaxis Vision App is a stand-alone purpose-built app for the Atom 500 and Atom 500 SDI. It allows anyone with an iOS device to view the wireless signal from the TX unit.
The Vaxis Vision App is more than just a viewer. It gives you the ability to activate monitoring functions such as peaking, focus punch in, frame guides, etc. You even get the ability to roll record your camera remotely, as long as it supports HDMI record triggering. (CHECK TO SEE IF IT WORKS WITH SDI TOO)
I will tell you how it works and performs further down in the review.
Power
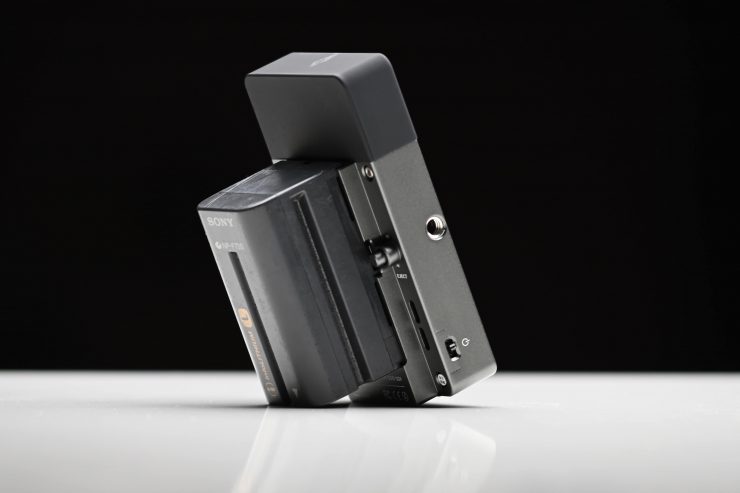
The Atom 500 SDI RX and TX units both have in-built battery plates that can take Sony NP batteries. You also have the option to power it through USB-C.
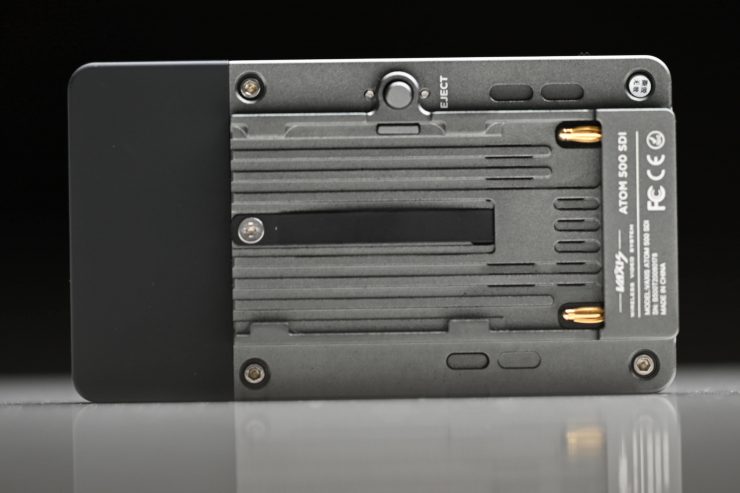
The battery plate has been re-designed and it now features a type of spring-loaded mechanism that helps keep the battery securely attached. The batteries don’t move or wobble around.
It is nice that Vaxis gives you two ways of powering the device. Having in-built batteries would have kept the size down, but most professionals don’t want devices with built-in batteries unless they are able to power a unit for a considerable amount of time.
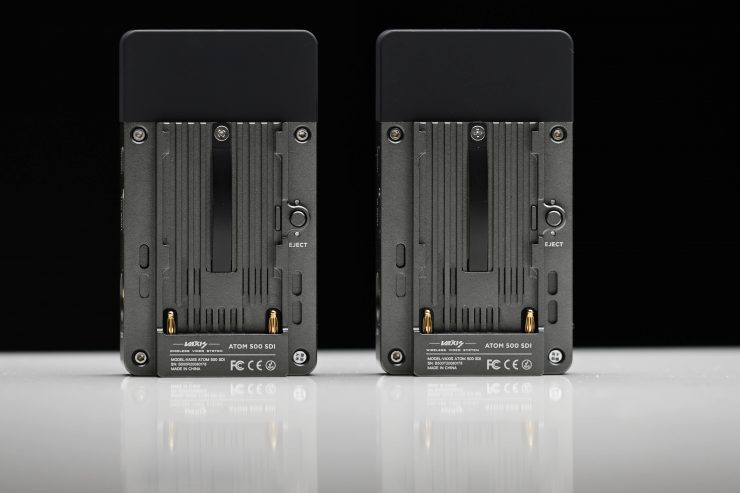
Running the Atom 500 SDI with a Sony NP battery on a small to mid-sized digital camera isn’t going to make it overly heavy. I do, however, wish that Vaxis had have put some type of industry-standard power connector at least on the TX unit. that way you could power it directly from an output on your camera.
Fan Noise
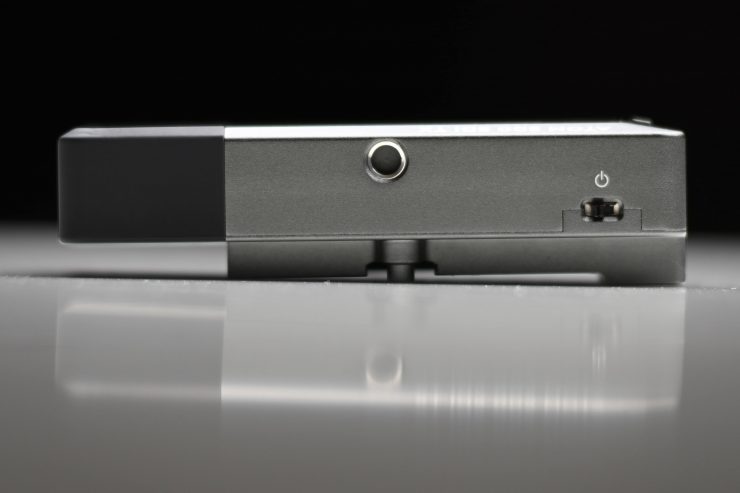
Both the TX and RX units have an in-built fan. This may be audible if you are using the TX near an on-board microphone. I would recommend placing the TX unit away from any onboard microphone.
In a very quiet room where audio recording is critical, this may also be a problem, but you can turn the fan off if need be.
The fan does seem to be a lot louder on the TX unit than it is on the RX unit.
You can change the fan setting between Auto/High/ Off. There is a temperature indicator that you can see on the OLED screen, but I’m not sure what temperature the Atom system can safely operate up to.
What can you transmit?
Through both SDI and HDMI, you are limited to 1080 up to 59.94p.
The Atom 500 SDI can transmit the following over SDI:
- 720p up to 50p
- 1080 50i or 1080 60i
- 1080p up to 59.94p
- 1080PSF up to 29.98p
The Atom 500 SDI can transmit the following over HDMI:
- 720p up to 50p
- 1080 50i or 1080 60i
- 1080p up to 59.94p
- 1080PSF up to 29.98p
You can be shooting in HD up to 60p, and depending on your camera, it should still be able to send a picture through the TX unit. I tried feeding 23.98, 24, 25,30, and 60p sources into the TX unit and they all worked. It won’t except 4K signals that are over 30p. I tried all of these tests with a Panasonic S1H.
Ins & Outs
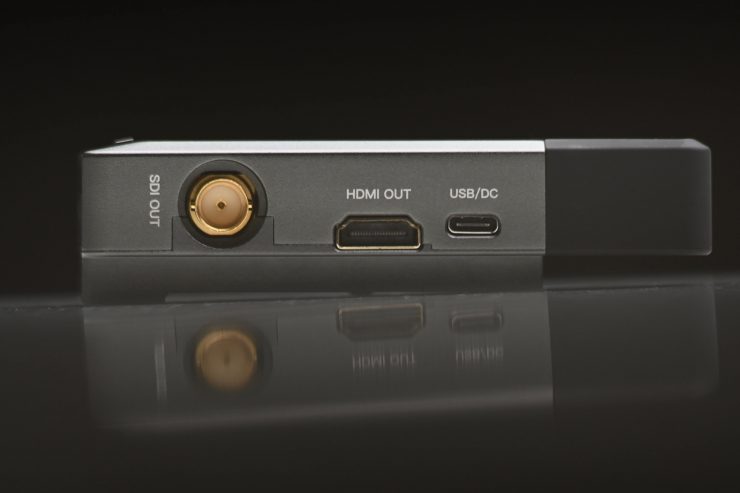
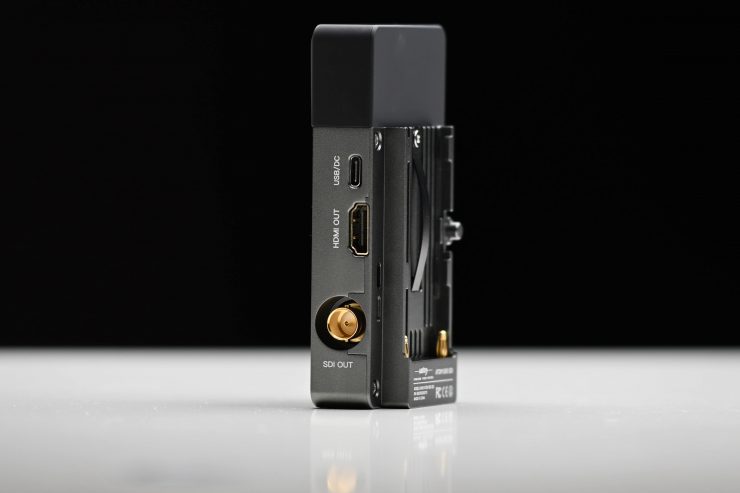
As I mentioned earlier, both the Atom 500 SDI TX and RX units feature both SDI and HDMI ports. The TX has an SDI In and an HDMI In. The RX has an SDI Out and an HDMI Out.
There is also a USB-C /DC input on both the TX and RX units.
Encryption
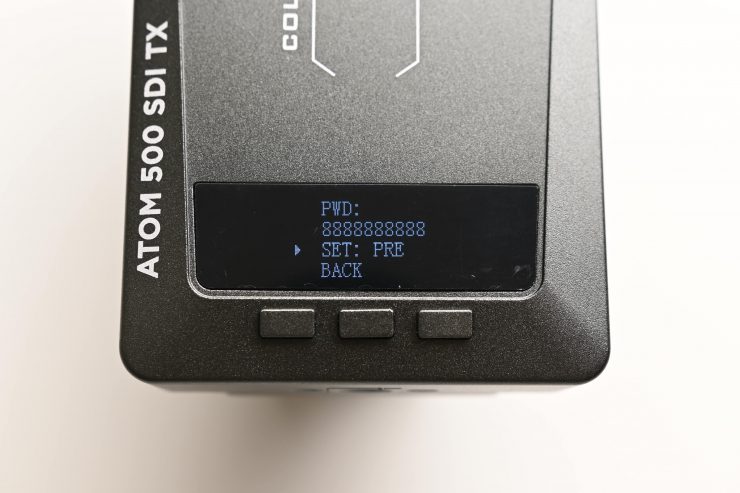
The system has the ability to set password protection so only the people you want to view the signal can. This is a nice feature and one that a lot of other affordable wireless video transmission systems don’t have.
Setup & Ease Of Use
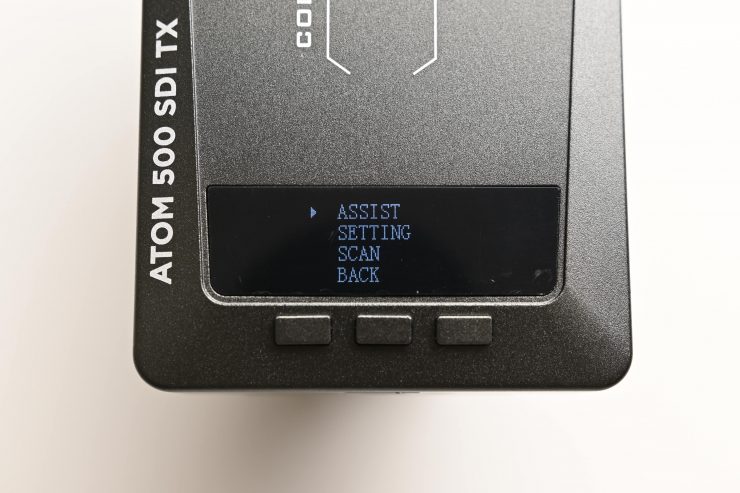
As I always say, a good wireless video solution should be easy and fast to set up and get running. In all honesty, this shouldn’t be a difficult task, and if it is, then the product has already failed in my opinion.
Just like most of the Vaxis wireless systems, the Atom 500 SDI is virtually plug-and-play. You just power up the TX unit, input a video source and then power up the RX and hook it up to a monitor.
Or you power up the TX unit, input a video source, and then launch the app.
If you are using both the TX and RX unit to send a signal to a monitor then all you need to make sure is that both the TX and RX are on the same channel. Once everything is powered on I got a picture within around 20 seconds. 20 seconds is about double the time it takes for other Vaxis wireless systems I have reviewed to receive a picture. Regardless, the Atom 500 SDI system was quick and easy to use.
Now, if you want to send an image from the TX and view it on the app, then this does involve a few steps, especially if you are using it for the first time.
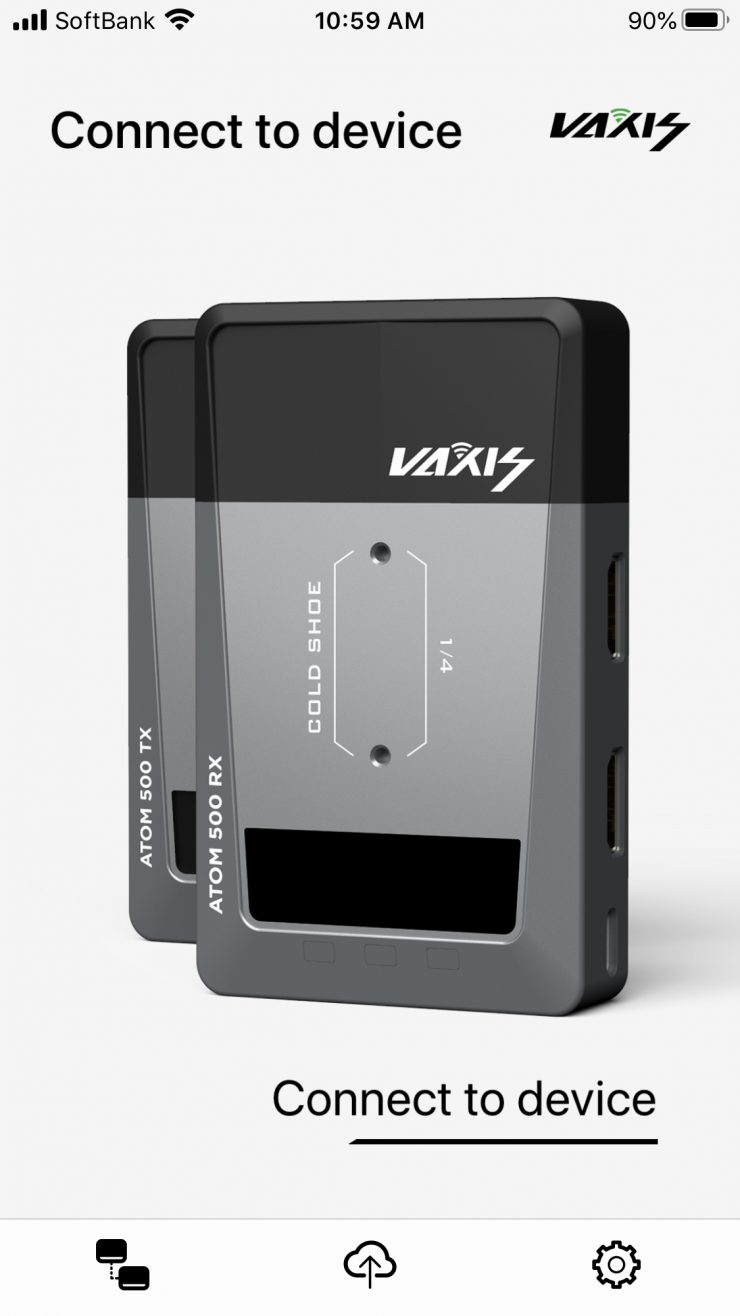
Firstly you need to download the Vaxis Vision app. Then once you open it, you need to connect to the TX unit.
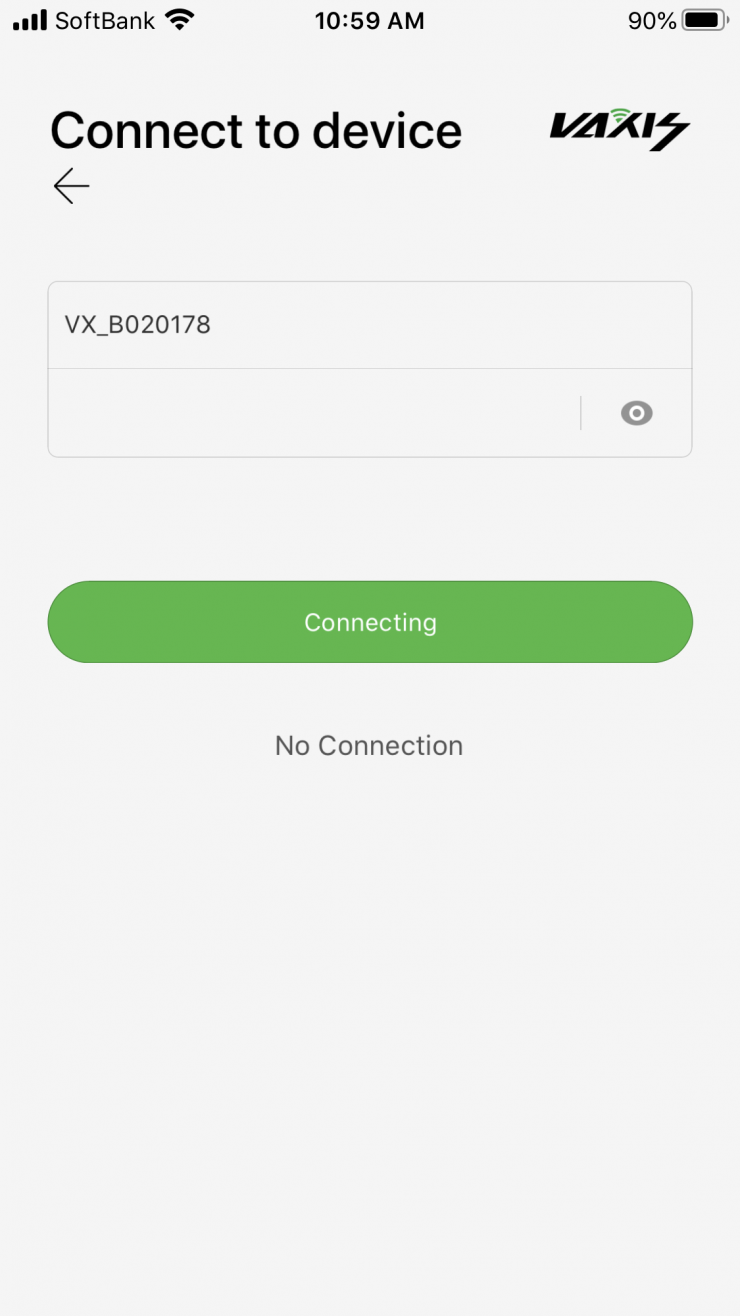
When you first try to connect you are greeted by this screen. At first, I didn’t know what to do, because the included instructions didn’t mention this step.
What I eventually worked out is that on the TX unit you need to go into the menu and do a pairing. Here it will also give you the VX_ # and the password.

Once you have entered this information you will be asked to join the Vaxis Vision WiFi network.
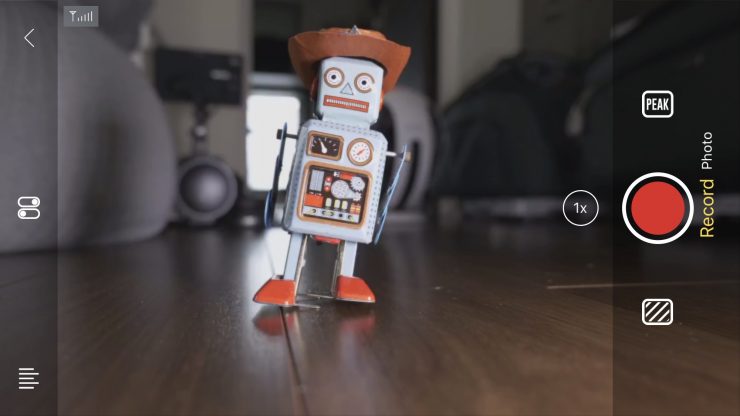
Once you have joined, you will be greeted by the following screen. The picture from the TX unit will be there, along with a bunch of icons.
You don’t have to go through the whole entering the VX# and password once you have done it once. However, you need to do it every time you hook up to a new device for the first time. You need to factor in this time if you are going to put it on a client’s phone or tablet.
Now, getting back to the ease of use, I wanted to see what would happen if I lost connection, so I turned the TX off and then back on again. As soon as turned the TX off you lose the picture on the app (as expected). Once I turned the TX unit back on the RX unit got the signal back in 22 seconds. This was pretty slow.
If you are using the Vaxis Vision app and you turn the TX off and then back on again, you lose the picture, but then the image won’t come back unless you re-boot the app from scratch.
So what about if I pulled out the HDMI or SDI from a camera? The system re-established connection in under 4 seconds on both the monitor and the Vaxis Vision app.
So what would happen if I suddenly changed the frame rate to 30p from 23.98p on my camera while the system was on? It took around 10 seconds for the picture to return. When I changed the camera back to 23.98fps it also took around 10 seconds to get the connection back.
In the final test, I wanted to change the operating channel and see what would happen. I changed the receiver to a different channel and then changed the transmitter to the same channel. This time it took around 20 seconds till I had a picture back.
Vaxis Vision App Usability
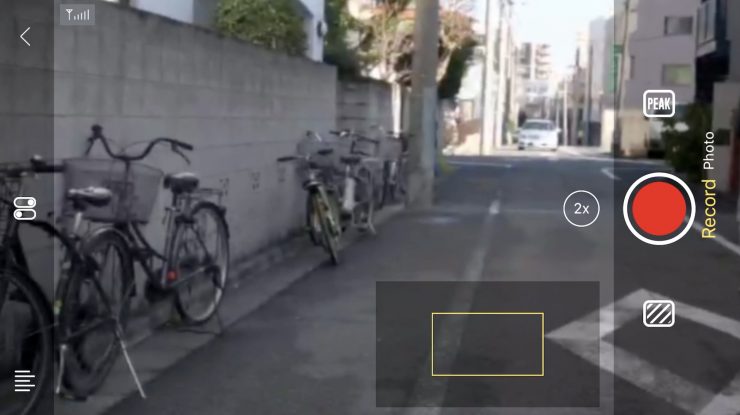
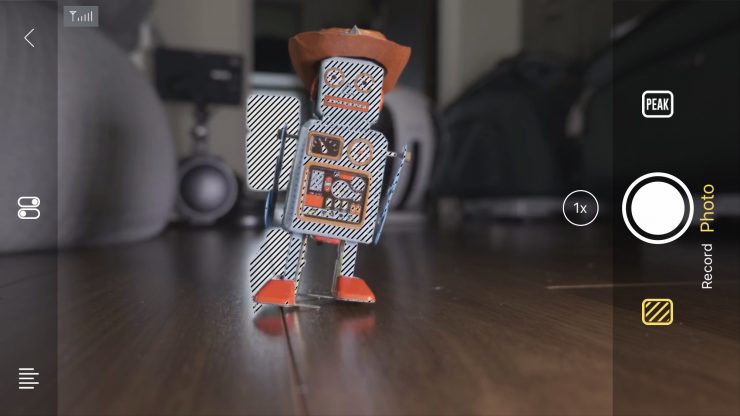
The app is fairly basic, but it does feature some nice functionality. You can do 2x and 4x focus magnification and you can move the screen around with your finger.
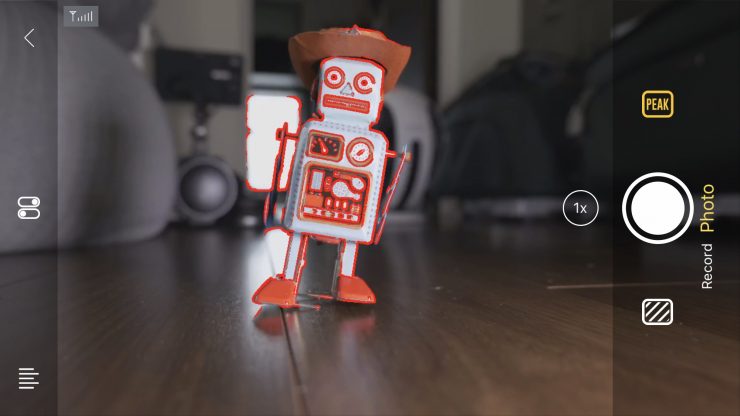
There is also peaking and zebras and you can change the intensity of both.
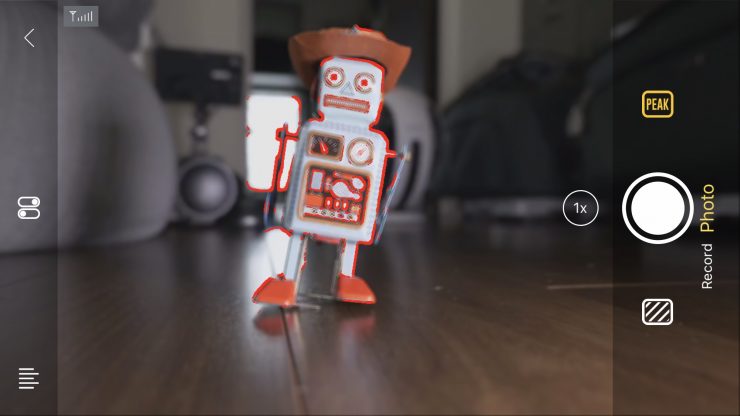
Even though you can change the intensity, you can’t change the color of the peaking, it is stuck on red.
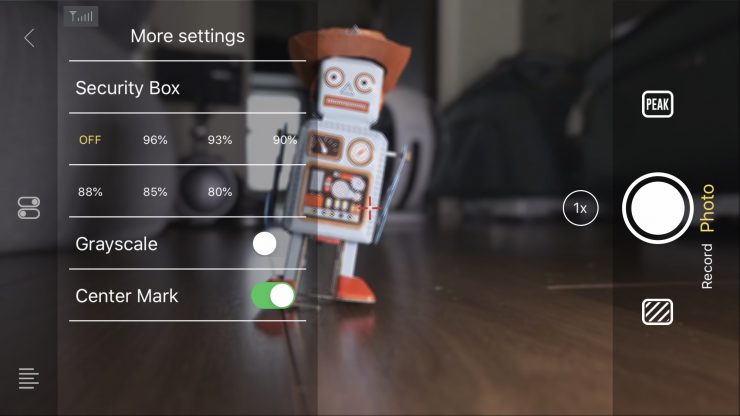
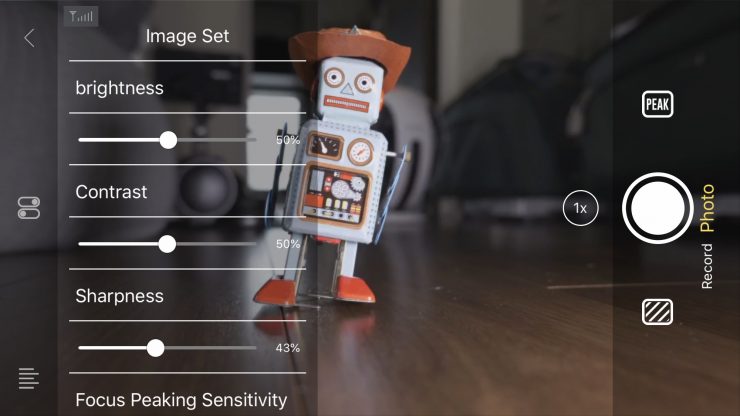
You can also put up frame guides and a center marker, as well as adjust the brightness, contrast, and sharpness of the screen.
Unfortunately, there is no way of getting a clean view up without these menu items, at least as far as I know. I certainly tried hard to see if you could. This is a bit of a mistake with the design of the app in my opinion. Although I’m sure this could easily be fixed with an update to the app. In saying that, I mentioned this to Vaxis 6 months ago and it still hasn’t been added.
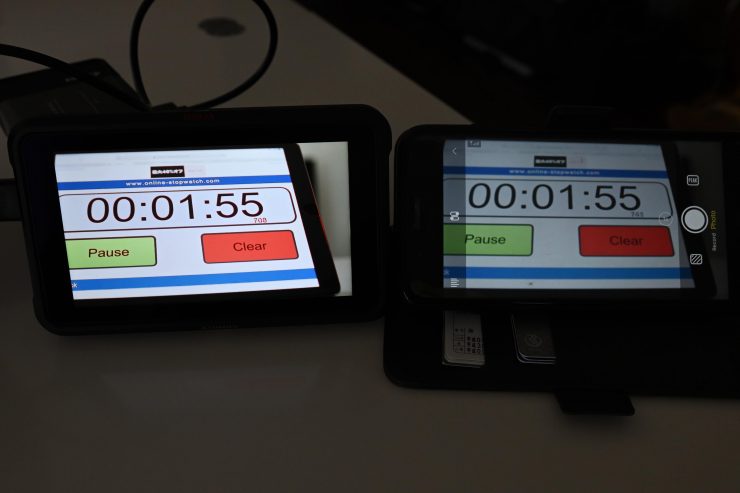
The picture quality of the signal coming up on the app is pretty bad in my opinion. The image looks very low res, and it doesn’t look sharp at all. Above you can see the image quality on the iPhone through the Vaxis Vision app compared to the Ninja V on the left.
Vaxis also states that the app gives you the ability to roll record your camera remotely, as long as it supports HDMI record triggering. I tried this with the Panasonic S1H and I couldn’t get it to work.
Image Delay
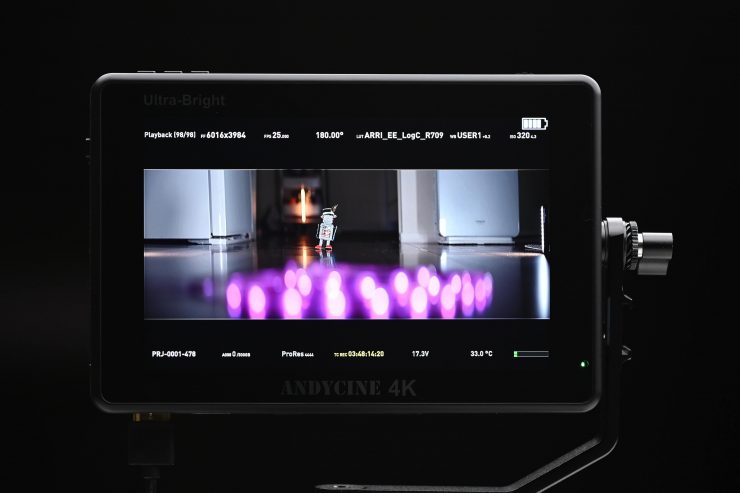
Zero (or close to) mage delay is one of the big reasons you pay more money for a higher-end system. Most high-end wireless video systems have almost zero latency, while a lot of the budget systems can have quite a lot of latency, especially those systems using HDMI. As the Atom 500 SDI uses SDI, in theory, the latency should be pretty low. So is it? Well, let’s find out.
I did some latency tests using the Kinefinity MAVO LF and output an SDI signal from the camera to the Atom 500 TX. I then connected a monitor to the Atom 500 RX via SDI.
I measured the delay average over a series of three tests at 140ms. Even for a system at this price that latency is reasonably high, especially when using SDI. Surprisingly when sending an SDI signal to the TX unit and the monitoring using the Vaxis Vision app the average delay was 71ms which was basically half the latency of when using the RX unit.
Now, when I went to try an HDMI test the TX unit wouldn’t receive any HDMI signal from the camera. This seems to be an issue between the Kinefinity MAVO LF and the Atom 500 SDI.
To test the HDMI latency I used a Panasonic S5. Over a series of three tests, I found that the average latency was 158ms which was only slightly worse than the results I got when using SDI. When feeding an HDMI signal into the TX unit and then using the Vaxis Vision app the average latency I got was 123ms. Strangely this was better than the results I got when using the RX unit.
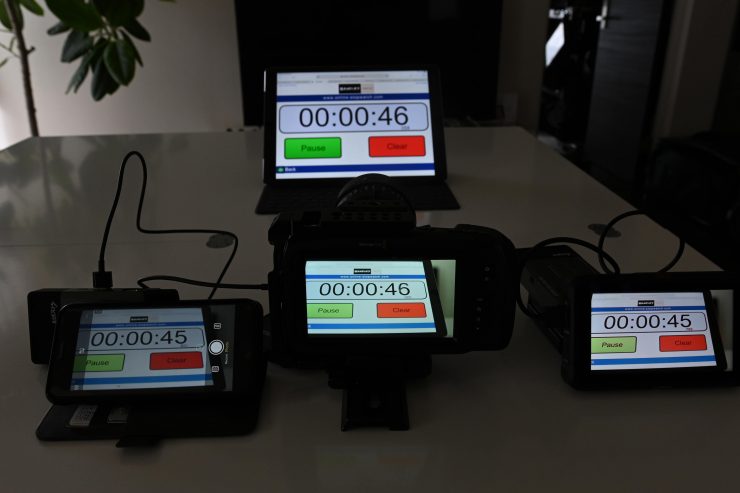
You should never test image latency with just one camera so I did another test using the BMPCC6K and an Atomos Ninja V. I outputted the signal from the BMPCC6K over HDMI to the TX unit. I then hooked up the RX unit via HDMI to the Atomos Ninja V. I also had the Vaxis Vision app open as well on an iPhone. This test was conducted with the RX unit Priority set to Latency.
Above you can see a test that clearly shows the latency between the object being filmed, the image on the BMPCC6K, the image coming out of the RX unit to the Ninja V, and on the Vaxis Vision app.
Over a series of four tests (and for this one I didn’t count the latency from the stopwatch I was filming to the camera) The average latency I got was as follows:
- Latency seen on the Atomos Ninja V: 122.25ms
- Latency seen on the Vaxis Vision app: 110ms
What do these figures actually mean? Well, anything below 100ms is considered to be low, because most humans don’t perceive a delay that small. Once you get over 100ms we perceive a noticeable delay.
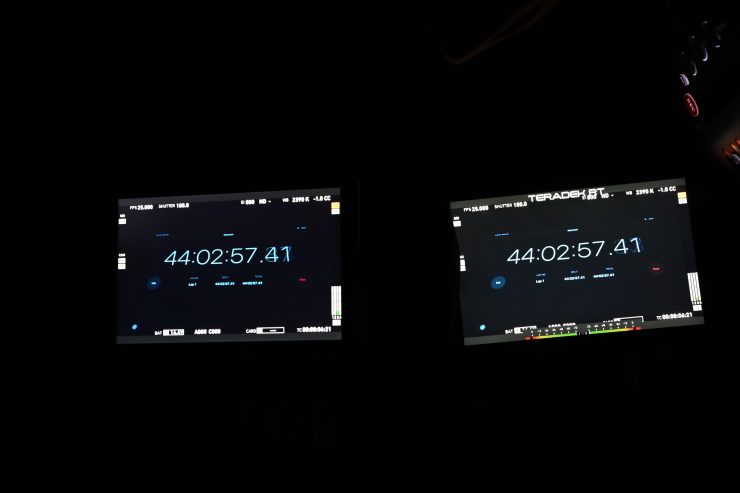
What you clearly need to know is that the amount of latency you will see can vary dramatically from camera to camera, especially when using HDMI.
Look, HDMI has inherent image dealy problems, and yes if you combine that along with one of the cheaper wireless video systems you can get a lot of latency. At the end of the day, there needs to be an acceptable limit that you are willing to tolerate.
It is strange that the image latency is less when using the Vaxis Vision app than it is when using the RX unit. Usually, it is the other way around.
Delay on other app-based systems
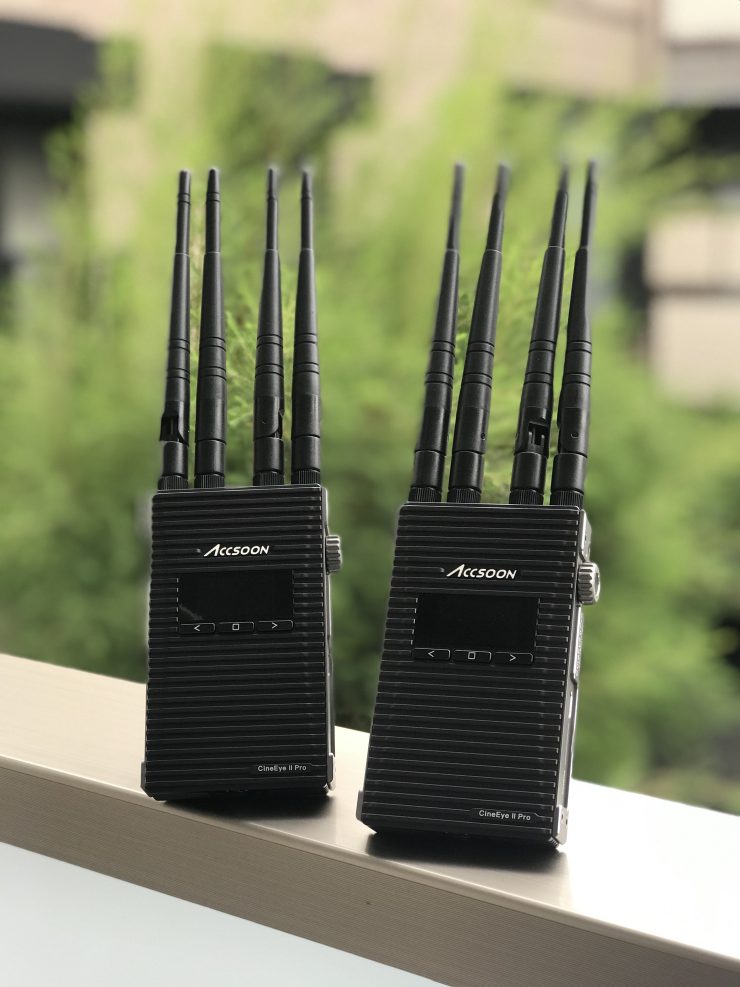
I recently reviewed the Accsoon CineEye 2 Pro, and even though that is an HDMI only device, the latency was far better than with the Vaxis Atom 500 SDI.
When I tested the Accsoon’s HDMI latency from the Kinefinity MAVO LF, I measured the delay average over a series of three tests at 11ms when using the Accsoon Go app with the TX set to Normal transmission. These results were excellent for a budget wireless video system.
Using the RX and Vaxis Vision App at the same time
You can use the Atom 500 SDI RX and send a signal to a monitor as well as using the Vaxis Vision app at the same time. I tested this out and it does work without any problems.
It is nice that you can do this and it certainly increases the flexibility of the system.
Real-world performance
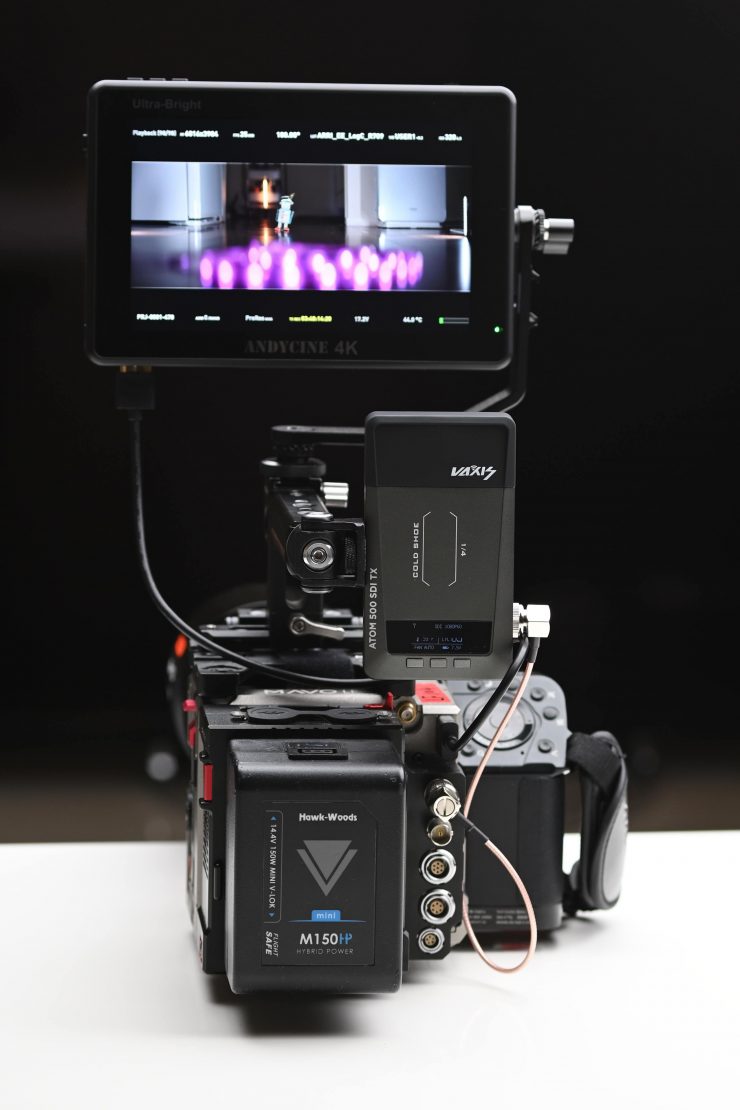
Pulling out connectors, changing settings and turning receivers and transmitters on and off is one thing, but how does it actually perform in the real world?
The real transmission distance is also relevant to the current air electromagnetic environment, because the system works in the ISM band, and therefore has exposure to all kinds of 5GHz band air interference.

With this in mind, I decided to test the range and performance of the system. To test the range of the system I remained in line of sight of the receiver and started walking away with the TX attached to the camera. I found that I could easily get 350m (1148′) and still have a stable signal. I’m sure I could have gotten even more distance, but I ran out of straight road where I was doing the test.
Now, Vaxis claims a maximum operating range of 500′ (152m) line-of-site, but this is usually only going to be achievable on flat, open terrain where there is little wireless interference. I did this test in the middle of Tokyo which is one of the most heavily congested RF and WiFi traffic areas on the planet. I didn’t expect the Atom 500 SDI to reach anywhere near its claimed operating distance in this environment, but it exceeded it by a large margin.
I really can’t explain why or how, but the test didn’t lie. What you should clearly remember is that the distance you can achieve will vary greatly depending on where you are and how you are using the system.
The only logical explanation I can come up with is that the automatic channel selection system must be working really well.
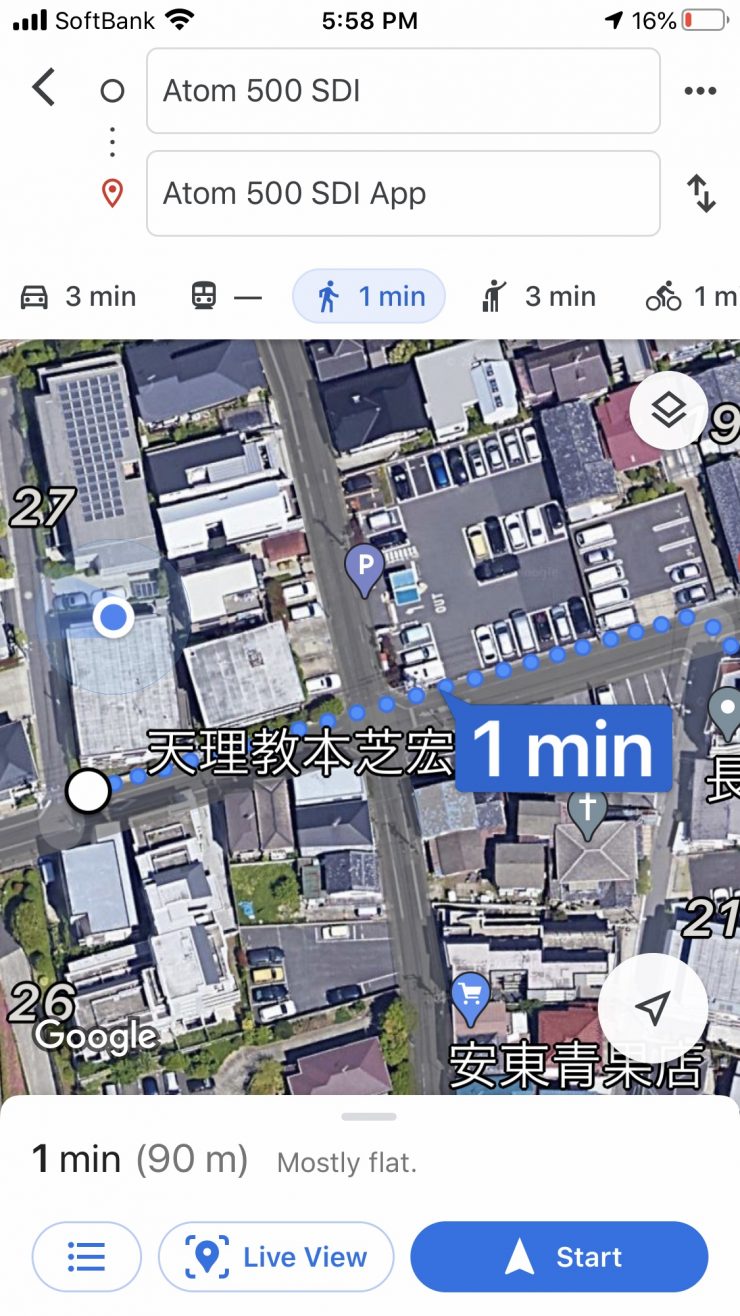
When I was using the Vaxis Vision App I found I could get around 90m (295′) maximum distance. In saying that, the app signal is never really that stable once you start getting around 40-50m away from the TX. I was constantly seeing the picture disappear and then reappear.
Whenever I review wireless video transmitters I do the test in the exact same place under the same operating conditions. This way I get a good idea of how various competing systems compare.
I also found that the automatic channel functionality worked really well. I would take the Atom 500 SDI into a different environment and I noticed that on occasion it would change the channel automatically.
Pricing & availability
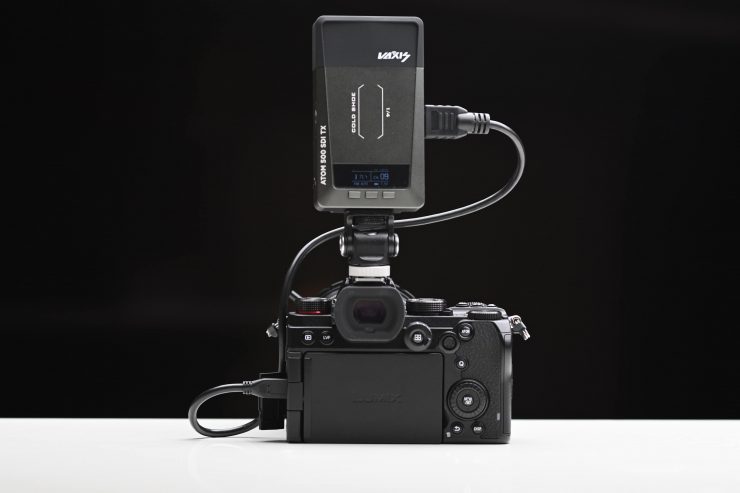
The Vaxis Atom 500 SDI will retail for $459 USD. This represents pretty good value for money considering its capabilities.
How does this price compare to other wireless video systems that can stream to an app?
- Vaxis Atom 500 $399 USD (HDMI Only)
- Accsoon CineEye Wireless Video Transmitter $249 USD (HDMI Only & no RX unit)
- Accsoon CineEye 2 Pro $599 USD (HDMI Only)
- Teradek SERV Pro $1,619.10 USD (No RX unit)
- Hollyland MARS 400S $569 USD
- Hollyland MARS 400S Pro $649 USD
- Hollyland MARS 400S $430 USD (HDMI Only)
Please note all of the above systems offer different features and functionality. The only other product this really competes against head to head is the Hollyland MARS 400S and 400S Pro.
Vaxis is going to start offering customers a warranty service that is sort of like DJI care. If you have a faulty unit, Vaxis will replace it with a new or refurbished unit if you register on the Vaxis website.
Competition
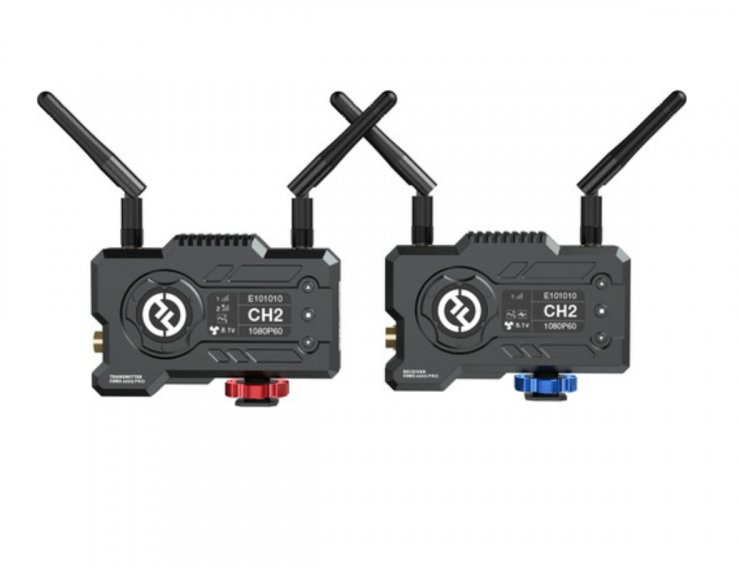
The only other product that competes head to head as I just mentioned is the Hollyland MARS 400S and the just-announced Mars 400S PRO. Theyt are the only other device that have SDI and HDMI capabilities, a TX and an RX unit, and the ability to transmit to an app.
Hollyland has the Mars 400S The MARS 400S is SDI and HDMI compatible and it has an operating range of up to 400ft range.
The MARS 400S and 400S Pro can be used with an iOS and Android APP. With an app you can stream video that can be watched on up to four iOS or Android devices at once. The receiver can also be used at the same time. The MARS 400S Pro retails for $649 USD.
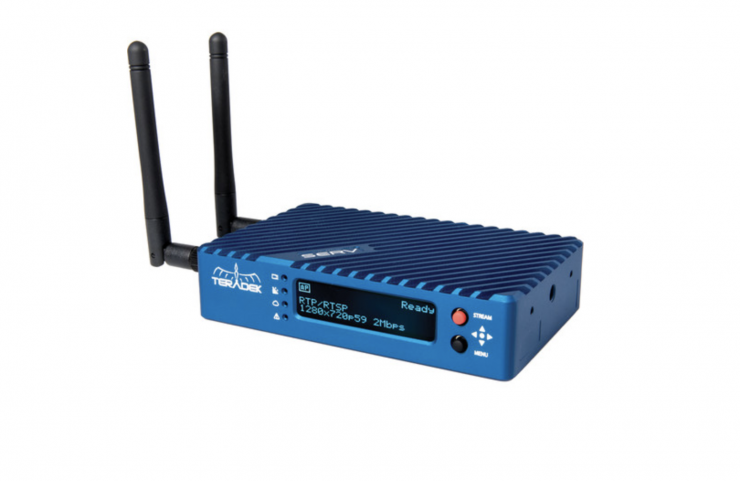
Teradek has its Serv Pro, but that has both an HDMI and SDI in and uses an app that has far more functionality and features. The Serv Pro can also be connected to 10 IOS devices at once. It is also way more expensive than the Atom 500 SDI and it has limited range and no RX unit.
Conclusion
A wireless video transmission system needs to have rock-solid reliability. It also has to not get in your way and be easy to set up and use.
The Atom 500 SDI is reasonably well built, relatively easy to set up and use, and it offers a lot of functionality and features for the price. Having a system that features both SDI and HDMI and the ability to stream to an app is impressive for $449 USD.
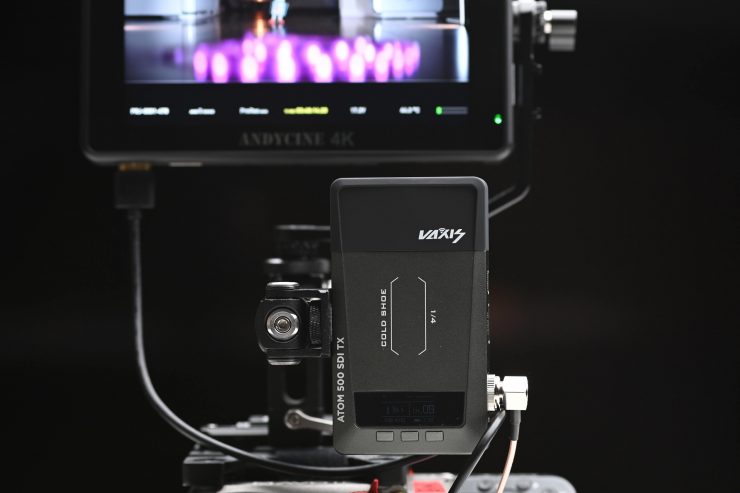
Image delay is something you need to be aware of depending on the type of camera you are using. My tests showed that image latency can vary dramatically. With the Kinefinity MAVO LF the latency was pretty good for an affordable wireless system, but when used with the Panasonic S1H or S5 then it was pretty bad. If you are watching the signal and are not near the camera and can’t see what is going on, then image latency isn’t necessarily a big deal.
I found it strange that the lowest latency I was able to achieve was by outputting an SDI signal to the TX unit and then monitoring via the Vaxis Vision app. The fact that this provided less latency than using the TX and RX both through SDI was puzzling, to say the least.
You don’t want to buy a product, regardless of how much it costs, or who it is aimed at, and then find out it doesn’t perform in the way you were expecting. I just want you to be aware of what you should expect and what the limitations are with the Atom 500 SDI.
The Atom 500 SDI features a lot of functionality and features for the money, however, the latency can be an issue, and the quality of the image when using the Vaxis Vision app is not great. While wireless video transmission systems have come down in price dramatically in recent years and you can now obtain a pretty good system without having to spend too much money, you are always going to have to spend a lot more money if you are after close to latency-free performance.
Like what we do and want to support Newsshooter? Consider becoming a Patreon supporter and help us to continue being the best source of news and reviews for professional tools for the independent filmmaker.

