While backup and data management isn’t the most exciting of topics for filmmakers it’s one that really needs to be addressed. I don’t shoot a lot of stuff professionally, but am often on the client-side and have worked with a broad range of filmmakers over the last decade and have been shocked at times to see the backup strategies (or lack thereof) that some employ. Sure that’s not everyone, and it’s usually those that have experienced data loss in the past that have a system in place. But it’s only a matter of time for the rest of us. Of course, that’s fine in a regular business storing spreadsheets and various “regular sized” files, but many professional filmmakers could be shooting a terabyte or more of data per job and consequently the upfront investment to protect that can be a huge deterrent.
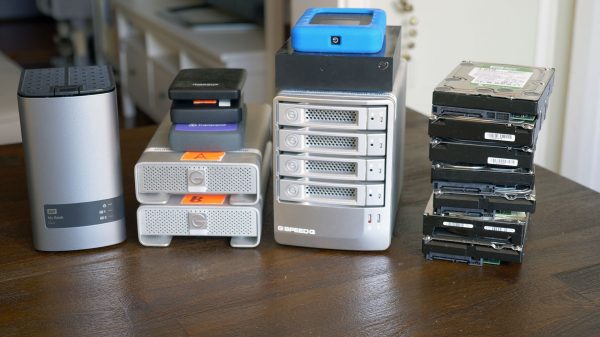
With the amount of data constantly increasing, what’s your backup & data management strategy like?
— Newsshooter (@TheNewsshooter) December 13, 2017
Not all RAIDs are created equal
So the most important rule in backup is that all hard drives will die eventually and that this is the most common cause of data loss. “Death, taxes and hard drive failure” I believe the saying goes. Luckily some smart people many decades ago developed disk array systems that spread data across multiple drives, allowing for instances of data corruption without total loss. While this is generally referred to as a RAID array, we need to be super careful as not all RAID configurations protect against a dodgy hard drive, and some do it better than others. So while you may have a Thunderbolt RAID device attached to your system with all your precious footage on board it doesn’t necessarily mean you’re any better off than a cheap USB drive – in fact, you may be worse off. RAID 0 devices actually spread your data across multiple drives to minimise seek times of physical drives, making data reads and writes much faster. But as you now have multiple drives without any redundancy any failure on any of the drives means a total loss, and the more drives you have the more likely a failure will occur.
Without going into too much detail as there are plenty of resources available online, RAID 1 is OK, RAID 5 is pretty good, but currently, RAID 6 is the best compromise of protection and cost for most cases. While RAID 5 protects you from one instance of hard drive failure (at the cost of one drive), RAID 6 will cover two simultaneous failures (at the cost of two drives). While it’s highly unlikely that two drives will fail at exactly the same time it is important to keep in mind that once you replace a failed drive you then enter a period where the RAID array needs to be rebuilt (from a data perspective) and until that’s been completed your array isn’t protected. This was fine back in the days when we were storing maybe up to 1TB, but in my instance the total array (raw size) is 40TB – this could take over a week to rebuild and the chance of having a second failure during a week-long period, while remote, is still in the realm of possibility. RAID 6 allows that second failure to happen, but of course, there’s no protection against a third – all comes down to odds at the end of the day, and what you can afford.
NAS vs Local array
Brands like G-Technology have popularised having multiple disk arrays locally attached to systems via Thunderbolt and/or firewire, which is ideal for giving you large capacity, high bandwidth storage to allow for real-time editing. The issue here though is that they don’t operate when your system is offline, and are only accessible by (or via) the computer that they are connected to. A network attached storage system (or NAS) is basically a stand-alone computer that allows you to host huge data arrays over your network so that they can be accessed by multiple users in an ‘always-on’ scenario.
So which is better? Outside of the realm of video editing, I would always recommend the NAS as the best way to go. Using a gigabit ethernet connection, this can be a viable solution for a studio to work from. Ultimately it’s going to end up being a combination of both, where you’re storing project masters on a NAS and then you or the editor effectively check the project out to their local thunderbolt/firewire drive for real-time editing. Once that’s completed it needs to be archived back to the NAS for safe keeping. That’s the workflow that I’ve decided on and it seems to be the best compromise for my situation.
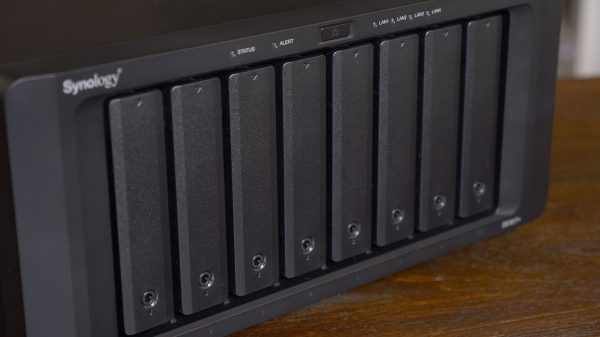
The Synology DS1817+
This was supposed to be a review right? So now you have some context on NAS drives and why they really are an integral part of an effective backup strategy we can talk about the Synology DS1817+ and whether it’s any good at its job.
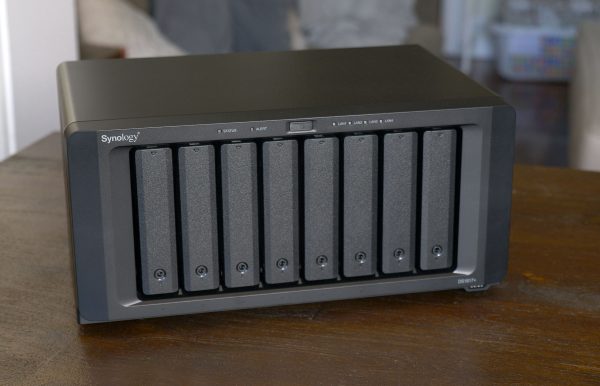
The Synology DS range has been around a few years and are considered a bit of a SOHO workhorse in NAS enclosures for two (DS218+/DS718+), four (DS918+), five (DS1517+), eight (DS1817+) and 12 (DS2415+) drive configurations (no drives are included, which is fairly standard practice for a NAS and allows you to source your preferred capacity and brand). Earlier this year the range was updated to the “+” which saw the processor and RAM capacity get beefier and support for 10Gb ethernet added. While 10Gbe is still in its infancy it does address the issue we touched on above of having both a NAS and a local thunderbolt/firewire array – in theory, you could potentially edit directly from a 10Gbe NAS (Synology has published a case study) but there’s the additional investment in the compatible router/switch and adaptors for each system in the network so it’s not something I’m going to be setting up for my home office in the near future.
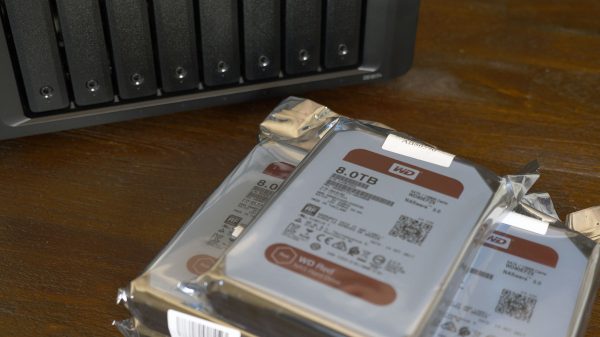
Key to any NAS purchase decision is reliability and scalability, and the DS1817+ seems to offer the goods on both accounts. Synology is a well-known reputable name in the network storage and backup market, and the DS1817+ features a powerful yet low-power quad-core 2.4GHz CPU along with two 12” fans to help keep air circulating. Eight hot-swappable drive bays gives you a healthy capacity – in my case I chose 8TB drives as I decided it was the best compromise of cost and scalability (it’s important to note that a RAID 6 array requires a minimum of five drives and that you will have to stick to the same size drives if you want to efficiently add capacity in future).
If you find that you run out of drive bays Synology also offers the DX517 expansion appliance which is like a mini-NAS itself that plugs into the back of the DS1817+ to give you another five drive bays. You can daisy chain two of these for a maximum of 18 drives, which in my configuration (8TB, RAID 6) gives you a whopping 128TB of space. I’m sure that’s good for about an hour of footage on RED’s MONSTRO VV!
The DS1817+ is also pleasantly quiet. Not silent, but nowhere near as loud as a Netgear ReadyNAS I had in place previously. In an office situation it doesn’t matter as much, but in a home office setup you don’t want a NAS that hums away constantly.
Once the hardware is set up then Synology’s DiskStation Manager software does all the setup and configuration, and I was really pleased with how user-friendly it was on the whole. Often the most difficult part of setting up a network device is the initial configuration, but the DS1817+ was instantly found by DiskStation and I was able to configure a volume and get started very quickly. It should be noted that the actual verification of the array took several days – that will be the same for any NAS, but it does add an overhead during that initial period which is when you’re trying to offload the 30+ USB drives stored in your cupboard! For reference, it took me about a week to get the 18TB worth of drives completely uploaded to the DS1817+, but I did notice the speeds were quicker after around day three when the verification had completed.
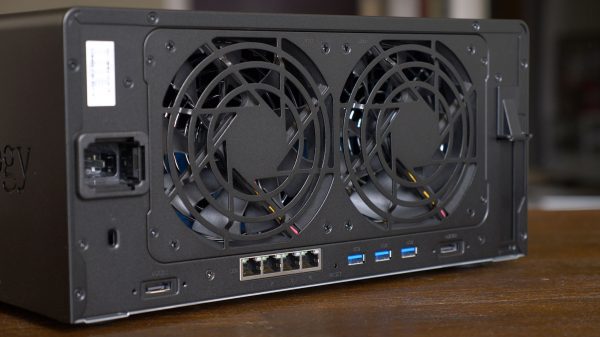
My only real gripe with the system is that it didn’t appear to have a USB backup ‘hotkey’. My previous NAS allowed you to simply plug in a USB drive and hit a button on the front of the box that would copy the whole USB drive to a pre-configured location on my NAS. While the DS1817+ has four USB3.0 ports and two eSATA, I needed to jump into the DiskStation software to set up the copy. You can, however, configure these jobs to run automatically for any USB device inserted but it doesn’t give you any options. What I would like to be able to do is use the backup button when my camera is directly connected to offload footage, but sometimes I’m connecting a drive and only want to copy a folder or two – with the current setup, I’m forced to use the software each time.
All up the DS1817+ has really won me over. I have built my own NAS (running FreeNAS) in the past as I was quite particular about my requirements but this has me regretting that decision – it checks all my boxes and if I’m honest about it I think it actually looks pretty good too. Dark, minimal and functional.
The complete package
While the Synology DS1817+ is a great NAS and will protect you against hard drive failure what I’ve described here isn’t strictly a complete backup strategy, it’s merely the first step to having your data safe from the most likely issue. Other factors to consider are a disaster (fire and theft being the classic examples) but then also user error – say you accidentally delete a folder, or you forget to do a “save as” on a major project and overwrite the master with a temporary copy.
The best approach to combat any physical damage to your backup is an off-site copy. This may be a cloud-based service like Dropbox or Google Drive, but given the scale of data we’re discussing you may prefer to duplicate your NAS setup somewhere else. So if you have an office then potentially you could set up the off-site copy at home. Or if you have multiple office sites then they can serve as off-site backups of each other. If you’re like me and work from home then you could plant it with a friend or relative, but then you have the issue of bandwidth – you’ll need blazingly fast internet at both ends to have any chance of keeping the systems synced. Another option is having a hosted service at a data centre, but then costs are again starting to escalate. Synology has a proprietary program called Presto File Server that they claim gives faster transfer rates than FTP or HTTP, but I haven’t had the opportunity to try it myself and see if it makes a noticeable difference.
User error is the trickier (and potentially costlier) area to protect against. Most of us will use just simple file name versioning but this requires a lot of discipline and isn’t ideal if it’s not just you using the archive. And unless you have a strong case of OCD you’ll get the classic “export_v2_final_FINAL_properfinal” that we’ve all succumbed to under the pressure of deadlines and never gone back to correct. A system with actual versioning of files (similar to how Apple’s Time Machine works) takes care of this for you, but as your data will be sitting on a non-Mac system then it’s not that simple. Unfortunately, I’m not too helpful here as I haven’t had experience, but if you’re using a system (hosted or locally) with versioning I’d be interested to hear your thoughts and recommendations in the comments. Fortunately for video professionals in most workflows, you only need to version project files and exports – it’s rare that you would need versioning on the actual camera footage which is obviously where the big data footprint lies.
UPDATE – To protect against user error (and cyber attacks like ransomware) Synology have suggested using their snapshot feature, which are much smaller in size than the actual file and are very quick to restore. My (basic) understanding is that each snapshot only stores the changes that need to be applied to the full size file on the NAS to restore it to the version in time that is being recorded. So rather than storing all the data it just stores the difference or ‘delta’. The snapshots can also be encrypted which is a handy feature for security.
Another thing I didn’t touch on is a UPS (uninterruptible power supply). You’ll definitely want to have one in place in between the DS1817+ (or any NAS) and the mains power, so if you lose power the drive has an opportunity to shut down gracefully rather than simply “blackout” potentially while writing data. Typically the UPS will connect to mains power, then will have a power output to your NAS (many will have a few ports so you can also cover your router/switch and possibly wifi – if you’re on a laptop then that will ensure you can save your work back over the network!). The UPS will also have a USB connection to the NAS which will send a signal under power loss – the NAS then triggers a shutdown sequence so your data is safe and sound.
So hopefully this review has made you consider your backup strategy – I’m sure many of you have a similar system set up, or perhaps even more robust. But for those of you that are shooting footage professionally what may seem like a costly investment upfront may turn out to save you a bit of money in the long run!
Pricing is $849.99 USD for the model with 2GB DDR3 Ram and $949.99 for the 8GB DDR3 Ram model. Note that you will also need to add the cost of drives for your total investment.


