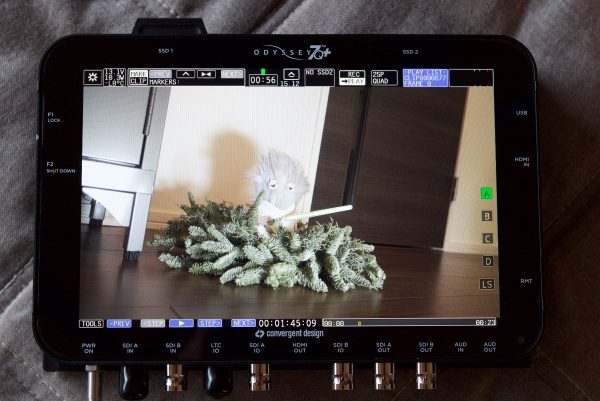
Convergent Design have just started shipping their Apollo portable HD multicamera recorder/switcher. The unit can simultaneously record up to four HD video signals, along with a fifth channel of either a live-switch between the four, or a quad-split reference view. Apollo can also function as a four-channel live switcher while simultaneously recording the four isolated HD video signals. Apollo is currently the only device of its kind that can both record multiple HD camera feeds as well as live-switch between them.
All the recorded camera feeds stay in perfect sync with matching timecode, which allows for the quick turn around of material. A single SSD contains all of the multi-camera media. There are two SSD slots on Apollo, allowing either twice the recording time or mirror recording for safety backup. Apollo uses industry-standard 2.5” SSD media, made by Convergent Design or qualified third party manufacturers.
Apollo is available as a stand alone unit, but if you own an Odyssey 7Q or 7Q+ you can get the same functionality as a paid upgrade. If you need to, you can also rent a licence to use Apollo functionality if you have a specific project that requires it. I tested out the Apollo option on my Odyssey 7Q+ to see just how well it works.
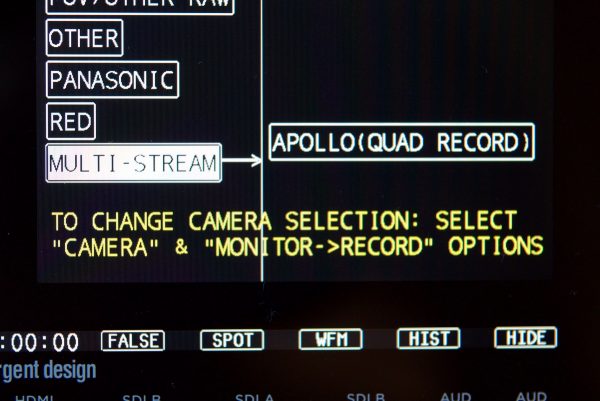
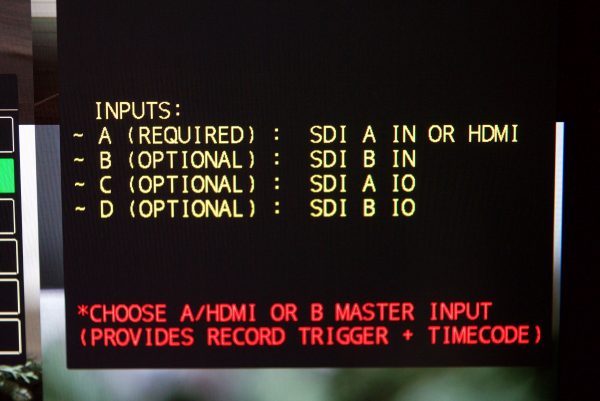
Once the Apollo option is loaded to your Odyssey 7Q/7Q+ you will need to select it and reboot the unit before you can do anything else. Once it is in Quad Record mode then you need to set it up and make sure that all your cameras are set up to output the same frame rate – this is essential. For instance, if you want to record in 25p, then all your cameras need to be set at 25p. There always has to be either a SDI A or HDMI input going into your Odyssey or Apollo for quad recording to work. You then need to choose your master camera. Your master camera can be set to come from the SDI A or B or the HDMI input. The master camera will be the camera that supplies the timecode and if you have your unit set up in camera trigger mode it will also be the camera that starts and stops all the recordings. The timecode does not have to come from the Master Camera. Just like record triggering, it can come from the Master, or it can happen on Apollo, or it can be separately input into Apollo. For timecode, Apollo can generate time of day timecode in drop frame or non-drop frame, or it can generate a record run timecode (aka seed). Apollo can also accept LTC via a BNC connection. For the record trigger, inputs are Master Camera either via embedded pulse in SDI/HDMI or via timecode numbers rolling from the camera (so camera would have to be set to Record Run), or the trigger can be by the record button on the Apollo, or a trigger cable plugged into the Remote port on Apollo.
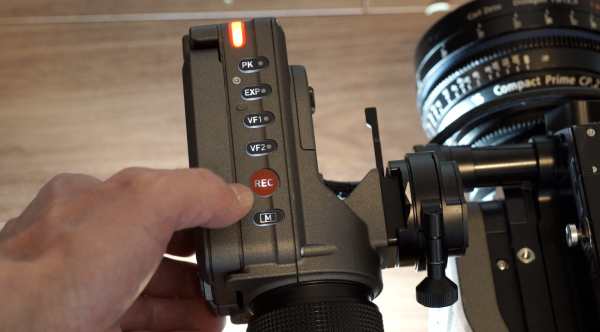
I found the best way is to locate the main camera as close as possible to the Odyssey. That way it is easier to start/stop your recordings. There is another method to triggering the Odyssey; instead of using a camera, you can set it up so you just press the record button on the unit to start /stop recording of all of the cameras.
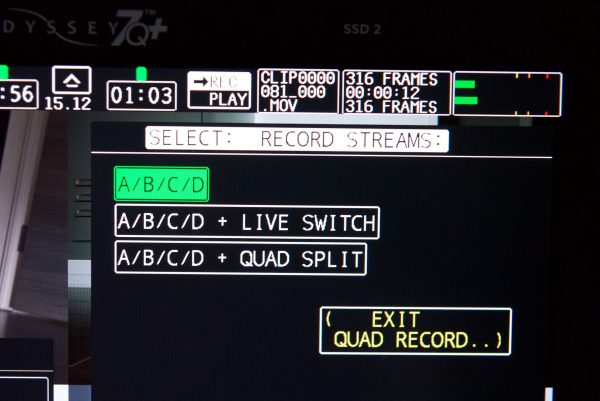
After all the cameras have been set up and connected you have a choice of three different quad recording options. You can choose to record the A/B/C/D camera inputs only, the A/B/C/D camera inputs as well as a live switch, or camera inputs A/B/C/D as well as a quad split. You then choose what flavour of ProRes you wish to record all the feeds in (ProRes LT, ProRes 422 or ProRes 422 HQ).
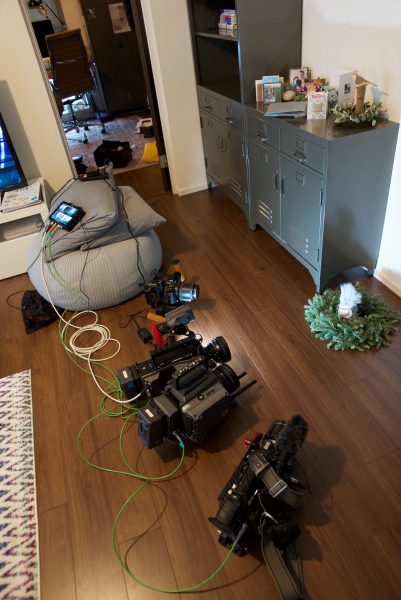
I hooked up a Sony a7S via HDMI and via SDI I used a Sony F3, Sony F35 and an Arri Amira. It was pretty easy to set them all up. The only problem I ran into using the a7S and a HDMI output was that I had to set the HDMI output on the Sony to 50i, so that it would actually output a correct signal that could be read by the Odyssey. This is a hardware limitation of how the a7S outputs its progressive signal over HDMI.
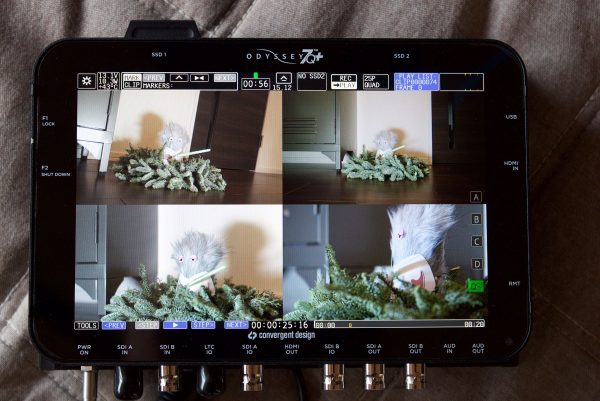
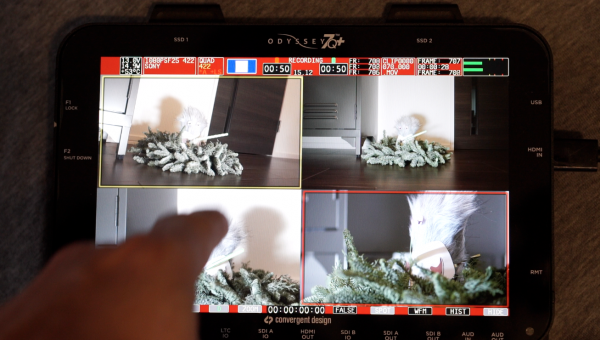
When the unit is ready to go and still in preview mode you can switch between a quad screen view or the individual cameras. In preview mode a yellow box comes up around one of your images and when you press it once it turns green, indicating that camera is being selected. You can then press on any of the other cameras to get a yellow box around it that means it is in preview mode and ready to be the next camera selected. I found this double tap functionality to be very intuitive and easy to use. It didn’t take me long to get used to it and having the preview mode means you don’t make any nasty mistakes when you’re actually live switching. Once you hit record the boxes change colour. Yellow is the preview colour and the box turns red once it is selected. You can still use all the tools like false colour, waveform etc once the device is recording, but you can’t do peaking or image zoom. It is a good idea to make sure all of your cameras are in focus and set up correctly once you start recording, especially if you’re only operating one out of the four cameras.
What I don’t like is that once you are recording you can only see a quad-screen view of all your cameras – you can’t look at any of the individual cameras in full screen mode. This is because Convergent Design don’t want you to think you’re doing a camera switch by going full screen when you are simply looking at the camera feed. They told me that they are looking into enabling a mode where you can see the cameras individually once you are in record mode.
One thing I would always recommend is that you should internally record on all the individual cameras as well as to the Odyssey as a fail-safe. Another feature of the Apollo Option is that when you are recording, if one of the cameras loses power or has a connection problem, all the other cameras will keep recording. Once the camera that has gone down comes back online it automatically starts recording again. This is a fantastic fail safe feature when recording multiple camera feeds.
Something else Convergent Design are looking to add to the live switching functionality is a feature where the last camera you selected before making a switch will automatically come back up in preview mode. Currently, when you select a camera you have to then tap once on whatever camera you would like to use next to get it into preview mode. If they can add this feature it would make a lot of sense in live switching applications such as interviews where two main cameras tend to be used the most. It would allow you to make instant changes instead of having the deal of having to put the camera into a preview mode first before selecting it.
One potential issue might be if you wanted to use the live switching mode and output a signal to a satellite truck or some other sort of production suite. The Apollo by default, takes the embedded audio from the SDI A or HDMI feed when you’re in live switching mode. This is fine if the camera that is plugged in can provide decent audio, but if you’re using a HDMI source from, say, a GoPro, the only audio you can output will be from that camera. This is far from ideal and I asked Convergent Design if they had any plans to change how this works. They told me that they will be addressing this in the future, but there is a current work around. In the audio menu you could choose to select the analog input and use a mixer or other audio recorder for your audio. You could then take the output of that device and run it into the 3.5mm audio in jack on the Apollo or Odyssey 7Q/7Q+. Convergent Design also told me that they are looking into a system where you could choose which input you want to take your audio from on a live switch. They are also looking into requests to enable to have the audio going out on a live switch to follow whatever camera is being selected. This is probably something you wouldn’t want to do for most applications, but for people wanting to use Apollo for teleconferencing purposes it makes a lot of sense.
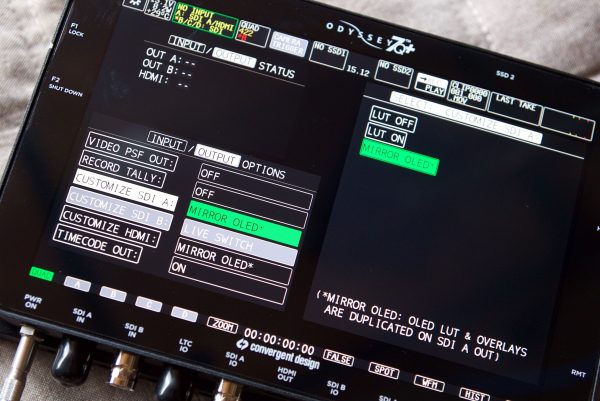
The Apollo functionality has some very clever features for outputting video. You can use up to three outputs (SDI A, SDI B, HDMI OUT) simultaneously to send out different images. On SDI A and HDMI OUT you can mirror the OLED display so that a LUT and/or overlays are outputted. On SDI B you can choose to just send out the camera that has been selected. This gives you a lot of options during productions to send out multiple different signals to who ever needs to see a particular view. Convergent Design are also working on an option where you would be able to just view whatever camera is in preview mode during a quad view or live switching. This would give you the best of both worlds and on three outputs you could have a quad view, preview and program.
Once you have finished recording you can go back into playback and look at your live switch/ quad view recording as well as all of the individual camera feeds. Here you can also add markers that will be saved in the metadata. You can then turn off the unit and take the SSD out and take your material into a NLE.
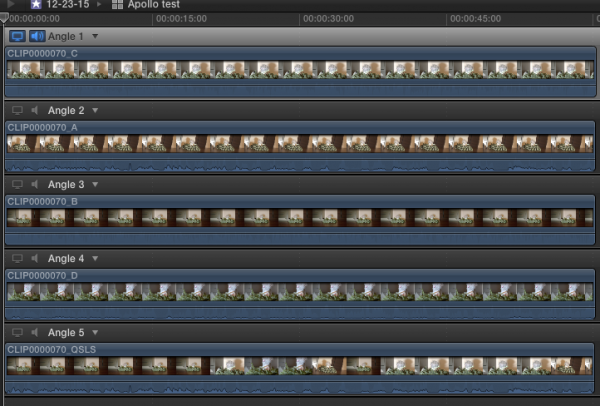
The multi camera clips are stored inside an Apple multitrack Quicktime format. The Quicktime file is one file that holds all five video streams within it. The theory behind this is that you can just take this one file, drop it into a NLE and see all of the video files that are contained with in it. Unfortunately none of the popular NLEs currently support the multitrack Quicktime format natively. Apple are suppposedly going to incorporate this into FCPX, but just when they will do this is still unclear.
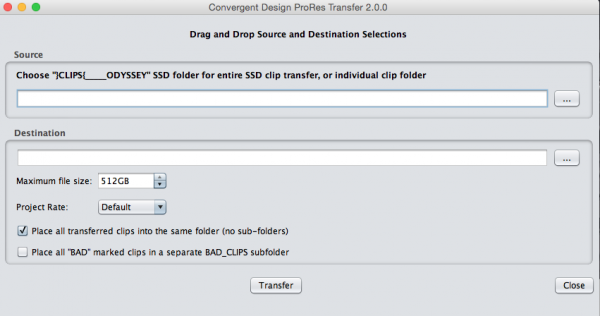
Once more NLEs and post production software support the multi-clip Quicktime format, Convergent Design will release Apollo Media Manager. Currently you have to use CDProRes Transfer Version 2.0 to unwrap the multi camera clips from within the multi-clip Quicktime format file. If you just try to open up the files in Quicktime player or a NLE, you won’t be able to see all the cameras that you recorded. Using CDProRes Transfer Version 2.0 is very easy and the nice thing about it is that it keeps the cameras labelled as A/B/C/D once the clips are unwrapped. It will also label your live switch or quad-view file as QSLS. This makes it very easy to know what camera is what once you are working with the files inside a NLE.
In January a firmware update will enable dual 4K/UHD recording (Apple ProRes in 24p, 25p, 30p). You will be able to use a combination of both HDMI and SDI sources or just SDI sources when recording the dual 4K/UHD streams. Also next year there will be DNxHD recording, recording of XML file Edit Decision Lists from Live Switching, audio delay and on-screen source naming. They will also be introducing the ability to interconnect audio for 12-channel HD / 6-channel 4K recording. A remote keyboard control pad will also be available that will allow users who prefer to do live switching by pressing buttons rather than using a touchscreen. Coming down the track you will even be able to do dissolves when switching between cameras. Convergent Design is still testing how they will implement this function. They tell me they are also working on many other features that can’t be talked about just yet.
The Apollo functionality is a fantastic piece of software that really takes your Odyssey 7Q/7Q+ to a whole new level. The ability to record four cameras in perfect sync and in the same codec to a single media source, as well as being able to do live switching and have multiple outputs makes Apollo a very versatile tool. It definitely fills a big gap in the market; live switching and multi-camera recording were usually too big or too expensive for a lot of people to use. For those working in news, event and documentary scenarios, Apollo can save you a lot of time as well as allow you to switch between multiple cameras in live environments.
Apollo is available as a stand alone unit for $3995US or as a upgrade option to the Odyssey 7Q/7Q+ for $1795US. For more information head over to the Convergent Design website.

