By technical editor Matt Allard:
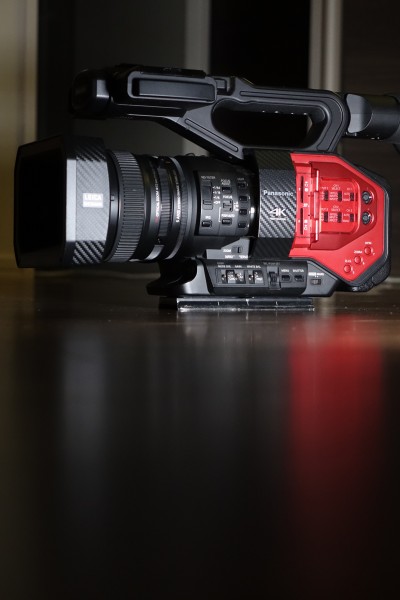
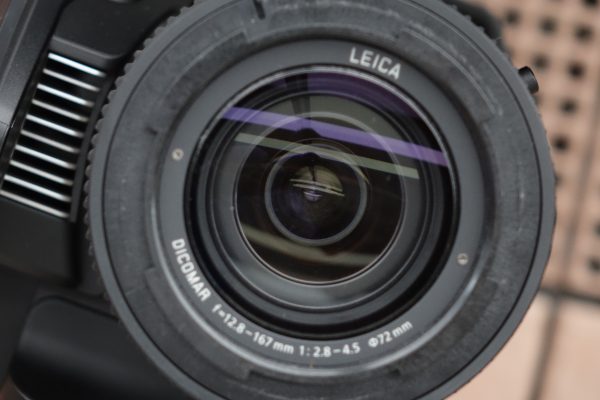
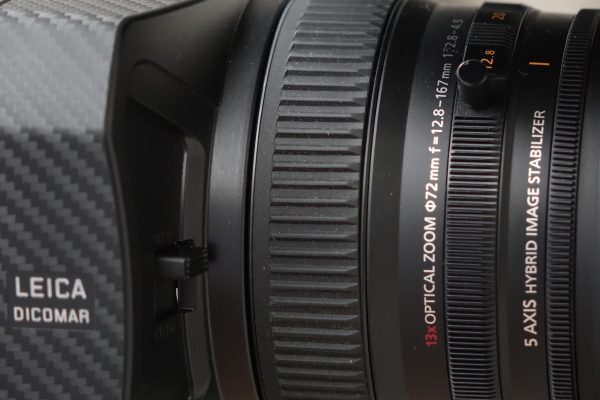
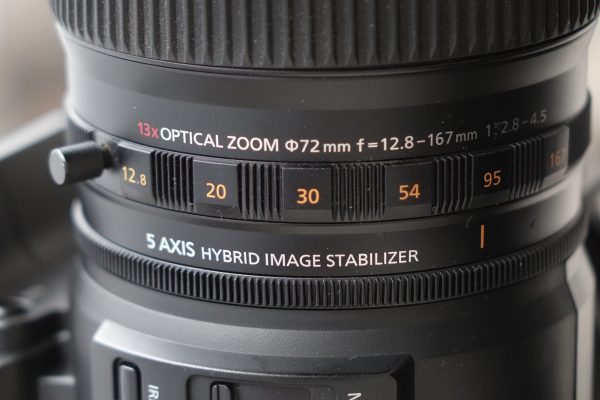
The Panasonic DVX 200 has a fixed LEICA DICOMAR 4K 13x servo zoom lens that has three rings for independent zoom, focus and iris control. The lens has a range of 12.8mm to 167mm (29.5 mm – 384.9 mm full frame 35mm equivalent in 4K 4096 x 2160, and 28mm – 365.3 mm in Full HD 1920×1080). This is a pretty wide range, but for me the lens is not really wide enough. I would have preferred a wider lens, even if that had meant losing some range at the longer end. I imagine that Panasonic, or third party makers like Zunow or Schneider will make a wide angle adapter for this lens in the future, but I would rather it was wider to begin with.
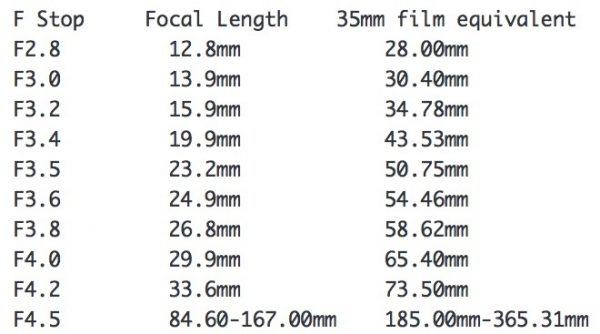
Fixed lens cameras are a balance between focal range, convenience and optical quality. The LEICA DICOMAR lens on this camera is definitely a compromise between the three. The lens has a variable aperture of F2.8 to F4.5, depending on the focal length. Unfortunately the lens only stays at F2.8 at the very wide end of the focal range. As you zoom in the lens aperture ramps almost instantly, and it isn’t until you go beyond 84.6mm (185mm in full frame 35mm film equivalent) that it remains constant at a rather slow F4.5. Below is a list of focal ranges where the aperture value changes on the lens:
Despite the almost instant ramping of the lens, it produces very sharp images with almost no chromatic aberration, even in 4K. At the longer ends of the focal range, the lens still remains quite sharp and produces nice results.
If you are used to fixed lens cameras like the Sony EX1 then you will probably be happy with the shallow depth of field you can achieve on the DVX 200 lens. If you come from DSLRs or large sensor video cameras then you won’t find the same super shallow depth of field – you need to use the longer end of the focal range if you want to really blur the background. Even other M4/3 sensor cameras like the GH4 will have much shallower depth of field when used with fast lenses. Moving to a DVX200 may leave you feeling a little disappointed.
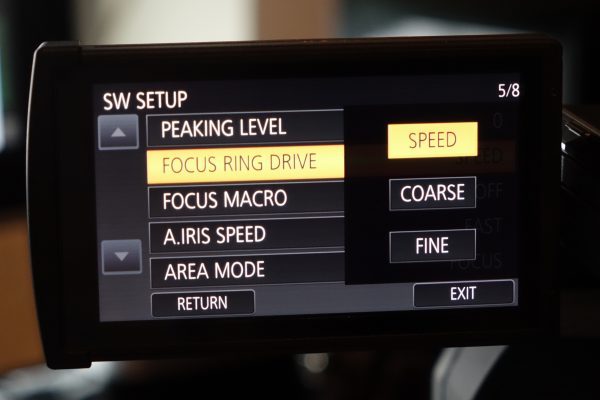
The mechanics of manual zoom, focus and iris rings are OK, but not perfect. They are not fully mechanical, but instead use a fly-by-wire system. For focus there are three different control settings you can choose from in the menu:
SPEED: Adjusts the focus value according to the speed at which the focus ring is rotated.
COARSE: Adjusts the focus value according to the rotational position of the focus ring. Since the operation of the focus ring results in a greater change in focus value, this setting is suitable for making rough adjustments.
FINE: Adjusts the focus value according to the rotational position of the focus ring. Since the operation of the focus ring results in a smaller change in focus value, this setting is suitable for making fine adjustments.
I found all three of these modes to work pretty well and they do allow you to tailor the behaviour to best suit what you are shooting.
The manual zoom control is also fine, but I found the manual iris control underwhelming. It seems to have a real lag to it and I always felt like I was waiting for the camera to catch up to what I was actually doing.
By default the lens has a close focus ability of 1m (3.28ft), but there is a Macro function that you can select in the menu which can also be assigned to a preset user button. This allows for close focusing up to 10cm (3.93″) from the lens.
There are also several digital zoom modes you can choose from on the DVX 200. An i.Zoom function allows up to approx. 20x magnification that Panasonic claims maintains high-definition picture quality. A 2x, 5x and 10x Digital Zoom feature is also available, but using anything over the 2x results in unacceptable quality. In the above video you can see what the different zoom settings do.
If you zoom the lens using the built-in servo it can be made to move slowly and smoothly. There is a menu option to turn on a feature called Fast Zoom. This speeds up the servo driven speed of the lens, however I didn’t find that it was that too much faster than the normal mode. Another nice function is that you can manually take control of the zoom at any point, even when the lens is in the servo control mode. This is very handy if you want to crash zoom quickly to capture something.
One of the big draws of the DVX 200 is the lens’s optical image stabilisation (OIS) system.There is also an advanced Hybrid OIS that combines optical and electronic image stabilisers. This system uses five-axis Hybrid image stabiliser technology and from my above tests you can see just how well it works. The optical image stabilisation function works when recording all formats including 4K, but Hybrid O.I.S will only work with HD recording and not 4K or UHD.
For handheld shooting the OIS does an amazing job and I was able to quite steadily hold a shot at the very long end of the lens. When I tried walking with it on, the results weren’t nearly as good, so don’t expect to use this function to replicate a gimbal or Steadicam shot.
There are settings in the camera menu to change how the OIS works. Panasonic recommends when using a tripod, that you turn off the Image Stabiliser. The camera has Blur amplitude or Blur frequency OIS settings where you can fine tune the image stabilisation but I did not test any of these more complex functions.
The DVX 200 has several options for autofocus. In the above test you can see how it tracks a moving subject walking towards camera. Like most autofocus systems it can be a little bit hit and miss at times, but I found the system to work pretty well overall.
You can customise autofocus for different subjects by adjusting the settings of the AF SPEED, AF SENSITIVITY, and AF AREA WIDTH individually.
By adjusting the AF SPEED you can change the focus speed of Auto Focus from a value of -5 to +5. The larger the value is, the faster the focus speed will become. Conversely, the smaller the value is, the slower the focus speed will become. Adjusting the AF SENSITIVITY you can enhance the stability or tracking performance. You can select a value between 0 and 10. Setting a larger value will track subjects faster and adjust rapidly when shifting focus between different subjects. Panasonic recommend that you set a larger value if you want to keep focus on a fast-moving subject. Setting a smaller value will provide more stability to focus, making it easier to keep focus on the targeted subject even when an intervening object passes in front of the camera or the subject disappears from the view of this unit. Panasonic recommends using this setting to avoid bringing an intervening object or the background into focus accidentally. Adjusting the AF AREA WIDTH adjusts the effective area width for Auto Focus according to the size of the subject.
There is also a One Push AF function. If you press the PUSH AUTO button in manual focus mode, the camera performs high-speed autofocusing until the image is sharp. Once the image it returns again to manual.
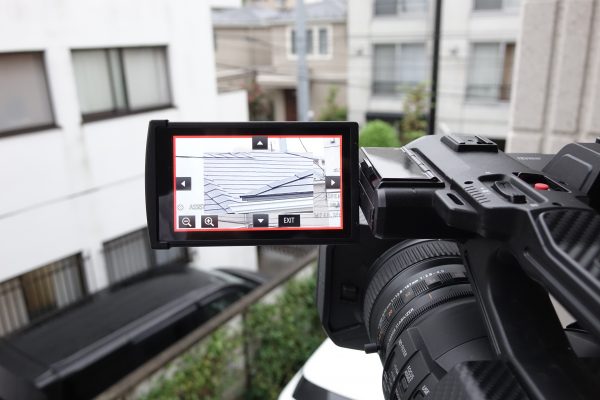
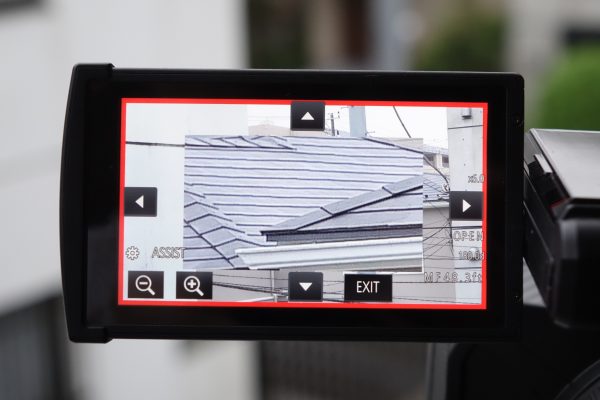
The DVX200 has several focus assist settings that do a really nice job of helping you achieve critical focus, which is very important when shooting in 4K and UHD. There are three settings to choose from:
[EXPAND]: Magnifies the central area of the screen when Focus Assist is used.
[PEAKING]: Highlights in-focus portions with color when Focus Assist is used.
[BOTH]: Sets both [EXPAND] and [PEAKING].
I tended to leave it on [BOTH] when I was using the camera. Not only can you change the zoom in magnification strength, but you can also move the magnification area around the screen. The focus assist function is one of the better systems I have used on any camera, at any price point.
You can also automatically focus by touching the LCD screen on the camera if you select Focus Area Select Mode. This can work quite well, but I did find that it would shake the camera sometimes when I tapped the LCD screen to select focus.
Another clever feature is the focus transition feature. With focus transition, you can shift the focus point between two, or three pre-registered positions. You can change not only the starting time of the focus transition, but also how fast or slow the transition is between the pre-registered positions. Above you can see a video where I tested this function. I found it to work really well and it is a nice feature if you are doing critical pull focuses with static subjects.
For a fixed lens camera the DVX 200 produces pretty impressive results. The lens is sharp and mostly free of chromatic aberration.The combination of autofocus functions and image stabilisation will satisfy many users – especially those moving up from a handycam. The downsides for large sensor advocates will be the ramping of the aperture, the lack of extreme shallow depth of focus, and lack of super wide angle coverage.
Please be aware that while it is a late pre-production version of the camera, it is not the final production version. There may well be improvements and updates to the camera before it becomes officially available in October.
You can see all the previous parts of my review here:
Panasonic DVX 200 Review Part 1: Camera overview, ergonomics and build
Panasonic DVX 200 Review Part 2- V-Log L, Scene Profiles and Colour Science
Panasonic DVX 200 Review Part 3: 4K, HD, frame rates and codecs
In Part five of my review I will be looking at resolution, rolling shutter, moire and low light performance.

